How to Install Parquet Flooring: Patterns, Tips, and Pro Techniques
You can install parquet flooring yourself if you plan well, prep the subfloor, and pick the right method—glue-down, nail/staple, or floating—based on material and moisture. Measure precisely, acclimate boards, lay a grid, and dry-fit patterns like herringbone or Versailles before gluing or fastening, keeping expansion gaps. Use jigs, spacers, and rollers for clean joints, and finish or sand as needed. Keep tools and zone work manageable, and continue for pro tips and troubleshooting.
Can You Install Parquet Flooring Yourself?
You can install parquet yourself if you’re handy and patient, but expect a moderate time commitment, some tool costs, and a learning curve.
Small rooms and simple patterns are realistic DIY projects, while large areas, complex herringbone layouts, or uneven subfloors are better left to pros.
Hire a contractor when precision, speed, or warranty coverage matters.
Short summary of feasibility, time, cost, and skill level
Though some parquet jobs are straightforward, installing it yourself depends on your comfort with precise measuring, cutting, and patience for detail.
You can learn how to install parquet flooring from guides and videos, but expect several days for a typical room, moderate material costs, and intermediate carpentry skills.
Mistakes cost time and money, so plan carefully and work methodically.
When to hire a pro vs DIY
When is it worth hiring a pro, and when can you tackle parquet yourself?
You can DIY if you’re confident with layout, cutting, and subfloor prep.
Hire a pro for complex patterns or moisture issues.
Consider time, tools, and warranty.
- Simple herringbone or chevron, small room
- Complex patterns or large areas
- Uneven or damp subfloor
- Tight timeline or warranty needs
What Is Parquet Flooring and Why Choose It?
Parquet flooring is a patterned wood floor made from small blocks or strips, commonly arranged in herringbone, chevron, basketweave, or Versailles layouts.
You’ll get a durable, stylish surface that can last decades with proper care, though some patterns and finishes may show wear or require more maintenance.
We’ll weigh the aesthetic benefits against longevity and upkeep so you can decide if parquet fits your space.
Definition and common parquet patterns (herringbone, chevron, basketweave, Versailles)

Think of parquet as a patterned wood floor made from small blocks or strips arranged into geometric designs that add instant character to a room.
You’ll recognize herringbone’s staggered V shapes, chevron’s continuous angled seams, basketweave’s woven squares, and Versailles’ ornate, interlaced panels.
Each pattern changes room rhythm and scale, so pick one that complements your space and style.
Pros and cons (durability, aesthetics, maintenance)
Although its patterned look grabs attention, parquet flooring also delivers real performance: it’s durable, visually versatile, and relatively straightforward to maintain if you pick the right material and finish. You’ll enjoy rich aesthetics and long life, but watch moisture sensitivity and repair complexity. Choose sealed hardwoods for longevity; engineered options resist humidity.
| Benefit | Trade-off |
|---|---|
| Aesthetics | Cost |
| Durability | Moisture |
| Repairable | Pattern matching |
| Low maintenance | Refinishing needed |
Planning Your Parquet Flooring Project
Start by measuring your room and calculating how much material you’ll need, including a waste factor for cuts and pattern matching.
Decide between solid or engineered wood, pick a species, thickness, and finish that suit your budget and use.
Finally, make a checklist of mandatory tools (trowel, spacers, saw) and optional extras (moisture meter, pneumatic nailer) so you won’t be missing anything on install day.
Measuring room size and calculating material needs (waste factor, pattern considerations)
Before you buy boards, measure the room carefully and calculate how much material you’ll need, including pattern-specific waste allowances.
Measure length and width, note irregularities, and plan layout direction. Account for cuts, repeats, and matching grain.
- Calculate square footage precisely
- Add waste: 5–15% by pattern complexity
- Include threshold and connections
- Round up to full boxes
Choosing materials (solid wood vs engineered, species, thickness, finish)
Which type of plank will best suit your room, budget, and lifestyle?
Choose solid for longevity and multiple refinishes; pick engineered for moisture-prone areas and stability.
Match species to hardness and color—oak, maple, walnut vary.
Opt for 3⁄4″ or thinner depending on subfloor and refinishing needs.
Select finish (matte, satin, gloss) for wear resistance and maintenance preferences.
Tools and supplies checklist (mandatory and optional)
You’ll need a clear, concise list of mandatory and optional tools to keep the job moving efficiently and avoid costly delays.
Gather essentials, plan extras, and inspect everything before starting.
- Tape measure, chalk line, spacers, moisture meter (mandatory)
- Flooring nailer/stapler, saws, mallet
- Adhesive, trowel, underlayment (optional)
- Finish supplies, sanding gear
Site Preparation and Subfloor Requirements
Before you lay any parquet, you’ll need to inspect and repair the subfloor—check levelness tolerances and perform moisture tests so boards sit flat and won’t cup or warp.
Decide on a proper subfloor (plywood over joists or properly cured concrete) and choose an underlayment that matches your installation method and moisture conditions.
Finally, acclimate the wood and stabilize the room’s temperature and humidity to the manufacturer’s guidelines before starting.
Inspecting and repairing the subfloor (levelness tolerances, moisture testing)
A solid subfloor is the foundation of a lasting parquet installation, so inspect it closely for levelness, damage, and moisture before you lay a single tile.
You’ll measure tolerances, test moisture, and repair defects promptly. Key checks include:
- Use a straightedge to find high/low spots.
- Conduct moisture tests across the area.
- Patch and sand uneven zones.
- Replace severely damaged sections.
Recommended subfloor types (plywood, concrete) and underlayment options
When choosing a subfloor for parquet, pick a stable, flat material—usually exterior-grade plywood over joists or a properly cured concrete slab—and match your underlayment to that base and the parquet type.
For plywood use thin foam or cork underlayment for sound and minor leveling; for concrete use a moisture barrier plus a levelling membrane or foam with vapor protection.
Guarantee compatibility with adhesive or floating installation.
Acclimation of wood and site conditions (temperature, humidity guidelines)
Because wood reacts to its environment, you should acclimate parquet in the room where it’ll be installed so it reaches stable moisture content and temperature.
Stack cartons off the floor, open boxes, and spread planks for 72–120 hours.
Maintain 60–80°F and 30–50% relative humidity.
Measure moisture in wood and subfloor; don’t install until readings are within manufacturer tolerances.
Installation Methods and Which to Use
You’ll choose between glue-down, nail/staple, or floating methods based on your subfloor, parquet type, and budget.
Glue-down gives a permanent, stable finish with specific adhesives and careful trowel technique. Nails/staples work for solid parquet where allowed but have limitations.
Floating installs suit engineered planks with the right underlay.
Compare cost, durability, sound transmission, and ease of repair to pick the best method for your space.
Glue-down installation (steps, best practices, adhesives)
Glue-down installation bonds parquet directly to a prepared subfloor using adhesive, giving you a stable, low-profile finished surface ideal for high-traffic areas and rooms with limited floor-to-ceiling height.
You’ll clean and level the substrate, spread adhesive, set tiles, and roll for full contact.
Best practices and adhesives:
- Use moisture-tested polyurethane or MS polymer
- Follow trowel notch size
- Work in manageable sections
- Allow full cure time before traffic
Nail/staple installation (requirements, limitations)
When your subfloor is a stable, nailed or stapled installation can be a faster, more forgiving option for solid parquet, letting you fasten tiles directly to wood substrates with mechanical hold rather than adhesive.
You’ll need a flat, rigid plywood or plank subfloor, proper pneumatic flooring cleats or staples, and a flooring nailer.
Limitations: not suitable for thin or engineered parquet and uneven substrates.
Floating installation (engineered parquet, underlay considerations)
If your parquet is engineered rather than solid, a floating installation lets the tiles lock together over an underlay without being fastened to the subfloor.
You’ll prepare a flat, clean surface, roll out vapor barrier and foam or cork underlay, then click or glue the joints per manufacturer instructions.
Leave expansion gaps at walls and trim with appropriate molding.
Comparison of methods: cost, durability, sound, repairability
Choosing the right installation method comes down to balancing cost, longevity, noise, and how easy repairs will be — and each approach has clear trade-offs. You’ll weigh glue-down (stable, pricier), nail-down (durable, louder), and floating (cheaper, easier repairs). Use the table to compare quickly.
| Method | Cost | Repairability |
|---|---|---|
| Glue-down | Medium-High | Moderate |
| Nail-down | Medium | Low |
| Floating | Low | High |
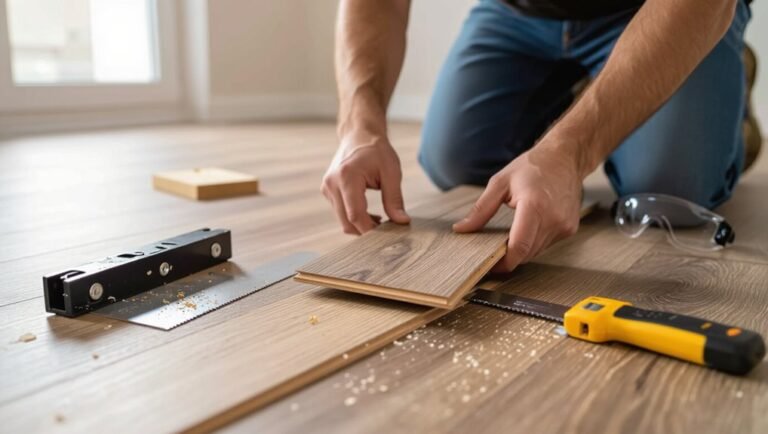
Step-by-Step Installation Guide
Start by planning your layout and marking the pattern so focal points fall where you want them.
Do a dry-lay and adjust for symmetry, then apply adhesive or fasten a starter row to anchor the pattern.
Continue laying rows while keeping alignment, and finish by cutting border pieces and fitting junctions.
Step 1 Layout planning and pattern marking

Begin by visualizing the overall pattern and marking a clear layout grid on the subfloor so you can install the parquet with confidence and symmetry.
Snap chalk lines from centerlines and reference walls, mark plumb lines for squares or herringbone angles, and note expansion gaps.
Measure and record offsets, alignment points, and stair or doorway changes so your installation stays true and balanced throughout.
Step 2 Dry-lay test and adjustment for focal points
1. You’ll dry-lay sections to verify pattern alignment and visual balance. Arrange planks from the planned starter line toward focal points, checking joints, symmetry, and edge gaps.
Shift rows to center motifs or correct offsets, trimming sacrificial pieces as needed. Walk the layout, inspect from multiple angles, and mark adjustments before you proceed to adhesive or fastening.
Step 3 Applying adhesive / fastening starter rows
Lay down adhesive or secure your starter rows with care, working only after your dry-lay marks are confirmed so the first courses set the pattern and alignment for the entire floor.
Spread adhesive per manufacturer directions; use a notched trowel and work in small sections to prevent skinning.
Press pieces firmly, tap with a mallet and block, and check alignment continually before adhesive cures.
Step 4 Laying subsequent rows and maintaining pattern alignment

Continue installing rows by working methodically from your confirmed starter lines, fitting each parquet piece snugly against the previous ones and keeping the pattern consistent.
Check spacing and orientation frequently, tap joints tight with a mallet and block, and wipe away excess adhesive as you go to avoid setting mistakes.
Keep a straight reference line, stagger end joints where required, and inspect for gaps or raised edges, correcting immediately.
Step 5 Cutting and fitting border pieces and transitions
Measure and cut border pieces and alteration strips precisely so they fit snugly against walls, doorways, and adjacent flooring.
Use a square and coping saw for accurate miters and scribe to uneven walls.
Dry-fit pieces, trim incremental millimeters, and label each for location.
For changes, match height and profile; fasten or glue according to manufacturer instructions for a clean, safe junction.
Step 6 Rolling, clamping, or nailing for secure bond
Prepare to secure the parquet by applying pressure where adhesive or fasteners need to set—use a roller for glued sections, clamps for small assemblies or tricky seams, and nails or staples where the manufacturer allows.
Roll systematically, overlap passes, and avoid trapping air. Clamp until adhesive skins.
When nailing, space fasteners per instructions, countersink nails, and fill holes to match pattern.
Step 7 Final sanding (if unfinished) and finishing coat application
Now finish the floor: if your parquet is unfinished, sand the assembled surface with progressively finer grits to remove joints, level changes, and open the wood pores for finish;
then clean thoroughly, inspect for defects, and apply the recommended finish in thin, even coats following drying and recoating times.
Work with grain, avoid over-sanding, tack between coats, and ventilate until fully cured.
Step 8 Installing trims, thresholds, and baseboards
With the floor sanded and sealed, it’s time to complete the look and seal the edges by installing trims, thresholds, and baseboards.
Measure and cut trims to fit, allowing expansion gaps. Secure thresholds at junctions with screws and adhesive, caulk joints where needed, and nail or glue baseboards, leaving a small gap at the floor if required.
Finish with paint or stain for a polished result.
Patterns Deep Dive: Techniques for Common Parquet Layouts
You’ll start by mastering block orientation and joint spacing for herringbone and chevron, since precise angle cuts and measurements make the pattern read cleanly.
Plan the Versailles or other geometric layouts carefully—map cutting sequences and alignment to keep visual continuity and avoid surprises.
Don’t forget borders and inlays as finishing touches that require their own layout and installation order.
Herringbone block orientation, joint spacing, alignment tips

Although herringbone feels classic, getting the block orientation, joint spacing, and alignment right takes careful planning and steady layout work.
You’ll establish a center guideline, orient blocks toward focal points, and dry-lay rows to confirm symmetry.
Maintain consistent joint gaps, use spacers for uniformity, and check alignment frequently with a chalk line and straightedge to prevent cumulative drift across the floor.
Chevron angle cuts, precision measurement, visual continuity

Because chevron relies on perfect miters, you must get angle cuts and measurements exact before you glue anything down.
Measure from a fixed centerline, mark mirrored cuts, and use a reliable miter saw with stops.
Dry-lay rows to check visual continuity and grain flow.
Adjust spacing for expansion gaps, then proceed methodically, gluing and tapping each joint to maintain seamless V patterns.
Versailles and complex geometrical patterns planning, cutting, and installation sequence
Shifting from chevron’s mirrored miters to Versailles and other geometric layouts means planning becomes more about repeatable modules and reference points than single angled cuts.
You’ll lay out full modules, establish grid lines, and pre-cut components for each motif.
Sequence installation from center modules outward, dry-fit assemblies, adjust tolerances, and adhesive-set panels in manageable sections to preserve alignment and pattern integrity.
Border and inlay options for custom looks
Borders and inlays let you personalize a parquet floor’s frame and focal points, so decide early how wide the border will be, what contrast you want, and whether you’ll use a single band, multiple bands, or a decorative inlay.
Choose materials, plan miters, and test patterns.
Consider:
- contrasting wood species
- single versus double band
- corner motifs
- inset medallions
Pro Techniques and Time-Saving Tips
You’ll speed the job with simple pro tools — jigs, spacers, and templates make layout and repetitive cuts much faster and more accurate.
Work in zones for large or irregular rooms, plan long runs to hide seams, and use staging techniques to keep pieces organized.
Finish smart with targeted sanding, quick-edge sealing, and proper drying times so you save hours without sacrificing quality.
Jigs, spacers, and templates to speed layout and cuts

A few well-made jigs, spacers, and templates will cut layout time and reduce mistakes, letting you repeat complex cuts and maintain consistent gaps without measuring each piece.
Build simple templates for repeating motif sections, use a spacer strip to guarantee uniform expansion gaps, and clamp a jig to guide your saw for precise bevels.
Label templates for quick reference and reuse.
Working in zones for large rooms and irregular shapes
When rooms get big or shapes go odd, break the space into manageable zones and tackle one section at a time; this keeps layout consistent, limits error propagation, and makes progress measurable.
Start from a primary focal zone, install full panels, then work outward. Use temporary guides and reference lines, track material per zone, and pause to verify pattern alignment before moving to the next area.
Handling long runs and minimizing visible seams
If your room has long runs, plan a staggered layout and an expansion strategy up front to keep seams tight and sightlines clean.
Use varied plank lengths to break continuous joints, install a concealed spline or tongue directionally to lock seams, and maintain consistent glue coverage.
Measure and dry-fit frequently, cut precisely at thresholds, and monitor alignment to prevent cumulative drift.
Finishing shortcuts without compromising quality
Now that you’ve planned layout and kept seams tight, you can speed up finishing work without sacrificing a pro look.
Use a quality floor sander for even sanding, then vacuum and tack cloth for dust-free finish.
Apply stain or sealer in thin, consistent coats with a lambswool applicator.
Let proper dry times and light buffing between coats guarantee durability and appearance.
Common Problems and How to Fix Them
You’ll likely run into issues like gapping, buckling, and cupping — learn what causes each and how to remedy them.
I’ll also cover how to diagnose and repair adhesive failures or delamination, recover from mismatched boards or pattern drift, and handle moisture damage and staining.
Follow these fixes step-by-step to get your parquet back to stable, attractive condition.
Gapping, buckling, and cupping causes and remedies
When moisture, temperature, or installation mistakes upset the balance of your subfloor and parquet pieces, you’ll see gaps, buckles, or cups develop over time; each problem has distinct causes and targeted fixes.
- Gapping: dry conditions or shrinkage — increase humidity, allow acclimation.
- Buckling: excessive moisture or restricted movement — dry area, relieve constraints.
- Cupping: top-layer moisture — dry slowly, improve ventilation.
- Prevent: proper acclimation, moisture testing, correct fastenings.
Adhesive failures and delamination diagnosis and repair steps
If adhesive failure or delamination shows up as loose, hollow-sounding tiles or sheets lifting at the edges, you can diagnose and often repair the problem without ripping out the entire floor.
Probe to locate voids, remove affected pieces, scrape old adhesive, clean substrates, and reapply manufacturer-recommended adhesive with proper trowel notch.
Clamp or weight until cured, then sand and finish to match.
Mismatched boards or pattern drift recovery techniques
Because parquet relies on precise layout and repeatable patterns, mismatched boards or pattern drift can quickly spoil the visual rhythm—yet you can usually correct it without redoing the whole floor.
Stop, remove affected sections, and relayout tiles from a stable reference line. Swap or rotate boards to restore grain and color continuity, scribe new pieces for tight fits, then glue and clamp for seamless alignment.
Dealing with moisture-related damage and staining
Although parquet’s finish can resist everyday spills, prolonged moisture and hidden leaks will warp blocks, lift glue lines, and leave dark stains, so you should act fast at the first sign of dampness.
Inspect subfloor, fix leaks, dry thoroughly with fans/dehumidifiers.
Replace irreparably warped or stained blocks, sand and refinish minor stains, and use moisture barrier and proper acclimation to prevent recurrence.
Maintenance, Repair, and Long-Term Care
To keep your parquet looking great, you’ll need simple daily and monthly cleaning routines and to know which products to use—or avoid—to protect the finish.
Learn quick scratch repair tricks, typical refinishing cycles and how to decide whether to refinish or replace.
Also control seasonal humidity and do preventive care so boards don’t cup, gap, or warp over time.
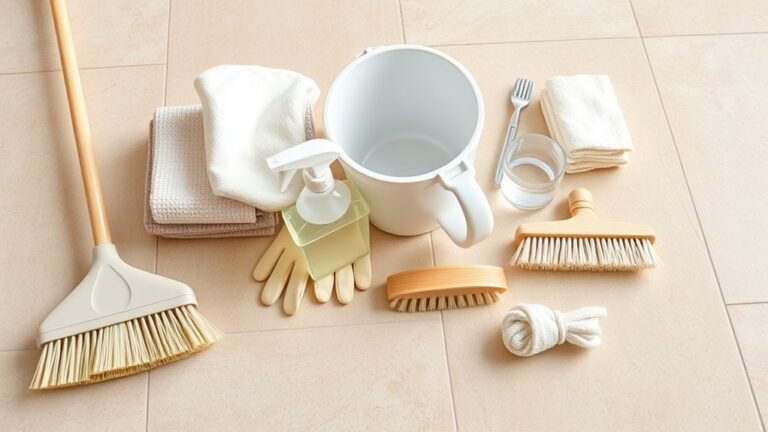
Daily and monthly cleaning routines (products to use and avoid)
When you keep a regular cleaning schedule, parquet floors stay beautiful longer and need fewer costly repairs; aim for quick daily care and a more thorough monthly routine.
You should sweep or vacuum daily, wipe spills immediately, and deep-clean monthly with a pH-neutral wood cleaner. Avoid harsh chemicals, steam mops, and oil soaps.
- Use soft broom or microfiber mop
- pH-neutral cleaner only
- Wipe spills promptly
- No steam or abrasive cleaners
Scratch repair, refinishing cycles, and when to refinish vs replace
Daily upkeep cuts down on wear that leads to scratches, but some marks and finish wear are inevitable over years of use; knowing how to repair scratches, plan refinishing cycles, and decide between refinishing and replacing will keep your parquet looking its best.
Use touch-up markers for surface scratches, filler for gouges, and light sanding between full refinishes.
Refinish when wear shows across boards; replace badly warped or thinned planks.
Seasonal care and humidity control to prevent damage
Because wood responds to temperature and moisture, you’ll need to adjust care as seasons change to keep parquet stable and crack-free.
Use a humidifier in winter to maintain 35–55% RH and a dehumidifier or AC in summer to prevent swelling.
Monitor with a hygrometer, seal gaps promptly, avoid rapid HVAC swings, and acclimate new wood before installation to minimize movement and damage.
Cost Breakdown and Time Estimates
You’ll want to compare material costs by wood species and pattern complexity, since herringbone or chevron runs pricier than simple blocks.
Decide whether you’ll spend weekends installing it yourself—adding more time but cutting labor—or hire pros who’ll finish faster but cost more.
Don’t forget hidden expenses like underlayment, junction strips, and waste allowance when you budget.
Material costs by type and pattern complexity
Material costs for parquet vary widely depending on wood species, plank size, and the pattern’s complexity, so you should budget accordingly before you start. Choose oak for mid-range, walnut or teak for premium, and engineered for savings. Simpler herringbone costs less than intricate Versailles.
| Type | Typical $/sqft | Pattern Impact |
|---|---|---|
| Oak | 4–8 | Low–Medium |
| Walnut | 8–15 | Medium–High |
| Engineered | 3–6 | Low |
Labor time estimates for DIY vs professional installation
Knowing the material costs helps you decide whether to tackle parquet as a DIY project or hire pros, since labor time and skill level can swing your total cost considerably.
Expect DIY to take 2–6 days for a 200–400 sq ft room depending on pattern complexity and your experience.
Pros typically finish in 1–2 days with higher precision but added hourly or project fees.
Hidden costs to budget for (underlayment, transitions, waste)
Anyone tackling parquet should budget beyond the boards themselves, since underlayment, connector pieces, adhesives or fasteners, and waste can add 10–25% to your total cost.
You’ll need underlayment for moisture and sound, junction strips for doorways, adhesive or nails, and extras for cutting waste.
Factor in delivery, threshold hardware, and a small contingency for damaged or mismatched pieces.
When to Hire a Professional
If your room is large, the pattern is complex, or there are structural issues, you’ll usually want a pro to guarantee a durable result.
Before hiring anyone, ask for proof of insurance, a portfolio of similar jobs, and details on warranties and timelines.
Compare quotes by scope, materials, and guarantees, and pick the installer who offers clear answers and documented experience.
Project types that warrant pro installation (large rooms, complex patterns, structural issues)
When a room is large, has intricate parquet patterns, or raises structural concerns, you should hire a pro—these situations demand precision, experience, and specialized tools to guarantee the floor looks right and performs well over time.
Hire pros for expansive open plans, multi-room runs needing seamless changes, custom geometric layouts, uneven subfloors, moisture or joist issues, or historic restorations where tolerance for error is minimal.
What to ask and verify with contractors (insurance, portfolio, warranty)
That said, once you decide a pro is needed, you’ll want to vet contractors carefully before signing anything.
Ask for proof of insurance, confirm licensing, and demand references with recent portfolio photos. Verify warranty details and timelines. Also get a written scope.
Check:
- Liability and workers’ comp certificates
- Local license number
- Past parquet projects photos
- Written warranty terms and exclusions
How to evaluate quotes and select the right installer
How do you compare bids so you pick the installer who’ll deliver quality on time and on budget?
Review scope, materials, timeline, and cleanup line-by-line. Check itemized costs, change-order policies, and payment schedule.
Verify licenses, insurance, references, and recent parquet photos. Favor contractors who offer written warranties and clear communication.
Choose the bid that balances experience, transparency, and fair pricing.
Mistakes to Avoid
Don’t skip acclimating the wood or testing for moisture, because that can cause warping or gaps.
Make sure the subfloor is flat and prepped, and don’t rush layout, cuts, or adhesive application.
Also avoid using finishes or cleaners that aren’t compatible with your parquet.
Skipping acclimation or moisture testing
If you skip acclimating your parquet or testing subfloor moisture, you’ll likely face cupping, gaps, or adhesive failure down the road.
You should let boards acclimate in the installation room for the manufacturer’s recommended time and measure moisture in both subfloor and parquet.
Don’t guess—use reliable meters and follow thresholds.
Proper testing prevents warping and costly repairs later.
Ignoring subfloor flatness and preparation
Once you’ve confirmed proper acclimation and moisture levels, check the subfloor’s flatness and prep before laying a single tile of parquet.
You must remove debris, fix squeaks, and level dips or high spots; even small irregularities cause gaps, cracked blocks, or lippage.
Use a straightedge, patch compounds, and guarantee a stable, dry surface so your pattern locks together and lasts.
Rushing pattern layout or cutting corners on adhesive
Although you may be enthusiastic to see the finished floor, rushing the pattern layout or skimping on adhesive will cost you time and money down the road.
Take accurate measurements, dry-fit sections, and align grain and joints before gluing. Use manufacturer-recommended adhesive, apply even coverage, and follow open time.
Proper patience prevents gaps, lifting, and costly repairs later.
Using incompatible finishes or cleaners
When you pick finishes or cleaners that don’t match your parquet’s factory coating, you’ll quickly see problems like dulling, streaks, or finish breakdown.
Always check the flooring manufacturer’s recommendations and test products on a scrap piece before applying them to the whole floor.
Use pH-neutral cleaners and manufacturer-approved maintenance products, avoid oil-based or abrasive agents, and follow drying times to preserve sheen and durability.
FAQs
You probably have a few practical questions before starting, like how long parquet lasts and whether you can install it over existing floors.
You’ll want to know if it’s suitable for bathrooms or basements, how much waste to order for patterned layouts, and whether engineered parquet can be refinished and how often.
Read on for clear answers to each of these common FAQs.
How long does parquet flooring last?
Wondering how long parquet flooring lasts? With proper installation, finish, and maintenance, you can expect 20–100+ years.
Solid hardwood parquet lasts longest; engineered varieties last decades if protected from moisture.
Regular cleaning, refinishing when wear appears, and controlling humidity extend life.
High-traffic areas may need earlier attention, but attentive care keeps parquet beautiful for generations.
Can parquet be installed over existing flooring?
Can you install parquet over existing flooring? Yes, in many cases you can lay parquet over flat, stable surfaces like hardwood or certain vinyl.
You’ll need to guarantee the subfloor is level, clean, dry and securely fastened.
Remove loose or cushioned layers, address height shifts, and follow manufacturer guidelines.
For glued or uneven floors, prep or removal may be required.
Is parquet suitable for bathrooms and basements?
How well parquet holds up in bathrooms and basements depends on the material and installation—solid wood struggles with moisture, while engineered or water-resistant varieties perform much better.
You should choose moisture-rated engineered planks, seal edges, and use proper underlayment or a vapor barrier.
Keep humidity stable, address leaks promptly, and avoid direct water exposure to extend lifespan and maintain appearance in damp areas.
How much waste should I order for patterned installs?
After you’ve picked the right parquet for moisture-prone areas, plan your material order with pattern waste in mind—patterned installs (herringbone, chevron, basket weave) generate far more offcuts than straight-laid planks.
Order 10–15% extra for simple patterns, 15–25% for complex layouts or irregular rooms.
Always buy from the same dye lot and keep spare boards for future repairs.
Can I refinish engineered parquet and how many times?
Wondering if engineered parquet can be refinished? You can, but it depends on wear-layer thickness. Thicker layers allow more sanding; thin veneers limit options.
Consider these factors:
- Wear-layer thickness (mm)
- Number of previous refinishes
- Nail/glue constraints
- Finish type (oil vs. polyurethane)
If unsure, consult a pro to avoid sanding through the veneer.