How to Level a Concrete Floor That Slopes Without a Full Replacement
You can fix a sloping concrete floor without replacing the slab by evaluating the slope, then choosing a method like grinding high spots, filling low areas with polymer-modified repair mortar, or pouring a self-leveling compound for moderate corrections; overlays or a plywood subfloor work for larger changes. Prep, profile the surface, and test moisture before applying products, and use proper PPE and tools. Keep going to learn step-by-step application tips, limits, and when to call an engineer.
Can You Level a Sloping Concrete Floor Without Full Replacement?
You can often correct a sloping concrete floor with methods like self-leveling compounds, grinding, or adding a screed or mortar overlay depending on the slope and use.
These fixes are quicker and cheaper than full replacement for modest, stable slopes.
But if the slab is severely cracked, heaved, or has major drainage or structural issues, you’ll need a full replacement.
Short summary of viable options
Although a full tear-out is sometimes necessary, you can often fix a sloping concrete floor without replacing the slab entirely by choosing among a few practical methods:
you’ll explore how to level a concrete floor that slopes using self-leveling compound, screed and feathering, bonded concrete overlays, grinding high spots, or adding a plywood subfloor.
Pick based on slope severity, moisture, and budget.
When a full replacement is unavoidable
When the slab shows major structural failure—large, active cracks, severe heave, or widespread erosion under the concrete—you’ll need to replace the floor rather than try to patch or level it.
You should hire a structural engineer, confirm subgrade issues, and plan full removal. Replacement lets you correct drainage, reinforcement, and proper slope.
Temporary fixes will fail and waste money.
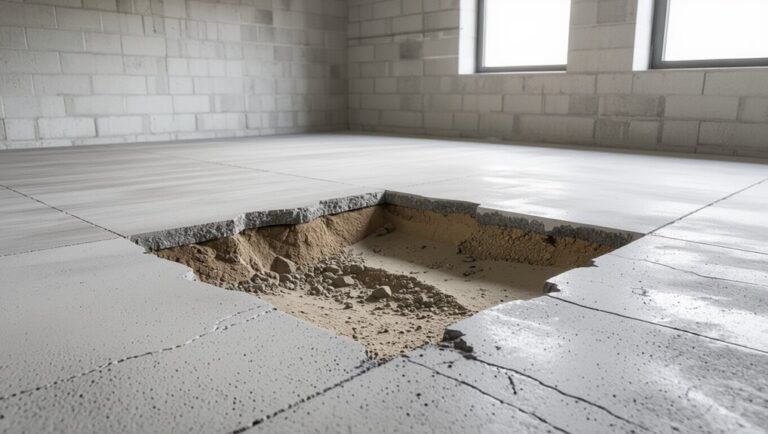
Understanding the Problem Why Concrete Floors Slope and How Much Is Normal
You’ll usually find floors slope because of settlement, poor subbase preparation, moisture movement, or simply construction tolerances.
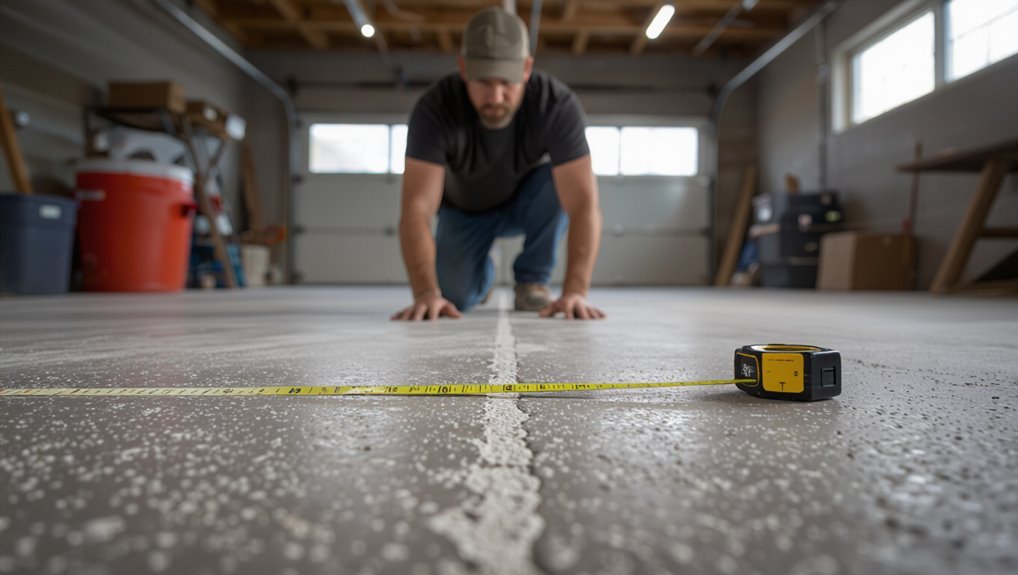
Use a long level, laser level, or string line to measure rise over run and compare it to acceptable limits for your room or floor finish.
Distinguish structural slopes that affect safety or drainage from cosmetic ones that only impact finishes so you can choose the right repair.
Common causes of sloping floors (settlement, subbase issues, moisture, construction tolerance)
Because floors sit on complex layers and endure changing conditions, sloping usually comes from a few predictable issues: settlement of the soil beneath, a poorly prepared or uneven subbase, moisture-driven movement in slabs or supporting soils, or simple construction tolerances and errors.
You’ll often see localized settling near drains or footings, subbase washout after heavy rain, moisture swelling or shrinkage, and framing or pour mistakes.
How to measure slope and how much slope is acceptable
How do you check whether a concrete floor is too sloped for its use? Measure with a long level or laser, noting rise over run; a 1/8″ per foot is often acceptable for interior floors.
Consider function: door swing, furniture, drainage.
Quick steps:
- Use a 6–10 ft level or straightedge and feeler gauges
- Measure rise over run across several spots
- Compare to planned use tolerances
Structural vs cosmetic slope: when it affects safety and finishes
After you’ve measured slope and decided whether it falls within acceptable tolerances, you’ll need to decide if the angle is a structural issue or merely cosmetic.
Check for cracks, settlement, sticking doors, or uneven load distribution — those signal structural concern needing an engineer.
If the slope only affects finishes or water puddling, you can usually use leveling compounds or targeted grinding to fix appearance and function.
Safety, Tools, and Materials You’ll Need
Before you start, make sure you’re protected with the right PPE—gloves, safety glasses, a dust mask or respirator, and knee protection—because cutting, grinding, and mixing materials create dust and debris.
Gather the essential tools: a straightedge or level, laser level, grinder or concrete planer, trowels and floats, and mixing tools for compounds.
Choose the appropriate material for the repair—self-leveling compound, cementitious overlay, thinset mortar, shims, or epoxy—based on the slope, thickness needed, and the final floor use.
Safety precautions and PPE
Because you’ll be working with power tools, dust, and heavy materials, take safety seriously from the first step.
Always wear impact-rated gloves, safety goggles, a N95 or better respirator, ear protection, and steel-toe boots. Use kneepads for prolonged kneeling.
Keep a tidy workspace, secure loose clothing and hair, and have a first-aid kit and fire extinguisher nearby before you begin.
Tools list (level, laser level, grinder, trowels, floats, mixing tools)
You’ll need a compact set of reliable tools to get a concrete floor perfectly level: a long spirit level or laser level for layout and slope checks, an angle grinder with diamond cup wheel for repairs and profiling, a range of trowels and floats for applying and finishing the topping, plus mixing tools (bucket mixer or paddle drill) to blend overlays or patch compound consistently.
- Level, laser, and measuring rules
- Grinder, blades, and dust control
- Trowels, floats, buckets, and mixer
Material options overview (self-leveling compound, cementitious overlay, thinset mortar, shims, epoxy)
Choosing the right material makes or breaks a leveling job, so match the product to the floor condition and final finish you want. You’ll pick self-leveling for broad low spots, cementitious overlay for texture, thinset under tile, shims for localized high-to-low shifts, and epoxy for durability and moisture resistance.
| Material | Best use |
|---|---|
| Self-leveling | Large, shallow dips |
| Overlay | Resurfacing |
| Thinset | Tile beds |
| Epoxy/Shims | Durability/localized leveling |
Deciding on the Right Method Quick Comparison of Repair Options
You’ll pick between raising low spots with a self-leveling compound or overlay, or lowering high spots with grinding and patching, depending on the severity and location of the problem.
Self-leveling mixes are fast and smooth for broad low areas but can be costly and require strong adhesion; cementitious overlays give more control and thickness but need good prep.
Grinding and targeted patching works best for isolated highs or thin slabs, though it’s dustier and can be labor-intensive.
Self-leveling compound: pros, cons, typical uses
Self-leveling compound is a fast, relatively simple way to flatten moderately uneven concrete floors: you mix a cementitious or gypsum-based powder with water, pour it onto the surface, and let it flow into low spots to create a smooth, level plane.
It cures quickly, saves labor, and works for thin fills, but needs sound prep, priming, and isn’t for deep slopes or structural fixes.
Cementitious overlay / skim coat: pros, cons, typical uses
If a self-leveling compound won’t handle deeper repairs or you need a thinner, more durable finish, a cementitious overlay or skim coat can be the better option.
You’ll get a thin, trowel-applied layer that restores flatness, resists wear, and accepts coatings.
It’s labor-intensive, needs proper surface prep and bonding, and won’t correct large slope changes—best for shallow repairs and resurfacing.
Partial grinding and patching: pros, cons, typical uses
When sections of a concrete floor have localized high spots, cracks, or small spalls, partial grinding and patching gives you a focused, cost-effective fix rather than replacing or resurfacing the whole slab.
You can grind down high areas, clean debris, and fill voids with patch mortar. It’s fast and minimal disruption, but won’t correct broad slope issues and may need skilled edge blending for seamless results.
Raising low spots vs lowering high spots: when to choose each
Because every slab has different problems and budget limits, you’ll choose either raising low spots or lowering high spots based on the extent of the defect, surrounding finishes, time, and cost. You’ll raise with overlays or epoxy for localized depressions; you’ll grind or slab-saw high areas when finishes tolerate dust. Choose the least invasive, cost-effective option.
| Method | Best for | Trade-off |
|---|---|---|
| Raise | Local lows | Build-up height |
| Lower | Local highs | Dust/time |
| Overlay | Large areas | Material cost |
Step-by-Step Guide Leveling Using Self-Leveling Compound
Before you start, walk the floor and measure and mark the high and low spots so you know exactly what you’re dealing with.
Next, clean, degrease, remove loose concrete, and fill cracks, then prime the slab and install dams or forms at junctures.
Finally, mix and pour the self-leveling compound within its working time, using techniques to spread, feather junctures, and smooth edges for a seamless finish.
Step 1: Inspect, measure, and mark high/low areas
Start by thoroughly inspecting the floor to identify dips, humps, and cracked areas that will affect the self-leveling compound.
Walk the space with a level or straightedge, measure slopes with a laser level or long spirit level, and mark highs and lows with chalk or tape.
Note changes in elevation and thresholds so you can plan compound depth and drainage before prepping.
Step 2: Prepare the surface (cleaning, degreasing, remove loose concrete, fill cracks)
Now that you’ve marked highs and lows, get the slab spotless so the compound can bond properly: sweep and vacuum away dust and debris, degrease oil or grease spots with a suitable concrete cleaner or trisodium phosphate solution, and chip out any loose or flaking concrete with a hammer and cold chisel.
Then:
- Scrub stained areas and rinse thoroughly.
- Fill cracks with epoxy or cementitious patch.
- Remove dust again and let the slab dry fully.
Step 3: Prime the slab and set up dams/forming for transitions
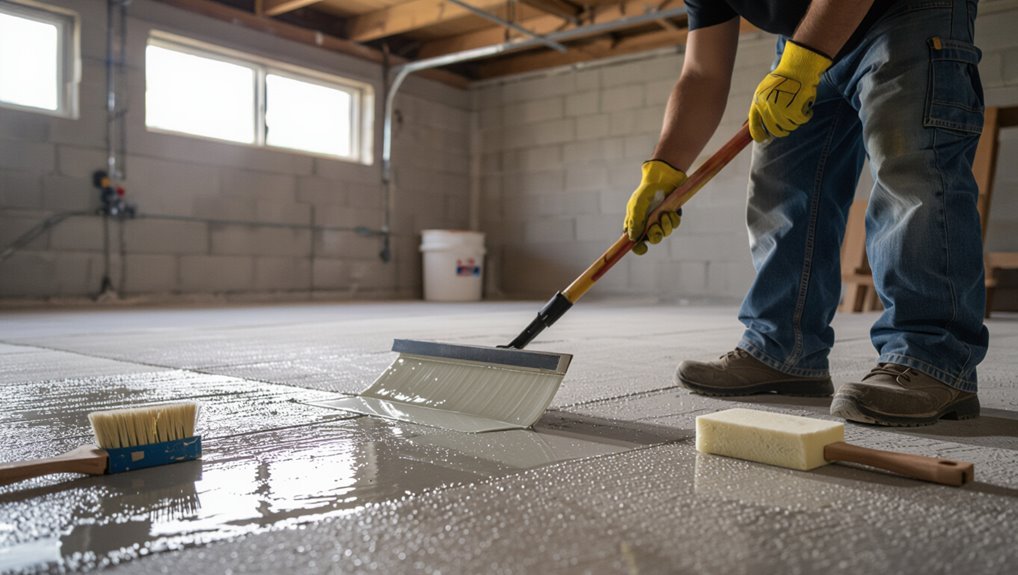
Prime the slab with a manufacturer-recommended primer and set up dams or forms at walls, doorways, and any junction points so the self-leveling compound can flow and cure to the correct height.
Use foam backer rod or caulk for small gaps, secure plywood or metal edge forms for larger changes, and seal seams to prevent leaks.
Verify slope and containment before pouring.
Step 4: Mix and apply the self-leveling compound techniques and working time tips
With your dams and primer in place, mix only the amount of self-leveling compound you can pour and finish within the manufacturer’s working time; overmixing or letting batches sit will shorten pot life and cause lumps.
Stir to a smooth, lump-free consistency, pour from one corner, and use a gauge rake to spread.
Work steadily, finishing edges before the compound skins over.
Step 5: Feathering transitions and smoothing edges
Step 5 focuses on feathering changes and smoothing edges so the new self-leveling compound blends seamlessly with adjacent surfaces and prevents trip hazards.
Use a trowel or margin tool to thin the compound at perimeters, work quickly while material is wet, and feather toward lower areas.
Check connections with a straightedge, remove ridges, and finish with light passes for a smooth, gradual edge.
Step 6: Curing time and post-application checks
Once the compound’s spread and edges look right, let it cure undisturbed so it reaches full strength and a stable surface you can work on.
Curing times vary by product, temperature, and humidity, so follow the manufacturer’s guidelines and avoid traffic until the specified window has passed.
Check hardness with a fingertip, inspect for air bubbles or shrinkage, and note moisture levels before proceeding.
Step 7: Preparing the leveled surface for final floor finish (tile, hardwood, epoxy)
After the compound has cured and you’ve checked hardness and moisture, get the surface ready for your chosen finish by cleaning, profiling, and priming as needed.
Remove dust, grease, and loose particles; etch or sand glossy spots for adhesion.
Apply the correct primer for tile thinset, hardwood adhesive, or epoxy.
Allow primer to dry fully, then follow manufacturer installation instructions for your finish.
Alternative How-To: Using Cementitious Overlay or Thin-Mill Topping
If your floor has deeper defects or needs a wear layer, you’ll choose a cementitious overlay or thin‑mill topping instead of a self‑leveler.
You’ll prep differently—mechanically profile, clean, and use primers or bonding agents—then apply the overlay to its recommended thickness (usually 1/8″ to 1/2″ for thin toppings) in prescribed layers.
After curing you’ll finish and seal the surface to protect it and achieve the desired texture and durability.
When to choose an overlay instead of self-leveler
When your slab has deep damage, significant slope, or you want a textured, durable finish instead of a perfectly flat surface, choose a cementitious overlay or thin-mill topping over a pourable self-leveler.
You’ll pick overlay when repairs need thickness, when mechanical grinding or profiling is acceptable, or when you want wear resistance and decorative options rather than a perfectly smooth, poured finish.
Surface prep differences and bonding techniques
Because overlays rely on mechanical and chemical bonds rather than just gravity, preparing the concrete is critical to performance; you’ll need to remove contaminants, profile the surface to the correct roughness, and repair delamination or loose areas before applying primer or bonding slurry.
Next, choose shot-blasting or diamond-grinding for adequate profile, acid-etch only when appropriate, vacuum thoroughly, and use compatible primers or epoxy slurries to guarantee adhesion.
Application steps and recommended thickness ranges
Although you’ve already prepped the slab, start by planning your overlay work in small, workable sections so mixes stay fresh and edges remain feathered; for cementitious overlays or thin-mill toppings that means batching only what you can place and finish within the product’s pot life.
Mix per instructions, trowel or screed to desired slope, and compact.
Typical thickness: featheredge to 1/4″ for overlays, 1/4″–1″ for thin-mill.
Finishing and sealing overlays
With your overlay placed and smoothed, focus next on finishing and sealing to protect the surface and lock in the look.
Work quickly to texture or trowel for the desired finish, repair minor imperfections, then let cure per manufacturer instructions.
Clean thoroughly, apply a breathable primer if recommended, then seal with a suitable penetrating or film-forming sealer to enhance durability and stain resistance.
Alternative How-To: Grinding High Spots and Spot Patching Low Areas
Start by measuring and marking the high and low spots so you know how much grinding and patching you’ll need.
Choose the right grinder and dust control (vacuum attachments and PPE) before you remove high areas, then fill low spots with repair mortar or epoxy depending on depth and expected load.
Finish by blending patch edges and sanding for a smooth, level surface.
Assessing how much grinding is required
How much grinding will you need depends on the severity and distribution of the high spots: run a straightedge or laser level across the floor to locate peaks and measure their height above the desired plane, then mark areas that exceed your tolerance (typically 1/8″–1/4″ for most finishes).
Tally marked areas, estimate average material removal per spot, and calculate total grinding area to decide time, effort, and whether spot patching complements grinding.
Grinding equipment and dust control measures
You’ve identified the high spots and figured the scope of work, so now pick the right grinder and dust-control setup for the job.
Use a variable-speed concrete grinder with diamond cup wheels for coarse removal and a smaller handheld for edges.
Connect a HEPA-rated vacuum to capture silica dust, seal off areas with plastic, wear PPE, and run slow, controlled passes to minimize airborne particles.
Patching low spots with repair mortar vs epoxy
When you’re pairing grinding with spot repairs, choose the patch material based on depth, traffic, and cure time: use polymer-modified repair mortar for larger depressions and deep fills because it bonds well and resists shrinkage.
Opt for epoxy or epoxy-cement blends for thin, high-wear patches that need fast return-to-service and superior chemical resistance.
Prepare, clean, prime, and follow manufacturer mix/temperature instructions.
Blending and final smoothing
Start by grinding the high spots flush and then blend those areas into adjacent patches so the surface reads as one plane; you’ll alternate between light grinding and feathering repair mortar or epoxy edges until shifts disappear and the floor feels uniformly level under your straightedge.
Work methodically, checking with a straightedge and a level, removing burrs, sanding junctions, and cleaning dust before final sealer or coating.
Common Mistakes and How to Avoid Them
Don’t rush into pouring a leveler—if the slab’s dirty, oily, or unprimed you’ll lose adhesion and the patch will fail.
Watch product limits and don’t build thickness in consecutive thin coats beyond the manufacturer’s specs, because over-application and poor mixing or working-time mistakes cause weak spots and trapped air.
Also check for structural slopes or settlement first, since no topping can fix underlying movement.
Applying levelers over contaminants or without primer
Although it might seem faster to pour a self-leveler over dust, oil, paint, or bare concrete, doing so without proper cleaning and a compatible primer almost always leads to bonding failures, bubbles, or delamination.
You should remove contaminants, etch or mechanically profile smooth surfaces, and use the manufacturer’s recommended primer.
Test adhesion in a small area and follow curing times to guarantee a stable, long-lasting bond.
Over-applying thin layers or exceeding product depth limits
After you’ve cleaned and primed the slab, resist the urge to build up level with multiple feather-thin coats or to push a product beyond its rated depth.
You’ll create weak, delaminating layers or cause curing failures. Follow manufacturer depth guidelines, use proper mix ratios, and apply in recommended lifts or switch to a thicker-specified compound.
Test small areas and let each layer fully cure before next.
Ignoring structural causes of slope
If you skip diagnosing the slab’s structural causes of slope, any surface-level leveling will only mask problems that’ll return or worsen.
Check for settling, joist movement, subbase voids, or beam issues before applying self-leveler.
You’ll save effort and money by addressing foundations, drainage, or framing defects first.
Patchers aren’t substitutes for structural repairs; call a pro if you’re unsure.
Poor mixing, working time mismanagement, and trapped air issues
When you rush mixing or let the compound sit too long, you’ll end up with weak patches, shortened working time, and bubbles that show through the finish.
You can avoid that by measuring, timing, and de-aerating carefully. Take these steps:
- Mix to manufacturer specs; don’t add excess water.
- Pour in small batches to match your working time.
- Use a drill mixer and spike roller to release trapped air.
Best Practices and Tips for Durable Results
Before you start, test for moisture and plan a vapor barrier so your new surface won’t fail later.
Make smooth changes for the finished flooring, pick leveling products rated for the traffic and finish you expect, and consider when a pro’s experience is worth the cost.
These steps will give you a durable, professional outcome with fewer surprises.
Proper moisture testing and vapor barrier considerations
Because excessive moisture ruins floor coverings and adhesives, you should always test concrete slab moisture before leveling and decide on a vapor barrier based on the results.
Use a calcium chloride test or in-situ relative humidity probes per standards. If readings exceed manufacturer limits, install an appropriate vapor barrier or moisture-mitigating primer.
Retest after remediation and document results before installing leveling compounds.
Achieving smooth transitions for finished flooring
If you want finished flooring to feel seamless and last, focus on creating smooth, properly sloped changes between surfaces—this means matching heights, feathering edges, and providing firm support at thresholds so coverings and trims sit flat and don’t flex or gap.
Use tapered screeds or leveling compounds to blend low spots, secure changeover strips, and confirm slopes divert water where needed for durability.
Choosing products based on expected traffic and finish
When you pick leveling products, match their strength and texture to the traffic load and final floor type so the surface holds up and looks right; choose fast-setting, high-compression mixes for garages or heavy use, blended underlayments for tile or vinyl, and feather-finish or skim coats for light residential areas.
Sealers and primers must suit the chosen finish and expected wear.
When to hire a pro vs DIY indicators
Wondering whether you should tackle a floor-leveling project yourself or call in a pro?
If slopes are minor, traffic light, and you’re comfortable mixing compounds, DIY saves money.
Hire a pro if slopes exceed an inch, the subfloor has structural damage, plumbing/electrical is involved, or you need a flawless finish for heavy traffic.
Professionals guarantee correct prep, slope correction, and warranty.
Cost, Timeframe, and Longevity Expectations
You’ll want to weigh cost differences between DIY patching or self-leveling compounds and hiring a pro, as labor and materials can change the price considerably.
Expect several hours to a couple of days for preparation and application, plus 24–72 hours or more for curing depending on the product.
With proper installation and occasional maintenance, a leveled concrete floor can last many years before needing major repairs.
Typical cost ranges for DIY vs professional jobs
Expect to pay very different amounts depending on whether you tackle the job yourself or hire pros: a DIY self-leveling job on a small to medium room typically runs $50–$300 for materials, while professional concrete leveling or grinding can cost $2–$6 per square foot for modest work and $6–$15+/sq ft for extensive repairs or true slab leveling.
Labor, site access, and needed prep can push total project prices into the hundreds or several thousands.
You’ll save money DIY but accept more risk and potentially shorter lifespan; pros cost more but deliver warranties, better tools, and longer-lasting results.
Time required for prep, application, and curing
1–3 days is a realistic window for most small to medium concrete-floor leveling jobs, but the exact timeline depends on prep, product cure times, and whether you hire pros.
You’ll spend hours cleaning, patching cracks, and priming. Self-leveling compound typically sets in 1–4 hours and cures in 24–72 hours.
Allow extra time for evaporation, inspection, and installing finishes afterward.
Expected lifespan and maintenance needs
After the floor cures and you’ve finished any post-pour inspections, think about how long the leveled surface should last and what upkeep it will need.
With proper installation and quality materials, expect 10–25 years before major work is needed.
Maintain by sealing annually or biannually, promptly repairing chips or cracks, controlling moisture, and avoiding heavy point loads to extend lifespan and reduce long-term costs.
Real-World Scenarios and Case Examples
You’ll see different fixes depending on the situation: for a small garage with a minor slope you’ll typically use a self-leveling compound, while a basement with moisture-related settling will need moisture mitigation and possibly mudjacking or partial replacement.
For a commercial floor with heavy traffic, you’ll want a structural repair and a high-strength topping designed for load and abrasion resistance.
Consider cost, downtime, and long-term maintenance for each case before you choose.
Small garage floor with minor slope recommended approach
When dealing with a small garage floor that has only a slight slope, the most practical approach is to grind high spots and use a thin polymer-modified self-leveling compound to smooth the rest. This minimizes material use, labor, and finish thickness while preserving drainage.
You’ll prep by cleaning, etching if needed, priming, applying the compound in thin passes, and finishing with a wear coat.
Basement with moisture-related settling recommended approach
If your basement has settled due to moisture, start by diagnosing the underlying cause rather than just covering the symptoms: identify active leaks, check perimeter grading and downspouts, and inspect for hydrostatic pressure or a failing drainage system.
Fix water entry and drainage first, then stabilize soil or install interior French drains and sump pumps as needed.
Use mudjacking or micro‑concrete only after moisture is controlled.
Commercial floor with heavy traffic recommended approach
Because heavy foot and vehicle loads in commercial spaces amplify small defects, assess traffic patterns, load types, and turnaround times before choosing a leveling method.
For heavy-duty sites, use structural repair: diamond grind, epoxy polymer overlays, or bonded concrete toppings designed for high PSI and abrasion.
Coordinate phased work to minimize downtime, guarantee proper substrate prep, and follow manufacturer specs for curing and joint restoration.
FAQ Common Questions About Leveling Sloped Concrete Floors
You probably have a few practical questions before you start—like whether self-leveler will bond over tile or adhesive residue and how thick you can pour at once.
You’ll want to know if leveling will stop doors from sticking or fix threshold gaps, and whether you can lay hardwood or tile over the finished overlay.
Finally, we’ll cover how to tell if the slope is just wear or a sign of a structural issue.
Can I use self-leveler over tile or adhesive residue?
Wondering whether you can pour self-leveler over existing tile or adhesive residue? You generally shouldn’t.
Tiles and gummy adhesive prevent proper bonding and can trap moisture. Remove loose tile and scrape adhesive to a sound substrate, then clean and prime per manufacturer instructions.
For well-bonded ceramic minimally profiled surfaces, use a suitable primer and consult specs before pouring to verify adhesion and warranty.
How thick can I apply self-leveling compound in one pour?
Most manufacturers let you pour self-leveling compound between 1/8 inch and 1/4 inch in a single pass for true featheredges.
However, some formulas can go up to 1/2 inch or more when mixed with aggregate or specified as “extended” mixes.
Check the product datasheet for maximum pour depth, use reinforcement or multiple lifts for greater thickness, and always follow cure times and substrate prep.
Will fixing the floor stop doors from sticking or gaps at thresholds?
If your doors are sticking or you’ve got visible gaps at thresholds, leveling the floor will often resolve the problem by restoring a flat, consistent plane for the door frame and sill to sit on.
You’ll likely see improved operation and tighter threshold gaps after proper leveling.
In some cases you’ll still need minor door trimming or hinge adjustment to perfect clearance and alignment.
Can I install hardwood or tile over a leveled overlay?
Can you install hardwood or tile over a leveled overlay? Yes—you can, but choose the right overlay and prep.
Use a cement-based, bonded leveling compound rated for your finished flooring. Verify the surface is fully cured, flat within manufacturer tolerances, clean, and primed if required.
For hardwood, follow moisture and fastener guidelines; for tile, use proper thinset and grout designed for overlays.
How do I know if the slope indicates a structural problem?
How steep is the slope, and what else do you see? Measure drop over distance; hairline cracks or wide gaps, sagging joists, sticking doors, or new wall cracks suggest structural issues.
Small, even slopes often stem from settling or poor pour and are repairable with overlays.
If you spot significant movement or deterioration, consult a structural engineer before leveling to guarantee safety and proper remediation.