How to Install WeatherTech Floor Liners in Any Vehicle Quickly
You can install WeatherTech floor liners in most vehicles quickly by first confirming fitment, removing old mats, and cleaning the floor so the carpet’s flat and dry. Test-fit each liner, align molded contours and logo for front/back, then snap them into OEM anchors or attach retention devices. Trim universal liners only as needed, checking pedal clearance and seat travel. Tighten and adjust for a flush fit, and keep going to learn tips for trimming, maintenance, and troubleshooting.
Quick Answer Can You Install WeatherTech Floor Liners in Any Vehicle Quickly?
Yes — you can install WeatherTech floor liners in most vehicles quickly if you have the right model and basic tools.
You’ll typically finish a DIY install in about 15–30 minutes per row. Just confirm fitment, remove old mats, and snap the liners into the factory anchors.
Short, direct verdict
Generally, you can install WeatherTech floor liners quickly in most vehicles, but fit and time depend on your model and whether you bought a custom or universal set.
Short verdict: yes, you can do it yourself. Follow the manufacturer’s guidance for positioning and anchors.
If you know how to install WeatherTech floor liners and have basic tools, installation is straightforward and reliable.
Time estimate for DIY installation ()
Expect to spend about 10–30 minutes per vehicle footwell installing WeatherTech liners, depending on whether they’re custom-fit or universal and on your familiarity with the process.
You’ll prep the area, fit the liner, secure retention clips, and repeat. Quick installs take under an hour for a front pair; full cabin fits vary.
- Prep: remove mats, vacuum
- Fit liners
- Secure clips
- Inspect fit
What Are WeatherTech Floor Liners and Why Choose Them?
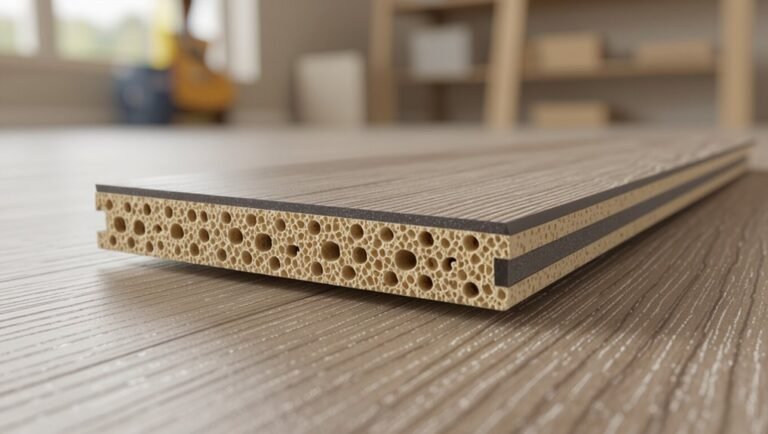
WeatherTech floor liners are precision-molded from high-density, stain- and slip-resistant materials to match specific makes and models, with universal options available if you don’t need a custom fit.
You’ll get rugged protection against water, mud, and road salt plus long-lasting durability that holds up under heavy use.
Before you buy, compare custom-fit versus universal liners to make sure the fit and coverage meet your vehicle’s needs.
Product overview materials, fit, and models
When you shop for floor liners, you’ll find WeatherTech offers heavy-duty, custom-fit mats made from high-density tri-extruded (HDTE) material that resists warping, stains, and UV damage.
They’re engineered to trap water, mud, and debris while preserving factory carpet coverage and mounting points.
You’ll choose front, rear, and cargo models tailored to vehicle make, trim, and year, with OEM-style anchoring and precise edge-to-edge coverage.
Key benefits protection, custom fit, durability ()
Beyond materials and fit, these liners protect your vehicle and simplify upkeep: they channel spills, snow melt, and grit into raised channels and deep wells so liquids don’t reach carpet.
They clip into factory anchors for a secure, OEM-like fit, and their HDTE construction resists cracking, fading, and warping so they keep performing season after season.
- Protects carpet from stains and moisture
- Keeps dirt contained for easy cleaning
- Secure, slip-free positioning
- Long-lasting, weather-resistant material
Compatibility basics custom-fit vs. universal liners
If you want liners that fit like they were made for your vehicle, choose custom-fit options; they’re molded from exact vehicle specifications to cover every contour and anchor point.
Custom-fit delivers precise protection, retention, and OEM-style looks.
Universal liners offer economy and broader compatibility but may need trimming and won’t lock into anchors.
Pick based on fit priority, budget, and planned use.
Prepare Before You Install
Before you start, gather the tools and supplies you’ll need—like a vacuum, trim tool, and the liners themselves—and make sure your vehicle’s interior is clean with seats positioned for easy access.
Check the fitment for your exact make and model by using a VIN lookup, the manufacturer’s model guides, or simple measurements of the floor area.
Doing these quick prep steps prevents surprises and speeds up installation.
Tools and supplies needed ()
Gather a few basic tools and supplies so your WeatherTech floor liners go in cleanly and fit correctly.
You’ll want items that help position, protect, and secure the liners without heavy gear. Keep everything reachable and organized to speed installation and avoid scratching interior trim.
- Soft microfiber cloths
- Trim-safe plastic pry tool
- Non-abrasive interior cleaner
- Rubber gloves
Vehicle preparation checklist cleaning and seat positions ()
Now that your tools and supplies are ready, get the vehicle prepped so the liners sit perfectly.
Remove old mats, vacuum debris, and wipe floors dry.
Move seats fully forward and recline if needed to access rear mounting areas.
Secure loose items and pedals.
Confirm carpet is flat and dry before placing liners.
- Remove old mats
- Vacuum and wipe
- Adjust seats for access
- Secure loose items
How to verify fitment for your vehicle (VIN lookup, model guides, measuring)

Once you’ve prepped the vehicle, confirm the liners match your make, model, and year by checking fitment through a VIN lookup, manufacturer model guides, or quick measurements of key floor areas; this verifies secure anchoring and edge coverage before you unpack the liners.
Use the VIN tool online, compare template diagrams, and measure toe room, hump height, and front-to-back depth to ascertain precise alignment.
Step-by-Step Installation Guide
Start by removing your old mats and giving the floors a good cleaning so the liners sit flat.
Inspect the mounting points and OEM retention devices, then test-fit the liners to make sure fronts and rears are oriented correctly.
Finally, align and attach the retention anchors and trim only if you’re using universal liners, following safe trimming techniques.
Step 1 Remove existing mats and clean the floor
Pull out the old floor mats and set them aside so you can access the bare carpet.
Vacuum thoroughly, getting dirt from seams and under pedals. Wipe remaining grime with a damp microfiber and mild cleaner, then dry completely.
Check for stains or sticky residue and treat as needed. A clean, dry surface guarantees the new WeatherTech liners sit flat and perform correctly.
Step 2 Inspect mounting points and OEM retention devices
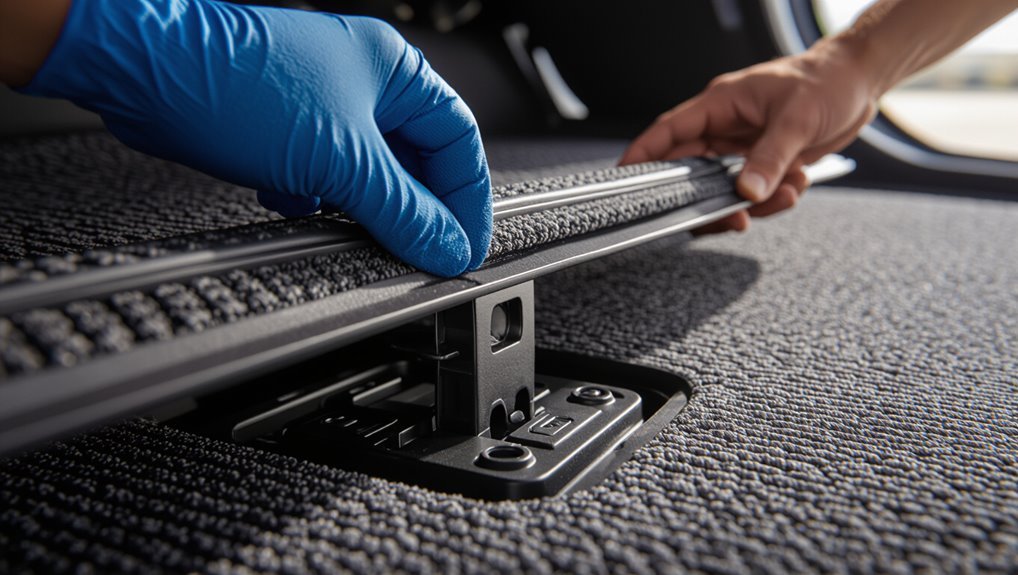
With the floor clean and dry, check the vehicle’s mounting points and any OEM retention devices before fitting your WeatherTech liners.
Look for clips, posts, or anchors; confirm they’re intact and free of debris. If a clip is damaged, replace or secure it per your owner’s manual.
Note locations so liners’ retention holes align precisely without forcing or trimming.
Step 3 Test-fit liners and orient front vs. rear
Now place each WeatherTech liner into the vehicle without fastening to confirm fit and orientation; front liners are molded to match pedal and seat contours while rear liners sit flatter and may span the transmission hump.
Check that edges line up with door sills, pedals clear freely, and rear pieces don’t block seat rails.
Adjust rotation and fore/aft positioning until each liner seats snugly.
Step 4 Align and attach retention devices or anchors
Step 4 centers on lining up the liners’ retention points with the vehicle’s anchors and snapping or fastening them into place so they won’t shift during use.
Position each liner, press down on each retention clip or hook until you hear or feel it engage, and tug gently to confirm security.
Repeat for all corners and both front and rear mats.
Step 5 Trim or adjust (if using universal liners) safe trimming techniques
Before you cut, double-check fit and mark trim lines so you only remove what’s necessary.
You’ll trim gradually, testing fit often. Use sharp scissors or a utility knife with a straightedge. Deburr edges and avoid overcutting.
- Trim small increments.
- Test fit after each cut.
- Keep trimmed pieces for reference.
- Smooth edges to prevent snags.
Step 6 Final positioning and quality check driver pedal clearance and seat movement
Once you’ve set the liners roughly in place, take time to verify final positioning and perform a focused quality check on driver pedal clearance and seat movement.
Sit, adjust the seat fully forward and back, ensuring no liner bunches under rails. Depress each pedal fully to confirm unobstructed travel.
Reposition edges as needed, secure anchors, and recheck before driving.
Typical time per step and total expected time
Now that you’ve confirmed pedal clearance and seat movement, let’s look at how long each installation stage usually takes so you can plan the job.
Unboxing and prepping: 5–10 minutes.
Removing old mats/cleaning: 10–20 minutes.
Fitting front liners: 5–10 minutes.
Rear liners: 5–10 minutes.
Final adjustments and checks: 5–10 minutes.
Total expected time: 30–60 minutes, depending on vehicle and thoroughness.
Installing Different Types & Vehicle Scenarios
When installing WeatherTech liners, you’ll usually use custom-fit pieces that align with factory contours. However, you may need universal/all-weather liners if a perfect match isn’t available.
For universals, you’ll learn simple trimming and adjustment tips. For compact cars, tight spaces, trucks, SUVs, vans, or rear cargo areas, you’ll use space-saving placement and anchoring techniques.
I’ll also cover special cases like non-standard floor anchors or aftermarket seats so you can secure liners safely and neatly.
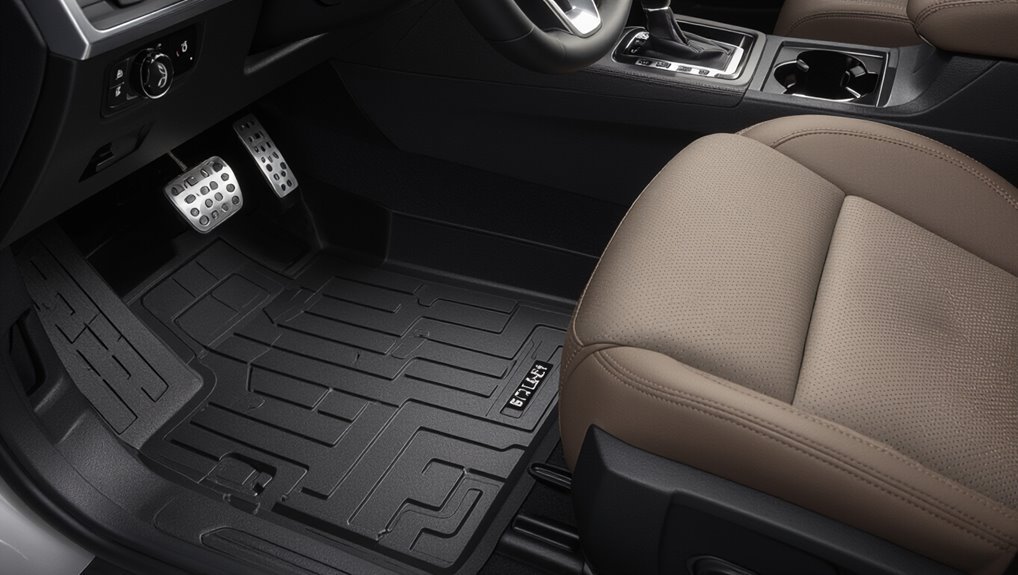
Installing custom-fit WeatherTech liners (most common)
Start by clearing out your vehicle’s floor so you can test-fit the custom WeatherTech liners—these are designed to match your make and model precisely, but slight bending or trimming might be needed for tight spots or unique trim.
Place each liner, align retention clips or anchors, press firmly into contours, check pedal and seat clearance, and reinstall mats or carpet edges to secure a snug, factory-like fit.
Installing universal/all-weather liners adjustments and trimming tips
Universal or all-weather liners fit many vehicles but often need trimming or adjustments to sit right.
You’ll dry-fit the liner, mark excess around pedals, seat rails, and door sills, then trim gradually with a utility knife.
Keep edges neat, test pedal clearance, and round corners to prevent lifting.
Recheck fit after trimming and secure anchors or non-slip pads as needed.
Compact cars and tight spaces space-saving techniques
If you trimmed or adjusted a liner to fit a larger vehicle, you’ll find compact cars pose different space-saving challenges and call for slightly different techniques.
Measure carefully, prioritize front-row clearance, and trim minimal material near pedals. Use scissors or a utility knife with steady cuts.
Tuck edges under seat rails, secure with clips or non-slip pads, and test pedal movement before finishing.
Trucks, SUVs, and vans rear row and cargo area considerations
For trucks, SUVs, and vans you’ll mainly focus on larger, flat surfaces and anchoring that keeps liners from shifting under heavy loads. Measure the rear seating and cargo floor, account for cargo tie-downs and fold-flat seats, and choose liners that match the vehicle’s layout (full-coverage, cargo, or drop-in).
Install liners flush to trim, trim only if specified, secure anchors, and test fit before loading.
Vehicles with non-standard floor anchors or aftermarket seats
When your vehicle has non-standard floor anchors or aftermarket seats, you’ll need to verify fitment and anchor compatibility before laying down WeatherTech liners.
Check manufacturer specs, test anchor points, and inspect seat mount locations. If anchors won’t align, use WeatherTech retention adapters or secure with approved fasteners.
Trim liners only as recommended, and confirm seat movement and airbag clearance after installation.
Comparison: Custom-Fit vs Universal WeatherTech Liners ()
You’ll want to weigh fit accuracy, installation ease, cost, and pros/cons when choosing between custom-fit and universal WeatherTech liners. Below is a quick snapshot to help you compare key factors at a glance before you decide. Use this to match your priorities—precision fit or budget-friendly flexibility.
| Custom-Fit | Universal |
|---|---|
| Exact contour to vehicle floor | Generic sizing for many models |
| Usually snaps into OEM anchors | Often simple trim-to-fit installation |
| Higher price | Lower price |
| Best protection, minimal movement | More affordable, may shift |
| Fewer trimming needs | May require cutting for perfect fit |
Fit accuracy, ease of installation, cost, and pros/cons ()
Although both WeatherTech custom-fit and universal liners aim to protect your vehicle, they differ sharply in fit accuracy, installation, cost, and trade-offs you should weigh. You’ll find custom liners hug contours, cost more, and install precisely; universal ones fit multiple models, are cheaper, and need trimming.
| Type | Fit | Cost |
|---|---|---|
| Custom | Excellent | High |
| Universal | Adjustable | Low |
Common Problems During Installation and How to Fix Them
You’ll run into a few common hiccups when installing WeatherTech liners, and knowing quick fixes makes the job smooth.
If liners slip or don’t anchor, check and secure the retention posts.
If they rub pedals or seats, reposition or slightly trim per instructions to restore clearance.
For tight rear rows, hump areas, or trimming risks, use gentle heat, test-fit repeatedly, and protect trim edges to avoid damage.
Liners that slip or don’t anchor quick fixes
If your liners shift or won’t stay anchored, quick checks can usually fix the problem without tools or a trip to the dealer.
Clean mounting surfaces and remove debris under the liner, align retention hooks with factory anchors, and press firmly until you hear a click.
If anchors seem loose, flip the liner and inspect guide tabs; reposition the liner for full contact and test stability.
Interference with pedals or seats corrective actions
Sometimes a liner can sit a bit too close to pedals or catch on a seat track, so check fitment right away and don’t drive until it’s resolved.
If it interferes, remove and trim excess lip with a utility knife, reposition anchors, or loosen seat bolts slightly to shift the track.
Test pedal travel and verify no binding before driving.
Poor fit in rear rows or hump areas adjustment strategies
After addressing pedal or seat interference, check the rear rows and center hump for gaps, bunching, or excessive lip overlap that can trap dirt or interfere with seating.
If you see misalignment, reposition liners from rear toward front, smooth edges over the hump, and seat passengers or apply gentle heat to relax material.
Use pressure and anchored points to secure fitment.
Damage risk during trimming prevention steps
When you need to trim a liner, plan your cuts and protect the surrounding vehicle surfaces so you don’t create permanent damage; mark trim lines lightly with a pencil, test-fit before cutting, and use sharp shears or a utility knife with controlled strokes to avoid jagged edges.
Work slowly, clamp or tape liners to prevent shifting, wear gloves, deburr edges with fine sandpaper, and inspect fit frequently.
Best Practices, Maintenance, and Longevity Tips
Keep a regular cleaning and care routine to prevent dirt buildup and protect the liner’s finish.
After removing liners seasonally or when changing vehicles, re-check anchors and store them flat and out of sun to preserve shape.
Inspect for cracks or excessive wear and replace liners when they no longer fit snugly or show significant damage.
Cleaning and care routine ()
Although WeatherTech liners are built tough, you’ll get the best performance and longest life by following a simple, regular cleaning routine.
Clean weekly, rinse debris, and air dry to prevent odors. Use mild soap for stains and a soft brush for grooves. Avoid harsh solvents that can degrade material.
- Rinse and shake out
- Mild soap scrub
- Air dry fully
- Inspect for damage
Re-checking anchors after seasonal removal
After cleaning and inspecting the liners, don’t forget to re-check the anchor points after seasonal removal so they hold securely when you reinstall the mats.
Inspect clips, posts, and grommets for wear or debris. Replace damaged fasteners and tighten loose anchors.
Test engagement by snapping the liner into place and gently pulling. Regular checks prevent shifting and extend liner life.
Storage and reinstalling after vehicle changes
When you remove liners for storage or because you’re changing vehicles, dry them completely, roll them loosely with the textured side inward, and stow them flat or upright in a cool, shaded place to prevent warping or UV damage.
Before reinstalling, clean mounting points, confirm clips and anchors fit the new vehicle, and test positioning for secure, trim-to-floor contact to avoid shifting.
When to replace liners
Decide to replace your WeatherTech liners when they show signs that cleaning and minor repairs won’t restore a proper fit or protective function.
Inspect for cracks, warped edges, compressed high-wear areas, or persistent odors. If anchors fail, tread grooves erode, or liners no longer cover spill paths, replace them.
Regularly assess condition every season and after heavy use to maintain safety and protection.
Cost, Value, and When to Choose Professional Installation
You’ll usually pay only for the liners and a little time if you install WeatherTech floor liners yourself, while professional installation adds labor costs that vary by shop.
If your vehicle has tricky trim, glued factory mats, or you want a guaranteed fit and warranty work, a pro can save time and risk.
We’ll compare typical DIY vs. pro price ranges and outline when hiring someone is worth it.
Typical costs for DIY vs professional install
Although installing WeatherTech floor liners yourself can save money, weighing parts, time, and skill is important before you start.
DIY typically costs only the liners (often $150–$400) plus basic tools and an hour or two of labor.
Professional install adds labor fees ($50–$150) but guarantees fit and saves your time.
Compare total cost, convenience, and confidence when deciding.
Situations where professional help is recommended ()
When you value a perfect fit, warranty protection, or just don’t have the time or confidence to handle trimming and anchoring, get professional help.
Pros guarantee precise trimming, proper anchoring, and avoid vehicle damage. You’ll also get documented service for claims and faster completion.
- Complex custom trimming
- Unfamiliar anchoring systems
- Time constraints
- Warranty or resale concerns
Frequently Asked Questions (3“5)
You’ve probably got a few practical questions before installing WeatherTech liners, like warranty effects, trimming, orientation, pedal safety, and moving liners between vehicles.
We’ll answer whether liners affect your vehicle warranty, if cutting them voids the product warranty, how to tell front from back, and whether they’re safe around pedals.
Will WeatherTech liners affect my vehicle warranty?
If your dealer or manufacturer ever questions whether WeatherTech liners void your warranty, remember that federal law protects you: the Magnuson-Moss Warranty Act says aftermarket accessories alone can’t void a warranty unless the manufacturer can prove they caused the damage.
Keep original components, document installation, and save receipts.
If a dispute arises, ask the dealer to show specific evidence linking liners to the claimed defect.
Can I trim WeatherTech liners without voiding the product warranty?
Wondering whether trimming WeatherTech liners will void their warranty?
You can trim some WeatherTech pieces using the manufacturer’s guidelines and tools without voiding coverage, but you must follow their instructions precisely.
Unauthorized cuts, significant modifications, or damage during trimming can void the warranty.
Always check WeatherTech’s trimming instructions and warranty terms before modifying liners to stay protected.
How do I know which side is front/back for my liners?
How can you tell which side of your WeatherTech liners goes to the front or back?
Check molded contours: the deeper, heel-pad area and pedal cutouts face forward. Align the logo or part number—usually toward the door or rear depending on model—and match mounting holes to factory anchors.
Fit the liner against the footwell; front edges will contour around pedals and seat base while rears sit flatter.
Are WeatherTech liners safe around pedals?
Once you’ve confirmed the liners’ orientation and anchor points, you’ll want to check pedal clearance and secure fit to verify safe operation.
Press each pedal fully to make sure the liner doesn’t shift or snag. Verify anchors engage and trim edges don’t interfere with movement.
If you notice binding or unusual resistance, reposition or reinstall the mat before driving to eliminate risk.
Can I transfer WeatherTech liners to another vehicle?
Can you move WeatherTech liners from one vehicle to another? Yes — you can, but fit matters.
Remove liners carefully, clean debris, and inspect for wear.
Compare contours of the new vehicle; WeatherTech liners are vehicle-specific, so they may not align or secure properly.
If fit’s off, consider selling or storing them and buying properly fitted liners for ideal protection and safety.
Quick Troubleshooting Checklist for Same-Day Installation
Before you start, run a quick pre-install diagnostic: check fitment, clear any debris, and confirm you’ve got all clips and tools.
If something’s off, use simple emergency fixes—trim trapped carpet edges, re-seat anchors, or swap problematic clips—to keep things moving.
These steps should let you finish a same-day installation within an hour.
Rapid pre-install diagnostic steps ()
If you want to get your WeatherTech liners in place the same day, run a quick diagnostic to spot any issues that could slow you down: check fitment codes against your vehicle, inspect liners for manufacturing defects or warps, confirm you have all retention clips and hardware, and verify floor surfaces are clean and dry.
- Match part numbers to VIN.
- Check edges and attachment points.
- Count and layout all fasteners.
- Remove debris and moisture.
Emergency fixes to complete installation within an hour
Got five minutes? You can finish a same-day install with quick fixes: clear debris, trim minor interference, realign anchors, and secure edges.
Stay calm, use basic tools, and test fit frequently. If a liner still binds, loosen nearby trim or swap front/rear positions briefly to isolate fit issues.
Follow steps methodically to finish within an hour.
- Remove debris
- Trim interference
- Realign anchors
- Secure edges