
How to Install Tile Over a Wood Floor and Prevent Cracking Over Time
You can tile over wood if you make the subfloor stiff, dry, and stable: fix sagging or rot, meet L/360 deflection, sister joists or add 3/4″ exterior plywood, then install an uncoupling membrane or cement backer board. Use polymer-modified thinset rated for wood, full-butter and back-butter large tiles, maintain expansion joints, and use flexible grout and sealers. Proper prep prevents cracks and long-term failures, and below you’ll find step-by-step details and options.
How to Install Tile Over a Wood Floor and Prevent Cracking Over Time
Yes — you can tile over wood if you take steps to prevent movement and cracking.
You’ll need to assess when to prep the wood subfloor for tile versus choosing alternatives like backer board or a floating floor.
I’ll walk you through the critical prep, materials, and decision points so your tile stays intact.
Can you tile over wood and stop cracking?
Although you can tile over an existing wood floor, preventing cracks means following specific preparation and installation steps so the tile system can handle movement.
You’ll need to learn how to install tile over wood floor properly: stiffen and brace the subfloor, use a decoupling membrane or cement backer board, choose flexible thinset and grout, and leave movement joints to accommodate seasonal shifts.
When to choose tiling over a wood subfloor vs. alternatives
Now that you know the prep steps that help prevent cracking, you’ll need to decide whether tiling over your wood subfloor is the right choice or if an alternative makes more sense.
Choose tile when subfloor is stable, joist deflection is low, and moisture is controlled.
Opt for plywood replacement, cement backerboard, or floating engineered floors if instability, excessive movement, or moisture risk remain.
Basic Understanding Why cracking happens when tiling over wood
When you tile over wood, the subfloor keeps moving—expanding, contracting, and deflecting under load—which can stress rigid tile and grout.
Tile and grout handle compression well but are poor at tolerating tensile or shear movement, so small shifts lead to cracks.
Different subfloor types (plywood, OSB, plank) vary in stiffness and stability, and choosing the wrong one raises the risk of failure.
How wood subfloors move and affect tile (expansion, contraction, deflection)
Because wood responds to moisture and load, your subfloor constantly expands, contracts, and bends—and those movements stress rigid tile and grout.
You’ll see gaps, hairline cracks, or full fractures where deflection or dimensional change exceeds what tile tolerates.
Joist spacing, sheet orientation, fastener pattern, and moisture swings control how much movement occurs.
Addressing these factors prevents stress transfer to the tile assembly.
Tile and grout limitations: tensile vs. shear movement
Although tiles and grout can handle significant compressive loads, they tolerate very little tensile or shear movement before cracking.
So you need to understand the difference: tensile forces pull materials apart, while shear forces slide layers past each other. Each mode stresses the brittle ceramic and mortar in different ways.
You’ll minimize cracking by limiting movement, using proper bedding, and installing isolation or decoupling where needed.
Types of wood subfloors and their suitability (plywood, OSB, plank)
If your floor is wood, you’ve got to match the tile system to the subfloor type—plywood, OSB, and plank behave differently under load and moisture, and that changes how likely the tile is to crack.
Plywood offers consistent stiffness and is generally best.
OSB swells at edges and needs extra rigidity.
Old plank floors flex and may require joist reinforcement or a plywood overlay before tiling.
Pre-Installation Assessment Evaluate the existing wood floor
Before you start tiling, inspect the structure with a checklist: check for sagging, loose boards, squeaks, and visible joist problems.
Measure floor deflection to the L/360 standard using a straightedge and level or a deflection meter, and perform moisture and rot tests with a moisture meter and probe.
Mark and repair any problematic areas—loose boards, high deflection zones, or rot—before proceeding.
Structural inspection checklist
Since a solid subfloor and framing make the difference between a lasting tile job and costly failures, you’ll want to perform a focused structural inspection before you start.
- Check joists for rot, sag, or insect damage; mark repairs.
- Verify subfloor fasteners; add screws every 6–8 inches at seams.
- Confirm plywood thickness and continuity; sister or replace weak sections.
Measuring floor deflection (L/360 standard and tools needed)
After you note any framing or subfloor repairs, measure floor deflection to confirm the structure will carry tile without premature cracking.
Use the L/360 guideline (span length divided by 360) for allowable deflection under live load. Span beams, joist spacing, and expected loads determine limits.
Use a straightedge, tape measure, and laser level or dial indicator to check midspan sag.
Moisture and rot testing methods
When you’re evaluating an existing wood floor for tile, check moisture and rot carefully because they directly affect adhesive bond and tile longevity.
Use these methods to assess conditions:
- Moisture meter: test multiple spots, compare to tile manufacturer limits.
- Calcium chloride or relative humidity test: verify subfloor dry rate over 24–72 hours.
- Probe and inspect: look for soft spots, discoloration, and musty odors.
Identifying problematic areas (loose boards, squeaks, joist issues)
Although the surface may look solid, you need to find loose boards, persistent squeaks, and joist problems before tiling so the new flooring won’t crack or detach.
Walk the room, press and bounce to spot movement, mark squeak locations, and probe suspected boards with a screwdriver.
Inspect joists from below for rot, deflection, or gaps.
Repair, sister, or reinforce any issues before proceeding.
Materials and Tools Needed
Before you start, you’ll want to pick tile types and sizes that suit a wood subfloor—smaller-format porcelain or mosaic tiles usually perform better than large slabs.
Prepare an underlayment or decoupling system (cement board, uncoupling membrane, or properly installed plywood), plus the right adhesives, thinset, sealants, and movement joints for your assembly.
Gather the necessary tools and fasteners—trowels, wet saw, spacers, screws, and a drill—so you’re ready when you begin.
Recommended tile types and sizes for wood subfloors
Since wood subfloors can flex more than concrete, pick tiles and sizes that tolerate slight movement and bond well to underlayment—porcelain and ceramic mosaics or smaller-format tiles (typically 2×2 to 8×8 inches) are best, while large-format slabs increase risk of cracking unless you stiffen the floor first.
- Choose porcelain or glazed ceramic for low absorption and strength.
- Favor mosaics or 4×4–6×6 for joints that bridge movement.
- Avoid heavy, oversized slabs without floor reinforcement.
Underlayment and decoupling options (cement backer board, uncoupling membrane, plywood underlayment)
1 essential step in tiling over wood is choosing the right underlayment or decoupling system to protect the tile from subfloor movement; you’ll pick between cement backer board, an uncoupling membrane, or plywood underlayment depending on your floor’s stiffness, existing structure, and the tile type. Choose backer board for rigidity, membranes for movement, plywood for simple reinforcement.
| Option | Best use |
|---|---|
| Backer board | Stiff, heavy tile |
| Membrane | Flexible, movement-prone floors |
| Plywood | Minor reinforcement |
Adhesives, thinset types, sealants, and movement joints
When you’re ready to bond tile to your prepared underlayment, pick adhesives and sealants that match the tile type, substrate, and expected movement—thinset mortars (modified or unmodified), epoxy adhesives, and mastics each have specific strengths and limitations.
Choose products rated for wood substrates, flexible sealants for perimeter gaps, and plan movement joints.
- Select appropriate thinset or epoxy
- Install perimeter/field movement joints
- Use flexible, paintable sealant
Tools and fasteners required
Tools and fasteners make or break a tile installation over wood, so you’ll want the right items on hand before you start.
Gather quality tools and corrosion-resistant fasteners to secure underlayment and prevent movement.
- Subfloor: cement backerboard, screws, and washers.
- Tools: wet saw, notched trowel, grout float.
- Accessories: tile spacers, waterproofing membrane, adhesive mixer.
Step-by-Step Installation Process
Start by preparing and reinforcing the wood subfloor: repair or replace damaged boards, strengthen joists, and make sure the surface is flat and stiff—sister joists or add a plywood layer if needed.
Next, install the proper underlayment or an uncoupling membrane before you plan the tile layout.
Finally, dry-fit tiles to establish spacing, pattern, and necessary expansion gaps.
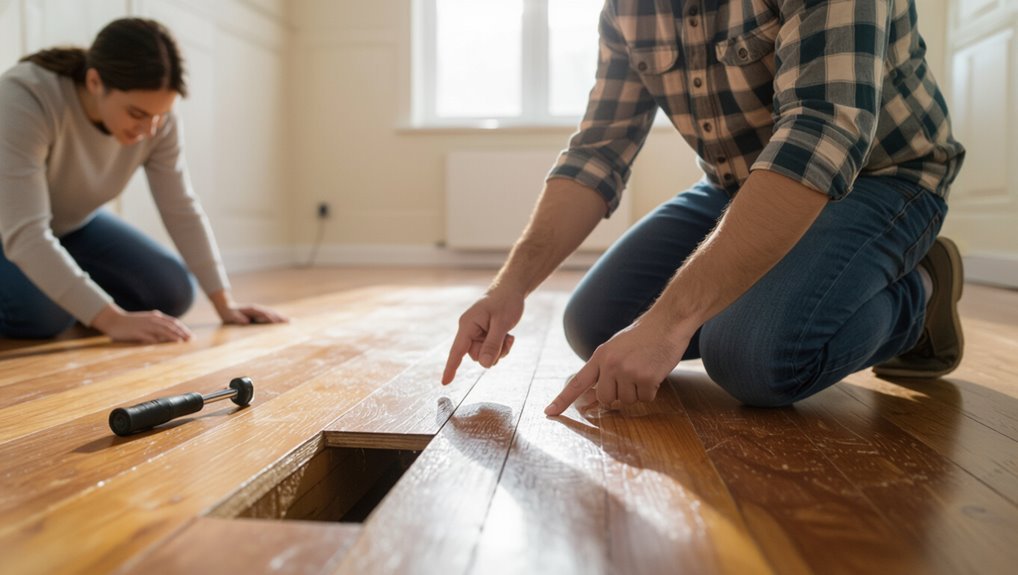
Step 1 Prepare and reinforce the wood subfloor
Inspect the wood subfloor for sagging, squeaks, rot, or loose boards—these issues must be fixed before you lay any tile.
Clean, sweep, and remove contaminants.
Add a layer of 3/4″ exterior-grade plywood or cement backer board per manufacturer specs, fasten with proper screws, and stagger seams.
Apply an uncoupling membrane or thinset as required to reduce movement and bond reliably.
Step 2 Repair or replace damaged boards and strengthen joists
Once the subfloor is cleaned and reinforced, check each board and joist for soft spots, movement, or visible damage—any compromised pieces must be repaired or replaced before you tile.
Remove rotten boards, secure loose ones with screws, and sister or reinforce weakened joists with properly sized lumber and structural fasteners.
Confirm all repairs are flush and firmly fastened to eliminate future deflection and movement.
Step 3 Ensure flatness and stiffness; use sistering or add plywood layer
To get a tile-ready surface, make sure the floor is both flat and stiff; you’ll either sister joists or add a plywood layer to eliminate bounce and meet deflection limits.
Check with a straightedge, shim low spots, and fasten sistered joists securely.
If adding plywood, use exterior-grade tongue-and-groove panels, stagger seams, screw every 6–8 inches, and glue seams to minimize movement.
Step 4 Install appropriate underlayment or uncoupling membrane
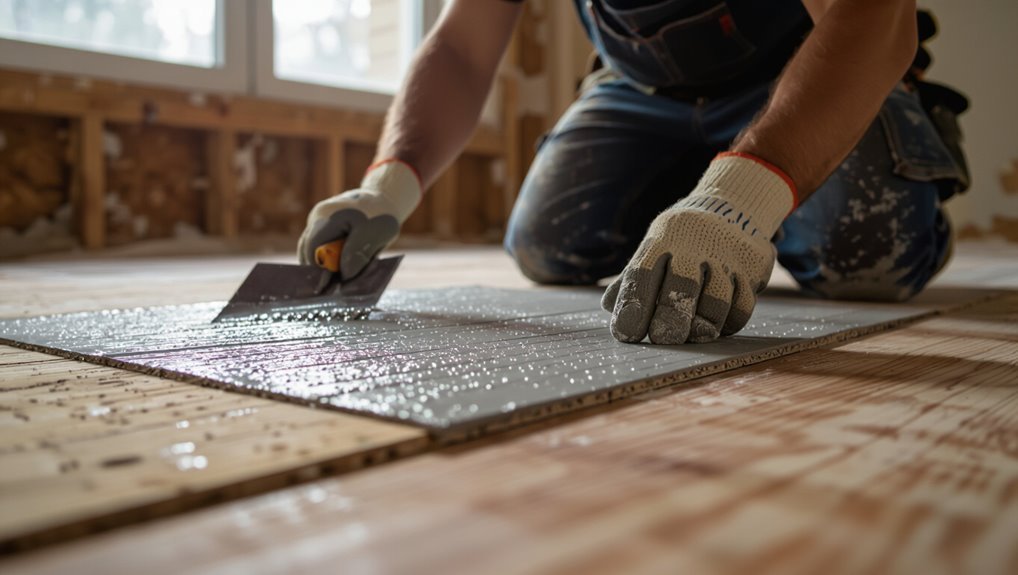
With joists sistered or a plywood layer fastened and flatness confirmed, you’re ready to install the underlayment or uncoupling membrane that will protect the tile and grout from movement.
Roll or lay the chosen membrane per manufacturer instructions, trowel thin-set where required, overlap seams and seal edges, and fasten per spec.
Confirm full contact and flatness before tiling to prevent voids and future cracking.
Step 5 Layout planning and dry fitting tiles (spacing, pattern, expansion gaps)
Although you’ve prepared the subfloor, you should plan your tile layout and dry-fit tiles before spreading any thin-set—this lets you establish a balanced pattern, consistent grout lines, and proper expansion gaps so the finished floor looks professional and performs well.
Start at a focal point, snap chalk lines, lay full tiles toward edges, adjust cuts for symmetry, and leave manufacturer-recommended expansion gaps at walls and fixtures.
Step 6 Use correct thinset mortar and trowel technique for wood subfloors
Choose a polymer-modified thinset rated for wood substrates and mix it to the manufacturer’s specified consistency—too dry and it won’t bond, too wet and it’ll slump under tile.
Use the recommended notched trowel size to achieve full coverage, comb in straight lines, and back-butter large or irregular tiles.
Work in small sections, apply even pressure, and avoid trapping air pockets beneath the mortar.
Step 7 Setting tiles and proper bedding methods
Start by laying out a clear reference line and work from the center or a straight edge toward the walls so your layout stays balanced and cuts are minimized.
Butter each tile’s back and comb thinset with the trowel’s correct notch. Press tiles firmly with a twisting motion, and use spacers for consistent joints.
Check level frequently, adjust quickly, and remove excess mortar.
Step 8 Grouting, sealing, and finishing
Finish the job by grouting, sealing, and completing the trim so your new tile looks durable and professional.
Mix grout to manufacturer specs, force it into joints, then wipe haze with a damp sponge.
After full cure, apply a compatible sealer to grout lines and porous tiles.
Reinstall or replace baseboards and threshold strips, caulk edges, and clean thoroughly for a finished, long-lasting floor.
Step 9 Install movement joints and perimeter isolation strips (where and how)
Because wood expands and tiles don’t, you need to install movement joints and perimeter isolation strips to prevent cracks and buckling; these controlled gaps absorb differential movement between the subfloor, tile field, and surrounding walls or fixtures.
Place movement joints every 8–12 feet and at changes in substrate direction.
Fit perimeter strips around walls, columns, and fixed fixtures, leaving 1/4–3/8″ gaps filled with flexible sealant.
Preventing Cracking Over Time Best Practices and Maintenance
To prevent cracks, you’ll need proper movement joints placed and sized per span and manufacturer guidelines so the tile can tolerate wood movement.
Keep up routine maintenance—monitor grout and joints, control humidity and temperature, and reseal grout/joints as recommended to limit movement-related failures.
I’ll cover where to put joints, how often to reseal, and simple environmental controls to protect your installation.
Recommended movement joint placement and sizing
When you lay tile over wood, plan movement joints from the start so the floor can expand and contract without cracking the tile or grout.
Use these guidelines:
- Place joints every 8–12 feet in both directions; reduce spacing for large tiles.
- Locate joints at doorways, room shifts, and changes in substrate.
- Size joints at least 3/16–1/4 inch, wider for wider spacing or larger tiles.
Ongoing maintenance to minimize movement-related failure
Although proper joints and installation reduce risk, you’ll need regular maintenance to keep movement from cracking tile or grout.
Inspect grout and caulk annually, repairing hairline cracks promptly. Re-seal grout where recommended, and tighten loose trim or fasteners that anchor connections.
Address localized wood squeaks or flex by reinforcing subfloor sections. Keep records of repairs to spot recurring movement patterns.
Environmental control (humidity, temperature) tips
Having addressed repairs and fastening that limit movement, you also need to control the environment around your tile to prevent long-term cracking.
Maintain stable indoor humidity (35–55%) with humidifiers or dehumidifiers, and avoid rapid temperature swings.
Use HVAC or passive ventilation to keep conditions steady, especially during season changes.
Monitor with a hygrometer and address leaks or dampness promptly to reduce substrate stress.
When and how to reseal grout and joints
Routine resealing of grout and joints every 1–3 years keeps water out and prevents hairline cracks from widening into structural problems.
Inspect grout annually, clean thoroughly, and let it dry 48 hours.
Use a penetrating sealer for sanded grout and a surface sealer for epoxy or polished tiles.
Apply with a brush or applicator, wipe excess, and reapply when water no longer beads.
Common Mistakes and How to Avoid Them
Don’t skip checking and reinforcing the subfloor or ignore deflection limits, because a weak base leads to cracked tiles.
Use the correct mortar, proper trowel size, and include uncoupling membranes or movement joints to handle movement.
Never tile over unstable or damp wood—fix the structure and moisture issues first.
Skipping subfloor reinforcement or deflection checks
If you skip checking and reinforcing the subfloor before tiling, you risk cracked tiles and loose grout because tile needs a stiff, stable base.
You should measure joist spacing and deflection, add plywood or cement board, and secure fasteners to minimize movement.
Address squeaks, replace damaged boards, and follow local deflection limits (L/360 or stricter) so your tile stays intact long-term.
Using wrong mortar or thinset and improper trowel size
Picking the wrong mortar or using the incorrect trowel size will undo all your careful prep by causing poor adhesion, lippage, or tiles that pop loose.
Choose a mortar formulated for wood substrates and exterior-grade movement if needed, follow manufacturer pot life, and use the trowel notch that achieves full coverage under tiles.
Test coverage as you go and adjust technique promptly.
Omitting uncoupling membranes or movement joints
When you skip an uncoupling membrane or fail to include movement joints, the stresses from wood’s natural expansion and contraction transfer straight to the tile, causing cracks, grout failure, or loose tiles.
Don’t assume rigid bonding will hold. Install a proper uncoupling membrane, plan movement joints at junctions and long runs, and follow manufacturer spacing to isolate movement and protect your tile.
Tiling directly over unstable or wet wood
Skipping proper membranes or movement joints already lets wood movement damage your tile—so laying tile over unstable or wet wood only makes failure more likely.
You must assess and fix moisture, secure loose boards, and add a stable substrate or cement backer board.
Use a proper vapor barrier and an uncoupling membrane.
Don’t rush; addressing instability prevents cracks and costly repairs.
Comparison of Underlayment Options (performance, cost, ease)
When choosing underlayment you’ll weigh performance, cost, and installation ease across options like cement backer board, fiberglass-cement panels, and uncoupling membranes such as Ditra.
You’ll also consider whether adding a plywood layer or reinforcing joists is needed to meet stiffness and deflection requirements.
Let’s compare the pros and cons of each so you can pick the right solution for your floor.
Cement backer board vs. fiberglass-cement panels
Although both cement backer board and fiberglass‑cement panels give you a stable surface for tile, they differ in weight, moisture resistance, and ease of installation; cement board is heavier and more durable but harder to cut and fasten, while fiberglass‑cement panels are lighter, easier to work with, and often more water‑resistant, though usually pricier.
| Option | Weight | Ease |
|---|---|---|
| Cement board | Heavy | Tough to cut |
| Fiberglass‑cement | Light | Easier, pricier |
Uncoupling membrane (e.g., Ditra) vs. traditional backer board pros and cons
If you want a tile floor that resists cracks from subfloor movement, an uncoupling membrane like Schluter‑Ditra offers a flexible, moisture‑tolerant layer that separates tile from wood.
Traditional cement backer board, by contrast, gives a rigid, robust surface but transmits any movement from the subfloor and usually requires more cutting, fastening, and cementitious underlayment.
You’ll choose Ditra for movement control and faster install; backer board for stiffness and lower material cost.
Adding a plywood subfloor layer vs. joist reinforcement
Because tile needs a stiff, stable base, you can either stiffen the floor by sistering or reinforcing the joists or by adding a new plywood subfloor layer; each approach affects performance, cost, and labor differently. You’ll choose joist reinforcement for max rigidity but higher labor, or plywood for faster installation and lower cost but slightly less stiffness.
| Option | Emotion | Outcome |
|---|---|---|
| Joist reinforcement | Confidence | Best long-term |
| Plywood layer | Relief | Faster, cheaper |
| Combination | Satisfaction | Balanced results |
Troubleshooting Diagnosing and Fixing Cracks After Installation
If you see cracks after installation, start by figuring out whether the substrate moved or the adhesive failed so you can target the fix.
You can often repair individual cracked tiles or grout by replacing the tile, re-bedding it with proper mortar, and regrouting, or by using repair compounds for minor grout cracks.
If movement keeps reappearing or the substrate is compromised, you’ll need to remove the tile and correct or replace the underlayment before retiling.
Identifying cause: substrate movement vs. adhesive failure
When tiles crack after installation, you’ll need to determine whether the underlying wood moved or the adhesive failed, because the fix depends entirely on the cause.
Inspect crack pattern: straight lines or isolated tiles, movement gaps at joints, or loose tiles.
Tap tiles—hollow sound suggests bond failure.
Check subfloor deflection, joist spacing, and moisture; those point to substrate movement rather than adhesive issues.
Repair methods for cracked tiles and grout
Start by evaluating the type and extent of the damage so you can choose the right repair method for cracked tiles and grout.
For hairline grout cracks, clean and regrout or use epoxy filler.
For cracked tiles, remove and replace individual tiles if substrate is stable.
Use flexible adhesive and movement joints to prevent recurrence.
Monitor repairs for movement.
When to remove tile and redo the substrate
Because persistent or widespread cracking usually signals a failing substrate, you’ll need to pull up the tile and redo the underlayment when repairs keep breaking down, tiles rock or sound hollow, large sections show repeated grout failure, or you can see movement beneath the surface.
Stop patching; strip to the subfloor, assess joist deflection and moisture, install appropriate backerboard or uncoupling membrane, then retile.
Cost and Time Estimates
You’ll want to budget for materials (tile, thinset, grout), labor, and any reinforcement or underlayment needed to stabilize the wood subfloor.
Expect costs to vary by quality and region, with a small bathroom typically taking less time and money than a large room.
Plan on a few days for a small bathroom and several days to a week or more for larger spaces depending on prep and curing times.
Typical cost breakdown (materials, labor, reinforcement, underlayment)
A straightforward cost breakdown helps you budget the main expenses when tiling over a wood floor: materials (tile, thinset, grout), labor, any necessary reinforcement of the subfloor, and the chosen underlayment system. Estimate: tile $2–$10/ft², labor $4–$10/ft², reinforcement $100–$500, underlayment $1–$4/ft².
| Item | Typical Range | Notes |
|---|---|---|
| Tile | $2–$10/ft² | Varies by material |
| Labor | $4–$10/ft² | Skilled labor costs |
| Reinforcement | $100–$500 | Joist/plywood work |
| Underlayment | $1–$4/ft² | Membrane or cement backer |
Typical timeline by project size (small bathroom, large room)
Now that you’ve got a handle on costs, let’s look at how long projects actually take so you can schedule work and budget for labor days.
For a small bathroom expect 2–4 days: prep, underlayment, tile, grout, and curing.
A large room runs 5–10+ days depending on subfloor repair, layout complexity, drying times, and installers’ pace.
Plan buffers for unexpected repairs.
FAQ
You probably have a few quick questions about tiling over wood—like whether you can tile directly over hardwood, how thick the subfloor needs to be, and if an uncoupling membrane is always required.
You’ll also want to know the recommended movement joint gap per linear foot and whether radiant floor heating raises the risk of cracking.
Let’s answer those points so you can decide the safest, most durable approach.
Can you tile directly over hardwood without removing it?
Wondering if you can tile directly over your hardwood? You can in some cases, but it’s risky.
The hardwood must be stable, flat, and well secured; loose boards, cupping, or water damage require removal.
You’ll need a proper underlayment (cement board or uncoupling membrane) and a valid adhesive to prevent movement and cracking.
When unsure, remove the hardwood.
How thick should the subfloor be for tile installation?
If you decide to keep your hardwood and add underlayment for tile, you’ll need to confirm the combined thickness of the subfloor, underlayment, and tile will meet stiffness requirements to prevent cracking.
Generally, verify a minimum of 1 1/8″ solid subfloor over joists or 1 1/4″ double-layer plywood (or equivalent) before underlayment.
Thicker assemblies reduce deflection; follow manufacturer and local code specs.
Do I need an uncoupling membrane for every wood floor?
When considering tile over wood, do you always need an uncoupling membrane? Not always, but it’s often recommended.
If your subfloor is stable, rigid, and properly prepared, you might tile without one. However, membranes reduce transfer of movement, prevent cracks, and improve adhesion over plywood or engineered floors.
Use one when joists deflect slightly, or when moisture and movement risk exists to protect your tile investment.
How much movement joint gap is required per linear foot?
Beyond choosing whether to add an uncoupling membrane, you’ll also need to plan movement joints to manage wood and tile movement.
Use about 1/8″ gap for every 8–10 linear feet of tile run, per many standards; reduce to 1/16″ for smaller tiles.
Place joints at room perimeter, changes in plane, and every specified interval to absorb expansion and prevent cracking.
Will radiant floor heating affect cracking risk?
Because radiant heat raises and cycles the floor temperature, it can increase stress at the tile–substrate interface and raise the risk of cracking if you don’t take precautions.
To mitigate risk, use decoupling membranes, flexible polymer-modified thinset, and proper movement joints.
Follow manufacturer limits for temperature and ramp rates, keep subfloor stiff and well-secured, and test heating gradually before full use.