How to Install a Shower Floor Drain Correctly and Prevent Future Leaks
You’ll start by removing the old drain, inspecting the subfloor, and choosing a compatible flange and trap adapter, then set the flange flush with the finished floor and secure watertight seals. Create a mortar bed sloped 1/4 inch per foot, apply a reliable waterproof membrane, and install tiles toward the drain, testing with a flood test and fixing any leaks. Tighten connections, clean traps, and perform routine checks, and keep going to learn detailed steps and tips.
How to Install a Shower Floor Drain Correctly and Prevent Future Leaks
Start by sealing joints, setting the flange level with the finished floor, and testing for leaks before closing the shower base.
You can handle simple flange replacements and tightening connections if you’re comfortable with basic plumbing and have the right tools.
Hire a pro for corroded drains, complex pipe work, or if a leak persists after your fixes.
What to do in brief
Begin by ensuring the old drain and surrounding tile or mortar are fully clean and dry so your new installation sits flush and seals properly.
You’ll then set the drain flange, apply waterproofing membrane or sealant per the manufacturer’s instructions, and tighten connections to the specified torque to prevent gaps.
Next, test for leaks, adjust the trap alignment, confirm proper slope, and reinstall trim.
When to DIY vs. When to Hire a Pro
While you can handle simple drain swaps and minor realignments yourself, call a professional if the job involves extensive waterproofing, major plumbing reconfiguration, or a concealed leak you can’t locate.
You should DIY when tasks are limited, tools and confidence match, and code compliance is clear. Otherwise hire a pro to avoid costly mistakes.
- Replace a worn flange
- Reseat a misaligned drain
- Investigate hidden leaks
Basic Understanding Parts, Types, and Common Causes of Leaks
Before you start, get familiar with the drain’s anatomy—strainer, flange, trap adapter, and the materials (PVC, brass, stainless) that affect durability.
Know the common drain types—center, linear, and tile-in—and which ones fit your shower slope and tile layout.
Finally, watch for typical leak points like faulty seals, improper flange installation, and cracked or misaligned fittings.
Shower drain anatomy: components and materials
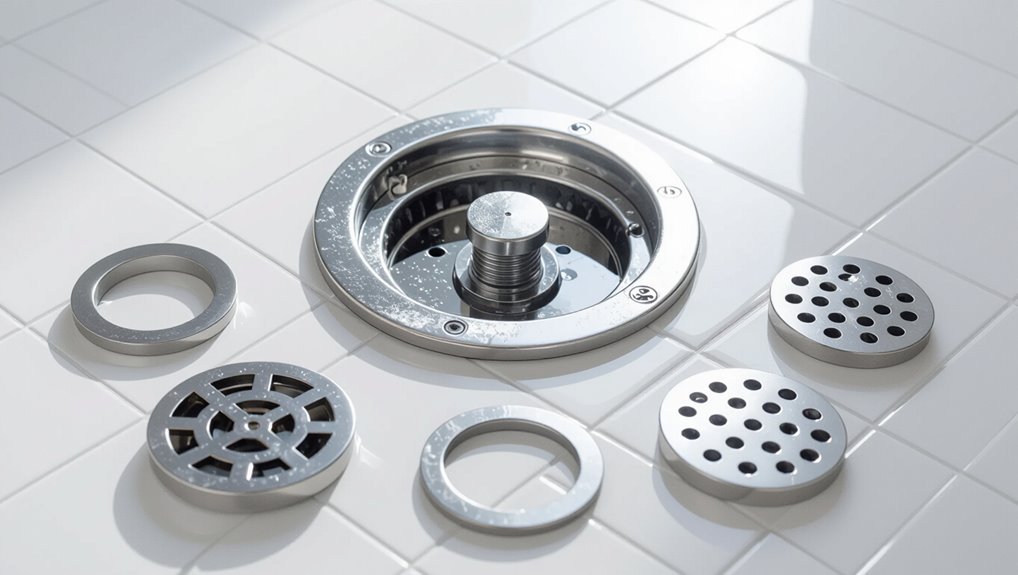
A shower drain’s anatomy includes a few key parts you’ll want to know—grate or cover, flange, clamping ring, drain body, trap, and the pipe connection—each made from different materials and each a common source of leaks if they fail or aren’t sealed correctly.
You’ll encounter stainless steel, brass, PVC, ABS, and cast iron; inspect joints, gaskets, and sealants so small faults don’t become big leaks.
Types of shower drains and compatibility (center, linear, tile-in)
Because floor slope, tile layout, and plumbing location all affect your options, choosing the right shower drain type matters for performance and leak prevention. You’ll pick center drains for simple slopes, linear drains for accessibility and long slopes, and tile-in for seamless looks—each needs proper waterproofing and flange compatibility.
| Drain Type | Best Use |
|---|---|
| Center | Standard slopes |
| Linear | Barrier-free |
| Tile-in | Aesthetic finishes |
Common causes of shower leak and failure points
Choosing the right drain type helps prevent problems, but leaks still happen when parts, installation, or wear fail.
You’ll spot issues from improper sealing, wrong slope, or damaged membranes. Inspect connections, grout, and fittings regularly to catch failures early.
- Improper flange seal or thinset gaps
- Incorrect drain height or slope
- Torn or poorly lapped waterproof membrane
Preparation Before Installation
Before you start, gather a checklist of tools and materials so you won’t have to stop mid-job.
Measure and plan the exact drain location to guarantee proper slope and alignment with existing plumbing.
Check local codes, permits, and any plumbing requirements so your installation meets regulations.
Tools and materials checklist
Tools and materials set the stage for a smooth drain install, so gather everything you’ll need before you begin.
You’ll want quality parts and the right tools to avoid rework and leaks.
- Replacement drain assembly, flange, and proper gasket or rubber seal
- PVC or ABS primer/solvent cement (or appropriate pipe adhesive) and plumber’s putty
- Adjustable wrench, pipe cutter, screwdrivers, and silicone sealant
Measuring and planning the drain location
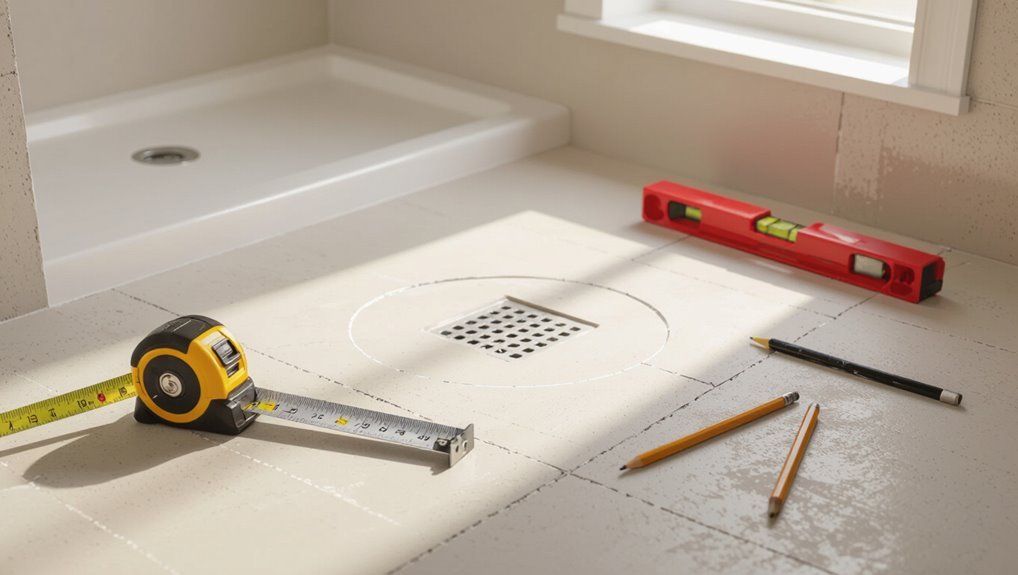
With your parts and tools laid out, it’s time to map where the drain will sit so the installation goes smoothly.
Measure shower dimensions, mark center point aligned with toespace and curb, and confirm slope direction toward drain.
Check existing waste pipe location, note offsets, and allow clearance for flange and trap.
Sketch placement, dimensions, and pipe run before cutting or framing.
Local codes, permits, and plumbing considerations
Because local codes vary and permits can affect timing, you should confirm rules for drain types, trap placement, slope, and waterproofing before you cut into the floor.
Check permit requirements, inspection timing, and licensed plumber obligations.
Verify local trap arm length, cleanout location, and venting.
Follow substrate and membrane standards, document approvals, and schedule inspections so your installation passes and prevents costly rework.
Step-by-Step Installation Process
Now you’ll walk through the actual installation, starting by removing the old drain and checking the subfloor for damage.
Prepare and level the shower base or mortar bed, then install or replace the drain flange and hub connection before applying your chosen waterproofing membrane.
Finally, secure the drain to the membrane and shape the mortar to a 1/4-inch-per-foot slope so water flows correctly.
Step 1 Remove old drain and inspect subfloor
Start by removing the old drain assembly so you can inspect the subfloor for rot, rust, or structural damage. Cut sealant, unscrew flange, and lift components.
Check for soft spots, water stains, mold, or deteriorated plywood. Measure thickness and note joist spacing.
If you find decay, replace or reinforce the subfloor before proceeding. Document conditions for repair.
Step 2 Prepare and level the shower base or mortar bed
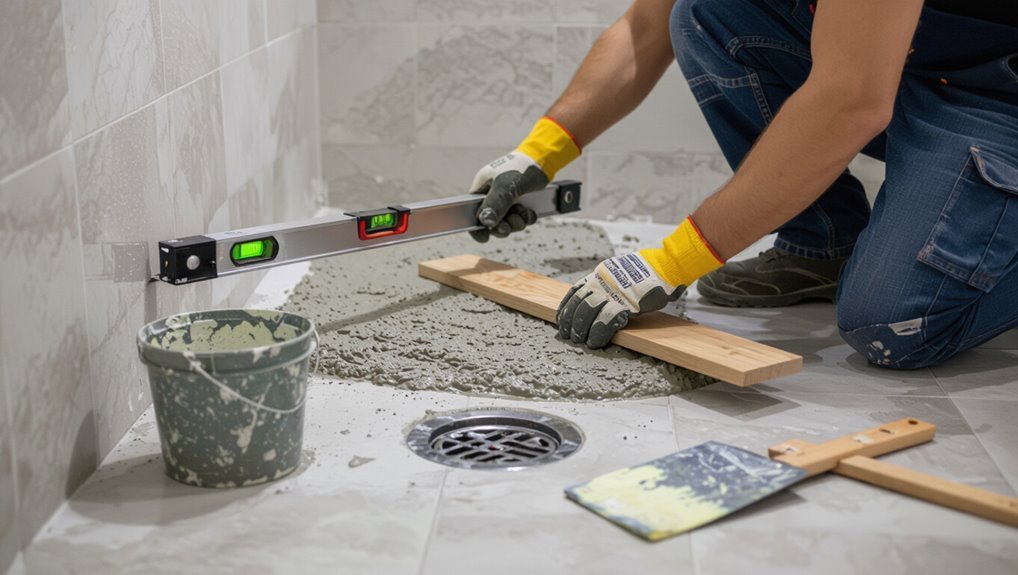
Level the shower base or mortar bed so the drain sits perfectly flush and water flows toward it; you’ll want a solid, even surface before setting the drain assembly.
Remove debris, compact base, and check subfloor rigidity.
Trowel and slope mortar at 1/4 inch per foot toward the drain, feathering edges.
Allow proper cure time, then recheck level and slope before proceeding.
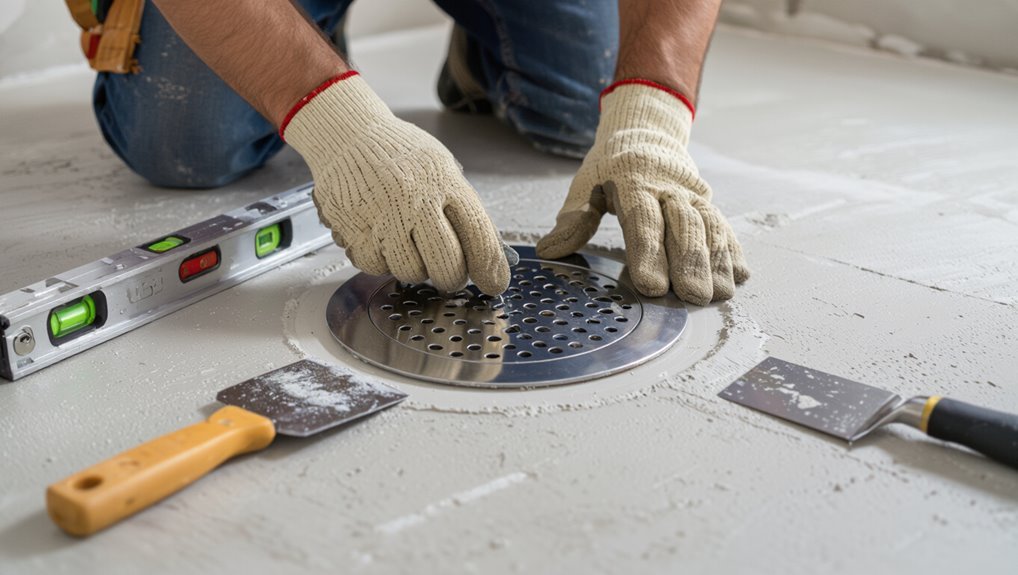
Step 3 Install or replace the drain flange and hub connection
Fit the drain flange into the hub connection and secure it so the drain sits flush with the shower base and creates a watertight seal.
Check hub alignment, apply appropriate plumber’s putty or gasket per manufacturer instructions, and tighten mounting screws evenly.
If replacing, remove old flange, clean threads, inspect the hub for damage, and test for proper fit and drainage before proceeding.
Step 4 Apply waterproofing membrane (curb, pan liner, or surface-applied)
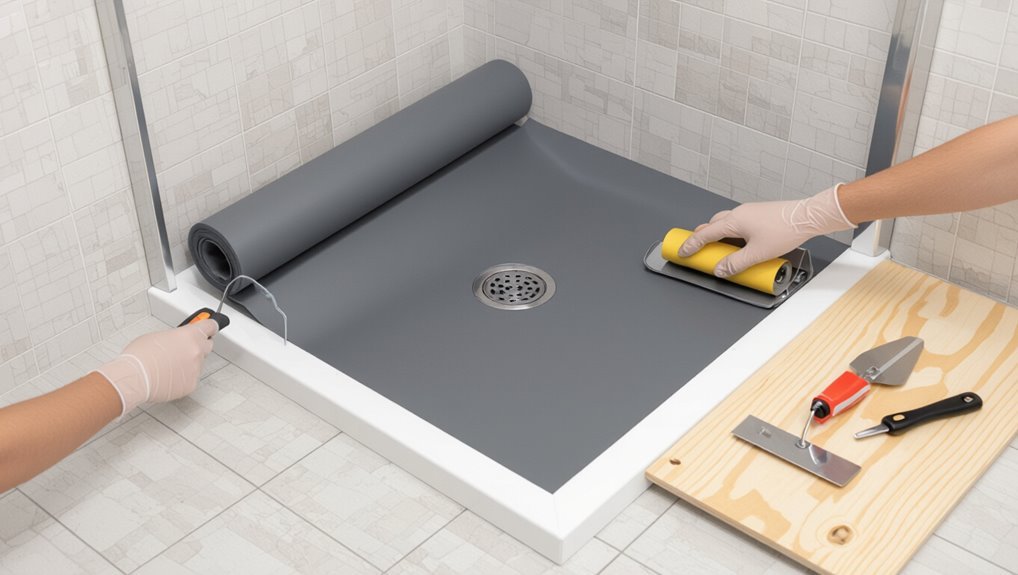
Apply the waterproofing membrane carefully so it creates a continuous, watertight barrier from the curb through the pan to the drain area, following the manufacturer’s system whether you’re using a bonded surface membrane, a prefabricated pan liner, or a traditional full pan liner.
Press seams, seal corners, and bond to substrates per instructions. Allow curing time, test for voids, and trim excess for tile installation.
Step 5 Secure drain to membrane and create proper slope to drain (1/4 per foot)
Now secure the drain to the membrane and shape the mortar bed so water flows at a 1/4 inch per foot pitch toward the outlet.
Tighten the drain flange per manufacturer specs, guarantee a continuous waterproof seal, and press the mortar tightly around the flange.
Use a straightedge and level to confirm consistent slope from walls to drain, correcting low spots as needed before curing.
Step 6 Install tile, grout, and final drain assembly
Begin laying your tiles from the back of the shower toward the drain, cutting and dry-fitting pieces as needed so each tile sits flush with the sloped mortar bed; keep consistent grout joints and check alignment frequently with a straightedge to maintain the pitch.
Apply thinset, set tiles, let cure, then grout and wipe joints.
Fit the drain flange and cover per manufacturer instructions, tightening evenly.
Step 7 Test for leaks and verify water flow
Turn on the water and run a slow, steady stream over the tiled floor toward the drain to check for proper flow and any signs of leakage beneath the shower.
Watch the drain for pooling, slow drainage, or gurgling.
Inspect the ceiling below (if accessible) and joints around the flange.
Fix any drips, reseal or tighten connections, then retest until watertight.
Materials and Methods Compared
Now you’ll compare common waterproofing options—liner, membrane, and liquid-applied systems—to see which suits your shower’s layout and skill level.
You’ll also weigh drain materials and finishes like brass, stainless steel, and PVC for durability, corrosion resistance, and cost.
These choices affect longevity and maintenance, so pick components that match your budget and installation method.
Waterproofing options: liner vs. membrane vs. liquid-applied
Waterproofing a shower floor comes down to three main approaches—preformed liners, sheet membranes, and liquid-applied systems—each with distinct materials, installation methods, and trade-offs you should weigh before committing. You’ll choose based on slope, access, and skill: liners fit pans, sheet membranes bond over substrate, and liquid products seal complex details.
| Type | Strength | Best use |
|---|---|---|
| Liner | Durable | Rehab |
| Sheet | Reliable | New builds |
| Liquid | Flexible | Custom shapes |
Drain materials and finishes: brass, stainless steel, PVC comparison
Once you’ve picked a waterproofing approach, you’ll next select the drain materials and finishes that will sit at the low point of the floor and meet your liner or membrane. Choose brass for durability and finish options, stainless for corrosion resistance, or PVC for budget and ease.
| Material | Pros | Cons |
|---|---|---|
| Brass | Durable, stylish | Expensive |
| Stainless | Corrosion-resistant | Scratches |
| PVC | Cheap, easy | Less durable |
Common Installation Mistakes and How to Avoid Them
Watch for a few common mistakes that can wreck a shower drain job: incorrect slope, bad waterproofing overlaps, wrong flange height or misaligned tile, and the wrong gasket or sealant.
You’ll want to check slopes with a level, verify overlapping waterproofing and tight seals, and confirm the flange and tile sit flush.
Inspect your work early—do a flood test and recheck seals and alignment before finishing.
Mistake 1 Improper slope or leveling
If your shower floor isn’t sloped correctly toward the drain, you’ll end up with puddles, slow drainage, and premature wear on materials.
You must set a consistent 1/4 inch per foot slope from the perimeter to the drain, check with a level, and pack mortar evenly.
Rework any high or low spots before tiling to guarantee water flows freely and prevents standing.
Mistake 2 Poor waterproofing overlaps and seals
Because water always finds the weakest seam, you need tight, properly overlapped waterproofing and sealed joints to keep moisture out of the subfloor and framing.
Inspect membrane overlaps, bond tape, and liquid-applied seams closely. Stagger and seal seams, extend membrane up curb and drain flange, and use compatible sealants.
Test with a short water flood to confirm watertightness before finishing.
Mistake 3 Incorrect flange height or tile-to-drain alignment
After you’ve confirmed the waterproofing holds, check the drain flange height and how the tile will meet the drain—improper alignment is a common cause of leaks and standing water.
Make sure the flange sits flush with the finished tile level, adjust the mortar bed so tiles slope to the drain, and dry-fit the grate.
Misalignment creates gaps and poor drainage; correct it before setting tile.
Mistake 4 Using wrong gasket or sealant
When you pick the wrong gasket or sealant, you’re asking for leaks, odors, and a shortened drain life.
Use manufacturer-specified gaskets and plumber’s-grade silicone or polyurethane sealants compatible with drain and substrate materials. Avoid household glues or non-waterproof caulks.
Clean mating surfaces, apply evenly, and torque fittings to specs. Proper materials and technique prevent seepage and extend the drain’s service life.
How to inspect work to catch mistakes early
As you wrap up each step, inspect your work methodically so small issues don’t become big, expensive problems.
Check seals, alignment, and fasteners before closing walls or flooring. Test for leaks with water and visual checks, correct issues immediately, and document actions.
- Run a shallow water test for 10–15 minutes
- Verify gasket seating and bolt torque
- Inspect surrounding substrate for moisture
Preventive Maintenance and Best Practices to Prevent Future Leaks
To keep leaks from starting, you should do routine inspections—look for slow drainage, loose grates, mold, or damp spots around the drain.
Regularly clean the hair trap and remove buildup, and schedule seasonal tasks like re-caulking, grout touch-ups, and checking the membrane.
Know when parts are worn beyond repair so you can replace the drain, flange, or seal instead of patching repeatedly.
Routine inspections and what to look for
Although small issues often start unnoticed, regular inspections catch worn seals, loose screws, and hair buildup before they turn into leaks.
Check for soft spots in the floor, odors indicating trapped moisture, and slow drainage that suggests deeper problems. Address minor issues promptly to avoid water damage.
- soft or spongy flooring near the drain
- musty smells after drying
- consistently slow drain performance
Cleaning and hair/trap maintenance tips
When you make cleaning the drain and trap a regular habit, you’ll prevent most clogs and keep water flowing freely.
Remove the grate, clear hair with a hooked tool, and flush with hot water weekly.
Use a mild enzyme cleaner monthly to break organic buildup.
Rinse thoroughly, reassemble securely, and test for proper flow.
Keep a spare trap cover and small brush handy.
Seasonal and long-term care: re-caulk, grout repair, membrane checks
Because small gaps and worn seals let moisture sneak into walls and subfloors, you should inspect and refresh caulk, grout, and the membrane on a seasonal schedule.
Check grout for cracks, reapply silicone at joints, and probe edges for soft spots.
Clean surfaces before repairs, use compatible products, and document dates.
Timely touch-ups prevent hidden water damage and costly remediation later.
When to replace parts vs. repair
If you spot recurring leaks, persistent odors, or soft spots despite regular touch-ups, it’s time to contemplate replacement rather than more repairs.
Inspect drain flange, gasket, and trap for corrosion or warping. Replace brittle seals, cracked tiles, or a failing membrane.
Repair only minor grout or caulk issues. Prioritize components that prevent water intrusion to avoid repeated damage and higher costs.
Troubleshooting Leaks After Installation
If you spot water where it shouldn’t be, start by isolating the source—check the drain, surrounding tiles, joints, and the subfloor for stains or movement.
You can apply temporary fixes like tightening fittings or using plumber’s putty, but know when those won’t cut it and a permanent repair or full re-installation is needed.
Look for persistent moisture, warped subflooring, or recurring grout failures as clear signs you should plan a full re-install.
Diagnosing leak source: drain, tile, joint, or subfloor
Wondering where that stubborn leak is coming from? You’ll isolate the source by testing sections, observing when water appears, and feeling for dampness beneath.
Start at the drain, move to tile grout and joints, then check the subfloor. Look for stains, soft spots, or drips while running water.
- Inspect drain flange and seal for seepage
- Probe grout, corners, and caulk lines
- Check subfloor for soft or discolored areas
Temporary fixes vs. permanent repairs
When a leak shows up after installation, decide quickly whether a short-term patch will keep water out long enough for a proper repair or if you need to stop work and fix it permanently.
Temporary fixes can limit damage but aren’t substitutes for addressing the underlying fault. Use tape, sealant, or a waterproof clamp only as stopgaps, then plan a definite repair: replace gaskets, re-seat the flange, or redo the seal.
Signs you need a full re-installation
How can you tell whether a leak calls for a full re-installation rather than another patch?
If water damage recurs after multiple repairs, the flange or drain assembly is corroded, tile or mortar is crumbling, or the waterproof membrane is saturated, you need a re-install.
Persistent odors, shifting tiles, or hidden structural rot also indicate the drain and surrounding waterproofing must be replaced.
Cost, Time, and Project Planning
Before you start, you’ll want a clear cost breakdown—materials, possible labor, and any permit fees—so you don’t get surprised.
Expect a DIY install to take a weekend for a straightforward job, while pros can finish faster but will add labor costs.
Use a simple project checklist and timeline to sequence tasks, order supplies, and book inspections or trades.
Typical cost breakdown (materials, labor, permits)
A typical shower floor drain installation will cost you anywhere from a few hundred to over a thousand dollars depending on materials, labor rates, and permit requirements. Expect materials ($50–$400), labor ($200–$800), and permits ($0–$200). Balance quality and budget: cheap parts can mean leaks; skilled labor reduces risk.
| Item | Typical Range |
|---|---|
| Materials | $50–$400 |
| Labor | $200–$800 |
Estimated time for DIY vs. professional install
If you tackle the shower floor drain yourself, plan on spending more time than the pros—usually a weekend or two—because you’ll be learning, measuring, cutting, and making multiple dry-fits.
A professional crew, by contrast, can often complete the job in a few hours to one day depending on access and complexity.
You should budget extra time for unexpected repairs, sourcing parts, and curing adhesives or mortar.
Project checklist and timeline
Start by listing every task, material, and permit you’ll need so you can budget time and money accurately; include demolition, plumbing/top-off work, drain assembly, waterproofing, tile or pan installation, and curing/inspection times.
Break the job into daily steps, assign durations, and add contingency. Track costs and order materials ahead to avoid delays.
- Day-by-day task list
- Material and permit checklist
- Cost and buffer estimates
FAQs
Got questions? You’ll find answers here on spotting leaks into the floor, whether you can swap in a new drain without replacing the whole pan, and which waterproofing methods work best for tile showers.
I’ll also cover how long a proper drain should last and any codes or standards you need to follow.
How do I know if my shower drain is leaking into the floor?
How can you tell whether water from your shower is seeping into the floor beneath it?
Look for soft or sagging subfloor, persistent musty odors, water stains on ceilings below, or warped tile and grout.
Run a dye test in the shower and check the ceiling or crawlspace after a while.
Listen for drips and monitor higher-than-normal water bills—these indicate hidden leaks.
Can I install a new drain without replacing the entire shower pan?
Can you replace just the drain without tearing out the whole shower pan? Yes—often you can swap the drain assembly if the pan and membrane are sound.
Shut off water, remove the old drain, inspect the flange and seal, then install a compatible drain with proper gasket or caulk.
If the membrane’s damaged or drains differ, pan replacement becomes necessary.
What waterproofing method is best for tile showers?
Wondering which waterproofing method will give your tile shower the best, longest-lasting protection?
You’ll usually get the best results with a bonded waterproofing membrane or a liquid-applied membrane over cement backerboard. They create a continuous, bonded barrier that seals joints and penetrations.
Combine with proper slope, quality tile mortar, and a watertight drain flange for reliable, maintainable protection.
How long should a properly installed shower drain last?
Although a properly installed shower drain can last decades, its lifespan depends on materials, installation quality, and maintenance.
With stainless steel or brass components and correct sealing, expect 20–50 years. Plastic parts or poor installation shorten that considerably.
You’ll extend life by preventing clogs, avoiding harsh chemicals, inspecting seals periodically, and addressing leaks immediately to stop corrosion and substrate damage.
Are there codes or standards I must follow for shower drains?
Which codes apply to your shower drain depends on where you live and whether your project is new construction or a retrofit, but you’ll generally need to meet local plumbing codes, the International Plumbing Code (IPC) or Uniform Plumbing Code (UPC), and any state or municipal amendments that affect trap size, trap arm length, venting, floor slope, and drain assembly type.
You should check local requirements, obtain permits, and follow manufacturers’ installation instructions.