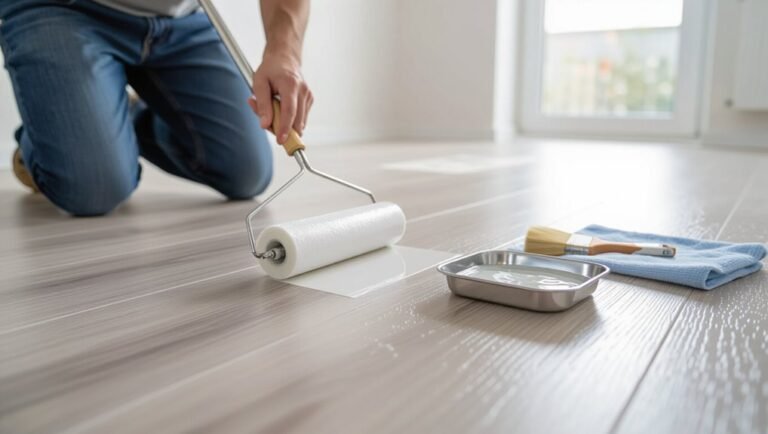
How to Clean Terracotta Floors and Restore Their Natural Color
You can restore terracotta’s warm color by starting with gentle care: sweep daily, mop weekly with a well‑wrung microfiber and a pH‑neutral cleaner, and blot spills fast. For deep soiling, use a mild degreaser or poultice for oils, and an acid cleaner only on mineral deposits after testing a small area. Rinse and dry thoroughly, then apply a breathable terracotta sealer or oil to enhance color. Keep reading for step‑by‑step tips and product choices.
Quick Answer Can You Clean and Restore Terracotta Floors?
Yes — you can clean and restore terracotta yourself by gently scrubbing with a pH-neutral cleaner, rinsing well, and resealing with a breathable terracotta sealer.
Call a professional if tiles are heavily stained, cracked, or the grout and substrate need repair, since improper methods can cause permanent damage.
If you’re unsure, get a pros’ opinion before attempting aggressive treatments.
One-sentence summary of the fastest safe method
If you need the quickest safe fix, mix a mild pH-neutral cleaner with warm water, mop gently, rinse, and let the terracotta air-dry before reapplying a compatible sealer if wear is evident.
For fast, safe results, you’ll learn how to clean terracotta floors by testing a small area, avoiding harsh acids or abrasives, and repeating gentle cleaning until color and finish look restored.
When to call a professional vs DIY
You can handle most routine terracotta cleaning yourself—testing a small patch, using a pH-neutral cleaner, and resealing worn areas will restore color and protect the tile—but some situations call for a pro.
Call a professional if stains are deep, grout or tiles are cracked, previous sealers fail, or historic/antique floors need preservation.
DIY for light wear, routine cleaning, and simple resealing.
Understanding Terracotta Floors: What They Are and Why Careful Cleaning Matters
Terracotta is a baked clay tile that’s naturally porous and finished in various ways—from raw, unglazed to waxed or sealed—each affecting how it soaks up dirt and moisture.
You’ll find different styles like rustic terracotta, glazed tiles, and encaustic-look pieces that get surface treatments to protect or change their appearance.
Over time color can fade or look dull from staining, efflorescence, or a worn sealer, so you’ll need careful cleaning and the right re‑sealing to restore it.
What is terracotta? (composition, porosity, finishes)
Clay tiles tell the story: terracotta is a baked, low-fired earthenware made from iron-rich clays that give it that warm, reddish hue.
You’ll find it porous and absorbent, so liquids and cleaners penetrate. It’s often left unglazed or finished with breathable sealers and waxes.
Knowing composition, porosity, and finish helps you choose gentle, pH-neutral cleaning and appropriate resealing.
Common types of terracotta tile and surface treatments
Surface variety matters: different terracotta tiles and finishes behave very differently when you clean them, so you’ll want to recognize what’s underfoot before you start.
You’ll encounter unglazed, glazed, honed, and rustic handmade tiles, plus sealers like wax, acrylic, or penetrating oil.
Test small areas first: each finish needs specific cleaners and methods to avoid surface damage or altered appearance.
Why terracotta loses color and looks dull (staining, efflorescence, worn sealer)
Over time, your tiles can lose their original warmth and depth for a few clear reasons: dirt and oils build up in pores, salts migrate to the surface as efflorescence, and sealers break down or wear thin.
You’ll notice dull, patchy color from embedded stains, chalky white crusts where salts evaporate, and uneven sheen when protective coatings have eroded.
Regular, proper cleaning restores vibrancy.
Safety and Preparation Before You Start
Before you start cleaning, make a checklist of tools and materials—mop, soft brushes, pH-neutral cleaner, sealant, buckets, and protective gloves.
Open windows for ventilation, wear gloves, and always test cleaners on a small, inconspicuous spot to check for color change or damage.
Use the test area results to choose the gentlest effective method so you don’t harm the tiles.
Tools and materials checklist
Gather the right tools and materials so you can work safely and get the best results on your terracotta floors.
You’ll need basic cleaning and restoration supplies, plus items for gentle scrubbing and even drying. Keep everything organized and within reach to streamline the process.
- Soft-bristle broom and vacuum
- pH-neutral cleaner or mild soap
- Microfiber mop and soft brushes
- Absorbent towels and buckets
Safety precautions (ventilation, gloves, test areas)
Now that you’ve got your tools and materials laid out, focus on safety so you can work confidently and avoid damage.
Open windows and use fans for good ventilation when using cleaners or sealers. Wear chemical-resistant gloves and knee pads. Keep pets and kids out of the area.
Have water and neutralizer ready. Read product labels and follow manufacturer precautions before proceeding.
How to test a small area to choose the right method
If you’re unsure which cleaning or sealing method will work, pick a discreet corner or an inconspicuous tile to test first; this lets you check for color change, efflorescence, or finish damage without risking the whole floor.
Clean, rinse, and dry that spot. Wait 24–48 hours, then inspect under good light.
Note any staining, dulling, or residue before proceeding with the chosen method.
Quick Daily and Regular Cleaning (Maintenance)
Keep dust and grit off terracotta by sweeping or dust-mopping daily with a soft-bristled broom or microfiber pad to prevent scratches.
For gentle wet cleaning, mop with a well-wrung mop using a mild pH-neutral cleaner diluted per label instructions a few times a week or as needed, avoiding soaking the floor.
Stick to products labeled safe for natural stone or terracotta and steer clear of acidic, bleach- or ammonia-based cleaners.
Sweeping and dust-mopping best practices
When you sweep or dust-mop terracotta floors daily, you remove abrasive grit that can scratch the surface and dull the finish; do it gently and consistently to protect the tiles.
Use a soft-bristle broom or microfiber dust mop, work with the grain of grout lines, sweep toward exits, empty debris promptly, and inspect for stuck particles to avoid dragging grit during future cleaning.
Gentle wet-cleaning routine (mixes and frequency)
Although you’ll still do most daily protection with sweeping, a quick, gentle wet-cleaning routine keeps terracotta looking fresh without harming the seal, and you should do it sparingly.
Use a microfiber mop damp—not wet—and warm water with a mild, pH-neutral cleaner diluted per label. Spot-treat stains gently.
Do this light wet-cleaning once weekly in low-traffic areas, twice in busier zones.
Best everyday cleaning products to use and avoid
Which products should you reach for every day and which should stay far away?
You’ll want gentle, pH-neutral cleaners, warm water, and soft brushes; avoid acidic, alkaline, or bleach-based cleaners that strip color or sealers.
Don’t use steam cleaners. Test anything new on a hidden tile first.
- pH-neutral floor cleaner
- Warm water, soft mop
- No bleach or ammonia
- No acidic cleaners or steam
Step-by-Step Deep Cleaning to Restore Natural Color
When you’re ready to bring terracotta back to its natural color, follow a clear step-by-step process starting with removing surface dirt and debris.
You’ll tackle grease and food stains, treat efflorescence and mineral buildup, choose the right acidic or alkaline cleaner for a deep clean, then rinse, neutralize, and dry thoroughly.
Working in that order helps prevent damage and guarantees an even, restored finish.
Step 1 Remove surface dirt and debris
Start by removing loose grit and dust so you can see what you’re working with and avoid scratching the tiles during deeper cleaning.
Sweep with a soft-bristled broom, then vacuum using a hard-floor setting or brush attachment. Pay attention to corners and grout lines.
Use a microfiber dust mop for a final pass. Dispose of collected debris before wet cleaning to prevent recontamination.
Step 2 Degreasing and spot treatment (oils, food stains)
Now that loose dirt’s gone, tackle grease and spots so they don’t set into the porous terracotta.
Blot fresh spills, then apply a mild degreaser or diluted dish soap with warm water. Gently scrub stains with a soft brush, rinse thoroughly, and dry.
For stubborn oil, use poultices (baking soda or diatomaceous earth) left to absorb, then vacuum and repeat if needed.
Step 3 Removing efflorescence and mineral deposits
Because terracotta is porous, salts and hard-water minerals can rise to the surface and leave chalky white deposits called efflorescence that dull the tile’s natural color;
you’ll remove them with an acid-based cleaner or a mild DIY solution, gentle agitation, and thorough rinsing to avoid damaging the clay.
Test a small area, apply cleaner, scrub with a soft brush, rinse completely, and dry.
Step 4 Deep cleaning with appropriate cleaners (acidic vs alkaline guidance)
While you’ve already tackled surface residues and efflorescence, it’s time to deep-clean so the terracotta’s true color comes back; choose an acidic cleaner for mineral build-up and efflorescence or a mild alkaline cleaner for greasy, organic soils, and always match the product to the sealer and glaze (if any) on your tiles.
Test a small area, dilute per label, work with a soft brush, and avoid harsh scrubbing.
Step 5 Rinsing, neutralizing and drying properly
After you’ve scrubbed with the right cleaner, rinse the floor thoroughly to remove all residues and prevent lingering chemical reactions. Use clean water and a mop or low-pressure hose, working from one end toward a drain or exit to avoid re-soiling cleaned areas.
Neutralize acidic or alkaline cleaners with the opposite mild solution, rinse again, then dry with microfiber mops and good ventilation to prevent staining.
Step 6 When to repeat steps or escalate treatment
If rinsing and drying haven’t fully restored your terracotta’s color, you’ll need to decide whether to repeat earlier steps or escalate to stronger treatments.
Evaluate remaining stains, note areas that improved, and retry gentle scrubbing and pH-neutral cleansers first.
If stains persist, try a targeted poultice or a commercial terracotta cleaner.
Test treatments in an inconspicuous spot before full application.
Restoring and Enhancing Natural Color
Once your tiles are clean and dry, you’ll need to decide between re-sealing, waxing, or oiling—each has pros and cons for durability, finish, and maintenance.
Pick the right sealer (penetrating for a natural matte look, surface for a glossier protective coat) and follow a careful step-by-step application to avoid blotches.
If you want richer color, consider tested natural enhancers or toners and apply them sparingly and per the manufacturer’s instructions to prevent staining.
Re-sealing vs waxing vs oiling pros and cons
Choosing between re-sealing, waxing, and oiling depends on how you want your terracotta to look and how much maintenance you’re willing to do; each method enhances color and protection differently. You’ll weigh durability, sheen, and upkeep: re-seal for long protection, wax for warmth and slip, oil for deep color. Decide based on traffic and desired finish.
| Method | Look | Maintenance |
|---|---|---|
| Re-seal | Matte/varied | Low |
| Wax | Warm sheen | High |
| Oil | Rich depth | Medium |
How to choose the right sealer for terracotta (penetrating vs surface)
What kind of finish do you want—natural matte or a surface sheen that highlights color?
Choose penetrating sealers if you want an invisible, breathable protection that deepens hue subtly and resists stains without film.
Pick surface sealers (acrylic, polyurethane) for stronger wear resistance and glossy color boost, but expect surface film, less breathability, and eventual recoating.
Consider traffic and maintenance.
Applying sealer: step-by-step
Start by making sure the floor is completely clean and dry; you’ll get the best color restoration when sealers go on a dirt-free surface.
Work in small sections: apply sealer evenly with a roller or pad, following manufacturer coverage.
Wait recommended drying time, inspect for missed spots, then apply a second coat if needed.
Allow full cure before foot traffic or rugs.
Natural color enhancers and toners (how to apply safely)
Although sealers do most of the protection work, applying a color enhancer or toner can revive terracotta’s warm tones and even out faded patches when you follow safe, manufacturer-recommended steps.
Test in an inconspicuous spot, clean and dry thoroughly, stir product, apply evenly with a brush or sponge, wipe excess, allow proper drying time, then seal.
Follow ventilation and PPE guidance.
Repairs and Dealing with Persistent Problems
When regular cleaning won’t remove deep stains or ghost marks, you’ll need targeted techniques to lift them without damaging the clay.
If tiles are chipped or cracked, you’ll learn when to repair with filler or when replacement is safer.
Replacing and recoloring grout lines can refresh the floor and stop stains from returning.
Removing deep stains and ghost marks
Deep stains and ghost marks on terracotta need targeted, patient treatment because regular cleaning usually won’t lift them; you’ll often have to identify the stain type, test a small inconspicuous area, and apply a controlled combination of poultices, poultice removers, or mild acids to draw the discoloration out without damaging the tile or sealer.
After testing, let poultices sit, rinse gently, repeat, then neutralize and reseal if needed.
Repairing chipped or cracked tiles
If a terracotta tile gets chipped or cracked, you can often fix it yourself without replacing the whole floor; assess the damage, clean the area, and decide whether a simple repair (filling chips, gluing hairline cracks) or a full tile replacement is needed.
For small chips, use a color-matched epoxy or filler, sand smooth, seal.
For larger breaks, remove and swap the tile, preserving surrounding grout.
Replacing grout and recoloring grout lines
Once you’ve handled cracked tiles and chips, you’ll often find the grout shows its own wear or staining that cleaning won’t fix.
Remove damaged grout with a grout saw, vacuum debris, and dampen joints.
Regrout with a compatible, breathable mortar for terracotta. If color matters, use a grout stain or colorant once cured.
Seal lightly to protect without trapping moisture.
Common Mistakes That Damage Terracotta Floors
Don’t use bleach, strong acids, or ammonia — those cleaners can etch and discolor terracotta.
You’ll also damage tiles by over-wetting them or leaving them to dry slowly, or by sealing with the wrong product or finish.
And avoid harsh scrubbing or abrasive tools, which can scratch and wear the surface.
Using the wrong cleaners (bleach, strong acids, ammonia)
Because terracotta is porous and often sealed with delicate finishes, harsh chemicals like bleach, strong acids, and ammonia strip sealers, etch the surface, and leave dull, discolored patches.
You should use pH-neutral cleaners or mild soap and water instead. Test any product in an inconspicuous spot first, rinse thoroughly, and neutralize residues.
Avoid DIY acidic mixtures and industrial-strength degreasers.
Over-wetting and poor drying practices
If you soak terracotta or leave it damp for long periods, water will penetrate the porous clay and can lift sealers, stain the surface, or cause efflorescence as salts leach out.
Don’t flood floors when cleaning; use minimal water, wrung-out mops, and fast ventilation.
Dry tiles thoroughly with fans or towels to prevent mold, salt deposits, and long-term weakening of the clay.
Incorrect sealing or applying the wrong finish
When you pick the wrong sealer or apply it incorrectly, you can trap moisture, alter the tile’s color, or create a slippery, uneven surface that’s hard to maintain.
Always test sealers on a small, inconspicuous area first. Choose breathable, terracotta-specific products, follow manufacturer directions, apply thin even coats, and allow proper curing time to preserve texture and natural hue.
Harsh scrubbing and abrasive tools to avoid
Although you might think tougher tools get the job done faster, harsh scrubbing and abrasive pads can quickly wear away terracotta’s finish and damage the surface.
Don’t use steel wool, wire brushes, or aggressive rotary scrubbers. Instead, choose soft-bristled brushes, microfiber mops, and mild cleaners.
Test any tool in an inconspicuous spot first, and work gently to preserve color and texture.
Prevention and Best Practices for Long-term Care
Keep a simple maintenance schedule—daily sweeping, weekly damp mopping with a pH-neutral cleaner, and annual resealing—to prevent dirt buildup and wear.
Use mats at entrances, furniture pads, and a humidifier or dehumidifier to protect tiles from scratches and moisture shifts.
Before heavy use or seasonal changes, check seals, clean thoroughly, and move or pad furniture to minimize damage.
Ongoing maintenance schedule (daily, weekly, annual)
A simple, consistent routine will protect your terracotta and save you time on repairs.
Daily: sweep or vacuum grit, wipe spills immediately.
Weekly: mop with pH-neutral cleaner, check grout and sealed areas for wear.
Monthly: inspect for stains, reapply light cleaner to high-traffic zones.
Annually: deep-clean, assess sealing needs, and repair minor chips or grout cracks promptly.
Protective measures (mats, furniture pads, humidity control)
When you pair simple barriers like doormats and felt furniture pads with humidity control, you’ll vastly reduce wear, staining, and cracking on terracotta floors; these preventive steps stop damage before it starts and keep cleaning and repairs minimal.
Use sturdy outdoor mats at entries, swap hard chair feet for felt pads, and maintain indoor humidity around 40–60% to prevent moisture-related expansion or drying.
Seasonal care and prepping before heavy use
Those ongoing protections set you up to handle seasonal shifts and high-traffic periods with less stress; before guests arrive or winter settles in, prep your terracotta floors so they resist stains, moisture changes, and abrasion.
Sweep, mop with pH-neutral cleaner, reapply a thin sealer if wear shows, and position runners in entryways.
Inspect grout, tighten furniture pads, and address spills promptly to prevent long-term damage.
Comparison: DIY Methods vs Professional Restoration
You’ll weigh DIY cleaning against professional restoration by comparing cost, time, effectiveness, risks, and when to call a pro. Below is a quick comparison to help you decide which route fits your situation. Use the table to spot trade-offs at a glance.
| Factor | DIY Methods | Professional Restoration |
|---|---|---|
| Cost | Low materials, variable labor | Higher upfront, includes expertise |
| Time | You control schedule, may take longer | Faster overall with crew and equipment |
| Effectiveness | Good for routine care, limited for damage | Superior for deep stains, repairs |
| Risks | Over-cleaning, inconsistent sealing | Lower risk when licensed and insured |
| When recommended | Routine maintenance, minor stains | Severe wear, structural issues, historic tiles |
Cost, time, effectiveness, risks
Although DIY cleaning can save money upfront, weighing cost, time, effectiveness, and risks shows clear trade-offs compared with hiring a professional restorer.
You’ll spend less on supplies but more time and effort; results vary and mistakes can damage tiles or sealers.
Professionals cost more but finish faster, use specialist products, and reduce risk.
Balance budget, schedule, and desired outcome.
When professional restoration is recommended
When your terracotta shows deep stains, widespread grout damage, severe wear to the sealer, or cracks that go beyond surface chips, call a professional—these problems often need specialized equipment and expertise to fix without risking further damage.
You should hire pros if DIY cleaners fail, if historic tiles require color-matching, or when extensive grinding, repointing, or re-sealing is needed to restore structure and appearance.
Tools, Cleaners and Product Recommendations
You’ll need a few essential tools—soft-bristle broom, mop with a microfiber or cotton head, scrub brush, pH-neutral cleaners, and suitable sealers—to clean and protect terracotta properly.
I’ll recommend specific cleaners and sealers for everyday cleaning, stain removal, and long-term protection, and point out products and ingredients you should avoid.
Follow those guidelines and you’ll prevent damage from harsh chemicals or unsuitable sealants.
Essential tools list
You don’t need a long shopping list to clean terracotta well—just a handful of reliable tools and the right cleaners will get the job done.
Gather sturdy, non-abrasive items that protect the tiles and help you work efficiently. Essentials include:
- Soft-bristle broom or vacuum with hard-floor setting
- Microfiber mop and buckets
- Soft nylon scrub brush
- Rubber gloves and microfiber cloths
Recommended cleaners and sealers by purpose
Although terracotta’s porous nature demands care, choosing the right cleaner and sealer makes maintenance straightforward: use pH-neutral cleaners for routine washing, mild alkaline or diluted stone soap for stubborn grime, and breathable, penetrating sealers (not surface films) to protect against stains without trapping moisture.
You’ll clean gently, seal appropriately, and preserve color.
- pH-neutral floor cleaner
- Diluted stone soap
- Breathable penetrating sealer
- Rejuvenating color enhancer
What to avoid unsafe products
When caring for terracotta, steer clear of harsh acids, abrasive tools, and non-breathable finishes that can etch, scratch, or trap moisture; they’ll damage the tile, ruin the patina, and invite long-term problems like efflorescence and mold.
Use gentle pH-neutral cleaners, soft mops, and breathable sealers instead.
- Bleach and vinegar
- Steel wool or wire brushes
- Ammonia-based cleaners
- Non-breathable polyurethane
FAQ Frequently Asked Questions
You probably have a few practical questions about care and risks, like how often to reseal, whether steam cleaners or acids are safe, and how to deal with efflorescence.
I’ll cover when resealing is needed, safe cleaning methods, and how to remove white powdery residue.
You’ll also learn whether you can permanently change terracotta’s color or finish.
How often should I reseal my terracotta floor?
How often you should reseal terracotta floors depends on the traffic, finish, and product you used—typically every 1–3 years for high-traffic areas and 3–5 years for lightly used rooms.
Check wear by water tests and visual dulling; if water soaks in or stains appear, reseal.
Clean thoroughly, follow manufacturer’s cure times, and choose compatible sealers to maintain color and protection.
Can I use a steam cleaner on terracotta?
Curious whether a steam cleaner’s safe for terracotta? You can use one cautiously: low‑heat, low‑moisture settings only, and avoid prolonged steaming in one spot.
Test an inconspicuous area first. Excess heat and moisture can loosen sealers or raise salts. After steaming, dry thoroughly and reseal if needed.
For unsealed or antique tiles, stick to gentle dry or damp cleaning instead.
Will acidic cleaners damage terracotta?
Because terracotta is porous and often finished with a sealer, acidic cleaners can etch the tile and strip or discolor that protective layer.
So you should avoid vinegar, lemon, or strong acid-based detergents on sealed and unsealed terracotta.
Use pH-neutral cleaners or mild soap and water instead.
Rinse thoroughly and dry to prevent staining, and test any product in an inconspicuous spot first.
How do I remove white powdery residue (efflorescence)?
Seeing a white, powdery film on your terracotta? That’s efflorescence—salts rising to the surface.
Dry-sweep, then mop with distilled water. For stubborn deposits, use a diluted vinegar solution (1 part vinegar to 10 parts water), rinse thoroughly, and dry.
Fix moisture sources and improve ventilation to prevent recurrence.
Repeat treatments until salt buildup stops appearing.
Can I change the color/look of terracotta permanently?
If efflorescence and moisture issues are under control, you can permanently change terracotta’s color and surface with stains, glazes, or paints, but each option affects breathability and maintenance.
You’ll choose penetrating stains for natural look, pigmented glazes for richer tones, or paint for opaque coverage.
Sealers and breathable finishes matter; consult pros for exterior or high-moisture areas to avoid damage.
Visual Guide and Before/After Examples
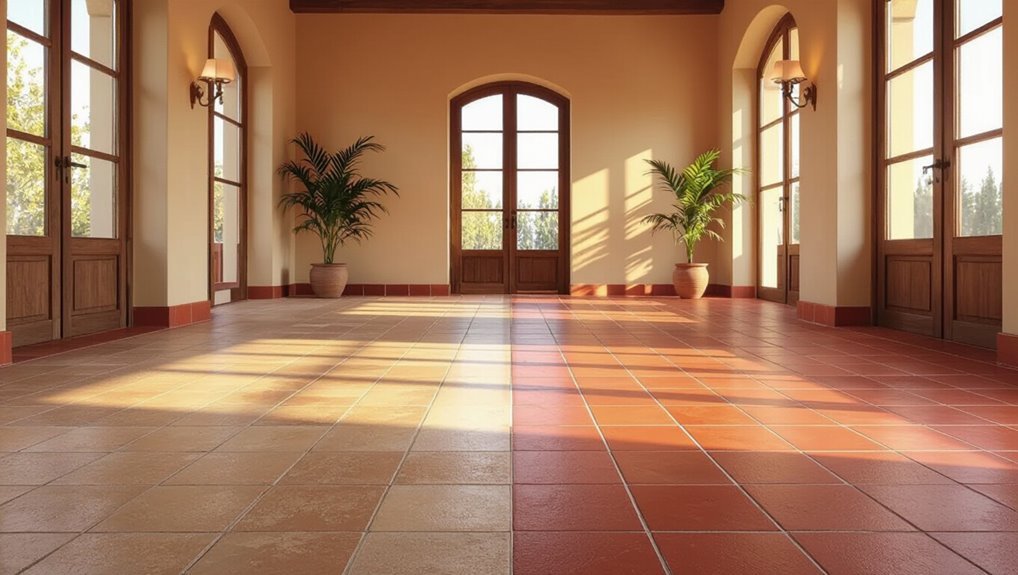
Want a quick way to judge how well your cleaning method works? Photograph a small test area before cleaning, then after each step—scrub, rinse, seal.
Use consistent light, angle, and distance. Compare images to spot color restoration, remaining stains, or uneven sealing.
Keep labeled before/after shots to guide adjustments and to document progress for future maintenance.