How to Cover Gaps in Laminate Flooring Quickly and Cleanly
You can hide gaps in laminate flooring fast and cleanly using a few simple fixes: clean the gap, press in a backer rod or felt rope for wide seams, then apply color‑matched wood putty or flexible silicone for narrow to medium gaps and smooth with a spatula or finger. Use quarter‑round or thresholds at edges for a neat finish. Avoid overfilling and check humidity causes. Try these quick steps now — keep going to get full step‑by‑step options and tips.
Quick Answer Fast Ways to Cover Gaps in Laminate Flooring
You can fix small laminate gaps fast with a few clean, temporary or semi-permanent options like rope caulk, silicone, or matching wood filler.
Keep a quick tools-and-materials checklist handy: rope caulk, silicone sealant, color-matched filler, putty knife, utility knife, and a rag.
I’ll walk you through when to use each and how to apply them.
One-sentence summary of fastest clean solutions
When gaps in laminate flooring need a quick, tidy fix, the fastest clean options are silicone caulk for narrow gaps, rope or felt filler for wider seams, and matching color wood filler for small chips—each can be applied in minutes and wiped smooth for an almost-instant improvement.
You’ll learn how to cover gaps in laminate flooring by choosing the simplest material, applying neatly, and wiping excess.
Quick tools and materials checklist
If speed and neatness matter, grab the right tools before you start: a tube of silicone caulk (clear or color-matched), a caulk gun, a few foam backer rods or felt rope for wider gaps, matching wood/laminate filler sticks or putty, a stiff putty knife or plastic scraper, a damp cloth or sponge for wiping, and a small brush or toothpick for detail work.
- Roll of backer rod
- Tube of caulk
- Putty stick and scraper
Basic Understanding What Causes Gaps and When They Matter
Gaps in laminate often happen because of humidity swings, poor installation, or house settling, and you’ll want to know which cause applies to your floor.
Small gaps mainly hurt the look and can be camouflaged temporarily, while larger gaps can trap dirt, weaken joints, or let moisture in and usually need a permanent fix.
Use temporary covers when the gaps are minor or seasonal, but plan repairs for persistent or functional problems.
Why laminate gaps form (humidity, installation, settling)
Because laminate is a floating floor that expands and contracts, you’ll see gaps form from changes in humidity, imperfect installation, or the house settling over time.
You’ll notice seasonal swelling and shrinking as moisture levels shift. Poorly aligned planks, insufficient expansion gaps at walls, or subfloor movement let seams open.
Identifying the cause helps you choose an appropriate, durable fix.
How big gaps affect appearance and function
A visible seam between planks can make a room look unfinished and let dirt, moisture, and pet hair collect where you can’t easily reach.
Wider gaps break visual continuity, trap debris, and can snag vacuum brushes. Functionally, large gaps may allow moisture to warp boards and reduce stability underfoot.
Small hairline gaps are mostly cosmetic, but anything wider needs attention to prevent long-term damage.
When to temporarily cover vs. permanently repair
When you notice separations between planks, decide whether to cover them temporarily or plan a permanent repair based on gap size, location, and cause.
If gaps are small, isolated, or seasonal, use fillers, tape, or rugs as temporary fixes.
For persistent, widening, or structural issues—moisture, subfloor movement, or improper installation—schedule permanent repairs like reinstallation, leveling, or replacement to prevent damage.
Materials and Tools You Need
To cover gaps effectively you’ll want a handful of common materials—moldable filler, color-matched putty or caulk, trim strips, and even rugs for large areas.
Equip yourself with basic tools like a putty knife, vacuum, seam roller, heat gun, utility knife, and measuring tape.
Choose products based on the gap size and your floor’s finish—use caulk or putty for hairline gaps, moldable filler for wider gaps, and matching colors for a seamless look.
Common materials for quick coverage (moldable filler, color-matched putty, caulk, trim strips, rugs)
Because gaps in laminate can be visible and collect dirt, you’ll want a few quick-cover options on hand that match the look and stay put.
Choose moldable filler or color-matched putty for shallow gaps, flexible caulk for slight movement, and trim strips or rugs for longer runs or aesthetic fixes.
- Moldable filler
- Color-matched putty
- Trim strips or rugs
Tools (putty knife, vacuum, seam roller, heat gun, utility knife, measuring tape)
You’ll need a few basic tools to get gaps in laminate looking tidy: a putty knife for smoothing fillers, a vacuum to remove debris, a seam roller to seat caulk or putty, a heat gun for softening moldable filler, and a utility knife plus measuring tape for clean cuts and accurate sizing.
- Clean, scrape, measure.
- Heat, press, smooth.
- Trim, wipe, inspect.
How to choose products by gap size and floor finish
Pick products based on the gap width and your floor’s finish: narrow gaps (under 1/8″) usually take color-matched caulk or thin acrylic fillers.
Medium gaps (1/8″–1/4″) work best with flexible wood-putty or vinyl seam filler, and wider gaps need a backer rod plus a flexible sealant or replacement plank.
Match sheen and texture; test color on scrap; choose flexible, low-odor formulas for floating laminate.
Step-by-Step Quick Fixes (Fast, Clean Methods)
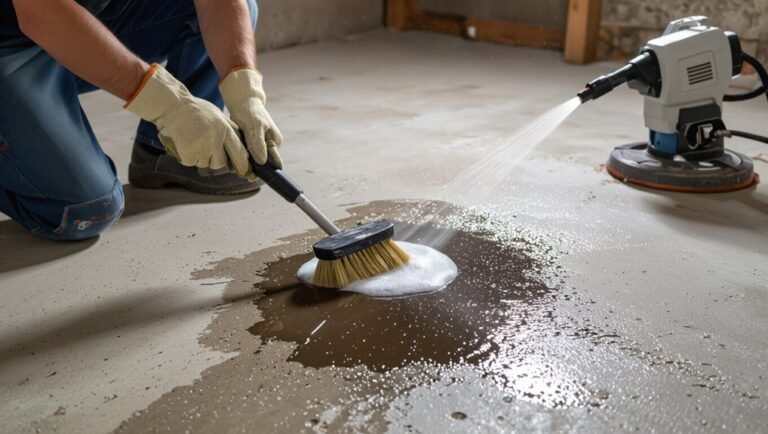
Start by cleaning the gap so any dust or debris won’t keep repairs from bonding.
For narrow gaps you’ll press in color‑matched laminate repair putty; for small to medium gaps you’ll use flexible caulk or silicone following the manufacturer’s smoothing and curing instructions; for larger gaps you’ll pack wood filler or epoxy and sand to match the surface.
If a gap is very wide, tuck in a rope or foam backer first, then top it with the appropriate filler for a neat, stable finish.
Step 1 Clean and prepare the gap area
Clear the area and give the gap a quick inspection so you know what you’re dealing with.
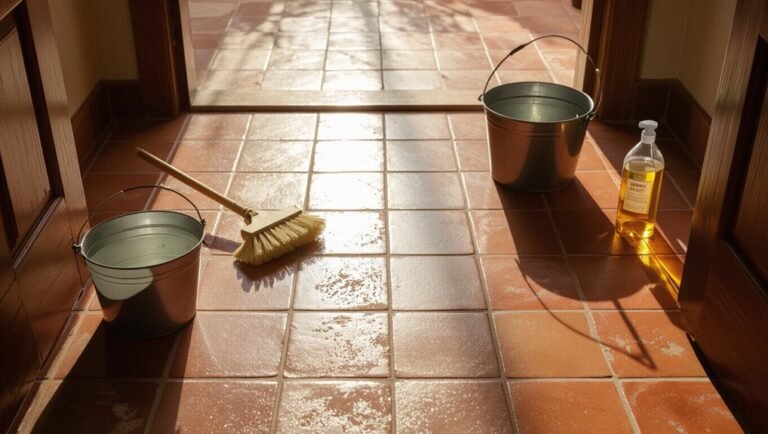
Remove loose debris with a soft brush or vacuum, then wipe edges with a damp cloth and mild cleaner. Let it dry completely.
Probe with a toothpick to check depth and remove trapped dust.
Measure gap width to choose the appropriate repair approach in the next step.
Step 2 Use color-matched laminate repair putty for narrow gaps (instructions)
With the gap cleaned and measured, you can fill narrow spaces quickly using color-matched laminate repair putty.
Choose a shade that matches grain, knead per manufacturer instructions, and press a thin bead into the gap with a plastic spatula or putty knife.
Smooth flush with the surface, remove excess, and let cure. Lightly buff to blend the finish once fully set.
Step 3 Use flexible caulk or silicone for small to medium gaps (instructions)
3 quick steps will fix most small-to-medium gaps: pick a flexible caulk or silicone that matches your floor color, prepare the seam, and apply a smooth, thin bead.
Clean the gap, remove dust, and tape edges. Cut the nozzle for a narrow bead, squeeze evenly, then smooth with a wet finger or tool.
Let cure per manufacturer instructions before traffic.
Step 4 Apply wood filler or epoxy for larger gaps (instructions)
For larger gaps that caulk can’t handle, use a wood filler or two-part epoxy to rebuild the seam and restore a smooth surface.
Clean debris, sand edges, and tape sides to protect laminate.
Mix filler or epoxy per instructions, apply with a putty knife, overfill slightly, then smooth.
Let cure fully, sand flush, and finish with matching stain or touch-up marker for a seamless look.
Step 5 Insert rope or foam backer for very wide gaps then top with filler (instructions)
Push a foam backer or braided rope into very wide gaps before applying filler to give the compound something to rest on and prevent sinking.
Trim the backer slightly below the floor surface.
Press filler (wood putty or matching epoxy) over it, smooth with a putty knife, and wipe excess.
Let cure fully, then lightly sand and touch up stain or paint for a seamless finish.
Step 6 Temporary cover options: transition strips, quarter-round molding, thresholds (when to use)
When you need a fast, clean fix that hides gaps without rebuilding the floor, use temporary covers like connector strips, quarter-round molding, or thresholds to bridge and conceal the space while allowing movement.
Choose link strips for doorways or height changes, quarter-round for perimeter gaps against baseboards, and thresholds for larger openings or exterior doors.
Install with adhesive or small brads; remove later.
Step 7 Quick cosmetic covers: match-colored markers, wax sticks, rugs and runners
Step 7 gives you fast, low-effort fixes that hide gaps without altering the floor: match-colored markers and wax sticks fill and blend small seams, while rugs and runners conceal larger areas and high-traffic spots.
Use markers for hairline gaps, wax for slightly wider seams, and lay rugs to protect movement paths. Test colors first, apply sparingly, and replace as needed.
Comparison of Methods by Speed, Cleanliness, Durability
Now you’ll see a side-by-side comparison of putty, caulk, filler, and trim to weigh speed, cleanliness, and durability.
You’ll get quick guidance on the best choice for different gap sizes and locations like the living room, bathroom, and doorways.
Use the table to match each method to your specific gap and traffic conditions.
Side-by-side comparison table: putty vs caulk vs filler vs trim
Because each gap-repair method has different trade-offs, a clear side-by-side comparison helps you choose the quickest, cleanest, and most durable option for your laminate floor.
| Method | Speed | Cleanliness |
|---|---|---|
| Putty | Medium | High |
| Caulk | Fast | Medium |
| Filler | Slow | High |
Trim: very durable, moderate speed, tidy finish.
Best choice by gap size and location (living room, bathroom, doorway)
Think about gap size and where it sits—those two factors should guide your repair choice.
For hairline gaps in living rooms, use color-matched putty for speed and invisibility.
For bathroom gaps, choose waterproof caulk despite slower cure time.
Wide doorway gaps need trim or backer rod plus filler for durability.
Consider traffic: high-traffic areas favor trim or robust filler.
Common Mistakes to Avoid
When covering gaps in laminate, don’t use the wrong filler—some will stain or shrink and make the problem worse.
Check the subfloor and moisture first, or any repair will fail.
Also avoid overfilling, poor color matching, or rushing the cure time, which will lead to visible, short-lived fixes.
Using wrong filler for laminate (staining, shrinking)
If you grab the wrong filler for gaps in laminate, you’ll quickly see problems like staining, shrinkage, or a poor bond that ruins the look and performance of your floor.
Don’t use timber fillers, oil-based caulks, or wood dyes that bleed. Choose a flexible, laminate-compatible filler matched to color; test a scrap first.
Proper product prevents shrinkage and visible stains.
Ignoring subfloor or moisture issues
Because laminate sits on top of whatever’s underneath, you can’t ignore the subfloor or moisture and expect good results.
Check for unevenness, rot, or damp before filling gaps. Moisture will lift or warp boards and make repairs fail.
Fix leaks, dry and level the subfloor, and use proper underlayment with a moisture barrier so your gap repairs last.
Overfilling gaps or poor color matching
Although you want gaps to disappear, overfilling them or using the wrong color filler creates a more obvious mismatch than the gap ever did.
Don’t pile on excess filler; it bulges, stains edges, and traps dirt.
Test color samples in natural light, feather edges smoothly, and remove surplus before it cures.
Aim for subtle, matching repair that blends with grain and sheen.
Not allowing proper curing time
Rushing the cure is a common pitfall—skip the temptation to walk on, clean, or move furniture over freshly filled gaps before the filler sets.
You’ll compromise adhesion, cause depressions, and transfer dust or fibers into the repair.
Follow manufacturer cure times, keep traffic off the area, and control temperature and humidity so the filler hardens properly for a durable, invisible repair.
Prevention and Best Practices for Long-Term Gap Control
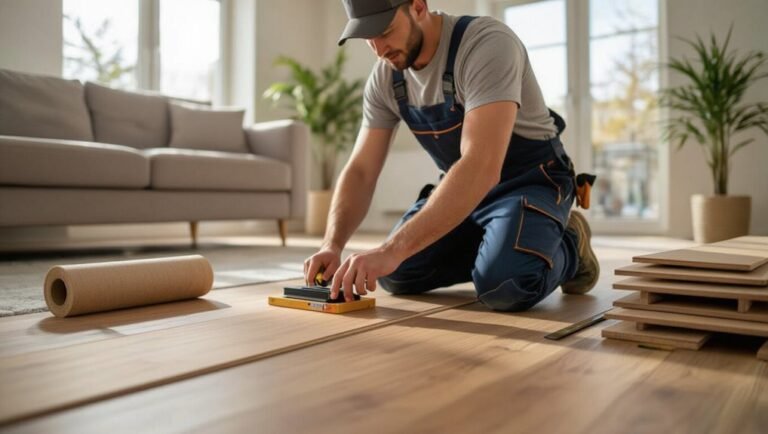
Start by acclimating your new laminate and following manufacturer installation steps to minimize gaps from the start.
Keep humidity stable with a dehumidifier or humidifier and perform simple maintenance checks so small separations don’t get worse.
Call a pro when gaps are widespread, the floor is buckling, or you’re unsure about structural issues that DIY fixes won’t resolve.
Proper acclimation and installation tips to prevent gaps
Before you lay a single plank, let the laminate acclimate in the room where it’ll be installed for at least 48–72 hours so the boards reach the same temperature and humidity as the space; this simple step drastically reduces expansion and contraction that cause gaps later.
Use proper underlayment, follow manufacturer spacing guidelines at walls, stagger seams, and snap or glue joints tightly for a stable, gap-resistant floor.
Humidity control and maintenance routines
After acclimating and installing your floor correctly, keep the room’s humidity steady to prevent gaps from appearing later.
Use a humidifier in winter and a dehumidifier or air conditioning in summer to maintain 35–55% relative humidity.
Monitor with a hygrometer, ventilate after spills, and clean gently to avoid warping.
Inspect periodically and address small gaps promptly to prevent bigger problems.
When to call a pro vs DIY
Wondering whether you can tackle a gap yourself or need a pro? Assess size, cause, and tools: small gaps from humidity shifts you can fix with fillers or repositioning; widespread buckling, uneven subfloor, or structural moisture problems need a pro.
If you lack time, tools, or confidence, hire one. Document warranties and get quotes before major repairs to avoid costly mistakes.
Quick Maintenance and Recheck Routine
Check your laminate for gaps and touch-ups every 2–3 months, and after any heavy traffic or moving.
Do a quick seasonal inspection—especially in spring and fall when humidity shifts—and tighten or reapply fillers as needed.
These simple, regular checks will keep small gaps from turning into bigger repairs.
How often to inspect and touch up
Because minor gaps can widen quickly with seasonal changes, you should set a simple routine for inspecting and touching up your laminate every few months.
Check visible seams, threshold strips, and high-traffic areas. Lightly clean before evaluating.
Reapply filler or adjust trim as needed. Note recurring spots and address underlying moisture or movement issues promptly to prevent larger repairs later.
Seasonal checks and simple upkeep
When seasons change, you should do a quick, focused walkthrough of your laminate to catch widening gaps, swollen boards, or loose trim before they get worse.
Check under doors, near windows, and along exterior walls. Tighten loose threshold strips, replace damaged trim, and apply filler where needed. Maintain humidity to prevent shifts.
- Sunlit corner inspection
- Doorway seam check
- Baseboard edge review
FAQ Fast Answers to Common Questions
You probably have a few quick questions about fixing gaps, like whether wood filler or caulk will harm laminate and how large a gap is still okay.
You’ll also want to know if temporary covers are safe in bathrooms and kitchens and how long to wait before walking on a repaired spot.
Read on for fast, practical answers to those common concerns.
Can I use wood filler on laminate flooring?
Can you use wood filler on laminate flooring? You can, but choose a flexible, water-resistant filler designed for laminates or vinyl; regular wood filler won’t bond well to the melamine surface and may crack.
Clean the gap, apply sparingly, smooth with a damp cloth, and let cure. Match color carefully—test first—and avoid fillers for large movement gaps or structural issues.
How big of a gap is acceptable in laminate flooring?
How large a gap is acceptable depends on location and movement—most manufacturers allow 1/16″ to 1/8″ (about 1.5–3 mm) between planks and up to 1/4″ (6 mm) at walls or junctions to accommodate expansion.
You should aim to keep running gaps below 1/8″ to prevent dirt and visible seams; larger gaps at edges can be hidden with trim or connecting strips for a neat finish.
Will caulk damage laminate floors?
Wondering whether caulk will harm your laminate floor? You can use quality, paintable acrylic or silicone-latex caulk without damage if you apply it correctly.
Keep it out of expansion gaps and seams meant to move, clean excess immediately, and test a small hidden area first.
Avoid solvent-based caulks and prolonged surface contact to prevent staining or finish softening.
Are temporary covers safe for bathrooms and kitchens?
Thinking about using temporary covers in bathrooms or kitchens? You can, but choose water-resistant, nonabrasive options—rubber thresholds, silicone strips, or waterproof tape.
Keep covers secure to prevent trips and gaps where moisture collects. Remove them frequently, dry the area, and inspect for swelling or mold.
For heavy splashes or steam, consider a more permanent, moisture-rated fix instead of long-term temporary solutions.
How long before I can walk on a repaired gap?
Want to step back onto your repaired laminate? Wait for the repair material to fully cure: most wood fillers and adhesives set in 1–24 hours, but full strength often takes 24–72 hours.
Check product instructions and touch-test a hidden spot. Keep weight off seams, avoid heavy traffic, and don’t move furniture onto the area until the manufacturer’s recommended cure time has passed.