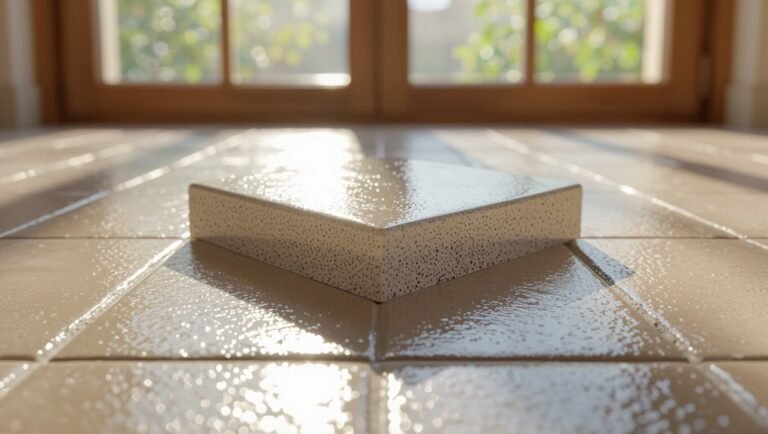
How to Clean Very Dirty Laminate Floors and Restore Their Shine
You can restore very dirty laminate floors by first removing loose grit with a vacuum or soft broom, then spot-treating sticky residue and stains. Mix warm water, a few drops of dish soap and a splash of white vinegar or use a commercial laminate cleaner, mop in small sections with a well-wrung microfiber, rinse twice with clean water, and dry thoroughly to avoid streaks or swelling. Follow with a light microfiber buff for shine — keep going for step-by-step tips and troubleshooting.
How to Clean Very Dirty Laminate Floors and Restore Shine
For really grimy laminate, the fastest effective method is to mop with a mild detergent solution, spot-scrub stuck-on grime with a soft brush, then buff with a microfiber cloth to restore shine.
Try DIY first if stains are surface-level and boards aren’t warped; you’ll save time and money.
Call a professional if water damage, deep scratches, or persistent discoloration won’t respond to cleaning.
One-sentence summary of the fastest effective method
Although it takes a few focused steps, you can quickly strip heavy grime from laminate floors and restore their shine by sweeping, spot-treating sticky areas, mopping with a mild vinegar-water solution, and finishing with a microfiber buff or a laminate-approved shine restorer.
For how to clean very dirty laminate floors, work systematically by zones, rinse mop heads often, dry promptly, and avoid excess water to prevent warping.
When to call a professional vs. DIY
When dirt and dullness are limited to surface grime, you can usually handle cleaning and restoring laminate yourself with the right tools and techniques; call a professional if you’re facing deep stains, swelling, widespread wear, or uncertainty about the floor’s finish.
If you’re unsure, get a consultation. Pros can repair warped planks, match finishes, and prevent further damage; DIY suits routine heavy cleaning and spot restoration.
Basic Understanding What Laminate Floors Are and Why Dirt Builds Up
Laminate floors are made of a photographic layer and protective wear layer over a fiberboard core, so you need to know what finishes you’re treating.
You’ll encounter dust, tracked-in grit, spills, and scuffs that each call for different cleaning approaches.
Avoid harsh scrubbing or soaking—those methods can strip the wear layer or warp the core.
Composition and finish of laminate flooring
Think of laminate flooring as a multi-layered sandwich: a durable wear layer protects a printed decorative layer that mimics wood or stone, all bonded to a core of high-density fiberboard and a backing layer for stability.
You’ll notice finishes vary—matte, semi-gloss, or high-gloss—and manufacturers add textured embossing and protective coatings that determine scratch resistance, moisture tolerance, and how easily grime adheres or wipes away.
Common types of dirt, stains, and damage on laminate
Those protective layers and finishes help a lot, but they don’t make your floor impervious to everyday grime.
You’ll see dust, tracked-in grit, pet hair, and mud build up. Spills cause sticky residues, food stains, and water rings.
Scuffs, scratches from furniture, and dulling from heel marks are common. Identifying these lets you choose gentle, appropriate cleaning and spot treatments.
Why harsh methods can harm laminate finishes
Because the surface layer is a thin, printed design sealed under a clear protective coat, using harsh cleaners, abrasive tools, or excessive moisture can quickly damage it.
You’ll strip the wear layer, dull the finish, and expose the core to swelling.
Use pH-neutral cleaners, soft microfiber mops, and minimal water to protect appearance and extend the floor’s life.
Tools, Materials, and Safety What You’ll Need
You’ll want a few basic tools—like a microfiber mop or cloth, a soft brush, and a vacuum with a hard-floor setting—to remove grit without scratching.
Pick gentle cleaners (commercial laminate products or a mild DIY mix) and avoid waxes, abrasive scrubbers, or harsh chemicals like bleach and ammonia.
Work in a well-ventilated area, wear gloves if using concentrated solutions, and keep spills and runoff minimal to protect the floor and your health.
Essential tools (mop types, microfiber cloths, soft brushes, vacuum)
Good tools make cleaning laminate faster and safer, so gather a few basics before you start: a soft microfiber mop (flat or spin) for gentle, streak-free cleaning; handheld microfiber cloths for spots and edges; a soft-bristle brush or broom for grout lines and stuck debris; and a vacuum with a hard-floor setting or soft brush attachment to remove dust without scratching the surface.
Recommended cleaning solutions (commercial and DIY)
Pick solutions that clean effectively without damaging the wear layer: a mild pH-neutral commercial laminate cleaner or a simple DIY mix—water with a few drops of dish soap or a 1:10 vinegar-to-water solution for tougher grime—will do the job without leaving residue.
Use sparingly, mop damp (not wet), and dry promptly.
- Test first
- Dilute correctly
- Rinse if needed
Products and ingredients to avoid
Because laminate relies on a thin wear layer, avoid harsh chemicals, abrasive tools, and excess water that can strip finish or cause swelling.
Don’t use bleach, ammonia, wax, or oil-based cleaners; they dull or damage finish.
Skip scouring pads, steel wool, steam mops, and heavy scrubbing.
Avoid thick wax polishes and solvent-based strippers—they leave residue and ruin the protective layer.
Safety precautions and ventilation
After avoiding damaging products and tools, make sure you protect yourself and your home before you start cleaning.
Open windows and doors, run fans, and avoid enclosed spaces when using cleaners.
Wear gloves and eye protection, and consider a mask for strong fumes.
Keep pets and kids out, store chemicals safely, and follow label instructions to prevent spills, burns, or respiratory irritation.
Preparation Assessing the Floor and Creating a Cleaning Plan
Before you start, walk the floor to spot any damage, gaps, or areas where the surface finish looks worn.
Test your chosen cleaning solution in an inconspicuous spot to make sure it won’t dull or warp the laminate.
Clear the room and move or protect baseboards and furniture so you can clean safely and work efficiently.
Inspecting for damage, gaps, and surface finish
Start by scanning the entire floor for visible damage, gaps between planks, and the type of surface finish so you can tailor your cleaning plan.
Note scratches, swollen or warped boards, and loose seams. Measure gap widths and map trouble spots.
This lets you decide repair needs, avoid harsh treatments on sensitive finishes, and schedule targeted cleaning before deeper restoration.
Testing cleaning solutions in an inconspicuous spot
With trouble spots mapped and finish identified, pick a hidden area—behind a cabinet, inside a closet, or along baseboard trim—to test cleaners.
Apply a small amount of your chosen solution, wait the recommended time, then blot gently.
Check for color change, finish dulling, swelling, or residue.
If the floor looks unchanged and feels normal, proceed; if not, try a milder option.
Clearing the room and protecting baseboards/furniture
Clear the room so you can work quickly and avoid tracking dirt back onto the freshly cleaned floor: move furniture to the center, lift or remove rugs, and take small items off shelves and baseboards.
Protect legs and baseboards with felt pads and painter’s tape, cover larger pieces with drop cloths, and block doorways to limit traffic.
Keep tools handy and plan breaks.
Step-by-Step Deep Cleaning Process for Very Dirty Laminate Floors
When your laminate is very dirty, start by removing loose debris with a vacuum or broom so dirt won’t scratch the surface.
Spot-treat stains and sticky areas, then apply a degreasing or deep-clean solution—either a commercial product or a gentle DIY mix.
Agitate gently with a mop or soft scrub tool, then rinse with clean water passes to remove any residue.
Step 1 Remove loose debris (vacuuming and sweeping)
1 Start by removing loose dirt and grit so you don’t grind it into the laminate during deeper cleaning.
Use a soft-brush broom or vacuum with a hard-floor setting to collect dust, pet hair, and crumbs. Work toward a doorway, overlapping strokes.
Empty the vacuum or dustpan frequently to avoid redistributing debris.
Check corners and under furniture before moving to the next step.
Step 2 Pre-treat stains and sticky spots (spot-cleaning techniques)
Because you’ve removed loose grit, you can now focus on spots and sticky residues without spreading them—inspect the floor and note any stains, spills, chewing gum, or adhesive buildup so you can treat each type appropriately.
Use targeted methods:
- Scrape softened gum with a plastic scraper and ice if needed.
- Blot fresh spills with a microfiber cloth.
- Test solvent on a hidden seam for adhesive spots.
Step 3 Apply degreasing/deep-clean solution (DIY and commercial options)
After pre-treating spots, you’ll apply a degreasing or deep-clean solution to lift embedded grime without harming the laminate finish.
Mix a gentle DIY blend (warm water, a few drops of dish soap, and a splash of white vinegar) or use a manufacturer-safe commercial laminate cleaner.
Test a small area first, work section by section, and avoid soaking seams or leaving residue.
Step 4 Agitate gently (mopping, soft scrubbing, tools to use)
Begin by loosening grime with gentle agitation: mop the floor with your diluted cleaner, then go over stubborn areas with a soft-bristled brush or non-abrasive scrub pad, keeping movements along the plank grain to protect the finish and avoid forcing liquid into seams.
Work small sections, using light pressure and a microfiber mop or sponge. Rinse brushes often and replace dirty pads to prevent re-depositing soil.
Step 5 Rinse and remove residue (clean water mop passes)
Step 5: Make two to three clean-water mop passes to lift any remaining cleaner and loosened grime—use a well-wrung microfiber mop and work in the same plank direction to avoid pushing water into seams.
Rinse the mop frequently, change rinse water when cloudy, and overlap passes to catch streaks.
Inspect edges and corners with a damp cloth to verify no residue remains before moving on.
Step 6 Dry thoroughly to prevent swelling or streaks
Once you’ve lifted all cleaner and grime with your rinse passes, dry the floor thoroughly to prevent swelling or streaks.
Use clean, absorbent microfiber mops or towels, working with the grain. Change or wring cloths often so you’re not spreading moisture.
Pay attention to joints and seams; dry them carefully to keep water from seeping in and causing damage.
Step 7 Final buffing to restore shine (microfiber buffing, polishing products)
Finish by giving the floor a final buff to restore its shine and remove any leftover haze from cleaning products.
Use a clean microfiber mop or cloth, move in small circular motions, and work with the grain.
If needed, apply a laminate-safe polishing product sparingly, buff until even sheen appears.
Avoid waxes or oil-based polishes that can damage the finish.
Restoring and Enhancing Shine Safe Polishing and Finishing Options
After deep cleaning, you’ll want to decide whether a laminate-specific polish or a DIY remedy is right for your floor based on the manufacturer’s guidance and the finish type.
Apply any polish or restorer with a microfiber pad in thin, even strokes to avoid streaks and buildup.
Keep in mind that quick shine hacks can brighten floors temporarily but often leave residue or dull faster than proper products.
When to use laminate-specific polish vs. home remedies
Wondering whether to reach for a store-bought laminate polish or try a DIY remedy?
Choose polish when your floor has visible wear, manufacturer recommends it, or you want a guaranteed, compatible formula.
Use simple home remedies for light dullness or quick touch-ups, but avoid oils or waxes that can gum up joints.
Test any product in an inconspicuous spot first.
How to apply polish or restorer for even shine
When you want an even, lasting shine, start by thoroughly cleaning and drying the floor so polish or restorer bonds to the surface instead of trapping dirt.
Apply thin, even coats with a microfiber mop or applicator, let each coat dry fully, and avoid overbuilding layers.
- Use manufacturer-recommended product.
- Work in small sections.
- Allow full cure time.
Temporary shine hacks and their drawbacks
If you’re tempted to grab household products or DIY tricks for a quick shine, know that many “fast fixes” give temporary gloss but can harm laminate long-term—residue buildup, surface clouding, and weakened wear layers are common outcomes.
You’ll notice streaks, slipperiness, and accelerated wear; cleaners with wax, oil, or vinegar can leave film.
Use manufacturer-approved polish or microfiber and follow instructions.
Troubleshooting Common Problems and Stubborn Stains
You’ll learn how to remove adhesive residue, gum, and paint spots without harming the finish.
I’ll also show methods for treating water marks, white rings, discoloration, and dealing with scratches or dull wear areas.
Finally, you’ll know which stains signal deeper damage that may require repair or replacement.
Removing adhesive residue, gum, and paint spots
Tackle stubborn spots like adhesive residue, gum, and paint with the right tools and a bit of patience—these issues respond best to targeted treatments rather than general mopping.
For adhesive or gum, freeze with ice in a bag, lift gently with a plastic scraper, then clean residue with a mild solvent on a cloth.
For paint, soften with warm, soapy water or a safe remover, scraping carefully.
Treating water marks, white rings, and discoloration
Sometimes water marks, white rings, and discoloration happen even when you care for laminate carefully, but most can be improved with prompt, targeted action.
Blot spills, then use a damp microfiber and mild vinegar solution to lift mineral deposits.
For stubborn rings, try a paste of baking soda and water applied gently, then rinse and dry.
Always test a hidden spot first.
Dealing with scratches and dull wear areas
Scratches and dull spots happen with regular use, but you can often minimize their appearance without refinishing the whole floor.
Use a color-matched laminate repair kit or wax stick for light scratches, buff gently with a microfiber cloth, and apply a laminate polish sparingly to dull areas.
Place felt pads on furniture legs and use rugs in high-traffic zones to prevent recurrence.
When stains indicate deeper damage
Light repairs can hide everyday wear, but deep-set stains often signal more serious issues below the surface.
If discoloration dyes through or swelling appears, you’re likely facing moisture infiltration, delamination, or substrate damage.
Stop cleaning aggressively, dry the area, and inspect seams.
Replace affected planks and address leaks or humidity sources to prevent recurring damage and restore floor integrity.
Mistakes to Avoid When Cleaning Laminate Floors
Don’t flood your laminate or use steam cleaners, since excess moisture can warp the boards.
Avoid abrasive scrubbers and harsh chemicals that can scratch or strip the finish.
And don’t over-polish—too much product causes buildup that makes floors look dull and can create slip hazards.
Using excessive water or steam cleaners
While you might think soaking laminate makes it cleaner, using excessive water or a steam cleaner can warp the boards and ruin the underlayment.
Don’t leave puddles; mop damp, not wet. Blot spills quickly and use a microfiber mop with minimal moisture.
If you must steam, check manufacturer guidelines first—many laminate floors aren’t designed for high heat or saturation.
Abrasive tools and harsh chemicals to avoid
Because laminate gets its look from a thin wear layer, you shouldn’t reach for scouring pads, steel wool, or stiff-bristled brushes—they can scratch and dull the surface permanently.
Don’t use bleach, ammonia, or oven cleaners; they strip finish and discolor boards. Instead, choose pH-neutral cleaners and soft microfiber mops.
Test any new product in an inconspicuous spot before full use.
Over-polishing and product buildup risks
If you keep polishing too often or use products that leave a residue, your laminate can end up looking cloudy, sticky, or uneven instead of glossy.
Stop over-polishing; follow manufacturer guidance. Use a gentle, residue-free cleaner and rinse well.
Periodically remove buildup with a microfiber mop and diluted vinegar solution.
Test products in a hidden spot before full use to avoid long-term damage.
Prevention and Best Practices to Keep Laminate Floors Looking New
Keep up a simple daily sweep and a weekly damp-mop to prevent grit and spills from scratching your laminate.
Use mats at entryways, furniture pads under legs, and a humidifier or dehumidifier to keep moisture in the safe range.
Schedule a seasonal deep clean and learn quick touch-up tricks for scuffs so small issues never become big problems.
Daily and weekly maintenance routine
When you stick to a simple daily and weekly routine, your laminate floors will stay cleaner and last longer.
You should sweep or vacuum daily to remove grit, spot-clean spills immediately, and mop weekly with a damp microfiber mop and pH-neutral cleaner.
- Sweep/vacuum daily
- Spot-clean spills instantly
- Damp-mop weekly with mild cleaner
Protective measures (mats, furniture pads, humidity control)
Alongside your daily sweeping and weekly damp-mopping, take steps to shield laminate from the wear and moisture that shortens its life.
Use entry mats and runners to trap grit, chair and furniture pads to prevent scratches, and felt under heavy pieces.
Keep indoor humidity between 35–55% to avoid warping; ventilate after spills and don’t let water pool.
Seasonal deep-cleaning schedule and quick touch-up tips
Although daily care keeps dirt at bay, a seasonal deep clean and quick touch-ups will restore shine and address minor damage before it gets worse.
Every spring and fall, mop with a manufacturer-safe cleaner, inspect seams, and tighten loose boards.
Monthly, spot-clean scuffs with a melamine sponge or laminate repair kit.
Wipe spills immediately, buff with a microfiber cloth, and replace damaged planks promptly.
Comparison DIY Methods vs. Commercial Products
You’ll want to weigh DIY solutions against commercial cleaners by effectiveness, cost, and safety to pick what’s best for your floors.
For tough grease, sticky grime, or restoring dullness I’ll recommend specific products and simple homemade mixes that work well for each problem.
Next, we’ll compare which options give the best results without harming the finish or your wallet.
Effectiveness, cost, and safety comparison
When deciding between DIY cleaners and store-bought products for laminate floors, weigh effectiveness, cost, and safety together—DIY solutions like diluted vinegar or mild soap can remove everyday dirt cheaply but may leave streaks or damage the finish if overused, while commercial cleaners are formulated to cut grime and protect coatings but cost more and sometimes contain harsher chemicals you’ll want to avoid around kids or pets.
| Option | Trade-off |
|---|---|
| DIY | Low cost, variable effectiveness |
| Commercial | Higher cost, consistent results |
| Safety | DIY gentler if used right |
| Maintenance | Commercial often longer-lasting |
Recommended product picks by problem type (grease, grime, dullness)
Because different messes need different approaches, pick products based on whether you’re tackling grease, general grime, or restoring shine.
You’ll choose DIY degreasers (vinegar + dish soap), basic all-purpose cleaners, or commercial restorers. Test small areas, follow dilution instructions, and avoid waxy products.
- Grease: vinegar + dish soap
- Grime: diluted all-purpose cleaner
- Dullness: commercial restorer
Supplies and Tools Checklist for Cleaning Day
Before you start, grab a printable checklist so you don’t forget any supplies for a deep clean or regular maintenance.
It’ll list everything from a soft broom and microfiber mop to pH-neutral cleaner and spare microfiber pads.
Keep the checklist handy during cleaning and tuck a copy with your supplies for future touch-ups.
Printable checklist for deep clean and maintenance
Gather the supplies and tools you’ll need so cleaning day goes smoothly and you don’t interrupt your workflow to hunt for items.
Print this checklist and tick each box as you go to stay focused, save time, and guarantee thorough care.
- Microfiber mop, soft-bristle broom, dustpan
- PH-neutral cleaner, white vinegar (diluted), spray bottle
- Soft cloths, old towels, spare mop head
FAQ Common Questions About Cleaning Laminate Floors
You’ll find quick answers here to common worries like whether vinegar or steam cleaners are safe for laminate and how often you should polish.
I’ll also cover how to fix deep scratches or repairable damage and recommend eco-friendly products that won’t harm your floors.
Use these FAQs to save time and avoid mistakes when caring for your laminate.
Can I use vinegar on laminate floors?
Can you use vinegar on laminate floors? Yes, but dilute it: mix one cup of white vinegar with a gallon of warm water.
Dampen a microfiber mop—don’t soak the floor—and wipe in the plank direction.
Vinegar removes grime and residue without leaving streaks, but avoid undiluted vinegar or prolonged wetting.
Dry the surface promptly to protect seams and finish.
Will steam cleaning damage laminate?
Wondering if steam cleaners are safe for laminate floors? You should avoid regular steam cleaning: excess heat and moisture can warp seams, lift edges, and damage the wear layer.
Occasional light vapor from a manufacturer-approved low-heat steam mop may be okay, but always check your flooring warranty and test an inconspicuous area first.
When in doubt, stick to damp mopping.
How often should I polish laminate floors?
How often should you polish laminate floors? You don’t need frequent polishing—usually every 3–6 months is enough for normal traffic.
High-traffic areas may benefit from a light polish every 6–8 weeks.
Always use products made for laminate, apply sparingly, and buff gently.
Over-polishing can leave residue or attract dirt, so monitor shine and adjust frequency accordingly.
How do I remove deep scratches or reparable damage?
If your laminate has deep scratches or repairable damage, you can often restore it without replacing planks by using a few targeted techniques—clean the area, assess the depth, and choose between fillers, touch-up kits, or plank replacement based on how severe the damage is.
For shallow gouges use a colored wax or marker; for deeper gaps, apply laminate filler or replace the plank for a seamless finish.
Are there eco-friendly products safe for laminate?
Want eco-friendly cleaners that won’t harm your laminate? You can choose gentle, plant-based solutions that cut grime without stripping the finish.
Test any product in a hidden spot first.
- Microfiber mop + water with a few drops of castile soap.
- Vinegar diluted (1/4 cup per gallon) for stubborn spots, wiped dry immediately.
- Commercial green laminate cleaners labeled non-abrasive.