How to Fix a Sloped Bathroom Floor Without Removing the Existing Tiles
You can fix a sloped bathroom floor without removing tiles if the tiles are solid and the subfloor isn’t rotten. Start by tapping and leveling to map highs and lows, then prep tiles with a primer. Use shims/sleepers and a plywood overlay for a durable build-up, or grind low spots and pour a self-leveling compound to smooth minor slopes. Allow proper cure and check clearances for doors and fixtures — keep going to see step-by-step methods and pros/cons.
Can You Fix a Sloped Bathroom Floor Without Removing Tiles?
You can often correct a sloped bathroom floor without tearing up tiles by using surface-level solutions like self-leveling compounds, floor patching, or adding a floating underlayment.
For minor slopes, feathering compounds or plywood shims under a new thin floor layer can bring the surface level.
For larger problems, you’ll likely need to address the subfloor through targeted access points rather than full tile removal.
Short summary of viable approaches
Although removing tiles is often the most thorough fix, you can address many slopes without tearing them out.
You’ll explore practical options for how to correct slope in bathroom floor without removing tiles. Choose based on severity, budget, and finish.
- Self-leveling compound
- Thin overlay or microtopping
- Shim under fixtures or cabinets
- Targeted substrate grinding
Basics What Causes a Sloped Bathroom Floor?
You’ll usually find a sloped bathroom floor comes from structural issues like settling, sagging joists, thinset failure under tiles, or rot in the subfloor.
You can measure slope with a level or straightedge and a tape—standards typically flag slopes greater than 1/4 inch per foot as unacceptable.
Knowing the cause and the amount of pitch guides whether you need repair or a full teardown.
Common structural causes (settling, joist sag, thinset failure, subfloor rot)
When a bathroom floor starts to slope, it’s usually because something in the structure has shifted or failed: the house may have settled, joists can sag from age or overload, thinset under tiles can crumble, or the subfloor can rot from moisture.
- Settlement: foundation movement shifts framing.
- Joist sag: loads or age bend supports.
- Thinset failure: adhesive loss creates hollow spots.
- Subfloor rot: moisture weakens panels, causing deflection.
How slopes are measured and what counts as unacceptable slope
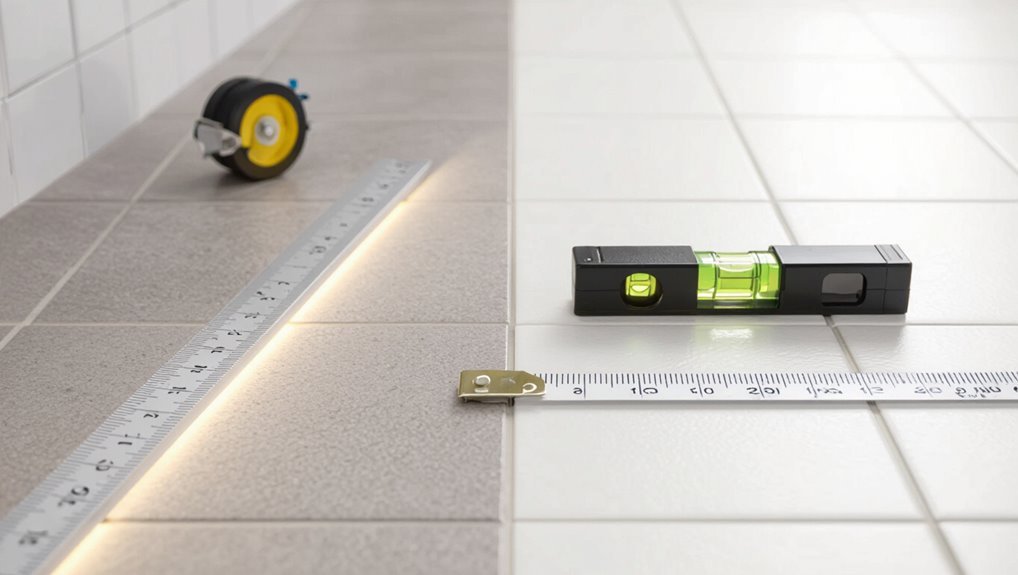
A simple level and a tape measure are usually all you need to check a bathroom’s slope: hold a 4-foot level on the floor and note the high and low points, then measure the vertical drop to calculate the rise over run (inches per foot).
Building tolerances usually allow about 1/4″ per foot; anything over 1/2″ per foot is problematic and needs repair.
When You Can Fix Without Removing Tiles (Assessment Checklist)
Before you start, you’ll want to check whether the tiles are firmly bonded or showing cracks, movement, or hollow sounds.
Grab a level, straightedge, and moisture meter to measure slope, deflection, and subfloor dampness so you can judge if surface repairs will work.
If tiles are loose, the subfloor is rotten, or deflection exceeds acceptable limits, you’ll have to remove the tiles and rebuild the substrate.
Signs that tiles are stable vs. failing
If you inspect your floor and the grout lines are intact, tiles don’t rock, and there’s no persistent soft spot or musty odor, you can often fix slope issues without pulling up the tile.
Check these signs to decide:
- No hairline cracks spreading from grout.
- Tiles stay cold and solid under pressure.
- Grout remains bonded, not powdery.
- No localized hollow sounds when tapped.
Tools and measurements to inspect slope and subfloor condition
Start with a small set of reliable tools so you can quickly determine how severe the slope and whether the subfloor is sound: a 4–6 ft straightedge or level, a torpedo level for tight spots, a hardwood or stud finder, a moisture meter, and a short mallet for tapping tiles to check for hollows.
- Measure max gap under straightedge.
- Scan for joists and voids.
- Check moisture at multiple points.
- Tap tiles for hollow sounds.
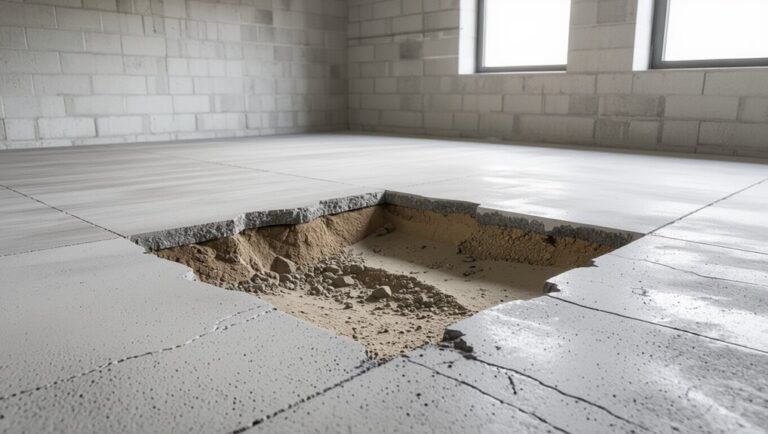
When tile removal is unavoidable
Once you’ve confirmed slope measurements, joist locations, moisture readings, and hollow spots, decide whether you can correct the problem from above or must remove the tile.
If subfloor rot, major deflection, mold, or inaccessible joists exist, removal’s necessary.
Plan for waste, backerboard replacement, and waterproofing.
Get permits, match tile or choose new material, and schedule drying time before reinstalling.
Main Solutions How to Fix a Sloped Bathroom Floor Without Removing Existing Tiles
You’ve got a few practical ways to correct a sloped bathroom floor without tearing out the tiles.
You can pour a self-leveling compound over the tiles, build a floating subfloor, use shims and furring strips in localized spots, or raise the floor with a thin plywood overlay or cement board.
I’ll outline each option’s pros, cons, and when to choose it.
Option 1 Leveling with self-leveling compound over tiles (overview)
You can level a sloped bathroom floor by applying a self-leveling compound over existing tiles, but you’ll need to prep the surface thoroughly—clean, roughen glazed tiles, and repair cracks first.
Use the right primer or bonding agent for glazed surfaces, follow the manufacturer’s mixing and pour instructions, and allow the recommended cure time before tiling or finishing.
This method is relatively quick and cost-effective compared with retiling, though it adds height, may mask severe structural issues, and typically costs a few hundred dollars for most small bathrooms.
Surface preparation steps
Before pouring self-leveling compound, prepare the tiled surface thoroughly so the new layer bonds and cures properly.
Clean grout lines and tiles of soap scum, oils, and loose debris.
Repair cracked or hollow tiles and reattach loose ones.
Roughen smooth tile surfaces with a grinder or sandpaper.
Remove silicone and sealant, then vacuum and tack-rag to eliminate dust before priming.
Priming and bonding considerations for glazed tiles
When working with glazed tiles, getting a reliable bond means choosing the right primer and applying it correctly so the self-leveling compound won’t delaminate or cure unevenly.
Test adhesion with a small patch primer designed for nonporous ceramics. Clean thoroughly, let the primer flash per manufacturer instructions, and use a bonding additive if recommended.
Confirm full coverage; avoid puddling or thin spots.
Application process and curing times
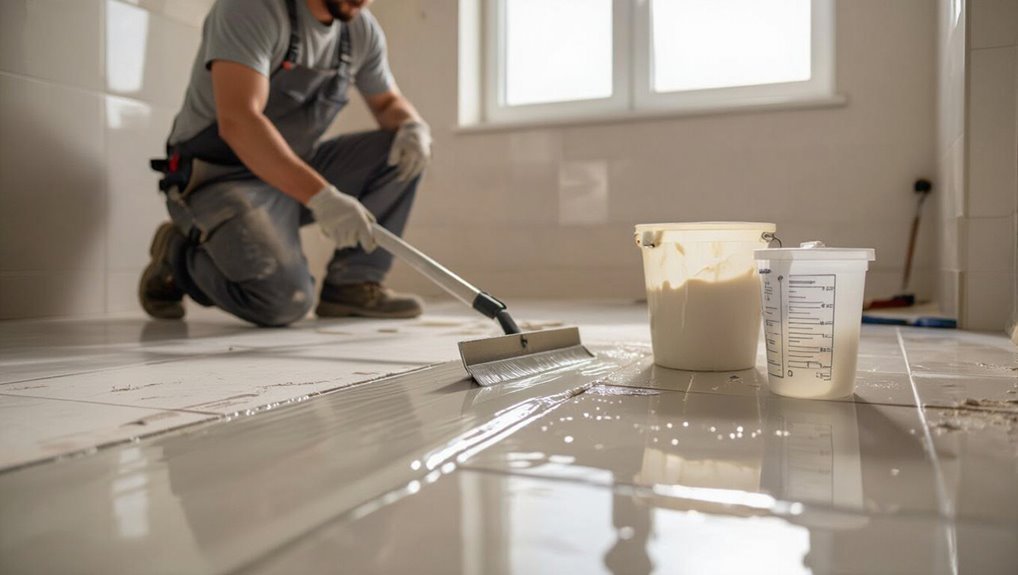
Start by mixing the self-leveling compound to the manufacturer’s specs—consistency matters because too thin or too thick will affect flow and cure—and pour it steadily from the lowest point so it spreads toward drains and edges; work in small sections if the area is large.
Use a gauge rake or smoother to guide flow, and spike-roll to remove trapped air.
Let cures set per label—typically 1–24 hours for foot traffic and 24–72 for tiling—keep area dust‑free and avoid moisture during initial cure.
Pros, cons, cost estimate
Now that the compound’s mixed and cured properly, consider the trade-offs of leveling over existing tile: it’s fast, less disruptive, and usually cheaper than tearing out tile—so you’ll get a smooth, uniform surface ready for new flooring in a day or two—but it adds height, may hide active substrate problems (like rot or loose tiles), and can fail if tiles aren’t well-bonded or if you don’t prep and prime correctly.
| Benefit | Drawback |
|---|---|
| Quick install | Adds height |
| Lower cost | Masks damage |
| Smooth finish | Requires good prep |
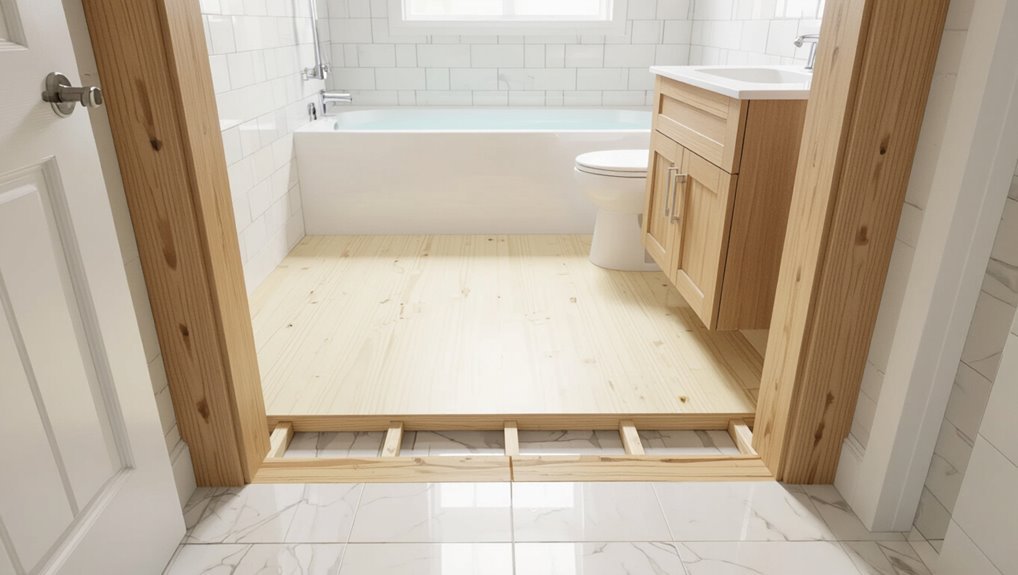
Option 2 Building a new floating subfloor over existing tiles
You can correct a sloped bathroom by building a floating subfloor over the existing tiles using sleepers, plywood, and a suitable underlayment—I’ll cover recommended thicknesses and materials.
I’ll also walk you through layout and fastening steps, address fixture and door clearance concerns, and outline pros, cons, and rough cost estimates.
This option adds height, so you’ll need to plan changes and plumbing access before you start.
Materials (plywood, sleepers, underlayment) and thickness guidelines
Anyone tackling a floating subfloor over existing tile will need the right materials and accurate thicknesses to get a level, durable surface: sleepers (or furring strips) to create a shimmed, ventilated frame, exterior-grade plywood for the subfloor, and a suitable underlayment (cement backer or decoupling membrane) for your finished floor.
Use 3/4″ sleepers, 3/4″ exterior plywood (or 1″ for greater stiffness), plus 1/4″–1/2″ backer or membrane as required by tile or vinyl manufacturer.
Step-by-step installation (layout, sleepers, plywood, fasteners)
Start by mapping the room and planning your layout so every sleeper lands on solid tile and stiffens the finished floor; you’ll mark high and low spots, snap reference lines, and locate plumbing or changes before cutting or fastening anything.
Lay sleepers perpendicular to joists, shim and adhesive-bond to tiles, screw through sleepers into substrate, install staggered tongue-and-groove plywood, screw and glue seams, and sand low spots.
Considerations for bathroom fixtures and door clearance
When planning a floating subfloor over existing tile, account for every fixture and the door swing so the added height and framing won’t block access or interfere with plumbing. Measure clearances at thresholds, under cabinets, and around the toilet, tub, and vanity before cutting sleepers or raising the floor.
Check trim, shower curb height, and threshold connections; mark plumbing vents and access panels, and confirm door stops or rehanging needs.
Pros, cons, cost estimate
With clear measurements for fixtures, doors, and plumbing in hand, you can weigh the pros, cons, and likely costs of building a floating subfloor over your existing tile. You’ll gain level flooring and insulation; you’ll lose some ceiling height and add weight. Expect DIY materials around $200–$600; pro install $800–$2,000.
| Pros | Cons |
|---|---|
| Level floor, insulation | Reduced ceiling height |
| Easier than tear-out | Added load on structure |
Option 3 Using shims and furring strips in localized areas
You can use shims and furring strips when the slope is localized and the joists or subfloor are otherwise sound.
I’ll outline the basic installation steps, moisture protection tips, and what to expect in pros, cons, and rough costs so you can decide if it’s worth the effort.
This method is typically lower-cost and less disruptive than full rebuilds but needs careful leveling and weatherproofing to avoid future problems.
When shimming is appropriate
Although shimming won’t solve every slope, it’s a smart choice when the unevenness is localized and the tile is sound.
Use shims when low spots are small, substrate access is possible through trim or fixtures, and you need minimal height correction.
Don’t shim over widespread settling, crack-prone tile, or active moisture problems.
Shimming works for targeted leveling before finishing touches.
Installation steps and moisture protection
Start by locating the low spots and planning your shim and furring-strip layout so you can work efficiently and avoid trimming multiple times.
Remove trim, loosen fixtures, and fasten treated furring strips to joists at planned heights.
Pack thin shims between strip and subfloor, trim flush, and screw through into joists.
Seal all exposed wood with a waterproof primer and caulk seams before reinstalling trim and fixtures.
Pros, cons, cost estimate
With the furring-strip method complete and wood sealed, weigh its practical benefits against drawbacks before you finish the trim and reinstall fixtures.
Pros: inexpensive, fast, targets localized dips, preserves tiles.
Cons: limited for severe slopes, adds slight floor height, needs precise shim work and sealing to prevent moisture issues.
Cost estimate: $50–$300 in materials plus any labor if you hire help.
Option 4 Raising floor with a thin plywood overlay or cement board
You can correct slope by adding a thin plywood overlay or cement board to raise low spots and create a flat surface.
I’ll cover recommended materials and build-ups, step-by-step installation and waterproofing tips, plus the main pros, cons, and a rough cost estimate.
This option is relatively fast and less invasive than ripping out tile, but it needs careful leveling and moisture protection.
Materials and recommended build-ups
One practical approach is to lay a thin plywood or cement-board overlay over the existing tile to raise low spots and create a flatter substrate for new flooring.
Use 1/4″ or 1/2″ exterior-grade plywood or 1/4″ cement board, compatible screws, and a quality thin-set or self-leveling underlayment where needed.
Include construction adhesive and moisture-resistant tape at joints.
Installation steps and waterproofing tips
If the overlay materials are in place, start by dry-fitting panels to map cuts around fixtures and slopes. Then mark high spots and gaps you’ll need to fill before fastening.
Trim panels, apply adhesive or thin-set, shim low areas, and screw panels to joists.
Seal seams with waterproof tape and membrane, extend waterproofing up walls, and allow cure before tiling or finishing.
Pros, cons, cost estimate
Several advantages make raising the floor with a thin plywood overlay or cement board an attractive option: it’s faster and less disruptive than tearing out tiles, lets you correct modest slopes and add a new waterproof layer, and works with existing fixtures when you plan carefully.
Pros: lower cost, quicker install, preserves tiles.
Cons: reduces ceiling/headroom, limited slope correction.
Cost: $5–$15/sq ft installed.
Step-by-Step Project Plan (Choose Your Method)
Before you start, check permits, take precise measurements, and plan minimal demolition so you don’t create extra work.
First clean the floor, test and reattach any loose tiles, then inspect for moisture and subfloor rot and make targeted repairs without removing tiles if possible.
Finally, pick your leveling method, follow its step-by-step timeline, and choose a final surface finish or overlay that suits bath environments.
Pre-project preparatory steps (permits, measurements, demolition minimal)
Start by confirming permits and taking exact measurements so you won’t hit surprises mid-project: check local building codes for required permits, measure floor slope at multiple points with a level and tape measure, and note plumbing or fixture locations that limit how much you can alter the substrate.
Next, plan minimal demolition: protect surrounding finishes, mark areas needing access, and gather tools and safety gear.
Step 1 Clean, test tile adhesion, and repair loose tiles
Begin by cleaning the floor thoroughly, then test tile adhesion and fix any loose tiles so you’ve got a stable surface to work on.
Sweep, vacuum, and degrease grout lines. Tap tiles to find hollow spots, mark them, and inject appropriate adhesive or remove and reset cracked tiles.
Confirm tiles sit flat and bond firmly before proceeding with leveling or repairs.
Step 2 Address moisture and subfloor rot without tile removal
If you find soft spots or musty odors under your tiles, you can often stop further damage without ripping everything out by isolating leaks, drying the area thoroughly, and reinforcing the subfloor through targeted repairs from above.
Cut inspection ports in grout lines, probe joists, remove wet backer locally, treat rot with epoxy consolidant or replace small sections, then seal and ventilate before proceeding.
Step 3 Leveling procedure timeline (detailed steps per chosen option)
Choose the method that fits your floor’s condition and your skill level, then follow its specific timeline so each step flows logically into the next.
You’ll sequence prep, repairs, leveling, and cure times. Typical timelines:
- Prep: 1 day (clean, secure tiles).
- Repair: 1–2 days (replace rotten subfloor).
- Level: 1 day (apply compound or shim).
- Cure: 24–72 hours before light use.
Step 4 Final surface finish options (new flooring over overlay)
Now that your overlay is cured and flat, pick a final surface that matches your style, budget, and bathroom use—options include tile, vinyl planks, engineered wood, or a waterproof membrane with thinset tile.
Choose based on moisture, slip resistance, and thickness.
- Porcelain/ceramic tile
- Luxury vinyl planks
- Engineered wood with waterproof core
- Waterproof membrane + thinset tile
Step 5 Post-installation checks and cure times
Once the final surface is down and the overlay’s cured, walk through a short checklist to confirm proper adhesion, level, and waterproofing before you resume full use of the bathroom.
Check for soft spots, gaps, or loose tiles, verify slope with a level toward the drain, test waterproof seams, and wait full manufacturer-recommended cure times (often 24–72 hours) before heavy traffic or fixtures.
Waterproofing and Drainage Considerations
When you overlay a sloped bathroom floor, you’ll need to preserve the existing waterproofing or replace it to prevent leaks.
Pay special attention to the shower pan, drain connections, and junctions so water still funnels correctly into drains.
Use proven products—liquid-applied membranes, bonded sheet membranes, and compatible sealants—rated for installation over tile and existing waterproofing.
Maintaining bathroom waterproofing with an overlay
Because an overlay alters the floor profile, you’ll need to guarantee the waterproofing layer stays continuous and the drain still performs as designed; otherwise you risk leaks and trapped water.
Inspect seams and membrane condition, and plan overlays to lap existing waterproofing.
Use compatible sealants and bonding membranes, maintain slopes to drains, and test with a water hold before finishing to confirm integrity.
How to handle shower pan, drains, and transitions
Several key elements — the shower pan, drain, and change details — determine whether your waterproofing holds and water evacuates reliably.
Inspect and level the pan overlay, guarantee the drain height matches your new finish, and seal changes to adjacent floors.
Use flexible flashing at joints, slope toward the drain at 1/4″ per foot, and test for leaks before finishing.
Best products and membranes for use over tiles
After you’ve confirmed the shower pan and drains are set and watertight, pick membranes and products that’ll perform over existing tile without trapping moisture.
Use breathable, uncoupling, and waterproof systems to redirect water and allow drying.
- Liquid-applied waterproofing
- Uncoupling membrane (e.g., Ditra)
- Vapor-permeable sheet membrane
- Linear/drainage mats that channel moisture
Tools, Materials, and Cost Breakdown
You’ll need different tools for each repair method—floor jack and shims for subfloor leveling, self-leveling compound and trowels for skim coats, or tile saw and thinset for retiling.
I’ll list typical material quantities, unit costs, and how long each option usually takes.
I’ll also note when the job’s complexity or time commitment means you should hire a pro.
Essential tools for each method
While each repair approach targets a specific problem, knowing the right tools and materials — and how much they’ll cost — keeps the job efficient and prevents surprises.
You’ll need method-specific kits and basic gear. Typical essentials:
- Level, straightedge, and laser/rotary level
- Grinder, patching trowel, and bonding agent
- Self-leveling compound, primer, and pump
- Protective gear, mixing bucket, and measuring tools
Typical material quantities and unit costs
Start by measuring the floor area and depth of the low spots so you can calculate exact material needs and avoid overbuying. Expect thin-set or self-leveler, primer, and patching compound. Typical quantities and unit costs:
| Item | Qty per 50 sq ft | Typical Unit Cost |
|---|---|---|
| Self-leveler | 25–40 lb | $15–$30/bag |
| Primer | 1 qt | $8–$15 |
| Patching compound | 10 lb | $10–$25 |
Time estimates and when to hire a pro
Because fixing a sloped bathroom floor can range from a few hours for small spot repairs to several days for full leveling and tile reset, plan your schedule around drying and cure times for primers, patching compounds, and self-levelers.
Small jobs: 4–8 hours.
Moderate: 1–2 days.
Extensive: 3–5 days.
Hire a pro if slope exceeds 1/4″ over 12″, plumbing drains need rework, or you lack time/tools.
Common Mistakes and How to Avoid Them
When you skip proper surface prep or use the wrong bonding agents, tiles can lift or grout can fail.
If you overbuild a patch or ignore changes, you’ll create a new slope or tripping hazard.
And if you trap moisture under the repair, mold and tile failure will follow, so always guarantee drainage and proper waterproofing.
Mistakes during surface prep and bonding
If you rush surface prep or skip proper bonding steps, the floor’s sloped surface can fail prematurely and force costly repairs.
You must remove contaminants, stabilize loose grout or tiles, and etch or prime surfaces as manufacturer recommends.
Don’t overwater mixes or apply thin coats. Use correct adhesives and follow cure times so overlays bond solidly and won’t delaminate under foot traffic or moisture.
Mistakes that lead to new slope or tripping hazards
Although you want a safe, level floor, common shortcuts can create a new slope or trip hazard, like piling too much patching compound in one spot, feathering edges unevenly, or leaving abrupt changes at thresholds.
You should spread material thinly, build connections gradually, check with a straightedge, and sand high spots.
Tape connections and recheck slope before finishing to avoid surprises.
How to prevent moisture entrapment and tile failure
Moisture is the hidden enemy of tile work, and you’ll prevent most failures by keeping water from getting trapped under or behind tiles; use proper waterproofing membranes, slope substrates toward drains, and avoid leaving voids in thinset or grout that can wick moisture.
Inspect seams, seal junctions, maintain grout, and use vapor-retardant backer boards. Test drainage, fix leaks promptly, and ventilate to stop mold and adhesive breakdown.
Best Practices and Maintenance After Repair
After the repair, you’ll want to choose durable finishes and proper junction profiles that protect edges and hide small height differences.
Check the floor regularly for new movement, soft spots, or grout cracks so you can catch recurring issues early.
Keep records of materials and workmanship for long-term performance and warranty claims, and follow manufacturer maintenance recommendations.
Recommended finishes and transition profiles
Pick durable, water-resistant finishes and matched junction profiles to protect your repaired slope and keep the room looking cohesive.
Use waterproof sealants, epoxy grout, and non-slip coatings on threshold areas.
Choose metal or PVC threshold profiles that align with tile height and slope, and secure them with flexible adhesive.
Finish edges with silicone for movement and moisture resistance, ensuring neat, long-lasting joins.
Routine checks and signs of recurring problems
1 simple routine check each month will help you catch problems before they grow: inspect grout and sealant lines, look for new soft spots or sagging in the tiled or subfloor areas, and test drains and fixtures for slow drainage or leaks.
- Check grout and caulk for cracks.
- Press tiles for bounce or hollow sounds.
- Monitor water stains and mold.
- Record slow drains and recurring leaks.
Tips for long-term performance and warranty concerns
Those monthly checks will also protect any repairs or warranties you have, so keep documenting what you find and when you fixed it.
Keep receipts, photos, and contractor notes in one file. Follow manufacturer maintenance schedules, use recommended cleaning products, and avoid heavy impacts.
Address minor issues promptly to prevent voiding warranties. Schedule annual inspections to verify drainage, seals, and leveling remain sound.
Comparison: Fixing Over Tiles vs. Removing Tiles
You can weigh fixing over existing tiles against removing them by comparing performance, longevity, and risks like poor adhesion or hidden water damage.
Fixing over tiles usually saves time and money up front, but full removal often costs more and takes longer while giving a more reliable, long-lasting result.
Consider removing tiles when you suspect substrate issues or want the best long-term investment.
Performance, longevity, and risk comparison
While fixing a sloped floor over existing tiles can be quicker and cheaper, removing tiles first usually yields better long-term performance and lower risk of hidden failures. You’ll get cleaner adhesion, easier waterproofing, and simpler inspection. Over-topping risks bonding failures and trapped moisture.
| Factor | Over Tiles | Remove Tiles |
|---|---|---|
| Adhesion | Lower | Higher |
| Inspection | Limited | Full |
| Moisture risk | Higher | Lower |
Cost and time comparison
Because labor and materials shift depending on whether you work over existing tiles or strip them out first, the cost and timeline for each approach can differ substantially. You’ll usually save time and money by leveling over tiles, but patchwork limits scope. Removing tiles raises labor, disposal, and downtime but gives fuller repairs.
| Fix Over Tiles | Remove Tiles |
|---|---|
| Lower cost | Higher cost |
| Faster | Slower |
| Less disruption | More disruption |
| Limited scope | Full access |
When full removal is the better investment
If the slope stems from widespread subfloor rot, plumbing reconfiguration, or repeated repairs that keep failing, full tile removal and subfloor replacement is usually the smarter long-term investment.
You’ll get a level, durable foundation, proper plumbing access, and fewer callbacks. Upfront costs and downtime rise, but you avoid hidden damage, compromised warranties, and ongoing patchwork that costs more over time.
FAQ Frequently Asked Questions
You probably have a few quick questions before you start: can you pour self-leveler over glazed tiles, will raising the floor affect doors and fixtures, and how much slope is acceptable?
Also ask whether it’s safe to tile over a plywood overlay in a wet area and how long you should wait before using the shower after leveling.
I’ll answer each of these clearly so you can plan the right repairs.
Can I pour self-leveler directly over glazed tiles?
Can you pour self-leveler directly over glazed tiles? You can, but not without prep.
Clean tiles thoroughly, roughen the glaze with diamond pad or acid etch, and apply a proper primer/bonding agent recommended by the self-leveler manufacturer.
Check for loose tiles and repair them first.
Follow mixing and application guidelines; thin layers may need reinforcement or an alternative underlayment for large depth corrections.
Will raising the floor affect doors and fixtures?
Raising the bathroom floor will usually affect doors, thresholds, and some fixtures, so plan for adjustments before you pour or install a leveling compound.
You’ll likely need to trim door bottoms, raise threshold strips, and extend or rehang vanity cabinets.
Toilets, showers, and low-profile tubs may need flange or drain modifications.
Measure clearances, check swing paths, and budget for minor carpentry or plumbing changes.
How much slope is acceptable in a bathroom?
How much slope is acceptable in a bathroom?
You should aim for a slope of 1/4 inch per foot toward the drain for showers and wet areas; main bathroom floors can be flatter but still need positive drainage.
Excessive slope causes tripping and uneven fixtures, while too little causes pooling.
Measure and correct deviations before refinishing or installing fixtures.
Can I tile over a plywood overlay in a wet area?
Although you can tile over a plywood overlay in some wet areas, you shouldn’t do it without taking precautions to prevent moisture damage and movement.
Use exterior-grade or marine plywood, install a proper waterproof membrane or decoupling system, seal all joints, and fasten securely to avoid flex.
If you’re unsure, consult a pro to confirm suitability for constant wet exposure.
How long before the shower can be used after leveling?
Once you’ve secured the plywood and membrane, you’ll want to know when the shower can be used after you level the floor.
Cure times vary: quick-setting compounds may allow light use in 24–48 hours, but standard cementitious overlays need 72 hours to a week.
Add adhesive and grout curing times, plus membrane manufacturer recommendations, before regular showering to guarantee waterproofing and bond strength.
Additional Resources and Next Steps
If your floor slope looks structural or you’re unsure about load-bearing issues, call a structural engineer or licensed contractor for an assessment.
You’ll also find links to product guides, primers, and installation manuals to help you choose the right materials and methods.
Start with professional advice, then consult the manuals before you buy or install.
When to call a structural engineer or licensed contractor
Call a licensed contractor or structural engineer when the slope is severe, worsening, or tied to visible structural problems—like large cracks, sagging joists, or doors that no longer latch—because hands-on assessment and calculations are needed to diagnose causes and safe fixes.
You should also call if water damage, mold growth, or unclear load paths exist, or if DIY repairs don’t stop movement or deterioration.
Links to product guides, primers, and installation manuals
Several concise product guides and installation manuals can help you pick the right materials and follow proper steps for leveling a sloped bathroom floor.
Use these resources to compare primers, self-leveling compounds, and edge treatments, and to confirm mixing ratios and cure times.
Follow manufacturer safety and substrate prep instructions to avoid failures.
- Primer guide
- Self-leveler manual
- Adhesive spec sheet
- Waterproofing instructions