How to Clean a Porcelain Floor and Keep It Looking Pristine
You can keep porcelain floors pristine by sweeping or vacuuming daily, damp-mopping weekly with a mild pH-neutral cleaner, and spot-treating spills right away to avoid stains. Use microfiber mops to prevent scratches, scrub grout monthly with a soft brush, and seal grout every 1–3 years for protection. For deep stains, try baking soda paste, hydrogen peroxide, or commercial removers as appropriate, and avoid acidic or abrasive products to preserve the glaze—keep going for full step-by-step care and tips.
How to Clean a Porcelain Floor and Keep It Pristine
To keep your porcelain floor pristine, start with a quick sweep or vacuum.
Mop with a mild detergent, and spot-treat stains as they appear.
You can finish a typical room in about 20–30 minutes, depending on size and stubbornness of dirt.
With this routine once a week and immediate attention to spills, your floor will stay looking new.
One-paragraph direct solution and time estimate
If you want a quick, effective clean, sweep or vacuum loose debris. Mop with a mild pH-neutral cleaner diluted per the label, then rinse with clean water and dry with a microfiber cloth to prevent streaks.
The whole process takes about 20–30 minutes for a typical room (30–45 minutes if grout needs scrubbing). For regular care, repeat weekly and spot-clean spills immediately—this is how to clean a porcelain floor.
Basic Understanding of Porcelain Flooring
Porcelain tile is a dense, fired material that’s different from ceramic in durability and water resistance, so you’ll treat it differently.
Because porcelain often has a glaze, grout lines, and low porosity, it needs specific care to avoid damage and preserve its finish.
Common issues you’ll face are stains, scratches, grout discoloration, and dullness, all of which proper cleaning and maintenance can minimize.
What is porcelain tile and how it differs from ceramic
A durable, dense tile made from refined clay and fired at higher temperatures, porcelain differs from ceramic in composition and performance: it’s less porous, harder, and more water-resistant, so it stands up better to heavy traffic and moisture.
You’ll notice tighter grain, finer finish, and greater longevity; choose porcelain when you want a tough, low-maintenance floor that resists chips and stains.
Why porcelain needs specific care (glaze, grout, porosity)
Because porcelain tiles combine a glazed surface, grout lines, and varying porosity, they need targeted care to keep them looking and performing their best.
You’ll protect the glaze from abrasive cleaners, address grout with appropriate sealers and cleaners, and choose products that match porosity so moisture and stains don’t penetrate.
Tailoring care preserves appearance and extends tile life.
Common problems: stains, scratches, grout discoloration, dullness
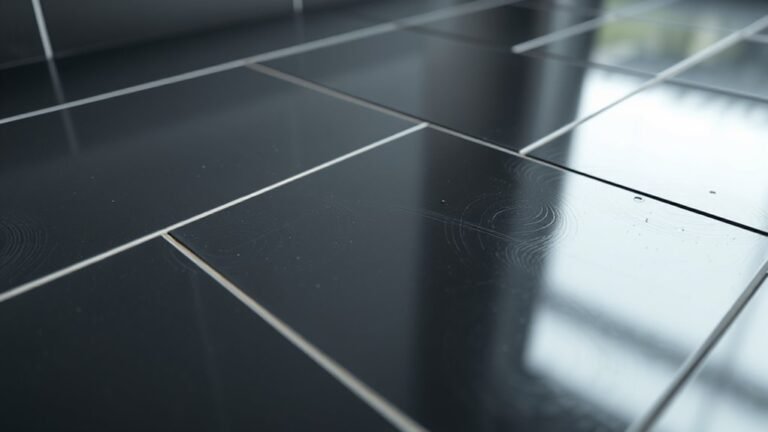
When stains, scratches, grout discoloration, or dullness appear, they tell you which part of the floor needs attention and what cleaning or repairs will work best.
You can address each issue quickly:
- Stains: blot, use pH-neutral cleaner, poultice for stubborn spots.
- Scratches: buff minor marks, replace tiles for deep gouges.
- Grout: scrub, re-seal, or regrout.
- Dullness: polish or apply appropriate sealer.
Essential Tools and Supplies You Need
You’ll want the right tools—like a microfiber mop, a soft-bristled brush, and a gentle sponge—to clean porcelain without scratching it.
Use pH-neutral cleaners for regular care and only dilute vinegar sparingly for spot cleaning.
Avoid acidic or abrasive cleaners, scrubbing pads, and waxes that can damage the surface.
Recommended cleaning tools (mop types, microfiber, soft brush)
Pick three dependable tools to cover everyday cleaning and occasional deep scrubs: a soft microfiber mop for daily dusting and damp cleans, a flat or sponge mop (choose based on how much water you want on the floor) for routine wet mopping, and a soft-bristled brush or nylon broom for grout lines and stubborn spots.
- Microfiber mop
- Flat/sponge mop
- Soft-bristled brush
- Vacuum with hard-floor setting
Safe cleaning products and ingredients (pH-neutral cleaners, vinegar use limits)
1 simple rule will keep your porcelain looking great: stick to gentle, pH-neutral cleaners and avoid harsh acids or abrasives.
Use mild detergents and dilute solutions. Limit vinegar to occasional, well-diluted rinses. Follow manufacturer labels.
- pH-neutral floor cleaner
- Mild dish soap (diluted)
- Diluted vinegar (sparingly)
- Clean water for rinsing
Tools and products to avoid (acidic cleaners, abrasive pads, wax)
While porcelain’s durable surface can handle regular cleaning, don’t reach for acidic cleaners, abrasive pads, or waxes—they can dull, etch, or damage the glaze.
You should avoid harsh products and tools that strip finish or leave residue. Follow this quick avoid-list:
- Acidic cleaners (vinegar full-strength)
- Abrasive pads or steel wool
- Bleach concentrates
- Paste wax or oil-based polishes
Step-by-Step Cleaning Process (Daily → Deep Cleaning)
Start with daily tasks like sweeping or using a dry mop to keep grit from scratching your porcelain.
Once a week, you’ll do a wet mop with a mild cleaner, following a clear room-by-room routine.
Monthly, focus on grout and edges and handle spills or stains immediately with targeted spot-cleaning steps.
Daily and routine maintenance (sweeping, dry mopping)
Sweep or dry-mop your porcelain floor every day to remove grit and dust that can scratch the glaze and dull its shine.
Use a soft-bristle broom or microfiber mop, working toward a central drain or doorway. Empty and shake out the mop frequently.
Spot-tackle spills immediately with a dry cloth.
Regular routine prevents buildup and reduces the need for harsher cleaning.
Weekly wet cleaning step-by-step
After daily sweeping, you should follow a simple weekly wet-cleaning routine to remove stubborn grime and restore shine.
Fill a bucket with warm water and a mild pH-neutral floor cleaner. Mop in sections, rinsing frequently.
For spots, scrub gently with a soft brush. Change water when dirty, let floor air-dry, and replace furniture once fully dry.
Monthly deeper clean grout and edge focus
When you move beyond weekly mopping, tackle grout lines and edges once a month to remove built-up dirt and prevent staining.
Scrub grout with a soft brush and a paste of baking soda and water or a pH-neutral cleaner, rinse thoroughly, and dry.
Use a narrow brush or toothbrush for baseboard seams and corners, then inspect for damaged grout to repair as needed.
Spot cleaning for spills and stains targeted steps
1 quick response to a spill can keep a stain from setting: blot liquids immediately with a clean microfiber or absorbent cloth, work from the outside in to avoid spreading, and then apply a mild, pH-neutral cleaner or a baking-soda paste for stubborn spots, rinsing and drying the area thoroughly.
- Blot, don’t rub.
- Test cleaner first.
- Use gentle scrub tool.
- Rinse and dry.
Deep Cleaning and Stain Removal Techniques
When it’s time for deep cleaning, you’ll learn specific fixes for common stains like coffee, oil, rust, and ink so you can treat each one effectively.
You’ll also get practical grout-restoration tips—homemade cleaners versus commercial options—and clear steps for removing soap scum, hard-water deposits, and mineral buildup.
Finally, you’ll find guidance on when and how to use a steam cleaner safely without damaging the porcelain.
Removing common stains (coffee, oil, rust, ink) methods per stain
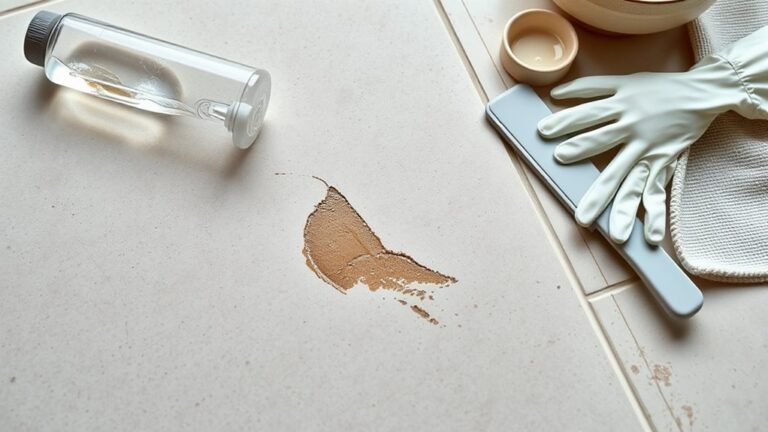
Although porcelain is durable, spills like coffee, oil, rust, and ink can penetrate grout or leave stubborn marks.
You’ll need targeted techniques for each stain type to restore the floor without damaging the glaze. Use these methods:
- Coffee: blot, warm soapy water, hydrogen peroxide for residue.
- Oil: dish soap, degreaser, rinse.
- Rust: commercial rust remover, follow label.
- Ink: rubbing alcohol, repeat carefully.
Grout cleaning and restoration (homemade cleaners vs commercial)
Grout often traps dirt and stains even after you’ve cleaned the tile, so deciding between homemade cleaners and commercial products matters for both appearance and longevity.
You’ll choose based on stain severity, grout type, safety, and budget.
- Baking soda + water paste
- Vinegar for mild stains (test first)
- Oxygen bleach for deep stains
- Commercial grout sealer for protection
Tackling soap scum, hard water deposits, and mineral buildup
Because mineral deposits and soap scum bond tightly to porcelain, you’ll need targeted cleaners and the right tools to remove them without dulling the finish.
Use gentle acids and nonabrasive pads, test first, then rinse thoroughly.
Steps:
- Wet area and apply cleaner.
- Let sit per instructions.
- Agitate with soft pad.
- Rinse and dry to prevent re‑buildup.
When to use steam cleaners safely
After rinsing away cleaners and mineral residue, you might wonder whether a steam cleaner will help lift deeper stains without harming the porcelain.
You can use low-pressure steam on glazed porcelain to sanitize and loosen grime, but avoid high heat on unglazed, cracked, or aged tiles and sealed grout.
Test a small area first, keep nozzle moving, and dry promptly.
Preventive Measures and Long-Term Care
To keep your porcelain floor looking its best, start simple with protective routines like doormats, felt pads under furniture, and area rugs in high-traffic zones.
Seal grout when it’s porous or stained to prevent moisture and dirt from settling, and reapply sealant as recommended.
Finally, reduce wear and preserve shine with light polishing and a scheduled maintenance plan that combines gentle cleaning and periodic deeper care.
Protective routines (doormats, felt pads, area rugs)
A few simple protective routines—placing heavy-duty doormats at every entrance, fitting furniture with felt pads, and adding area rugs in high-traffic zones—will cut down on grit, scratches, and wear on your porcelain floors.
Keep routines consistent:
- Shake or vacuum doormats weekly.
- Replace worn felt pads promptly.
- Use non-slip rug pads.
- Rotate rugs to even traffic patterns.
Sealing grout and when sealing is necessary
While porcelain tiles are naturally water-resistant, grout lines can absorb stains and moisture, so you should consider sealing them to protect against discoloration, mold, and grout breakdown.
Seal new grout after curing (usually 72 hours), reapply every 1–3 years depending on traffic, and spot-test sealers first.
Clean grout thoroughly before sealing, and choose a penetrating sealer suited to grout type.
Reducing wear and maintaining shine (polishing tips, scheduled maintenance)
1 simple routine can keep porcelain floors looking like new: sweep or vacuum daily, mop with a pH-neutral cleaner weekly, and address spills immediately to prevent stains and wear.
Buff high-traffic areas monthly with a microfiber pad to restore shine, avoid abrasive pads, and use a recommended polish sparingly.
Schedule deep cleaning quarterly and replace mats to reduce grit and prolong finish.
Common Mistakes and How to Avoid Them
Don’t use harsh scrubbing or acidic cleaners that can dull or etch porcelain—stick to soft tools and pH-neutral solutions.
Pay special attention to grout: using the wrong brush or bleach can weaken joints, so choose grout-safe cleaners and gentle agitation.
Watch for commercial products with strong solvents, vague ingredient lists, or claims that seem too good to be true and test anything new on an inconspicuous spot first.
Harmful cleaning habits that damage porcelain
Although porcelain is tough, certain everyday cleaning habits can quickly dull its finish, etch the surface, or leave stains that won’t come out.
Don’t use abrasive pads, harsh acids, or straight bleach; they strip glaze and cause etching. Avoid overly hot water and pouring undiluted cleaners.
Wipe spills promptly, test products in a hidden spot, and stick to pH-neutral cleaners for safe, lasting results.
Grout-specific errors and fixes
Grout often gets overlooked, but small mistakes—like scrubbing with metal brushes, sealing too soon or too late, or using bleach on colored grout—can leave cracks, discoloration, or weakened joints.
Rinse with mild detergent, use nylon brushes, spot-test cleaners, and let grout fully cure before sealing.
Regrout damaged areas with matching mortar, and maintain regular gentle cleaning to prevent dirt buildup and stains.
Misusing commercial products red flags to watch for
When you reach for a commercial cleaner, watch for misleading labels and overly harsh ingredients that can dull porcelain, etch glazes, or strip grout sealers.
Check the active ingredients, pH level, and “safe for porcelain” claims, and always spot-test in an inconspicuous area before treating the whole floor.
- Avoid acids or high-alkaline formulas
- Skip bleach on colored grout
- Don’t use abrasive powders
- Reject vague “all-purpose” claims
Comparison: DIY Cleaners vs Commercial Products
You’ll weigh effectiveness, cost, and safety when choosing between DIY solutions and commercial cleaners for porcelain floors.
I’ll list the best commercial options by purpose and give simple DIY recipes you can use safely.
That way you can pick the cleaner that fits your stain type, budget, and risk tolerance.
Effectiveness, cost, and safety overview
Although homemade mixtures can tackle everyday dirt and stains, commercial porcelain cleaners usually offer stronger, faster results for tough grime and sealed surfaces. You’ll weigh cost, efficacy, and safety: DIY is cheaper and gentler but slower; commercial products save time yet may need precautions. Choose by frequency, soil level, and household sensitivity.
| Factor | Note |
|---|---|
| Effectiveness | DIY: mild; Commercial: stronger |
| Cost | DIY: low; Commercial: variable |
| Safety | DIY: safer; Commercial: read labels |
| Convenience | DIY: slower; Commercial: faster |
| Suitability | Match to finish and soil |
Best commercial cleaners by purpose
Pick a commercial cleaner based on the specific challenge you’re facing—daily maintenance, heavy grime, grout staining, or high-traffic restoration—because products are formulated for different tasks and will beat DIY mixes for speed and targeted results.
Choose concentrated pH-neutral mops for routine care, enzymatic degreasers for oil, grout brighteners for lines, and restorative sealants for worn areas.
- Daily
- Grime
- Grout
- Restoration
Simple DIY recipes and when to use them
Anyone can mix up a few simple DIY cleaners from pantry staples, and they work well for light, routine cleaning or spot-treating spills; however, they’re not as fast, potent, or targeted as many commercial formulations for heavy grime, oil, stained grout, or restoration work.
- Vinegar+water: light daily shine.
- Baking soda paste: grout spots.
- Mild dish soap: greasy tracked-in dirt.
- Hydrogen peroxide: stubborn stains, test first.
Use commercial products for deep cleaning or sealed grout.
Quick Maintenance Schedules and Checklists
Keep a simple maintenance rhythm so your porcelain stays pristine: you’ll use a daily sweep, weekly mop, monthly grout check, and an annual deep clean.
Add a seasonal deep-maintenance plan to handle buildup, seal grout, and inspect for chips or loose tiles.
Use a checklist you can tick off to stay consistent and spot problems early.
Daily, weekly, monthly, and annual checklist
A simple, regular schedule will keep your porcelain floor looking its best with minimal effort.
Follow concise tasks so you won’t fall behind.
- Daily: sweep/vacuum, spot-mop spills.
- Weekly: damp-mop with pH-neutral cleaner, dry thoroughly.
- Monthly: inspect grout, clean edges and under furniture.
- Annual: deep-clean grout, reseal if recommended by manufacturer.
Seasonal deep-maintenance plan
When the seasons change, set aside time each quarter for deeper care so your porcelain floor stays durable and stain-free. These seasonal checks target grout, grout seals, edges, and high-traffic areas that routine cleaning can miss.
Inspect grout for cracks, reseal where needed, deep-clean stubborn stains, tighten or replace damaged trim, and rearrange mats. Log actions and dates to track maintenance.
Troubleshooting Guide Problems and Solutions
If your porcelain floor looks dull after cleaning, we’ll cover common causes and simple fixes you can try.
For stubborn grout discoloration, you’ll get escalation steps from extra scrubbing to professional restoration.
We’ll also outline temporary repairs for chips and scratches and explain when it’s time to call a pro.
Dull finish after cleaning causes and fixes
Several common mistakes can leave your porcelain floor looking dull after cleaning, but most are easy to fix once you know the cause.
Use too-strong detergents, leave soap residue, or let water spots dry; each mutes shine.
Rinse thoroughly with clean water, buff with a soft microfiber, and avoid waxes or oil-based products.
Repeat gentle cleaning weekly to restore luster.
Persistent grout discoloration escalation steps
Because grout stains can persist despite routine cleaning, you’ll need a clear escalation plan that starts with the least invasive remedies and progresses to stronger treatments only as necessary.
Begin with warm water and a stiff brush, then a pH-neutral cleaner.
If stains remain, use a baking soda paste, then diluted hydrogen peroxide.
For stubborn discoloration, consider grout-specific stain removers or professional cleaning.
Chips and scratches temporary repairs and when to call a pro
When a chip or scratch mars your porcelain floor, you can often hide or slow further damage with a few quick fixes before calling in a pro.
Clean area, use matching porcelain repair kit or clear epoxy for tiny chips, and fine-grit sanding for shallow scratches.
For deep gouges, widespread damage, or visible pattern loss, contact a professional restorist to match glaze and prevent more costly repairs.
FAQ
You probably have a few quick questions about cleaning and caring for porcelain floors—like whether vinegar or bleach are safe and how often to seal tile or grout.
You’ll also want to know the best mop to use, if steam cleaning can harm the surface, and how to remove grease or oil.
Read on for concise answers and practical tips.
Can I use vinegar or bleach on porcelain floors?
Wondering whether vinegar or bleach will harm your porcelain floors?
Don’t use straight vinegar or strong bleach regularly: acidic cleaners can dull grout sealers and harsh bleaches may discolor grout or damage finishes.
For routine cleaning, use a pH-neutral cleaner or mild dish soap diluted in water.
Spot-treat stubborn stains with manufacturer-recommended products to avoid long-term harm.
How often should I seal porcelain tile or grout?
If you’ve avoided harsh cleaners to protect grout and finishes, you’ll also want to know how often to seal porcelain tile and grout to keep that protection intact.
Seal glazed porcelain rarely—usually every 3–5 years if manufacturer recommends; unglazed or high-traffic areas may need sealing every 1–2 years.
Reapply when water no longer beads on the surface or grout darkens.
What is the best mop for porcelain tile?
Which mop works best for porcelain tile depends on your priorities—ease, drying time, or grout cleaning—but a microfiber flat mop is the most versatile choice.
You’ll want a low-lint microfiber head, a durable swivel handle for reach, and a washable pad.
For textured or grout-heavy floors, pair it with a soft-bristled grout brush.
Avoid abrasive or overly wet mops to protect finish.
Will steam cleaning damage porcelain floors?
You can often use a steam cleaner on porcelain tile without harming the surface, but you’ll need to follow a few precautions.
Use low-to-medium heat, avoid excessive dwell time, and keep the nozzle moving to prevent grout damage or loosening.
Don’t use steam on cracked tiles or unsealed grout.
Test a small area first, then proceed with regular, gentle passes only.
How do I remove grease or oil from porcelain tile?
Wondering how to get grease or oil off porcelain tile? Act quickly: blot excess with paper towels, don’t rub.
Sprinkle baking soda or cornstarch to absorb remaining oil, let sit 10–15 minutes, then sweep.
Apply a few drops of dish soap diluted in warm water, scrub gently with a soft brush, rinse thoroughly, and dry.
For stubborn stains use a pH-neutral cleaner or isopropyl alcohol.