What Is Loose Lay Vinyl Flooring and Is It Right for Your Home?
Loose lay vinyl flooring is a glue-free, layered vinyl plank that stays put by its weight and textured backing, so you can install it fast and with minimal mess. It’s water-resistant, cushioned, and easy to replace—great for rentals, bathrooms, basements, and busy homes with kids or pets. It does need a very flat subfloor and can dent under heavy rollers, so weigh your furniture and traffic. Keep going to learn how to pick, prep, and care for it.
What Loose Lay Vinyl Flooring Is Quick Answer
Loose lay vinyl is a durable, glue-free flooring that stays in place by weight and a textured backing.
This allows you to float planks or tiles over most flat subfloors. It installs quickly with minimal tools and is easy to replace if a section gets damaged.
It’s best for homeowners who want a fast, low-mess update and may rent or plan to change floors later.
Direct, concise definition for homeowners
Think of loose lay vinyl as a heavy, flexible plank or tile that stays in place by its weight and a textured backing, not adhesive.
You’ll find what’s loose lay vinyl flooring ideal when you want quick, low-mess installation, easy replacement, and minimal subfloor prep.
It resists cupping and shifting, suits busy rooms, and lets you remove or update flooring without glue or special tools.
One-sentence verdict: who it’s best for
If you want fast, low-mess flooring that you can install or replace yourself, loose lay vinyl is ideal for renters, busy households, and DIYers who need a stable, water-resistant surface without glue or major subfloor work.
It’s best when you want quick updates, easy repairs, and decent durability in kitchens, bathrooms, or rental units, but not for heavy commercial use or uneven subfloors.
Basic Understanding Features and Construction
You’ll want to know that loose lay vinyl is built in layers—typically a printed design layer, a wear layer, a core (often flexible vinyl or stone-plastic composite), and a backing that helps it stay put.
It differs from LVT, SPC, and click-lock systems by relying on weight and backing grip rather than interlocking edges or rigid cores.
Pay attention to total thickness, wear-layer mil thickness (common ranges: 2–20 mil for residential to commercial), and backing types since those determine durability and stability.
Loose lay vinyl composition and layers
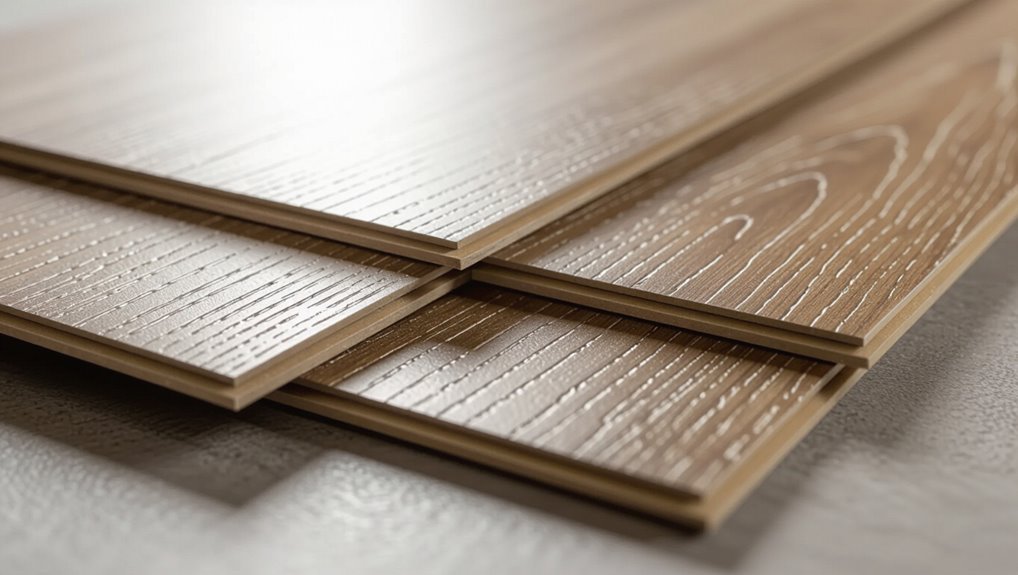
Loose lay vinyl is built from several precise layers that work together to give you stability, durability, and easy installation.
You’ll typically find a wear layer resisting scratches and stains, a printed design layer for realistic visuals, a rigid or flexible core for dimensional stability, a backing that grips the subfloor, and often a protective coating for added longevity and easy cleaning.
How loose lay differs from other vinyl types (LVT, SPC, click-lock)
Those layers give loose lay its grip and flexibility, but its overall design sets it apart from other vinyl options like LVT, SPC, and click-lock planks. You’ll find loose lay rests flat without glue or interlocking systems, so installation’s faster and removal’s easier. It’s softer underfoot and tolerates minor subfloor imperfections better.
| Type | Installation | Feel |
|---|---|---|
| Loose lay | Float | Softer |
| LVT | Glue/float | Versatile |
| SPC | Click/glue | Rigid |
Typical thicknesses, wear layers, and backings
Because loose-lay products rely on weight and surface grip rather than locking or adhesive, their construction balances thickness, wear layer, and backing to deliver stability, durability, and comfort.
You’ll typically see total thicknesses from 2mm to 5mm, wear layers 0.3mm–0.7mm for homes, and heavy foam or felt backings for grip and sound absorption.
Thicker cores resist denting; stronger wear layers resist scratches.
Benefits of Loose Lay Vinyl Flooring
You’ll appreciate how loose lay vinyl lets you finish rooms fast since it installs quickly without glue or long waits.
It also gives cushioning, reduces noise, and adds warmth underfoot, while standing up to spills and humid spaces.
When a plank gets damaged, you can swap it out easily, keeping maintenance simple.
Ease of installation and time-to-complete
While you can hire a pro, loose lay vinyl shines for DIYers because its heavy, click-free planks or tiles simply float over a flat subfloor and lock in place by weight and friction.
You’ll save time and finish rooms quickly with minimal tools and cuts.
- Fast layout and snap-free placement
- Little adhesive or underlayment needed
- One-day room installs for most spaces
Comfort, acoustics, and thermal properties
Loose lay vinyl feels softer underfoot than tile or hardwood, thanks to its dense backing and optional cushioned underlay that absorb impact and reduce fatigue during long stands.
You’ll notice room noise drops—vinyl dampens footsteps and echoes better than hard surfaces—while its low thermal resistance lets it warm quickly with room air or underfloor heating, keeping floors comfortable year-round without heavy insulation.
Water resistance and suitability for wet areas
Those comfort and acoustic gains matter even more when moisture’s present, because vinyl’s water resistance keeps performance consistent in damp conditions.
You can install loose lay in bathrooms, mudrooms, and basements where spills and humidity occur. Its waterproof core prevents warping and mold growth, and tight seams limit seepage.
Still follow manufacturer guidelines for wet-area installations and adhesive recommendations for edges.
Replaceability and maintenance advantages
Because panels float rather than glue down, you can swap damaged planks quickly without disturbing surrounding flooring.
You’ll save time and money on repairs, since replacements slide in easily and don’t require adhesive removal.
Routine cleaning is simple—vacuum and mop—and minor gaps or shifts are easy to realign.
The lightweight, modular design also simplifies DIY upgrades and spot maintenance.
Limitations and Potential Drawbacks
You should be aware that loose lay vinyl can be less forgiving under heavy furniture or frequent rolling loads and may indent or shift without proper protection.
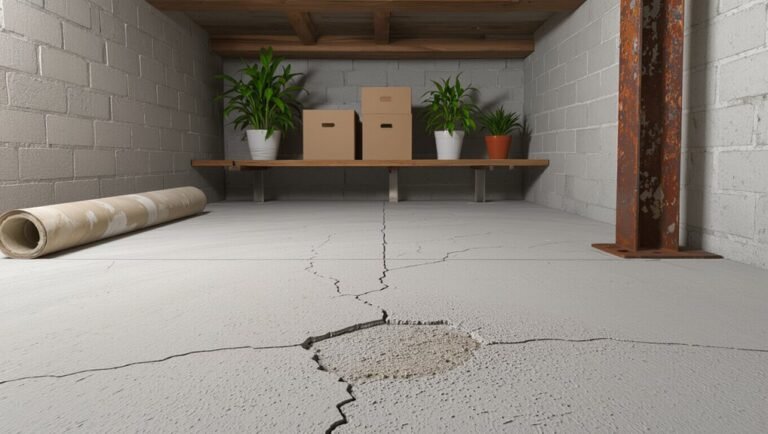
It also demands a very flat, well-prepared subfloor because gaps, bumps, or unevenness will show and can cause edge gapping or seasonal movement.
Finally, check expected lifespan and warranty limits carefully since some loose lay products have shorter warranties or exclusions tied to these issues.
Performance under heavy furniture and rolling loads
Loose lay vinyl handles everyday furniture well, but it can struggle under very heavy, concentrated loads and frequent rolling traffic.
You should avoid placing extremely heavy items—like massive safes or industrial shelving—directly on it without protective plates.
Office chairs on casters and dollies can cause indentation or seam shifting over time, so use wide-wheel casters, protective mats, or distribute weight to prevent damage.
Subfloor requirements and flatness sensitivity
Although loose lay vinyl installs faster than glued options, it demands a smooth, stable subfloor to perform well; any bumps, dips, or debris can telegraph through the planks and shorten the floor’s life.
You’ll need to prep, level, and repair concrete, plywood, or existing floors before installation.
Poor flatness causes premature wear, visible imperfections, and possible warranties voided.
Edge gapping, expansion, and seasonal movement
Because vinyl expands and contracts with temperature and humidity changes, you’ll need to plan for edge gaps and movement when installing loose lay flooring.
Leave manufacturer‑recommended expansion gaps around walls and fixed objects, and use proper threshold strips at doorways.
Expect small seasonal shifts; avoid rigid trim that restricts movement.
Monitor gaps and re‑adjust edges if planks buckle or separate.
Lifespan and warranty considerations
Those seasonal movements and edge gaps can affect how long your floor performs and whether a warranty will cover issues.
You’ll want to check manufacturer lifespan estimates, wear-layer thickness, and installation requirements—misinstallations or moisture-related gaps often void coverage.
Keep records of humidity control, maintenance, and seller communications to support claims.
Realistic expectations: loose lay may last well, but warranties vary, so read terms carefully.
Is Loose Lay Right for Your Home Decision Guide
Before you commit to loose lay, ask a few key questions about moisture, subfloor condition, and how long you want the floors to last.
Think room by room—kitchens and basements need different priorities than bathrooms, living rooms, or rental units.
Also consider your household: pets, kids, and heavy foot traffic all influence whether loose lay is the right fit.
Key questions to ask before choosing loose lay
Wondering if loose lay vinyl fits your home? You’ll want to evaluate moisture, traffic, and installation constraints before deciding.
Ask practical, specific questions so you’re not surprised later.
- Is subfloor condition suitable and level?
- Will heavy furniture or rolling loads stress the planks?
- Do you need a quick DIY install or professional help?
Room-by-room suitability (kitchen, bathroom, living room, basement, rental units)
When you pick loose lay vinyl, think about how each room’s moisture, traffic, and furniture will affect performance.
In kitchens and bathrooms, choose waterproof options and add thresholds for wet zones.
In living rooms, it’s fine if furniture stays put.
Basements need moisture barriers and flatter subfloors.
For rental units, prioritize durability, quick installation, and easy replacement.
Household use cases and lifestyle fit (pets, kids, high traffic)
Rooms set the stage, but your daily life decides if loose lay vinyl is the right pick.
If you have pets, it resists scratches and is water-tolerant for accidents. For kids, it’s cushioned and easy to clean.
In high-traffic zones it wears well, though you’ll want thicker wear layers and occasional re-seating to prevent movement under heavy use.
Installation Overview Step-by-Step for DIY and Pros
Before you start, gather tools and materials, verify your subfloor is clean, level, and dry, and let the planks acclimate.
Measure carefully, then follow a clear sequence: prep and test the subfloor, lay and cut panels to fit, and finish with trim, connections, and thresholds.
Whether you’re DIYing or hiring a pro, this step-by-step approach keeps the job efficient and durable.
Pre-installation checklist: tools, materials, and subfloor prep
Start by gathering everything you’ll need so the job goes smoothly: the correct amount of loose lay vinyl planks or tiles (plus 5–10% for waste), a quality underlayment if required, a utility knife with fresh blades, a straightedge, tape measure, chalk line, spacers, seam roller, pry bar, and a heavy-duty tapping block or pull bar.
Clean, level, dry subfloor; repair gaps; remove trim.
- Verify moisture levels
- Confirm subfloor flatness
- Have safety gear ready
Step 1: Measuring and acclimating planks
Measure each area carefully and let the planks acclimate so they settle to the room’s temperature and humidity before you lay them.
Record room dimensions, note irregular walls and doorways, and plan plank layout to minimize narrow cuts.
Stack unopened boxes flat in the installation room for 48–72 hours.
Check manufacturer recommendations for acclimation time and temperature range, and keep climate stable during this period.
Step 2: Subfloor cleaning, leveling, and moisture testing
With the planks acclimated and layout planned, turn your attention to the subfloor: it must be clean, flat, and dry to support a loose lay installation.
Remove debris, adhesive residue, and protrusions. Fill low spots with a leveling compound and sand high spots.
Test moisture with a reliable meter or perform a calcium chloride test; address excess moisture before proceeding.
Step 3: Laying panels, cutting, and fitting
Begin laying panels along your longest straight wall, working left to right (or right to left if you’re left-handed) so seams stagger consistently; keep a 1/8″ to 1/4″ expansion gap at walls unless the manufacturer specifies otherwise.
Fit full panels first, trim end pieces with a straightedge and utility knife using multiple shallow passes, and dry-fit around obstacles.
Tap joints tight with a tapping block; avoid forcing panels.
Step 4: Finishing touches: trim, transitions, and thresholds
After you’ve locked the last plank in place and checked gaps, it’s time to finish edges, joiners, and doorways so the floor looks polished and performs well.
Install baseboards or quarter-round to conceal edges, use appropriate connector strips between floor types, and fit thresholds at doorways.
Caulk seams where needed, trim excess material, and guarantee transitions sit flush for smooth traffic and moisture control.
When to hire a professional
If your project is straightforward—small room, flat subfloor, simple cuts—you can handle loose lay vinyl yourself; however, call a pro when the space has complex layouts, uneven or damaged subfloors, extensive changes, or moisture and warranty requirements that demand certified installers.
Hire a pro if you lack tools, time, or confidence, or if the job affects structural elements, plumbing, or electrical work.
Cost Considerations and Value Comparison
You’ll want to weigh typical price ranges for loose lay planks and any labor if you hire help, since materials can vary widely by brand and thickness.
Consider long-term value too—easy maintenance, lower replacement frequency, and how buyers view floating installations can affect resale.
Finally, compare that total cost and performance to glue-down and click-lock systems to see which delivers the best return for your budget.
Typical price ranges: materials and labor
When budgeting for loose lay vinyl, expect wide price swings depending on product quality, plank size, and installation complexity; basic DIY planks can run as low as $1 to $3 per square foot for materials, while premium, commercial-grade options often cost $4 to $8 or more, and professional labor typically adds $1.50 to $4 per square foot depending on site prep and local rates.
| Tier | Material $/ft² | Labor $/ft² |
|---|---|---|
| Budget | 1–3 | 1.5–2.5 |
| Mid | 3–5 | 1.5–3 |
| Premium | 5–8+ | 2.5–4 |
Long-term value: maintenance, replacement, and resale impact
Because loose lay vinyl needs minimal upkeep and can last well under normal wear, it often delivers strong long-term value compared with other resilient floors.
You’ll save on routine maintenance—simple cleaning and occasional resealing aren’t usually required—and replacement is straightforward if damaged.
Its durability and clean look can positively influence resale, especially in kitchens, bathrooms, and rental units where practicality matters.
Comparison with glue-down vinyl and click-lock options
Although all three systems aim to deliver durable, water-resistant flooring, loose lay, glue-down, and click-lock vinyl differ in upfront cost, installation expense, and long-term value in ways that affect your budget. You’ll pay less to buy loose lay, more for glue-down labor, and see midrange costs with click-lock durability and DIY potential.
| Type | Upfront | Installation |
|---|---|---|
| Loose lay | Low | DIY/low |
| Glue-down | Mid | High |
| Click-lock | Mid | DIY/medium |
Common Installation Mistakes and How to Avoid Them
When you install loose lay vinyl, avoid common pitfalls that can ruin the job: uneven subfloors, moisture or temperature problems, sloppy trimming and connections, and using heavy rolling equipment that’s too much for the product.
Check and level the subfloor, test and control moisture and temperature, and take care with cuts and connection pieces.
Use appropriate rollers or avoid heavy equipment to protect the plank integrity.
Mistake 1: Installing over uneven subfloors
If your subfloor isn’t flat, your loose lay vinyl won’t sit or lock properly, and you’ll end up with gaps, telegraphing, or premature wear.
You should inspect for high spots, dips, and debris, then sand, level, or use a self-leveling compound.
Follow manufacturer tolerances, repair damage, and guarantee a clean, stable base so the planks remain flat and perform as designed.
Mistake 2: Ignoring moisture and temperature issues
Because loose lay vinyl reacts to moisture and temperature swings, you need to address those conditions before and during installation.
Test subfloor moisture with a meter, let damp areas dry, and fix leaks or poor ventilation.
Acclimate planks per manufacturer guidelines so they adjust to room temperature.
Control indoor humidity and avoid installing in spaces prone to condensation or temperature extremes.
Mistake 3: Improper trimming and transitions
Although trimming and alteration work might seem like a finishing touch, improper cuts or mismatched profiles can ruin both the look and performance of your loose lay floor.
You should measure twice, cut cleanly, and use compatible transition strips. Leave proper expansion gaps, avoid forcing joints, and secure edges where needed.
Clean, level thresholds and neat end-caps guarantee a professional, durable finish.
Mistake 4: Overloading with heavy rolling equipment
When you roll heavy equipment over loose lay vinyl, you risk compressing the backing, causing permanent indentations and disrupting the floor’s ability to rebound and stay flat.
Don’t use heavy rollers, forklifts, or pallet jacks during or immediately after installation. Instead, use lightweight tools, distribute weight with plywood sheets, and move equipment slowly.
Protect seams and edges to prevent shifting and permanent damage.
Maintenance, Repair, and Care Tips
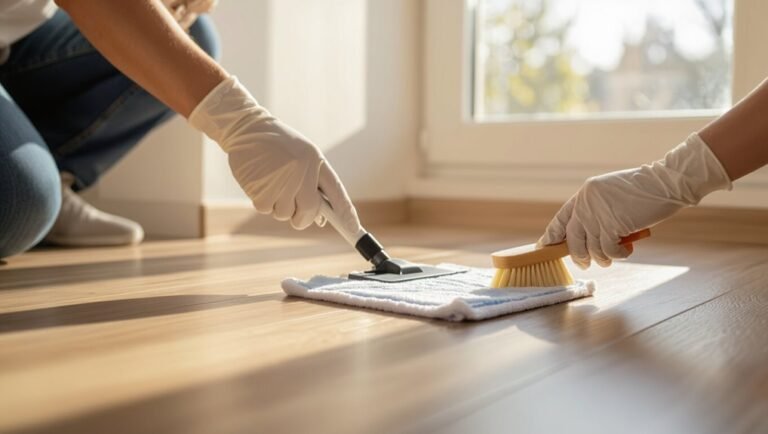
Keep a simple daily and weekly cleaning routine to prevent dirt buildup and use gentle products to avoid damaging the surface.
If you get scratches, dents, or stains, you’ll want quick fixes—like spot cleaners, repair kits, or replacing a panel—to stop problems from spreading.
Also follow seasonal care tips (humidity control and proper acclimation) to prevent movement or gapping over time.
Daily and weekly cleaning routine
Daily and weekly cleaning routines help your loose lay vinyl stay durable and looking new with minimal effort.
You should sweep or vacuum daily to remove grit, mop weekly with a pH-neutral cleaner, and dry surfaces to prevent residue. Avoid harsh chemicals and excessive water.
- Sweep or vacuum daily
- Damp-mop weekly with mild cleaner
- Dry promptly after cleaning
How to handle scratches, dents, and stains
1 simple approach to dealing with scratches, dents, and stains on loose lay vinyl is to assess the damage first—clean the area, note the depth and size, and decide whether you can fix it yourself or need a pro—then follow targeted repairs to restore appearance and prevent further issues.
For light scratches, buff gently and apply a vinyl polish; for stains, use recommended cleaners and blot, not scrub.
Replacing damaged panels and spot repairs
When a panel’s damaged beyond simple cleaning or buffing, you’ll want to replace it promptly to stop moisture and dirt from migrating under the floor.
Remove grout or adhesive residues, lift the damaged plank, and slide in a matching replacement.
For small tears, use a vinyl repair kit or color-matched filler.
Test adhesives on scrap pieces and press seams flat to guarantee a seamless, secure finish.
Seasonal care to prevent movement or gapping
Because loose lay vinyl reacts to temperature and humidity, you’ll want to adjust care with the seasons to keep panels from buckling or gapping.
In winter, maintain steady indoor humidity with a humidifier and avoid rapid heating.
In summer, use air conditioning or dehumidifiers to limit expansion.
Allow acclimation after big temperature shifts and inspect edges monthly, tightening or re-seating panels as needed.
Best Practices and Buying Tips
When you’re shopping for loose lay vinyl, focus first on wear layer thickness and construction to match foot traffic and durability needs.
Think about finishes, textures, and colors that fit your style while resisting scratches and slips, and prepare a short list of questions for suppliers and installers about installation methods and site prep.
Don’t forget to check warranties, certifications, and testing standards so you know performance expectations and coverage.
Choosing the right wear layer and thickness
Although it may seem like a small detail, the wear layer and overall thickness determine how durable, comfortable, and long-lasting your loose lay vinyl will be—so choose them based on traffic, room function, and budget.
For busy areas, pick a thicker plank and 20–30 mil wear layer; for low-traffic rooms, 12–20 mil suffices. Thicker products resist dents and last longer.
Selecting finishes, textures, and colors for style and durability
Now that you’ve matched wear layer and thickness to traffic and budget, you’ll want to pick finishes, textures, and colors that balance style with long-term performance.
Choose matte or low-sheen finishes to hide scratches and scuffs.
Select textured grain for realism and slip resistance in wet areas.
Pick neutral tones for resale, bolder patterns for focal rooms, and test samples in different light before buying.
Questions to ask suppliers and installers
What should you ask suppliers and installers before committing?
Be direct: confirm scope, timelines, and prep needs, and get clear pricing.
Ask about experience with loose lay, installation methods, and site-specific recommendations.
- Do you handle subfloor prep and moisture checks?
- What’re total costs, timeline, and cleanup responsibilities?
- Can you provide references or photos of similar jobs?
Warranties, certifications, and testing standards to check
When you’re choosing loose lay vinyl, prioritize clear warranties and recognized certifications so you know the product’s durability, indoor air quality, and installation limits.
Check wear-layer and residential/commercial warranty lengths, moisture and temperature limits, and transferability.
Look for FloorScore, GREENGUARD, or equivalent VOC certification, and ASTM or ISO testing for abrasion, indentation, and dimensional stability.
Get everything in writing.
FAQ Common Homeowner Questions
You probably have practical questions like whether loose lay can go over your current floor, if it’s waterproof or just water-resistant, and how long it’ll last.
You’ll also want to know if it’s suitable for bathrooms or basements and whether the planks will shift after installation.
I’ll answer each so you can pick the right product and installation for your home.
Can loose lay vinyl be installed over existing flooring?
Curious whether you can lay loose lay vinyl over your current floor? Yes—you often can if the substrate is clean, level, dry, and securely attached.
Remove loose tiles, repair gaps, and fill low spots. Avoid highly cushioned or heavily textured surfaces.
Follow manufacturer guidelines for underlayment and acclimation. Proper preparation guarantees a stable, long-lasting installation without full demolition.
Is loose lay vinyl waterproof or only water-resistant?
Wondering whether loose lay vinyl stands up to spills, showers, and pet accidents?
It’s typically waterproof at the surface thanks to a durable wear layer and waterproof core, so standing water and routine spills won’t ruin it.
Seams and connections matter—properly installed, they resist moisture.
Still, avoid prolonged flooding and guarantee subfloor is dry to prevent mold beneath the planks.
How long does loose lay vinyl typically last?
Since loose lay vinyl handles everyday moisture well when installed over a dry subfloor, it’s reasonable to ask how long that performance will last.
Expect 10–20 years with typical residential use; quality, wear layer thickness, foot traffic, sunlight exposure, and maintenance determine longevity.
High-traffic areas may need replacement sooner, while proper cleaning and protective pads extend life toward the upper end.
Can I use loose lay in a bathroom or basement?
Can you use loose lay vinyl in a bathroom or basement? Yes — it’s water-resistant and works well for bathrooms and finished basements if subfloors are dry, smooth, and level.
In basements, address moisture with a vapor barrier and proper sealing.
For bathrooms, verify seams are tight and trim around fixtures.
Follow manufacturer guidelines for recommended environments and adhesives if required.
Will loose lay flooring shift or move after installation?
How likely is loose lay flooring to shift after installation?
You’ll rarely notice movement if the subfloor’s flat, clean and dry, and planks are sized correctly. Heavy furniture and proper edge restraints keep sheets stable.
High-traffic, pets or improper installation can cause slight shifting; use adhesive in problem areas or connector strips to lock pieces and prevent gaps or lifting.
Conclusion Final Recommendation and Next Steps
You’ve seen the main pros—easy installation, good durability, and quick replacement—and the cons like movement in very large rooms and limited edge sealing.
To decide, weigh your budget, room size, and how much traffic and moisture you expect.
If you’re ready, start by measuring the space, ordering a few sample planks, and scheduling a weekend to test-fit and install.
Quick summary of pros and cons
1 clear takeaway: loose lay vinyl gives you durable, water-resistant flooring that’s quick to install and easy to replace, but it can be pricier up front, may shift on uneven subfloors, and sometimes lacks the highest-end aesthetics.
Pros: fast installation, waterproof, low maintenance, good for rentals.
Cons: costlier initial price, needs flat substrate, limited luxury look, possible movement under heavy traffic.
How to decide and what to do next (sample action plan)
When you’re choosing loose lay vinyl, start by matching its strengths to your priorities—durability and quick installation for high-traffic or rental spaces, or a truer luxury look if aesthetics top your list.
Then weigh budget and subfloor condition before committing.
Inspect subfloor, request samples, test in room light, get quotes, plan installation timeline, and schedule maintenance checks to guarantee lasting performance.