How to Clean Hard Floors: The Best Methods for Every Surface Type
You’ll clean hard floors correctly by matching tools, cleaners, and moisture to each material: sweep or vacuum first, then use a barely damp microfiber and a pH‑neutral cleaner for hardwood and laminate, warm water and mild soap for tile, diluted cleaner for vinyl, and pH‑balanced products for natural stone—avoid excess water, acids, and abrasive scrubbers. Follow manufacturer guidance, test products on a small patch, and adopt regular maintenance; keep going to learn specific steps for every floor type.
Best Methods at a Glance
You’ll get a one-sentence cleaning tip for each hard floor type so you can act fast and confidently.
Follow the quick summaries to choose the right cleaner and tool for tile, hardwood, laminate, vinyl, and stone.
Use the short guidance as your go-to checklist before you start.
One-sentence summary for each hard floor type
Pick the floor type you have, and use the single-sentence cheat sheet below to get the correct cleaning method at a glance—each line tells you the best routine and one key thing to avoid.
- Hardwood: Sweep, mop with damp microfiber and pH-neutral cleaner; avoid soaking or harsh detergents.
- Laminate: Dry mop, light damp wipe with gentle cleaner; avoid excess water.
- Tile: Mop with warm water and mild soap; avoid abrasive scrubbers.
- Vinyl: Use diluted cleaner and soft mop; avoid steam cleaners.
Basic Understanding What Are Hard Floors and Why Proper Cleaning Matters
Hard floors include materials like wood, laminate, tile, vinyl, stone, and concrete, and each one needs a slightly different approach.
Your cleaning choices affect how long the floor lasts, how it looks, and the quality of the air in your home.
Keep basic principles in mind—match cleaners to pH needs, control moisture and abrasion, and protect any finish.
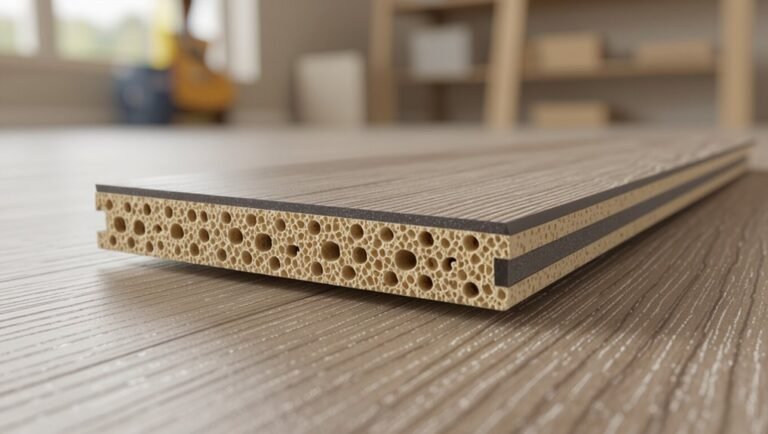
Definition and common hard floor materials (wood, laminate, tile, vinyl, stone, concrete)
Because they form the backbone of most homes and businesses, hard floors deserve a clear definition and proper care: they’re rigid, non-carpeted surfaces made from materials like wood, laminate, tile, vinyl, stone, and concrete, each with different durability, finish, and vulnerability to water or abrasion.
You’ll treat each differently: wood needs gentle cleaning, laminate resists moisture, tile tolerates scrubbing, vinyl is resilient, stone may require sealers, and concrete varies by finish.
How cleaning affects longevity, appearance, and indoor air quality
Longevity depends on how you clean and maintain your floors: regular, proper care prevents premature wear, preserves finish, and keeps surfaces looking their best.
By removing grit, spills, and residues you reduce scratches, staining, and sealing failures. Clean floors reflect light better and boost curb appeal.
They also lower dust, allergens, and VOC buildup, improving indoor air quality for your household.
Key cleaning principles (pH, moisture control, abrasion, finish protection)
When you clean hard floors correctly, four principles—pH balance, moisture control, abrasion management, and finish protection—determine whether your efforts preserve or damage the surface.
Use cleaners matched to the floor’s pH tolerance, avoid excess water on sensitive materials, limit grit and scrubbing that scratch, and choose products that maintain or restore protective finishes.
Follow manufacturer guidance for best results.
How to Prepare Before Cleaning
Before you start, gather the right tools and supplies so you won’t stop mid-job.
Make sure the area’s well-ventilated, follow manufacturer guidelines, and test cleaning products on a small patch to avoid damage.
Check the floor’s finish and scan for scratches, stains, or worn areas so you can choose the proper cleaner and method.
Tools and supplies checklist
Start with a simple checklist so you’ve got everything on hand: broom or vacuum, microfiber mop, bucket, pH-appropriate cleaner, soft scrub brush, and a few microfiber cloths.
Gather protective gloves, extra mop pads, and a dustpan. Keep cleaners labeled and separated.
- Gloves
- Extra mop pads
- Dustpan
- Labeled cleaners
Safety precautions (ventilation, test patches, manufacturer guidelines)
Now that you’ve gathered your tools and labeled cleaners, take a moment to prepare the space for safe cleaning. Open windows or run fans for ventilation, wear gloves and eye protection, and follow product instructions.
Always do a discreet test patch in an inconspicuous area, wait for results, and check your floor’s manufacturer guidelines to avoid voiding warranties or causing damage.
How to identify floor finish and damage before cleaning

While you’re preparing to clean, take a moment to identify your floor’s finish and any damage so you choose the right methods and avoid harm.
Check labels or test a hidden corner: water beads on sealed surfaces, soaks into unfinished wood.
Look for scratches, peeling finish, stains, or soft spots.
Note damage type and severity, then pick cleaners and tools that match the finish.
Step-by-Step Cleaning Methods by Floor Type
Now we’ll walk through specific, step-by-step cleaning methods for each floor type so you can use the right products and techniques.
You’ll get clear instructions for hardwood (solid and engineered), laminate, tile (ceramic and porcelain), vinyl/LVP, and natural stone like marble, granite, and slate.
Follow the guidance for your floor to avoid damage and keep it looking its best.
Hardwood Floors (solid and engineered)
For hardwood floors, you’ll want a simple routine of daily sweeping or dry dusting and a weekly touch-up to keep grit from scratching the finish.
When wet cleaning, use a manufacturer-safe cleaner and a barely damp mop, and treat sticky spots or scuffs with a gentle cleaner and a soft cloth.
Watch for cupping, dark stains, or finish loss as signs of water damage that may require refinishing or professional repair.
Daily/weekly routine (sweeping, dry dusting)
1-2 times a week you should sweep or dry-dust your hardwood floors to remove grit and dust that can scratch the finish; doing this regularly keeps the surface looking good and prolongs the floor’s life.
Use a microfiber dust mop or soft-bristle broom, work with the grain, and empty debris promptly.
Focus on high-traffic areas and entryways to prevent buildup.
Wet cleaning method and recommended cleaners
Although you should only wet-clean hardwood sparingly, doing it correctly removes stubborn grime without damaging the finish; damp-mop with a well-wrung microfiber mop using a pH-neutral hardwood cleaner diluted per label.
Work small sections, follow grain, rinse mop frequently, and dry immediately with a clean cloth.
Avoid abrasive pads, oil soaps, and excessive water to preserve finish and prevent warping.
Removing sticky spots and scuffs
Once you’ve removed general grime with a damp microfiber mop, tackle sticky spots and scuffs promptly to prevent residue buildup and finish wear.
Gently rub spots with a soft cloth dampened in diluted dish soap or a hardwood-approved cleaner. For scuffs, use a tennis ball or a soft pencil eraser.
Wipe dry and buff with a clean microfiber cloth to restore shine.
Dealing with water damage and refinishing indicators
If water has sat on your hardwood, act quickly to assess and limit damage: blot moisture, raise airflow, and lift affected boards if swollen.
Check for cupping, buckling, or dark stains signaling deep penetration.
Small surface issues? Light sanding and recoating may work.
Extensive warping or persistent stains mean you’ll likely need professional drying and full refinishing or board replacement.
Laminate Floors
For laminate floors, you’ll start with dry cleaning—sweeping or vacuuming—to remove grit before any damp mopping.
Use a barely damp microfiber mop and a gentle cleaner to avoid excess moisture that can cause swelling or warping.
For stubborn stains or adhesive residue, spot-treat with a recommended remover and a soft cloth, never abrasive tools.
Dry cleaning and safe mopping techniques
Although laminate looks tough, it needs gentle dry cleaning and careful mopping to avoid warping or dulling the finish; start by sweeping or vacuuming with a soft brush to remove grit, then use a microfiber dry mop for dust.
For damp cleaning, wring the mop well, choose a pH-neutral cleaner, and work in small sections, drying immediately to maintain the surface.
Avoiding swelling and warping moisture limits
After dry cleaning and careful damp mopping, you’ll want to strictly limit moisture exposure to prevent laminate from swelling or warping.
Wring your mop thoroughly, use microfiber flat mops, and work in small sections so floors dry fast.
Avoid standing water, steam cleaners, or wet vacuums.
Wipe spills up immediately and guarantee good room ventilation to speed drying and protect the boards.
Removing stains and adhesive residue
When a stubborn stain or sticky residue won’t come up with routine mopping, act quickly and use the gentlest effective method for laminate so you don’t damage the wear layer.
Blot fresh spills, then try a damp microfiber with mild dish soap.
For adhesive, gently rub with mineral spirits on a soft cloth, test first in an inconspicuous spot, then rinse and dry immediately.
Tile Floors (ceramic and porcelain)
For ceramic and porcelain tile, you’ll keep surfaces looking great with regular sweeping and a damp mop using a neutral cleaner.
When grout’s stained or grimy, you’ll use targeted cleaners, a stiff brush or steam cleaner to deep-clean and rinse thoroughly.
Finish by sealing grout (and unglazed tile if recommended) after it’s fully dry to protect against stains and make future cleaning easier.
Regular sweeping and mopping method
Start by removing loose dirt and grit with a broom or vacuum to prevent scratching the glaze on ceramic and porcelain tiles.
Dust-mop or sweep daily, then damp-mop weekly with warm water and a pH-neutral cleaner. Wring the mop well to avoid puddles, follow grout lines, and change mop water when dirty.
Dry with a microfiber cloth to prevent streaks and residue.
Deep-clean grout: solutions and tools
Because grout is porous and traps dirt, oils, and mildew, deep-cleaning it requires the right solutions and tools to restore color and prevent damage.
You’ll need targeted cleaners, agitation, and rinsing. Follow these steps:
- Mix pH-neutral cleaner or baking soda paste for stains.
- Scrub with a stiff nylon brush.
- Rinse thoroughly and blot dry.
- Repeat stubborn-spot treatment as needed.
Sealing tile and grout when and how
When grout and unglazed tile are sealed soon after cleaning, they resist stains and moisture so you spend less time on spot treatments and deep scrubs; here’s how to tell when sealing’s needed and how to do it right.
Test with water—if it beads, sealing isn’t urgent. If it darkens, clean thoroughly, dry, apply a penetrating sealer per label, and recoat as recommended.
Vinyl and Luxury Vinyl Plank (LVP)
For vinyl and LVP you’ll keep things simple with routine sweeping and a mild, pH-neutral cleaner to protect the finish.
If stains or scuffs show up, you can usually lift them with gentle scrubbing, a magic eraser, or targeted cleaners while avoiding harsh abrasives.
Pay special attention to seams and edges—dry them thoroughly, repair gaps with recommended fillers, and consider restorative treatments for worn areas.
Routine care and gentle cleaners
Although vinyl and LVP are durable, they still need gentle, routine care to stay looking their best.
Sweep or vacuum daily to remove grit, then mop weekly with a microfiber mop and a pH-neutral cleaner diluted per label.
Rinse with clean water to avoid residue. Dry thoroughly to prevent water spots.
Use felt pads on furniture to reduce wear.
Stain removal and scuff prevention
Beyond routine wiping and gentle mopping, you’ll also want a clear plan for removing stains and preventing scuffs on vinyl and LVP so small marks don’t become big problems.
For stains, blot spills, use a mild detergent or diluted vinegar, then rinse.
For scuffs, try a soft cloth with baking soda paste or a vinyl-safe eraser.
Use felt pads on furniture and avoid dragging heavy items.
Handling seams and restorative treatments
When you’re working with vinyl or LVP, seams need regular attention to prevent dirt build-up, moisture intrusion, and edge lifting—issues that can shorten the floor’s life.
Clean seams with a soft brush and mild cleaner, dry thoroughly, then inspect for gaps.
Use appropriate seam sealer or flexible caulk for repairs.
For worn finish, apply a compatible restorative polish per manufacturer instructions.
Natural Stone (marble, granite, slate)
For natural stone like marble, granite, or slate, you’ll want to use pH-neutral cleaners and steer clear of acids that can etch the surface.
We’ll cover polishing, sealing, and targeted stain extraction to keep your stone looking its best.
I’ll also explain how to repair chips and etches or when to call a pro.
pH-neutral cleaners and avoid acids
Because natural stone reacts to strong chemicals, you should stick with pH-neutral cleaners and steer clear of acids and harsh alkalis to protect marble, granite, and slate.
Mix cleaner per label, test in an inconspicuous spot, mop with a soft microfiber, and rinse thoroughly with clean water.
Dry with a soft towel to prevent streaks and water spots.
Polishing, sealing, and stain extraction
Restore and protect your natural stone by polishing, sealing, and tackling stains with targeted steps that respect the stone’s porosity and finish. Use gentle stone polish, apply a penetrating sealer per manufacturer directions, and spot-treat stains with poultices. Buff lightly to finish.
| Task | Product | Tip |
|---|---|---|
| Polish | Stone polish | Test first |
| Seal | Penetrating sealer | Follow cure time |
| Stain extract | Poultice | Match stain type |
Repairing chips and etches
When chips or etches mar your natural stone, you can often repair them yourself with the right materials and a steady hand; start by evaluating the depth and finish so you choose an appropriate filler and polishing method.
Clean the area, sand or grind lightly for a smooth edge, apply color-matched epoxy or resin, cure, then polish to blend.
Finish with sealant.
Concrete Floors (sealed and polished)
For sealed and polished concrete, start by sweeping and using a neutral pH cleaner to avoid dulling the finish.
Tackle oil stains with a degreaser or poultice and treat efflorescence with a mild acid rinse, following product instructions.
Finish by re-sealing high-traffic zones and spot-sealing worn areas to protect the floor.
Sweeping and neutral pH cleaning
Before you wet-clean sealed or polished concrete, sweep thoroughly to remove grit that can scratch the finish; then use a neutral pH cleaner to lift dirt without dulling the seal.
Vacuum or microfiber dust mop first, focusing edges and corners.
Dilute product per label, apply with a flat mop, rinse with clean water, and dry with a microfiber pad to prevent streaks and residue.
Removing oil stains and efflorescence
After sweeping and neutral-pH mopping, tackle stubborn marks like oil and efflorescence with targeted treatments that won’t harm your sealed or polished concrete.
For oil, blot fresh spills, apply degreaser or poultice, scrub with a soft-bristle brush, then rinse and dry.
For efflorescence, use a diluted masonry cleaner or vinegar solution, scrub gently, rinse thoroughly, and allow full drying before evaluating results.
Re-sealing and protecting high-traffic areas
When traffic wears down the finish on sealed or polished concrete, it’s time to re-seal and protect the area to restore slip resistance and prolong the floor’s life.
Clean thoroughly, remove old sealers with a stripper or light grind, rinse and dry.
Apply a compatible concrete sealer or penetrating product in thin coats, let cure, and add mats or runners to reduce future wear.
Deep Cleaning and Specialty Treatments
You should save deep cleaning for heavy soil, worn finish, or seasonal maintenance rather than routine touch-ups.
Learn which floors tolerate steam, which need low-moisture methods, and the correct machine-scrubber or buffer settings and pads to avoid damage.
If the job’s large, the finish’s compromised, or you’re unsure about equipment or chemicals, call a professional.
When to deep-clean vs. routine cleaning
Although regular sweeping and mopping keep dirt at bay, deeper cleaning is needed when buildup, stains, or wear signs appear that routine methods can’t remove.
You should deep-clean when grout darkens, finish looks dull, sticky residue returns after mopping, or odors persist.
Schedule deep cleans quarterly for high-traffic areas, biannually elsewhere, and spot-treat spills immediately to prevent permanent damage.
Steam cleaning: which floors are safe and best practices
If your floors can handle moisture and heat, steam cleaning is a fast, chemical-free way to lift grime and sanitize deep seams and grout; check manufacturers’ guidance first and avoid using steam on unsealed hardwood, laminate with click‑lock seams, certain vinyls, and some natural stone that can etch or delaminate.
Use low‑moisture settings, move steadily, mop up excess, test a hidden spot, and ventilate.
Machine scrubbing and buffer use settings and pads

After steam cleaning, machine scrubbing and buffers handle heavier buildup and restore finish on durable floors. They use rotating pads or brushes and adjustable speeds to scrub, strip, or burnish depending on your goal.
Choose pad type (soft for polishing, medium for cleaning, abrasive for stripping), match speed to floor resilience, test a small area, use appropriate cleaner, and wear PPE to avoid damage and guarantee safety.
Professional services: when to call a pro
When stains, wear, or buildup go beyond what your mop, steamer, or scrubber can safely remove, call a professional for deep cleaning or specialty treatments.
They’ll diagnose the problem, recommend the right method—like hot-water extraction, chemical stripping, or restorative recoating—and deliver results without risking damage to the floor or finish.
You should hire pros for persistent stains, odor, structural issues, or historic finishes needing specialized care.
Comparison Table Best Cleaner Types by Floor Material
Here’s a quick, side-by-side guide to the best cleaners for each hard-floor material so you can pick the right product at a glance. Choose pH-neutral for sealed wood, mild detergent for tile, and stone-specific cleaners for natural stone to protect finishes and grout.
| Floor Type | Best Cleaner | Why |
|---|---|---|
| Sealed wood | pH-neutral | Protects finish |
| Tile | Mild detergent | Cuts grease |
| Natural stone | Stone cleaner | Preserves pore structure |
Common Cleaning Mistakes and How to Avoid Them
Don’t douse your floors—excess water can warp wood and seep into seams.
Avoid acidic or abrasive cleaners that strip finishes, and don’t over-wax or buff incorrectly or you’ll damage the finish.
Always follow the manufacturer’s care instructions to protect the floor and preserve your warranty.
Too much water and moisture-related damage
Although water seems harmless, using too much of it — or letting moisture sit — can warp wood, lift tiles, stain grout, and promote mold growth.
You should wring mops thoroughly, use damp—not soaking—techniques, and dry floors quickly with microfiber cloths or fans.
Check under appliances, seal grout, and address spills immediately to prevent long-term structural and cosmetic damage.
Using acidic or abrasive cleaners on sensitive floors
Because some cleaners eat away finishes and dull surfaces, you should never use acidic or abrasive products on sensitive floors like hardwood, natural stone, or laminate.
Instead, choose pH-neutral cleaners or manufacturer-recommended solutions. Test cleaners in an unseen spot first.
Use soft microfiber mops and nonabrasive pads. Rinse residues promptly and avoid DIY acidic mixtures like vinegar or harsh scrubs that etch, stain, or strip finishes.
Over-waxing, incorrect buffing, and finish damage
When you keep adding wax or buffing the same spot too hard, you can build up cloudy, uneven layers or burn through the finish and expose bare wood or substrate.
Stop over-waxing by applying thin, even coats and letting each cure. Use proper pads and light pressure when buffing.
Test techniques in an inconspicuous area to avoid irreversible finish damage.
Ignoring manufacturer instructions and warranty voiding
If you skip the manufacturer’s cleaning and care instructions, you could unknowingly void your floor’s warranty and cause damage that won’t be covered.
Read guidelines before using cleaners, pads, or machines. Follow recommended products, dilution ratios, and maintenance schedules.
Keep receipts and document cleaning to support claims. When in doubt, contact the manufacturer—it’s cheaper than repairing or replacing improperly treated flooring.
Prevention and Best Practices for Long-Term Floor Care
To keep your floors looking great, set a simple daily and weekly cleaning routine and stick to it.
Use entryway mats and a no-shoes rule to cut tracked-in dirt, and protect legs with felt pads under furniture.
Seasonally check humidity levels and adjust care—sweep more in dry months and mop with a slightly damp cloth when humidity’s high.
Daily and weekly maintenance schedule
A simple daily and weekly routine will keep your hard floors looking their best and prevent small issues from becoming costly repairs.
You should sweep daily, spot-mop spills, and inspect for damage.
Weekly, damp-mop with a suitable cleaner and check grout or sealant.
Maintain consistency to extend finish life.
- Sweep/vacuum daily
- Spot-clean spills immediately
- Damp-mop weekly
- Inspect and address damage promptly
Entryway strategies to reduce dirt (mats, shoe rules)
When you stop dirt at the door, you cut down on scrubbing, scratching, and the need for repairs; simple entryway strategies like durable mats, a clear shoe policy, and a tidy drop zone make that easy.
Place coarse mats outside and absorbent ones inside, label a no-shoe zone or provide slippers, and keep a small broom or boot tray handy so you catch grit before it reaches floors.
Furniture protection and use of felt pads
Stopping grit at the door helps, but protecting floors from furniture keeps them looking good for years.
Use felt pads on chair and table legs, replacing them when worn. Choose pads sized to distribute weight; avoid sticky residue by cleaning legs first.
Lift heavy items instead of dragging and use protective coasters under plant pots.
Check pads regularly to prevent trapped grit scratching finishes.
Seasonal care and humidity control tips
Because humidity swings and seasonal changes directly affect most hard floors, you should monitor indoor moisture and adjust heating, cooling, or humidification to keep planks and tiles stable.
Use a hygrometer, set humidifier/dehumidifier to manufacturer-recommended ranges, and ventilate during damp spells.
Wipe spills promptly, inspect for gaps or cupping seasonally, and maintain consistent indoor temperatures to prevent warping and grout damage.
Troubleshooting Common Problems
You’ll run into scratches and dents sometimes, and you’ll want to know when a temporary fix will do versus when a permanent repair is needed.
For stains—food, ink, oil—you’ll learn targeted removal methods, while grout issues and persistent odors require different cleaning and sealing approaches.
If you spot warping, buckling, or cupping, you’ll need to check moisture sources and follow the right remedies to prevent further damage.
Scratches and dents temporary fixes and permanent repairs
Though minor scratches and dents are inevitable on high-traffic floors, you can often hide or fix them yourself without calling a pro.
For temporary fixes, use a matching wood marker, wax fill stick, or furniture pads to prevent new damage.
For permanent repairs, sand and refinish small wood areas, replace damaged planks, or consult a pro for deep gouges or subfloor issues.
Stains (food, ink, oil) targeted removal techniques
When a spill turns into a stubborn stain, tackling it with the right method and timing makes all the difference; act fast.
Blot food — don’t rub — then use mild detergent and warm water.
For ink, dab isopropyl alcohol on a cloth and blot outward.
For oil, sprinkle baking soda, let absorb, vacuum, then clean with degreasing dish soap and rinse.
Grout discoloration and persistent odors
If grout’s looking dingy or your floors keep smelling musty, don’t assume it’s permanent — most discoloration and odors come from surface grime, mold, or trapped organic matter and can be fixed with targeted cleaning and sealing.
Scrub grout with a stiff brush and a baking soda-vinegar or oxygen bleach paste, rinse thoroughly, dry fully, then apply a grout sealer.
Repeat for stubborn mold.
Warping, buckling, and cupping causes and remedies
Because moisture, temperature changes, and improper installation stress flooring materials, you’ll often see warping, buckling, or cupping as the result.
Inspect moisture sources—leaks, spills, poor subfloor ventilation—and fix them. Stabilize humidity with dehumidifiers and acclimate new boards before installation.
Replace severely deformed planks, tighten loose fastenings, and consult a pro for structural issues. Prompt action prevents wider damage and costly repairs.
Frequently Asked Questions (FAQ)
You probably have a few common questions about cleaning hard floors, like whether vinegar is safe, how often to deep-clean, or if steam cleaners work on hardwood and laminate.
You’ll also want the best methods for removing pet stains and odors and for restoring shine to dull surfaces.
Read on for clear, practical answers to each of these points.
Can I use vinegar to clean hard floors?
Wondering whether vinegar’s safe for your floors? You can use diluted white vinegar (about 1/2 cup per gallon of water) on sealed tile and vinyl to cut grease and disinfect.
Avoid vinegar on natural stone, unsealed wood, or waxed floors—it’s acidic and can etch or dull finishes.
Test a small area first, rinse with clean water, and dry promptly to prevent damage.
How often should I deep-clean my floors?
How often you should deep-clean your floors depends on traffic, household members, and floor type—aim for a thorough deep clean every 3–12 months.
High-traffic areas, pets, kids, or allergy sufferers need deeper cleaning more often, perhaps quarterly.
Low-traffic rooms can stretch to annual maintenance.
Spot-treat spills promptly, vacuum regularly, and schedule deep cleaning when buildup or dullness appears.
Is steam cleaning safe for hardwood and laminate?
Although steam cleaners can sanitize and remove grime effectively, they’re not always safe for hardwood or laminate floors — excessive heat and moisture can warp, delaminate, or strip finishes.
If your flooring manufacturer explicitly permits low-heat steam, use a specialized attachment, minimal passes, and dry immediately.
Otherwise, choose damp mopping with approved cleaners to protect finish and joints and avoid long-term damage.
What’s the best way to remove pet stains and odors?
Dealing with pet stains and odors quickly will give you the best chance of removing them completely; start by blotting up as much liquid as possible.
Then treat the area with an enzymatic cleaner specifically designed for urine or feces to break down odor-causing proteins.
After cleaning, rinse with plain water, blot dry, and air-dry.
Repeat treatment for persistent odors and always test cleaners in an inconspicuous spot.
How do I restore shine to dull floors?
Want your floors to gleam again? Use gentle, surface-appropriate methods to restore shine without damage.
- Clean: sweep/vacuum, mop with manufacturer-approved cleaner.
- Buff: microfiber mop or machine on low speed for smooth surfaces.
- Recoat: apply a thin layer of compatible finish or floor polish.
- Protect: use rugs, felt pads, and avoid harsh chemicals to maintain gloss.