How to Fix Horizontal Gaps in Laminate Flooring Before They Get Worse
You can stop horizontal gaps in laminate flooring from worsening by identifying the cause, tightening loose planks, and controlling humidity. Start by inspecting gap width, nearby boards, and the subfloor for moisture or unevenness. Use a tapping block and pull bar to snug joints, fill small seams with color-matched filler, or replace warped boards. Maintain indoor humidity at 30–50% and fix any water leaks. Keep going to get step-by-step fixes, tool lists, and prevention tips.
How to Fix Horizontal Gaps in Laminate Flooring Before They Get Worse
You can often fix small horizontal gaps quickly with a few tools and some elbow grease, so don’t ignore them.
Decide whether the issue is a simple seasonal shrinkage you can handle yourself or a structural problem that needs a pro.
If the boards are warped, separating, or the subfloor’s at fault, call a professional before the gap gets worse.
Can You Fix Horizontal Gaps Quickly?
Wondering whether horizontal gaps in your laminate can be fixed quickly?
You can often address small gaps fast by cleaning the joints, applying a matching laminate filler or wood putty, and tapping boards back with a mallet and block.
For minor shifting, pulling boards toward each other with a pry bar and shim works.
Follow manufacturer guidelines to avoid damage.
When to DIY vs. When to Call a Pro
If the gaps are small, evenly spaced, and the planks still click together, you can usually tackle the repair yourself with basic tools and a bit of patience.
Decide based on scope, tools, and risk:
- Small gaps: DIY—use spacers, tapping block, humidity control.
- Widespread or warped planks: call a pro for refitting or replacement.
- Structural issues or moisture: always hire an expert.
Understanding Horizontal Gaps in Laminate Flooring
A horizontal gap is the space that opens along the length of your laminate plank seams, usually running parallel to the boards.
You’ll most often see them from seasonal expansion and contraction, poor installation, or uneven subfloor conditions.
They differ from vertical gaps and buckling because they stay level with the floor rather than lifting or separating at the board ends.
What Is a Horizontal Gap?
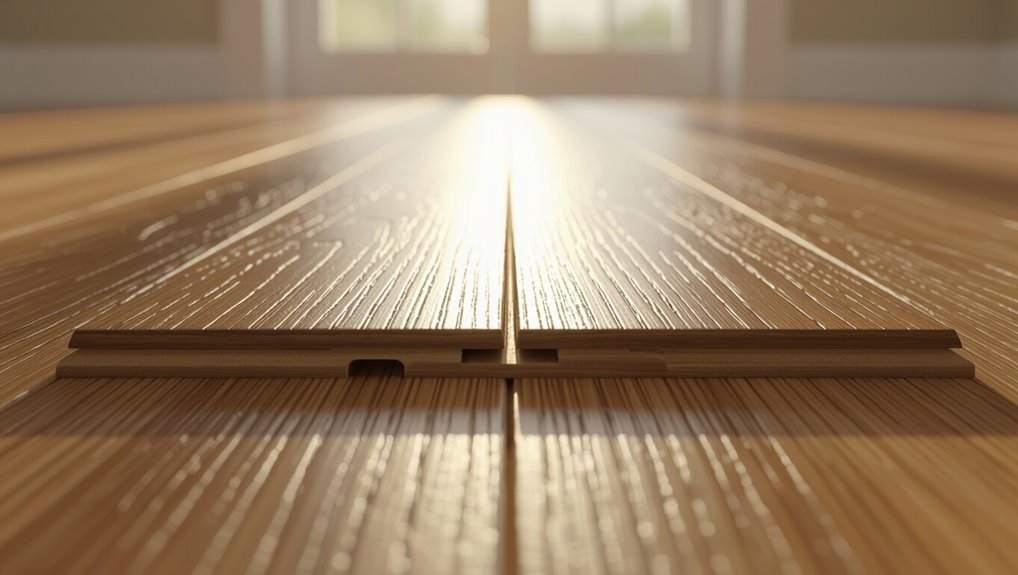
Think of a horizontal gap as the narrow space that opens between two laminate planks along their long edges, running parallel to the room’s length.
You’ll notice it as a visible seam where light, dust, or moisture can collect. It changes the floor’s appearance, can catch dirt, and may affect walking comfort.
You can spot and measure it easily.
Common Causes of Horizontal Gaps
When temperature or humidity shifts, your laminate planks can expand and contract, and those movements often pull seams apart so you see horizontal gaps.
Other common causes include improper installation (insufficient expansion gaps or misaligned seams), subfloor irregularities, heavy traffic that shifts boards, and water exposure that swells cores.
Inspect installation and moisture sources to pinpoint the root cause quickly.
How Horizontal Gaps Differ from Vertical Gaps and Buckling
Although both look like seams gone wrong, horizontal gaps behave differently from vertical gaps and buckling, and you’ll need a different approach to diagnose and fix them. Horizontal gaps usually mean shrinkage or poor locking; buckling signals moisture swelling. Inspect joints, underlayment, and room humidity to target the right repair.
| Issue | Clue |
|---|---|
| Horizontal gap | Visible seam along plank length |
| Vertical gap | Raised edge between planks |
| Buckling | Wave or lift across boards |
| Cause | Shrinkage vs swelling |
Assessing the Damage and Preparing to Repair
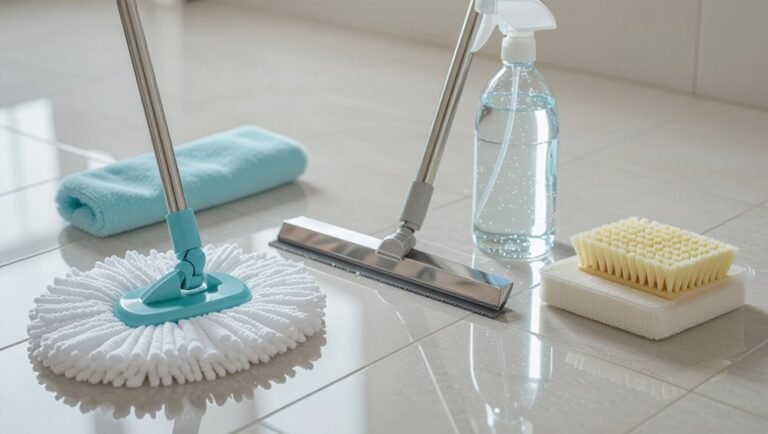
Before you start repairs, check safety gear and gather tools like tapping blocks, spacers, a pry bar, tape measure, and moisture meter.
Inspect each gap closely—measure width and length, note loose boards or misaligned seams, and look for swelling, buckling, or mold.
Finally, test subfloor flatness and moisture and consider room humidity to determine if the problem’s structural, environmental, or just an installation issue.
Safety Checklist and Tools Needed
Start by sizing up the gap and the surrounding boards so you know exactly what tools and precautions you’ll need for the job.
Gather safety gear, a pry bar, tapping block, and glue. Follow this checklist:
- PPE: gloves, safety glasses, knee pads.
- Tools: pry bar, mallet, spacer wedges.
- Supplies: wood glue, cleaning rags, replacement planks.
How to Inspect and Measure Gaps (what to look for)
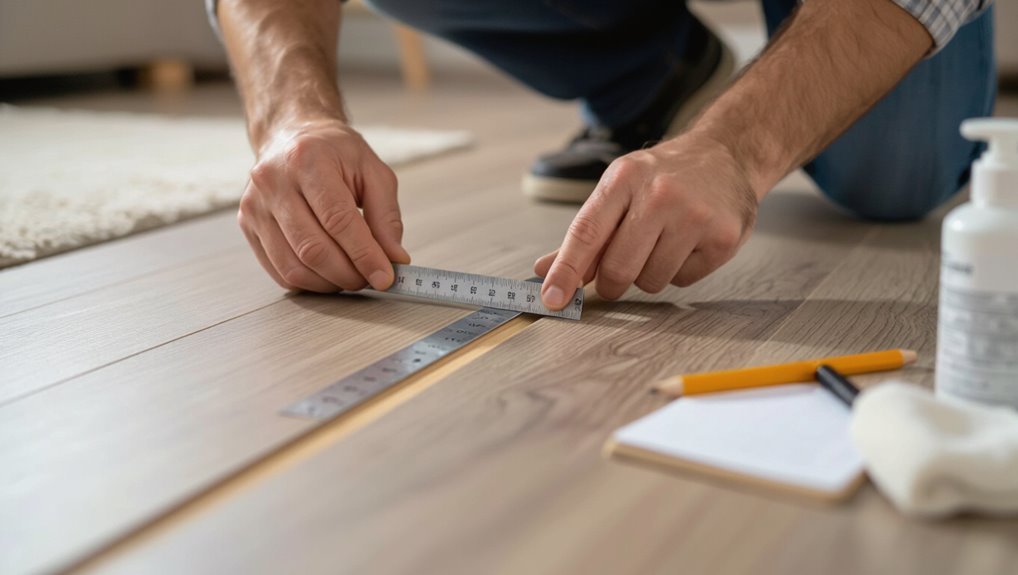
How wide and long are the gaps, and where are they located? You’ll measure width with a feeler gauge or ruler and note length and pattern—single seams, multiple boards, or perimeter gaps. Check for raised edges, loose clicks, or moisture stains. Record measurements and photos for each affected area, so you can plan repairs and prioritize worst spots first.
Determining If Subfloor or Environment Is the Root Cause
Wondering whether those gaps came from the subfloor, the room conditions, or the planks themselves?
Check for sagging, bouncy areas, or unevenness to implicate the subfloor. Measure humidity and seasonal expansion ranges; excessive moisture or dryness points to environment.
Inspect plank ends for cupping or wear. Document findings, prioritize fixes—subfloor repairs first, then moisture control, finally plank replacement.
Step-by-Step Repair Methods
Now you’ll walk through practical fixes for common gap problems.
You’ll learn how to tighten loose planks with a tapping block and pull bar, fill small gaps with wood or laminate filler, or replace individual boards when needed.
You’ll also see how adjusting humidity and properly acclimating flooring can prevent gaps from coming back.
Method 1 Tightening Loose Planks with Tapping Block and Pull Bar
Start by clearing furniture and debris so you can see the gap and work freely.
Use a tapping block and mallet to nudge the plank toward the adjoining board, tapping evenly along the seam, and a pull bar for stubborn edges.
Finally, inspect the locking mechanism and re-engage the seam so the boards lock tightly back together.
Step 1: Clear and Clean the Area
Before you tighten any planks, clear the area around the gap so you can work safely and see what’s causing the problem; sweep or vacuum loose dirt and remove furniture, rugs, and baseboards if they block access.
Check for debris lodged in joints, dry the surface, and inspect plank edges for damage.
Keep small tools nearby and wear gloves to protect your hands.
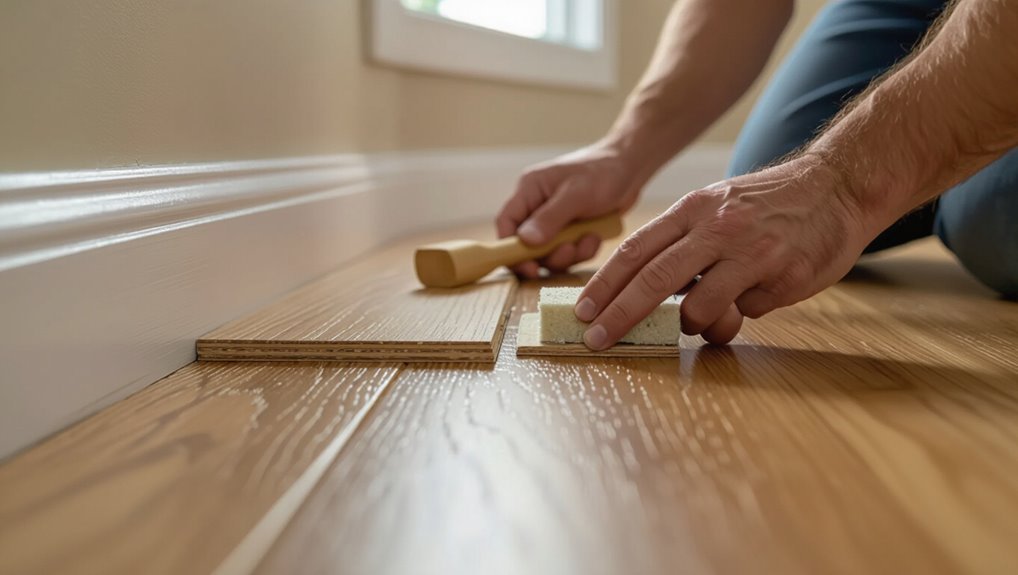
Step 2: Use a Tapping Block and Mallet Properly
Grab your tapping block and mallet and position the block against the tongue of the loose plank, then tap gently to shift the board into the locking profile without damaging the edge.
Work along the seam, tapping short controlled strikes. Keep the block flush to protect the groove.
If resistance stays, stop and reposition; don’t force the joint or hit the plank directly.
Step 3: Check Locking Mechanism and Re-engage Seams
Inspect the locking profile along the seam to make sure tongues and grooves are clean, undamaged, and aligned; any debris, splinters, or a slightly raised tongue will prevent a tight fit.
If parts are intact, angle the plank slightly upward, engage the tongue, then press down while tapping with a block.
Use a pull bar for end joints to fully re-engage seams.
Method 2 Using Wood-Filler or Laminate Gap Filler for Small Gaps
For small gaps you’ll want to pick a filler that matches your floor’s color and material—test a few shades on a scrap or inconspicuous spot.
Apply the filler smoothly into the gap, wipe excess quickly, and follow the manufacturer’s drying time.
Once dry, sand or rub gently and blend the repair so it’s unobtrusive.
Step 1: Choose Appropriate Filler (color-matching tips)
While matching filler to your laminate may seem tricky, picking the right color makes the repair nearly invisible.
Compare fillers in natural light, hold swatches against the plank grain, and test on scrap or an inconspicuous spot.
Choose water-based or stainable wood filler compatible with your finish. If needed, blend two shades for a closer match, then let the test cure before committing.
Step 2: Application Technique and Drying Time
1. You’ll load a narrow putty knife or syringe with filler, pressing it into the gap at a shallow angle so filler bonds to the sides.
Smooth excess flush with the surface, wiping immediately with a damp cloth.
Let the manufacturer-recommended drying time elapse—usually 1–24 hours—before light traffic.
Confirm rooms stay dry and temperature-stable for proper cure.
Step 3: Finishing and Blending
Now that the filler has set, you’ll move on to finishing and blending so the repair looks seamless.
Sand lightly with fine-grit paper, wipe dust, then use a matching stain or marker to tint the filler.
Feather edges into the plank finish, let stain dry, and apply a thin clear coat if needed.
Check color in different light and touch up sparingly for a natural result.
Method 3 Replacing Individual Planks for Persistent Gaps
If gaps keep reappearing, you’ll want to replace the affected planks.
First remove the trim and lift the damaged pieces, then fit new planks using the proper click-and-lock technique.
Finally, reinstall the trim and inspect all joints to make sure the gaps are gone.
Step 1: Remove Trim and Lift Affected Planks
Start by removing baseboards and quarter round carefully so you can access the plank ends; pry them off with a trim puller or pry bar wrapped in a cloth to avoid damaging the wall or molding.
Locate the affected planks, release or cut the tongue where needed, and lift panels gently.
Keep removed trim and clips organized for reinstallation later.
Step 2: Install Replacement Planks Correctly
1. You’ll fit replacement planks by matching grain and size, dry-fitting first.
Angle the new plank’s tongue into the groove, then press down or tap gently with a mallet and scrap block to lock seams.
Maintain proper expansion gap at walls using spacers.
Check alignment with adjacent boards and stagger end joints to preserve floor stability and appearance.
Step 3: Reinstall Trim and Inspect Joints
Once the replacement planks are locked in, you’ll reinstall baseboards and shoe molding to conceal the expansion gap and restore the room’s finished look.
Carefully nail trim without pinching the flooring. Inspect all plank joints for tight seams and level changes.
Tap any loose connections with a mallet and block. Clean debris, verify movement allowance, and confirm gaps are fixed before finishing.
Method 4 Adjusting Room Humidity and Acclimating Flooring
You can often fix gaps by controlling the room’s moisture and letting new planks acclimate before installation.
Start by using humidifiers or dehumidifiers safely—keep devices away from water sources and monitor humidity with a hygrometer.
Follow the recommended acclimation timeline (usually 48–72 hours or up to a week in extreme conditions) and lay boards only when they’ve reached stable room humidity.
Step 1: Use Humidifiers/Dehumidifiers Safely
If gaps have opened because the air’s too dry or too damp, control humidity with a humidifier or dehumidifier to bring the room into the 35–55% relative humidity range and let the flooring stabilize for several days.
Monitor with a hygrometer, adjust gradually (no rapid swings), position units away from walls, empty/clean reservoirs regularly, and follow manufacturer safety instructions to prevent mold or warping.
Step 2: Acclimation Timeline and Best Practices
Because proper acclimation prevents recurring gaps, let the boards sit in the room for at least 48–72 hours before installation or reattachment, and longer in extreme seasons.
During that time, keep temperature between 60–80°F and relative humidity 35–55%.
Stack boards flat, off the floor, with spacers for airflow.
Check moisture content with a meter; delay work if readings exceed manufacturer limits.
Troubleshooting and Advanced Fixes
If gaps reappear after a repair, you’ll need to diagnose whether the subfloor or the original installation is at fault.
Check expansion gaps and connections to guarantee they’re correct, and correct any pressure points that force boards apart.
For warping, buckling, or moisture damage you’ll have to address humidity sources and replace affected planks or underlayment as needed.
When Gaps Reappear Diagnose Subfloor or Installation Issues
When gaps keep coming back after you’ve already repaired them, it’s a signal to look beyond the surface and inspect the subfloor and installation for underlying problems.
Check for uneven or warped subfloor, moisture damage, loose underlayment, or improper plank alignment. Measure for level and secure loose boards.
If you find structural or moisture issues, address them before re-laying or repairing the laminate.
Fixing Expansion Gap Problems and Transitions
Though gaps at edges and shifts might seem minor, they can signal incorrect expansion spacing or problematic shifts that will worsen over time.
Check perimeter clearances, remove trim, and verify manufacturer gap specs. If tight at junctions, re-seat or replace threshold strips.
Add slotted expansion trim where needed. For floating floors, loosen fastened boards only at problematic runs to restore proper movement and close gaps.
Addressing Warping, Buckling, and Moisture Damage
Because moisture and stress can warp or buckle laminate quickly, you’ll want to diagnose the cause before attempting repairs.
Inspect subfloor, underlayment, and room humidity. Remove affected planks and dry area thoroughly.
Replace warped or swollen boards and repair or replace damaged underlayment.
Improve ventilation, fix leaks, and use a dehumidifier.
Reinstall with correct expansion gaps to prevent recurrence.
Common Mistakes to Avoid
Don’t force planks together the wrong way—doing so can damage the locking system and make gaps worse.
Don’t use the wrong fillers or sealants, since incompatible products can fail or stain the surface.
And don’t ignore moisture or subfloor issues, because they’ll keep causing gaps no matter how well you repair the top layer.
Mistake: Forcing Planks Together Wrongly
If you force planks together incorrectly, you’ll often damage the locking system or create uneven seams that show up as gaps later.
Don’t slam or pry pieces; use proper angle-and-click technique and a tapping block so joints seat evenly. If a plank resists, back it out, inspect for debris or damage, then realign.
Forcing can void warranties and cause recurring gaps.
Mistake: Using Incorrect Fillers or Sealants
One common error is reaching for whatever caulk or wood filler you have on hand and hoping it’ll do the job; using the wrong filler or sealant can make gaps worse, stain surrounding planks, or fail to flex with the flooring, causing new separations.
Choose a laminate-compatible, flexible product matched to color and movement. Test in an inconspicuous spot first and follow manufacturer instructions.
Mistake: Ignoring Underlying Moisture or Subfloor Problems
Fixing gaps with the right filler matters, but it won’t hold if moisture or a faulty subfloor is causing the movement.
Don’t ignore dampness, leaks, or swollen underlayment—these force boards apart. Inspect for plumbing issues, rising humidity, or uneven subflooring.
Fix moisture sources, dry and repair the subfloor, then reinstall or secure the laminate so gaps won’t recur.
Prevention and Best Practices
To prevent gaps from appearing, follow proper installation steps like correct panel alignment and adequate expansion gaps so horizontal separations never start.
Keep a simple maintenance routine—regular cleaning, monitoring humidity, and quick inspections—to catch issues before they grow.
Also adjust care seasonally and plan long-term checks to protect the floor’s fit and finish.
Installation Best Practices to Prevent Horizontal Gaps
When you lay laminate planks carefully from the start, you’ll prevent most horizontal gaps before they form; precise alignment, proper staggering, and consistent tapping keep boards locked together under everyday movement.
- Measure and acclimate planks so expansion gaps are correct.
- Stagger end joints at least 12 inches to disperse stress.
- Use a tapping block and pull bar to guarantee snug, even seams.
Maintenance Routines (cleaning, humidity control, inspections)
Because daily care and periodic checks keep small issues from growing, you should adopt simple maintenance routines for laminate floors: sweep or vacuum regularly, wipe spills immediately, and use a damp—not wet—mop with manufacturer-approved cleaner.
Monitor indoor humidity with a hygrometer, aiming for 35–55%. Inspect seams monthly for separation or swelling, and address minor gaps before they expand.
Seasonal Tips and Long-Term Care
Although seasonal changes can stress laminate floors, you can prevent most gaps and buckling with a few simple habits: monitor indoor humidity (30–50%), use a humidifier in winter and dehumidifier in summer, avoid rapid temperature swings, keep vents clear, and leave expansion gaps at installation.
Inspect seams seasonally, tighten loose connectors, and address small gaps promptly to avoid costly repairs.
Cost, Time, and Tools Comparison
You’ll want to compare typical cost ranges and time estimates for each repair method so you can pick one that fits your budget and schedule.
I’ll also separate essential tools from nice-to-have extras so you don’t overspend on gear.
That way you’ll know what’s required for quick fixes versus full repairs.
Typical Cost Range and Time Estimates for Each Repair Method
When deciding how to fix gaps in your laminate floor, cost and time are often the deciding factors, so this section compares typical price ranges, expected repair time, and the tools you’ll need for each common method.
| Method | Cost & Time |
|---|---|
| DIY filler | $5–$30, 15–45 min |
| Board replacement | $30–$150, 1–3 hrs |
| Re-clocking/joint repair | $10–$80, 30–90 min |
| Professional service | $150–$500+, 1–4 hrs |
Essential vs. Nice-to-Have Tools
Because the right tools can make the job faster and neater, it helps to separate what’s essential from what’s optional before you start: essential tools cover safety and basic repairs (tapping block, pull bar, spacers, utility knife, measuring tape, and a rubber mallet), while nice-to-have items speed work or improve finish (tapping kit, floor jack, oscillating multi-tool, pneumatic nailer, and matching filler pens).
- Essentials: low cost, quick to learn.
- Nice-to-have: higher cost, saves time.
- Choose based on budget, project size, and skill.
FAQ
You probably have a few quick questions about gaps, like how big is safe to ignore and whether fillers will last on laminate.
You’ll also want to know if humidity control can close gaps, when a full replacement makes sense, and how to match new planks to your old floor.
Read on for concise answers to each of these common concerns.
How large of a gap is safe to ignore?
How big a gap can you safely ignore?
You can usually overlook hairline splits under 1/8 inch (about 3 mm) if boards stay flat and seasons are stable.
Anything larger risks moisture, dirt buildup, and plank movement.
Monitor small gaps over months; if they widen, squeak, or let light through, address them promptly to avoid bigger repairs.
Will wood filler hold up long-term on laminate?
Will wood filler hold up long-term on laminate?
You can use wood filler for small, stable gaps, but it’s not ideal for moving joints. It bonds to the surface and looks neat, yet repeated expansion, foot traffic, and moisture can crack or detach it.
For lasting repairs, consider flexible gap fillers or replacing affected planks rather than relying solely on wood filler.
Can humidity control alone close existing gaps?
If you’ve tried wood filler and found it cracking or detaching, controlling humidity can help—but it won’t always close existing gaps on its own.
You should stabilize indoor moisture to prevent expansion and contraction cycles. Moderate changes may reduce small gaps over time, but larger separations usually need mechanical intervention—re-seating boards, tightening joints, or using trim and targeted repairs to restore a seamless floor.
Is it better to replace the whole floor if gaps are widespread?
When gaps are widespread, you’ll usually weigh repair time and cost against replacement longevity; replacing the whole floor often makes sense when gaps affect most boards, the underlayment is damaged, or the locking system has failed.
You should replace if repairs are frequent, visible seams disrupt function or appearance, or subfloor issues exist.
Otherwise, targeted plank replacement and reinstallation can save time and money.
How do I match replacement planks to old laminate?
Replacing many boards might push you to swap the whole floor, but if you’re fixing only a few planks, matching replacements to the existing laminate matters for a cohesive look.
Check manufacturer, style, and color codes; bring a sample to stores. Match plank size, bevel profile, and wear layer thickness.
Consider leftover stock, reclaimed pieces, or custom-ordering to guarantee a seamless repair.