How to Grind a Concrete Floor Smooth: Tools, Tips, and Safety Essentials
You can grind a concrete floor smooth by evaluating flatness, choosing the right grinder and diamond tooling, and working progressively from coarse to fine grits while controlling dust with a HEPA vacuum. Prep the slab, repair deep depressions, and use handheld tools for edges. Wear respirator, eye and hearing protection, and use GFCI power. Finish with densifier or sealer and regular maintenance. Keep going to learn step‑by‑step techniques, tool choices, and safety details.
Can You Grind a Concrete Floor Smooth?
Yes — you can grind a concrete floor smooth, and it’s often the fastest way to remove high spots, thin coatings, and minor imperfections.
You’ll want to choose grinding when the surface is structurally sound and you need a true flat, level finish; if the slab has deep cracks, major pitting, or severe slope issues, repairs or overlays may be better.
We’ll compare when grinding makes sense versus patching, self-leveling compounds, or a new pour.
Short practical verdict
You can grind a concrete floor smooth, but how close you get depends on the slab, tools, and time you’re willing to invest.
If you follow clear steps for how to grind concrete floor—assess flatness, pick the right grinder and diamonds, work progressively, and control dust—you’ll achieve a much smoother surface.
Expect effort, patience, and occasional repairs for best results.
When grinding is the right solution vs. alternatives
When deciding whether to grind your concrete floor, consider the slab’s condition, the finish you want, and how much time and money you’ll invest.
Grinding’s ideal for uneven, stained, or rough slabs when you want a smooth, polished, or prep-ready surface.
Choose alternatives—self-leveling compounds, overlays, or coatings—if damage is deep, budget’s tight, or you need faster, less dusty fixes.
Basic Understanding What Is Concrete Floor Grinding and Why Do It?
Grinding strips the top layer of concrete to reveal a flatter, cleaner surface and can remove old coatings or stains.
You’ll get improved flatness for better-looking floors and a properly prepared substrate for sealers or new coatings.
Keep in mind grinding won’t fix deep cracks, structural issues, or severe unevenness without additional repairs.
What grinding does to concrete surfaces
Think of grinding as shaving a concrete floor down to reveal a flatter, cleaner, and more durable surface. You remove high spots, laitance, and surface contaminants while exposing aggregate and creating micro-roughness that improves adhesion for treatments.
Grinding also evens porosity, reduces trip hazards, and uncovers hidden defects you can repair. You control depth and finish by selecting grit and machine speed.
Benefits: flatness, preparation for coatings, aesthetics, removal of coatings
Because a properly ground slab is both flatter and more consistent, you’ll get better results from coatings and finishes, smoother walking surfaces, and a more attractive final look.
Grinding also removes old sealers, adhesives, and paint, giving you a clean, porous surface for primers and overlays.
You’ll reduce tripping hazards, improve light reflection, and create a durable base for long-lasting floor systems.
Limitations and when grinding won’t solve the problem
While concrete grinding can fix many surface issues, it won’t correct major structural defects or hidden problems that go beyond the slab’s surface.
You shouldn’t expect grinding to fix deep cracks, settling, moisture intrusion, or contaminated concrete.
If the slab bows, has reinforcement failure, or active water leaks, consult a structural or waterproofing professional.
Use grinding for surface-level preparation only.
Overview of Tools and Materials Needed
Before you start, you’ll want to know which grinder suits the job—handhelds for edges, walk-behinds or floor grinders for large areas, and planetary units for heavier work.
Pick diamond tooling (cup wheels, segments, or pads) in the right grit range, and plan for dust control with a compatible vacuum system.
Also gather ancillary items like grinder accessories, markers, trowels, and repair compounds so you can fix flaws and finish cleanly.
Types of grinders: handheld, walk-behind, planetary, and floor grinders
Choosing the right grinder will make the job faster and give you a smoother finish, so you should know how handheld, walk-behind, planetary, and floor grinders differ. You’ll pick handhelds for edges, walk-behinds for medium areas, planetary for even pressure, and floor grinders for large surfaces.
| Grinder type | Best use |
|---|---|
| Handheld | Edges |
| Walk-behind | Medium areas |
| Planetary | Even finish |
| Floor | Large surfaces |
Diamond tooling: cup wheels, segments, pads, grit ranges
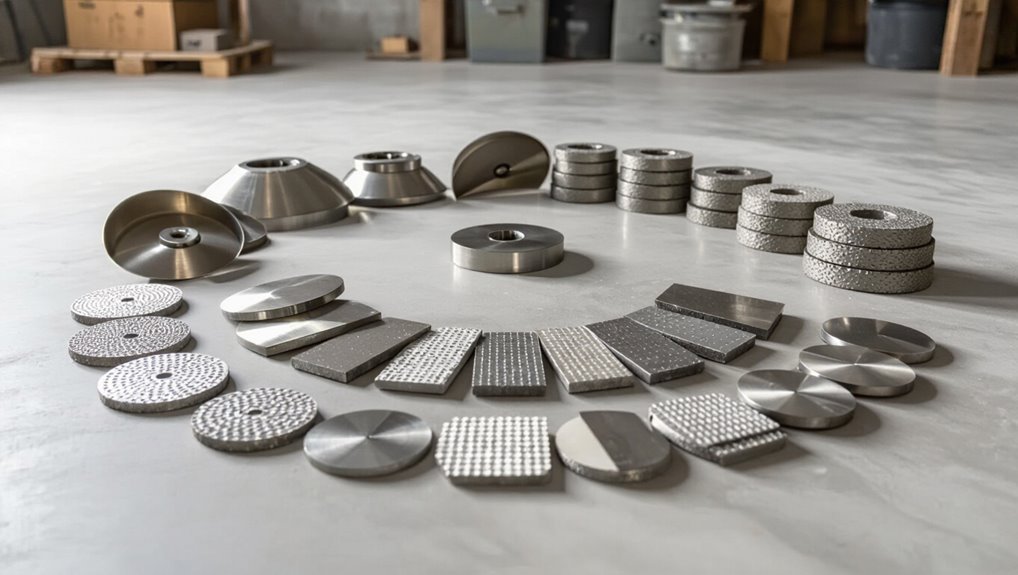
Diamond diamond tooling comes in a few clear forms—cup wheels, segmented wheels, diamond pads, and specialty segments—each designed for a specific stage of smoothing and material removal.
You’ll choose coarse cup or segmented wheels for fast stock removal, finer diamond pads for polishing, and specialty segments for coatings or hard aggregates.
Match bond and grit range to concrete hardness and job phase.
Dust control and vacuum systems
When you start grinding, controlling dust is as important as picking the right tooling, so you’ll need a reliable vacuum system, HEPA filters, and the correct hoses and adapters to keep the worksite safe and compliant.
Choose an industrial HEPA-rated vacuum with sufficient CFM and static lift, matched hose diameter, anti-static fittings, and sealed connections.
Empty and maintain filters per manufacturer instructions.
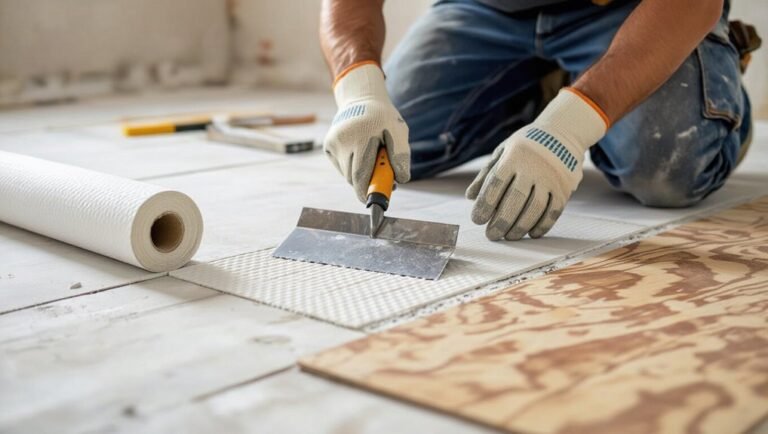
Ancillary tools and materials: grinders’ accessories, markers, trowels, repair compounds
You’ll need more than just a grinder and discs to get a concrete floor truly smooth: the right accessories, layout markers, finishing trowels, and repair compounds make the difference between a rough job and a professional finish.
You’ll also need precise measuring, patch materials, and safety gear to execute repairs and finish edges cleanly.
- Diamond segments and backing pads
- Chalk line and markers
- Steel and magnesium trowels
- Epoxy/cement repair compounds
- Hand grinders and edging tools
Safety Essentials Before You Start
Before you grind, make sure you’re wearing proper PPE—respirator, eye and hearing protection, gloves, and knee pads—to protect against dust, noise, and abrasion.
Prepare the site with ventilation, barriers, and signage, and use GFCI protection on all electrical equipment to prevent shocks.
Also check dust exposure limits and local regulations so you can control airborne silica and stay compliant.
PPE: respirators, eye protection, hearing protection, gloves, knee pads
Because grinding concrete kicks up a lot of dust, noise, and flying debris, you should gear up with a proper respirator, safety glasses, hearing protection, cut-resistant gloves, and knee pads before you touch the machine.
You’ll protect lungs, eyes, ears, hands, and knees so you can work longer and safer.
- NIOSH-rated respirator
- Impact safety glasses
- Over-ear muffs
- Cut-resistant gloves
- Padded knee pads
Site preparation and containment: ventilation, barriers, signage
When you set up the work area, control dust and airflow so particles don’t spread through the building; seal doorways with plastic sheeting, run negative-pressure ventilation or HEPA-filtered air scrubbers, and post clear signage and barriers to keep people out of the hazard zone.
Use taped seams, sticky floor runners, and temporary walls; mark ingress/egress, establish a decontamination path, and restrict access to trained personnel.
Electrical safety and GFCI use
Although concrete grinding is noisy and dusty, electrical hazards are the most immediate danger you need to eliminate before you start: inspect cords, plugs, and tools for damage, use only grounded or double-insulated equipment, and plug grinders into GFCI-protected outlets or portable GFCI breakers.
Test GFCIs before work, keep cords dry and off walkways, and stop immediately if a trip or fault occurs.
Dust exposure limits and regulatory considerations
Having the electrical risks under control lets you focus on airborne hazards: concrete dust can contain crystalline silica, which causes serious lung disease even at low exposures.
Know and follow OSHA and local exposure limits (PEL, REL), use HEPA vacuums, wet methods, and respiratory protection when limits might be exceeded.
Keep exposure records, train workers, and consult regulations for compliance and reporting.
Step-by-Step Guide How to Grind a Concrete Floor Smooth
Start by evaluating the floor for cracks, coatings, high and low spots, and moisture so you know what you’re up against.
Then plan your grinding sequence and grit progression, repair any cracks or loose material, and remove debris.
Begin with a rough pass using coarse grits with proper overlap, then follow with medium-grit passes to level and remove remaining defects.
Step 1 Assess the floor: cracks, coatings, high/low spots, moisture

Before you ever fire up the grinder, walk the slab and inspect it closely for cracks, coatings, uneven areas, and signs of moisture—these conditions dictate your prep, tools, and safety steps.
Note crack width/depth, bonded or loose coatings, visible high/low spots, and damp or efflorescence areas.
Document locations, take photos, and mark hazards so you can plan repairs, containment, and testing before grinding.
Step 2 Plan the grinding sequence and select grits
Map out your grinding passes and pick grits that move you steadily from aggressive removal to fine finishing:
begin with a coarse diamond (30–40 grit) for heavy leveling or coating removal,
follow with a medium grit (60–100) to smooth deep scratches and blend shifts,
then finish with progressively finer grits (200–400+) for a true smooth surface or polished sheen.
Determine direction, overlap, and edge work.
Step 3 Repair and prep: fill cracks/holes and remove loose material
Inspect the slab closely and clear away any loose debris so you can see and access every crack, spall, and hole that needs attention.
Remove dust with a vacuum, chip out weak edges, and widen hairline cracks so filler bonds.
Mix and apply a suitable concrete patch or epoxy, trowel smooth, and let cure fully before any grinding to guarantee a solid, even surface.
Step 4 Rough grinding pass (coarse grits) technique and overlap
Start the grinder and take a test pass with a coarse diamond cup wheel (typically 30–40 grit) to establish your primary plane and remove high spots, laitance, and surface coatings; work in straight, overlapping passes about 50% over previous cuts to avoid ridges.
Keep the machine moving at steady speed, check frequently for flatness, and adjust pressure or grit if the grinder hunts or stalls.
Step 5 Intermediate passes (medium grits) leveling and defect removal
Move through the medium-grit passes (typically 80–120 grit) to level the surface and eliminate the scratches and imperfections left by the coarse wheel.
Keep a consistent overlap and steady speed, checking progress frequently. Focus on low spots, small chips, and resin or paint residue.
Vacuum debris between passes, adjust pressure if needed, and avoid over-grinding edges or creating new ridges.
Step 6 Fine grinding and polishing passes (fine grits) achieving smoothness
Now you’ll switch to fine-grit tooling (typically 200–400 grit and up) to remove the faint scratches left by earlier passes and bring the slab to a true smoothness and sheen.
Work in overlapping, consistent passes, keep the grinder moving to avoid hotspots, and check progress frequently.
Finish with the highest grit suitable for your desired gloss and clean the surface thoroughly before sealing.
Step 7 Edge and corner work with handheld tools
Tackle edges and corners with handheld tools since walk-behind grinders can’t reach tight spots; you’ll use an angle grinder or edger fitted with fine-grit diamond pads to blend the perimeter into the rest of the floor.
Work slowly, keep the tool level, overlap passes to avoid ridges, and maintain consistent pressure.
Protect yourself with eye, ear, and respirator gear while checking progress frequently.
Step 8 Clean-up, dust removal, and inspection
After grinding, don protective gear and start removing dust and debris with a high-efficiency vacuum and broom, working from the perimeter toward the center so you don’t recontaminate cleaned areas.
Wipe surfaces with a damp microfiber cloth, run the vacuum again, and inspect for remaining scratches, pits, or residue.
Mark repairs, verify flatness, and document conditions before applying sealer or finishing.
Tips, Best Practices, and Efficiency Strategies
As you finish the basics, you’ll want clear rules for grit progression based on the floor’s starting profile and for choosing wet or dry methods.
Pay attention to grinder speed, feed rate, and overlap to avoid hotspots, swirl marks, and uneven finishes.
Finally, plan your cleanup and profile for coatings or sealers so the surface bonds correctly.
Choosing grit progression for different starting conditions
When your concrete starts rough or scarred, you’ll want a more aggressive grit sequence than for a relatively smooth slab.
So match progression to surface condition: begin with a coarse diamond that removes high spots and old coatings, move through medium grits to even out scratch patterns, and finish with fine grits for the desired sheen.
Adjust steps based on contamination, porosity, and desired finish level.
Optimal grinder speed, feed rate, and overlap for uniform results
Because grinder speed, feed rate, and overlap work together to determine cut depth, heat buildup, and scratch pattern, you’ll need to dial each in for a uniform finish:
Run grinders at manufacturer-recommended RPM for your diamond size, move at a steady pace to avoid gouging, and overlap passes 30–50% to blend edges.
Adjust slower for harder concrete and faster for softer mixes.
Managing hotspots, swirl marks, and inconsistent finish
After you’ve nailed speed, feed, and overlap, you’ll still run into heat spots, swirl marks, and patchy areas unless you manage cutter pressure, grit selection, and staging carefully.
Reduce pressure on hot areas, back off and pass lighter; step down grits gradually to blend scratches; overlap passes slightly more over trouble spots; keep discs sharp and change worn segments promptly to restore consistent finish.
When to use wet vs. dry grinding
If you’re deciding between wet and dry grinding, weigh dust control, cutting speed, surface condition, and cleanup requirements up front: choose wet for heavy dust suppression, smoother cuts, and harder aggregates but plan for slurry containment and longer drying.
Use dry for quick cleanup, faster removal on porous surfaces, and easier mobility with proper HEPA vacuums.
Match method to site constraints and safety.
Preparing for coatings or sealers after grinding
When you’ve finished grinding, plan the prep work so coatings or sealers bond well and go down smoothly: test for moisture and profile, remove dust and contaminants, and make any repairs or patching before you apply primer or sealer.
Then vacuum thoroughly, wipe with appropriate solvent or cleaner, verify surface profile with test patches, and confirm temperature and humidity meet manufacturer specs before rolling or spraying.
Common Problems and How to Fix Them
You’ll encounter issues like uneven floors or lippage, excessive dust and clogged tooling, burn marks or scratches, and even hidden contaminants or exposed rebar.
I’ll show how to diagnose each problem quickly and what corrective steps or preventive measures to take.
Follow these fixes to get a smooth, durable finish without costly rework.
Uneven floor and lippage diagnosis and corrective steps
Though it might look minor at first, unevenness and lippage can trip up installation and ruin the finished appearance of a smooth concrete floor.
So you’ll want to diagnose and correct them before sealing or polishing. Walk the slab with a straightedge and level, mark high and low spots, grind high areas and feather edges.
Use self-leveling compound for deep depressions, then recheck for uniform flatness.
Excessive dust or clogged tooling prevention and remedies
If excessive dust builds up or tooling clogs, your grinder will cut less effectively and the job will take longer.
So you need to control dust and keep diamonds clear from the start. Use a HEPA vacuum attachment, run slower feed rates, and switch to open-seg diamond pads when glazing occurs.
Pause periodically to clean tooling, replace worn segments, and inspect for embedded debris.
Burn marks, scratches, and surface discoloration causes and fixes
Several common causes produce burn marks, scratches, and discoloration on a concrete floor, and knowing how each happens lets you fix them quickly:
Use dull or overloaded diamonds, excessive pressure, or too-high RPMs to blame burns—reduce speed, change tooling, and use lighter passes.
For scratches, switch to finer grits and keep the machine moving.
For stains, clean, etch, and reseal the area.
Hidden contaminants or rebar exposure detection and response
After addressing surface burns, scratches, and stains, you’ll next need to watch for hidden contaminants and exposed rebar that can undermine a finished grind.
Scan with a metal detector, perform moisture and adhesive tests, and probe suspicious areas.
If rebar appears, stop grinding, mark and cover or cut back to proper depth, and repair with patching compound before resuming to prevent tool damage and failures.
Comparison DIY vs. Hiring a Professional
You can save money doing the grinding yourself, but factor in tool rental or purchase, consumables, and the extra time and learning curve.
Professionals bring faster results and higher-quality finishes with commercial equipment, which is worth it for large areas or structural issues.
We’ll look at when contractor-grade gear or a pro is the smarter choice versus a DIY approach.
Cost comparison: tools, consumables, time
Doing the job yourself can save money upfront, but you’ll need to weigh tool purchases, consumables, and the time you’ll spend against a pro’s hourly rate and included equipment.
Renting a grinder plus discs, pads, and dust control runs hundreds daily; buying specialized machines costs thousands. Factor in disposal, electricity, and unexpected replacements.
Pros bundle labor, expertise, and waste handling—compare total project estimates before deciding.
Skill, speed, and quality trade-offs
While tackling a concrete grind yourself can save money, it usually demands a steeper learning curve and more time than hiring a pro. You’ll trade speed and finish consistency for control and lower cost; expect more practice. Choose based on skill, schedule, and desired outcome.
| Option | Speed | Finish |
|---|---|---|
| DIY | Slower | Variable |
| Pro | Faster | Consistent |
When professional equipment or contractors are recommended
If your project involves large areas, deep levelling, stubborn coatings, or a polished finish, hire a professional or rent heavy-duty equipment—those situations need power, expertise, and dust control that typical consumer grinders can’t deliver.
You’ll save time, avoid mistakes, and meet safety regulations.
DIY suits small repairs or learning, but don’t underestimate cleanup, respirators, and warranty or liability implications.
Materials and Equipment Buying Guide
You’ll want to match the grinder size to your project—small handhelds for touch-ups, walk-behinds for whole rooms, and larger machines for commercial slabs.
Pick diamond tooling by grit and bond based on concrete hardness, and plan for a dust-extraction system or HEPA-rated vacuum that handles the expected debris.
Finally, weigh rental versus purchase by frequency of use, budget, and maintenance responsibilities.
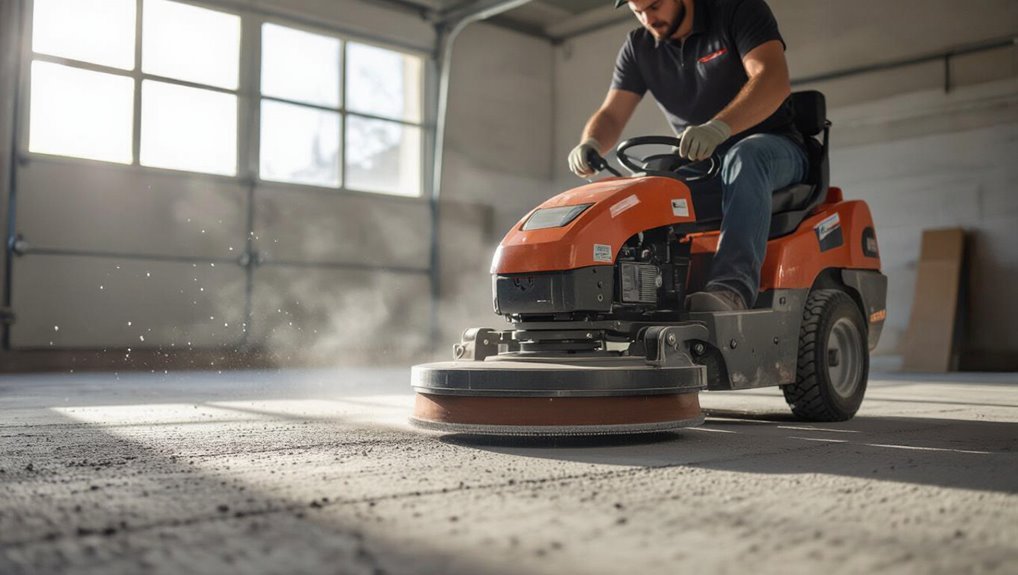
How to choose the right grinder for your project size
Because project size drives the work tempo and tool demands, choosing the right grinder means matching machine type, power, and tooling to the square footage and surface condition you’re tackling.
For small rooms, pick a single- or dual-head handheld; for garages or slabs, use a ride-on or large planetary unit.
Match motor size to hardness, consider dust collection capacity, and rent for one-off jobs.
Selecting diamond tooling by grit and bond for concrete type
When matching diamond tooling to your concrete, pick the grit and bond that suit the slab’s hardness and the finish you want.
Use coarse grits (16–30) and soft bonds for hard, dense concrete to cut aggressively; medium grits (30–60) for general smoothing; fine grits (80–200+) and hard bonds for soft or porously finished surfaces.
Match bond hardness inversely to concrete hardness.
Recommended dust extraction systems and vacuums
Choosing the right diamond tooling is only part of the job; controlling the dust you create matters just as much for finish quality and onsite safety.
You’ll want a high‑efficiency HEPA vacuum paired with a compatible planetary or ride‑on grinder. Look for rated airflow, cyclonic pre‑separation, tool mounting kits, and sealed bags.
Prioritize portability, filter access, and service support for reliable dust control.
Rental vs. purchase decision factors
If you only need a grinder for a single project or occasional touch-ups, rent to save upfront cash and avoid maintenance headaches.
But if you’re running regular jobs or need specific tooling and controls, buying can lower long-term costs and give you full control over setup and availability.
Choose based on frequency, budget, storage, maintenance willingness, and resale value.
- Frequency of use
- Short-term cost
- Long-term expense
- Storage and transport
- Maintenance skills
Maintenance and Aftercare of a Ground Concrete Floor
After grinding, you’ll choose between sealing, densifying, or polishing to protect the surface and achieve the look you want.
You should stick to a regular cleaning routine, use pH-neutral cleaners, and treat spills promptly to prevent stains.
Periodically inspect for wear or cracks and address repairs or resealing as needed to keep the floor long-lasting.
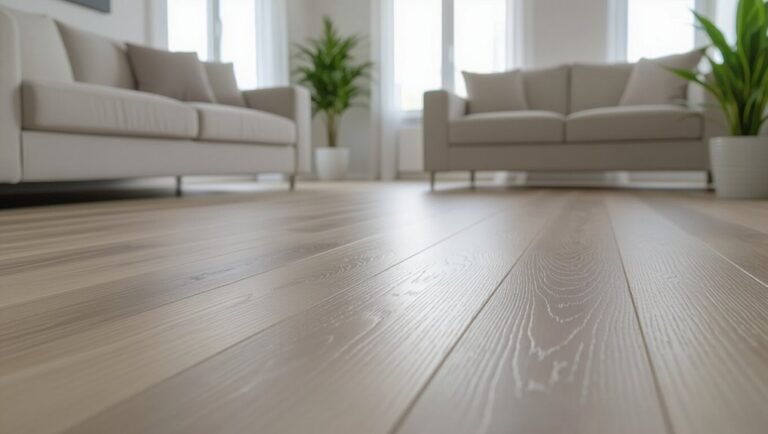
Sealing, densifying, and polishing options
When you’ve brought the concrete to the level of smoothness you want, the next step is deciding how to protect and finish it—whether that means sealing to block stains, densifying to harden the surface, or polishing to achieve a glossy look.
Choose penetrating sealers for breathability, lithium or sodium silicate densifiers for strength, and progressively finer grits plus diamond pads for a lasting polish.
Routine cleaning and stain prevention tips
A few simple habits will keep your ground concrete floor looking great and prevent stains from setting in: sweep or dust-mop daily to remove grit, wipe up spills immediately—especially oil, grease, and acidic substances—and place mats or pads under heavy equipment and entryways to trap dirt.
Use pH-neutral cleaners, damp-mop routinely, avoid harsh chemicals, and spot-treat stains promptly with appropriate cleaners.
Long-term inspection and repair recommendations
Since regular care only prevents some issues, you should schedule periodic inspections and address wear promptly to keep your ground concrete floor performing and looking its best.
Check for hairline cracks, spalling, or surface dulling every 6–12 months.
Repair chips with polymer-modified cement, reseal worn areas, and regrind localized high-traffic spots.
Keep records and act quickly to avoid costly restorations.
Estimated Time, Cost, and Project Planning
Plan your grind by estimating time per square foot based on area size and concrete condition so you can set a realistic schedule.
Budget for labor, equipment rental or purchase, and consumables like diamond pads and backup discs to get a clear cost picture.
Also, pick dates with favorable weather and allow buffer days for prep, curing, or unexpected delays.
Time estimates by area and condition
Expect grinding a small, flat 200–400 sq ft garage to take a single day, while larger or uneven surfaces can stretch the job across several days.
You’ll want to match your time estimates to both square footage and the floor’s condition.
Account for prep, multiple grit passes, repairs, and cleanup.
Highly pitted or contaminated floors add hours or extra sessions; plan buffer time.
Typical cost breakdown (labor, equipment, consumables)
A typical concrete floor grinding job breaks costs into three clear buckets: labor, equipment, and consumables, and you’ll want to estimate each separately so you can spot where savings or overruns will come from. Estimate labor by hours, equipment by rental or purchase, consumables by diamonds/discs. Use the table to compare unit rates quickly.
| Item | Unit | Typical range |
|---|---|---|
| Labor | hr | $30–$75 |
| Equipment | day | $80–$250 |
| Consumables | job | $20–$200 |
Scheduling tips and weather/season considerations
With labor, equipment, and consumables estimated, you’ll need to schedule the work around realistic time windows and seasonal conditions to avoid delays and added costs.
Plan grinding when temperatures and humidity allow proper dust control and concrete curing—usually spring or fall.
Block consecutive days for prep, grinding, and sealing.
Factor in backup days for weather, permit waits, and equipment rental returns to prevent overruns.
Mistakes to Avoid
Don’t over-grind or you’ll remove more concrete than necessary and weaken the slab.
Make sure you control dust and wear proper PPE, and don’t skip the right grit sequence or tooling.
Always fix subsurface defects before you grind so you’re not masking bigger problems.
Over-grinding and removing too much material
Beware of taking off too much concrete when you grind; it’s easy to get carried away and damage the slab’s integrity or change the floor’s level.
Check depth frequently, mark target areas, and use progressive grit steps.
Stop often to inspect for thin spots, reinforcement exposure, or slopes.
When in doubt, remove less—you can always grind more, but you can’t replace lost slab.
Skipping proper dust control and PPE
If you skip proper dust control and PPE, you’ll not only make a mess—you’ll risk serious health issues and costly cleanup.
You must contain dust with a vacuum-equipped grinder or barriers, wear an appropriate respirator, eye protection, hearing protection, and disposable coveralls.
Ignoring controls exposes you to silica, fines your project, and forces remediation.
Protect yourself and save time and money.
Using wrong grit sequence or tooling
When you jump steps or pick the wrong tooling, you’ll waste time and damage the slab’s finish; start with coarse diamonds for flatness, then move through medium to fine grits to refine and polish.
If you skip grits or use aggressive pads too long, you’ll create swirl marks, uneven removal, and excessive wear.
Follow a planned grit sequence and match tooling to machine speed for consistent results.
Failing to repair subsurface defects before grinding
Although the surface may look solid, skipping repairs to subsurface defects will let voids, delamination, and embedded debris show through after grinding, ruining the finish and wasting time.
You should scan, probe, and core suspect areas, patch voids, bond delaminated zones, and remove contaminants before grinding.
Otherwise you’ll rework the floor, waste abrasives, and compromise adhesion for coatings or sealers.
Frequently Asked Questions
You probably have a few specific questions before you start, like how smooth you can get the surface and whether wet or dry grinding is better for a home.
You’ll want to know how to handle cracks or height differences, which diamond grit to begin with, and if grinding will strip paint or epoxy.
Below are clear answers to help you choose the right methods and avoid common pitfalls.
How smooth can I make a concrete floor with grinding?
If you want a mirror-like finish, grinding can get a concrete floor very smooth, but exact results depend on the concrete mix, existing surface defects, and the equipment and abrasives you use.
You can achieve polished, low-porosity surfaces with progressive grits and patience. Deep pitting or heavy repairs limit smoothness; expect the best outcomes on dense, well-cured slabs and with proper prep.
Is wet grinding better than dry grinding for homes?
Wondering whether wet or dry grinding suits your home best?
Wet grinding cuts dust, cools diamonds, and gives a cleaner finish—ideal for indoor work if you can manage slurry disposal and electrical safety.
Dry grinding avoids slurry and is faster with proper vacuum dust control, but creates more airborne dust and may require more cleanup and respiratory protection.
Choose based on access, cleanup, and ventilation.
Can I grind concrete with cracks or large height variations?
Can you grind a cracked or uneven concrete floor and get a good result? Yes, but you’ll need to repair major cracks, fill voids, and level large height differences before final grinding.
Use epoxy or cementitious patch for cracks, self-leveling compound for dips, and feather edges at junctions.
Small hairline cracks can be ground carefully, but structural damage needs professional assessment.
How do I know which diamond grit to start with?
Which grit you start with depends on how rough the concrete is and what finish you want.
If the surface is heavily worn or uneven, begin with a coarse 30–40 grit to remove high spots. For moderately rough floors, use 60 grit.
Move progressively to 80, 100, then 200+ for a finer polish.
Test a small area first to confirm results.
Will grinding remove paint and epoxy coatings?
Will grinding remove paint or epoxy from your concrete? Yes — aggressive grinding can strip paint and thin epoxy, but thicker or well-bonded coatings may resist.
Start with coarse diamond abrasives, test a small area, and increase aggressiveness as needed. Expect multiple passes for full removal.
Use dust control and PPE; chemical strippers or shot blasting might be faster for stubborn coatings.