How to Clean Vinyl Flooring Planks the Right Way Every Time
You can keep vinyl plank floors looking like new by sweeping or vacuuming daily, blotting spills immediately, and mopping weekly with a pH-neutral cleaner or mild dish soap. Use a microfiber mop, rinse often, and dry thoroughly to avoid moisture damage. Treat scuffs with baking soda paste or a melamine sponge, and protect high-traffic areas with mats and felt pads. Follow manufacturer care and simple preventive steps—continue for step-by-step tips and stain fixes.
How to Clean Vinyl Flooring Planks the Right Way Every Time (Quick Answer)
For a fast, reliable routine you’ll sweep or vacuum daily and mop weekly with a pH-neutral vinyl cleaner or a mild dish soap solution for stubborn spots.
Use plain water for light maintenance or rinsing, and bring in a cleaning solution only when grime or spills won’t come up with water alone.
That approach keeps your planks looking great without damaging the wear layer.
Immediate short answer best overall routine and products
Start by sweeping or dry-mopping to remove grit, then damp-mop with a pH-neutral vinyl cleaner (or a 1:1,000 diluted household cleaner) and warm water, rinsing dirty water and drying with a microfiber cloth.
For routine care, you’ll sweep daily, damp-mop weekly with that cleaner, blot spills immediately, use felt pads, and choose nonabrasive tools to keep vinyl planks looking new.
When to use water-only vs. cleaning solutions
Although plain water can handle light dust and fresh spills, you’ll need a cleaning solution when grime, grease, or built-up residue won’t lift with mopping alone.
Use water-only for daily touch-ups and delicate finishes. Choose a pH-neutral vinyl cleaner for routine deeper cleanings or soap for greasy spots.
Test any new product in an inconspicuous area first to avoid damage.
Understanding Vinyl Flooring Planks
You’ll want to know whether your floor is luxury vinyl planks, glued sheet vinyl, or another construction, because each has different layers and finishes that affect cleaning.
Cleaning methods change with surface type and finish—some finishes resist scuffs and water better, while others need gentler cleaners.
Expect different reactions to common stains like water rings, oil, pet accidents, and scuffs, and tailor your approach accordingly.
What vinyl planks are (construction types: luxury vinyl plank vs. sheet vinyl)
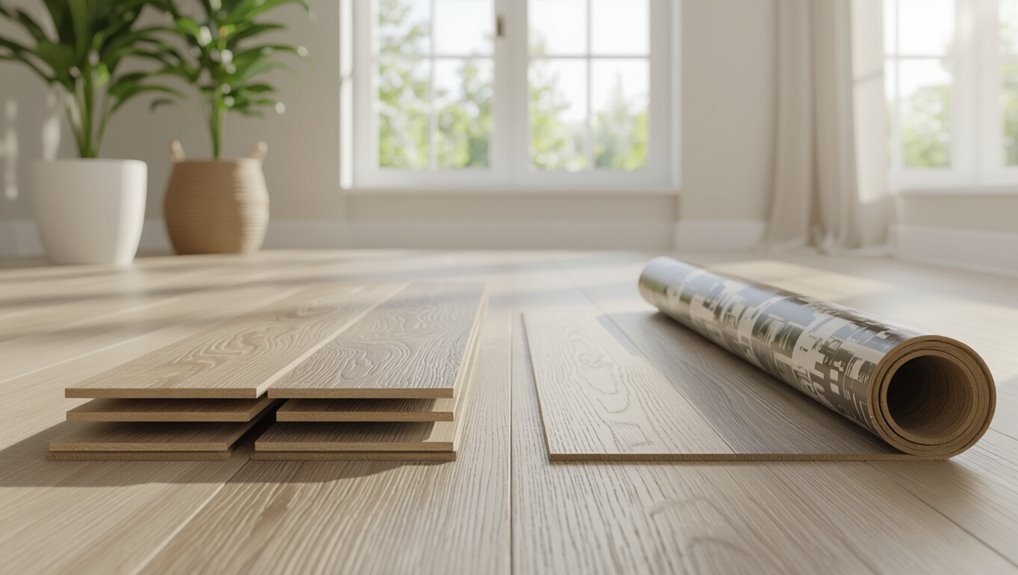
Vinyl flooring comes in two main forms—luxury vinyl plank (LVP) and sheet vinyl—and knowing the difference helps you pick the right product for your room.
LVP mimics wood with individual, rigid planks and layered construction (wear layer, printed design, core).
Sheet vinyl is flexible, continuous, and often thinner.
Each type has different installation methods, durability levels, and maintenance needs.
Why cleaning methods differ by surface type and finish
Because plank surfaces, finishes, and edges vary, the way you clean them needs to change too: you’ll choose gentler methods for textured or embossed planks to avoid wearing finish, while smooth, factory-coated surfaces tolerate mild detergents and soft mopping.
Sealed edges resist moisture, but unsealed seams need minimal water. Match cleaners to finish and follow manufacturer guidance to protect appearance and durability.
Common stains and how vinyl reacts (water, oil, pet stains, scuffs)
When liquids, oils, pets, or shoes leave marks on your planks, each stain behaves differently and calls for a specific response:
Water usually beads and wipes away; oil soaks in, needing degreaser; pet urine can discolor and odor if not blotted and neutralized; scuffs often come off with a gentle eraser or microfiber and mild cleaner.
Test cleaners in an inconspicuous spot first.
Tools and Supplies You Need
Before you start cleaning, gather a broom or vacuum and a microfiber mop so you can remove grit without scratching the surface.
Use pH-neutral cleaners or simple homemade solutions like diluted dish soap for regular cleaning.
Avoid steam cleaners, abrasive pads, and ammonia-based products that can damage vinyl.
Essential tools (broom, vacuum, microfiber mop)
Start with three reliable tools: a soft-bristle broom for sweeping up grit, a vacuum with a hard-floor setting to pick up finer dust and pet hair, and a microfiber mop for gentle, streak-free cleaning.
Use them regularly to prevent scratches and buildup.
- Sweep daily to remove abrasive debris.
- Vacuum corners and edges with soft-floor mode.
- Damp-mop with clean microfiber, rinsing often.
Recommended cleaning solutions (pH-neutral cleaners, homemade options)
Although you can buy many cleaners, stick to pH-neutral products or simple homemade mixes to protect vinyl’s finish and avoid discoloration.
You’ll want gentle options that cut grease without leaving residue. Mix small batches and test a corner first.
Common choices include:
- Diluted pH-neutral floor cleaner for routine mopping
- Warm water with a few drops of dish soap
- Vinegar diluted with water for occasional deep cleaning
Tools and chemicals to avoid (steam cleaners, abrasive pads, ammonia)
Now that you know which gentle cleaners work, pay equal attention to what not to use: certain tools and chemicals can damage vinyl’s wear layer, dull its finish, or cause staining.
Don’t use harsh methods or cleaners; they’ll shorten your floor’s life. Consider avoiding:
- Steam cleaners that lift seams and warp planks
- Abrasive pads that scratch the surface
- Ammonia or bleach that strips finish and discolors
Step-by-Step Cleaning Routine (Daily to Deep Clean)
Start with simple daily care: sweep or vacuum loose dirt and tackle spots as they appear so grime doesn’t set.
Once a week, mop with the proper dilution and technique, then set aside time monthly to clean edges, grout lines, and give the surface a deeper wash.
For stubborn stains like oil, ink, gum, or rust and for restoring dull or scuffed planks, follow targeted removal and restorative steps to protect your floor’s finish.
Step 1 Daily/regular maintenance: sweeping and spot cleaning
Sweep or vacuum your vinyl planks a few times a week to remove grit and dust that can scratch the surface, and tackle spills or sticky spots as they happen with a damp microfiber cloth or mop.
Dry the area afterward to prevent moisture damage. Use gentle, pH-neutral cleaners for stubborn spots, blot rather than scrub, and lift particles with a soft broom or vacuum attachment.
Step 2 Weekly cleaning: mopping technique and dilution ratios
While you’ve kept up with daily spot cleaning, weekly mopping removes the thin film of dirt and residue that builds up over time and restores your vinyl’s appearance.
Fill a bucket with warm water and mild pH-neutral cleaner—typically 1/4 cup per gallon.
Use a microfiber mop, wring until damp, mop with the grain, rinse mop frequently, and let floors air-dry.
Step 3 Monthly care: deeper cleaning and grout/edge attention
Because monthly care digs deeper than your weekly mop, you’ll focus on removing buildup in grout lines and along edges where dirt and grime hide.
Use a soft-bristled brush and a pH-neutral cleaner, scrubbing gently to avoid damaging vinyl. Vacuum edges first, rinse with clean water, and dry thoroughly.
Inspect seams and trim for wear, resealing or repairing minor gaps as needed.
Step 4 Deep stain removal: procedure for oil, ink, gum, and rust
When tough stains show up—oil, ink, gum, or rust—you’ll need targeted techniques and the right cleaners to lift them without harming the vinyl; start by identifying the stain type so you can follow the specific steps below.
For oil, blot, apply mild degreaser, rinse.
For ink, use rubbing alcohol.
For gum, freeze and scrape.
For rust, apply a commercial rust remover sparingly and rinse.
Step 5 Restorative cleaning for dull or scuffed planks
If your vinyl planks look dull or show scuffs, you can restore their appearance with a few targeted steps that avoid harsh chemicals or abrasives.
Start by sweeping, then mop with a pH-neutral cleaner diluted per label. Buff with a microfiber pad and allow to dry.
For persistent scuffs, gently rub with a vinyl-safe eraser or a soft cloth dampened with isopropyl alcohol.
Preventing Damage and Prolonging Life
To keep your vinyl looking its best, focus on high-traffic zones and entryways by using walk-off mats and regular spot cleaning.
Protect floors with rugs, felt pads under furniture, and furniture sliders to prevent scratches and gouges.
Also monitor indoor humidity and temperature—excess moisture or dryness can warp planks, so use a dehumidifier or humidifier as needed.
Best practices for traffic areas and entryways
High-traffic zones and entryways take the worst abuse on vinyl planks, so you should treat them proactively: sweep or vacuum daily to remove grit, mop with a pH-neutral cleaner weekly, and spot-clean spills immediately.
Dry thoroughly to prevent moisture damage. Rotate floor mats, avoid dragging heavy items, and inspect seams regularly for wear so you can address problems before they worsen.
Protective measures: rugs, pads, furniture sliders
1 simple step you can take to shield vinyl planks is to place the right rugs and pads where wear concentrates; they trap grit, cushion impact, and cut down on scuffs.
Use nonstaining rug pads, felt furniture sliders, and narrow runner rugs in hallways to prolong finish life and reduce cleaning.
- Nonstaining rug pads
- Felt furniture sliders under legs
- Narrow runner rugs for corridors
Climate and humidity considerations for vinyl
While rugs and pads guard against surface wear, managing the room’s climate will protect vinyl from warping, shrinking, and seam separation over time.
Keep indoor humidity between 30–50% and maintain steady temperatures. Use a dehumidifier or humidifier as needed, run HVAC to avoid wide swings, and dry spills quickly.
Stable conditions reduce expansion/contraction and prolong plank life.
Common Problems and How to Fix Them
You’ll likely run into a few common issues with vinyl planks—scuffs and scratches, discoloration or yellowing, and sometimes lifted or damaged boards.
You’ll learn simple methods to remove scuffs and minimize scratches, what can reverse or prevent yellowing, and when a lifted plank needs a temporary patch versus a permanent replacement.
Follow these fixes early to keep small problems from becoming costly repairs.
Removing stubborn scuffs and scratches
Don’t let scuffs and shallow scratches ruin your vinyl’s look—most can be minimized or removed with simple, gentle techniques.
For scuffs, rub a soft cloth with a bit of baking soda paste or a melamine sponge, testing first.
For light scratches, buff gently with a microfiber cloth and a small amount of nonabrasive polish.
Deep gouges need professional repair or replacement.
Dealing with discoloration and yellowing
If your vinyl starts to yellow or show uneven discoloration, act quickly to identify the cause so you can treat it effectively.
Check for sunlight exposure, rubber-backed mats, or chemical residue from cleaners.
Test a small area with a vinyl-safe cleaner and a baking soda paste.
Use UV blockers, swap rubber pads for felt, and avoid harsh chemicals to prevent recurrence.
Repairing lifted or damaged planks (temporary vs. permanent fixes)
Sunlight, rubber backing, or cleaners can also cause edges to lift or weaken seams.
So after you check those causes, move on to evaluating the damage.
You can try temporary fixes like weight and adhesive tape, but permanent repair often needs replacement or professional reglue.
Choose based on peel size, subfloor condition, and plank type.
- small corner peel taped down
- adhesive bead and clamp
- full plank replacement
Comparison: Commercial Cleaners vs. DIY Solutions
You’ll want to weigh how well commercial cleaners remove stains and protect vinyl versus the safety and gentler profiles of many DIY mixes.
Consider cost, convenience, and environmental impact—store brands can be pricier but save time, while homemade solutions are cheaper and greener if used correctly.
Think about what matters most to you: results, budget, or eco-friendly choices.
Effectiveness and safety comparison
While both commercial cleaners and DIY solutions can remove dirt and stains from vinyl planks, they differ in strength, ingredients, and risk: commercial products are formulated for consistent results and often tackle tough grime faster, but they can contain harsh chemicals that require ventilation and careful use, whereas DIY mixes (like mild soap and water or vinegar dilutions) are gentler, cheaper, and safer for frequent use but may need more elbow grease and occasional spot-treating for stubborn marks.
| Type | Notes |
|---|---|
| Commercial | Strong, fast |
| DIY | Gentle, safe |
| Safety | Ventilation vs. mild |
| Effectiveness | Tough stains vs. regular dirt |
| Usage | Spot-treat vs. routine care |
Cost, convenience, and environmental impact
Beyond performance and safety, you’ll also want to weigh cost, convenience, and environmental impact when choosing between commercial cleaners and DIY mixes.
Commercial products save time and often perform reliably but cost more and may contain harsher chemicals.
DIY solutions are cheaper, customizable, and typically greener, yet require effort and testing.
Pick the option that balances your budget, schedule, and eco priorities.
Maintenance Schedule Template
You’ll want a simple maintenance schedule that lists daily, weekly, monthly, and annual tasks so your vinyl planks stay in top shape.
Include a checklist for quick cleaning, deeper cleans, and seasonal care, and note signs—like persistent stains, warping, or seam separation—when you should call a pro.
That way you’ll spot problems early and know when repair or replacement is needed.
Daily, weekly, monthly, annual checklist
To keep vinyl planks looking great and lasting longer, follow a simple maintenance schedule that breaks tasks into daily, weekly, monthly, and annual checkpoints.
You’ll prevent dirt buildup, protect finish, and spot issues early.
Daily: sweep or vacuum.
Weekly: damp-mop with manufacturer-approved cleaner.
Monthly: inspect seams, deep-clean high-traffic areas.
Annual: reseal edges and check underlayment for moisture.
Signs it’s time for professional care or replacement
After following the daily-to-annual checklist, watch for warning signs that mean it’s time to call a pro or consider replacing your vinyl planks.
If you see persistent stains, lifting seams, bubbling, cracks, gouges, or widespread wear through the wear layer, don’t delay.
Water damage, mold under planks, or repeated repairs signal replacement.
A pro can assess subfloor issues and recommend repair or full replacement.
Frequently Asked Questions (FAQ)
Got questions about caring for your vinyl plank floors? You’ll find answers here on steam mops, deep-cleaning frequency, vinegar use, tackling water stains or mineral deposits, and whether waxing or polishing is safe.
Read on for clear, practical tips.
Can I use a steam mop on vinyl plank floors?
Curious whether you can use a steam mop on vinyl plank floors? You can, but cautiously.
High heat and moisture can warp or delaminate cheaper or older vinyl. Use a low-heat steam setting, avoid prolonged passes, and keep the mop moving.
Test a hidden area first and follow manufacturer guidelines—if they warn against steam, stick to damp mopping instead.
How often should I deep clean vinyl planks?
How often you should deep clean vinyl planks depends on foot traffic and household conditions.
Generally, aim for a deep clean every 3–6 months in normal homes. Clean high-traffic areas monthly.
If you have pets, kids, or heavy soil, deep clean every 4–8 weeks.
Always spot-clean spills promptly and maintain weekly light cleaning to extend time between deep cleans.
Will vinegar damage my vinyl floor?
If you’re scheduling those deep cleans, you might wonder whether common DIY solutions like vinegar are safe for vinyl floors.
You can use diluted white vinegar (about 1 cup per gallon of warm water) occasionally to cut grime without harming the wear layer.
Avoid undiluted vinegar and repeated use on unsealed or older vinyl to prevent dulling or edge lifting over time.
How do I remove water stains or mineral deposits?
Why are those cloudy rings showing up near sinks and windows? Mineral deposits from hard water leave dull, white film.
Mix equal parts water and white vinegar, dampen a microfiber cloth, and gently rub the stains. Rinse with clean water and dry thoroughly.
For stubborn buildup, apply a paste of baking soda and water, scrub lightly, then rinse and dry to prevent recurrence.
Can I wax or polish vinyl plank flooring?
Curious whether you should wax or polish vinyl plank flooring? You shouldn’t.
Most vinyl has a factory-applied wear layer and don’t need wax or polish; those products can cause buildup, yellowing, or slippery surfaces.
If the finish looks dull, use a manufacturer-approved restorative product or a specifically labeled vinyl floor polish.
Always test in an inconspicuous spot and follow instructions.
Quick Reference: Do’s and Don’ts for Vinyl Plank Cleaning
1 clear set of do’s and don’ts will save you time and protect your vinyl planks: follow gentle cleaning, quick spill cleanup, and nonabrasive tools, and avoid harsh chemicals, steam mops, and scrubbing pads that can damage the wear layer.
- Wipe spills immediately with a soft cloth.
- Sweep or vacuum debris daily to prevent scratches.
- Use pH-neutral cleaner and a microfiber mop; skip bleach.