How to Clean Sheet Vinyl Flooring Without Dulling the Finish
You can keep sheet vinyl looking fresh by using a microfiber mop, soft brush, and a neutral-pH cleaner or a gentle homemade mix (warm water, a teaspoon of dish soap, 1/4 cup white vinegar). Vacuum or sweep first, mop with minimal moisture, rinse with clean water, and dry with a soft towel to avoid residue or dulling. Skip steam mops, abrasive pads, and harsh chemicals. Keep doing this and you’ll find easy ways to extend the finish and address issues.
Quick Answer How to Clean Sheet Vinyl Flooring Without Dulling the Finish
You can quickly clean sheet vinyl without dulling the finish by using mild cleaners and a soft mop.
For the best quick method, mix a few drops of dish soap or a pH-neutral floor cleaner with warm water, mop gently, then rinse with clear water and dry with a soft towel.
Avoid abrasive scrubbers, strong ammonia or bleach, and wax-based products that can leave a haze.
One sentence summary
If you want to keep sheet vinyl looking fresh without dulling the finish, clean regularly with a pH-neutral cleaner or mild dish soap diluted in warm water.
Mop gently, and avoid abrasive tools, harsh chemicals, or waxes.
For a concise one-sentence summary, remember how to clean sheet vinyl flooring: use gentle cleaners, soft mops, immediate spill cleanup, and occasional rinsing to preserve sheen.
Best quick method (products and steps)
Start with a quick sweep or vacuum to remove grit. Then mop with a microfiber pad and a pH‑neutral cleaner (or a teaspoon of mild dish soap per gallon of warm water), wringing the mop until damp—not wet—to avoid soaking the seams.
Spot‑treat stubborn marks with a soft cloth and a little rubbing alcohol. Rinse with plain water, and dry with a clean microfiber towel to preserve the finish. Use gentle, nonabrasive products.
Basic Understanding What Sheet Vinyl Is and Why Finish Matters
Sheet vinyl is a continuous, flexible flooring made of layered vinyl and a protective wear layer, and you’ll want to know which type you have before cleaning.
Different finishes and wear-layer thicknesses resist wear and stains to varying degrees, so the right products and methods depend on that construction.
Using harsh chemicals, abrasive tools, or excessive scrubbing can chemically or physically strip or dull the finish, so choose gentle cleaners and soft tools.
What is sheet vinyl flooring?
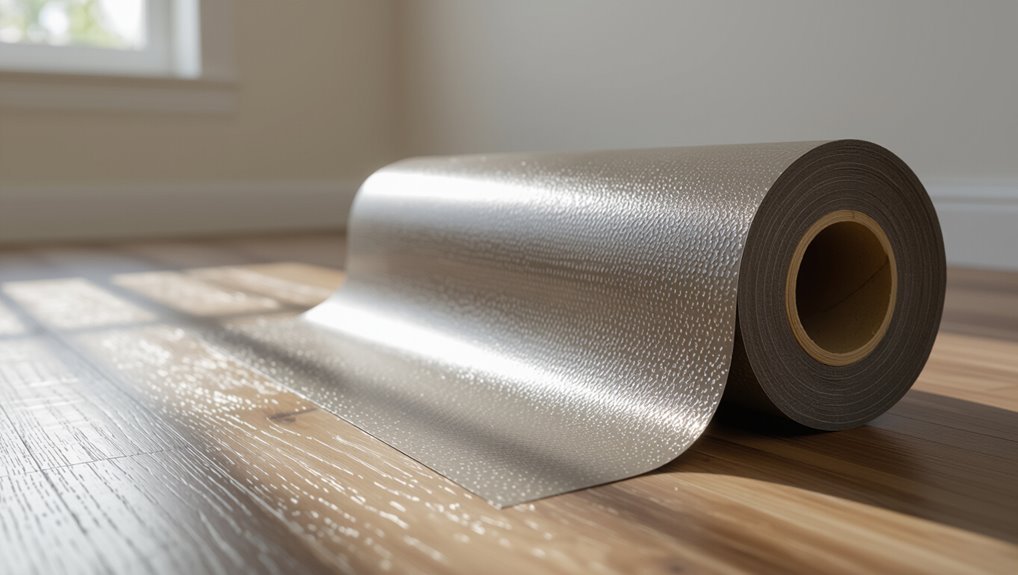
Vinyl flooring wraps a durable, flexible layer of synthetic material around a backing to create a single, continuous sheet that covers your floor without seams.
You get water resistance, easy upkeep, and a smooth surface that tolerates household traffic. It installs quickly, hides subfloor imperfections, and stays dimensionally stable.
Knowing this helps you choose cleaning methods that protect appearance and longevity.
Types of finishes and wear layers
Because the finish and wear layer determine how well your sheet vinyl resists scratches, stains, and everyday wear, it’s important to know the differences before you clean or buy.
You’ll find clear protective coatings, UV-cured urethane, and factory-applied wear layers of varying thickness. Thicker wear layers offer better durability; tougher finishes handle traffic and cleaners more safely, so match type to room use.
How improper cleaning dulls the finish (chemical and physical causes)
Knowing your finish helps you avoid mistakes that can wear it down, but cleaning choices themselves often cause more harm than everyday foot traffic.
You can strip protective coatings with harsh detergents, bleach, or ammonia, and abrasive scrubbing or rough pads create micro-scratches that scatter light.
Residue from waxes or cleaners builds haze, dulling sheen.
Use pH-neutral cleaners and soft tools.
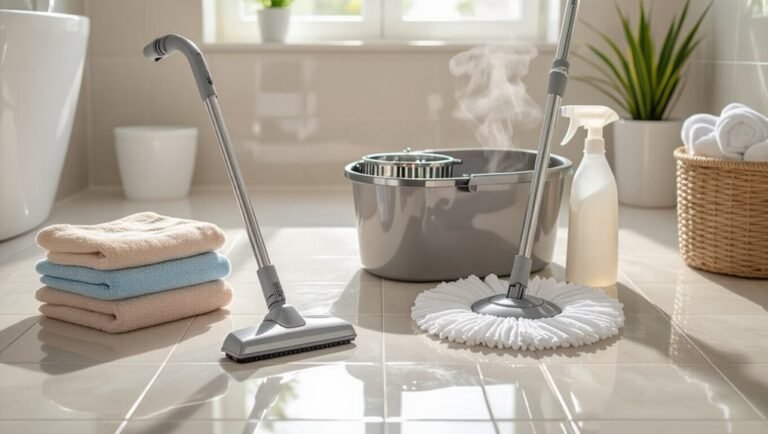
Tools and Products You Should and Shouldn’t Use
You’ll want the right tools—microfiber mops, soft brushes, and a vacuum on a hard-floor setting—to remove dirt without scratching the finish.
Use neutral-pH cleaners or diluted commercial vinyl solutions for regular cleaning and spot treatment.
Avoid harsh chemicals like ammonia or bleach, abrasive pads, steam mops, and waxes that can damage or dull sheet vinyl.
Recommended tools (mop types, soft brushes, microfiber, vacuum settings)
Start with a few reliable tools that protect your sheet vinyl while getting it truly clean: a microfiber mop for daily dusting, a soft-bristle broom or brush for loosening dirt in seams, a vacuum on a hard-floor setting (or with the beater bar off) for heavier debris, and a damp microfiber or sponge mop for occasional wet cleaning.
- Use soft heads to avoid scratching.
- Choose washable microfiber.
- Avoid stiff-bristle tools.
Safe cleaning products (neutral pH cleaners, diluted solutions, commercial vinyl cleaners)
Although gentle cleaners do most of the work, you still need to pick products that won’t dull, lift, or damage your sheet vinyl.
Use neutral pH cleaners, dilute concentrated solutions per label, and choose commercial vinyl cleaners designed for resilient flooring.
Test any product in an inconspicuous spot first.
Rinse residues with clean water and dry promptly to preserve the finish and prevent streaking.
Products and tools to avoid (ammonia, bleach, abrasive pads, steam mops, waxes)
Even with the right cleaners, some common products and tools can harm sheet vinyl, so steer clear of them. You’ll avoid dulling, discoloration, and surface damage by skipping harsh chemicals and abrasive implements.
- Ammonia, bleach, and strong solvents — they strip finishes.
- Steel wool, scouring pads — they scratch.
- Steam mops and paste waxes — they warp or leave residue.
Step-by-Step Cleaning Routine to Preserve Finish
Start by removing loose debris and dry dirt with a broom or vacuum so you won’t grind particles into the finish.
Treat stains and spills promptly with the right cleaners, then mop regularly using the proper dilution and technique.
For deep cleaning use safe formulations at appropriate intervals, and finish by drying or lightly buffing with a microfiber to preserve the finish without abrasion.
Step 1 Preparation: remove debris and dry dirt (vacuuming, sweeping)
1. You should start by removing loose grit and dry dirt to protect the finish. Vacuum with a soft-brush attachment or use a broom designed for hard floors; avoid stiff bristles that can scratch.
Focus on corners and under furniture. Empty the vacuum canister or sweep debris into a dustpan before mopping.
Regular brief cleaning prevents abrasive wear and keeps the surface smooth.
Step 2 Spot cleaning stains and spills (solutions and techniques)
Once you’ve removed loose grit, tackle stains and spills promptly to keep them from bonding to the finish.
Blot liquids with a soft cloth, don’t scrub.
For sticky residues, use a few drops of mild dish soap diluted in warm water on a microfiber cloth.
For ink or oil, try isopropyl alcohol sparingly, testing an inconspicuous spot first.
Rinse and dry.
Step 3 Mopping for regular maintenance (dilution ratios, mop technique)
Because regular mopping keeps dirt from abrading the finish, you’ll want to use the right dilution and technique: mix a pH-neutral cleaner per label (often 1:128 to 1:64), wring the mop until damp, and work in long overlapping strokes following the grain.
Rinse mop regularly, change solution when dirty, and dry floors with a microfiber pad to avoid streaks and water spots.
Step 4 Deep cleaning for ground in grime (safe formulations and frequency)
Lift embedded grime with a targeted deep-clean routine that’s gentle on your vinyl finish: use a manufacturer-approved, pH-neutral or mildly alkaline cleaner formulated for sheet vinyl (avoid abrasive powders, bleach, or straight ammonia), dilute per label, and tackle small sections with a soft-bristle brush or microfiber pad on a low-speed floor machine.
Limit deep cleans to only when regular mopping won’t remove soil—typically every 3–12 months depending on traffic—and always rinse thoroughly and dry to prevent residue and wear.
Step 5 Drying and buffing without abrading (air dry vs. microfiber buffing)
Finish drying and buffing carefully to preserve your sheet vinyl’s finish: let low-traffic air drying do most of the work, then use a clean microfiber pad on a low-speed buffer or a soft microfiber cloth to remove streaks and restore sheen without abrading the surface.
Work small areas, keep pads spotless, avoid pressure or high speeds, and allow full cure before heavy traffic to prevent scuffs.
Safe Homemade Solutions and Exact Recipes
For everyday care, you can make a gentle cleaner with warm water, a few drops of dish soap, and a cup of vinegar per gallon—I’ll give exact proportions next.
For sticky residue, I’ll show a stronger but safe mix (limited rubbing alcohol or baking soda paste and how much to use).
I’ll also note when a commercial cleaner is a better, safer choice so you don’t risk damaging the finish.
Gentle everyday cleaner recipe (ingredients and proportions)
A simple, gentle cleaner you can keep on hand uses just three common ingredients: warm water, mild dish soap, and a little white vinegar—mix 1 gallon (3.8 L) warm water with 1 teaspoon of dish soap and 1/4 cup (60 mL) white vinegar.
Dampen a microfiber mop or cloth, wring well, and mop. Rinse occasionally with plain water to avoid residue.
Deeper-clean recipe for sticky residue (safe additives and limits)
When sticky residue won’t come up with your everyday mix, make a slightly stronger DIY solution that stays safe for sheet vinyl by limiting harsher additives: combine 1 gallon (3.8 L) warm water with 1 tablespoon mild dish soap, 1/4 cup (60 mL) white vinegar, and up to 2 tablespoons isopropyl rubbing alcohol (70%);
test a small, inconspicuous area first and never exceed these amounts to avoid drying or dulling the finish.
Gently mop, blot stubborn spots with a microfiber cloth, rinse with plain water, and dry thoroughly.
When to use store bought cleaners instead
Why reach for a store-bought cleaner instead of a homemade mix?
Use commercial formulas when stains resist gentle DIY solutions, when product labels specify vinyl-safe ingredients, or when you need disinfecting power (look for EPA-approved).
Pick pH-neutral, non-abrasive cleaners, test in an inconspicuous spot, follow dilution instructions, and avoid ammonia, bleach, or waxy polishes that dull or damage sheet vinyl.
Comparison: Cleaning Methods That Preserve vs. Damage Finish
You’ll want to compare common cleaning methods side-by-side so you can pick what preserves your sheet vinyl finish and what wears it down. Below is a quick reference that rates efficacy, risk to the finish, and how often to use each method. Use it to plan a routine that keeps your floor clean without causing damage.
| Method | Key indicators (efficacy / risk to finish / recommended frequency) |
|---|---|
| Vacuum | High efficacy / Low risk / Weekly |
| Dry mop | Moderate efficacy / Very low risk / Daily |
| Microfiber wet mop | High efficacy / Low risk / 1–2× weekly |
| Steam mop | High efficacy / High risk (can lift seams) / Rare, spot use only |
| Abrasive scrubbing | Low–moderate efficacy / Very high risk / Avoid unless necessary |
Method rows (vacuum, dry mop, microfiber wet mop, steam mop, abrasive scrubbing)
Compare cleaning methods side-by-side so you can pick approaches that preserve your sheet vinyl’s finish rather than wear it down.
Vacuum removes grit without abrasion; dry mop lifts dust; microfiber wet mop cleans gently with minimal water and pH-neutral solution.
Avoid steam mops—high heat can loosen vinyl.
Never use abrasive scrubbing or harsh pads; they’ll scratch and dull the surface quickly.
Indicators: efficacy, risk to finish, recommended frequency
Think of three clear indicators—cleaning efficacy, risk to the finish, and how often to act—to judge each method.
You’ll rate efficacy by soil removal and residue left. Assess risk by abrasiveness, heat, chemicals, and scrubbing force.
Set frequency: daily sweeping, weekly damp mopping, occasional deep clean, and rarely use risky methods.
Choose options that maximize cleaning while minimizing finish wear.
Common Mistakes That Dull Vinyl and How to Avoid Them
Don’t over-soak or scrub sheet vinyl with abrasive pads, since excess water and rough scrubbing can lift the surface and dull the finish.
Avoid waxes, polishes, or oil soaps made for other floors and don’t let cleaners sit without rinsing, as residues will haze the surface.
Steer clear of harsh chemicals and high-heat tools that can permanently damage the vinyl’s protective layer.
Using too much water or abrasive scrubbing
One common mistake is using too much water or scrubbing so hard that you strip the wear layer—both can make sheet vinyl look dull and worn long before it needs replacing.
You should mop with a damp, not soaking, cloth and blot spills promptly.
Use a soft-bristle brush for stains, gentle cleaners, and avoid steel wool or abrasive pads that scratch and weaken the finish.
Applying waxes, polishes, or oil soaps meant for other floors
If you use waxes, polishes, or oil soaps made for wood or tile, they’ll leave a greasy residue or film that dulls sheet vinyl and attracts dirt.
Don’t apply those products. Use vinyl-specific cleaners or a mild pH-neutral detergent diluted per instructions.
Test any new product in an inconspicuous spot first, apply sparingly, and buff gently with a soft microfiber to restore shine without buildup.
Leaving cleaners to sit or not rinsing properly
After avoiding inappropriate waxes and polishes, pay attention to how you apply and remove cleaners: letting detergent sit or failing to rinse properly can leave a cloudy film, sticky residue, or streaks that attract dirt and dull the finish.
Always work in small sections, wipe up excess solution promptly, and follow with a clean, damp mop or microfiber cloth to remove residue and restore shine.
Using harsh chemicals or high-heat devices
While strong chemicals and high heat might seem like quick fixes, they can strip protective layers, warp seams, and fade colors on sheet vinyl.
Don’t use bleach, ammonia, oven cleaners, or steam cleaners. Stick to pH-neutral cleaners and cool water.
Test any product in an inconspicuous spot first, follow manufacturer guidance, and dry thoroughly to prevent damage and dulling.
Prevention and Long-Term Care Strategies
To keep your sheet vinyl looking its best, use doormats, furniture pads, and area rugs to prevent scratches and grit buildup.
Follow a simple maintenance schedule—daily sweeping, weekly damp mopping, and quarterly deeper cleans—to stop dirt from causing long-term wear.
If you spot persistent stains, lifting seams, or damage beyond routine care, call a flooring professional for repair or restoration.
Protective measures (doormats, furniture pads, area rugs)
Because small habits make a big difference, you should outfit entryways with doormats, use furniture pads under legs, and place area rugs in high-traffic zones to protect your sheet vinyl from scratches, dirt, and wear.
- Shake or vacuum doormats regularly to trap grit.
- Replace worn furniture pads to prevent gouges.
- Choose breathable, non-slip rug backings to avoid moisture buildup.
Recommended maintenance schedule (daily, weekly, quarterly)
A simple checklist helps you keep sheet vinyl looking its best:
Sweep or vacuum daily to remove grit.
Weekly, damp-mop with a manufacturer-approved cleaner and quick-dry microfiber.
Monthly, inspect seams and edges for lifting; address spills immediately.
Quarterly, deep-clean with a neutral cleaner and buff lightly if recommended, and check protective pads and mats for wear to prevent surface damage.
When to call a professional
If you spot persistent stains, bubbling seams, or areas that feel unusually soft underfoot, call a professional—those signs often mean moisture damage, adhesive failure, or wear that DIY fixes won’t fully resolve.
You should also hire a pro for large-scale discoloration, extensive seams lifting, or chronic odors.
They’ll assess subfloor issues, recommend repairs or replacement, and prevent recurring problems.
Troubleshooting Restore Shine Without Damaging the Floor
If your sheet vinyl looks only lightly dulled, you can follow gentle, safe steps to lift the shine without harming the wear layer.
For heavily dulled or chemically damaged finishes, you’ll need to assess whether stronger restoration, professional treatment, or simply replacing the affected planks is the best choice.
I’ll walk you through quick tests and clear options so you can decide when refinishing is possible and when replacement is necessary.
Lightly dulled finish: safe restoration steps
When your sheet vinyl looks a bit dull but isn’t scratched or worn through, you can usually restore its shine safely without stripping finishes or sanding; start by testing mild cleaning and gentle polish methods on an inconspicuous spot.
Use a pH-neutral cleaner, rinse thoroughly, then buff dry with a microfiber.
If needed, apply a manufacturer-approved vinyl polish sparingly and buff to blend.
Heavily dulled or chemically damaged finish: assessment and options
You tried gentle cleaning and a light polish but the floor still looks lifeless or shows streaks, haze, or soft spots from harsh cleaners or solvents—now you need a careful assessment before any further treatment.
Inspect for surface melting, color loss, or sticky residue.
Test a small area with manufacturer-recommended products.
If damage is localized, consider targeted cleaning or compatible restorative coatings; otherwise consult pros.
When refinishing or replacement is necessary
Although minor dulling or surface haze can often be corrected with proper cleaning and a compatible polish, some floors show irreversible damage or wear that requires refinishing or full replacement.
You should inspect deep scratches, lifted seams, or penetration into the vinyl’s pattern layer. If repairs won’t restore uniformity or adhesion, plan for professional refinishing or replace the sheet vinyl to protect appearance and performance.
FAQs Quick Answers to Common Questions
You’ll find quick answers here to common questions like using vinegar, steam cleaning, deep-clean frequency, buffing for shine, and removing scuff marks without harming the finish.
Follow the short, practical tips to protect your sheet vinyl while keeping it clean.
If you need step-by-step instructions for any point, ask and I’ll walk you through it.
Can I use vinegar to clean sheet vinyl?
Wondering if vinegar’s a safe and effective cleaner for sheet vinyl?
You can use a mild diluted vinegar solution (about 1/4 cup white vinegar to a gallon of warm water) for routine cleaning. It removes grime without dulling finish when rinsed well and not left to sit.
Avoid undiluted vinegar and abrasive scrubbing to prevent damage to the wear layer.
Is steam cleaning safe for sheet vinyl?
If vinegar works for regular wipe-downs, you might be tempted to bring out a steam mop for deeper cleaning—but be careful.
Steam can loosen adhesive, warp seams, or discolor some sheet vinyl. Test a hidden area first, use low-heat settings, and keep the mop moving.
Avoid excessive water exposure and consult your flooring manufacturer’s recommendations before steam cleaning.
How often should I deep clean sheet vinyl flooring?
How often should you deep clean sheet vinyl flooring? Aim for a thorough deep clean every 3–6 months, depending on traffic and soil.
High-traffic areas may need quarterly attention; low-use rooms can wait toward six months.
Also spot-clean spills promptly and maintain weekly light cleaning to reduce buildup, keeping the finish intact without overworking the surface.
Will buffing regain shine on a dull vinyl floor?
Sometimes buffing can bring back a dull vinyl floor’s shine, but it depends on the finish and condition of the surface.
You can use a low-speed buffer with a soft pad for mild dullness, testing a small area first.
Avoid aggressive polishing if the wear layer is thin; instead, consider a compatible restorative product or professional advice to prevent damage.
How to remove scuff marks without damaging the finish?
You can often treat scuff marks quickly without harming the finish by using gentle, non-abrasive methods and testing first on an inconspicuous spot.
Use a soft cloth with warm water and mild dish soap, a melamine sponge gently rubbed, or a small amount of white toothpaste. Rinse and dry.
Avoid abrasive pads, harsh chemicals, or heavy scrubbing that can dull the vinyl.