How to Apply Vinyl Flooring: A Beginner-Friendly Installation Guide
You can install vinyl flooring yourself in a weekend using basic tools and careful prep. Choose sheet, LVP, or LVT based on room and look, then acclimate materials 48 hours. Remove old flooring, level the subfloor, and pick click-lock, peel-and-stick, or glue-down methods. Measure, stagger joints, cut with a utility knife, and use proper adhesive or tapping tools. Follow maintenance tips to extend life, and keep going to learn detailed steps and troubleshooting.
Can You Install Vinyl Flooring Yourself?
You can often install vinyl flooring yourself if you’re comfortable with basic tools and careful measuring.
Expect a weekend or two for most rooms, with costs typically much lower than hiring pros if you already have tools.
Simpler clicked or peel-and-stick options need less skill, while sheet or glued-down jobs are trickier and may require more experience.
Short summary of DIY feasibility, time, cost, and skill level
Many homeowners can install vinyl flooring themselves with basic tools and careful prep, but success hinges on your comfort with measuring, cutting, and leveling subfloors.
You’ll typically finish a small room in a weekend. Costs stay low for DIY—materials and tools vary by quality.
Moderate skill suffices; follow instructions for how to apply vinyl flooring, and practice straight cuts for best results.
What Is Vinyl Flooring and Why Choose It?
Vinyl flooring comes in sheet, luxury vinyl plank (LVP), and vinyl tile (LVT) options, each offering different looks and installation methods.
You’ll find vinyl is more water-resistant and affordable than hardwood or laminate, and often softer and easier to install than ceramic tile, though it can lack the resale value and longevity of real wood or stone.
It’s ideal for kitchens, bathrooms, basements, and high-traffic areas where moisture resistance and easy maintenance matter.
Types of vinyl flooring (sheet, luxury vinyl plank (LVP), vinyl tile (LVT))
Flooring comes in three main vinyl varieties—sheet, luxury vinyl plank (LVP), and vinyl tile (LVT)—each designed for different looks, budgets, and installation methods. You’ll pick sheet for large, seamless areas; LVP for realistic wood appearance; LVT for tile patterns and easy replacement.
| Type | Best for |
|---|---|
| Sheet | Bathrooms, kitchens |
| LVP | Living rooms |
| LVT | Entryways, repairs |
Pros and cons compared to hardwood, laminate, tile
After choosing between sheet, LVP, and LVT, you’ll want to weigh how vinyl stacks up against hardwood, laminate, and tile so you can match performance and look to your needs.
Vinyl’s water resistance, comfort, and lower cost beat hardwood and often laminate.
It’s softer and warmer than tile but less authentic than real wood and can scratch or dent more easily than hardwood.
Best rooms and use cases
Because it’s water-resistant, durable, and available in many styles, you can confidently use vinyl in rooms where moisture, traffic, or budget are top concerns.
Install it in kitchens, bathrooms, mudrooms, basements, and entryways. It’s great for rentals, playrooms, and home gyms too.
Choose textured or slip-resistant options for safety, and pick thicker or cushioned vinyl for comfort underfoot.
Tools, Materials, and Preparation Checklist
Before you start, gather the required tools (utility knife, tape measure, straightedge, roller) and any optional extras that’ll speed the job.
Choose the right material and installation type—click-lock, glue-down, or peel-and-stick—and pick an adhesive suited to your subfloor.
Measure carefully with a waste allowance, inspect and prep the subfloor, and perform moisture testing to confirm it’s ready.
Required tools and optional helpful tools
You’ll need a concise set of tools and materials to get vinyl flooring installed efficiently—some are essential, others just make the job faster and cleaner.
Gather basics, then add helpful extras for accuracy and speed.
- Utility knife and extra blades
- Tape measure and straightedge
- Pry bar and hammer
- Tapping block and pull bar
- Knee pads and spacers
Materials and adhesive types (click-lock, glue-down, peel-and-stick)
Now that you’ve got your tools ready, pick the right vinyl type and adhesive for your room and skill level.
Choose click-lock planks for fast, floating installs; glue-down sheets or tiles for permanent, moisture-resistant surfaces; and peel-and-stick for small, simple areas.
Match adhesive to substrate and traffic, and follow manufacturer specs for acclimation, trowel size, and open time to guarantee a secure bond.
Measuring and calculating material needs (waste allowance)

Measure your room carefully and calculate square footage plus waste so you buy the right amount of vinyl.
Measure length and width of each area, subtract fixed obstacles, and add 5–10% waste for straight layouts, 10–15% for diagonal or patterned cuts.
Round up to whole boxes, note plank orientation, and double-check totals before ordering to avoid shortages.
Subfloor requirements and moisture testing methods
Because a stable, dry subfloor is the foundation of a lasting vinyl installation, you should verify surface flatness, structural integrity, and moisture levels before laying any planks or sheets.
Check for cracks, squeaks, and deflection; repair or level as needed.
Use a moisture meter (pin or non‑penetrating) and perform calcium chloride or relative humidity tests for concrete to guarantee readings meet manufacturer limits.
Pre-Installation Steps
Before you lay a single plank, acclimate the vinyl in the room for at least 48 hours and remove old flooring so you can inspect the subfloor.
Patch cracks, fill low spots with appropriate compounds or self-levelers, and sand any high areas until the surface is flat and clean.
Finally, install the recommended underlayment or moisture barrier where required to protect the vinyl and guarantee proper performance.
Acclimating vinyl planks or tiles
While you’re gathering tools and prepping the subfloor, let the vinyl planks or tiles sit in the room where they’ll be installed for at least 48 hours so they can acclimate to the room’s temperature and humidity.
Lay cartons flat, open boxes slightly to allow air flow, and avoid stacking.
Check manufacturer recommendations for specific time, temperature, and moisture limits before installation.
Removing existing flooring and prepping the subfloor
Now that your vinyl has acclimated, you’ll need to remove any old floor coverings and prepare the subfloor so the new planks or tiles lay flat and last.
Pull up carpet, tack strips, vinyl, or tile; scrape adhesive residue. Sweep and vacuum thoroughly.
Check for squeaks and fasten loose boards. Make certain the surface is clean, dry, and structurally sound before installing your new flooring.
Repairing and leveling subfloor (patching compounds, self-levelers)
If the subfloor isn’t flat and sound, correct it now so your vinyl lays smooth and bonds properly.
Remove debris, loose boards, and weak patching. Fill holes and low spots with a compatible patching compound; feather edges for a seamless surface.
For larger uneven areas, mix and pour a self-leveling compound per instructions.
Sand any high spots and verify flatness before proceeding.
Installing underlayment or moisture barrier (when and how)

With a flat, stable subfloor, decide whether you need an underlayment or moisture barrier based on your vinyl type and the room’s moisture conditions.
For floating click-lock vinyl use a cushioned underlayment for comfort and sound reduction.
For glue-down or moisture-prone areas install a vapor barrier; overlap seams and tape.
Trim excess, maintain expansion gaps, and follow manufacturer specs.
Step-by-Step Installation Guide
Now you’ll walk through the actual installation, starting with laying out the room and planning your pattern so cuts and seams fall where they look best.
You’ll learn how to cut planks or tiles cleanly, install a click-lock floating first row, and apply glue-down or peel-and-stick products with the right adhesives and trowel technique.
Finally, you’ll handle doorways, passages, and thresholds to finish the job neatly.
Step 1 Laying out the room and planning the pattern

Start by measuring the room and sketching a quick layout so you can visualize seam placement and plank direction before you cut anything.
Decide on a focal line—usually along the longest wall or entry—and work outward. Account for changes in level, doorways, and cabinets.
Dry-lay rows to confirm pattern balance, stagger seams per manufacturer recommendations, and mark starting points to guarantee a consistent, professional-looking install.
Step 2 Cutting vinyl planks/tiles to fit (tools and techniques)

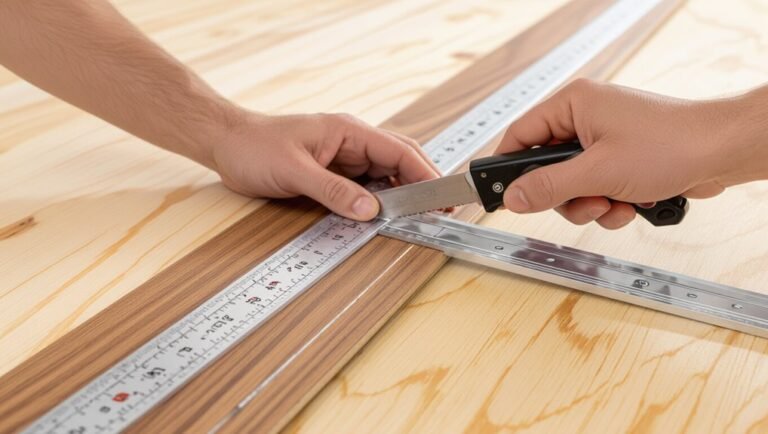
Measure and mark each plank or tile carefully before you cut so pieces fit snugly around walls, doorways, and obstacles.
Use a straightedge, carpenter’s square and pencil for accurate lines.
For planks, score and snap with a utility knife; for tiles, use a utility knife or vinyl cutter.
Drill starter holes for pipes and make relief cuts for tight curves.
Wear safety goggles.
Step 3 Installing click-lock (floating) LVP first row to completion
Place the first click-lock plank with its tongue facing the wall, using spacers to maintain the manufacturer’s recommended expansion gap. Stagger the end joints at least 6–8 inches from the next row for stability and appearance.
You’ll then:
- Align and angle the next plank to engage the lock
- Tap joints gently with a block and mallet
- Check gaps continuously
- Trim end pieces as needed
- Remove spacers before installing trim
Step 4 Installing glue-down and peel-and-stick vinyl (adhesive types, trowel technique)
1 type of vinyl—glue-down and peel-and-stick—requires careful adhesive work, so you’ll want to prepare the subfloor and layout before applying any adhesive.
Choose adhesive by vinyl type, notch size, and open time. Use a trowel to spread even ridges, press planks firmly, and roll seams.
- solvent vs water-based
- trowel notch selection
- spread direction
- placement timing
- use a floor roller
Step 5 Handling doorways, transitions, and thresholds

When you reach doorways, changes, and thresholds, plan each cut and trim so the flooring meets adjoining surfaces cleanly and allows doors to swing freely.
Measure openings, undercut jambs, and test door clearance before final bonding.
Install connector strips where heights differ, centering them over seams.
Secure thresholds with recommended screws or adhesive, ensuring smooth, watertight edges and stable connections.
Step 6 Fitting around fixtures, vents, and cabinets
After you’ve handled doorways and thresholds, move on to trimming around fixed objects like cabinets, vents, and pipes so the floor fits snugly and looks finished.
Measure and mark cut lines, transfer them to the plank, and cut with a jigsaw or utility knife.
Test-fit pieces, notch for pipes, and secure edges; leave minimal expansion gaps around fixtures for movement.
Step 7 Finishing touches: baseboards, shoe molding, and cleaning
Step 7 brings the final touches that make your new vinyl floor look finished and professional: reinstall or add baseboards, fit shoe molding where needed to cover expansion gaps, and give the floor a thorough cleaning so adhesives and dust don’t mar the surface.
Reattach trim with finishing nails or adhesive, caulk seams where appropriate, touch up paint, and mop with manufacturer-approved cleaner for a pristine, durable result.
Common Problems During Installation and How to Fix Them
You’ll likely run into issues like gapping, buckling, peaking, adhesive failure, bubbling, visible seams, color mismatches, or post-installation moisture problems, and you should know how to spot the cause quickly.
In the next section, I’ll explain practical fixes for each—how to reseat or relieve tension to stop buckling, reapply or replace adhesive and eliminate bubbles, blend or replace planks to hide seams and color differences, and address moisture with drying, vapor barriers, or replacement when needed.
Follow these troubleshooting steps promptly to prevent small defects from becoming bigger repairs.
Gapping, buckling, and peaking causes and remedies
When planks separate, buckle, or form raised seams, it’s usually because of moisture, temperature change, improper acclimation, or incorrect installation techniques; recognizing the cause quickly helps you choose the right fix.
Check subfloor flatness, humidity, and room temperature; re-acclimate and reinstall if needed.
For minor gaps use proper spacers; relieve buckling by removing pressure points and allowing expansion space; trim peaks.
Adhesive failures and bubbling troubleshooting steps
If your vinyl starts to lift, bubble, or the adhesive seems to fail, act quickly to identify the cause so you can limit damage and fix it correctly.
Check substrate moisture and cleanliness, then peel back a bubbled section. Reapply recommended adhesive or seam sealer, press with a roller, and weight until cured.
For trapped air, prick small holes and press out bubbles; replace badly damaged planks.
Visible seams and color mismatches correction tips
Although seams and color variations can be subtle at first, they become obvious under certain light and detract from the floor’s overall look, so you should address them right away; inspect seams, tighten loose joints, and use seam sealer or color-matched filler to blend gaps.
Replace miscut planks, rotate materials to balance shade, and guarantee uniform directional laying for consistent appearance.
Handling moisture-related issues after installation
Because vinyl is water-resistant but not impervious, you’ll still see moisture-related problems after installation if you don’t address sources and signs quickly.
Inspect for cupping, bubbling, or discoloration. Fix leaks, improve ventilation, and use a dehumidifier.
Replace sections with trapped moisture and dry subfloor thoroughly.
Apply a proper moisture barrier when renovating and monitor humidity to prevent recurrence.
Best Practices and Professional Tips
To get seams that last and glue that holds, you’ll want tight seams, the right adhesive, and careful surface prep.
Keep the room at the recommended temperature and humidity during and after installation, and plan layout choices that make future cleaning and repairs easier.
Know your limits—tackle simple planks yourself but hire a pro for tricky patterns, uneven subfloors, or large jobs.
How to ensure long-lasting seams and adhesion
When you want seams that hold up over years of foot traffic, focus on proper surface prep, correct adhesive choice, and precise seam techniques from the start.
Clean, dry, level subfloors and use manufacturer-recommended adhesive.
Butt seams tightly, use a seam roller and seam tape or heat-weld where specified.
Allow adequate cure time, trim excess adhesive, and inspect seams regularly for early repairs.
Temperature and humidity control during and after installation
Although vinyl’s flexibility makes it forgiving, controlling temperature and humidity during and after installation is critical to prevent gapping, buckling, and adhesive failure; keep indoor temperature between 65–85°F and relative humidity 30–50% before, during, and 48–72 hours after installation.
Use HVAC, dehumidifiers, or heaters as needed, acclimate planks 48 hours, avoid rapid swings, and monitor conditions with a reliable thermometer/hygrometer.
Maintenance-friendly installation choices
Choose installation methods and materials that make ongoing care simple—it’s the best way to keep your vinyl looking good with less effort.
Pick wear-layer thickness, easy-clean finishes, and water-resistant adhesives. Use tight seams and proper edge trims to prevent dirt buildup.
Opt for floating or glue-down systems per traffic needs, and install threshold strips for simple cleaning and long-term durability.
When to hire a pro vs. DIY
Wondering whether you should tackle vinyl flooring yourself or call a pro? Consider your skill level, tools, and time.
DIY suits simple floating or peel-and-stick installs on flat, dry subfloors when you can follow instructions.
Hire a pro for complex layouts, moisture issues, glued-down sheets, or uneven substrates.
Pros guarantee warranty, precise seams, and faster completion, reducing costly mistakes.
Cost, Time Estimates, and ROI
You’ll want to budget for materials, tools, and any labor so you know the full cost up front.
Expect quick installs for small rooms or peel-and-stick planks and longer timelines for glue-down or full-room replacements.
Also weigh resale value and durability—higher-quality vinyl can cost more but often pays off with longer life and better appeal to buyers.
Typical cost breakdown (materials, tools, labor)
A clear cost breakdown helps you budget for vinyl flooring by separating materials, tools, and labor so you can spot savings and prioritize upgrades; you’ll see material quality, necessary tools, and expected labor costs, helping decide DIY versus pro installation and where to save without sacrificing durability.
| Item | Typical Range | Notes |
|---|---|---|
| Materials | $1–$5/sq ft | Thickness affects price |
| Tools | $20–$200 | One-time vs rental |
| Labor | $1–$4/sq ft | Varies by complexity |
Time estimates by room size and installation type
While exact times vary by room layout and the installation method you choose, you can generally plan installs in blocks: for peel-and-stick or click-lock planks, expect about 1–2 hours per 50 sq ft for prep and 1–3 hours per 100 sq ft for actual laying if the room’s straightforward;
glue-down and sheet vinyl need more prep and longer adhesive cure times, often doubling total hours.
For a 100 sq ft room, plan 3–8 hours; 200 sq ft, 6–16 hours.
Resale and durability implications
Because potential buyers often scan flooring as a sign of overall care, your choice of vinyl and the quality of its installation can directly affect resale value and how long the surface lasts.
Choose durable, wear-rated vinyl and professional-grade underlayment to boost longevity.
Factor material and labor costs against expected ROI: higher-grade options usually increase appeal and resale price, shortening payback time.
Materials and Product Comparison
Now you’ll compare click-lock, glue-down, and peel-and-stick systems to pick the best fit for your space and skill level.
You’ll also weigh vinyl thickness and wear-layer options to balance comfort, durability, and budget.
Finally, you’ll get brand recommendations and buying tips based on warranty, customer reviews, and retailer support.
Click-lock vs glue-down vs peel-and-stick
Which vinyl option fits your skill level, budget, and room use? You’ll pick click-lock for DIY ease, glue-down for permanence and moisture resistance, or peel-and-stick for quick, low-cost updates. Consider traffic, subfloor, and desired longevity before choosing.
| Type | Skill | Best for |
|---|---|---|
| Click-lock | Easy | Living areas |
| Glue-down | Moderate | Wet rooms |
| Peel-and-stick | Very easy | Rentals/short-term |
Comparing popular vinyl thicknesses and wear layers
When deciding between vinyl options, thickness and wear-layer ratings tell you how well a floor will handle traffic, dents, and lifespan—so you should match those specs to the room’s use.
Thicker vinyl (4–8mm) feels more solid; 2–3mm suits light use.
Wear layers range 6–30 mil—residential needs start around 12–20 mil, while commercial spaces require heavier wear layers.
Recommended brands and where to buy (criteria for selection)
Pick brands that match your room’s traffic, installation method, and budget, and you’ll avoid costly mistakes down the line.
Choose trusted makers with clear warranties, easy returns, and local stock. Look for pro reviews and sample availability.
Consider these criteria:
- Warranty length and coverage
- Wear layer and thickness options
- Installation support and guides
- Local retailer or big-box availability
- Price vs. value comparisons
Safety, Tools Care, and Disposal
Before you start, follow basic safety: wear cut-resistant gloves and eye protection, handle adhesives carefully, and keep the area well ventilated.
Clean and maintain your blades, rollers, and trowels after use and store leftover planks and adhesives in labeled, sealed containers.
When replacing old flooring, check local recycling programs and hazardous-waste rules so you dispose of materials responsibly.
Safety precautions (cutting, adhesives, ventilation)
1 clear rule: protect yourself and others whenever you’re cutting, gluing, or working in confined spaces.
Wear safety glasses, a dust mask or respirator rated for VOCs, and cut-resistant gloves. Use sharp blades to reduce force, clamp materials, and cut away from your body.
Work with adhesives in well-ventilated areas, follow manufacturer instructions, and keep a fire extinguisher nearby.
Proper care of tools and storage of leftover materials
You’ve already taken steps to protect yourself while cutting and gluing; now extend that same care to your tools and leftover materials to keep the jobsite safe and your equipment working well.
Clean blades, rollers, and trowels immediately per manufacturer directions.
Store adhesives and unused planks in labeled, sealed containers away from heat and moisture.
Inspect, oil, and shelve tools to prevent damage and accidents.
Disposal and recycling options for old flooring
While removing old flooring can feel like just another chore, disposing of it responsibly protects the environment and keeps your worksite safe.
Separate materials—vinyl, underlayment, nails—and check local recycling centers for vinyl or plastic film programs.
Donate reusable planks to salvage stores, rent a dumpster for bulky waste, and follow municipal rules for hazardous adhesives.
Label bags and keep receipts.
Frequently Asked Questions
You probably have a few common questions before you start, like how long vinyl lasts and whether you can lay it over existing vinyl or tile.
You’ll also want to know if LVP needs underlayment, how soon you can move furniture back in, and whether damaged vinyl can be repaired or refinished.
I’ll answer each one clearly so you can finish your project with confidence.
How long does vinyl flooring last?
Wondering how long vinyl flooring will last in your home? Expect 10–25 years for quality vinyl, depending on wear layer thickness, traffic, and maintenance.
Luxury vinyl plank often lasts longer than basic sheet vinyl. Proper installation and prompt repairs extend life. Heavy traffic, pets, or sunlight shorten it.
Regular cleaning and protective pads help maximize longevity.
Can vinyl be installed over existing vinyl or tile?
Curious whether you can lay new vinyl over old vinyl or tile? You can in many cases, saving removal time.
Confirm the existing floor is clean, flat, and firmly bonded; remove loose tiles or glued edges.
Smooth irregularities with a leveling compound and repair seams.
Follow manufacturer guidelines—some products allow direct installation, others require removal for warranty compliance.
Is underlayment necessary for LVP?
When should you use underlayment with luxury vinyl plank (LVP)?
You’ll need underlayment if your subfloor is uneven, noisy, or cold, or if the manufacturer requires one for warranty.
Floating LVP often benefits from foam or cork for sound reduction and comfort; glued-down products usually don’t.
Check product specs, address moisture, and choose an approved underlayment for proper performance.
How soon can furniture be moved back in?
How long should you wait before bringing furniture back onto new vinyl flooring?
Generally wait 24–48 hours for adhesive or seams to set and to allow acclimation.
Use felt pads or protective glides under legs to prevent indentations.
For heavy items, wait 72 hours and lift rather than drag.
Check manufacturer guidelines—some adhesives or luxury vinyl products need longer cure times.
Can vinyl flooring be refinished or repaired?
Can vinyl flooring be refinished, or is repair your only option? You can’t sand or refinish most vinyl like wood, but you can repair damage.
Small cuts or gouges get fixed with vinyl repair kits, heat-welded patches, or replacement planks.
For large wear or persistent damage, replacing the affected area or entire floor is usually more durable and visually consistent.