How to Install Engineered Flooring: A Full Walkthrough for Any Subfloor
You can install engineered flooring over plywood, OSB, concrete, or most existing hard surfaces if you check moisture, flatten the subfloor, and use the right underlayment or vapor barrier. Choose floating, glue-down, or nail/staple methods based on substrate and skill, acclimate boards 48–72 hours, stagger joints, and leave expansion gaps. Use proper tools and safety gear, and call a pro for major moisture or structural issues—keep going to learn the exact prep and step-by-step techniques.
Can You Install Engineered Flooring Over Any Subfloor?
You can install engineered flooring over many common subfloors—plywood, OSB, concrete, and even some existing hard surfaces—but each has limits like moisture sensitivity or unevenness.
Check the subfloor for level, dryness, and structural soundness before you start, and use appropriate underlayment and moisture barriers when required.
If you’re unsure about moisture issues, major unevenness, or load-bearing concerns, consult a pro to avoid costly mistakes.
One-sentence summary of compatibility and limitations
Although engineered flooring’s layered construction makes it more forgiving than solid wood, it isn’t suitable for every subfloor—concrete, plywood, and existing well-adhered vinyl are usually fine, while uneven, damp, or soft substrates like particleboard, bare OSB in poor condition, and floors with active moisture issues need repair or replacement before installation.
You can install engineered flooring over suitable bases, but always test moisture and level before proceeding.
When to consult a pro
When the subfloor shows signs of moisture, major unevenness, or structural damage, call a professional before buying materials or starting work.
You should also consult a pro if you’re unsure about moisture testing, vapor barriers, or load-bearing issues. A contractor can evaluate risks, recommend fixes, and guarantee warranty compliance.
- Moisture problems
- Structural concerns
- Complex leveling
- Warranty questions
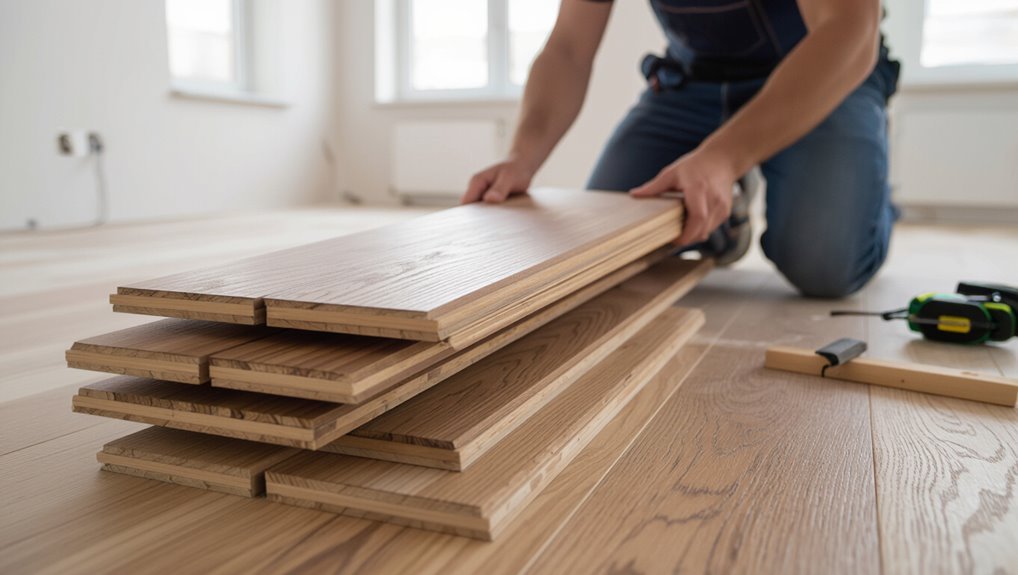
Basic Understanding What Is Engineered Flooring and Why Choose It?
Engineered flooring is built from a hardwood veneer bonded to layered plywood or high-density fiberboard, and you’ll want to know how that construction affects performance.
You’ll find it more stable and moisture-tolerant than solid hardwood, often costing less while still offering real wood surfaces.
Common formats you’ll encounter include tongue-and-groove, click-lock, and prefinished boards that simplify installation.
Construction and materials of engineered flooring
Because it’s built in layers, engineered flooring gives you the look of solid hardwood with greater stability and versatility.
You’ll find a wear layer of real hardwood atop plywood or high-density fiberboard cores, plus backing layers for balance.
Thickness, veneer species, and core construction determine durability and refinishing potential.
Manufacturers may use cross‑piled or HDF cores, adhesives, and finishes tailored to performance.
Advantages over solid hardwood (stability, moisture tolerance, cost)
Stability, moisture resistance, and cost savings are the main reasons you’d pick engineered flooring over solid hardwood. You get a stable, layered core that shrugs off humidity, fits basements or kitchens, and costs less for similar looks — so you feel relieved, confident, and smart choosing it.
| Benefit | Feeling |
|---|---|
| Stable in humidity | Relief |
| Lower cost, similar look | Confidence |
Common engineered flooring formats (tongue-and-groove, click-lock, prefinished)
If those practical benefits sold you on layered wood, the next step is picking a format that fits your installation skill and room use.
Tongue-and-groove requires glue or nails and suits traditional installs.
Click-lock snaps together for fast, floating floors you can DIY.
Prefinished planks save sanding and finishing time, offering consistent factory coats and immediate use—ideal for busy homes.
Assessing Your Subfloor Types and Their Suitability
Before you start, you’ll check what type of subfloor you have—plywood or OSB may need sanding, fastening, or a leveling compound, while concrete slabs demand moisture testing and possible vapor barriers.
You’ll also consider whether existing hardwood, vinyl, tile, or terrazzo can be overlaid or requires an underlayment, and whether suspended joist floors meet stiffness and deflection criteria.
These assessments determine prep, underlayment choices, and whether floating or glued methods are appropriate.
Plywood and OSB subfloors pros, cons, prep requirements
Plywood and OSB are the two most common subfloor panels you’ll encounter, and each brings distinct strengths and weaknesses you should weigh before installing engineered flooring.
Plywood resists moisture better, fastens strongly and sands smooth; it costs more.
OSB is budget-friendly and stable but swells at edges if wet and holds fasteners less firmly.
Guarantee flatness, secure squeaks, and replace damaged panels before installation.
Concrete slab moisture concerns, vapor barriers, leveling
Switching focus from wood subfloors, concrete slabs demand a different checklist because moisture and flatness affect engineered flooring performance.
Test slab moisture with an ASTM-approved method; high readings mean you’ll need a vapor barrier or waterproofing membrane.
Repair cracks, remove laitance, and use a self-leveling compound to achieve a flat, smooth surface within manufacturer tolerance before installation.
Existing hardwood or vinyl overlay possibilities and limitations
If you already have hardwood or sheet vinyl, you can often install engineered flooring over it—but only after a careful assessment of thickness, adhesion, and condition.
Check that the existing surface is level, solidly glued or nailed, and free of soft spots.
Make certain total build-up won’t interfere with doors, connections, or thresholds.
Remove loose material; repair or replace compromised boards before installation.
Tile and terrazzo when you can float or need underlayment
Tile and terrazzo can work as a base for engineered flooring, but you’ll need to decide whether to float your new floor or install an underlayment first.
If tiles are level, intact, and well-bonded, you can often float over a proper vapor barrier and foam underlayment.
For uneven, cracked, or highly textured surfaces, install a cement backer or plywood underlayment to guarantee stability and sound isolation.
Suspended joist floors and crawlspaces stiffness and deflection criteria
Because suspended joist floors and crawlspaces flex more than concrete slabs, you’ll need to check stiffness and deflection before installing engineered flooring.
You should:
- Measure joist span and spacing against manufacturer L/360 or L/720 limits.
- Add blocking, sistering, or strapping to reduce bounce.
- Use 3/4″ T&G subfloor or specified underlayment.
- Confirm crawlspace ventilation and moisture control before installation.
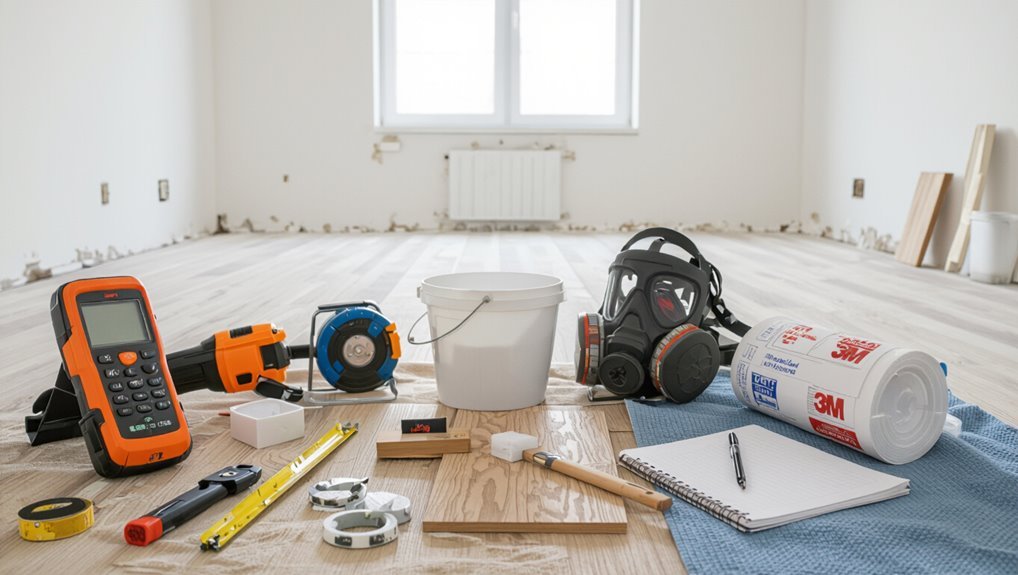
Tools, Materials, and Preparations You Need
Before you start installing, gather a clear tools checklist and the materials you’ll need—engineered planks, underlayment, the correct adhesive or fasteners—to avoid interruptions.
Let the planks acclimate and verify room conditions with moisture testing (RH and MVER) so the subfloor and air are within spec.
Wear appropriate safety gear and set up a clean, well-lit workspace to work efficiently and safely.
Tools checklist
Tools and the right materials make the job faster and cleaner, so gather them before you start: a tape measure, chalk line, rubber mallet, pull bar, spacers, utility knife, jigsaw or miter saw, tapping block, pry bar, and a quality underlayment plus adhesive (if your product requires it).
- Measuring and marking tools
- Cutting and trimming tools
- Installation and tapping tools
- Removal and prep tools
Materials checklist (engineered planks, underlayment, adhesives, fasteners)
Start with the right materials so your installation goes smoothly: engineered planks sized and finished for your room, an appropriate underlayment, the correct adhesive or fasteners for your subfloor, and any junction pieces or trim you’ll need.
Gather and verify quality, quantity, and compatibility before starting.
- Engineered planks (grade, finish)
- Underlayment (type, thickness)
- Adhesive or fasteners (manufacturer spec)
- Trim, connections, and fillers
Site preparation: acclimation, room conditions, moisture testing (RH & MVER)
1 key step is to prepare the site so your engineered flooring performs as designed: acclimate the planks in the room for at least 48–72 hours, stabilize temperature and humidity to the manufacturer’s range, and perform moisture testing (both in-situ RH and MVER on concrete) to confirm the subfloor meets specs.
Check wood subfloors for moisture and flatness; document results and address any remediation before installing.
Safety gear and workspace setup
Before you cut or fasten a single plank, equip yourself with the right protective gear and lay out a safe, organized workspace—gloves, safety glasses, a dust mask or respirator, hearing protection, and knee pads will protect you from common hazards, while proper lighting, clear walkways, and a stable workbench keep the job efficient and accident-free.
Keep tools charged, cords secured, and materials staged by sequence to minimize trips.
Step-by-Step Installation Process
Before you start laying boards, inspect and repair the subfloor for flatness, moisture, and squeaks so you’ve got a solid base.
If you’re on concrete, add a vapor barrier or mitigation, then choose and install the right underlayment—foam, cork, or plywood—based on your needs.
Plan your layout and expansion gaps, then pick an installation method: floating, glue-down, or nail/staple.
Step 1 Inspect and repair the subfloor (flatness, moisture, squeaks)
Start by thoroughly inspecting the subfloor for flatness, moisture, and squeaks, since these issues will determine whether you can install engineered flooring directly or need repairs first.
Measure flatness with a straightedge and level, test moisture with a meter, and walk the area to locate squeaks.
Shim, sand, patch, or secure loose boards until the surface meets manufacturer tolerances.
Step 2 Install vapor barrier or moisture mitigation on concrete
1. You’ll clean and dry the concrete thoroughly, then test moisture.
Choose a compatible vapor barrier—plastic sheeting or a liquid membrane—and follow manufacturer instructions.
Overlap seams, tape edges, and extend up walls slightly.
For liquid products, apply evenly and allow curing time.
Confirm seams and penetrations are sealed so moisture won’t compromise the engineered flooring later.
Step 3 Lay underlayment type selection and installation (foam, cork, plywood)
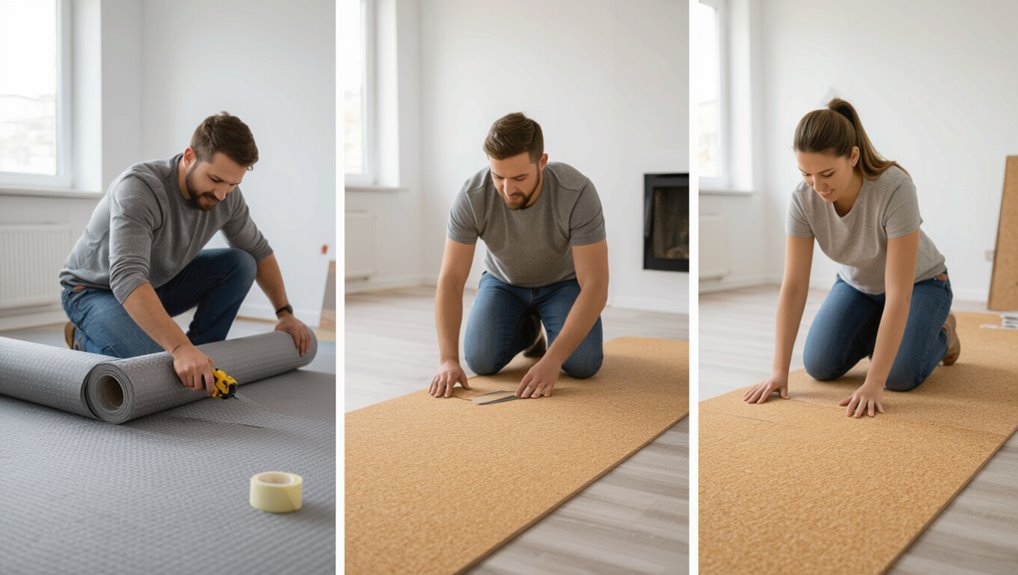
With your moisture barrier in place and cured, choose an underlayment that matches your subfloor conditions and the engineered flooring’s requirements.
For plywood or uneven wood, use thin plywood or rosin-backed underlayment.
For sound and comfort over concrete, choose foam or cork with proper vapor compatibility.
Roll or lay panels tight, tape seams per manufacturer, and trim edges for a smooth, stable substrate.
Step 4 Layout planning and expansion gap guidelines
Before you lay a single plank, plan the room’s layout and mark the required expansion gaps so the floor can move without buckling. Measure room dimensions, establish a straight starter row, and stagger end joints for stability.
Maintain manufacturer-recommended perimeter gaps (usually 1/4″–3/8″), accommodate changes and doorways, and note fixed objects or heat sources needing extra clearance.
Step 5 Installation methods explained: floating, glue-down, nail/staple
You’ve planned your layout and set expansion gaps, so now pick the installation method that fits your subfloor, skill level, and traffic. Choose floating for ease and moisture tolerance, glue-down for stability on concrete, or nail/staple for solid subfloors and high traffic.
| Method | Best Subfloor | Skill/Tools |
|---|---|---|
| Floating | Plywood/OSB | Low |
| Glue-down | Concrete | Moderate |
| Nail/staple | Wood joists | High |
Step 6 First row installation techniques and staggering
1. You’ll begin by measuring and snapping a chalk line to keep the first row straight.
Place boards tongue-side towards the wall, maintaining the manufacturer’s expansion gap with spacers.
Stagger end joints at least 6–8 inches (or per guidelines) from adjacent rows for stability and appearance.
Check alignment frequently, tapping boards snugly with a mallet and pull bar as needed.
Step 7 Cutting, fitting around obstacles, and transitions
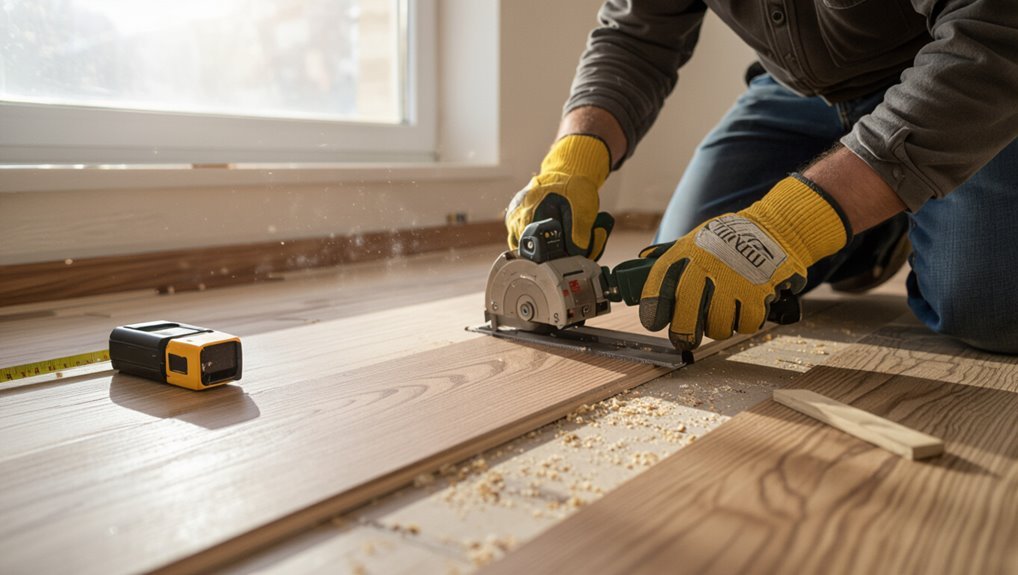
With the first rows aligned and tapped tightly, you’ll next cut and fit boards around doorways, vents, and pipes, and install threshold pieces where the flooring meets other surfaces.
Measure openings, scribe curves, and mark clearances for pipe collars. Use a jigsaw or pull saw for precise cuts, test-fit pieces, then glue or click them into place.
Confirm smooth shift alignment and secure fastenings.
Step 8 Last rows, thresholds, and trims
As you approach the final rows, plan each cut and trim so the last boards fit snugly yet leave the required expansion gap; measure twice, cut once, and dry-fit pieces before locking or gluing them in place.
Fit last boards using a pry bar or pull bar, trim edges for clearance, install thresholds at doorways, secure reducer or T-molding, and attach baseboards or quarter-round to conceal gaps.
Step 9 Post-installation checks and cleanup
Once the last rows, thresholds, and trims are in place, you’ll want to perform a careful post-installation check and cleanup to confirm the floor looks and performs as planned.
Inspect seams, connections, and expansion gaps; verify boards are secure and undamaged.
Remove spacers, vacuum debris, and wipe with manufacturer-recommended cleaner.
Reinstall baseboards, test doors, and document any defects for warranty.
Choosing the Right Installation Method for Your Subfloor
Next you’ll pick the best installation method for your subfloor—floating, glue-down, or nail/staple—based on moisture, subfloor type, and room use.
You’ll also consider hybrid options like partial glue plus floating for tricky areas where extra stability helps.
Finally, weigh the cost and time differences of each method so you can choose the most practical solution for your budget and schedule.
When to float vs. glue-down vs. nail/staple
Choosing the right installation method—floating, glue-down, or nail/staple—depends on your subfloor type, room conditions, and the engineered plank you’re using. You’ll float over concrete with moisture barriers, glue-down for stability on concrete or radiant heat, and nail/staple on plywood or OSB. Match method to substrate, traffic, and manufacturer guidelines.
| Subfloor | Recommended |
|---|---|
| Concrete | Glue-down |
| Radiant | Glue-down |
| Plywood | Nail/staple |
| Uneven | Float |
| High traffic | Glue-down |
Hybrid solutions (partial glue + floating) and when they make sense
Hybrid installations mix glue-down and floating techniques to give you the benefits of both—localized adhesive for stability where it’s needed and floating seams elsewhere to accommodate movement.
You’ll use glue around the perimeter, heavy-traffic zones, or over moisture-prone spots, then float remaining field panels to allow expansion.
This approach suits mixed substrates, changeover rooms, or when you want extra anchoring without full glue-down commitment.
Cost and time comparisons by method
When you compare installation methods—floating, full glue-down, and partial (hybrid) glue—you’ll see clear differences in both upfront cost and labor time; floating runs the quickest and cheapest on flat, stable subfloors.
Full glue-down takes longer and costs more in adhesive and skill, while hybrids sit between the two by adding targeted adhesive time and material.
- Floating: low cost, fast install.
- Full glue-down: high cost, slow.
- Hybrid: moderate cost, moderate time.
- Labor skill: floating easy, glue-down needs pro.
Common Problems and How to Avoid Them
You’ll face a few recurring issues—moisture-related failures, gapping, buckling or cupping, squeaks and deflection on joisted floors, and mismatched heights at junctions—and you’ll want to spot and prevent them early.
Check moisture levels, follow acclimation and fastening guidelines, reinforce joists if needed, and plan junctions to match existing floors.
In the sections that follow, I’ll show how to detect each problem and the practical fixes to avoid costly repairs.
Moisture-related failures: causes and fixes
Because moisture is the most common cause of engineered-flooring failures, you should address humidity and water risks before installation.
Test subfloor moisture with a meter, fix leaks, and guarantee vapor barriers or moisture membranes are installed where needed.
Condition boards in the room, maintain indoor relative humidity (30–50%), and use appropriate adhesives or sealants to prevent long-term moisture intrusion.
Gapping, buckling, and cupping: detection and remediation
Several common board distortions—gapping, buckling, and cupping—show themselves early and predict larger problems if you don’t act fast.
Inspect for uneven seams, raised boards, or edges higher than centers.
Address causes: control moisture, guarantee proper acclimation, verify subfloor flatness, and relieve restrained edges.
Repair by replacing affected planks, sanding cupped boards after drying, and rehanging or re-fastening where buckling occurred.
Squeaks and deflection issues on joisted floors
If your engineered floor creaks or feels springy, the issue usually lies in the joists or how the floor’s fastened to them.
Check for loose joists, inadequate blocking, or spaced fasteners. Reinforce with joist screws, add blocking or bridging, and secure subfloor panels with ring-shank nails or screws.
Confirm joist deflection meets flooring manufacturer limits before installing to prevent future squeaks and movement.
Matching existing flooring heights and transitions
Once you’ve fixed joist movement and secured the subfloor, you’ll face the practical task of matching new engineered planks to the height and edge of existing flooring where rooms meet.
Measure thicknesses, add underlayment height, and trim or shim the subfloor to equalize.
Use connecting strips for irregular differences, slope thresholds safely, and test door clearances before final installation.
Best Practices and Pro Tips for Durability and Appearance
Before you start, make sure the flooring is properly acclimated and stored so boards stay stable after installation.
Use the right fastening patterns, adhesive coverage, and curing times, and keep correct expansion gaps with well-placed junctions.
Finish cleanly with baseboards, thresholds, and trim to hide gaps and protect edges for long-lasting appearance.
Proper acclimation and storage tips
Although engineered planks are more stable than solid wood, you should still acclimate and store them properly to prevent warping and gaps after installation.
Keep boxes closed in the installation space 48–72 hours at normal temperature and humidity.
Stack pallets flat off the floor on stickers, avoid direct sunlight and heat sources, and rotate boxes during installation to blend color variation.
Fastening patterns, adhesive coverage, and curing times
With planks acclimated and staged correctly, it’s time to focus on how you secure them so they stay flat and look professional.
Use recommended fastening patterns for your installation method—stagger nails or staples per manufacturer spacing.
Spread adhesive evenly with the specified trowel, cover required square footage, and follow curing times before traffic or sanding.
Monitor temperature and humidity during cure.
Maintaining correct expansion gaps and transition placement
Because engineered floors expand and contract with humidity and temperature changes, you need to leave consistent expansion gaps at walls, columns, and fixed objects and place connections where different floor types or rooms meet so movement won’t buckle boards or stress seams.
Use recommended gap widths (typically 1/4″–3/8″ or manufacturer spec), install thresholds at doorways or large runs, and allow uninterrupted floating sections to move.
Finishing touches: baseboards, thresholds, and trim to hide gaps
Now that you’ve set and protected the required expansion gaps and planned where different floors meet, it’s time to cover those gaps neatly with baseboards, thresholds, and trim that let the floor move while hiding edges.
Use quarter-round or shoe molding nailed to the wall, not the floor.
Install appropriate connections for height differences, seal exterior edges, and leave documented expansion space for future repairs.
Comparison: Engineered Flooring vs. Alternatives for Challenging Subfloors
When you’re facing a challenging subfloor, it helps to compare engineered flooring with other options so you can pick the right performance and installation method. Below is a quick comparison to help you weigh engineered vs. laminate on concrete, engineered vs. solid hardwood on radiant heat, and engineered vs. vinyl plank for moisture-prone areas. Use these points to match material strengths to your site’s conditions.
| Comparison focus | Quick takeaway |
|---|---|
| Engineered vs. laminate on concrete | Engineered bonds/float well over concrete; laminate may need underlayment and moisture barrier. |
| Engineered vs. solid hardwood on radiant heat | Engineered tolerates temperature changes and micro-movement better than solid hardwood. |
| Engineered vs. vinyl plank for moisture-prone areas | Vinyl is more waterproof, but engineered with proper finish and installation handles occasional moisture better. |
| Installation complexity | Engineered often offers multiple install methods (float, glue, nail) giving flexibility. |
Engineered vs. laminate on concrete
If your concrete slab is prone to moisture or temperature swings, engineered hardwood usually gives you a more reliable, long-term floor than laminate—its real wood veneer and stable core handle humidity better and can be installed directly over concrete with the right underlayment or adhesive.
Laminate can be cheaper and easy to float, but it risks swelling or delamination if moisture breaches the barrier.
Engineered vs. solid hardwood on radiant heat
Because radiant heat puts continuous thermal and moisture stress on the floor, engineered hardwood typically outperforms solid hardwood in those systems: you’ll get greater dimensional stability, thinner profiles that transfer heat efficiently, and multilayer construction that resists cupping and gaps.
Choose engineered with manufacturer-approved adhesives or floating installations, follow heat-temperature limits, and acclimate properly to prevent finish or substrate issues.
Engineered vs. vinyl plank for moisture-prone areas
1 clear distinction matters: vinyl plank and engineered hardwood handle moisture very differently, so pick the one that matches your room’s humidity, subfloor condition, and lifespan goals.
You’ll choose vinyl for wet basements, bathrooms, or imperfect concrete—waterproof, flexible, and low maintenance.
Pick engineered for dryer basements with controlled humidity if you want authentic wood, refinishing potential, and higher long-term value.
Cost, Timeframe, and When to Hire a Professional
Before you start, you’ll want a clear idea of typical costs by installation method and room size so you can budget accurately.
Expect shorter timelines if you tackle a small room yourself and faster, more reliable completion with a pro—especially on larger or tricky subfloors.
If you spot uneven subfloors, extensive moisture issues, or tight timelines, hire a contractor and ask about insurance, references, warranties, and a detailed written estimate.
Typical cost ranges by method and room size
Costs for installing engineered flooring vary widely depending on the method you choose and the room size, but you can expect basic glue-down or floating installations to run lower per square foot than nail-down or specialty underlayment jobs. Pick based on budget and room area; higher traffic or moisture zones cost more.
| Method | Small (100 sq ft) | Large (400 sq ft) |
|---|---|---|
| Floating | $300–$800 | $1,200–$3,200 |
| Glue-down | $400–$1,000 | $1,600–$4,000 |
| Nail-down | $500–$1,200 | $2,000–$4,800 |
Estimated project timelines for DIY vs. pro
Tackling engineered flooring yourself can save money but usually takes longer than hiring pros, so weigh your budget against available time and skill.
For a single room, expect 1–3 days DIY (prep, acclimation, installation, finishing) versus 1 day for pros. Larger projects scale accordingly.
Factor in tool rental, learning curve, and your schedule; hire pros if deadlines or complexity exceed your capacity.
Signs you should hire a pro and questions to ask contractors
If your project timeline, skill level, or subfloor condition makes the DIY route risky, it’s time to contemplate hiring a pro.
You should hire help if moisture issues, irregular subfloors, tight deadlines, or warranty needs exceed your experience.
Ask contractors about:
- Total cost breakdown
- Project timeframe and milestones
- Subfloor prep and moisture testing
- Warranty, insurance, and references
FAQs
You probably have a few practical questions before you start — like whether engineered flooring works over radiant heat, how long it needs to acclimate, or if underlayment is always required.
You’ll also want to know if you can lay it over existing vinyl or tile and what subfloor prep could void your warranty.
We’ll answer each so you can avoid surprises and protect your investment.
Can engineered flooring be installed over radiant heated floors?
Curious whether engineered flooring works with radiant heat? Yes — engineered boards tolerate temperature changes better than solid wood.
You should guarantee the system’s surface temperature stays below manufacturer limits (usually ~80°F/27°C), use an approved adhesive or floating method, and maintain stable humidity.
Gradual heating, proper subfloor prep, and following the flooring maker’s installation guidelines prevent cupping, gaps, or warranty issues.
How long should engineered flooring acclimate before installation?
How long should engineered flooring acclimate before installation?
You should let boards sit in the installation space to adjust to temperature and humidity. Typical acclimation is 48–72 hours for most climates; some manufacturers recommend up to 7 days.
Keep boxes unopened, off the wall, and lay a few boards flat to check moisture.
Follow manufacturer specs and measure subfloor moisture before you install.
Do I always need an underlayment under engineered wood?
Needless to say, underlayment isn’t always mandatory, but it’s usually recommended—especially over subfloors that are uneven, noisy, or slightly damp.
You’ll skip it on smooth, dry, level concrete or plywood if the manufacturer allows.
Otherwise choose a vapor barrier for moisture, foam or cork for sound and comfort, and follow thickness and installation guidelines to protect the floor and warranty.
Can you install engineered flooring over vinyl or tile without removing it?
Wondering if you can lay engineered flooring right over your old vinyl or tile?
Yes, often you can if the surface is flat, clean, dry, and firmly adhered.
Remove loose tiles or peel vinyl edges, fill grout lines and level high/low spots.
Use an appropriate underlayment or isolation layer and follow manufacturer guidelines to guarantee stability and avoid moisture or telegraphing issues.
What warranty issues should I watch for related to subfloor preparation?
Which subfloor problems can void your warranty?
You must follow manufacturer guidelines: improper moisture testing, inadequate moisture barriers, unevenness beyond specified tolerances, incorrect underlayment, and installing over contaminated or unstable substrates.
If you ignore acclimation, fastenings, or recommended adhesives, you risk voiding coverage.
Keep records of tests, photos, and receipts to prove you met prep requirements if a claim arises.