How to Fix a Chip in Laminate Flooring Without Replacing the Whole Plank
You can usually fix a chip in laminate without replacing the whole plank by cleaning the area, filling the void with color-matched laminate filler or two-part epoxy, then sanding and sealing for a smooth, blended finish. For shallow chips use putty or touch-up kits; for deeper gouges build up thin layers, cure fully, then contour and tint to match. Follow product instructions and test colors on scrap—keep going to learn step-by-step methods and tips.
Can You Fix a Chip in Laminate Flooring Without Replacing the Whole Plank?
Yes—you can often fix small chips with a putty or laminate repair kit that matches the color and texture.
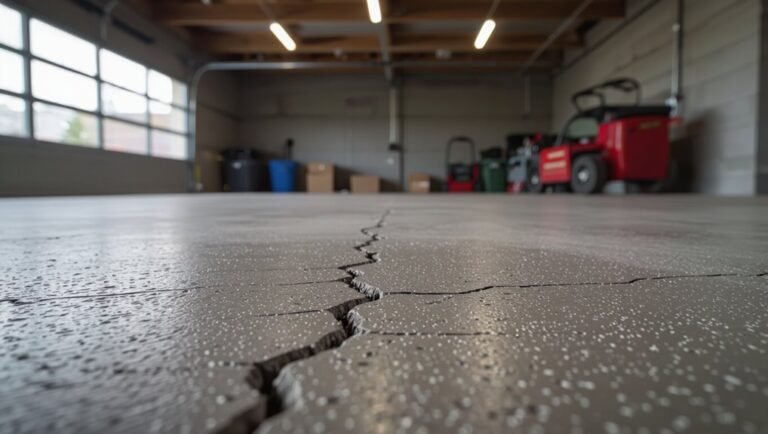
If the damage is deep, along a tongue-and-groove seam, or the plank is warped, replacement is usually the better choice.
Start with a repair when the chip is surface-level and replace when structural integrity or appearance is compromised.
Direct, concise solution summary
You can usually fix a small chip in laminate without replacing the whole plank by cleaning the area, filling the chip with a color-matched laminate repair compound or wood filler, smoothing it flush, and sealing or buffing to blend the finish.
Larger or structural damage, deep gouges, or wear along tongue-and-groove edges may still require plank replacement.
For straightforward how to fix a chip in laminate flooring, clean, fill, shape, and blend.
When a repair is feasible vs when replacement is necessary
Although small surface chips are often simple to fix, whether you should repair or replace a laminate plank depends on the chip’s size, location, and the plank’s structural integrity.
You can repair shallow, isolated chips or those near edges with filler and touch-up.
Replace planks with deep gouges, core delamination, moisture damage, or multiple adjacent chips—especially if structural stability or seam locking is compromised.
Basic Understanding What Causes Chips in Laminate Flooring and How Laminate Is Constructed
To fix a chip effectively, you’ll first want to understand how laminate planks are built — a wear layer, printed design, core, and backing — because chips usually start by breaching the wear layer into the core.
Chips most often come from impacts, prolonged moisture exposure, or simple wear and tear, and where a chip sits (edge vs. center) and how big it’s will determine whether you can spot-repair or need a plank replacement.
Keep these causes and layer differences in mind when you assess the damage and choose a repair method.
Laminate plank layers and how chips form
Laminate flooring combines several bonded layers so it looks like real wood while staying affordable and durable.
You’ll find a wear layer, decorative image, high-density fiberboard core, and backing. Chips occur when the top layers crack or the core compresses at an edge, exposing the decorative layer.
Knowing this helps you choose repair methods that restore appearance and protect the core.
Common causes of chips (impact, moisture, wear)
Think of chips as the visible result when the floor’s layers get pushed beyond their limits: impacts from dropped tools or furniture, swelling and softening from moisture, and long-term wear at high-traffic edges all weaken the wear layer and HDF core.
You’ll notice dents and missing laminate where force, prolonged dampness, or abrasive traffic strip protective coatings and expose the fibreboard to faster breakdown.
How chip location and size affect repair options

Because where a chip appears and how big it’s change what you can realistically do, you’ll pick different fixes for edge nicks, surface flakes, and deep core gouges.
You’ll use filler and paint for tiny surface chips, a plug or epoxy for larger center defects, and may need plank replacement for deep edge or structural damage.
Assess depth, location, and traffic.
Tools and Materials You’ll Need Before You Start
Before you start, gather a few essential tools like a utility knife, putty knife, small brush, and fine-grit sandpaper so you won’t interrupt the repair hunt.
You’ll also want recommended repair materials — laminate filler or putty, a color-matching kit, and a clear sealant — to guarantee the chip blends in and stays protected.
For better results consider optional items such as a small sander, clamps, or replacement edge strips if the damage is extensive.
Essential tools list
You’ll need a few basic tools and materials to repair a chip in laminate flooring properly: a putty knife, matching laminate filler or wood putty, fine-grit sandpaper, rubbing alcohol or a mild cleaner, a clean cloth, and a small artist’s brush or plastic applicator for precise touch-ups.
- Putty knife for shaping
- Sandpaper (220–320 grit)
- Cleaner and cloth
- Small brush/applicator for detail
Recommended repair materials (fillers, putty, color kits, sealants)
A few targeted repair materials will make the job quick and durable: choose a laminate-specific filler or wood putty that matches your floor’s finish, pick a color-matching kit or marker for fine blending, and have a clear sealant or finish restorer to protect the repair.
- Laminate filler or wood putty
- Color-matching kit/markers
- Fine applicator tools (plastic spatula, toothpicks)
- Clear sealant or water-based finish restorer
Optional items for better results (sanders, clamps, replacement edge strips)
If you want cleaner, longer-lasting repairs, consider a few optional tools that make tight chips easier to match and finish.
A fine orbital sander smooths edges and blends filler. Bar clamps hold seams tight while adhesive cures. Replacement edge strips restore worn borders without swapping planks.
Small files, precision blades, and a dab of clear sealant improve fit and durability.
Step-by-Step Repairs Small Surface Chips (Minor Dings and Scratches)
Start by cleaning the area and evaluating the chip so you know how deep the repair needs to be.
Pick a filler or colored wax that matches your floor, then apply the putty or wax, level it, and blend the color.
Finish by sanding or buffing any excess and sealing the spot for a smooth, lasting result.
Step 1: Clean and assess the damage
Before you reach for any repair kit, clear the area and get a good look at the chip so you know what you’re dealing with.
Wipe away dust and grime, then inspect depth and surrounding finish. Note if plank is loose or water-damaged before proceeding.
- Sweep and vacuum
- Clean with mild detergent
- Dry thoroughly
- Photograph for reference
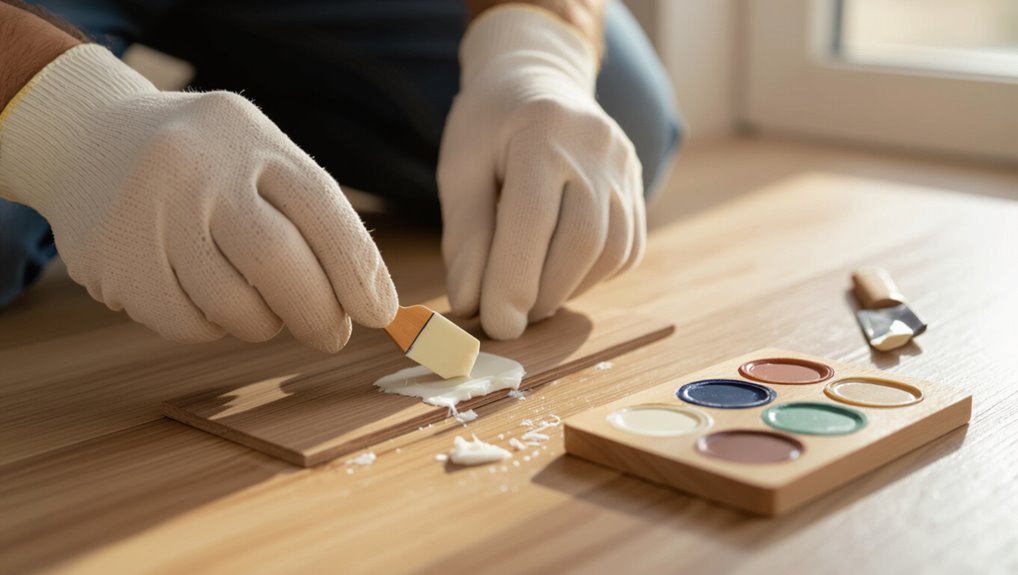
Step 2: Choose the right filler or colored wax
While you’re cleaning up, pick a repair material that matches the chip’s size and your floor’s color so the fix blends in.
For tiny surface nicks, use colored wax sticks or marker pens; for deeper chips, choose laminate-specific putty or epoxy filler.
Match sheen (matte vs. gloss) and test on a scrap or hidden area to confirm color before you proceed.
Step 3: Application process for putty/wax (fill, level, color-match)
Now that you’ve matched the color and sheen, it’s time to apply the filler or wax to the chip so the repair sits flush and nearly invisible.
Press putty into the void, overfilling slightly. Smooth with a plastic card or popsicle stick, removing excess.
For wax, press and sculpt with a warmed tool. Check color, add tiny amounts until it blends seamlessly with surrounding laminate.
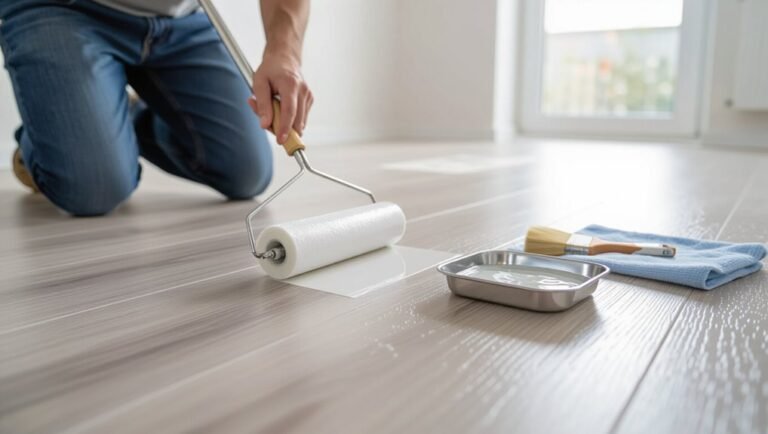
Step 4: Finishing touches (sanding, buffing, sealing)
Let the filled chip cure briefly, then gently sand the area with fine-grit sandpaper (320–400 grit) until it’s level with the surrounding laminate; use light, circular motions and a sanding block to keep the surface even.
Wipe dust with a tack cloth, buff lightly to blend texture, then apply a thin coat of clear laminate sealer or water-based polyurethane.
Let dry fully before traffic.
Step-by-Step Repairs Deeper Chips and Missing Laminate Material
When a chip exposes the sublayer or removes chunks of laminate, you’ll first check the board’s structural integrity and whether the underlayment is affected.
Clear away loose fragments and clean the area so fillers will bond properly.
Then you’ll rebuild the lost material with epoxy or wood filler in thin layers, sand smooth, match the color, and seal with a protective coat.
Step 1: Assess structural integrity and sublayer exposure
Before you start filling or replacing material, inspect the chip to see how deep it goes and whether the underlayment or core is exposed; that determines whether you can repair the surface or need a more involved fix.
Check for soft spots, delamination, or moisture damage. Press around edges to test bonding.
If the core’s compromised, plan for patching or plank replacement rather than cosmetic touch-up.
Step 2: Prepare the area (removing loose fragments, cleaning)
Now that you’ve confirmed whether the core or underlayment is damaged, prepare the chip for repair by removing any loose fragments and cleaning the area thoroughly.
Use a soft brush or vacuum to lift debris, then wipe with a damp cloth and mild cleaner. Let it dry completely.
Remove dust from crevices with a toothpick or compressed air so adhesives will bond properly.
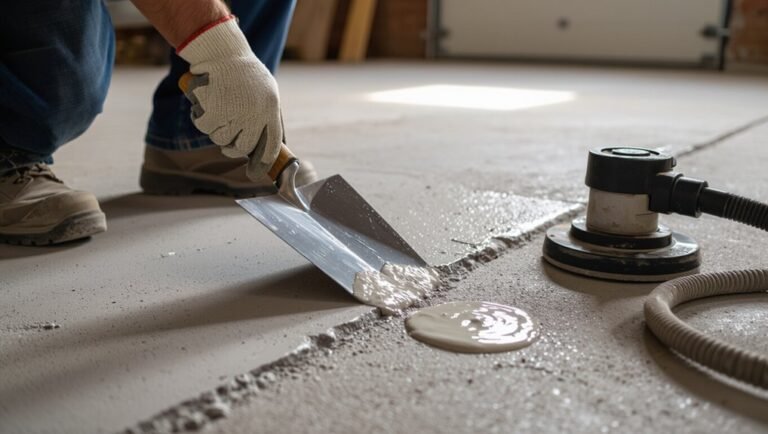
Step 3: Fill and rebuild with epoxy or wood filler (mixing, layering)

Mix and apply a two-part epoxy or a quality wood filler to rebuild the missing laminate, working in thin layers so each coat cures fully and bonds to the substrate.
Mix per manufacturer instructions, remove air bubbles, and use a small spatula or putty knife to fill progressively.
Let each layer harden before adding more, slightly overfilling to allow later contouring.
Step 4: Sanding, color matching, and protective coating
Start by smoothing the repaired area so it blends with the surrounding laminate: sand the overfilled epoxy or filler with progressively finer grits until the surface matches the floor’s profile and sheen.
Test stain or tint markers to match color, apply thin, even coats, and seal with a clear polyurethane or laminate-safe finish.
Let cure fully before light traffic.
Edge and Corner Chip Repairs (Plank Ends, Tongue/Groove Areas)
Edge and corner chips need extra care because they can affect how planks lock together and let moisture in at seams.
You’ll learn targeted fixes like installing slim edge strips, using epoxy for small losses, or carefully trimming and reseating damaged tongues or grooves.
Follow proper sealing and alignment steps so your repair won’t cause gaps or locking problems later.
Challenges specific to edges and seams
When chips occur at plank ends or along tongue-and-groove seams, you’ll face tighter tolerances and harder-to-hide repair lines than on field surfaces.
You’ll need precise color matching, minimal buildup to preserve fit, and careful sanding to avoid altering connections.
Seams must remain flush to prevent gaps or locking issues, and moisture or adhesive choices can affect long-term stability.
Repair techniques for edge chips (edge strips, epoxy, trimming)
Fix chips at plank ends and tongue-and-groove seams with methods that keep tolerances tight and connections intact: thin edge strips for shallow damage, two-part epoxy or wood filler for deeper voids, and careful trimming to remove loose fragments without altering locking faces.
You’ll sand flush after curing, match color with stain or marker, and test fit neighboring planks to guarantee the joint still locks.
Preventing seam issues after repair
Although a repaired chip might look solid, you’ll still need to protect plank ends and tongue-and-groove seams from misalignment and gaps; keeping tolerances tight, surfaces clean, and locking faces untouched prevents future seam issues.
After repair, dry-fit adjacent planks, remove debris, and avoid adhesive on locking edges. Use gentle tapping to seat joints, clamp if needed, and monitor for movement over several days.
When to Use a Laminate Repair Kit vs DIY Materials
You’ll find laminate repair kits usually include color-matched putty, hardener, applicators, and sometimes touch-up markers.
Kits save time and simplify matching, but they can be pricier than mixing your own fillers and may not match every pattern perfectly.
We’ll compare cost, time, and when a custom DIY approach makes more sense.
What laminate repair kits include
When a small chip appears in your laminate, a repair kit can save time and give a cleaner result than improvised materials; these kits bundle the specific tools and color-matched compounds you need to restore the surface.
You’ll find everything targeted to match finish and texture so you can fix it neatly yourself.
- Color-matched wax or filler
- Texture pads or grain tools
- Mixing sticks and palette
- Clear sealant or finish
Pros and cons of kits vs custom fillers
If you want a quick, reliable fix with minimal guesswork, pick a laminate repair kit; if you’re matching an unusual shade or need a larger, structural patch, custom fillers let you tailor color and consistency.
Kits give matched colors, easy application, and consistent hardness, but limited shapes and finishes.
Custom fillers offer precise color mixing and sculpting, yet require skill, curing control, and more tools.
Price and time comparison
Although both laminate repair kits and DIY fillers can get the job done, you’ll usually pay less up front and finish faster with a kit—most kits cost $10–$40 and include matched compounds, applicators, and simple instructions, while DIY materials (resins, pigments, hardeners, tools) often run $20–$100-plus and demand extra mixing, color-matching, and curing time.
| Option | Cost | Time |
|---|---|---|
| Kit | $10–$40 | 15–60 min |
| DIY | $20–$100+ | 1–4+ hrs |
| Pro | $50–$200+ | 1–3 hrs |
Alternative Non-Destructive Fixes (Cosmetic and Temporary)
You can cover small chips quickly with touch-up markers, wax sticks, and simple blending techniques to make them less noticeable.
For chips that won’t be fixed right away, use rugs, furniture placement, or decorative items to hide the damage.
Remember these tricks are cosmetic and temporary, so weigh short-term appeal against long-term durability.
Touch-up markers, wax sticks, and blending techniques
Start by matching the damage to the right cosmetic fix: touch-up markers are great for hairline scratches and small chips, while wax sticks fill shallow gouges and let you sculpt the surface.
Test color on scrap, apply thin layers, wipe excess, then blend edges with a soft cloth or plastic scraper.
Seal with clear laminate polish for durability.
Using rugs, furniture placement, and aesthetic camouflages
If those touch-ups don’t fully hide a chip or you want a non-permanent option, you can use rugs, furniture placement, and other visual tricks to mask the damage while keeping the floor intact.
You’ll focus on concealment, flow, and style without altering the plank.
- Place an area rug strategically
- Reposition a chair or table
- Use decorative baskets or plants
- Add removable adhesive decals
Short-term vs long-term effectiveness
While these non-destructive tricks can quickly hide a chip and keep traffic flowing, they vary widely in how long they’ll stay effective—some fixes look good for weeks, others for years.
You’ll choose based on use: temporary fillers, marker touch-ups, or rugs work short-term and let you postpone repair.
More durable options—epoxy fills, quality touch-up kits, careful sealing—last longer but demand precision and time.
Common Mistakes to Avoid When Repairing Chips
When repairing a laminate chip, don’t oversand and thin out the printed layer or you’ll make the damage worse.
Make sure your color match is exact so the patch doesn’t show as a visible line.
Also avoid glues or sealants not meant for laminate, since they can fail or cause staining.
Over-sanding and damaging the printed layer
Because laminate’s decorative layer is thin and printed, you can remove more than the chip and expose a lighter core if you sand too aggressively.
Work gently with fine-grit sandpaper, check progress often, and stop as soon as the damaged edges blend.
If you over-sand, you’ll create a noticeable depression that’s harder to hide and may require plank replacement.
Poor color matching and visible repair lines
Sanding too far can leave you chasing the wrong shade, and poor color matching will make even a well-shaped repair stand out.
Match tones under the same light, test mixtures on scrap, and blend edges with thin layers.
Don’t rely on a single color swatch; build translucency and feather the repair to hide boundary lines so the fix reads as part of the plank.
Using inappropriate adhesives or sealants
If you grab the wrong adhesive or sealant, your repair can fail fast or look worse than the chip did.
Don’t use construction adhesives, superglue that yellows, or non-flexible sealants that crack with floor movement.
Choose laminate-specific fillers or clear, flexible sealants recommended by the manufacturer.
Test compatibility on a scrap first to verify color, adhesion, and durability before committing.
Prevention and Best Practices to Avoid Future Chips
To keep chips from coming back, you should use protective measures like furniture pads, mats, and felt strips under legs and high-traffic areas.
When moving heavy items, lift or use sliders and place rugs to absorb impact rather than dragging directly on the floor.
Keep a simple maintenance routine—regular sweeping, prompt cleanup of spills, and quick attention to small scratches—so you catch and fix minor damage before it worsens.
Protective measures (furniture pads, mats, felt strips)
When you set heavy items down or slide chairs across laminate, tiny chips often start at contact points, so take simple protective steps now to stop damage before it starts.
Use pads and mats to cushion surfaces and reduce abrasion.
- Felt pads on chair and table legs
- Rubber or PVC caster covers
- Low-profile entry mats at doorways
- Area rugs under high-traffic spots
Handling heavy items and impact-reduction tips
Since heavy lifts and careless drops put the most stress on laminate edges, handle bulky items with deliberate care and the right gear to prevent chips.
Use furniture dollies, moving straps, and soft sliders. Lift with helpers rather than dragging.
Cushion hard contacts with blankets or foam. Anchor tall pieces to prevent tipping, and avoid stacking heavy loads on vulnerable seams to reduce impact risk.
Maintenance routine to spot and fix minor damage early
Although a quick daily glance might seem minor, a short, consistent maintenance routine helps you catch chips before they spread and keeps small repairs simple.
Inspect high-traffic areas weekly, wipe debris, and check furniture feet and pet nails.
Keep a repair kit handy—colored filler, sandpaper, sealer—and touch up tiny chips immediately to prevent moisture damage and larger repairs.
Cost, Time, and Durability Expectations
Expect realistic expectations: DIY fixes like color-matched fillers or touch-up kits usually cost under $20–$50 and take 30–60 minutes, while professional repairs can run $75–$250 and take a few hours plus travel time.
You’ll also want to weigh durability—fillers and markers can last months to a few years depending on traffic, whereas replacement planks or pro repairs often match factory longevity.
Use that trade-off to choose the right balance of cost, time, and lifespan for your situation.
Typical cost range for DIY repairs vs professional repair
Anyone tackling a laminate chip will want to weigh DIY savings against the added cost and time of hiring a pro: DIY kits, filler, and sealant typically run $10–$50, while touch-up markers and wax kits add small extras.
A professional repair usually costs $100–$300 depending on extent and local rates. You’ll save money DIY but professionals often deliver cleaner, longer‑lasting results.
Time required for each repair type
Along with cost, time and durability shape whether you tackle a chip yourself or hire a pro: simple spot repairs with markers, wax sticks, or pre-mixed filler usually take 15–45 minutes per affected plank and cure within a few hours.
DIY resin or replacement-piece fixes need several hours to a full day including sanding and drying, and professional repairs often require a few hours on site but may span a day or two if matching, ordering, or multiple repairs are involved.
Longer cure times or finish coats can extend total completion, but pros typically deliver more durable, ready-to-walk results sooner than most DIY attempts.
For planning, assume short fixes take under an hour, medium jobs a half to full day, and complex or scheduled pro work one to two days.
Expected longevity of different repair methods
Different repair methods will give you very different lifespans: quick fixes like markers, wax sticks, or pre-mixed fillers usually hold up for months to a few years under light traffic.
DIY resin or replacement-piece repairs can last several years if done correctly.
Professional repairs—especially those that replace planks or use industrial-grade fillers and finishes—can last as long as the surrounding floor.
Expect lower cost and quicker fixes to wear faster; invest more for longevity.
FAQ Common Questions About Fixing Chips in Laminate Flooring
You’ll want quick answers to whether repairs can be color-matched, if fillers actually bond to laminate, or if wood putty will work.
Also consider whether water-damaged chips are fixable and when it’s better to call a pro or replace the plank.
Below are clear, practical FAQs to help you decide.
Can I color-match the repair so it’s invisible?
Wondering if you can make a chip disappear by color-matching the repair? You can often blend fillers and touch-up markers to closely match wood grain and finish, but success depends on pattern complexity and lighting.
Mix tones, work in thin layers, and test on scrap. Expect slight variation up close; from a normal distance most repairs become hard to notice.
Will filler products bond to laminate or just sit on top?
How well a filler sticks depends on the product and the laminate’s wear layer—some fillers are designed to chemically adhere or mechanically key into slightly roughened edges, while others merely sit on the surface and can peel or flake over time.
Check manufacturer specs for adhesion to melamine or wear layers, prepare edges per instructions, and test a small area to confirm bonding before completing the repair.
Can I use wood filler or putty meant for solid wood?
Can you use wood filler or putty meant for solid wood on laminate? You can, but it’s not ideal.
Solid-wood fillers may not adhere or flex with laminate’s composite core and coating. Use a laminate-specific repair compound or a flexible epoxy designed for laminates.
If you try wood filler, test invisibly first and expect possible peeling, color mismatch, or premature failure.
Is it possible to repair water-damaged chipped laminate?
Sometimes water damage hides under a chipped laminate, and whether you can repair it depends on how deep the moisture went and how long it sat there.
If only the surface layer swelled or stained, you can dry, sand lightly, and fill or touch up the chip.
If core swelling, delamination, or mold appears, repairs won’t hold and replacement is usually necessary.
When should I call a professional or replace the plank entirely?
If the chip sits only on the surface and you’ve dried and treated any minor water spots, you can often handle repairs yourself; but when damage reaches the core, shows ongoing moisture, or the plank’s locking edge is warped, call a pro or plan to replace that plank.
- Structural core sagging or crumbling
- Persistent swelling or discoloration
- Damaged locking profile preventing snug fit
- Multiple adjacent planks compromised