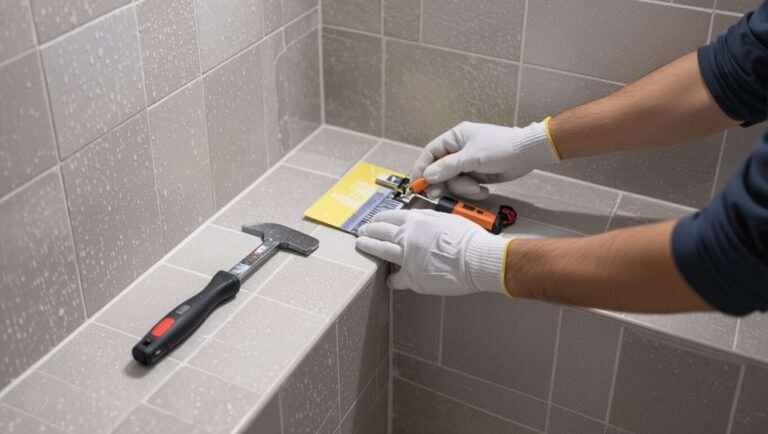
What Are Vinyl Floors? Types, Benefits, and What to Expect
Vinyl floors are synthetic PVC-based planks or sheets that mimic wood, stone, or tile while resisting water, scratches, and heavy wear. You’ll choose from sheet vinyl, luxury vinyl plank (LVP), luxury vinyl tile (LVT), VCT, and rigid-core options like WPC or SPC depending on budget, moisture needs, and installation skill. They’re affordable, low-maintenance, and comfy underfoot, lasting 10–30 years with proper care—keep exploring to learn how to pick, install, and maintain the best option for your home.
What Are Vinyl Floors?
Vinyl floors are synthetic flooring made from layered PVC that mimics wood, stone, or tile.
You’ll find them tough, water-resistant, low-maintenance, and budget-friendly—great for kitchens, bathrooms, and high-traffic rooms.
In the next section we’ll look at the different types and how to pick the right one for your space.
One-sentence definition
A resilient, budget-friendly flooring made from PVC, vinyl floors mimic wood, stone, or tile while offering water resistance and easy maintenance.
When you ask what’re vinyl floors, know they’re thin, layered sheets or planks with a printed design and protective wear layer, engineered for durability, simple installation, and low upkeep so you can confidently choose them for many indoor spaces.
Short summary of main benefits and typical uses
Now that you know what vinyl floors are, you’ll appreciate how they pack several practical benefits into an affordable package.
You’ll get water resistance, durable wear layers, low maintenance, and realistic looks that mimic wood or stone.
They’re perfect for kitchens, bathrooms, basements, and rental units where budget, moisture control, and easy cleaning matter, yet style and comfort still count.
Basic Understanding Vinyl Flooring Explained
You’ll find vinyl is a durable, multi-layered flooring made from PVC and other composites, built with a wear layer, printed design, core and backing for strength.
It comes in several constructions—sheet, LVP, LVT and VCT—each suited to different looks and traffic levels.
Compared with hardwood, laminate and tile, vinyl often wins on water resistance, comfort and cost, though appearance and resale value can vary.
What vinyl flooring is (materials & construction)
Think of vinyl flooring as a layered, engineered sheet or plank designed for durability and style—you’re looking at a core material topped with a printed design layer and a clear wear layer that protects it.
You’ll also find backing for stability, optional foam or cork underlayment for comfort and sound control, and waterproof compounds that resist moisture and stains for easy maintenance.
Types of vinyl by construction: Sheet, Luxury Vinyl Plank (LVP), Luxury Vinyl Tile (LVT), Vinyl Composite Tile (VCT)
Vinyl comes in several distinct constructions—sheet, luxury vinyl plank (LVP), luxury vinyl tile (LVT), and vinyl composite tile (VCT)—each built for different looks and performance.
You’ll choose sheet for large, seamless areas and moisture resistance.
LVP mimics hardwood; LVT replicates stone or ceramic.
VCT is durable, budget-friendly, and common in commercial settings requiring frequent maintenance and refinishing.
How vinyl is made (layers: wear layer, design layer, core, backing)
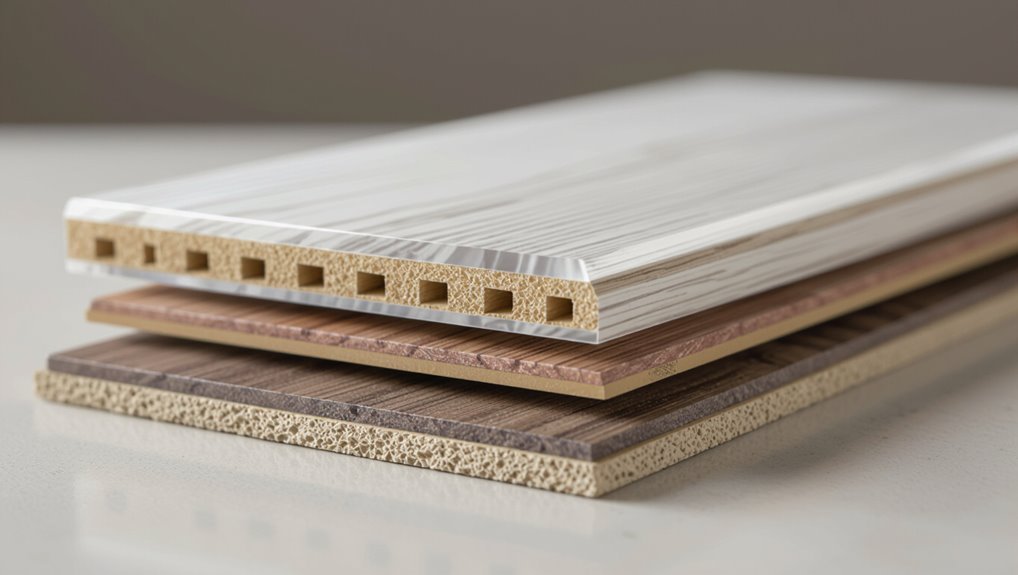
Most vinyl floors stack four distinct layers that each handle a specific job: a clear wear layer that resists scratches and stains, a printed design layer that gives the floor its look, a core that provides stability and thickness, and a backing that balances the plank or sheet and manages moisture.
You’ll choose wear thickness, core type (rigid or flexible), and backing for durability and installation needs.
Vinyl vs other flooring materials (hardwood, laminate, tile)
While hardwood, laminate, and tile each have clear strengths, you’ll find vinyl often wins on cost, moisture resistance, and ease of installation. It’s durable, low-maintenance, and comes in many styles, though hardwood offers resale value and tile excels in heat tolerance.
| Feature | Comparison |
|---|---|
| Cost | Vinyl lowest |
| Moisture | Vinyl best |
| Installation | Vinyl easiest |
| Appearance | Hardwood authentic |
Types of Vinyl Floors Detailed Breakdown
Now you’ll look at the main vinyl types so you can pick the right one for your space.
I’ll cover sheet vinyl, Luxury Vinyl Plank (LVP), Luxury Vinyl Tile (LVT), Vinyl Composite Tile (VCT) and commercial grades, plus rigid-core options (WPC and SPC).
For each I’ll note features, pros and cons, and the rooms or uses where they work best.
Sheet vinyl features, pros, cons, best rooms
Think of sheet vinyl as the workhorse of resilient flooring: it’s a continuous, flexible roll that gives you waterproof coverage with fewer seams, easy cleaning, and budget-friendly installation.
You get durable, low-maintenance surfaces ideal for kitchens, bathrooms, and laundry.
Downsides: can gouge, seams matter if improperly installed, and patterns may look less realistic than higher-end vinyl options.
Luxury Vinyl Plank (LVP) features, pros, cons, best rooms
Because LVP mimics wood plank styling while delivering extra durability and waterproofing, it’s become the go-to option when you want the look of hardwood without the upkeep.
You’ll get realistic textures, click-lock or glue-down installation, and strong wear layers.
Pros: waterproof, scratch-resistant, comfortable underfoot.
Cons: can fade in direct sun, less resale prestige than real wood.
Ideal for kitchens, bathrooms, and basements.
Luxury Vinyl Tile (LVT) features, pros, cons, best rooms
While LVT borrows the realistic visuals and durability of LVP, it’s laid out in square or rectangular tiles to replicate stone, ceramic, or geometric patterns with greater design flexibility.
You’ll get water resistance, easy maintenance, and varied textures.
Pros: upscale look, durable, versatile installation patterns.
Cons: can feel less warm underfoot, edges may reveal seams.
Best for kitchens, bathrooms, entryways.
Vinyl Composite Tile (VCT) & commercial grades features, pros, cons, best uses
Durability defines Vinyl Composite Tile (VCT): it’s a dense, resilient sheet of vinyl chips bound with a tough binder, designed for heavy commercial traffic and frequent cleaning.
You’ll get a low-cost, long-lasting surface that withstands scuffs and frequent waxing. Installation and maintenance demand skill and routine care; appearance can dull without polishing.
Best for retail, schools, hospitals, and high-traffic corridors.
Rigid core options (WPC, SPC) what they are and when to choose them
When you need vinyl that combines rigid stability with easy installation, rigid-core options like WPC (wood plastic composite) and SPC (stone plastic composite) deliver—each balances comfort, waterproofing, and dimensional stability differently.
You’ll pick WPC for a softer, warmer feel and minor subfloor imperfections; choose SPC for maximum hardness, superior dent resistance, and better performance in high-traffic or sun-exposed areas.
Visual and finish options (embossing, textures, grout lines)
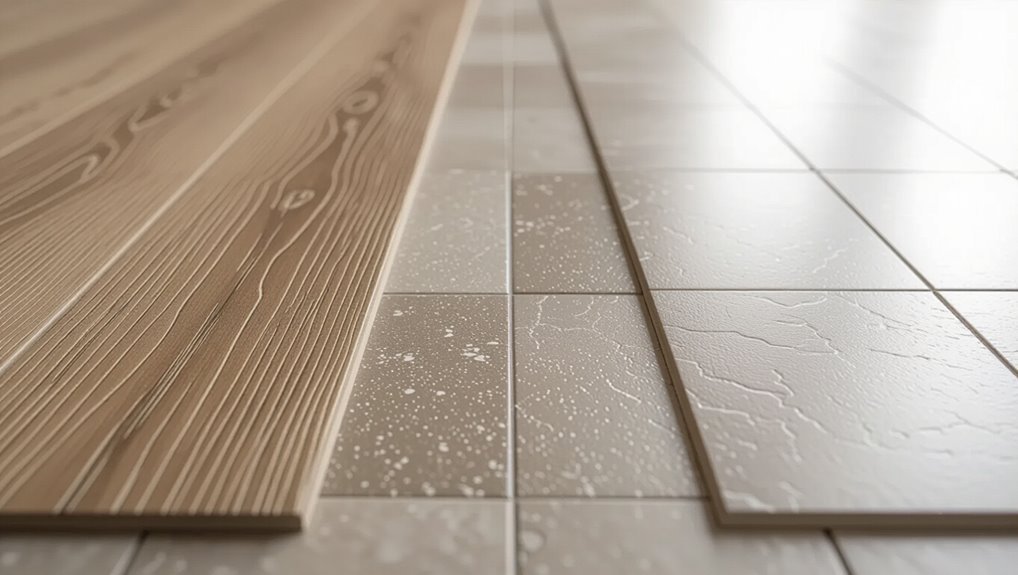
1 main reason vinyl’s visual options matter is they let you match look, feel, and grout realism without sacrificing performance.
You can choose embossing to mimic wood grain, textured surfaces for slip resistance, or printed grout lines for tile realism.
These finishes affect touch, light reflection, and maintenance, so pick one that fits your style, traffic level, and cleaning routine.
Benefits of Vinyl Flooring
You’ll find vinyl stands out for its durability and wear resistance, making it a strong choice in high-traffic spaces.
It’s water-resistant for baths and basements, while offering comfortable underfoot feel, noise reduction, and better thermal performance than tile.
Plus, vinyl gives realistic looks at a lower upfront and maintenance cost, so you get more style for your budget.
Durability and wear resistance
Although vinyl looks sleek, it’s built to take daily life—scratches, scuffs, spills, and heavy foot traffic won’t faze it.
You’ll get a tough wear layer that resists abrasion and preserves the printed design beneath.
With proper maintenance and quality selection, vinyl keeps its finish longer than many alternatives, reducing replacement frequency and saving you time and money over the years.
Water resistance and suitability for wet areas
Because vinyl has a waterproof core and a sealed wear layer, it stands up well in kitchens, bathrooms, and basements where moisture’s a constant concern.
You can mop spills without worrying about swelling or staining, and many luxury vinyl planks and tiles lock tightly to prevent seepage.
For showers or submerged areas, pick products specifically rated for full water exposure and follow installation guidelines.
Comfort, sound, and thermal properties
When you walk across vinyl floors, you’ll notice a softer, more forgiving feel than tile or hardwood, thanks to cushioned cores and flexible wear layers that absorb impact and reduce fatigue.
You’ll also hear less foot noise—vinyl dampens sound better than hard surfaces—and it retains warmth, making rooms feel cozier underfoot.
These traits improve comfort in daily living and reduce echo.
Aesthetic versatility and realism
Vinyl gives you the look of real wood, stone, or tile without the price or upkeep. Modern printing and embossing techniques make patterns, grains, and textures remarkably convincing.
You can choose from matte, glossy, or hand-scraped finishes, varied plank sizes, and grout-effect tiles to match any style. Color consistency and repeatable patterns help you achieve cohesive, high-end visuals throughout your space.
Cost and value proposition (installation + maintenance)
Although you might expect high-end looks to come with high-end costs, vinyl delivers a strong value proposition for both installation and ongoing maintenance. You’ll pay less per square foot, install faster, and clean with simple routines, cutting lifetime costs.
| Cost factor | Typical range | Benefit |
|---|---|---|
| Material | $1–$5/ft² | Low upfront |
| Installation | $1–$3/ft² | Quick labor |
| Maintenance | $0.10–$0.50/ft²/yr | Minimal care |
Environmental considerations and recyclability
1 key environmental question about vinyl flooring is how it’s made, used, and disposed of—and whether it can be part of a circular lifecycle.
You should weigh production impacts (PVC, additives), indoor air quality, and durability that reduces replacement.
Look for recycled-content options and take-back or recycling programs. Proper maintenance lowers waste; when replacing, choose installers who offer recycling or responsible disposal.
What to Expect During Selection and Purchase
When you shop for vinyl, you’ll compare key specs like thickness, wear layer, AC rating, and warranty to match performance needs.
Learn to read product labels and tech sheets so you can spot what really matters and understand price ranges and the cost drivers.
Decide where to buy—big-box retail, pro supply stores, or online—based on selection, support, and budget.
Key specifications to compare (thickness, wear layer, AC rating, warranty)
Before you buy, focus on a handful of specs that determine how the floor will perform: overall thickness, wear layer thickness, AC (abrasion) rating, and the warranty’s coverage and duration.
Check thickness for stability, thicker wear layers for durability, and higher AC ratings for traffic resilience.
Confirm what the warranty actually covers—materials, labor, wear—and how long it lasts.
How to read product labels and technical specs
Now that you know which specs matter, you’ll need to read product labels and technical sheets so you can compare like-for-like.
Look for wear layer thickness, total plank thickness, backing type, and installation method.
Check abrasion class, water resistance rating, and warranty terms.
Note measurement units and testing standards (e.g., ISO, ASTM).
Flag unclear entries and request manufacturer clarification before buying.
Price ranges and factors that influence cost
Expect vinyl flooring prices to span a wide range depending on material, construction, and finish—luxury vinyl plank (LVP) and tile (LVT) often cost more than basic sheet or glued vinyl, while thicker wear layers, rigid cores, and high-end visuals raise the sticker further.
You’ll also pay for brand reputation, installation complexity, underlayment needs, and warranties; geographic labor rates and shipping affect final cost.
Where to buy: retail, pro supply, online
You’ll find vinyl flooring through three main channels—big-box retailers, professional supply houses, and online sellers—each offering different product ranges, pricing, and service levels.
You’ll get showroom displays and installation bundles at retailers, contractor-grade options and volume discounts from pro suppliers, and vast selections plus reviews online.
Compare warranties, return policies, and sample availability before buying to ascertain fit, color, and quality.
Installation Overview Options and Process
You’ll choose between DIY and pro installation based on skill, budget, and how much disruption you can tolerate.
We’ll compare glue-down, loose-lay, click-lock, and peel-and-stick methods, explain subfloor prep and moisture testing, and outline basic installation steps.
Finally, you’ll get typical timelines and what to expect during the work so you can plan accordingly.
DIY vs professional installation: pros and cons
Whether you’re handy with tools or prefer handing the job to pros, choosing between DIY and professional installation comes down to time, skill, and budget.
If you DIY, you’ll save labor costs and control scheduling but must manage prep, precise cuts, and potential mistakes.
Hiring pros guarantees speed, warranty, and cleaner finishes, though it costs more upfront.
Common installation methods: glue-down, loose lay, click-lock, peel-and-stick
After weighing DIY versus hiring pros, you’ll next want to pick the installation style that matches your skill level, subfloor, and room use.
Glue-down offers long-lasting adhesion for high-traffic areas but needs adhesive.
Loose lay sits flat using weight and friction—easy to replace.
Click-lock snaps together for DIY-friendly, floating floors.
Peel-and-stick is simplest for small rooms or budget projects.
Subfloor preparation and moisture testing
Before you lay any planks, get the subfloor clean, level, and completely dry—moisture and unevenness are the main causes of failures in vinyl installations.
Remove debris, fix dips or high spots, and use a self-leveler if needed.
Test moisture with a hygrometer or moisture meter and follow manufacturer limits.
Address excess moisture with mitigation systems before proceeding.
Installation steps at a glance
With the subfloor prepped and moisture under control, you can move on to the actual installation workflow.
You’ll choose plank or sheet layout, acclimate materials, install underlayment if needed, fit and trim pieces, and finish with connections and sealants.
Follow manufacturer instructions and keep lines straight for a professional look.
- Plan layout
- Acclimate vinyl
- Lay underlayment
- Fit and trim
- Install trims and seals
Typical timelines and disruptions to expect
Although every job differs, you can generally expect a simple vinyl plank or sheet installation to take a day or two.
Larger rooms, complex patterns, or glue-down methods can stretch to several days.
You’ll need to clear furniture, allow time for subfloor prep and acclimation, and expect noise, dust, and limited room access.
Plan for contractor schedules and minor touch-ups.
Maintenance, Cleaning, and Care
To keep your vinyl looking great, you’ll want simple daily and weekly cleaning habits plus the right products for tougher stains and periodic deep cleans.
Use gentle cleaners, specific stain-removal techniques, and preventive measures like furniture pads, entry mats, and humidity control to extend the floor’s life.
I’ll also explain how to tell when a patch or repair will do versus when it’s time to replace the flooring.
Daily and weekly cleaning routines
Start by sweeping or dry-mopping your vinyl floors every day to remove grit and dust that can cause scratches, and vacuum with a soft-brush setting for high-traffic areas.
Once or twice weekly, damp-mop with a manufacturer-approved cleaner, using a microfiber mop and minimal water.
Wipe spills promptly, place doormats at entries, and use felt pads under furniture to prevent scuffs.
Stain removal and deeper cleaning (products and techniques)
When stains or grime won’t come off with routine mopping, act quickly with the right products and techniques to prevent lasting damage to your vinyl; choose cleaners recommended by the manufacturer, test them in an inconspicuous spot, and follow up with gentle tools like microfiber cloths or non-abrasive sponges to lift stains without harming the finish.
For tough spots, use a diluted pH-neutral cleaner or rubbing alcohol on a cloth, avoid bleach and abrasive pads, and rinse thoroughly.
Preventive care: furniture pads, mats, humidity control
Although regular cleaning keeps your vinyl looking good, preventive care—like furniture pads, entry mats, and humidity control—does the heavy lifting of avoiding scratches, stains, and warping before they start.
Use felt pads under legs, roll casters with soft covers, and place durable mats at entries and sinks.
Keep indoor humidity between 35–55% to minimize expansion or gaps and monitor seasonal changes.
When to repair vs when to replace
If a small gouge or loose plank shows up, you can often fix it yourself; but deep damage, widespread warping, or recurring problems usually mean it’s time to replace the floor.
Patch kits, seam adhesive, or swapping a plank work for localized issues.
Replace when repairs are frequent, subfloor is compromised, or visible wear undermines appearance and function—especially before selling or remodeling.
Common Problems, Mistakes, and How to Avoid Them
You’ll want to watch for common issues like installation errors that cause warping, gaps, or buckling and choosing the wrong grade or wear layer for your space.
Moisture problems and improper maintenance are other top causes of failure, but you can prevent them with the right underlayment, sealants, and cleaning routine.
Below we’ll cover how to avoid these mistakes so your vinyl lasts as planned.
Installation mistakes that cause warping, gaps, or buckling
When installers skip proper acclimation, neglect subfloor prep, or rush adhesive application, vinyl planks and sheets can warp, pull apart, or buckle. Understanding these common mistakes helps you prevent lasting damage and costly repairs.
Check moisture, level and clean the subfloor, allow boards to acclimate, follow adhesive open times, and maintain correct expansion gaps. Inspect work as you go to catch issues early.
Mistakes in product selection (wrong grade or wear layer)
Because not all vinyl is built the same, choosing the wrong grade or too-thin wear layer can leave your floor scuffed, dented, or prematurely worn.
You should match grade and wear layer to traffic and appliance load—residential light, commercial heavy, or high-traffic zones.
Check manufacturer specs, warranties, and abrasion ratings.
Don’t skimp; a thicker wear layer saves replacement and repair costs.
Moisture-related failures and prevention
If you install vinyl over a damp subfloor or ignore plumbing leaks, moisture will cause buckling, delamination, mold, and adhesive failure.
Prevent problems by testing and drying subfloors, fixing leaks promptly, and using vapor barriers or waterproof underlayments where recommended.
Choose waterproof vinyl types for high-moisture areas, follow manufacturer moisture limits, and allow acclimation before installation to reduce risk.
Maintenance errors that shorten lifespan
Even with proper installation and moisture control, how you care for vinyl will largely determine how long it lasts.
Avoid abrasive cleaners, harsh chemicals, and steam mops that degrade wear layers. Don’t drag furniture; use pads and casters.
Clean spills promptly, vacuum grit, and follow manufacturer recommendations for cleaners and polish.
Regular, gentle care prevents premature fading, scratches, and peeling.
Best Practices and Buying Tips
When choosing vinyl, think about each room’s traffic and moisture so you pick the right product for the space.
Check the wear layer and warranty to guarantee long-lasting performance, and make sure your underlayment and subfloor meet the manufacturer’s requirements.
Finally, save smart by comparing specs and focusing on durability rather than just price.
How to choose the right type for each room
How do you pick the right vinyl for each room?
Consider traffic, moisture, and comfort: choose rigid core or luxury vinyl plank for high-traffic living areas, waterproof sheet or LVP for bathrooms and kitchens, and softer, cushioned vinyl for bedrooms.
Match style to decor, factor installation method, and set a realistic budget.
Test samples under lighting before buying.
Prioritizing wear layer and warranty for longevity
Because the wear layer and warranty determine how long your vinyl will stay looking good, you should make them your top priorities when shopping.
Look for thicker wear layers (20 mil+ for high-traffic areas) and clear warranty terms covering wear-through, stains, and fading.
Verify labor and replacement provisions, pro-rated periods, and required maintenance to keep the warranty valid.
Matching underlayment and subfloor requirements
A strong wear layer and solid warranty matter most, but they won’t help if the subfloor and underlayment don’t support the vinyl.
Check manufacturer specs for thickness, moisture limits, and recommended underlayment type. Confirm subfloor is level, clean, dry, and structurally sound.
Use vapor barriers where required and acoustic or cushioned underlayments only when compatible.
Follow installation guidelines to keep warranties valid.
Smart saving strategies without sacrificing performance
When you want to save on vinyl floors without cutting corners, focus on smart choices that preserve performance and warranty coverage.
Compare wear layers and warranties, choose realistic visuals over premium embossing, and buy full boxes to avoid waste.
Opt for mid-range brands with proven reviews, install yourself if skilled, and skip costly extras that don’t improve durability.
Cost Comparison and ROI
You’ll want to compare typical installed costs by vinyl type—luxury vinyl plank, sheet, and tile—so you know upfront what to expect.
Factor in long-term ownership costs like maintenance, repairs, and eventual replacement to get a true lifecycle price.
Finally, consider how the look and durability affect resale value and whether the aesthetic ROI justifies a higher initial spend.
Typical installed cost ranges by vinyl type
Costs for installed vinyl vary widely by type, so knowing which product you’re choosing lets you forecast both upfront spending and long-term value. Expect basic sheet vinyl to run low, luxury vinyl plank (LVP) midrange, and rigid core premium. Compare materials and installation complexity to pick what fits your budget and style.
| Type | Installed Cost/ft² | Typical Use |
|---|---|---|
| Sheet | $1–$3 | Utility rooms |
| LVP | $2.50–$7 | Living areas |
| Rigid core | $4–$12 | High-traffic spaces |
Long-term cost of ownership (maintenance, repairs, replacement)
Knowing the upfront price per square foot is only part of the picture; your long-term outlays for maintenance, repairs, and eventual replacement will shape the true cost of ownership and return on investment.
You’ll pay low routine maintenance for vinyl—sweeping and mopping—but budget for periodic seam repairs, adhesive touch-ups, and eventual plank replacement after 10–25 years, depending on wear and quality.
Resale impact and aesthetic ROI
Although vinyl won’t fetch the same premium as hardwood, it can still boost your home’s appeal and saleability when you pick high-quality styles and installation.
This is because buyers respond to how a floor looks and how well it holds up. Choose neutral tones and realistic textures to attract more buyers.
Additionally, document warranties and recent installations to justify price and improve perceived value at resale.
Real-World Use Cases and Room-by-Room Recommendations
You’ll want different vinyl types depending on the room—waterproof styles work best for kitchens and bathrooms, while durable, moisture-resistant options suit basements and laundry rooms.
For living areas and bedrooms you can choose softer, more decorative vinyl that prioritizes comfort and appearance.
In commercial or high-traffic spaces pick heavy-duty, wear-layered vinyl that stands up to constant use.
Kitchens and bathrooms
When planning kitchen and bathroom floors, pick vinyl that balances water resistance, durability, and slip safety so it handles spills, steam, and heavy foot traffic without sacrificing style.
Choose waterproof luxury vinyl planks or tiles, textured surfaces for traction, and a thick wear layer for longevity.
Install with proper underlayment and sealed seams to prevent moisture issues and simplify cleaning.
Basements and laundry rooms
Because basements and laundry rooms face moisture, temperature swings, and heavy-duty use, pick vinyl that’s truly waterproof, durable, and easy to maintain.
Choose luxury vinyl plank or tile with a robust wear layer and waterproof core.
Elevate flooring with proper underlayment for cold resistance and mold prevention.
Clean spills promptly, use rugs by machines, and allow airflow to curb dampness and odors.
Living areas and bedrooms
Although living rooms and bedrooms see lighter traffic than kitchens or entryways, they still need flooring that balances comfort, style, and durability.
Choose vinyl plank with a textured, realistic finish for warmth and noise reduction. Opt for a thicker wear layer and underlayment for comfort underfoot.
Pick colors and patterns that match your décor, and maintain with simple sweeping and occasional damp mopping.
Commercial and high-traffic spaces
If your space sees constant foot traffic or heavy equipment, pick vinyl designed for commercial use—it’s built to resist wear, scratches, and stains while staying low-maintenance.
Choose thicker wear layers, commercial-grade adhesives, and welded seams for moisture protection.
You’ll want slip-resistant finishes for safety, easy-to-clean surfaces for hygiene, and warranties covering commercial use.
Install with professional prep for maximum longevity.
Frequently Asked Questions (FAQ)
You probably have questions about lifespan, repairs, and moisture performance, so we’ll cover how long vinyl typically lasts, whether it can be refinished or repaired, and if it’s waterproof or only water-resistant.
We’ll also answer safety concerns for pets and children and whether you can install vinyl over existing flooring.
Read on for clear, practical answers to those common questions.
How long do vinyl floors typically last?
Curious how long vinyl floors will hold up? You can expect 10–20 years for standard vinyl, while luxury vinyl plank (LVP) or tile (LVT) often lasts 20–30 years with proper care.
Lifespan depends on traffic, installation quality, and maintenance. Regular cleaning and avoiding sharp objects or heavy dragging will help maximize longevity, keeping floors looking good longer.
Can vinyl floors be refinished or repaired?
Knowing how long vinyl lasts helps set expectations for upkeep, but you’ll also want to know whether damage means replacement or repair.
You can’t refinish vinyl like hardwood, but you can repair surface issues: use filler for dents, replace planks or tiles for deep gouges, and apply seam adhesives.
Small scratches often buff out; extensive wear usually calls for replacement.
Are vinyl floors waterproof or just water-resistant?
Wondering whether vinyl stands up to spills, splashes, or full-on water exposure? It depends.
Luxury vinyl plank and tile often come waterproof, with sealed wear layers and waterproof cores that tolerate standing water.
Standard sheet vinyl and some vinyl tiles are water-resistant, handling moisture but risking edge or subfloor damage if soaked.
Always check product specs and install proper perimeter and seam sealing for best protection.
Is vinyl flooring safe for pets and children?
If waterproofing and moisture resistance matter for your choice, you’ll also want to contemplate how vinyl performs around kids and pets.
Vinyl is durable, easy to clean, and resists scratches and spills, making it practical for active households.
Choose low-VOC products and textured finishes for traction.
Avoid loose edges and seams to prevent tripping, and maintain cleanliness to reduce allergens and odors.
Can vinyl be installed over existing flooring?
Can you install vinyl over your existing floor? Yes—often you can.
Peel-and-stick, click-lock, or floating vinyl planks work over clean, flat, dry surfaces like vinyl, tile, or wood.
Remove loose tiles, level high spots, and fix moisture issues first.
Avoid installing over carpet or uneven subfloors.
Check manufacturer guidelines and warranties before proceeding to guarantee proper adhesion and performance.
Conclusion Making the Right Vinyl Flooring Choice
Wrap up your decision with a quick checklist: budget, durability, style, and maintenance needs.
Then get samples, measure your space, and compare textures in the room’s light before you buy.
If you want extra confidence, consult a pro for installation advice and final measurements.
Quick checklist for final decision-making
Before you commit, run through this short checklist to validate your vinyl choice meets your needs:
- Verify durability rating matches room traffic and kids/pets.
- Confirm moisture resistance for bathrooms or basements.
- Check maintenance needs fit your routine.
- Guarantee appearance and texture suit your style and comfort.
- Compare warranty terms and installation method for long-term value.
Recommended next steps (samples, measurements, professional consultation)
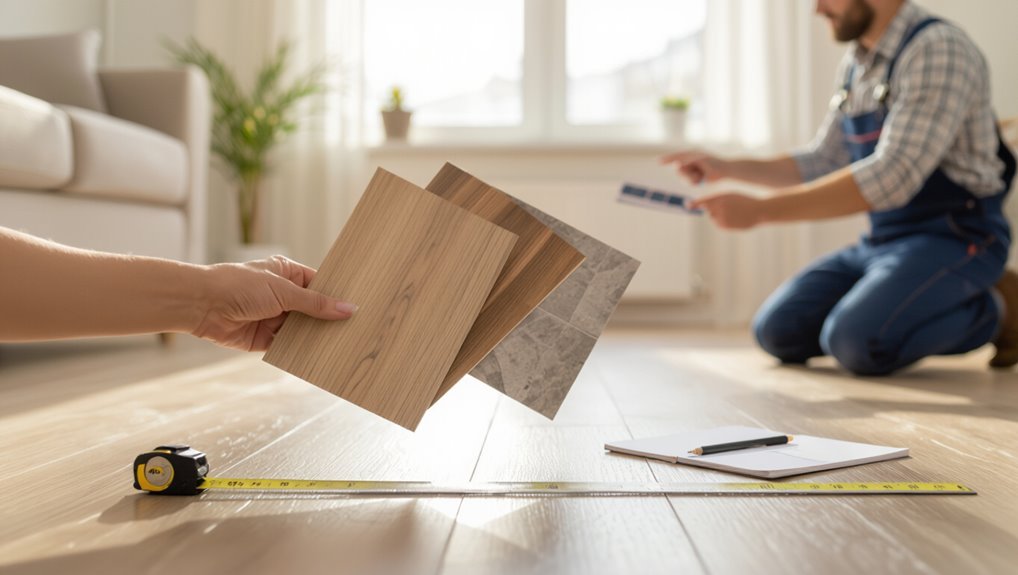
Start by ordering samples and taking precise measurements so you can see and test finishes in your actual light and layout; then schedule a professional consultation if anything about subfloor prep, moisture barriers, or installation methods feels uncertain.
Compare samples in different lighting, confirm dimensions and connections, check warranty and maintenance needs, and get written estimates and timelines from installers before committing.