How to Tile a Bathroom Floor: Step-by-Step Guide for a Perfect Result
You can tile a bathroom floor yourself if you’re comfortable with basic tools and prep; otherwise hire a pro for uneven subfloors or complex drains. Clear the room, inspect and level the substrate, install cement backer board, snap reference lines, and dry-fit tiles. Apply thin-set, set tiles with spacers, let mortar cure, then grout, seal porous surfaces, and caulk edges. Follow manufacturer cures and inspect for hollow spots — keep going to get full step-by-step guidance.
Can You Tile a Bathroom Floor Yourself?
You can tile a small bathroom yourself by prepping the subfloor, laying thinset, placing tiles with spacers, and grouting—expect a weekend for a 5×8 ft room if you’re efficient.
Hire a pro if the floor is uneven, drains or waterproofing are involved, or you want a flawless finish without trial and error.
If you’re handy and patient, DIY saves money; if not, a contractor will save time and headaches.
Short summary of process and time estimate
Tackle the project in clear stages: prep the subfloor, lay out and cut tiles, spread thinset and set tiles, grout and seal, then clean up and cure.
You can learn how tile bathroom floor techniques quickly; expect 1–3 days for a small bathroom, longer if repairs or drying times are needed.
Plan for adhesive and grout curing between steps.
When to hire a professional vs DIY
While tiling a bathroom floor is a doable weekend project for many homeowners, you should weigh your comfort with tools, floor condition, and time constraints before deciding to DIY.
Hire a pro if subfloor repairs, complex layouts, waterproofing, or plumbing obstacles exceed your skills, or if you need flawless grout and warranty.
DIY if you’re confident, patient, and have basic tools.
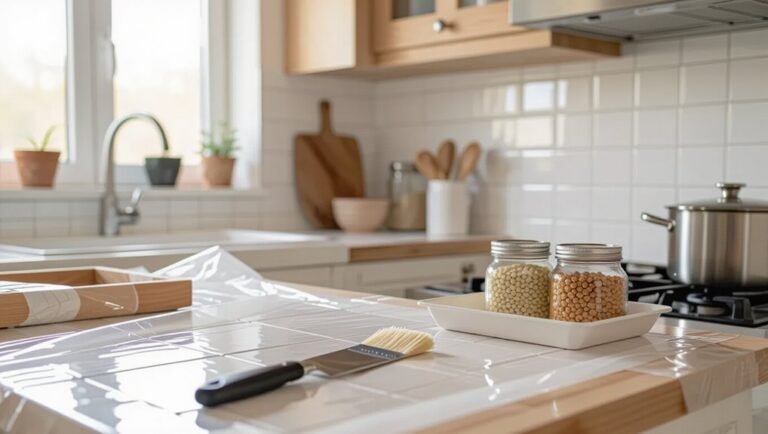
Basic Understanding What You Need to Know Before Tiling
Before you start tiling, you’ll want to know which tile types work best where, from porcelain for floors to smaller mosaics for showers.
Make a checklist of essential materials and tools—backer board, mortar, grout, trowel, spacers, and safety gear—so you don’t get stalled mid-job.
Also learn key terms like substrate and waterproofing basics to avoid common mistakes and protect your floor long-term.
Types of bathroom tiles and where to use them
Because bathrooms face constant moisture and traffic, choosing the right tile matters more than you might think. You’ll pick porcelain for durability, ceramic for ease, natural stone for luxury (seal it), and mosaic for accents. Match finish to slip resistance and location.
| Tile Type | Best Use |
|---|---|
| Porcelain | Floors |
| Ceramic | Walls |
| Stone | Accent floors |
| Mosaic | Shower niches |
Essential materials and tools checklist
Once you’ve chosen your tile, gather the right materials and tools so the job goes smoothly; having everything on hand saves trips to the store and prevents mistakes.
You’ll need quality supplies and the right gear to work confidently and efficiently.
- Tile cutter or wet saw
- Measuring tape and pencil
- Level and straight edge
- Safety gear (gloves, goggles)
- Bucket and sponge
Key terms: substrate, mortar, grout, backer board, trowel, spacers
A few basic terms will make tiling less confusing: substrate is the floor surface you’ll cover; backer board is a rigid layer you install over it.
Mortar is the adhesive you’ll trowel down; grout fills joints after tiles cure.
Use a notched trowel for even mortar and spacers to maintain consistent gaps.
Know these before you start.
Safety considerations and waterproofing basics
Knowing the terms keeps you from fumbling during installation, but you also need to protect yourself and your work from moisture and mishaps.
Wear goggles, gloves, and a dust mask when cutting tiles. Use a cement backer board, apply a waterproof membrane on joints and seams, and seal connections to drains.
Keep ventilation good and clean up slurry promptly to prevent slips and mold.
Step-by-Step Guide to Tiling a Bathroom Floor
Now you’ll follow a clear sequence to tile your bathroom floor: prepare the space, plan the layout, mix and apply thin-set mortar, set the tiles, and allow curing time before inspecting.
Start by clearing and leveling the subfloor so tiles sit flat. Then snap reference lines to guide placement.
Work methodically across the room, checking alignments and spacing as the mortar cures.
Step 1 Prepare the space
First, you’ll remove fixtures, baseboards, and the old flooring so you’ve got a clear workspace.
Next, inspect the subfloor and joists, repairing any rot or uneven areas to guarantee a solid base.
Finally, install or replace cement backer board and underlayment to create a stable, water-resistant surface for your tile.
Remove fixtures, baseboards, and old flooring
Start by clearing everything from the room and shutting off water and power to fixtures you’ll remove; this keeps the workspace safe and gives you room to work.
Remove toilet, vanity, and shower trim carefully, pry off baseboards, and strip old flooring down to the subfloor. Label plumbing parts and pack fasteners.
- Unscrew toilet bolts
- Disconnect water lines
- Pry off baseboards
- Tear out tile or vinyl
- Bag screws and clips
Inspect and repair subfloor and joists
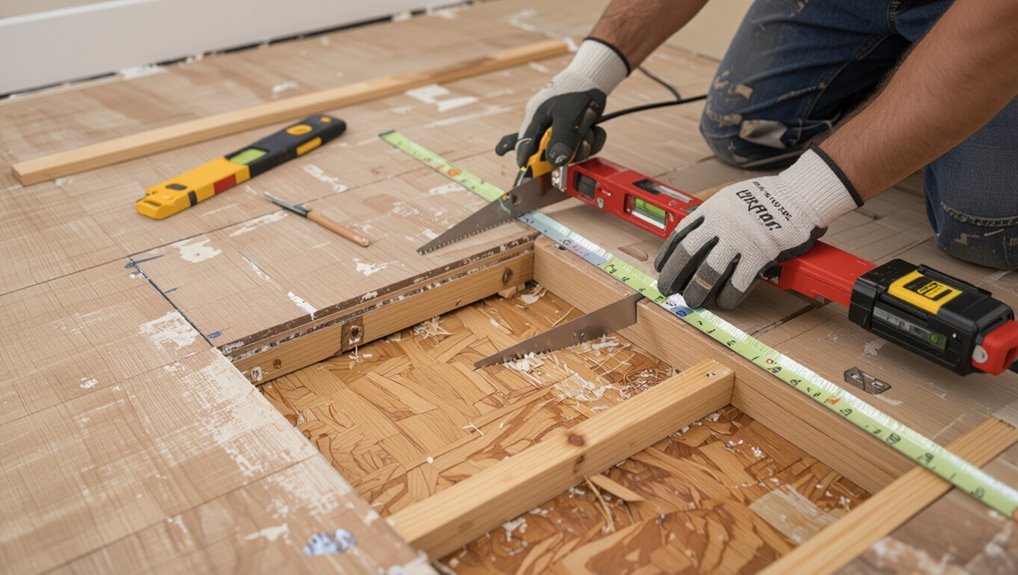
Check the subfloor and joists for rot, soft spots, squeaks, or any movement that could compromise your tile installation.
Probe suspect areas, lift loose boards, and measure deflection between joists.
Replace or sister damaged joists, and nail or screw down loose subflooring to eliminate bounce.
Guarantee framing is level and structurally sound before proceeding to underlayment installation.
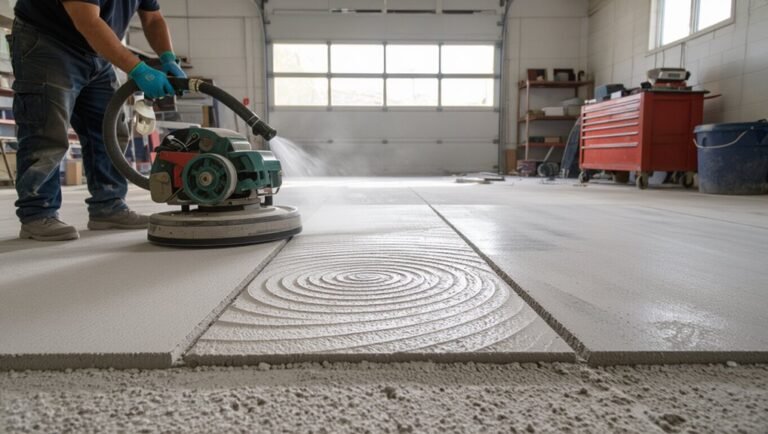
Install or replace cement backer board and underlayment
With the subfloor repaired and firmly fastened, you’re ready to install cement backer board and underlayment to create a stable, water-resistant base for tile.
Measure and cut boards to fit, stagger seams, and use thinset underlayment for full contact.
Screw boards to joists with corrosion-resistant screws, seal seams with mesh tape and thinset, and apply a waterproof membrane where required.
Step 2 Plan your layout
Measure your room and calculate how many tiles you’ll need, accounting for waste and layout options.
Dry-lay a row or two to find the best starting point and minimize awkward cuts.
Mark straight layout lines and choose a focal point so your pattern looks balanced when you install.
Measure and calculate tile count and layout options

Before you cut or buy anything, figure out how many full tiles and what fraction pieces you’ll need by measuring the room and mapping a layout on paper or with a simple drawing app.
Measure length and width, note alcoves, fixtures, and offsets. Calculate area, add 10% waste, and plan grout-line spacing.
List tile count by full and cut pieces.
Dry-lay tiles to find best starting point and minimize cuts
Start by dry-laying tiles across the floor to visualize the pattern and find the most attractive, least wasteful starting line.
Work outward from that line, staggering rows if using a pattern, and check edge widths.
Shift the layout to avoid tiny slivers at walls and fixtures.
Note cut locations, measure those spots, and keep tiles aligned so grout joints remain consistent.
Mark layout lines and define focal point
Now mark two perpendicular layout lines that cross at your chosen focal point—this gives you a reference grid to keep tiles straight and centered.
From that intersection, snap chalk lines toward walls and around fixtures. Adjust so cut tiles at edges are balanced.
Transfer lines to the substrate if needed. Number or note the starting quadrant so you tile in a controlled, symmetrical sequence.
Step 3 Mix and apply thin-set mortar
Now you’ll mix and apply the thin-set mortar, starting by choosing a mortar suited to your tile type and the substrate so it bonds properly.
Follow the manufacturer’s mixing ratios and watch the mortar’s open time so it stays workable but still tacks up when laid.
Use a trowel with the correct notch size to get full coverage and consistent mortar thickness under each tile.
Choosing the right mortar for tile type and substrate
Because different tiles and substrates demand different bond strengths and flexibility, you’ll want to match your mortar to both the tile type and the surface you’re covering.
Use polymer-modified thin-set for dense porcelain and large-format tiles, flexible or latex-enhanced mortar over plywood or uncoupling membranes, and rapid-set blends for fast jobs.
Check manufacturer recommendations and ANSI specifications before buying.
Proper mortar mixing and open time
Consistency matters when you mix thin-set: get it right and the mortar will hold tiles firmly, cure properly, and give you enough open time to work.
Measure water and powder per manufacturer, mix to a creamy peanut-butter consistency, then let it slake briefly and remix.
Monitor pot life; don’t retemper with extra water. Mix only what you can use within the open time.
Applying mortar with correct trowel notch size
With your thin-set mixed and within its open time, pick a trowel whose notch size matches the tile and substrate so you get full coverage without wasting mortar.
Hold the trowel at a consistent 45-degree angle, comb straight ridges, and apply only as much mortar as you can tile before skinning.
Back-butter large or uneven tiles to guarantee complete contact.
Step 4 Set tiles
Now you’ll set the tiles, using spacers and a level to keep grout lines consistent and the surface flat.
When you need cuts, use the right cutter or wet saw and wear eye and hand protection.
Take extra care around fixtures and tight spots, measuring twice and dry-fitting pieces before permanently troweling them into place.
Techniques for evenly setting tiles and maintaining grout lines

Start by laying out a clear reference line so you can set tiles straight and keep grout lines uniform; this baseline will guide every row and help you spot misalignments early.
Use spacers for consistent joints, press tiles firmly into thinset with a slight twisting motion, check alignment frequently with a straightedge, adjust height with gentle taps, and wipe excess mortar to keep grout lines clean.
Cutting tiles: tools and safety tips
After you’ve set the main field of tiles and confirmed straight, evenly spaced joints, you’ll need to cut tiles to fit edges, fixtures, and irregular spaces.
Use a manual snap cutter for straight cuts, a wet saw for precise or porcelain cuts, and tile nippers for small notches.
Always wear eye protection, gloves, a dust mask, and clamp tiles securely before cutting.
Working around fixtures and tight spaces
When you approach fixtures and tight spots, plan each cut and placement so tiles sit snugly without gaps or awkward seams. Measure twice, mark tiles, and use a tile nipper or wet saw for curves and notches.
Fit tiles around pipes and vents with consistent grout joints. Dry-fit pieces, adjust for level, then set with thinset and spacers for a clean, durable finish.
Step 5 Allow curing time and inspect
Let the adhesive and grout cure undisturbed for the manufacturer’s recommended time—usually 24–72 hours—and protect the floor with cardboard or rosin paper if people will be walking through.
After curing, walk the floor and tap each tile; a hollow sound or movement means the tile didn’t bond and needs lifting and re-bedding.
Fix any hollow tiles promptly to prevent future cracking or water damage.
Recommended curing times and temporary protections
Because the grout and thinset need time to gain full strength, you should plan specific curing windows and protect the floor from traffic and moisture while it sets.
Wait at least 24 hours before light foot traffic, 72 hours for full grout cure, and seven days for heavy use.
Use roped-off signs, cardboard or plywood walkways, and keep the room ventilated and dry.
Identifying and fixing hollow-sounding tiles
After the curing window, walk the floor and listen for hollow-sounding tiles—they indicate voids in the thinset that can lead to cracking or tile failure.
Mark any hollows, remove affected tiles carefully, clean old mortar, and apply fresh thinset with proper coverage and back-buttering if needed.
Press and level replacement tiles, allow full cure, then grout and seal.
Test for solid sound.
Step 6 Grout and seal
Now that your tiles are set, you’ll pick a grout type and color—sanded for wider joints, unsanded for narrow gaps—to match durability and appearance.
Apply grout with a rubber float, work diagonally across joints, then wipe haze with a damp sponge before it fully hardens.
Once cured, seal grout (and porous tiles if required) to protect against stains and moisture.
Choosing grout type (sanded vs unsanded) and color
While you’re finishing tiles, you’ll need to pick the right grout—sanded for joints 1/8″ wide or larger, unsanded for narrower gaps and delicate surfaces—because the choice affects durability, appearance, and ease of maintenance.
Choose a color that complements tile and hides stains; lighter grout widens the look, darker grout conceals dirt.
Consider epoxy grout for high-moisture areas and easier long-term upkeep.
Grouting technique and cleanup
With your grout type and color chosen, it’s time to mix and apply grout so joints are fully filled and tiles stay protected.
Work small sections, pack grout diagonally with a rubber float, removing excess.
After 10–20 minutes, wipe haze with a damp sponge, rinsing sponge often.
Let grout firm, then buff tiles with a dry cloth to remove final residue.
Sealing grout and tile (when needed)
Although sealing isn’t always required, you’ll want to protect porous grout and certain natural tiles to prevent stains and moisture penetration.
Choose a penetrating sealer for grout and stone; water-based sealers suit most ceramic or porcelain.
Test in an inconspicuous spot, then apply evenly with a brush or applicator. Wipe excess, let cure per instructions, and reapply periodically for sustained protection.
Step 7 Reinstall fixtures and finishing touches
Now that the grout’s cured, you’ll reattach baseboards, trim, and any fixtures you removed so the room looks finished and functions properly.
Take time to caulk gaps and tighten fittings to prevent water intrusion.
Finish with a thorough cleaning and note any maintenance steps to keep the new floor looking great.
Reattaching baseboards, trim, and fixtures
Finish by carefully reattaching baseboards, trim, and fixtures so your new tile looks complete and functions properly.
Measure and dry-fit pieces, reinstalling baseboards with finish nails into studs and caulking seams.
Reattach toilet, vanity, towel bars, and switch plates, tightening mounts and checking seals.
Adjust thresholds and connector strips for smooth edges.
Test fixtures for stability before regular use.
Final cleaning and maintenance start-up
Once you’ve reinstalled baseboards and fixtures, focus on a thorough final clean and initial maintenance to protect your new floor and guarantee everything’s sealed and functioning.
Remove grout haze with a pH-neutral cleaner, buff tiles dry, and inspect grout lines for voids.
Seal grout if recommended, tighten fixtures, check caulk joints, and schedule gentle cleaning routines to preserve appearance and longevity.
Common Problems and How to Fix Them
You’ll likely run into a few common issues—uneven tiles and lippage, cracked tiles or grout, water damage and mold, or tile adhesion failures—and you’ll want to know how to fix each.
Start by diagnosing whether the problem is surface-level (grout or a loose tile) or structural (subfloor or waterproofing failure).
From there you can follow targeted remedies—leveling and re-setting tiles, replacing cracked pieces and re-grouting, improving waterproofing and ventilation, or re-tiling when adhesion is beyond repair.
Uneven tiles and lippage causes and remedies
If your new bathroom floor shows uneven tiles or noticeable lippage—where one tile edge sits higher than its neighbor—you’ll want to address it quickly to avoid tripping hazards and grout failures.
Check substrate flatness, thin-set consistency, and tile leveling clips; loosen and reset high tiles with fresh mortar, use spacers and a level, and grind small peaks or replace poorly seated tiles for a smooth finish.
Cracked tiles or grout repair steps
Noticing cracks in tiles or grout after fixing lippage is frustrating, but you can often repair them without redoing the whole floor.
Remove loose grout or fragments, clean joints and tile edges, then apply matching grout or epoxy.
For cracked tiles, remove damaged tile, clean adhesive, apply fresh thinset, and set a replacement.
Seal repaired grout to protect edges.
Water damage and mold prevention strategies
Because bathrooms stay damp, water damage and mold can sneak up fast unless you address moisture sources and ventilation, inspect seals, and use appropriate waterproofing and materials.
Check and replace failing caulk around tubs, showers, and fixtures. Install or upgrade an exhaust fan vented outside, slope subfloor toward drains, choose mold-resistant backerboard and grout, and clean vents and grout regularly to prevent buildup.
Tile adhesion failures and when to re-tile
When tiles start popping up, cracking, or hollow-sounding underfoot, it’s a clear sign the bond between tile and substrate has failed. You need to diagnose what’s gone wrong before repairing or re-tiling.
Check for moisture, inadequate mortar, movement, or poor surface prep.
Remove loose tiles, assess substrate integrity, fix underlying issues, then re-tile using appropriate thinset, backer board, and expansion joints.
Best Practices, Tips and Time-Saving Strategies
For a small bathroom, choose tile sizes and patterns that make the space feel larger and lay out your cuts to minimize waste.
Use efficient tools—like a wet saw, tile spacers, and a grout float—and plan each step to save time and avoid rework.
Budget for quality materials, watch for seasonal humidity that affects adhesive and grout curing, and don’t skip proper subfloor prep to prevent costly mistakes.
Optimal tile sizes and patterns for small bathrooms
Although small bathrooms limit layout options, choosing the right tile size and pattern can make the space feel larger and simpler to install.
Use larger-format tiles (12×24 or 18×18) to reduce grout lines and visually expand the floor.
Lay tiles diagonally or in a staggered subway pattern for depth.
Keep grout color close to tile tone for a seamless, airy look.
Efficient tools and accessories that speed up the job
A few smart tools and accessories will shave hours off your bathroom tile job and cut frustration—think a quality wet tile saw for fast, clean cuts, a notched trowel sized to your thinset and tile for proper coverage, and a tile leveling system to eliminate lippage without constant reworking.
- Wet tile saw
- Notched trowel
- Tile leveling clips
- Grout float
- Knee pads
Budgeting tips and how to avoid costly mistakes
When you plan your budget before buying materials or renting tools, you’ll avoid surprise costs and keep the project on track.
Estimate materials, waste (add 10–15%), and tool rentals. Get multiple quotes for tile and labor, prioritize quality where failure is costly, and buy slightly more grout and adhesive.
Track expenses, inspect work as you go, and fix small issues immediately to prevent expensive rework.
Seasonal and humidity considerations
Budget planning also needs to account for seasonal and humidity factors that can affect materials, drying times, and tool rentals.
Plan tiling when indoor humidity is low and temperatures are stable; use dehumidifiers or heaters if needed.
Allow extra curing time in damp conditions, stock moisture-resistant adhesives and grout, and schedule rentals when demand (and cost) is lower to save time and money.
Materials and Cost Comparison
Now let’s look at what you’ll actually spend: break down costs for materials, tools, and any labor you might hire.
Compare common tile types—ceramic, porcelain, natural stone—on durability and upkeep so you can weigh long-term value against upfront price.
That way you’ll pick the option that fits your budget and lifestyle.
Cost breakdown: materials, tools, and labor
Tallying costs for a bathroom tile job helps you make smarter choices about materials, tools, and whether to hire pros or do it yourself. Estimate tiles, grout, underlayment; list tool purchases or rentals; compare labor quotes per hour or per square foot. Use the table below to visualize typical low/mid/high ranges.
| Item | DIY cost | Pro cost |
|---|---|---|
| Tiles | $2–$10/sq ft | $3–$12/sq ft |
| Tools | $20–$200 | Rental ≈ $15/day |
| Labor | $0 | $4–$10/sq ft |
Durability and maintenance comparison of common tile types
Different tile types hold up and require care in distinct ways, so knowing their durability and maintenance needs helps you pick what fits your lifestyle. Choose porcelain for toughness and low upkeep; ceramic is affordable but needs sealant on grout; natural stone looks great but demands sealing and gentle cleaners.
| Tile Type | Durability | Maintenance |
|---|---|---|
| Porcelain | High | Low |
| Ceramic | Medium | Medium |
| Stone | Variable | High |
Checklist: Pre-Tile and Post-Tile Walkthrough
Before you lay the first tile, walk through a concise pre-tile checklist to confirm the subfloor is level, the layout is planned, and all materials and tools are on hand.
After the grout cures, run a post-tile walkthrough to spot clean, check joints, trim connections, and verify fixtures and sealants are correctly installed.
- Verify subfloor flatness and moisture barrier
- Dry-fit layout and cuts
- Confirm tile, adhesive, grout quantities
- Inspect grout lines and remove haze
- Check trim, changes, and caulking
FAQ
You probably have a few practical questions before you start—like how long tiling a small bathroom takes and whether you can lay new tile over existing tile.
You’ll also want to know which grout works best, how to keep water from seeping under tiles, and how to pick tile size and patterns for ventilation and slip resistance.
I’ll answer each one clearly so you can plan and avoid common mistakes.
How long does tiling a small bathroom floor take?
Wondering how long tiling a small bathroom floor will take? Expect 1–2 days for prep, layout, and cutting, plus 24 hours for thinset to cure before grouting.
Grouting and cleanup add another day for a safe walk-on time.
If you rush, quality suffers; allow extra time for complicated cuts, subfloor repairs, or unexpected issues to avoid mistakes.
Can I lay new tile over existing tile?
If you want to save time after tiling, laying new tile over existing tile can be tempting—but it only works in specific situations.
You can do it if the old tiles are firmly bonded, level, and free of damage. Remove loose grout, clean thoroughly, and use a proper thinset designed for bonding.
Don’t tile over unstable, cracked, or uneven surfaces.
What is the best grout to use in a bathroom?
Which grout should you pick for a bathroom?
Use a polymer-modified cement grout for durability and flexibility, or epoxy grout where stains and moisture are serious concerns.
Choose sanded grout for joints over 1/8″ and unsanded for narrower gaps.
Match grout color to tile and seal cement-based grout to resist mildew.
Clean spills promptly to keep grout looking new.
How do I prevent water from seeping under tiles?
Good grout and proper sealing help, but preventing water from seeping under tiles starts with creating a watertight base.
Waterproof the substrate with a quality membrane, seal seams and corners with waterproof tape or caulk, and slope shower pans toward drains.
Use a backer board designed for wet areas, fix cracks, and test for leaks before tiling so water stays where it belongs.
How do I choose the right tile size and pattern for ventilation and slip resistance?
How do you balance ventilation needs and slip resistance when picking tile size and pattern?
Choose smaller tiles or mosaic sheets in wet zones — more grout lines improve traction and let floor drains work efficiently.
Use textured, matte finishes rated for wet areas (COF ≥ 0.6).
Coordinate larger, smoother tiles in dry areas for easy cleaning while keeping changes low and slip risk minimal.