How to Lay Bathroom Flooring: Best Options and How to Install Each One
You’ll pick bathroom flooring by balancing water resistance, slip safety, durability, upkeep, and budget. Measure and inspect the subfloor, fix rot, then choose from porcelain or ceramic tile for durability, luxury vinyl or waterproof laminate for easy install, engineered wood for warmth, or stone for a premium look—each needs the right underlayment, moisture barrier, and sealing. Follow manufacturer steps for layout, adhesive or click-lock installation, grout or seam sealing, and finish trims; keep going to learn specific steps and tips.
Best Bathroom Flooring Options and When to Use Each
When choosing bathroom flooring, focus on durability, water resistance, and slip safety so you get a surface that fits your budget and style.
You’ll pick ceramic or porcelain tiles for wet zones, luxury vinyl for budget-friendly resilience, and engineered wood or waterproof laminate for warmth where moisture’s controlled.
Learn how to lay bathroom flooring for each material to guarantee proper underlayment and sealing.
Basic Understanding Bathroom Flooring Fundamentals
Choosing the right bathroom flooring matters because it affects safety, longevity, and how much upkeep you’ll face.
You’ll want to weigh water resistance, slip resistance, durability, maintenance needs, and cost when comparing materials.
Also check your subfloor and address moisture barriers or damage before you install so the new floor performs well.
Why flooring choice matters in bathrooms
Because bathrooms face constant moisture, heavy foot traffic, and occasional impacts, the flooring you pick directly affects durability, safety, and upkeep.
You’ll want materials that withstand daily use, resist stains, and tolerate cleaning routines without degrading.
The right choice reduces long-term repairs, protects subfloors, and complements style.
Making an informed selection saves time, money, and frustration down the road.
Key performance criteria (water resistance, slip resistance, durability, maintenance, cost)
Performance matters—so you’ll want to evaluate flooring by how it handles five key criteria: water resistance, slip resistance, durability, maintenance, and cost.
Consider sealed or waterproof surfaces for wet areas, textured finishes to reduce slips, materials that resist scratches and dents, and cleaning needs that fit your routine.
Balance upfront price against lifespan and repair costs to choose wisely.
Subfloor and moisture considerations
Before you pick a finish, check the subfloor and how moisture moves through your bathroom: a solid, dry subfloor and proper moisture controls determine whether your new flooring will last.
Inspect for rot, soft spots, and levelness.
Repair or replace damaged plywood or concrete, add a vapor barrier or waterproof membrane as needed, and guarantee proper drainage and ventilation to prevent future problems.
Overview of Best Flooring Options
Now that you’ve got the basics down, you’ll want to compare the top flooring choices for bathrooms so you can pick the right balance of water resistance, durability, and style.
Consider these popular options as you plan your install:
- Porcelain and ceramic tile
- Luxury vinyl plank and vinyl sheet
- Natural stone / engineered stone-look options
- Engineered wood (water-resistant) and waterproof laminate
Porcelain and ceramic tile
While tile can feel intimidating at first, porcelain and ceramic are among the smartest choices for bathroom floors because they’re durable, water-resistant, and available in countless styles and price points.
You’ll get long-lasting performance, easy maintenance, and excellent stain resistance.
Install requires a waterproof underlayment, proper thinset, grout sealed against moisture, and careful leveling for a professional finish.
Luxury vinyl plank and vinyl sheet
One of the most practical choices for bathroom floors is luxury vinyl—both plank and sheet—because it delivers true water resistance, easy installation, and realistic looks that mimic wood or stone.
You’ll appreciate low maintenance, durable wear layers, and cushioning underfoot. Planks fit like floating floors; sheet vinyl offers seamless coverage ideal for wet areas.
Both cut, glue, or click into place easily.
Natural stone
If you want a bathroom floor that combines timeless beauty with serious durability, natural stone is hard to beat.
You’ll get authentic variation, excellent longevity, and strong resale appeal.
Expect higher cost, heavier installation, and need for proper subfloor support and sealing to prevent staining and moisture damage.
Choose slate, marble, travertine, or granite based on slip resistance and maintenance preferences.
Engineered wood (water-resistant options)
When you want the warmth and look of hardwood without sacrificing moisture resistance, engineered wood is a smart choice—its layered construction and moisture‑blocking core make it far more stable than solid wood in humid bathrooms.
You’ll get real wood veneer, easy floating or glue-down installs, and better dimensional stability. Choose products rated for bathrooms, seal edges, and maintain prompt spill cleanup to prolong lifespan.
Waterproof laminate
Engineered wood gives you genuine warmth, but if you want maximum water resistance with a wood-like look, waterproof laminate is worth a close look.
You’ll get durable, click‑lock planks that resist spills, stains, and humidity. It’s affordable, easy to install over many subfloors, and low‑maintenance.
Pick a quality underlayment, seal seams at wet zones, and avoid prolonged standing water.
Painted or sealed concrete
Painted or sealed concrete gives you a hard‑wearing, low‑maintenance floor that’s ideal for bathrooms where moisture and traffic are concerns.
You’ll prep the slab by cleaning and repairing cracks, then apply a concrete primer, paint or epoxy, and a clear sealer for added protection.
It’s cost‑effective, durable, and easy to clean, but expect a cold, hard surface and occasional resealing.
Rubber and cork (specialty options)
Two specialty choices—rubber and cork—offer unique benefits for bathrooms: both are water‑resistant options that cushion your feet, dampen sound, and stand up to heavy use.
You’ll find rubber resilient and low‑maintenance, ideal for showers or laundry areas.
Cork brings natural warmth and anti‑microbial qualities but needs a good seal.
Both install as tiles or sheets; follow manufacturer adhesion guidelines.
Comparison of Options Pros, Cons, and Typical Cost
When choosing bathroom flooring, you’ll weigh durability, water resistance, maintenance, appearance, and cost to find what fits your needs and budget. Compare options quickly: tile is durable/waterproof but pricier; vinyl is affordable/waterproof; engineered wood looks warm but needs care; cork/rubber are comfy but niche.
| Option | Quick pros/cons |
|---|---|
| Tile | Durable/waterproof; higher cost |
| Vinyl | Affordable/waterproof; less long-term value |
| Wood | Warm/attractive; water-sensitive |
| Cork/Rubber | Comfortable; limited styles |
How to Prepare for Any Bathroom Flooring Installation
Before you start, gather a tools-and-materials checklist so you won’t be making mid-job runs.
Measure the room and calculate waste to order the right amount of flooring and underlayment.
Inspect and prep the subfloor for level, rot, or mold, then choose the proper moisture barrier and underlayment for your floor type.
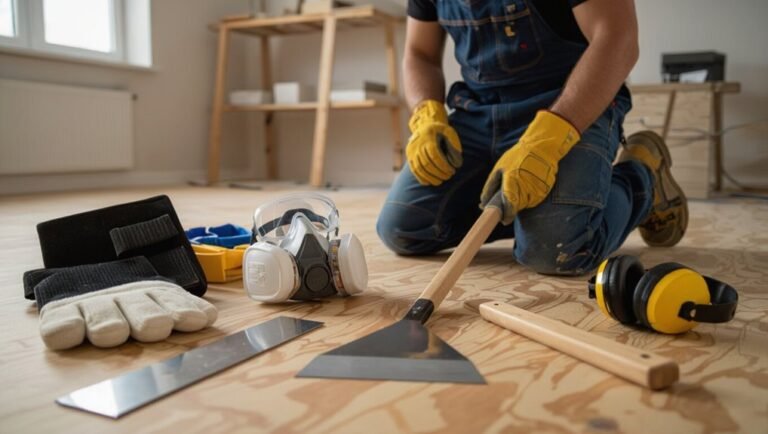
Tools and materials checklist
Start by gathering the essential tools and materials so you won’t be running back to the store mid-job: a quality tape measure, utility knife, straightedge or level, chalk line, pry bar, hammer, notched trowel (for adhesive), wet saw or tile cutter (if using tile), spacers, grout float, sponge, and appropriate underlayment and flooring materials.
- Safety gear: gloves, goggles, knee pads
- Adhesives, nails, grout
- Threshold strips, trim pieces
- Cleaning supplies, trash bags
Measuring room size and calculating materials
Measure the room carefully so you know exactly how much flooring, underlayment, and trim you’ll need; use a tape measure to record length and width, note alcoves, door swings, and fixtures, and sketch a simple floor plan with dimensions and any cuts or waste areas indicated.
Calculate area, add 10–15% for waste, convert to box or roll quantities, and list trim lengths.
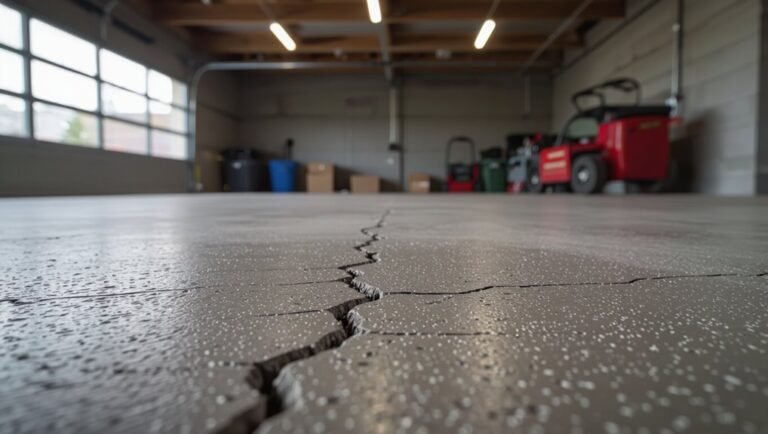
Assessing and preparing the subfloor (leveling, remediation of rot/mold)
Because a stable, dry subfloor is the foundation of any lasting bathroom installation, you should inspect it thoroughly for level, rot, mold, and moisture issues before laying a single tile or plank.
Check flatness with a straightedge, probe soft spots, remove and replace rotten joists or plywood, treat minor mold with appropriate cleaners, and sand or level low spots with patching compound for a solid base.
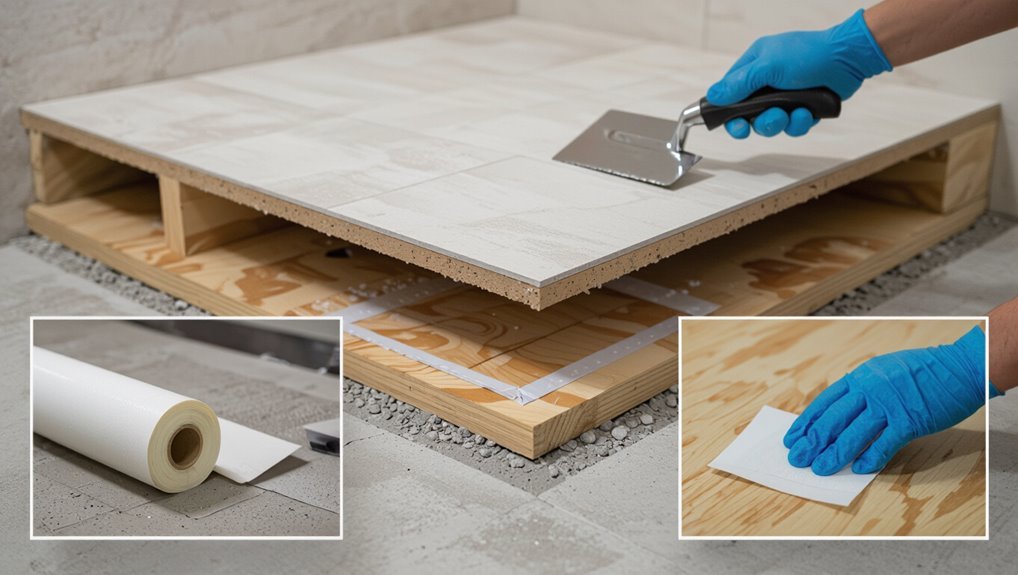
Moisture barrier and underlayment selection
With a sound, level subfloor in place, you’ll need to decide on moisture barriers and underlayment that match your chosen flooring and the bathroom’s humidity conditions.
Choose vapor barriers for high-moisture areas, waterproof underlayments for tile, and decoupling membranes to prevent cracks.
Cushioning underlayment suits vinyl; cement board or foam backer is required under tile.
Seal seams and follow manufacturer specs.
Step-by-Step Installation: Porcelain and Ceramic Tile
You’ll start by planning the layout and dry-fitting tiles so cuts and joints fall where you want them.
Then you’ll install a cement backer board, spread thinset, set tiles, and follow with grout and sealer.
Finish with trim, cleanup, and a final inspection to guarantee everything’s even and watertight.
Step 1 Layout planning and dry fitting
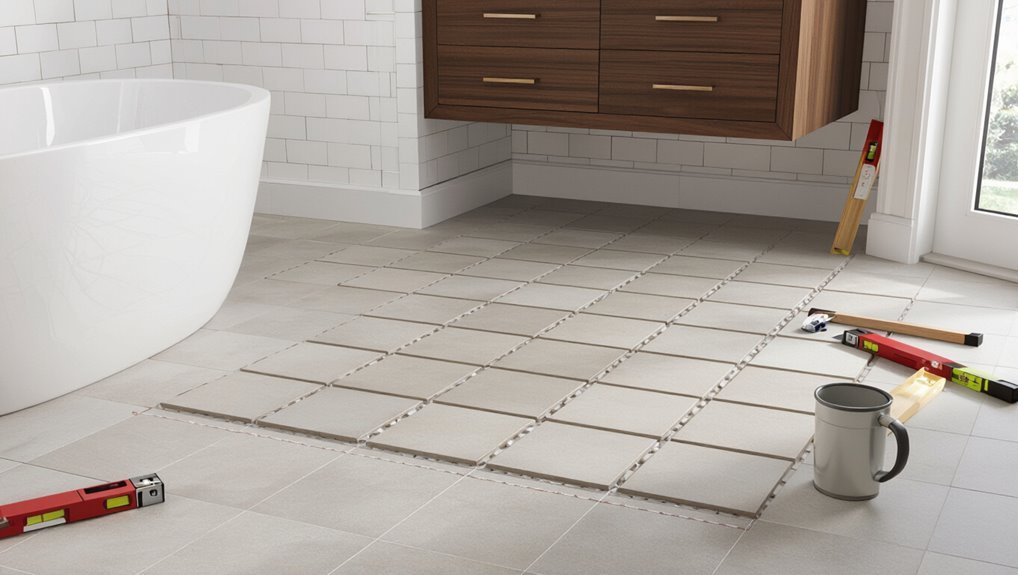
Start by mapping the room and dry-fitting tiles so you can spot awkward cuts and adjust your layout before you commit.
Measure and mark a centered starting line, work outward, and stagger joints for visual balance.
Check grout joint widths with spacers, preview tile patterns, and test connections at doorways and fixtures.
Adjust rows to avoid tiny edge pieces and guarantee a clean finish.
Step 2 Install backer board or cement board
Install cement backer board to create a stable, moisture-resistant substrate for your porcelain or ceramic tiles.
Measure and cut boards to fit, leaving 1/8″ gaps at seams and 1/4″ at walls.
Apply thin-bed mortar to the subfloor, set boards, screw with corrosion-resistant backer-board screws every 6–8″ on edges and 8–10″ field, and tape seams with alkali-resistant mesh.
Step 3 Mix and apply thinset, set tiles
Mix the thinset to a peanut-butter–like consistency and spread it with a notched trowel.
Then press each tile into place following your layout lines and maintaining consistent spacing.
Tap tiles gently with a rubber mallet and use spacers for uniform joints.
Remove excess thinset from joints as you go.
Check for level and adjust immediately; let the mortar cure per manufacturer directions.
Step 4 Grouting and sealing
Before the grout sets, you’ll remove any remaining thinset from the joints and sweep or vacuum the tile surface so the grout can bond cleanly; then prepare the grout to the manufacturer’s recommended consistency and work it into the joints with a rubber float at a 45-degree angle, pressing firmly to fill voids and avoid air pockets.
After tooling, wipe haze with a damp sponge, let cure, then apply grout sealer per instructions to protect against moisture and staining.
Step 5 Finishing touches and cleanup
Step 5 wraps up the job and makes the room usable again: after the grout cures, remove spacers, clean all grout haze with a damp sponge and microfiber cloth, reinstall trim and junction strips, replace or refit fixtures and toilet, and give the floor a final mop so it’s ready for traffic.
Inspect grout lines, touch up edges, seal connections, reinstall baseboards, and ventilate until fully dry.
Common mistakes when tiling and how to avoid them
Once the floor’s finished and you’re cleaning up, it’s a good moment to look back at common tiling mistakes so you don’t repeat them next time.
Don’t skip leveling, proper substrate prep, or waterproofing. Use correct mortar, leave consistent grout joints with spacers, clean haze promptly, and allow full cure times.
Check cuts fit and connections align before final grouting.
Step-by-Step Installation: Luxury Vinyl Plank (LVP) and Vinyl Sheet
Before you start, let the LVP or vinyl sheet acclimate and sketch a layout so seams and patterns fall where you want.
Install the recommended underlayment and a moisture barrier, then either click-lock the planks or spread adhesive for sheets.
Finish by sealing seams, trimming around fixtures, adding edging strips, and cleaning up.
Step 1 Acclimate vinyl and plan layout
Start by letting your vinyl sit in the bathroom for 48–72 hours so it can acclimate to the room’s temperature and humidity; this prevents gaps, buckling, and uneven seams after installation.
While it acclimates, measure the room, mark reference lines, and plan plank or sheet seams to minimize waste and avoid small cut strips at walls and doorways.
Step 2 Install underlayment and moisture barrier
With the layout set and the vinyl acclimated, lay the foundation by installing the underlayment and moisture barrier for LVP or sheet vinyl.
Roll out recommended foam or cork underlayment, trim to fit, and tape seams.
For bathrooms, add a continuous waterproof membrane or 6-mil polyethylene, overlapped and sealed at seams and walls.
Smooth wrinkles and staple or tape edges securely.
Step 3 Click-lock LVP installation or full-spread adhesive for vinyl sheet
Lay the planks or sheet carefully, following the manufacturer’s pattern and leaving the recommended expansion gap at all walls and fixtures.
For click-lock LVP, stagger seams, angle and snap boards, and tap joints with a block for snug fits.
For vinyl sheet, spread adhesive per instructions, roll the sheet into place, and press firmly to eliminate bubbles and guarantee full contact.
Step 4 Sealing seams and trimming around fixtures
Seal seams and trim precisely around fixtures to protect the floor from water intrusion and give the installation a finished look.
Run a bead of waterproof sealant into all plank and sheet seams, smoothing with a damp finger or tool.
Cut vinyl snugly around toilet bases, tubs, and pipes, using a utility knife and radius tool, then seal gaps with caulk for a watertight edge.
Step 5 Transition strips and cleanup
Before you finish, install threshold strips and clean the area so the floor looks professional and functions properly.
Fit junction strips at doorways, securing them per manufacturer instructions and allowing expansion gaps. Trim excess under trim or thresholds, then vacuum and tack-rag the floor.
Wipe with manufacturer-approved cleaner, reinstall baseboards or shoe molding, and inspect seams and edges for a final, neat finish.
Common mistakes for vinyl installations
While vinyl is forgiving, you’ll still run into problems if you rush, skip prep, or ignore manufacturer specs.
Don’t install over uneven subfloors, omit acclimation, or use wrong adhesives. Avoid tight seams, inadequate expansion gaps, and poor trimming at fixtures.
Don’t trap moisture under sheets or lock planks without checking layout. Follow manufacturer instructions and double-check measurements for a lasting finish.
Step-by-Step Installation: Natural Stone
Choosing and sealing the right stone and plan for protection is your first move, since porosity and finish change everything.
You’ll need to reinforce the subfloor, install cement backer board, set tiles with the correct thinset and spacers, then grout, seal, and schedule regular maintenance.
Be aware of common risks—uneven subfloors, improper adhesives, and missed sealing can cause staining, cracking, or loose tiles.
Step 1 Stone selection and sealing strategy
Start by picking a stone that fits your bathroom’s use and look—durable, low-porosity options like granite, slate, or honed travertine work best for wet areas, while softer, highly porous stones need more maintenance and frequent sealing.
Choose a penetrating sealer for natural stone; test on a scrap, apply per manufacturer directions, and plan resealing every 1–3 years depending on traffic and moisture.
Step 2 Subfloor reinforcement and backer board
With your stone and sealer selected, inspect the subfloor for level, stiffness, and soundness before laying any backer board.
Reinforce soft spots by sistering joists or adding plywood to meet deflection limits.
Cut and dry-fit cement backer board, stagger seams off framing, and fasten per manufacturer specs with corrosion-resistant screws and proper joints.
Tape seams and apply thinset-compatible joint compound.
Step 3 Setting stone with appropriate thinset and spacers
Mix the thinset to the manufacturer’s specified consistency and temperature, then spread it with a notched trowel sized for your stone and substrate so you get full coverage and proper bed thickness.
Press each stone firmly into the bed, wiggle slightly to collapse ridges, and maintain even joint widths using spacers.
Check level and alignment as you go, removing excess thinset before it skins.
Step 4 Grouting, sealing, and long-term maintenance
Finish the installation by grouting and sealing to protect the stone and keep joints watertight; you’ll choose grout type and sealant based on the stone, joint width, and expected moisture.
Then follow manufacturer directions for application and curing to guarantee durability and ease of maintenance.
After curing, wipe residue, apply penetrating sealer per intervals, clean with pH-neutral products, reseal periodically, and inspect grout lines for cracking.
Risks and common pitfalls with natural stone
Although natural stone gives your bathroom a timeless look, it also brings specific risks you’ll need to manage: it’s porous, stains easily, and can etch from acids.
You’ll need proper sealing, slip-resistant finishes, and careful cleaning products.
Improper substrate prep, uneven tiles, or weak adhesives lead to cracking and moisture intrusion.
Plan for maintenance, test sealers, and hire pros for complex installations.
Step-by-Step Installation: Engineered Wood and Waterproof Laminate
Before you start, pick water-resistant engineered wood or waterproof laminate and let the planks acclimate to the bathroom’s temperature and humidity.
Lay a proper underlayment and moisture barrier, then choose either a floating or glue-down method based on the product and subfloor.
Finish by sealing edges and junctions, and remember engineered wood works in low-moisture bathrooms but should be avoided in wet rooms or where frequent standing water occurs.
Step 1 Choosing water-resistant products and acclimation
Moisture is the main enemy in bathroom installations, so choose engineered wood or waterproof laminate rated specifically for wet or high-humidity areas and let the planks acclimate in the room for at least 48–72 hours so they stabilize to the home’s temperature and humidity.
Inspect cartons for manufacturer ratings, check warranty limitations, mix boards from multiple boxes for consistent color, and store flat off the floor during acclimation.
Step 2 Underlayment and moisture barrier installation
Step 2 gets you into the subfloor details: you’ll lay a proper underlayment and a continuous moisture barrier to protect the engineered wood or waterproof laminate from dampness and to guarantee a stable, level surface for installation.
Inspect and repair subfloor, clean and dry it.
Roll out vapor barrier with overlaps taped.
Trim underlayment to fit, stagger seams, and secure per manufacturer instructions.
Step 3 Float or glue-down installation methods
With the subfloor prepped and your moisture barrier in place, you’re ready to choose between floating and glue-down methods for engineered wood or waterproof laminate.
For floating floors, click-lock panels join over underlayment—stagger seams, leave expansion gaps, and tap boards tight.
For glue-down, follow adhesive guidelines, spread with the correct trowel, press boards firmly, and roll to guarantee full contact.
Step 4 Sealing edges and transitions
Finish sealing the perimeter and changes to lock out water and give your floor a clean, professional look.
Use silicone or polyurethane caulk at walls and fixtures, keeping a thin, even bead.
Install threshold strips at doorways and between materials, fastening per manufacturer instructions.
Butt joints need expansion gaps covered with trim.
Wipe excess sealant promptly for neat, durable results.
When engineered wood is appropriate vs. when to avoid it
Wondering whether engineered wood is right for your bathroom? You should choose it for low-moisture bathrooms, with proper moisture barriers, good ventilation, and limited wet zones.
Avoid engineered wood in full baths, shower areas, or poorly ventilated spaces where leaks occur.
If you need more water resistance, pick waterproof laminate or vinyl; they handle spills and humidity far better than wood.
Step-by-Step Installation: Painted/Sealed Concrete and Specialty Floors (rubber, cork)
Start by prepping the concrete or substrate, filling cracks and smoothing low spots so the surface’s sound before you coat or lay specialty tiles.
Next, apply the appropriate primer, paint, or adhesive for your material, then finish with a durable sealer and any non-slip treatment required for safety.
Finally, follow recommended maintenance—regular cleaning and resealing as needed—to keep rubber, cork, or painted concrete lasting longer.
Step 1 Surface preparation and patching
Before laying any painted or sealed concrete or specialty floor like rubber or cork, you’ll need a clean, dry, and sound surface; remove loose paint, grease, and debris, and repair cracks or holes so adhesives bond properly.
Grind high spots, fill depressions with a compatible patching compound, sand smooth, and vacuum thoroughly.
Check moisture and slope; correct issues before continuing.
Step 2 Priming, painting, or adhesive application
Apply primer or paint and spread adhesive only after your repaired surface is fully dry and swept clean; this guarantees proper bonding for painted or sealed concrete and for specialty floors like rubber or cork.
Use roller or brush for even primer coats, let recommended dry times elapse, then apply flooring adhesive with the correct trowel notch.
Press materials firmly, following manufacturer coverage rates.
Step 3 Sealing and non-slip treatments
Once your paint or adhesive has fully cured, seal the surface with the manufacturer-recommended product to protect against moisture and wear.
Add a non-slip treatment where needed to keep the floor safe when wet.
Apply thin, even coats of sealant, sanding lightly between coats if instructed.
Broadcast fine aggregate or use a textured additive in the final coat for reliable traction.
Maintenance and longevity considerations
When you finish installing painted or sealed concrete or laying rubber or cork flooring, regular care and timely repairs will keep the surface looking good and performing safely for years.
Clean with pH-neutral cleaners, avoid harsh chemicals, and use soft mops.
Reapply sealers or finishes per manufacturer intervals, fix chips or seams promptly, and protect high-traffic areas with mats to extend lifespan.
Flooring Transitions, Thresholds, and Trim
Now that your floor is in, you’ll pick the right junction pieces and thresholds for doorways and adjoining rooms to guarantee a smooth, safe seam.
You’ll also install baseboards and shoe molding to cover expansion gaps and give the room a finished look.
Finally, you’ll carefully trim and seal around toilets, tubs, and vanities so water can’t creep under edges and the finish stays neat.
Choosing transition types for doorways and adjoining rooms
Choosing the right alteration between rooms matters because it affects appearance, safety, and how your floors meet at doorways.
Pick connections based on height differences, traffic, and material—T-molds for equal heights, reducers for drop-offs, and thresholds for significant gaps.
Use waterproof, slip-resistant options in bathrooms, and match metal or wood finishes to trim and door hardware for a cohesive, durable result.
Installing baseboards and shoe molding
Finish the room by installing baseboards and shoe molding to cover expansion gaps, protect walls from moisture and scuffs, and give your bathroom a clean, finished look.
Measure and cut baseboards to fit, miter corners, and nail them to studs or use adhesive where needed.
Caulk seams, paint or seal, then add shoe molding to hide gaps and create a neat, moisture-resistant perimeter.
Finishing around toilets, tubs, and vanities
Finishing around toilets, tubs, and vanities requires careful cuts, secure connections, and proper sealing to keep the floor watertight and looking professional.
Measure and scribe around fixtures, trim gaps with bead of silicone, and use flexible sealants where movement occurs.
Install junction strips at doorways, tight-fit thresholds at tub edges, and reinstall fixtures, checking for level and leak-free seals before final cleanup.
Common Problems and How to Fix Them
You’ll run into a few common issues—water leaks, loose or cracked tiles, vinyl seams that lift or bubble, and mold from long-term moisture—and you should know how to spot them quickly.
I’ll show how to diagnose leaks and moisture damage, repair lipping or broken tiles, and re-seat or reglue vinyl seams.
Then we’ll cover simple prevention steps to keep mold and recurring moisture problems from coming back.
Water leaks and moisture damage diagnosis
When water gets past your flooring or seals, it can quickly warp subflooring, rot joists, and breed mold—so spotting leaks early matters.
Check grout, caulk, and fixtures for dampness, staining, or soft spots. Use a moisture meter and inspect under cabinets and around drains.
Trace odors, monitor utility bills, and run dye tests in tubs to pinpoint leaks before they worsen.
Loose, cracked, or lipping tiles repair steps
Start by identifying which tiles are loose, cracked, or lipping—press each tile, look for movement, run a straightedge across the floor, and note grout gaps or uneven edges.
Remove damaged tiles, clean old adhesive, and inspect the substrate for rot or hollows.
Replace or repair the substrate, apply thinset, bed new tiles level, grout, and seal grout lines to prevent future movement.
Vinyl seams lifting and bubbling remedies
If you’ve fixed loose or cracked tiles, you’ve already seen how substrate issues and moisture can wreck a floor—vinyl seams behave the same way.
To fix lifting or bubbling, clean and dry the area, apply pressure with a roller, inject vinyl adhesive under the seam, and press down.
Trim bubbled sections, heat-smooth minor bubbles, and reseal edges with matching seam sealer.
Preventing mold and long-term moisture issues
Because bathrooms sit at the intersection of water and warmth, you’ve got to stop moisture before it gets into the subfloor and framing; doing so prevents mold, rot, and costly repairs.
Use waterproof membranes, proper underlayment, and sealed seams.
Ventilate with an exhaust fan, fix leaks promptly, slope shower pans to drains, and choose water-resistant flooring.
Inspect and reseal grout and connections annually.
Best Practices, Maintenance, and Care
To keep your new bathroom floor looking and performing its best, follow cleaning methods specific to the material—vinyl, tile, and wood all need different cleaners and techniques.
Use preventative measures like absorbent mats, good ventilation, and fresh caulking to stop moisture damage.
Check seals and finishes regularly and reseal or refinish as soon as wear or discoloration appears.
Cleaning methods by flooring type
Different flooring types demand specific cleaning routines, so you’ll want to match your products and techniques to the material to keep it looking good and lasting longer.
For tile, mop with pH-neutral cleaner and scrub grout occasionally.
For vinyl, use a mild detergent and avoid abrasive tools.
For engineered wood, use a damp mop and wood-safe cleaner. Dry promptly to prevent damage.
Preventative tips (mats, ventilation, caulking)
While regular cleaning keeps flooring looking good, taking a few preventative steps will stop problems before they start: use non-slip, absorbent mats at sinks and tubs, ventilate with an exhaust fan or open windows to reduce humidity, and inspect caulking around fixtures annually.
Replace cracked caulk promptly and choose mildew-resistant products. These habits extend flooring life and prevent water damage.
When to reseal or refinish
Anyone who wants their bathroom floor to last should watch for signs that it needs resealing or refinishing.
Check annually for dullness, water beading failure, stains, or surface scratches.
Reseal tile grout and stone every 1–3 years; refinish wood or engineered floors when finish wears through or water darkens the grain.
Address issues promptly to prevent costly damage.
Cost Estimation and Timeframe Guide
You’ll want to budget by material—vinyl and laminate are usually cheapest per sq ft, tile and stone cost more, and luxury options top the range.
Consider labor vs DIY: expect a weekend for a small DIY install but several days plus drying time for tile, while pros finish faster but add labor costs.
Hire a professional if your subfloor needs repair, the layout is complex, or you want guaranteed waterproofing and a warranty.
Typical cost ranges per sq ft by material
Because different materials vary so much in durability and installation complexity, estimating cost per square foot helps you budget and choose wisely.
Vinyl: $1–5; luxury vinyl plank: $2–7; ceramic/porcelain tile: $3–15; natural stone: $7–25; engineered hardwood: $4–12; solid hardwood (not typical for bathrooms): $5–15.
Include underlayment and extras when comparing totals so your estimates stay realistic.
Labor vs. DIY time estimates
Now that you’ve compared material prices per square foot, let’s look at how time and labor affect the total cost.
If you DIY, plan for demo, prep, and installation times: vinyl plank or tile — a day to two for small baths; porcelain or stone — longer for layout and grout.
Contractors finish faster but add hourly or project labor fees.
When to hire a professional
If your bathroom has uneven subflooring, complex layouts, or plumbing and electrical work needed, hire a pro—those issues add time, require specialized tools, and can balloon costs if handled poorly.
You should also call a pro if you lack experience, need waterproofing guarantees, or face tight timelines.
Get multiple quotes, check references, and compare realistic schedules before committing.
FAQ
You probably have specific questions like whether you can install tile over old vinyl, which flooring suits a small bathroom, and how to make floors non-slip.
You’ll also want to know if underfloor heating works with different materials and how often flooring needs resealing or replacing.
Below are clear answers to help you decide and plan.
Can I install tile over old vinyl flooring?
Wondering whether you can tile over old vinyl? You can, but only if the vinyl is securely bonded, smooth, and not cushioned.
Remove loose or damaged areas, clean thoroughly, and sand glossy surfaces. Use a suitable thinset and a primer or uncoupling membrane if needed.
Check local codes and height changes; when in doubt, remove the vinyl for a more reliable long-term installation.
What flooring is best for a small bathroom?
When choosing flooring for a small bathroom, pick materials that make the space feel larger, resist moisture, and stand up to frequent cleaning.
Opt for light-colored, low-gloss tiles with minimal grout lines or waterproof luxury vinyl plank with a narrow plank width.
Both reflect light, visually expand the room, tolerate spills, and are easy to maintain without overwhelming the layout.
How do I make bathroom floors safer (non-slip)?
Though most bathroom floors are designed to handle moisture, they can still get dangerously slippery—especially when wet—so take steps to reduce skid risk.
Use textured tiles or slip-resistant vinyl, add non-slip treatments or anti-slip coatings, apply adhesive grip strips near tubs and showers, secure bath mats with rubber backing, and guarantee good lighting and prompt drying to prevent falls.
Is underfloor heating compatible with all flooring types?
If you’re adding underfloor heating to make wet floors more comfortable and safer, you’ll want to know which floor coverings work with it.
Most tile, stone, and engineered wood work well because they conduct heat.
Solid hardwood, some vinyl and thick carpets may reduce efficiency or risk movement.
Check manufacturer guidelines, use compatible adhesives and underlay, and control maximum surface temperatures.
How often should bathroom flooring be resealed or replaced?
How often you should reseal or replace bathroom flooring depends on the material, wear, and moisture exposure: grout and natural stone usually need resealing every 1–3 years.
Engineered wood and vinyl may only need surface maintenance every 3–10 years, and solid hardwood or poorly maintained floors might require replacement sooner if they warp or rot.
Monitor seals, clean regularly, and address leaks immediately to extend life.