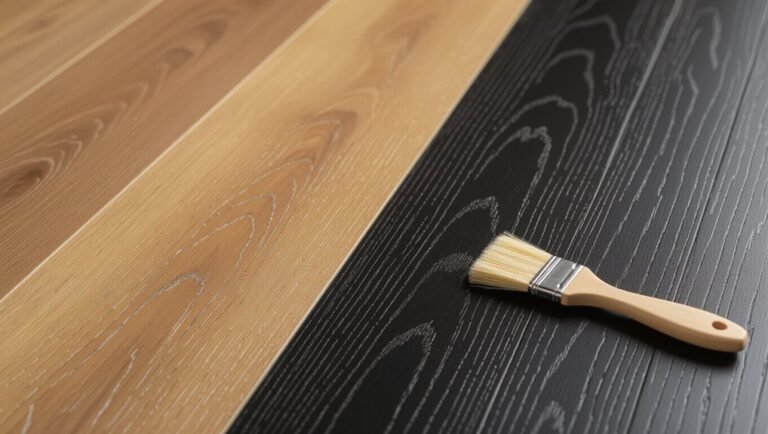
How to Get Paint Off a Laminate Floor Without Ruining the Surface
You can remove paint from laminate without ruining it by softening fresh spots with warm, soapy water, using a plastic scraper and blotting gently; for dried latex, soak a cloth in warm, soapy water or isopropyl alcohol and lift softened paint with a plastic putty knife. Avoid metal tools, harsh solvents, and over-wetting seams. Test any cleaner in a hidden area first, dry promptly, and use heat on low for stubborn bits — continue for step-by-step methods, precautions, and repair tips.
How to Remove Paint from Laminate Floors Without Damage
Start by trying the safest, fastest method: gently soften and lift fresh paint with a damp cloth and mild detergent, using a plastic scraper for stubborn spots.
If the paint’s dried, test a small hidden area with rubbing alcohol or a laminate-safe remover before treating the whole stain.
Call a professional if the paint covers a large area, is oil-based, or household efforts risk damaging the finish.
One-line summary of safest, fastest method
If you want the safest, fastest method, gently soften the paint with a warm, damp cloth and a few drops of mild dish soap.
Then lift it with a plastic scraper—working small areas and drying immediately to avoid swelling the laminate.
For how to get paint off a laminate floor, repeat softening and gentle scraping, blot dry, and finish with a damp microfiber to remove residue.
When to call a professional
Once you’ve tried gentle softening and scraping but the paint won’t budge, is cracked, or the area’s large, you should call a professional.
Call a pro if you’re unsure about solvents, the finish looks damaged, or the paint covers seams or junctions.
A technician has tools and tests to avoid delamination, match finish, and remove stubborn paint safely, saving time and preventing costly mistakes.
Basic Understanding What Laminate Is and Why Paint Removal Needs Care
Laminate flooring is a layered product with a thin photographic layer and a protective wear layer over a fiberboard core, so you’re really cleaning the surface, not solid wood.
You’ll want to avoid strong solvents or harsh scrubbing because they can strip the wear layer or swell the core.
Different paints—water-based latex, oil-based, and spray paints—adhere differently and may require different, gentler removal methods.
What laminate flooring is made of
Think of laminate flooring as a layered sandwich: a tough wear layer, a printed decorative layer that mimics wood or stone, a core of high-density fiberboard (HDF) that gives stability, and a backing layer that resists moisture and warping.
You’ll find edges joined by click-lock or glued seams, and the wear layer’s finish determines scratch and stain resistance, so treat the surface gently.
Why laminate surface can be damaged by solvents or abrasives
Because the decorative and wear layers are thin and surface-applied, strong solvents or harsh scrubbing can strip the finish, lift the printed design, or swell the HDF core underneath; you should treat paint removal gently to avoid irreversible damage.
You’ll avoid discoloration, clouding, delamination, and edge swelling by using mild cleaners, soft cloths, gentle scraping, and spot-testing products before wider application.
Types of paint commonly found on floors (latex, oil-based, spray paint)
Paint on floors usually falls into three practical categories: water-based latex, oil-based alkyd, and spray-applied coatings (which can be either type).
You’ll find latex dries fast, softens with soapy water, and’s easiest to remove. Oil-based cures harder, resists water, and may need solvents.
Spray paint behaves like its base—thin, fast, and often layered—so test removal methods on an inconspicuous spot first.
Assessment Before You Start
Before you start removing paint, identify what type of paint it’s and how long it’s been sitting so you can choose a safe method.
Check your laminate’s finish and wear layer to judge how much abrasion or solvent it can tolerate.
Finally, test your chosen cleaner on a small hidden spot to confirm compatibility.
Identify paint type and age
Start by figuring out what kind of paint you’re dealing with and how long it’s been sitting there, since that determines the safest removal method.
Check labels or ask workers if possible. Water-based paints soften with warm soapy water, while oil and alkyd need solvents.
Fresh splatters wipe off easier; cured paint may require scraping or a gentle chemical remover.
Test a small spot first.
Determine finish and wear layer of your laminate
1. You need to know your laminate’s finish and wear layer before removing paint.
Check manufacturer labels, receipts, or online model info to learn thickness and surface coating (melamine, aluminum oxide, or PU).
Thicker wear layers tolerate gentler abrasion; thin overlays require mild solvents and soft tools.
This helps you choose safe methods that won’t strip the protective coating.
Test a small hidden area for compatibility
Now that you know the finish and wear layer, try the removal method on a small, hidden spot to confirm compatibility.
Pick an inconspicuous area like inside a closet or under furniture, apply your chosen solvent or tool for the recommended time, then blot and inspect.
If the surface shows no discoloration, softening, or finish lift, it’s safe to proceed; if not, stop and try a gentler option.
Tools and Safe Materials You’ll Need
Before you start, gather simple household supplies like warm water, mild dish soap, and microfiber cloths plus protective gloves and a drop cloth to protect the floor.
For tougher spots, keep recommended cleaners on hand—rubbing alcohol, citrus-based removers, and acetone (use sparingly and only with precautions and good ventilation).
Also have plastic scrapers, nylon scrub pads or a toothbrush ready for gentle mechanical removal.
Household supplies (warm water, mild dish soap, microfiber cloths)
You’ll only need a few common household supplies to tackle paint on laminate: warm water, a mild dish soap, and soft microfiber cloths.
Use warm water mixed with a drop of soap to loosen fresh drips. Wring cloths so they’re damp, not wet, and blot or gently rub in the grain direction.
Replace cloths as they pick up paint.
Recommended solvents and cleaners (isopropyl alcohol, citrus-based removers, acetone with cautions)
If warm, soapy water doesn’t lift the paint, reach for stronger but safe cleaners: isopropyl alcohol for water-based paint, citrus-based removers for sticky residues, and acetone only for stubborn spots—and only with caution.
Test any solvent in an inconspicuous area first, apply sparingly on a soft cloth, blot rather than scrub, ventilate the room, and wear gloves to protect finishes and your skin.
Tools for mechanical removal (plastic scrapers, nylon scrub pads, toothbrush)
Gather a small kit of safe, nonabrasive tools so you can lift paint without scratching the laminate: a thin plastic scraper or putty knife for gently prying up softened paint, nylon scrub pads (not steel wool) for scuffing away residue, and an old toothbrush for working around edges and in grooves.
Use light pressure, keep blades angled flat, and replace pads when they clog to avoid abrasion.
Protective gear and safety items (gloves, ventilation, drop cloths)
Anyone working on paint removal should wear basic protective gear and set up ventilation before you start:
chemical-resistant gloves to shield your skin, safety glasses to keep splatters out of your eyes, and a mask or respirator if you’re using solvents that give off fumes.
Use drop cloths to protect floors, and keep windows open for airflow.
- Gloves (chemical-resistant)
- Safety glasses
- Respirator or mask
- Drop cloths
- Ventilation fan
Step-by-Step Paint Removal Process (Safe Method First)
Start by prepping the area and protecting nearby surfaces so you don’t spread mess or damage the floor.
For fresh paint, you’ll blot and wipe with soap and water, then use warm soapy water and a plastic scraper for dried latex.
If spots stay, try isopropyl alcohol or a citrus remover, and reserve a recommended solvent with very short contact time for oil-based or spray paint.
Step 1 Prepare the area and protect surrounding surfaces
Before you remove any paint, clear a path and cover everything you want to keep clean—lay down drop cloths or plastic sheeting over the laminate and tape off baseboards, vents, and nearby furniture so dust and solvents don’t spread.
Then ventilate, wear gloves, and keep pets and kids away. Prepare tools and test a hidden spot.
- Drop cloths/plastic
- Painter’s tape
- Vent covers
- Gloves
- Small trash bin
Step 2 Remove fresh/wet paint with soap and water
With the area prepped and a test spot checked, you can tackle fresh paint using just soap, water, and a soft cloth.
Dampen the cloth with warm, soapy water and gently blot—don’t scrub—to lift paint. Rinse and repeat until residue fades.
Dry the floor with a clean microfiber towel. Dispose of dirty water and inspect for any remaining spots.
Step 3 Remove dried latex paint using warm soapy water and plastic scraper
If the paint’s already dried, soften it first by soaking a cloth in warm, soapy water and laying it over the spot for several minutes to loosen the film.
Then carefully lift the softened paint with a plastic scraper, working at a low angle to avoid scratching the laminate.
Wipe residue with the damp cloth, repeat soaking as needed, and dry the area thoroughly to prevent water damage.
Step 4 Use isopropyl alcohol or citrus remover for stubborn latex spots
Reach for isopropyl alcohol or a citrus-based remover when warm soapy water and scraping haven’t budged dried latex paint.
Dampen a soft cloth, test a hidden spot, then gently rub the spot in the grain direction.
Don’t soak the seam or leave solvent on the surface. Wipe residue with a damp cloth and dry thoroughly to restore the finish.
Step 5 Remove oil-based paint or spray paint carefully with recommended solvent and short contact time
Tackle oil-based or spray paint by using the manufacturer-recommended solvent—mineral spirits for oil-based paint or a dedicated paint remover for aerosols—and limiting contact time to prevent finish damage.
Test on an inconspicuous spot, apply sparingly with a soft cloth, blot instead of scrubbing, and wipe excess promptly.
Repeat short applications until paint loosens, then remove residue carefully to avoid laminate swelling.
Step 6 Rinse residue and restore finish with laminate-safe cleaner
Wipe the affected area with a damp microfiber cloth to lift any remaining solvent and paint particles.
Then follow with a laminate-safe cleaner to neutralize residues and restore the floor’s sheen.
Apply cleaner per label, working small sections with gentle strokes.
Rinse cloth frequently, avoid soaking seams, and buff lightly to blend cleaned area with surrounding finish so it looks uniform and protected.
Step 7 Dry and inspect, repeat only as needed
Let the floor dry completely, then closely inspect the cleaned area for any remaining paint spots, sticky residue, or finish changes; only repeat the safe removal steps if you still see blemishes.
Use a soft cloth and good lighting, check seams and edges, and avoid scrubbing hard.
Repeat gentle treatments one more time, then consider targeted solvent use only if necessary.
Alternative Methods and When to Use Them
If the safe method doesn’t do the job, you can try alternatives like using a heat gun or hair dryer to soften paint—keep the heat low and move constantly to avoid warping the laminate.
For tougher spots, choose a commercial remover labeled safe for laminate and follow the manufacturer’s instructions and ventilation warnings.
Reserve light sanding or buffing for small, stubborn spots only, because mechanical abrasion can scuff or remove the finish.
Heat gun or hair dryer for softening paint precautions
Because heat can soften both paint and the laminate’s protective coating, you should take precautions when using a heat gun or hair dryer to remove paint: keep the tool moving, use low heat, hold it several inches away, and test a hidden spot first.
Wear heat-resistant gloves and a mask, avoid prolonged heating, and stop if you notice warping, bubbling, or discoloration.
Commercial paint removers formulated for laminate selection and usage
When DIY methods won’t budge stubborn paint, commercial removers made specifically for laminate can save you time and reduce risk—just pick a product labeled safe for laminate or vinyl and follow the manufacturer’s instructions exactly.
Test in an inconspicuous area, wear gloves and ventilation, apply briefly, blot—don’t rub—then neutralize per directions and rinse.
Dispose of residues responsibly.
Mechanical methods (light sanding, buffing) risks and limited use cases
Although mechanical methods like light sanding or buffing can remove stubborn paint spots, you should reserve them for very limited situations because they can damage the laminate wear layer and void warranties.
If you must, test an inconspicuous area first, use fine-grit sandpaper or a soft buffing pad, apply minimal pressure, and stop at any sign of shine loss.
Consider professional repair instead.
Comparison of Removal Methods and Their Risks
You’ll want to weigh how effective a solvent is against the risk it poses to your laminate’s finish, since stronger chemicals can remove paint but also strip sealant.
Mechanical methods like scraping or nylon pads are often safer for the finish and cheaper, but they can be slower and may require more elbow grease.
Match the approach to your priorities—speed, safety, or cost—to pick the best method for your situation.
Solvent effectiveness vs. risk to finish
Picking a solvent means balancing how well it dissolves paint against the chance it will dull or strip your laminate finish. You’ll test a hidden spot, start with milder options (soap, rubbing alcohol), then escalate only if needed. Monitor finish, work quickly, rinse thoroughly, and stop at any sign of softening.
| Solvent | Effectiveness | Risk |
|---|---|---|
| Soap/water | Low | Very low |
| Rubbing alcohol | Medium | Low |
| Acetone | High | High |
| Mineral spirits | Medium-high | Medium |
| Commercial stripper | Variable | Variable |
Mechanical vs. chemical approaches speed, safety, and cost
After testing solvents and seeing how your laminate reacts, weigh whether to use mechanical methods (scraping, sanding, heat) or chemical ones (alcohol, acetone, commercial removers).
Mechanical is faster and cheap but risks scratches and edge lifting; use gentle tools.
Chemicals can be precise and safer for finish but cost more and require ventilation and testing.
Pick based on paint type, damage risk, and budget.
Common Mistakes That Ruin Laminate Floors
Don’t grab metal scrapers or wire brushes, because they’ll scratch the wear layer and leave permanent marks.
Don’t leave strong solvents sitting on the surface or reach for bleach or lacquer thinner, since they can discolor or break down the laminate.
And don’t sand aggressively or apply excessive heat—those tactics can warp, bubble, or cause delamination.
Using metal scrapers or wire brushes
Scraping at paint with metal scrapers or wire brushes can seem like a quick fix, but it often scores and dulls the laminate’s protective finish.
Don’t use metal tools; they gouge, lift edges, and create micro-scratches that trap dirt. Instead, pick plastic scrapers or soft nylon brushes and work gently.
Test in an inconspicuous spot before proceeding across the floor.
Leaving solvents on too long or using harsh chemicals (bleach, lacquer thinner)
While strong solvents can lift stubborn paint, leaving them on laminate or using harsh chemicals like bleach or lacquer thinner will eat away at the wear layer and discolor the surface.
Don’t soak the floor or let fumes sit; you’ll weaken the protective finish. Instead, test a mild, manufacturer-approved cleaner on an inconspicuous spot, apply briefly, blot immediately, and rinse thoroughly to avoid damage.
Excessive sanding or heat causing warping or delamination
If you sand too aggressively or apply high heat to remove paint, you’ll quickly strip the wear layer and cause boards to warp or delaminate.
Don’t power-sand laminate or use heat guns near seams. Instead, use gentle scraping, a plastic putty knife, and solvent-safe cleaners per manufacturer guidance.
Test a small area first, work slowly, and stop at the printed decorative layer to avoid permanent damage.
Prevention and Best Practices to Avoid Future Paint Spills
Before you start any painting, you’ll want to prep and protect laminate floors with drop cloths and tape to keep stray splatters off the surface.
If a spill happens, act fast: blot excess paint, use the right cleaner, and avoid scrubbing that could damage the finish.
Keep handy a small kit of absorbent cloths, a plastic scraper, mild solvent recommended for laminate, and gloves so you can tackle spills immediately.
Prep and protect floors before painting projects
Start by clearing and cleaning the area so you can see the whole floor and remove dust that could trap paint; then lay down quality protective materials—contractor-grade drop cloths, rosin paper, or adhesive floor protection—securing edges with painter’s tape to prevent slips and paint seepage.
Use boot covers, move furniture, create a designated paint zone, and check seals.
- Wear shoe covers
- Tape seams tightly
- Elevate small items
- Keep a rag handy
- Use weighted corners
Immediate cleanup protocols for spills
Once you’ve protected the floor and set up a paint zone, respond to any spills right away to prevent stains and hard-to-remove buildup.
Blot liquid paints with a microfiber cloth, avoiding rubbing. Scoop or scrape dried globs gently with a plastic putty knife.
Rinse the area with warm, soapy water, dry thoroughly, and ventilate the room to speed drying and prevent tracking.
Recommended products to keep on hand
Keep a small kit of essentials within reach so you can prevent spills from becoming stains: good-quality drop cloths (canvas or heavy-duty reusable plastic), painter’s tape, a tray with liners, microfiber cloths, a plastic putty knife, and a mop or sponge with a mild detergent.
Add rubbing alcohol, adhesive remover safe for laminate, a soft-bristled brush, disposable gloves, and resealable bags for waste.
Repair Options If the Finish Is Damaged
If the finish’s scratched or stained from paint, you can try spot repair kits or laminate touch-up markers to blend the damage.
For deep gouges or irreparable wear, replacing the affected planks is often the best long-term fix.
If you’re unsure about matching color or doing a plank replacement, call a flooring professional for advice or service.
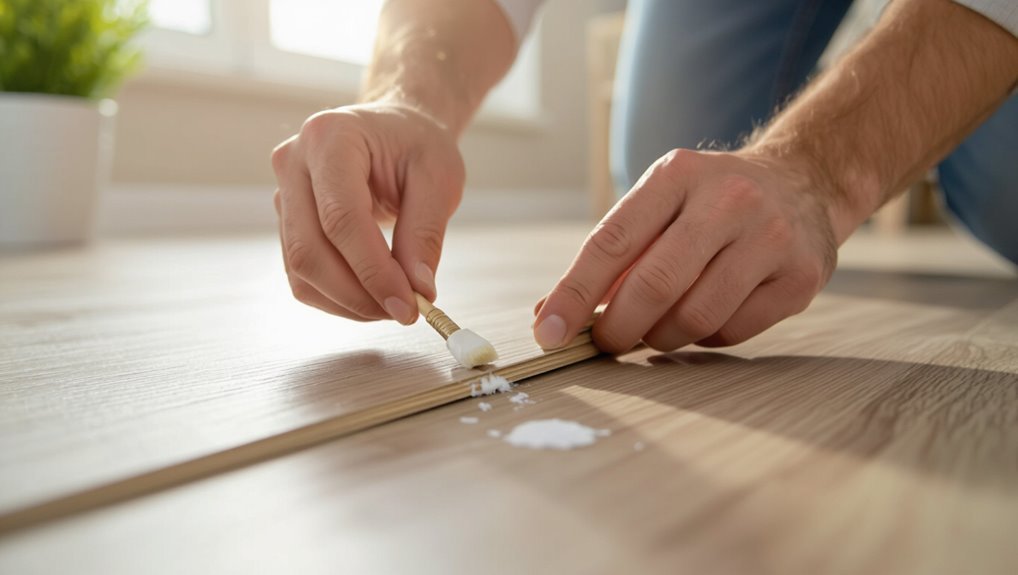
Spot repair kits and laminate touch-up markers
When small chips or scratches mar your laminate floor, spot repair kits and touch-up markers offer a quick, affordable way to hide damage without refinishing the entire room.
Choose a kit that matches grain and color, clean the area, apply filler or marker in thin layers, then blend with a soft cloth.
Seal per product instructions for durability.
Replacing damaged planks when replacement is necessary
Spot repairs can hide minor dings, but some damage—deep gouges, warped boards, or finish that’s flaked away across a whole plank—means you’ll need to replace individual laminate planks.
Remove the baseboard, release adjacent boards, and slide out the damaged plank. Fit a matching replacement, locking it into place, trim as needed, and reinstall trim.
Clean the area and check joins for stability.
When to consult a flooring professional
Although minor scuffs you can fix yourself, call a flooring professional once finish damage spreads, shows deep discoloration, or compromises the plank’s protective layer.
A pro will assess whether refinishing, spot repair, or plank replacement is best, prevent further warping or moisture issues, and match texture and color.
You’ll save time and avoid costly mistakes by getting expert evaluation and proper tools for lasting results.
FAQ Fast Answers to Common Questions
Got a few quick questions?
You’ll get short, practical answers about using acetone, how long solvents should sit, whether heat or steam can harm laminate, and tips for textured surfaces.
Read on and apply the safest option for your floor.
Can I use nail polish remover (acetone) on laminate?
Can you safely use nail polish remover (acetone) on laminate? You can, but cautiously.
Acetone removes paint and can dull or strip the laminate finish. Test a hidden spot first, use a small amount on a cloth, blot gently, and rinse with water afterward.
If finish softens or color changes, stop and use a milder method like rubbing alcohol or dish soap and warm water.
How long should I let a solvent sit on paint before wiping?
How long should you let a solvent sit on paint before wiping?
Let it dwell just long enough to soften the paint—typically 1–5 minutes for water-based, 5–15 minutes for tougher spots.
Check a small area first.
Don’t let solvent dry on the laminate; reapply if needed.
Wipe gently with a soft cloth, rinse the area, and dry to prevent residue or damage.
Will heat damage laminate if I use a hair dryer?
If you keep the hair dryer moving and don’t hold it too close, short bursts of heat usually won’t harm laminate; however, prolonged high heat can warp the surface or loosen seams.
Use low-to-medium heat, keep the dryer at least 6–8 inches away, and move constantly.
Test a hidden spot first, avoid steam settings, and stop if the laminate feels hot or discolors.
How do I remove paint from textured laminate?
Heat can help lift paint, but textured laminate needs a gentler approach to avoid damaging the pattern.
Use a soft-bristle brush and a plastic scraper to work paint from grooves, applying a mild solvent like rubbing alcohol or diluted dish soap sparingly.
Blot, don’t rub; rinse with a damp cloth and dry.
Test any product in an inconspicuous spot first.
Is it safe to use a steam mop to remove paint?
Wondering whether a steam mop can remove paint from laminate? You shouldn’t use one.
Steam can warp or delaminate laminate planks by forcing moisture into seams and under the wear layer.
For spot paint removal, stick to gentle scraping, rubbing alcohol, or a commercial laminate-safe remover.
If you must try heat, test in an inconspicuous area first and avoid prolonged exposure.
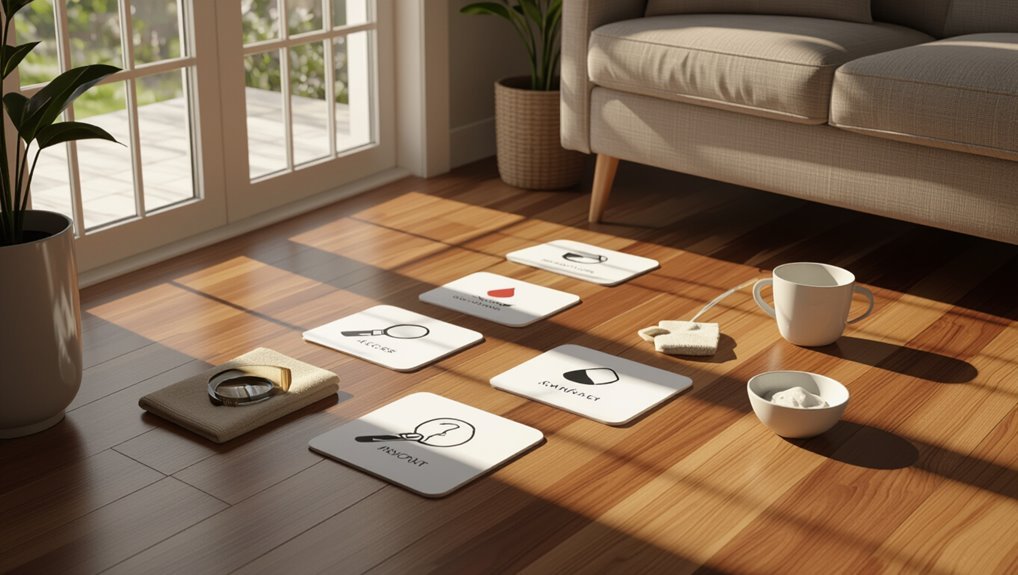
Visual Guide and Quick Reference Checklist
You’ll find a simple step-by-step flowchart that helps you decide what to do based on paint type and how long it’s been sitting.
Keep a one-page checklist nearby for quick action after a spill—tools, cleaners, and safety steps laid out.
Follow the flowchart and checklist to act fast and avoid damage.
Step-by-step flowchart for decision-making
Start by quickly evaluating the paint type and how long it’s been on the laminate—this determines whether you’ll scrape, soften, or dissolve the spot.
Follow a simple flow: assess (wet/dry, latex/oil), choose method (scrape, heat, solvent), test in inconspicuous area, apply gently, remove residue, rinse and dry.
If damage risk appears, stop and consult a professional.
One-page checklist for quick action after a paint spill
Act fast: the first 10–15 minutes after a spill matter most for keeping paint off your laminate.
You’ll want a simple, one-page checklist to act decisively: contain, blot, lift, test, and finish. Keep it visible near work areas so you don’t hesitate.
- Contain spill perimeter with paper/towels
- Blot excess paint—don’t rub
- Lift with damp cloth and mild cleaner
- Test solvent on scrap
- Rinse and dry promptly