How to Install Backsplash Tile: Spacing, Grouting, and Pro Tips
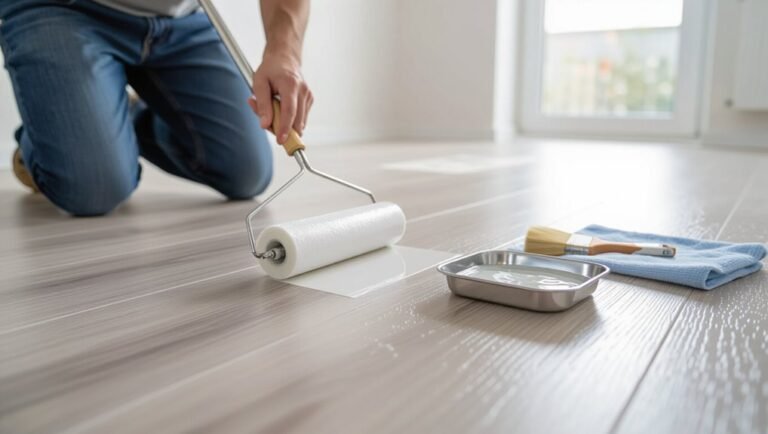
You can install a durable, attractive backsplash yourself with basic tools and careful planning. Measure and dry-fit tiles, mark a level reference line, and use the right adhesive and spacers to keep joints consistent. Wait the adhesive to cure, then grout with sanded or unsanded grout as appropriate, wipe clean, and seal porous or stone tiles. Avoid lippage with leveling clips and seal grout annually for maintenance. Keep going to get step-by-step tips and pro tricks.
Can You Install Backsplash Tile Yourself?
You can often install a backsplash yourself if you’ve got basic DIY skills and the right tools.
Expect a weekend or two for a typical kitchen, with costs ranging from low for basic ceramic tile to higher for glass or stone and special tools.
If you’re unsure about layout, cutting, or grout work, plan to hire a pro to avoid costly mistakes.
One Paragraph Summary of Time, Cost, Skill Level
Although it’ll vary with tile type and kitchen size, most homeowners can expect a straightforward subway-tile backsplash to take a weekend (8–16 hours) from prep through grouting.
Mosaic or intricate patterns can stretch to two weekends or more. You can learn how to install backsplash tile yourself; expect moderate tools, $100–$600 materials, basic skills, and patience.
- Time: weekend
- Cost: low–moderate
- Skill: DIY-friendly
- Tip: practice cuts first
Basic Understanding What Is a Backsplash and Why Proper Spacing & Grouting Matter
A backsplash protects your walls from splashes and stains and can be made from materials like ceramic, subway, glass, mosaic, or natural stone.
You’ll pick a tile type based on style and durability, then set tiles with consistent spacing so grout can do its job.
Proper grout and joint width keep the installation watertight, strong, and looking right over time.
Purpose and Materials of a Kitchen Backsplash
Think of a backsplash as the hardworking shield behind your stove and sink: it protects walls from splashes, heat, and stains while tying the kitchen’s look together.
You’ll choose durable, water-resistant materials and plan spacing/grout to prevent moisture damage. Consider function, maintenance, and aesthetics:
- Waterproofing
- Durable substrate
- Appropriate grout
- Easy-clean finish
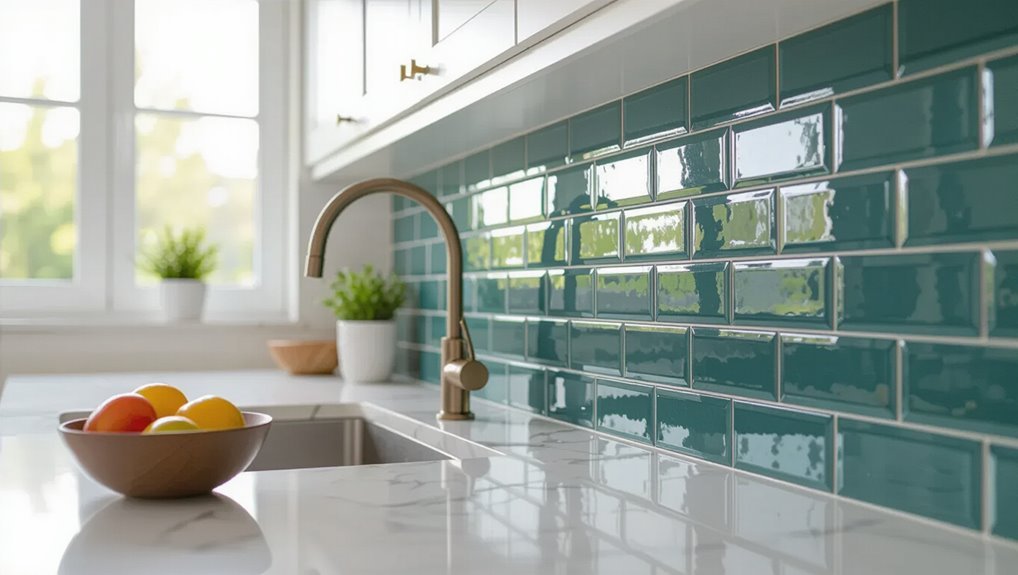
Tile Types Common for Backsplashes (ceramic, subway, glass, mosaic, stone)
Tiles for backsplashes come in many materials—ceramic, subway (a style of ceramic or porcelain), glass, mosaic, and natural stone—each offering different looks, care needs, and installation quirks. You’ll choose based on style, durability, and maintenance. Consider porosity, edge uniformity, and weight for installation.
| Type | Look | Care/Notes |
|---|---|---|
| Ceramic/Subway | Classic, smooth | Easy clean, uniform |
| Glass | Sleek, reflective | Shows smudges, fragile |
| Mosaic/Stone | Textured, varied | Seal natural stone |
Role of Tile Spacing (grout joints) and Grout in Durability & Appearance

Because grout fills the gaps between tiles, it doesn’t just finish the look—it protects the wall from moisture, stabilizes the layout, and affects how easy the backsplash is to clean.
You’ll choose joint width based on tile size and movement, balancing aesthetics with flexibility.
Proper grout type and sealing prevent stains, cracking, and mold, keeping your backsplash durable and low‑maintenance.
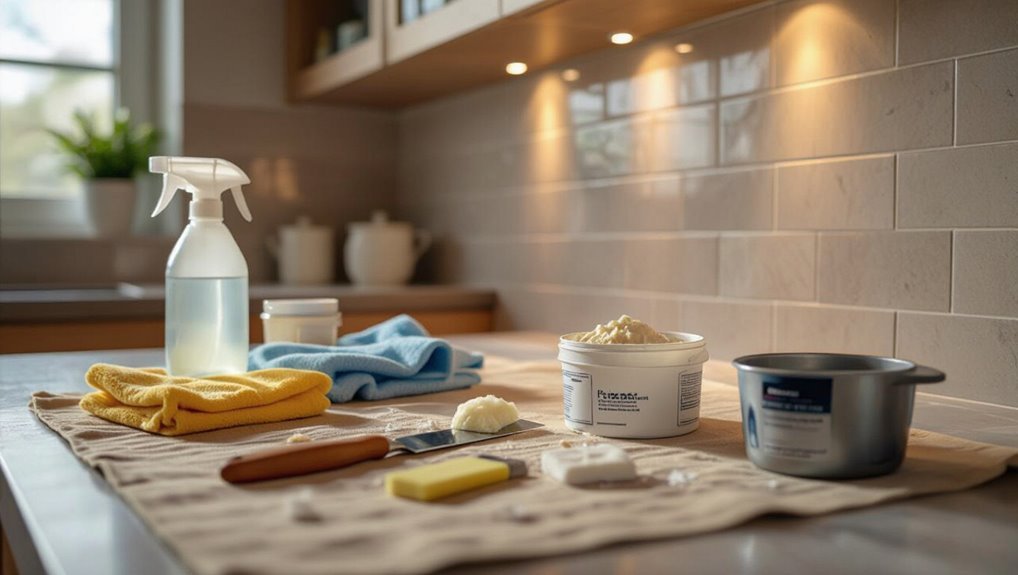
Tools, Materials, and Preparation Checklist
Before you start tiling, gather the essential tools—trowel, tile cutter, spacers, level, grout float—and the materials like tile, adhesive/mortar, grout, sealer, and caulk.
Clean and repair the wall, install backer board where needed, and apply any required waterproofing so your surface is stable and dry.
Having everything prepped and on hand will make the installation faster and prevent costly mistakes.
Essential Tools (trowel, tile cutter, spacers, level, grout float, etc.)
You’ll want a compact kit of reliable tools to get your backsplash installed cleanly and efficiently.
Gather a notched trowel, tile cutter or wet saw, spacers, and a level. Also bring a grout float, margin trowel, sponge, and bucket.
Keep safety gear—glasses and gloves—handy. Organize tools for easy access and check blades and edges before you start.
- Notched trowel
- Tile cutter
- Spacers
- Level
Required Materials (tile, adhesive/mortar, grout, sealer, caulk)
Now that your tools are organized, gather the materials you’ll need to actually set the tile: the tile itself, an appropriate adhesive or thin-set mortar, grout, a penetrating sealer (for porous tiles or grout), and caulk for joints where the backsplash meets countertops or cabinets.
You’ll also want a mixing bucket and clean sponges. Consider tile type and grout color.
- Tile selection
- Adhesive/mortar
- Grout
- Sealer/caulk
Surface Prep Steps Clean, Repair, Backer Board, Waterproofing
Start by stripping the wall down to a clean, sound surface—remove loose paint, grease, old adhesive, and any caulking so the tile has a solid bond.
Then follow this checklist for prep and tools:
- Cleaners, degreaser, scraper
- Patch compound, sandpaper, putty knife
- Cement backer board, screws, mesh tape
- Waterproof membrane, roller, sealant
Quick Plan Measuring, Layout, and Calculating Materials
Start by measuring the wall area and subtracting openings like outlets and windows so you know the actual coverage.
Then lay out tiles dry to find center lines and adjust cuts for a balanced look.
Finally, calculate how many tiles, spacers, adhesive, and grout you’ll need, adding a small waste allowance for cuts and breakage.
Measuring Wall Area and Accounting for Outlets/Windows

Measure the total wall area you’ll tile first so you can order the right amount of material and avoid surprises.
Then subtract openings and add waste. Use a tape, record dimensions, and calculate area.
- Measure wall width × height.
- Measure each outlet/window and subtract area.
- Add 10–15% for cuts/waste.
- Round up tiles and order extras for matching.
How to Create a Tile Layout and Find Center Lines (dry layout)
Before you set any adhesive, do a dry layout so you can see how the tile grid will sit on the wall and where cuts and focal lines will fall.
Mark center lines, snap vertical and horizontal guides, and arrange tiles with spacers. Check symmetry and adjust to avoid tiny edge cuts.
- Find center
- Snap lines
- Dry-fit tiles
- Note cut locations
How to Calculate Tile, Spacers, Adhesive, and Grout Quantities
One quick way to avoid surprises is to calculate exactly how much tile, spacers, adhesive, and grout you’ll need before you buy anything. Measure wall area, subtract openings, add 10% waste, then compute adhesive and grout per manufacturer coverage. Use spacers count by joints.
| Item | Rule |
|---|---|
| Tile | Area +10% |
| Spacers | Joints count |
| Adhesive | Coverage sheet |
| Grout | Coverage bag |
Step by Step Installation Guide
You’ll start by marking a level reference line and clear guidelines so every tile sits straight.
Next you’ll spread the right adhesive, back-butter when needed, set tiles with spacers, and cut around edges and outlets using the proper tools.
Finally, let the installation cure fully before you grout.
Step 1 Marking Guidelines and Establishing a Level Reference Line
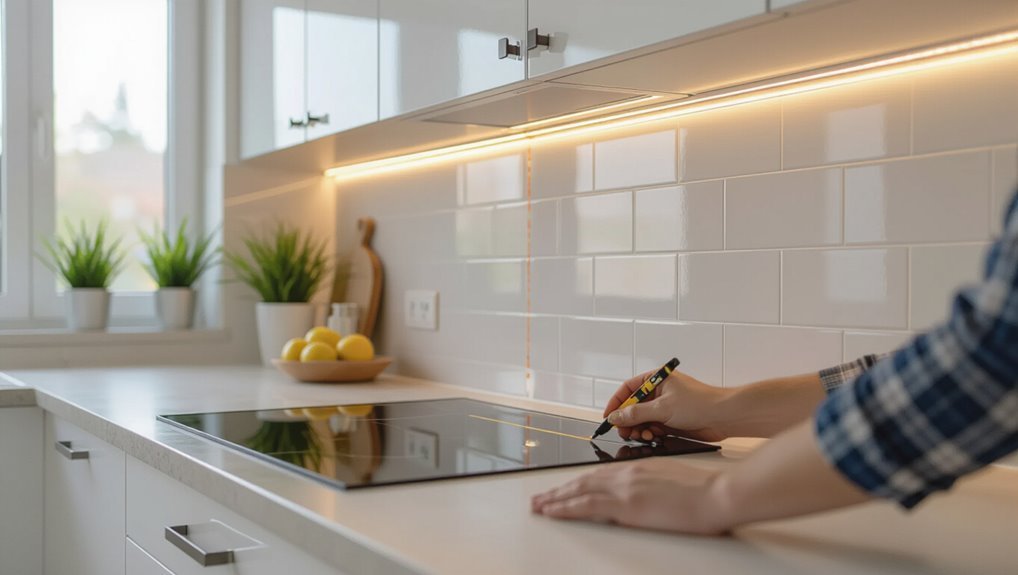
Start by measuring the full width of the backsplash area and marking the center with a pencil; this centerline will guide the entire layout and keep your pattern balanced.
Next, use a level to draw a horizontal reference line at your desired height, account for outlets and cabinets, and mark vertical plumb lines at corners.
Double-check measurements before cutting or placing tiles.
Step 2 Applying Adhesive/Mortar Properly (back butter, comb size)
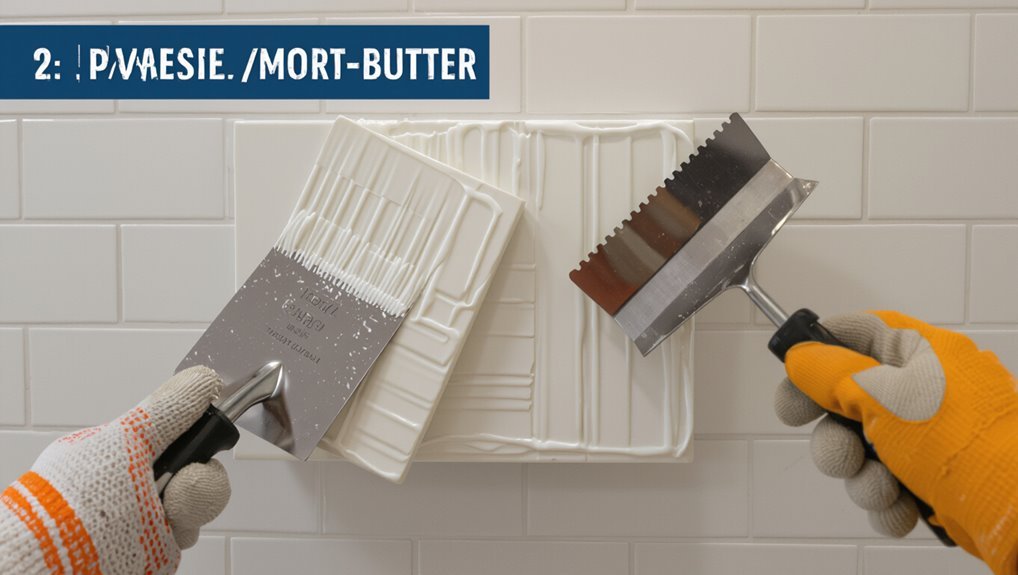
With your layout lines in place and tiles dry-fit, it’s time to apply the adhesive so tiles bond firmly and sit flat.
Back-butter large or uneven tiles with thinset to guarantee full contact.
Use a notched trowel sized for your tile (usually 1/4″ x 1/4″ or 1/4″ x 3/8″); comb in one direction, keeping consistent ridges and working small areas.
Step 3 Setting Tiles and Using Spacers for Consistent Joints
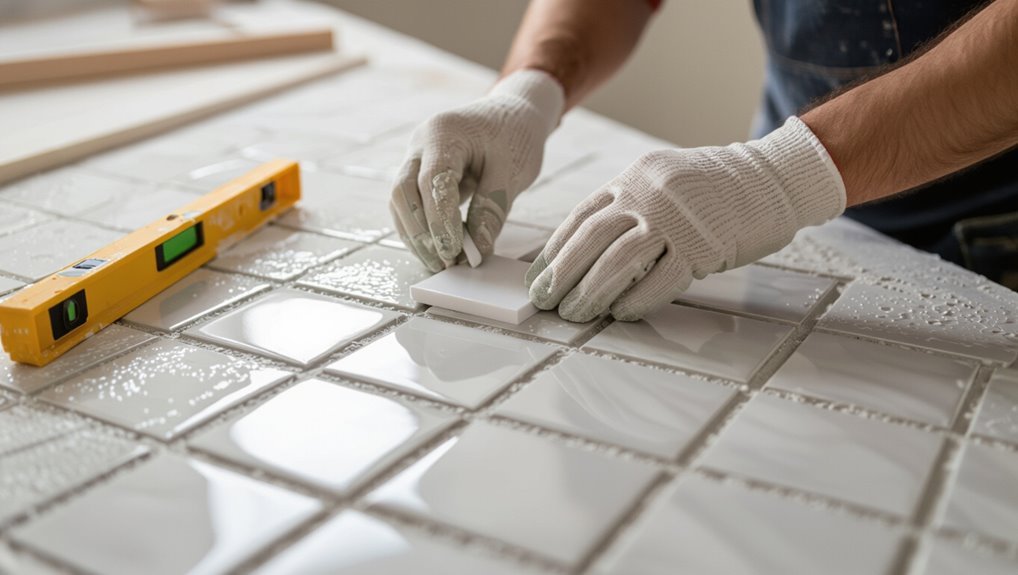
Set each tile gently into the combed thinset, pressing and slightly twisting to collapse the ridges and secure full contact; for large tiles, press from the center outward to avoid air pockets.
Use uniform spacers at every corner, check alignment with a straightedge and level, adjust before thinset skins, maintain consistent joint width, and stagger rows per your layout to guarantee tidy, even seams.
Step 4 Cutting Tiles for Edges, Outlets, and Odd Shapes (tools & techniques)
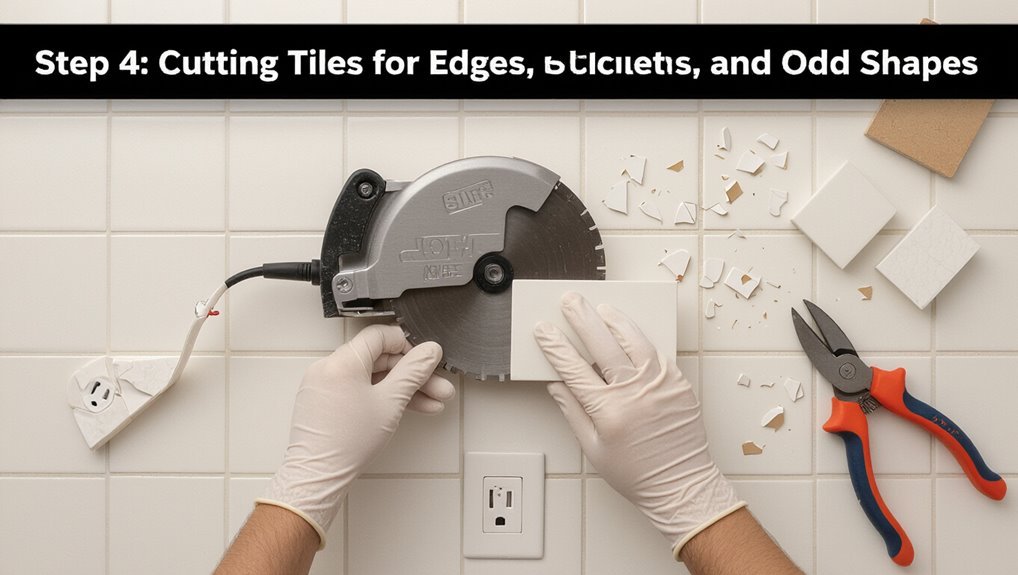
After you’ve secured full contact and checked alignment, you’ll need to cut tiles to fit edges, outlets, and irregular shapes.
Measure and mark carefully, transfer marks to the tile, and use a wet saw for straight cuts, a tile nipper for curves, and a carbide-grit wheel or rotary tool for notches.
Smooth cuts with a rubbing stone, check fit, and adjust as needed.
Step 5 Allowing Proper Cure Time Before Grouting
Because the adhesive needs time to reach full strength, you’ll wait before grouting so tiles don’t shift or loosen; most thinset requires 24–72 hours depending on brand, temperature, and humidity.
Follow these steps before grouting:
- Check manufacturer cure time.
- Keep area dry and undisturbed.
- Maintain steady room temperature.
- Remove spacers and clean joints gently.
Step 6 Grouting Techniques (mixing, applying, wiping, sanding)
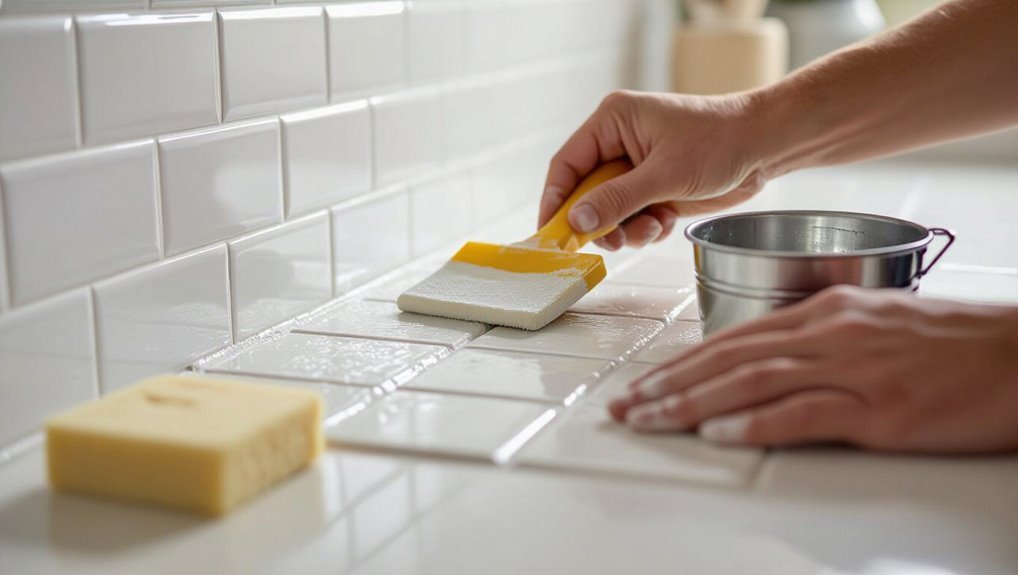
Now that the adhesive has cured and you’ve removed spacers and cleaned the joints, it’s time to grout—this seals gaps, stabilizes tiles, and finishes the look.
Mix grout to manufacturer consistency, apply with a rubber float at a 45° angle, pressing into joints.
Wipe excess with a damp sponge, rinse frequently, then let set and lightly sand any high spots or haze for a smooth finish.
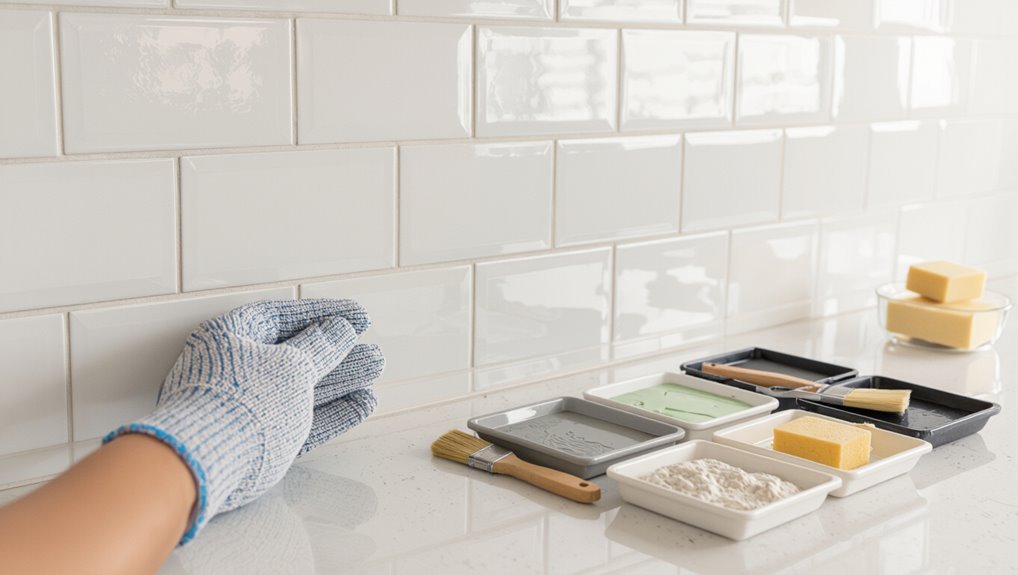
Step 7 Sealing Grout and Finishing Edges with Caulk
Step 7 seals your work and gives it a finished look: once the grout has fully cured, apply a penetrating or grout-specific sealer according to the product instructions—usually with a small brush or applicator—then smooth a color-matched silicone or acrylic caulk along perimeter joints (where tile meets countertop, sink, or cabinetry) to flexibly finish edges and prevent water intrusion.
- Test sealer on scrap
- Apply evenly
- Tool caulk smoothly
- Wipe excess promptly
Spacing & Grout Choices How to Choose Width, Type, and Color
Decide your grout joint width based on tile size and material—smaller tiles and delicate porcelains need thinner joints, while larger or textured tiles tolerate wider gaps.
Choose a grout type that fits the job and traffic—sanded for wider joints, unsanded for narrow, epoxy for stain resistance, or premixed for quick touch-ups.
Pick a grout color to either blend for a seamless look or contrast to highlight the pattern, and test swatches before committing.
Recommended Joint Widths by Tile Size and Material
Because grout joints affect both the look and longevity of your backsplash, you’ll want to match joint width to tile size and material from the start. Choose narrower joints for small, rectified porcelain; wider for natural stone or uneven handmade tile. Use the chart below to guide choices.
| Tile Size | Material | Recommended Joint |
|---|---|---|
| Small (≤2″) | Porcelain | 1/16″ |
| Medium (2–12″) | Ceramic | 1/8″ |
| Large (>12″) | Natural stone | 3/16″ |
Grout Types Explained (sanded vs. unsanded vs. epoxy vs. premixed)
Anyone can get overwhelmed by grout options, but choosing the right type—sanded, unsanded, epoxy, or premixed—comes down to joint width, tile material, and how much maintenance you want.
You’ll pick sanded for wide joints and durability; unsanded for delicate or glazed tiles; epoxy for stain resistance and heavy wear; premixed for small, low-traffic jobs.
- Sanded
- Unsanded
- Epoxy
- Premixed
How Grout Color Affects Visual Outcome and Tips for Choosing
While grout might seem like a small detail, its color dramatically changes your backsplash’s look—making tile lines pop, fade into the background, or even alter perceived size and pattern.
Choose matching grout for a seamless, spacious feel; contrasting grout for definition and pattern emphasis.
Consider lighting, tile texture, and maintenance—darker grout hides stains, lighter grout brightens.
Test samples before committing.
Common Problems, How to Fix Them, and Prevention
You’ll run into common issues like lippage or uneven tiles if you don’t level as you go, and I’ll show how to correct that during installation.
I’ll also cover grout sinking and cracking with straightforward repair techniques and preventive tips.
Finally, you’ll learn how to spot adhesive failure and loose tiles, when to reattach, and when full replacement is smarter.
Lippage, Uneven Tiles, and How to Correct During Install
If tiles end up at different heights, it creates lippage—a small but visible trip hazard and a finished look that screams “amateur.” You can prevent and correct it during install by monitoring level, using proper thinset, and adjusting tiles immediately.
- Check substrate flatness
- Use a notched trowel
- Employ tile leveling clips
- Tap tiles with a soft mallet
Grout Sinking, Cracking, and Repair Methods
Catch grout issues early to avoid bigger repairs down the line: sinking and cracking usually come from improper mixing, weak bond to the tiles, movement in the substrate, or inadequate joint depth.
You can fix most problems by removing the damaged grout, preparing the joint properly, and regrouting with the right materials and technique.
- Remove loose grout and clean joints.
- Check substrate movement.
- Regrout with correct mix and depth.
- Seal and allow full cure.
Adhesive Failure, Loose Tiles, and When to Replace
When tiles start to pop loose or you see adhesive squeezing from joints, the bond has failed and you should act quickly to prevent water damage and more extensive repairs.
You should:
- Remove loose tiles, scrape old mastic.
- Clean substrate, dry thoroughly.
- Reapply appropriate thinset, press tiles with spacers.
- Replace cracked tiles and reseal grout to prevent recurrence.
Pro Tips and Best Practices
You’ll pick up time-saving tricks pros use, like batching cuts and using spacers to speed layout.
Try aesthetic moves—staggered patterns, a few accent tiles, or grout contrast—to lift the look without extra work.
I’ll also cover simple maintenance: routine cleaning and resealing where needed to keep your backsplash looking new.
Time Saving Techniques Professionals Use
Although prepping seems like extra work, pros know a little planning cuts install time dramatically.
You’ll work faster if you:
- Lay out tiles dry to optimize cuts.
- Use a quality wet saw and sharp blades.
- Keep grout and spacers organized by row.
- Mix only needed adhesive, reheating small batches as required.
Aesthetic Tricks (stagger patterns, accent tiles, grout contrast)
Pattern, contrast, and small accents can completely change a backsplash’s look, so pick a layout that complements your kitchen’s style and scale.
Stagger tiles for motion and hide imperfections; use a bold grout to define shapes or a matching grout for seamless flow.
Add one or two accent tiles or a trim row to create focal points without overwhelming the design.
Maintenance Tips to Keep Backsplash Looking New (cleaning, resealing)
When you finish installing tile, plan a simple routine to keep the backsplash looking new: wipe spills immediately, clean weekly with a mild detergent, and avoid abrasive tools that scratch glaze.
Seal grout annually to repel stains and moisture. Follow these steps:
- Use pH-neutral cleaner.
- Blot stains, don’t scrub.
- Reapply grout sealer yearly.
- Inspect and touch up caulk.
Cost, Time Estimates, and When to Hire a Pro
You’ll want to compare typical DIY costs and time—materials and a weekend’s labor—against pro pricing and faster turnaround.
Hire a pro if your wall needs repair, your layout is complex, or you want a guaranteed waterproof finish.
Knowing those trade-offs will help you decide whether to tackle it yourself or call in an expert.
Typical DIY vs. Professional Cost Breakdown and Labor Time
Deciding whether to DIY or hire a pro comes down to budget, timeline, and your comfort with precision work: DIY can cut material and labor costs but typically takes longer and risks mistakes that raise repair expenses, while a professional charges more upfront yet finishes faster with guaranteed workmanship and fewer surprises. Estimate examples:
| Option | Cost range | Labor time |
|---|---|---|
| DIY | $50–$300 | 6–20 hrs |
| Pro | $300–$1,200+ | 2–6 hrs |
| Hybrid | $150–$600 | 4–10 hrs |
Scenarios Where Hiring a Pro Is Recommended
If you’re weighing DIY savings against a pro’s speed, there are clear situations where hiring a professional makes sense: complex layouts (tiny mosaic, intricate patterns, or large format tiles), uneven walls that need plastering or backerboard, electrical/plumbing work behind the backsplash, or any job where a mistake would be costly—like ceramic near a range or water-sensitive areas.
- Cost vs. value
- Time estimates
- Risky conditions
- Warranty and cleanup
Tools & Product Comparison Chart
Now you’ll compare the tools and products that make the job easier and last longer.
We’ll look at tile cutters side-by-side, explain which grout types suit different joints, and recommend adhesives for various tile materials.
Use this chart to pick the right gear for your backsplash.
Comparison of Tile Cutters, Grout Types, and Adhesives
Choosing the right tools and materials makes a big difference in how your backsplash installation turns out, so you’ll want to compare tile cutters, grout types, and adhesives side-by-side before you start. Pick what’s comfortable, durable, and matches tile. Use this quick chart to guide confident choices:
| Tool/Type | Feeling |
|---|---|
| Manual cutter | Controlled |
| Wet saw | Powerful |
| Sanded grout | Durable |
| Epoxy adhesive | Secure |
FAQ
You’ll find quick answers here to common questions like grout line width for subway tile and whether you can grout immediately after laying tile.
I’ll cover sealing frequency, cutting tiles around outlets, and how to pick a grout color that matches your tile.
If you have a specific scenario, ask and I’ll give tailored tips.
How wide should my grout lines be for subway tile?
How wide should your grout lines be for subway tile? Aim for 1/16″ to 1/8″ for a tight, classic look; 3/16″ to 1/4″ suits slightly irregular tiles or a more pronounced grid.
Smaller joints emphasize uniformity, while larger joints hide size variation and allow more grout color impact. Choose based on tile edge straightness and your desired visual effect.
Can I grout right away after laying tile?
After you set your subway tiles and their spacers, don’t rush into grouting—those tiles need time for the thinset to cure so they stay fixed and the grout can bond properly.
Wait the manufacturer’s recommended cure time, usually 24–72 hours depending on thinset and conditions.
Check that tiles are firmly set and joints are clean and dry before mixing and applying grout for best adhesion and finish.
Do I need to seal my grout and how often?
Should you seal grout? Yes—sealing protects against stains and moisture, especially in kitchens.
Apply a penetrating sealer after grout has cured (usually 72 hours to 7 days), following product directions.
Reseal every 1–3 years depending on traffic, cleaning, and product quality.
Test by spraying water; if it absorbs, reseal.
Clean before resealing for best adhesion.
What’s the best way to cut tiles around outlets?
Begin by turning off power to the outlet at the breaker and confirming it’s dead with a voltage tester.
Remove the cover and outlet, mark tile with outlet box outline and center punch.
Use a wet tile saw or angle grinder with diamond blade for straight cuts; a carbide nibbling bit or hole saw cutter for round openings.
Dry-fit, adjust, then grout and reinstall.
How do I match grout color to tile?
How closely do you want your grout to blend or contrast with the tiles?
Decide purpose: seamless look uses matching grout; contrast highlights pattern.
Hold sample tiles, apply grout swatches, let dry—color shifts when cured.
Consider stain resistance, joint width, and lighting.
Test small area, then pick sanded or unsanded formula accordingly.
Seal grout to protect color and ease cleaning.