Which Direction Should You Install Laminate Flooring? It Matters More Than You Think
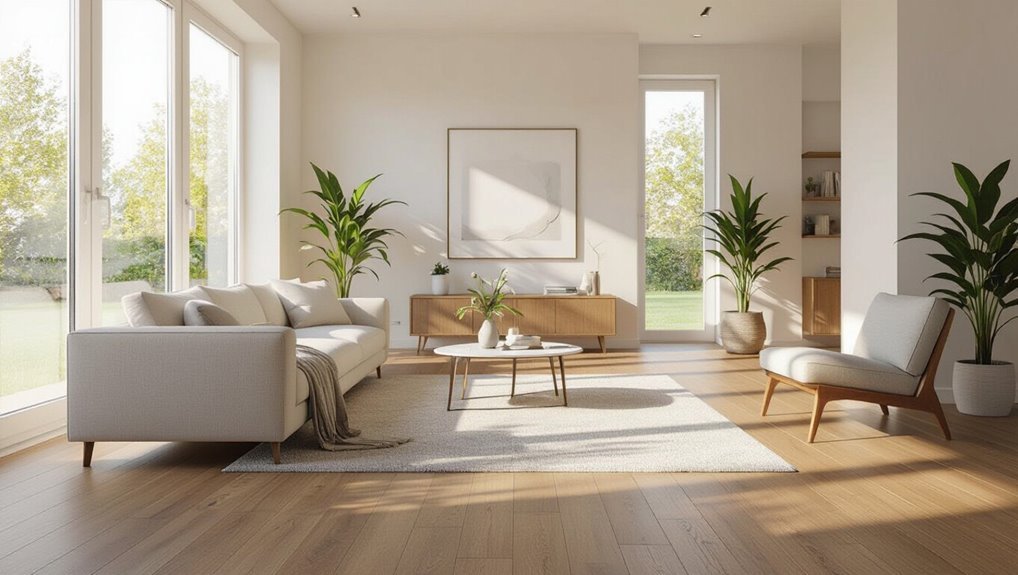
You should run laminate planks parallel to the longest wall or toward the room’s main light source, because direction shapes how the space feels and how seams and grain show. In long, narrow rooms lay boards lengthwise to elongate the space; in square or open areas orient toward the primary light or sightline. Also align planks perpendicular to joists for stability and leave proper expansion gaps. Keep going to see practical tips, layout choices, and common pitfalls.
Which Direction Should You Install Laminate Flooring?
Think about the room and the plank style when choosing direction: run planks parallel to the longest wall in long, narrow rooms and toward the main light source in square or open spaces.
For plank styles with a strong lengthwise grain, running them lengthwise from the main entrance usually looks best.
As a simple rule of thumb, install planks so their length flows toward the room’s primary light or main sightline.
Short, direct recommendation based on room type and plank style
For most rooms, run laminate planks parallel to the longest wall or toward the main light source to make the space look larger and seams less noticeable.
In bedrooms, run with the bed for flow; in narrow hallways, run lengthwise.
For patterned or chevron planks, follow the design’s grain.
Consider which direction to install laminate flooring based on room shape, traffic, and plank style.
One-sentence rule of thumb for most installations
While room shape, light and plank pattern affect the choice, a simple rule of thumb is to run laminate planks parallel to the longest wall or toward the main light source so the space reads larger and seams draw less attention.
You’ll also align traffic flow, simplify installation across width, and minimize visible end joints, making the floor look cohesive and professional with less effort.
Basic Understanding What Direction Means and Why It Matters
When we talk about “direction” in laminate flooring, we mean the orientation of the planks relative to the room and light source.
Your choice will change the look—planks can make a room feel longer, wider, or guide how light and shadows play across the floor.
You’ll also need to balance that aesthetic with practical limits like expansion gaps, seam placement, and the condition of the subfloor.
What “direction†refers to in laminate flooring installations
Direction in laminate flooring means the way the planks run across a room—typically along the longest wall, toward the main light source, or in line with traffic flow—and it affects appearance, perceived space, and installation complexity.
You’ll choose orientation relative to room layout, joins, and subfloor seams, considering ease of installation, plank length alignment, and change placements to guarantee a clean, durable result.
How plank orientation affects appearance, perception of space, and light flow
Because the way you lay the planks guides how light and sight move through a room, plank orientation has a big impact on appearance, perceived size, and how bright spaces feel.
Run planks lengthwise to elongate and emphasize flow, or across a narrow room to widen it.
Diagonal layouts add dynamism and camouflage minor imperfections while reflecting light differently.
Structural and installation constraints that influence direction (expansion gaps, seams, subfloor)
Although visual choices matter, you’ll also have to work within structural limits: expansion gaps, plank seams, and the condition and layout of the subfloor all dictate which way you can lay the boards and how they’ll perform over time.
You’ll align seams away from weak spots, run planks perpendicular to joists when required, and leave proper expansion gaps at walls and thresholds to prevent buckling.
Factors to Consider When Choosing Direction
When choosing plank direction, consider the room’s shape and dimensions so the layout looks balanced and minimizes awkward cuts.
Let natural light, doorways, sightlines, and focal points guide the flow, and check subfloor type and joist direction for structural support.
Also match plank length, pattern, and bevels to the chosen direction to keep seams and repeats visually pleasing.
Room shape and dimensions
If your room is long and narrow, run the laminate boards parallel to the longest wall to make the space feel more open; in square or irregular rooms, pick a direction that visually balances the layout and minimizes awkward cuts.
Measure room proportions, account for doorways and passages, and orient boards to reduce small slivers at edges.
Plan panel runs to keep joints centered and neat.
Main light source(s) and natural light direction
Because light plays a big role in how your floor looks, orient boards to complement the room’s main light source(s) and the direction of natural light.
Run planks parallel to incoming sunlight to emphasize length and minimize visible seams.
In rooms with strong side lighting, choose wider boards and a smoother finish to reduce glare and highlight grain, ensuring consistent appearance throughout the day.
Doorways, sightlines, and focal points
As you plan board direction, think about how doorways and sightlines guide the eye—run planks toward main entrances and focal points to create a sense of flow and make rooms feel larger.
Align boards so a visitor’s view follows uninterrupted lines between spaces, emphasizing architectural features or a fireplace.
Use direction to unify adjacent rooms and minimize visible shifts at thresholds.
Subfloor type and joist direction
When choosing plank direction, consider your subfloor material and the joist layout since they determine stability and how the floor will perform over time.
Run laminate perpendicular to joists when possible to reduce flex and clicking.
On concrete or engineered subfloors, choose the orientation that limits seams and follows room flow.
Always check manufacturer span limits and reinforce weak areas before installation.
Plank length, pattern, and bevels
Plank length, pattern, and bevels all affect how your room looks and how seams read, so pick options that reinforce the direction you want the eye to follow.
Longer planks create fewer joints and a sleeker flow; shorter ones make busier rhythm.
Straight, continuous patterns emphasize lengthwise installation, while micro-bevels highlight each plank.
Match these choices to your desired visual direction.
Traffic flow and wear patterns
Consider how people move through the room and place your planks to minimize seams in high-traffic paths; running boards parallel to the main flow reduces edge wear and creates a smoother walking surface, while perpendicular runs can concentrate stress at joints and show more seam wear over time.
You’ll orient planks to spread footfall across boards, protect joints, and prolong finish life in busy zones.
Installation ease and waste minimization
If you want installation to go quickly and with minimal waste, pick a direction that aligns with room dimensions and obstacles so you reduce cuts and offcuts.
Lay boards parallel to the longest wall or entrance to minimize end cuts, and stagger seams for easier fitting.
Plan starting rows to avoid narrow final strips, measure carefully, and keep scrap for future repairs or changes.
Primary Recommendation and Rationale
For most rooms, you’ll be best off running planks parallel to the longest wall to make the space feel larger and to simplify installation.
If natural light is a dominant feature, run planks parallel to the incoming light to minimize visible seams and highlight the grain, while always orienting them perpendicular to floor joists when possible for added structural stability.
Reserve diagonal or herringbone layouts for strong aesthetic statements or to visually expand small, awkward rooms.
Installing planks parallel to the longest wall benefits and when to use
When you run laminate planks parallel to the room’s longest wall, you create a visually seamless flow that makes the space look larger and draws the eye along the room’s length.
You’ll highlight room proportions, simplify installation across long runs, and reduce visible seams.
Use this layout in narrow rooms or open plans where elongation and clean sightlines improve comfort and resale appeal.
Installing planks parallel to incoming light benefits and when to use
Because natural light highlights plank edges and grain, lay laminate parallel to incoming light to minimize visible seams and make boards read as a continuous surface.
Doing so softens contrast, conceals minor color variations, and emphasizes length. Use this when large windows or glass doors dominate a room.
It improves visual flow, makes spaces feel wider, and reduces distracting shadow lines.
Installing planks perpendicular to floor joists structural and stability reasons
While laying planks parallel to incoming light can hide seams and lengthen a room visually, you’ll usually run the boards perpendicular to the floor joists to maximize structural stability.
Doing so reduces plank span between supports, minimizes deflection, and prevents squeaks or joint failure. You’ll get firmer footing, better load distribution, and longer-lasting clicks with fewer warranty issues when aligned across joists.
When to use diagonal or herringbone layouts aesthetic and small-room solutions
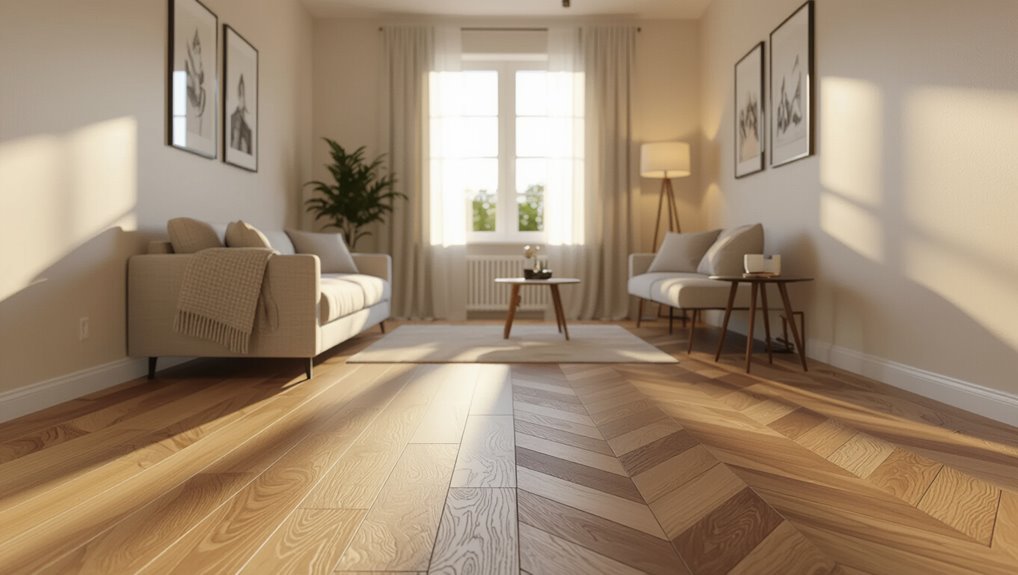
If you want to make a small or oddly shaped room feel larger and more dynamic, lay planks on the diagonal or in a herringbone pattern; these layouts draw the eye across the space, mask irregular walls, and create a sense of depth that straight runs can’t match.
Choose diagonal for subtle widening, herringbone for upscale focal impact, and orient toward the room’s longest sightline for best effect.
Step-by-Step Guidance for Choosing Direction
Start by evaluating the room’s shape, dimensions, and sightlines so you know the visual flow you want.
Check where natural light comes from and mark the primary light direction, then locate joists and note the subfloor orientation.
Finish by doing a dry-lay to visualize options and calculate material yield and waste for each direction.
Step 1: Assess room shape, dimensions, and sightlines
Before laying a single plank, walk the room and note its shape, measurements, and the main sightlines so you can decide which direction will look best and minimize cuts.
You’ll then evaluate edges, changes, and focal points to plan runs that reduce waste.
- Longest wall and doorway flows
- Narrow or irregular sections
- Sightlines from entry and key windows
Step 2: Check natural light and mark the primary light direction
2 simple checks will save you time: note where the sun and major windows cast light into the room, then mark the primary light direction on your plan so you can orient planks to show the grain and seams to best effect.
You’ll walk the space at different times, observe glare and shadow, then draw an arrow on your layout indicating the dominant light flow for plank alignment.
Step 3: Locate joists and evaluate subfloor orientation
Now that you’ve marked the room’s primary light direction, turn your attention to the structure beneath the floor: locate the joists and note the subfloor panel layout.
Run a stud finder, inspect seams, and note tongue-and-groove orientation. Aligning laminate perpendicular to joists gives strength and reduces sag.
If panels run oddly, factor their seams into plank direction to minimize visible offsets.
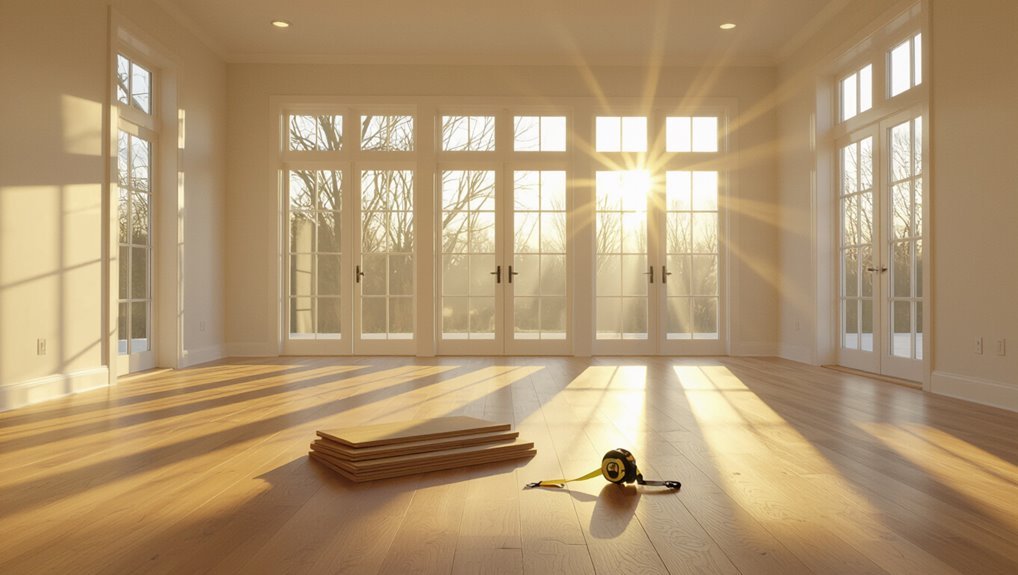
Step 4: Measure and do a dry-lay or mockup to visualize options
Start by measuring the room and laying out a few rows of laminate without locking them in to see how the pattern, joints, and end cuts will look across the space.
Then mock up different directions to compare flow and light.
Check:
- How seams align with walls and windows.
- How staggered end joints read visually.
- Any awkward narrow starter or end pieces.
Step 5: Calculate material yield and waste for different directions
With your mockup showing how boards run and where narrow pieces may appear, next calculate how many planks you’ll actually need for each direction so you can compare material yield and waste. Measure full rows, count end cuts, add 5–10% for waste. Use the table to track results quickly:
| Direction | Planks needed |
|---|---|
| Along length | 45 |
| Across width | 52 |
Step 6: Final decision checklist before installation
Although you’ve laid out options and run the numbers, take one last focused pass through a short checklist to confirm your direction choice before you start laying boards.
Verify visual flow from main entry. Confirm plank orientation minimizes seams and waste. Make sure light and traffic align with chosen layout.
- Sightline test
- Waste check
- Light/traffic confirmation
Comparison of Common Orientations
When you pick an orientation, you’ll weigh visual impact and practicality: running planks parallel to the longest wall or the main light source changes how a room reads.
You’ll also consider structural factors—parallel or perpendicular to joists affects stability and ease of installation.
Finally, straight, diagonal, or patterned layouts each alter aesthetics and cost, so choose the look and budget that fit your space.
Parallel to longest wall vs. parallel to light source
Deciding whether to lay laminate parallel to the longest wall or to the main light source affects how your room looks and feels, so pick the orientation that best hides seams and highlights the space. You’ll choose longest wall for perceived width, light source for fewer visible joints; weigh traffic flow and focal direction.
| Option | Visual effect | Best use |
|---|---|---|
| Longest wall | Widens room | Hallways |
| Light source | Fewer seams | Living rooms |
| Both | Balanced | Open plans |
Parallel to joists vs. perpendicular to joists structural pros and cons
You’ve weighed visual orientation against light and flow; now consider how the boards relate to the joists underneath, since that affects stability and longevity. Laying parallel spans joists, reducing panel flex and improving support; perpendicular can bridge joist gaps but may need underlayment or blocking. Choose based on joist spacing, subfloor rigidity, and load.
| Orientation | Support | Installation note |
|---|---|---|
| Parallel | High | Less flex |
| Perpendicular | Moderate | May need blocking |
Straight vs. diagonal vs. patterned installations aesthetics and cost comparison
Although straight layouts are the quickest and most budget-friendly, diagonal and patterned installations can transform a room’s proportions and curb appeal, so weigh aesthetics against added labor and materials. You’ll choose straight for speed, diagonal for widening small rooms, and patterns for drama, but expect higher waste and installation costs with complexity.
| Style | Impact |
|---|---|
| Straight | Efficient, simple |
| Diagonal | Expands space |
| Patterned | High drama |
| Cost | Low→High |
Common Mistakes and How to Avoid Them
Don’t ignore light direction or you’ll highlight seams and flaws the moment the sun hits the floor.
Don’t follow joists blindly—think about sightlines, expansion gaps, waste for extra boards, and proper changes at thresholds.
Plan for movement and order a bit more material than you think you need so you won’t be stuck mid-job.
Ignoring light direction and creating visible seams
When light falls across your new floor, it can make even small gaps and misaligned boards stand out. So plan your plank layout with the room’s light sources in mind.
Angle planks to minimize shadowed seams, stagger joints responsibly, and test layout with a temporary row.
Adjust orientation before clicking pieces together to avoid glare-revealed imperfections that’ll be hard to fix later.
Following joists blindly without considering sightlines
After you’ve checked how light hits the floor, take a moment to look down the room’s sightlines before laying planks.
Don’t follow joists automatically; they may create awkward seams or shorten visible runs. Align planks with the longest uninterrupted sightline or main viewing angle so boards read naturally.
This simple adjustment improves flow, hides joints, and makes the installation look intentional and cohesive.
Failing to account for expansion gaps and movement
Because laminate expands and contracts with temperature and humidity, you need to leave consistent expansion gaps around the perimeter and at fixed points; skipping them leads to buckling, crowning, or popping seams as the floor moves.
Measure and mark gap widths per manufacturer guidelines, use spacers during installation, allow gaps at thresholds and around pipes, and install connector strips to accommodate movement without stress.
Underestimating waste and ordering insufficient material
If you skip careful waste calculations, you’ll likely run out of planks mid-job or end up paying for a costly rush order.
Measure each room, factor pattern repeats and angled cuts, and add 8–15% extra for mistakes and future repairs.
Order slightly more than calculated, keep leftover sealed and labeled, and avoid last-minute shortages that stall progress and inflate costs.
Overlooking transitions and door thresholds
Once you’ve got materials and layout sorted, don’t forget the joins between rooms and the thresholds at doors—these small spots make a big difference in appearance, wear, and movement between surfaces.
You should plan junction profiles before cutting, match heights to avoid tripping, allow expansion gaps, and choose durable thresholds that complement your flooring.
Proper placement keeps seams tight and traffic smooth.
Best Practices and Pro Tips
When planning your layout, keep a consistent sightline from the main doorway so the floor reads correctly as soon as someone enters.
Do mockups and temporary layouts to confirm your direction, plank width and length choices, and talk those decisions through with installers or contractors.
Also consider how orientation affects maintenance—traffic wear and cleaning access—so your practical needs match the visual plan.
Consistent sightline planning from main doorway
Although it’s easy to focus on plank layout near walls, you should plan your sightlines from the main doorway first so the floor reads straight and intentional as soon as someone enters.
Stand at the threshold, note dominant sightlines toward focal points, and orient planks to reinforce those views.
Align seams to minimize visual interruptions and guarantee consistent spacing for a polished, cohesive entrance experience.
Using mockups and temporary layouts to confirm choice
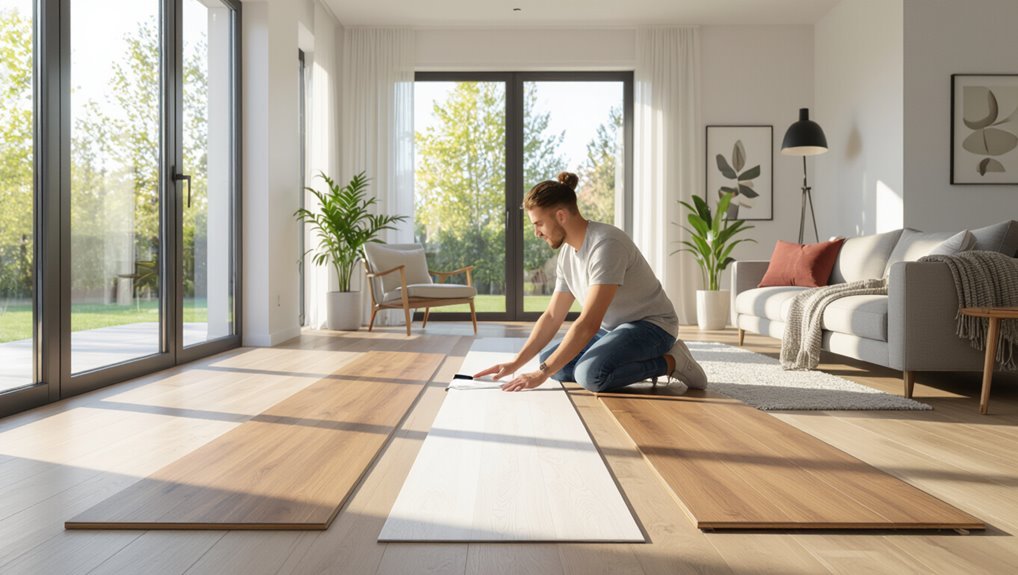
Try laying out three to five full planks in different orientations before you commit—mockups and temporary layouts let you see how color, grain, and seams read across the room.
Walk the space at different times of day, step back from doorways and windows, and photograph angles.
Adjust orientation until the flow feels natural; mockups reveal glare, pattern clashes, and awkward end joints before installation.
Communicating direction choice with installers and contractors
Because the plank direction sets the room’s visual flow, communicate your decision clearly and early so installers know exactly what to follow.
Share sketches, photos of mockups, and a written note on the contract specifying orientation relative to the main light source or entry.
Confirm starting wall, changes, and any diagonal runs.
Ask installers to acknowledge and mark plans before work begins.
Choosing plank width and length to complement chosen direction
Now that you’ve locked in plank orientation with your installer, pick widths and lengths that reinforce that flow instead of working against it.
Choose longer planks for open areas to emphasize direction; shorter, varied lengths suit busy rooms and hide seams.
Wider boards read more contemporary and widen a space along the grain, while narrower planks add rhythm and scale for traditional looks.
Maintenance considerations tied to plank orientation
When you orient planks to follow traffic flow, maintenance becomes simpler: dirt tends to track along the grain, making sweeping and vacuuming more effective, while cross‑grain layouts can trap grit in seams and require more frequent edge cleaning.
You’ll also find spills wick less toward seams when planks align with light and wear patterns.
Rotate rugs, clean edges with a crevice tool, and mop cautiously.
Case Studies / Scenarios (When to Choose Each Direction)
When deciding plank direction, think about how each space is shaped and used: run planks lengthwise in a long narrow hallway for visual flow, orient them toward the dominant window in a small square room to make the space feel larger, and align runs to create seamless connections in open-plan living and dining areas.
On a second-story install with exposed joists, prioritize running perpendicular to the joists for structural support unless visual continuity with the lower floor outweighs it.
These choices balance appearance, function, and installation practicality.
Long narrow hallway recommended approach and reasoning
Although laying planks lengthwise can make the corridor feel longer, you should also consider running them across the hall to minimize visible seams and handle door changes more easily.
Each option affects perception, installation complexity, and waste differently, so pick the direction that balances appearance with practicality for your specific hallway.
Measure carefully, align with light sources, stagger joints for strength, and plan shifts.
Small square room with a dominant window recommended approach
If you want the room to feel balanced and highlight that large window, run the planks perpendicular to the window so the boards draw the eye toward the view and daylight.
This layout widens perception, minimizes awkward seams, and creates a focal flow. Center your starter row parallel to the main sightline, stagger joints for visual interest, and align connections to doorways for tidy finishes.
Open-plan living and dining space seamless transitions between zones
Shifting from how planks can frame a single window, consider an open-plan living and dining area where you want the floors to tie separate zones together while still letting each feel distinct.
Lay planks lengthwise through both spaces to unify them; use subtle changes in plank direction, borders, or rugs to define dining versus lounging areas without breaking visual flow or creating awkward seams.
Second-story installation with exposed joist direction what to prioritize
When you’re installing laminate on a second story with exposed joists, prioritize the direction that minimizes deflection and follows the joist span so the flooring feels solid underfoot.
Choose boards perpendicular to joists when possible, or add blocking/underlayment if running parallel.
Inspect joist spacing, stiffness, and changes to stairs or openings.
Prioritize structural support over aesthetics to prevent squeaks and premature wear.
FAQ
You’ll want clear, practical answers to common worries like whether planks will look odd perpendicular to light, if they should run parallel to joists, and how plank width affects direction.
You’ll also need guidance on how much extra material to order for different layouts and whether you can change direction between rooms and handle shifts.
Read on for concise tips to resolve each of these points.
Will laminate look weird if installed perpendicular to the light?
Curious whether laying laminate perpendicular to the light will look odd?
It can emphasize seams and plank ends, especially with high-gloss finishes or pronounced textures. You’ll notice more visible joints and potential color variation under strong side lighting.
To minimize oddness, choose matte finishes, narrower boards, or consistent grain patterns; test a small area before committing to the entire room.
Is it necessary to run laminate planks parallel to floor joists?
Do you have to run laminate planks parallel to the floor joists? No—you can install them perpendicular or diagonal for appearance or room flow.
However, if you’re laying over exposed joists (rare) or installing long runs without a subfloor, align with joists for structural support.
On standard plywood subfloors, focus on aesthetics and expansion gaps, not joist direction.
How much extra material should I order depending on layout direction?
Whether you run planks parallel, perpendicular, or on the diagonal will slightly affect how much waste you generate, so plan accordingly before ordering.
For straight runs order 7–10% extra for cuts and mistakes.
Perpendicular layouts need 10–12%.
Diagonal patterns increase waste to 12–15% because of angled cuts and more short offcuts.
Always round up and buy from the same batch.
Can I change direction between rooms and how to handle transitions?
Want to run the planks in different directions between rooms? You can. Use junction strips or thresholds at doorways to cover expansion gaps and create a clean break.
Align seams away from traffic lines, and plan locking patterns so boards meet properly. Keep consistent underlayment height, and secure junctions per manufacturer instructions to avoid movement, tripping hazards, or warranty issues.
Does plank width affect the recommended installation direction?
Because wider planks draw the eye and show seams more clearly, you’ll usually run them parallel to the longest wall or main light source to make rooms feel larger and minimize visible joints.
Narrower boards hide seams and suit busier patterns, so you can be more flexible.
Consider room size, traffic flow, and matching adjacent rooms when choosing plank width and direction.