How to Install Mosaic Tile: Patterns, Grout, and Pro Finishing Tips
You can install mosaic tile yourself with basic tools and careful planning; start by evaluating and prepping a sound, level substrate, measure and dry-fit mesh-backed sheets or individual tesserae, then spread thinset with the correct notched trowel and press tiles into place using spacers and a rubber mallet to control lippage. After curing, grout diagonally with sanded or unsanded grout as needed, clean haze, seal porous tiles, and finish edges neatly—keep going to learn pro tips, patterns, and troubleshooting.
Can You Install Mosaic Tile Yourself and What It Entails
You can install mosaic tile yourself if you’re comfortable measuring, cutting, applying thinset, and grouting—expect a few hours for a small backsplash and a couple of days for larger areas to allow for curing.
The difficulty is moderate: basic projects suit DIYers with common tools (trowel, tile cutter, spacers, level), while intricate patterns, uneven walls, or wet-area waterproofing raise the challenge.
Hire a pro when you lack time, the surface needs prep or waterproofing, or you want guaranteed waterproofing and a flawless finish.
Short summary of process, time, difficulty, and tools
Although mosaic tile installation is approachable for many homeowners, it takes patience, basic skills, and the right tools.
You’ll prep surfaces, lay mesh sheets, spread thinset, press tiles, trim edges, and grout. Expect a few hours to a weekend depending on area and skill.
Difficulty is moderate; tools include trowel, tile cutter, spacers, grout float, sponge, level, and mixing bucket.
When to hire a pro vs. DIY
Wondering whether to tackle mosaic tile yourself or call a pro? You can DIY smaller backsplashes or simple floors if you’re handy, patient, and have proper tools.
Hire a pro for large areas, wet rooms, complex patterns, substrates needing repair, or when warranty and waterproofing matter.
Pros save time, prevent costly mistakes, and guarantee durable, code-compliant results.
Basic Understanding What Is Mosaic Tile and Why Choose It
Mosaic tile is small-format tile made from glass, ceramic, stone, or metal and sold on sheets, mesh, or individual pieces so you can pick the right material and format for your project.
You’ll weigh pros and cons—durability and slip resistance for floors, ease of cleaning for backsplashes, and water resistance needs for showers and walls—before choosing.
Finally, you can use different patterns and color arrangements to create visual effects that expand, focus, or add texture to a room.
Definition, materials, and common formats
Tiles tell a story in miniature: mosaic tile is made from small pieces of glass, ceramic, stone, or metal—called tesserae—set into sheets or loose units to create patterns and images.
You’ll choose it for durability, design flexibility, and ease of installation in tight or curved spaces. Formats include mesh-backed sheets, penny rounds, hex tiles, and subway mosaics; materials affect texture, finish, and cutting.
Pros and cons for floors, walls, backsplashes, and showers
Having covered materials and formats, let’s look at where mosaic works best—and where it can cause headaches.
You’ll love mosaics on backsplashes and accent walls for detail and easy cleanup.
Showers benefit from slip-resistant, small tiles but need careful waterproofing.
Floors can be durable yet tricky: grout lines and maintenance increase, and uneven substrates magnify installation challenges.
Tile patterns and visual effects explained
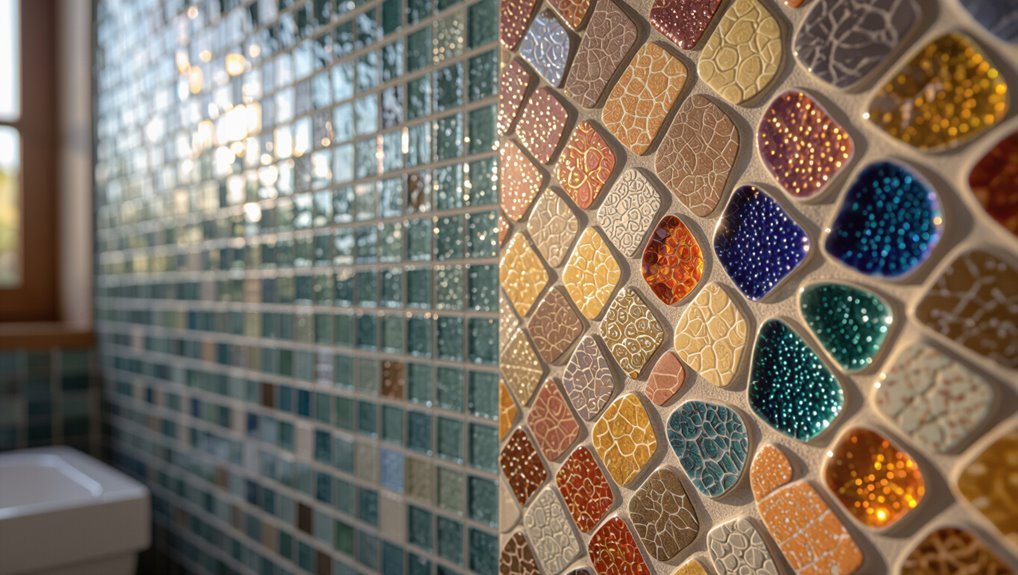
Pattern and placement make mosaic tile sing: the same small pieces can create movement, focal points, or seamless fields depending on how you arrange them.
Choose grid, herringbone, basketweave, or radial layouts to guide sightlines. Contrast colors and grout to emphasize pattern, or match tones for subtle texture.
Scale and repetition control energy; pick patterns that suit room size and function.
Planning Your Mosaic Tile Project
Before you start, check the substrate type and follow a prep checklist so the surface is sound and level.
Measure the area, plan your layout, and calculate tile, grout, adhesive, and waste so you order the right quantities.
Pick tile style, grout color, and adhesive suited to the location, and gather the required tools and safety gear.
Assessing the surface: substrate types and preparation checklist
If your mosaic is going to look professional and last, you need to match the tile to a sound substrate and prepare it correctly; that means identifying the surface type—concrete, cement board, drywall, plywood, existing tile, or backerboard—checking for levelness, rigidity, moisture, and contamination, and addressing any issues like loose sections, mold, or excessive deflection before you lay a single piece.
Inspect, clean, repair, prime.
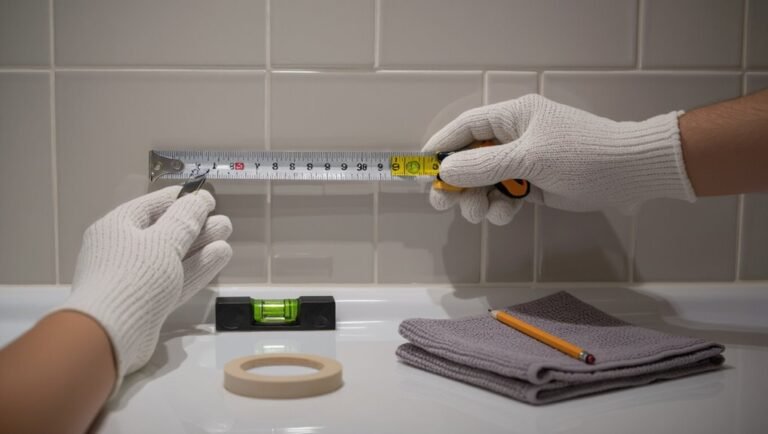
Measuring, layout planning, and estimating tile and material quantities
Start by measuring the installation area carefully—length, width, and any cutouts or obstacles—so you can create an accurate layout and calculate materials.
Sketch the layout, note pattern repeats, plan cuts, and add 10–15% waste.
Use the table for quick reference.
| Item | Action |
|---|---|
| Area | Measure |
| Layout | Sketch |
| Waste | 10–15% |
| Cuts | Plan ahead |
Choosing tile, grout color, and adhesive types
With your measurements and layout nailed down, you’ll pick tiles, grout, and adhesive that match the design and performance needs of the space.
Choose tile material (glass, ceramic, stone) for look and durability. Match grout color to emphasize or blend patterns.
Select adhesive rated for substrate and environment (wet areas, floors, walls). Consider flexible thinset for movement and waterproofing needs.
Required tools and safety gear
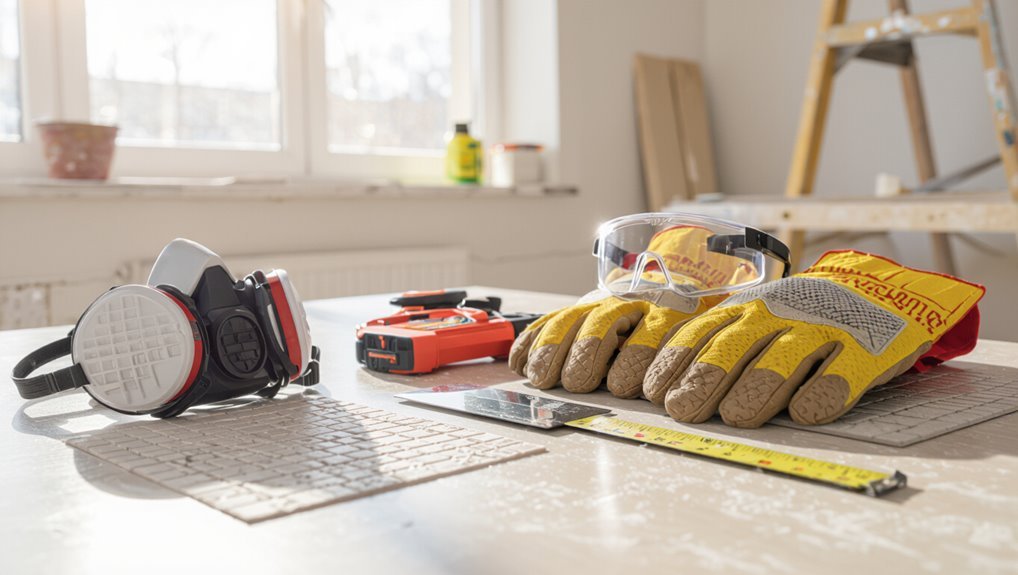
Because proper tools and safety gear make the job faster and keep you safe, gather them before you mix adhesive or cut a tile.
You’ll work cleaner and avoid injuries by prepping quality gear and checking condition.
- Tile cutter or wet saw
- Notched trowel and grout float
- Safety glasses, gloves, dust mask
- Knee pads and a sturdy work mat
Quick Materials and Terminology Cheat Sheet
You’ll want to get familiar with common adhesives, the right trowel notch, spacers, and sealers so your mosaic stays put and looks even.
Choose grout based on the joints: use sanded for wider gaps, unsanded for narrow or delicate tiles, and epoxy for high-moisture or heavy-traffic areas.
Keep a short checklist of these items to streamline prepping and installation.
Common adhesives, trowels, spacers, and sealers
Before you lay a single tile, get familiar with the adhesives, trowels, spacers, and sealers you’ll use most—each choice affects bond strength, grout lines, and long-term durability.
You’ll pick thinset or mastic, match notch size to tile backing, set even gaps with spacers, and seal porous tiles and edges for moisture protection.
- Polymer-modified thinset for most mosaics
- 1/16″–1/4″ notch trowels
- Plastic or reusable spacers
- Penetrating or surface sealers
Grout types and when to use each (sanded vs. unsanded vs. epoxy)
Grout comes in three main types—sanded, unsanded, and epoxy—and choosing the right one depends on joint width, tile material, and exposure to moisture or stains.
Use sanded for joints ≥1/8″ on durable tiles.
Choose unsanded for delicate or glazed edges and joints <1/8".
Pick epoxy where moisture, stains, or heavy wear demand chemical resistance; it’s harder to apply and more expensive.
Step-by-Step Installation Process
You’ll start by preparing and repairing the surface so tiles bond evenly.
Next you’ll dry-layout the sheets to align patterns, mix and apply thinset with the right trowel technique, then set sheets or individual tiles using consistent spacing and gentle taps.
Finally, you’ll cut mosaics and odd shapes with the proper tools to fit edges and fixtures.
Step 1 Surface preparation and repair
For a lasting mosaic installation, start by inspecting and prepping the substrate so tiles have a clean, stable surface to bond to.
Remove loose material, old adhesive, paint, and contaminants. Repair cracks, holes, and uneven areas with appropriate patching compound or backerboard.
Confirm surface is flat, dry, and level. Prime porous substrates and follow manufacturer recommendations before tiling.
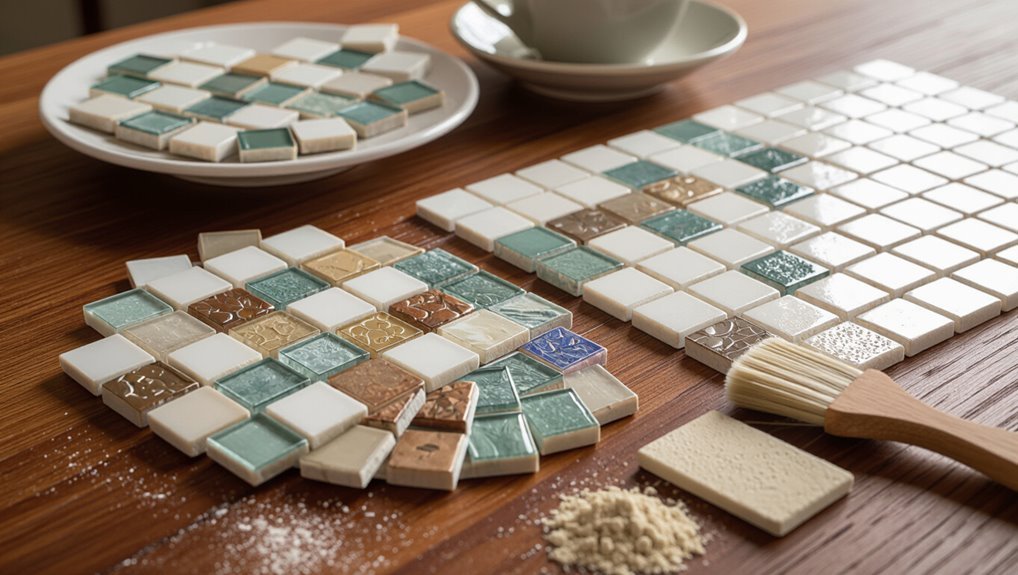
Step 2 Dry layout and pattern alignment
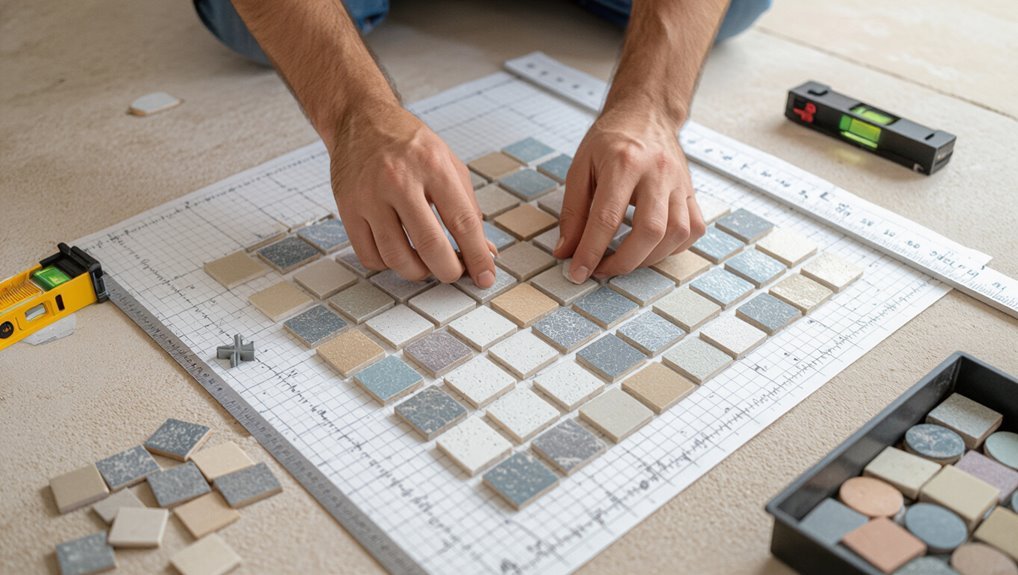
With the substrate prepped and repairs set, lay out your mosaic sheets on the floor or countertop to confirm fit and pattern flow before applying any adhesive.
Check alignment, trim edges, and stagger sheets to maintain continuous patterns.
Note focal points, grout line placement, and shifts to borders.
Mark reference lines and sheet orientations so installation proceeds consistently and avoids awkward cuts.
Step 3 Mixing and applying thinset or adhesive (technique tips)
Mix the thinset to a creamy, peanut-butter consistency and apply it promptly so it stays workable; use the manufacturer’s water ratio and a drill-mounted paddle to avoid lumps.
Spread with a notched trowel matching tile size, hold the trowel at a consistent angle, and comb in straight lines.
Back-butter larger pieces, keep a wet edge, and clean excess before it skins over.
Step 4 Setting mosaic sheets or individual tiles (spacing and tapping)
Now you’ll start setting the mosaic sheets or individual tiles onto the fresh thinset, pressing each piece firmly and checking spacing as you go.
Use spacers or sight lines to keep consistent grout joints. Tap tiles gently with a rubber mallet or float handle to bed them fully, remove excess adhesive squeezing up, and periodically verify level and alignment before the thinset skins over.
Step 5 Cutting mosaics and odd shapes (tools and techniques)
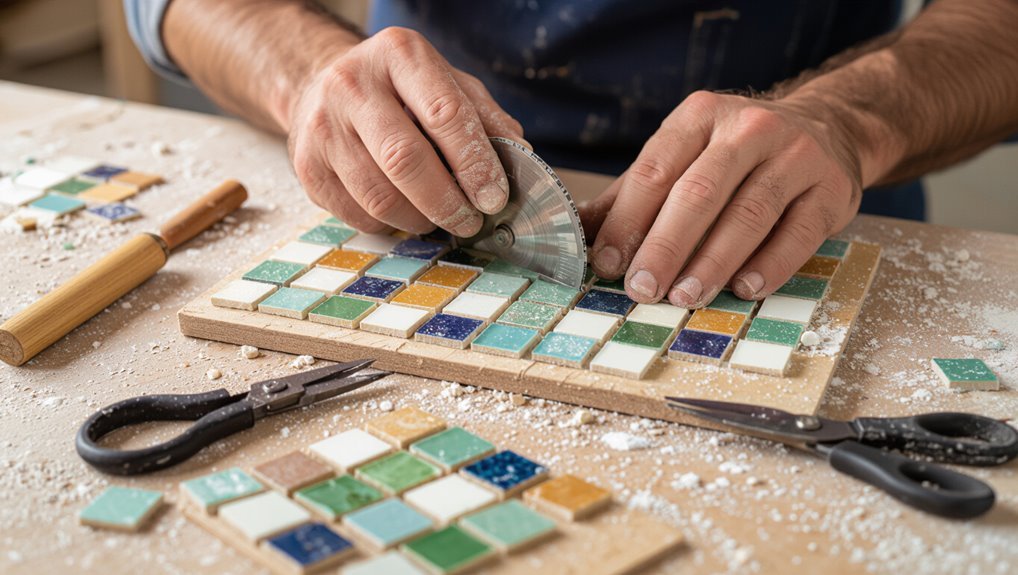
When you encounter edges, corners, or fixtures, you’ll need to cut sheets or individual tesserae to fit precisely; choose the right tool—tile nippers for small adjustments, a score-and-snap cutter for straight cuts, or a wet saw for curves and harder materials—and measure twice before making the cut.
Support sheets, mark cutlines on mesh backing, wear eye protection, and trim slowly for clean, controlled results.
Step 6 Waiting times and monitoring for movement
Although the mortar sets quickly on the surface, you should wait the manufacturer’s recommended cure time—usually 24 to 72 hours—before grouting or subjecting the mosaic to foot traffic.
During this period, check for any movement or slumping and gently press test a few tiles to confirm they’re firmly bonded.
Keep the area undisturbed, control temperature and humidity, and note any soft spots for repair before proceeding.
Step 7 Grouting mosaics: method, tools, and timing
Before you start grouting, double-check that the mortar is fully cured and the mosaic is clean and dry. Then gather your grout, float, sponge, bucket, and a grout sealer if needed; proper timing and the right tools make the process much easier.
Mix grout to manufacturer specs, apply diagonally with a float, forcing grout into joints. Remove excess, let set until thumbprint-resistant, then sponge light residue.
Step 8 Cleaning haze, sealing grout, and final finishing
Scrub away the remaining grout haze and seal the joints to lock in color and durability; you’ll finish by polishing the tiles and inspecting edges and connections for any touch-ups.
Use a damp sponge for haze, then a microfiber cloth for polish. Apply grout sealer per manufacturer instructions, wiping excess immediately.
Check seams, trim, and junctions; perform minor repairs and remove residue for a crisp, professional look.
Step 9 Curing time and post-installation care
Once the grout and sealer are applied, give the installation adequate curing time so the adhesive, grout, and sealer can reach full strength and you don’t damage the work; typically this means keeping the area dry and traffic-free for at least 24–72 hours, with full curing often taking up to 7 days depending on products and conditions.
After curing, remove protective barriers, avoid heavy loads for a week, clean gently, and maintain sealed grout with periodic resealing.
Pattern and Design Guidance
Think about where each pattern will go—herringbone or basketweave works great for floors, while intricate mosaics shine as backsplashes or accent walls.
Plan repeatable patterns or custom layouts by sketching a grid and mapping tiles so seams line up and shifts feel intentional.
Mix colors, textures, and borders sparingly to create contrast without overwhelming the space.
Popular mosaic patterns and where to use them
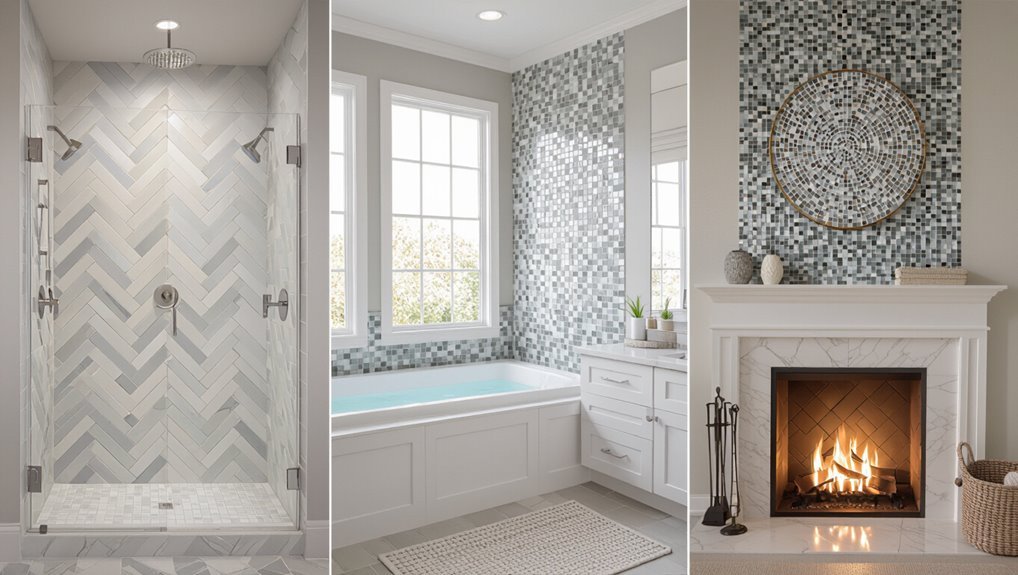
When you pick a mosaic pattern, consider scale, movement, and the room’s function so the design both fits and performs.
Geometric layouts give crisp order to floors and backsplashes, while flowing patterns like waves or arabesques soften showers and accent walls.
Use herringbone or basketweave for visual texture in kitchens, hex or penny rounds for wet areas where slip resistance matters, and medallions as focal points.
How to create repeatable patterns and custom layouts
After settling on a pattern type and placement, focus on repeatability and customization so your mosaic reads as intentional rather than accidental.
Measure and mark a grid, test a small mockup, and use mesh-backed sheets or templates to maintain spacing.
Rotate or flip units for variation without breaking rhythm.
Keep a written layout map and label any custom cuts so you can replicate the design consistently.
Tips for mixing colors, textures, and border treatments
Because color, texture, and borders define your mosaic’s personality, start by choosing a dominant palette and two to three supporting tones you’ll repeat throughout the field and accents.
Balance matte and glossy tiles for depth, use metallics sparingly for highlights, and select grout that complements or contrasts intentionally.
Frame panels with thin borders to anchor patterns and keep scale consistent for cohesion.
Common Problems and How to Fix Them
You’ll likely run into issues like lippage and uneven tiles, so you’ll need tips on correcting high or low edges.
You’ll also learn how to address grout cracking or discoloration, fix adhesion failures, and troubleshoot water intrusion or waterproofing mistakes.
Following simple diagnostic steps will help you spot the cause and choose the right repair.
Lippage, uneven tiles, and how to correct
When tiles sit at different heights they create lippage—a trip hazard and a focal point that undermines a finished look—so you’ll want to catch and correct it as you go.
Use a level and straightedge while setting, employ spacers, and press tiles into thinset to match adjacent heights.
For small lippage, tap down with a rubber mallet; remove and re-bed severely uneven tiles.
Grout cracking, discoloration, and remediation
If grout starts to crack or change color, address it quickly to prevent water damage and mold growth.
Remove loose grout with a grout saw, clean joints, and let dry. Re-grout with matching mix, compacting firmly.
For stains, try hydrogen peroxide or a poultice; avoid bleach on colored grout.
Seal cured grout to prevent future cracking and discoloration.
Adhesion failures and troubleshooting
Grout issues often signal deeper problems with the bond between tile and substrate. So after fixing cracked or discolored grout, you should inspect for adhesion failures.
Check for hollow sounds, loose tiles, or movement when pressed. Remove affected tiles, clean substrate, and evaluate thinset type and coverage.
Reapply appropriate mortar, guarantee full-bed contact, and allow proper cure before grouting.
Water intrusion and waterproofing mistakes
Water intrusion is one of the fastest ways a tile installation fails, and you’ll usually see the damage in discoloration, mold, loose tiles, or soft substrate long before the cause is obvious.
Prevent mistakes by sealing seams, corners, and penetrations with proper membranes, slope wet areas to drains, and use vapor-impermeable backer where needed.
Inspect, repair leaks, and replace compromised substrate immediately.
Pro Finishing Tips and Best Practices
Now that the mosaic is set, you’ll want to focus on getting crisp grout lines, neat edge treatments, and smooth shifts.
Pick the right sealant for your tile type and follow a regular maintenance schedule to keep colors and grout looking new.
With careful finishing and simple upkeep, your installation will stay durable and professional-looking.
Achieving perfect grout lines and clean joints
When you want crisp, even grout lines and tight, clean joints, preparation and the right technique make all the difference; take time to plan joint width, use proper spacers, and pick a grout suited to your tile and setting.
Work in small sections, press grout firmly, tool joints consistently, and clean haze before it cures.
Seal appropriately and inspect for voids or unevenness.
Edge treatments, trims, and transitions
If you want a truly professional finish, pay as much attention to edges, trims, and changes as you do to tile placement and grout—clean, well-chosen profiles hide cut edges, protect corners, and create seamless shifts to other surfaces.
Choose matching metal or ceramic trim, miter or bullnose exposed edges, use Schluter or similar profiles at junctions, and keep fasteners and adhesive tidy for crisp, durable lines.
Sealing strategies for different materials
Because different mosaic substrates absorb and react to sealers in unique ways, you’ll want to tailor your approach to the material—glass, natural stone, metal, or porcelain—rather than use one product for everything.
Use penetrating sealers for porous stone, surface sealers for glazed porcelain, and specialty protectants for metal.
Test small areas, follow manufacturer cure times, and apply thin, even coats for durable, invisible protection.
Maintenance schedule to preserve appearance and durability
To keep your mosaic looking its best and lasting for years, set a simple, regular maintenance schedule that matches the materials and traffic it sees.
You’ll clean gently, reseal when needed, and inspect grout periodically to prevent stains and damage. Follow a plan to spot-treat stains, deep-clean quarterly, and reseal according to manufacturer guidance.
- Weekly light cleaning
- Quarterly deep clean
- Inspect grout monthly
- Reseal yearly
Tools, Materials, and Cost Comparison
Now let’s look at the tools, materials, and costs so you can decide whether to DIY or hire a pro.
You’ll get a clear cost breakdown comparing materials and labor, plus guidance on what quality levels of tile, grout, and adhesives are worth the investment.
That way you can balance upfront costs against long-term durability and appearance.
Cost breakdown: DIY vs. professional installation
While you can save money by tackling mosaic tile yourself, the true cost depends on the tools you need, the materials you choose, and how much time you’re willing to invest. You’ll weigh tool rental, tile and grout, and labor if hiring pros. Use the table to compare quick estimates and make a decision.
| Item | DIY Avg | Pro Avg |
|---|---|---|
| Tools | $30–$150 | Included |
| Materials | $50–$300 | $70–$350 |
| Labor | $0 | $200–$600 |
| Total | $80–$450 | $270–$1,100 |
Recommended quality levels for tile, grout, and adhesives
Because the longevity and finish of your mosaic depend on what you choose, pick tile, grout, and adhesives based on the project’s location, traffic, and exposure to moisture.
Choose porcelain or glass for durability, epoxy grout for wet areas, and polymer-modified thinset for stronger bonds.
Consider warranties and price vs. performance before buying.
- Porcelain/glass: high wear resistance
- Epoxy grout: stain/moisture proof
- Polymer thinset: superior adhesion
- Warranty: indicates manufacturer confidence
Step-by-Step Checklist (Printable)
Before you start, you’ll use a pre-install checklist to confirm materials, tools, and substrate readiness.
On installation day, follow a concise step-by-step checklist to keep layout, adhesive, and grouting on track.
Afterward, a post-install care checklist will help you cure, seal, and maintain your mosaic for long-lasting results.
Pre-install checklist
If you want the job to go smoothly, use this printable pre-install checklist to confirm tools, materials, surface prep, and measurements are all set before you start laying tile.
Verify substrate is clean, dry, level, and primed; confirm tile count plus 10% waste; check adhesive, grout, spacers, and sealant; test layout, edge trims, and proper trowel size; gather safety gear and cleanup supplies.
Installation day checklist
Start with one clear plan: gather your tools, confirm your layout, and set a realistic timeline so you can work steadily through each step without rushing.
Today, check substrate is clean and level, mix adhesive per instructions, apply thinset in small sections, press mosaics firmly, maintain grout line spacers, clean excess mortar as you go, and allow proper cure before grouting.
Post-install care checklist
You’ve finished laying the mosaics and letting the mortar cure; now you’ll protect that work with a clear post-install care checklist you can print and follow.
Cool and dry for 24–48 hours.
Remove haze, then seal grout after manufacturer time.
Avoid heavy traffic 7 days.
Clean with pH-neutral products.
Reinspect grout lines, touch up chips, reseal annually.
Keep records and photos for warranty.
Frequently Asked Questions
You probably have budget, prep, timing, color, and location questions about mosaic tile—like cost per square foot, whether you can layer it over existing tile or drywall, and when to grout and use the area.
You’ll also want to know which grout color hides stains and makes the tiles pop, and whether mosaics work in showers or outdoors.
Below are clear answers to those common concerns.
How much does it cost per square foot to install mosaic tile?
Curious about how much it costs per square foot to install mosaic tile? Expect $10–$30 for basic labor and materials, higher for intricate patterns, specialty tiles, or detailed cuts.
DIY can lower costs to $5–$15/ft² but adds time and risk. Always get multiple quotes, factor in grout, substrate prep, and waste, and budget a contingency for surprises.
Can mosaic tile be installed over existing tile or drywall?
After figuring costs, homeowners often ask whether mosaic tile can go over existing tile or drywall—yes, but the answer depends on condition and preparation.
You can tile over sound, well-bonded ceramic or smooth drywall if you clean, degrease, and roughen surfaces.
Use appropriate thinset and a primer or membrane for drywall.
Remove loose, cracked tile or uneven areas before installing mosaics.
How long should I wait before grouting and using the tiled area?
Once the thinset has fully cured—typically 24 to 48 hours at room temperature—you can grout the joints, but don’t rush into heavy use: wait another 24 to 72 hours after grouting before exposing the area to light foot traffic or water.
For full strength and sealant application, allow a full 7 days before heavy traffic, constant moisture, or placing rugs and furniture.
What grout color will hide stains best and make mosaics pop?
Which grout color will both hide stains and make your mosaic pop depends on contrast and practicality: darker grouts (charcoal to deep gray) conceal dirt best, while mid-tones and slightly contrasting hues highlight tile shapes and patterns without showing every smudge.
Choose grout that balances maintenance and style—consider sealers for porous grout, test samples next to your tile, and pick a hue that complements hardware and room lighting.
Can I install mosaic tile in a shower or exterior area?
If you liked how grout choices affect both appearance and upkeep, you’ll want to know where mosaic tile performs best.
You can use mosaics in showers and on exterior walls if you pick frost-resistant, slip-rated tile and a waterproof membrane beneath.
Use epoxy grout outdoors or in wet areas, seal natural stone, and guarantee proper slope and drainage to prevent damage.