How to Paint Ceramic Tile That Lasts More Than a Season
You can make ceramic tile last by doing solid prep, using the right products, and sealing well. Start by deep-cleaning and deglossing glazed tiles or sanding unglazed ones, repair grout or cracks, then apply a high-bond primer. Use durable latex or epoxy paint in thin coats, sand between layers, and finish with a compatible clear sealer or polyurethane. Allow full curing before use, maintain gently, and follow best practices below to learn how to maximize longevity.
How to Paint Ceramic Tile That Lasts More Than a Season
You can make tile paint last if you use the right prep, primer, and durable topcoat.
Consider whether painting is a good long-term fix for your situation or if replacement is wiser for heavy-wear areas.
I’ll walk you through how to assess durability and choose the best approach.
Can You Make Tile Paint Last?
Although refreshed tile can look great, painted ceramic often flakes or dulls fast unless you take specific steps to make the finish durable.
You’ll need proper cleaning, sanding, primer, and a quality epoxy or acrylic topcoat.
Ask how do I paint ceramic tile to follow prep and curing times precisely.
With correct materials and patience, painted tile can hold up for years.
When Painting Tile Is a Good Long-Term Solution vs Replace
When your tile is structurally sound, well-adhered, and mostly free of deep scratches or missing grout, painting can be a cost-effective long-term solution that buys you years of fresh-looking surfaces.
Choose painting when layout, substrate, and waterproofing are intact, the style update is temporary, or budget limits replacement.
Replace when tiles crack, substrate fails, or you need permanent waterproofing and resale-ready durability.
Understanding Ceramic Tile and Paint Adhesion
Before you start painting, you need to know what your tile is made of—clay, porcelain, or other ceramic—because composition affects porosity and how well paint will stick.
Check for surface problems like glaze, dirt, grease, or crazing that will prevent adhesion unless you prep them properly.
Finally, identify the tile type (glazed vs. unglazed, porcelain vs. quarry) so you can choose the right primer and paint for compatibility.
What Ceramic Tile Is Made Of and Why That Matters
Ceramic tile is a dense, baked mixture of clay and minerals whose surface chemistry and porosity determine how well paint will stick, so understanding what it’s made of matters if you want a durable finish.
You’ll note glazed tiles have a glassy, low-porosity layer that resists adhesion, while unglazed bisque absorbs primers.
Different formulations and kiln temperatures change hardness and bonding behavior, informing prep and product choice.
Common Surface Problems That Affect Paint Longevity
Because tile surfaces vary so much, a few common problems can dramatically shorten a paint job if you don’t address them: loose glaze, surface contaminants (soap scum, oils, and silicone), hairline cracks, heavy porosity in bisque tiles, and failing grout or caulk.
You should clean, degloss, repair cracks, and fill or replace failing grout/caulk so paint can adhere and last.
Types of Tiles (glazed, unglazed, porcelain, quarry) and Compatibility
Those surface issues all affect how paint bonds, but the tile type you’re working with matters just as much.
Glazed tiles are slick—etch or use bonding primer.
Unglazed and quarry are porous and accept paint better after cleaning.
Porcelain is dense; sand and prime or use epoxy paint.
Match prep and primer to tile type so adhesion lasts beyond a season.
Materials, Tools, and Paint Types What to Use
Before you start, pick the right products: epoxy or epoxy-acrylics give the toughest finish, while oil-based enamels work for lower-traffic areas.
You’ll also need a bonding or etching primer and a clear sealer to lock in adhesion and durability.
Gather proper tools—sanders or etchers, quality rollers and brushes, and a respirator—so the job goes smoothly and safely.
Best Paint Types for Tile (epoxy, epoxy-acrylic, oil-based, enamel)
Picking the right paint will make or break a tile project, so you’ll want to match the coating to the tile’s material and the room’s wear. Use epoxy for durability, epoxy-acrylic for easier application, oil-based for adhesion on glossy surfaces, and enamel for a hard finish.
| Paint Type | Best Use |
|---|---|
| Epoxy | High-traffic floors |
| Enamel | Trim, accents |
Primers and Sealers: Bonding Primers, Etching Primers, Clear Sealers
1 essential step most DIYers skip is choosing the right primer and sealer—these products make the difference between paint that sticks and paint that flakes.
Use a bonding primer for smooth glaze, an etching primer when light abrasion isn’t enough, and finish with a clear sealer rated for floors or moisture.
Follow manufacturer cure times so coatings adhere and resist chips.
Tools and Supplies Checklist (sanders, etchers, rollers, brushes, respirator)
Gathering the right tools and supplies upfront makes the job faster and gives your paint the best chance to last. You’ll need grit for prep, reliable applicators, and safety gear.
Select each item for tile work to guarantee adhesion and a smooth finish.
- Sanders or sanding blocks
- Acid etcher or degreaser
- Quality rollers (smooth nap)
- Nylon/poly brushes
- NIOSH-rated respirator
Preparation: The Foundation for Long-Lasting Paint
Before you paint, you’ll assess the tile and surrounding area for cracks, loose grout, and other defects that could ruin the finish.
You’ll then deep-clean grease and grime, profile the surface with etching or sanding as appropriate, and make any necessary repairs.
Finally, mask off nearby surfaces, set up ventilation, and follow safety precautions so your paint lasts.
Assessing Tile Condition and Surroundings
Start by taking a close look at the tiles and their surroundings so you can spot damage, contaminants, and installation issues that’ll affect paint adhesion and durability.
Check for cracks, loose or popped tiles, lifted grout, and mold. Note surface gloss, previous coatings, and water exposure.
Mark areas needing repair or replacement before sanding, priming, or painting to guarantee a lasting finish.
Deep Cleaning: Products and Techniques to Remove Grease and Grime
Tackle deep cleaning next—it’s the step that removes lingering grease, soap scum, and dirt that’ll keep paint from sticking.
You’ll degrease, dissolve residue, and rinse thoroughly so primer bonds. Use gloves and ventilate.
- Trisodium phosphate (TSP) solution
- Vinegar and baking soda scrub
- Commercial tile degreaser
- Isopropyl alcohol wipe-down
- Hot water and microfiber rinse
Surface Profiling: Etching vs Sanding When and How
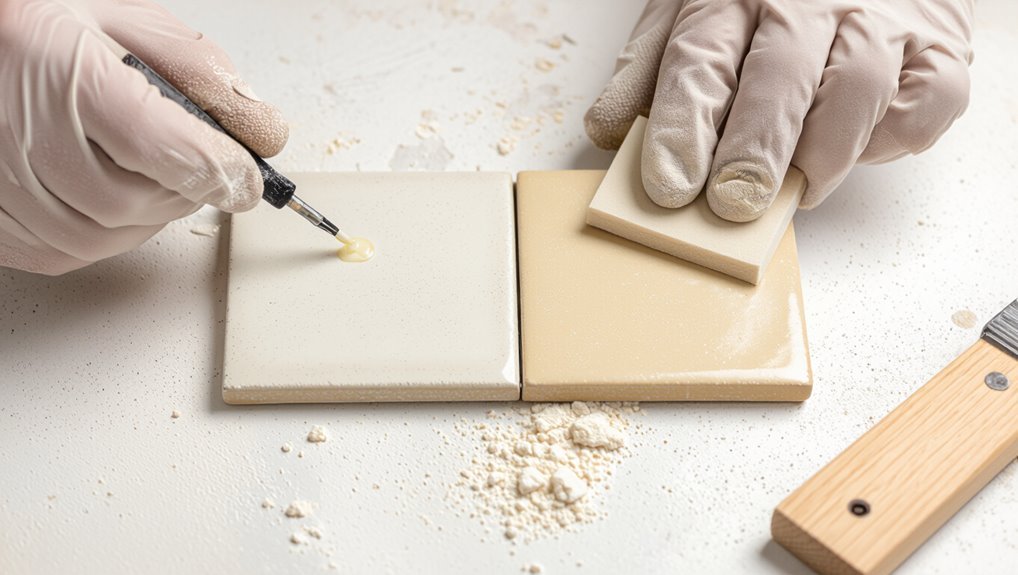
Once you’ve degreased and rinsed the tile, you’ll profile the surface so primer can grip — either by etching with a chemical solution to microscopically roughen glazed tiles or by sanding to create visible tooth, with the right method chosen based on tile type, glaze hardness, and surrounding materials.
Use muriatic or etch products per instructions on smooth glazes; sand with fine grit for matte or unglazed tiles.
Repairing Cracks, Loose Grout, and Surface Defects
After profiling the tile so primer can grab, address any cracks, loose grout, or surface defects that will undermine the paint bond.
Remove loose grout, clean joints, and let them dry.
Fill cracks and voids with flexible tile caulk or epoxy filler, smooth flush, and sand once cured.
Replace missing grout with matching sanded grout and wipe residue before priming and painting.
Masking, Ventilation, and Safety Setup
Before you lay down any paint, set up proper masking, ventilation, and safety so you won’t undo your prep work or harm yourself.
Tape edges with high-quality painter’s tape, cover fixtures and floors with drop cloths, and seal vents.
Open windows, run exhaust fans, and wear an N95 respirator, gloves, and eye protection.
Keep a fire extinguisher handy and follow product labels.
Step-by-Step Painting Process
Now that your tiles are prepped, you’ll follow a clear sequence: prime with the right timing and coats, apply your first paint coat using smooth, even strokes, then sand between coats and add any extra layers as needed.
After that you’ll seal with a topcoat and allow proper curing time before reinstalling fixtures.
Finish with a careful inspection to confirm adhesion, coverage, and a durable, even surface.
Step 1 Apply Primer Correctly (timing, coats, drying conditions)
Start by choosing a high-bond primer formulated for glossy surfaces so it will grip the tile; you’ll want to apply two thin coats rather than one heavy one, letting the first coat dry fully to the touch (usually 30–60 minutes) before sanding lightly and applying the second.
Work in a dust-free, ventilated space, maintain 50–75°F, and allow full cure per manufacturer before painting.
Step 2 First Paint Coat: Techniques for Smooth, Even Coverage
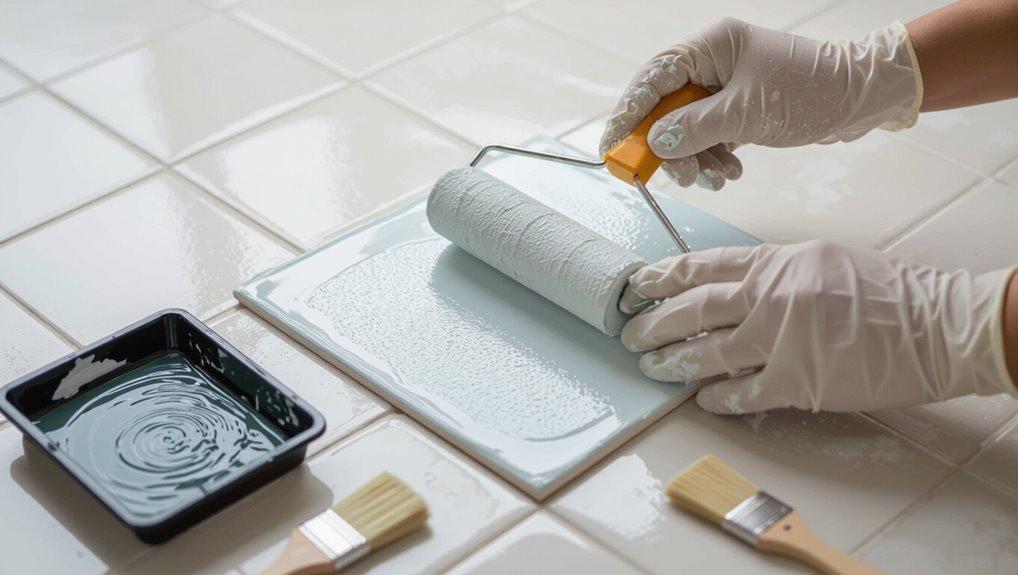
With the primer cured and sanded smooth, you can move on to laying down the first paint coat; this step sets the tone for adhesion and finish.
Use a high-quality nylon/polyester brush or short-nap roller, work in thin, even strokes, and maintain a wet edge to avoid lap marks.
Let paint self-level; avoid overworking areas for a uniform surface.
Step 3 Sanding Between Coats and Additional Coats (how many, grit)
Sand lightly between coats to knock down dust nibs and tiny brush strokes so the next layer lays on smoothly; use 220–320 grit for paint (move up to 400 grit only for ultra-smooth finishes) and wipe away sanding residue with a tack cloth before applying another thin coat.
Repeat sanding and thin coats until you achieve full, uniform coverage—typically two to three paint coats, more for deep colors.
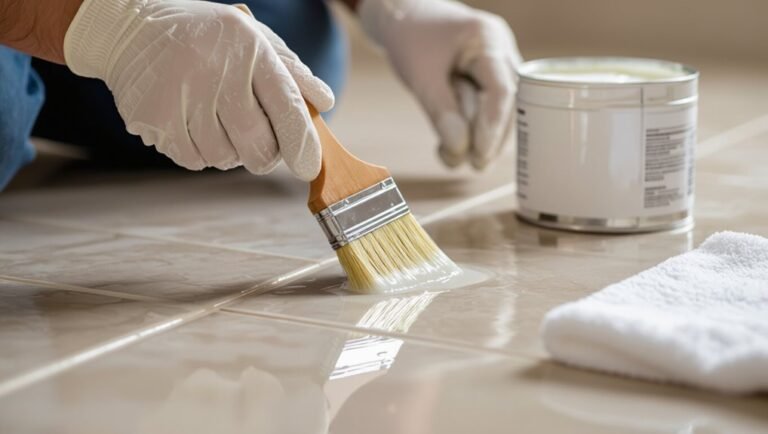
Step 4 Apply Topcoat/Sealer and Curing Time Recommendations
After your paint layers are smooth and fully even, it’s time to protect that finish by applying a compatible topcoat or sealer.
Choose a clear, water- or oil-based polyurethane or epoxy designed for tile. Apply thin, even coats with a foam brush, allow recommended dry times between coats, and let the sealer cure fully—typically 48–72 hours—before light use; full hardness may take up to 7 days.
Step 5 Reinstalling Fixtures and Final Inspection
1. After curing, reinstall fixtures carefully: tighten screws, reconnect faucets, and remount towel bars without overdriving fasteners.
Inspect painted surfaces for missed spots, drips, or adhesion issues. Touch up small flaws with matching paint and let dry.
Run a gentle test of fixtures and seals to confirm stability and water resistance.
Clean residues and enjoy your refreshed, durable tile.
Special Scenarios and Room-Specific Guidance
When you’re painting tile, each room has its own challenges—bathrooms need moisture- and steam-resistant coatings for showers,
kitchens require heat-, grease-, and cleaning-durable finishes for backsplashes,
and floors demand abrasion resistance, slip control, and load-bearing durability.
Exterior or high-exposure areas call for weatherproof primers and topcoats that resist UV and moisture.
Next, we’ll cover specific product choices and prep steps for each situation.
Bathroom Tile (moisture, steam, shower-safe solutions)
Bathrooms demand special care because constant moisture, steam, and direct water exposure shorten the life of ordinary tile paint if you don’t choose the right products and prep properly.
Use epoxy or marine-grade paint, fully degrease and etch tiles, and apply a primer rated for wet areas.
Seal grout with waterproof sealer, cure per manufacturer instructions, and ventilate to reduce steam and prolong the finish.
Kitchen Backsplash (heat, grease, cleaning durability)
In the kitchen, your backsplash faces heat, grease, and frequent cleaning, so pick products and prep methods that stand up to all three.
Degrease thoroughly, sand lightly, and use a high-heat, grease-resistant primer plus an enamel or polyurethane topcoat rated for kitchens.
Mask grout, cure fully, and avoid abrasive cleaners; recoat when finish shows wear to maintain durability and easy cleaning.
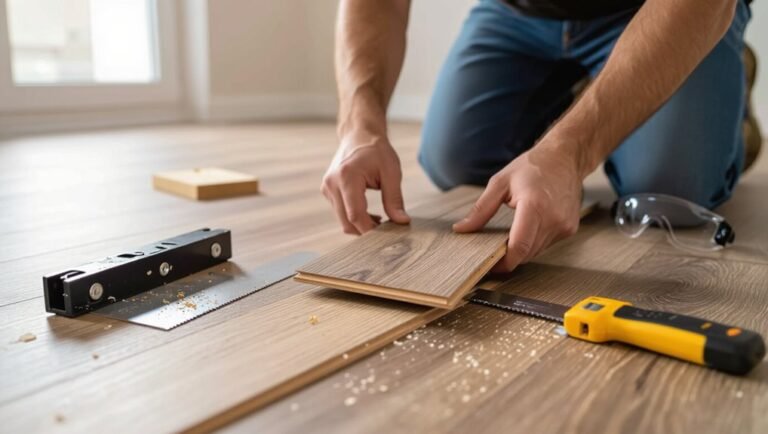
Floor Tile (abrasion, slip resistance, load-bearing considerations)
Because floor surfaces take constant foot traffic, spills, and the weight of furniture, you’ll choose tougher prep and coatings than you’d for walls or backsplashes.
Scuff, degrease, and etch or sand for adhesion. Use high-traffic epoxy or urethane floor paint, add a textured non-slip additive, and allow proper cure time.
Consider load points and furniture pads to protect the finish.
Exterior Tile or High-Exposure Areas
Moving from heavy-traffic indoor floors to exterior or high-exposure tiles means you’ll face harsher elements—UV, freeze-thaw cycles, constant moisture, and dirt—and you must choose preparation methods and coatings built for those conditions.
Scrub, etch, and fully dry; repair grout and seal cracks.
Use exterior-grade primers, elastomeric or polyaspartic topcoats, and UV-stable sealers.
Expect periodic maintenance and recoat schedules.
Common Mistakes That Cause Paint to Fail
When your paint fails on ceramic tile, it’s usually because something basic was skipped.
You mightn’t have cleaned or etched the surface, used the wrong primer or paint, applied too few coats or didn’t let them cure, or ignored humidity and temperature limits.
Fixing those common mistakes will give your finish a much better chance of lasting.
Skipping Proper Cleaning or Etching
If you skip proper cleaning or etching, paint won’t bond to slick ceramic and will peel or flake off within weeks.
You need to remove grease, soap residue, and mineral buildup with a degreaser and a scuff or acid etch per manufacturer instructions.
Rinse thoroughly, let tile dry, and inspect for missed spots.
Proper surface prep prevents adhesion failure and saves repainting time.
Using the Wrong Primer or Paint Type
Because ceramic tile needs a primer and paint made for slick, nonporous surfaces, using regular wall primer or latex paint will almost always lead to peeling and chipping.
You should choose a bonding primer formulated for tile and a durable enamel or epoxy topcoat.
Read labels for adhesion, flexibility, and water resistance, and avoid craft or interior wall-only products that won’t bond.
Inadequate Curing Time or Too Few Coats
Although you might rush to grout or use the tiled surface right away, not allowing coatings to cure fully—or skimping on coats—undermines adhesion and durability.
Let each coat dry per manufacturer instructions, sanding lightly between layers for grip. Apply thin, even multiple coats rather than one thick one.
Rushing leaves soft, easily chipped finishes, so plan curing time to guarantee a hard, long-lasting surface.
Ignoring Environmental Conditions (humidity, temperature)
When you ignore humidity and temperature, paint won’t dry or cure as planned and adhesion suffers.
You should schedule painting when conditions match the paint’s label—typically moderate temperature and low humidity.
Too cold, too hot, or too damp causes tacky finishes, bubbling, or peeling.
Use a dehumidifier, heat, or wait for better weather to guarantee proper curing and long-lasting results.
Preventive Measures and Best Practices for Longevity
Keep up routine maintenance with gentle cleaners and soft tools so your painted tile keeps its finish longer.
Learn how to tell when a quick touch-up will do versus when a full repaint or replacement is needed.
Consider durability boosts like anti-slip additives and extra sealers to reduce wear and safety risks.
Routine Maintenance and Cleaning Methods That Preserve Finish
Protect your freshly painted tile by making maintenance simple and consistent: sweep or vacuum loose grit daily, mop with a pH-neutral cleaner weekly, and blot spills immediately to prevent stains and finish degradation.
- Use microfiber mops to reduce abrasion.
- Avoid harsh chemicals and bleach.
- Place mats at entryways to trap dirt.
- Lift furniture; use felt pads.
- Reseal grout annually and inspect for wear.
When to Touch Up vs When to Repaint or Replace
If you spot small chips, scuffs, or thin wear in isolated areas, you can usually touch them up quickly without redoing the whole surface; larger flaking, widespread peeling, or compromised adhesion means you should plan to repaint or, in severe cases, replace the tile.
Touch up when damage is cosmetic and adhesion is intact; repaint if multiple areas fail or sealers delaminate; replace if substrate is weakened.
Enhancements for Durability (anti-slip additives, extra sealers)
Once you’ve decided whether to touch up, repaint, or replace, plan steps that will extend the life of your work: adding anti-slip additives to topcoats and applying extra sealers will reduce wear, improve safety, and keep finishes bonded longer.
Use a fine aggregate for traction in wet areas, apply two thin sealer coats curing fully between, and maintain with mild cleaners to preserve protection.
Cost, Time, and Expected Lifespan
Expect to weigh materials and labor: a DIY kit and supplies will run much less than hiring a pro, but pros finish faster and may charge several hundred to a few thousand dollars.
Plan on a weekend or two for a careful DIY job versus a day or two for a professional crew, depending on room size and prep needs.
With proper prep and maintenance, painted tile can last 5–10 years, but heavy use, poor adhesion, or skipping sealers will shorten that considerably.
Typical Cost Breakdown and Time Estimates for DIY vs Pro
Comparing DIY vs pro painting on ceramic tile comes down to three things: money, time, and how long the finish will last.
DIY typically costs $50–200 for primer, paint, sandpaper, and tools, taking a weekend plus cure time.
Hiring a pro runs $300–1,500 depending on area and prep, with faster turnaround and usually longer-lasting, warranty-backed results.
Realistic Lifespan Expectations and Factors That Shorten It
Although painted tile can look great and save you money, its lifespan varies a lot based on materials, prep, and use, so you should plan for maintenance sooner than you’d with new tile.
Expect 3–7 years for well-prepped, sealed work; 1–3 years if shortcuts or heavy wear occur.
Costs, humidity, cleaners, and traffic shorten life—budget touch-ups.
Comparison: Paint vs Tile Replacement vs Tile Overlays
When you’re weighing paint, full tile replacement, or overlays, consider the pros and cons of durability, cost, and appearance for each option.
Painting is fastest and cheapest but less durable. Replacement gives the best long-term result yet costs more. Overlays sit in the middle as a faster refresh with moderate longevity.
If your tile is cracked, uneven, or you want a permanent change, replacement is usually the smarter choice.
Pros and Cons Comparison
Choosing between painting tile, replacing it, or installing overlays comes down to balancing cost, durability, appearance, and effort. You’ll weigh upfront price, lifespan, maintenance, and DIY difficulty to pick what fits your timeline and budget.
| Option | Pros | Cons |
|---|---|---|
| Paint | Affordable, quick | Less durable |
| Replace | Longest-lasting | Costly, time-consuming |
| Overlays | Mid durability | Added thickness |
Situations Where Replacement Is Preferable
If your tile has widespread cracking, severe water damage, or persistent mold that won’t come out, replacing it’s usually the smarter choice because paint or overlays won’t fix structural problems or hidden moisture.
Choose replacement when grout is crumbling, tiles are loose, or substrates are compromised.
You’ll prevent future failures, avoid recurring repairs, and restore long-term waterproofing and resale value.
Frequently Asked Questions
You probably have a few quick questions about painted tile—how long it lasts with proper prep, whether you can paint a shower or tub surround, and if sanding is always required before priming.
You’ll also want to know which paints stand up to regular cleaning and whether you can return tile to its original finish later. Below are clear answers to those common concerns.
How long should painted tile last with proper prep?
When prepped and painted correctly, ceramic tile can hold up for 5–15 years depending on traffic, moisture, and the exact products you use; routine care and occasional touch-ups will keep the finish looking fresh longer.
You should expect shorter lifespans in high-traffic floors or damp areas and longer results on walls and low-use surfaces.
Recoat scuffed spots promptly and follow manufacturer maintenance guidelines.
Can you paint tile in a shower or tub surround?
Wondering whether you can paint tile in a shower or tub surround? You can, but it’s riskier than dry areas because constant moisture and cleaning shorten finish life.
Use waterproofing-friendly primers and epoxy or marine-grade topcoats, guarantee excellent adhesion, and follow cure times strictly.
Expect more frequent touch-ups or redoing compared with walls; consider professional application for best durability.
Is sanding always necessary before priming tile?
Moisture and heavy wear in showers make surface prep even more important, but sanding isn’t always required before priming tile.
If glaze is intact and you use a bonding primer, thorough cleaning and deglossing often suffice.
Sand if glaze is glossy, damaged, or primer manufacturer mandates it.
Use fine-grit, clean dust, and wipe before priming to guarantee adhesion and avoid peeling.
What paint will withstand regular cleaning and scrubbing?
Any durable paint for tile should be a high-adhesion, washable formula—typically a 100% acrylic or epoxy-modified enamel—because these resist scuffs, moisture, and repeated scrubbing.
Choose a paint labeled “washable” or “scrub-resistant,” and opt for a satin or semi-gloss finish for easier cleaning.
Always follow manufacturer cure times and use recommended topcoats or sealers to maintain durability.
Can painted tile be returned to original finish later?
Can you return painted tile to its original finish? You can, but it’s often labor-intensive.
Strip paint with a chemical remover or sandblast glazed tiles, then clean and neutralize surfaces. Complete removal may damage glaze or grout, requiring repair or regrouting.
Expect time, ventilation, and protective gear. If original gloss matters, test a small area first to gauge results before committing.