How to Fix a Gap in Laminate Flooring Without Replacing It
You can fix a gap in laminate flooring without replacing planks by pushing boards together, using a tapping block and mallet, or inserting color-matched filler or caulk for small seams; for wider cracks use backer rod or compression foam before sealing, and secure loose boards with adhesive or repair clips after checking underlayment and moisture. Touch up with matching putty and trim like quarter round to hide edges. Keep humidity stable to prevent recurrence and learn more about step‑by‑step fixes ahead.
How to Fix a Gap in Laminate Flooring Without Replacing It
When you spot a gap, try quick fixes first like using a floor gap filler, tightening loose boards, or adjusting humidity before calling for a full replacement.
Small gaps from shrinkage or minor movement are often repairable and much cheaper to fix.
But if boards are warped, delaminated, or the locking system is damaged, you’ll need to replace affected planks to prevent bigger problems.
Best Immediate Fixes at a Glance
Wondering how to stop that gap from getting worse without ripping out the floor? Here’s a quick list for how to fix gap in laminate flooring:
- push boards together with a pry bar and sanding block,
- insert matching filler or color-matched caulk,
- add felt under furniture to reduce stress,
- and tighten loose connections.
Each step’s quick and reversible for immediate improvement.
When to Repair vs. When Replacement Is Necessary
How do you decide whether to patch a gap in your laminate or replace the affected planks?
Inspect moisture, damage, and joint integrity. If boards swell, delaminate, or the locking profile is broken, replace them.
If gaps stem from shrinkage, minor cupping, or loose connections, try targeted fixes: tighten, add filler, or adjust trim.
Prioritize durability and appearance when choosing.
Understanding Gaps in Laminate Flooring
You’ll see gaps form for a few common reasons—moisture and temperature changes, poor installation, or normal wear.
These can show up as seam gaps, end gaps, plank separation, or problems with expansion spaces.
Use a straightedge, gap gauge, and tape measure to check size and location, and note any trip hazards or loose boards before you start repairs.
What Causes Gaps (Moisture, Temperature, Installation, Wear)
When gaps appear between laminate planks, they usually stem from four main causes: moisture changes, temperature fluctuations, improper installation, or normal wear.
You’ll notice gaps widen with humidity swings, shrink in dry heat, or emerge if joints weren’t aligned or boards weren’t acclimated.
Regular traffic and aging can loosen clicks.
Check these primary drivers:
- Moisture and humidity
- Temperature and seasonal shifts
- Installation errors and wear
Types of Gaps (Seam gaps, End gaps, Plank separation, Expansion gap issues)
Although gaps can all look similar at first glance, they fall into distinct types that tell you what’s wrong and how to fix it.
You’ll see seam gaps between planks, end gaps at board ends, plank separation where boards split, and expansion gap issues at walls or junctions.
Identify the type to choose the right repair.
- Seam gaps
- End gaps
- Expansion issues
How to Assess the Severity of a Gap (tools, measurements, safety concerns)
Now that you can tell seam gaps from end gaps and expansion problems, assess how serious a gap is before choosing a fix.
Inspect length, width, and location; use a tape measure and feeler gauge for precision. Note movement when you step on planks. Check moisture with a meter and look for buckling.
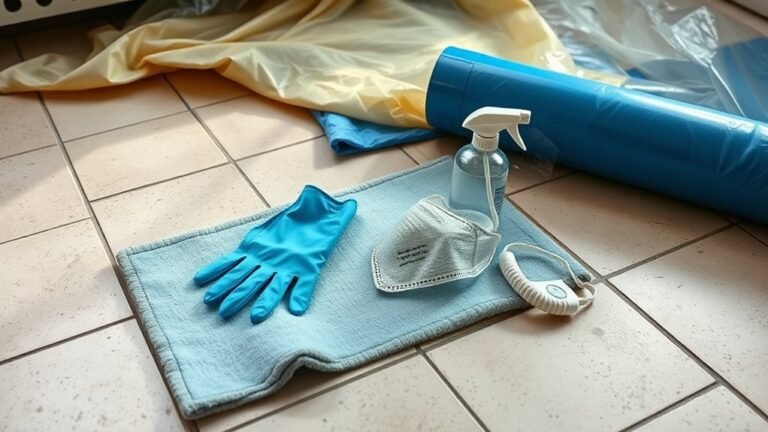
Wear gloves and knee pads; unplug nearby electrical devices for safety.
Tools and Materials You’ll Need
You’ll want a few basic tools—like a tapping block, mallet, pry bar, and putty knife—to reposition boards and clean gaps.
Keep laminate-specific repair materials on hand (laminate or wood filler, color-matched putty, caulk, backer rod, and adhesive) for filling and finishing.
Reserve specialty products—foam filler, seam sealer, or a floor gap repair kit—for larger or stubborn gaps.
Basic Tools (tapping block, mallet, pry bar, putty knife)
Before you start closing gaps in your laminate flooring, gather a few simple hand tools that make the job quick and clean: a tapping block to protect edges while you tighten boards, a rubber mallet for controlled force, a pry bar for removing trim and levering boards, and a putty knife for applying and smoothing filler.
- Use the tapping block when aligning planks.
- Tap gently with the mallet.
- Pry trim carefully to avoid damage.
Repair Materials (laminate filler, wood filler, caulk, backer rod, color-matched putty, adhesive)
With your tools at hand, gather the right repair materials so the fix holds and blends with the floor.
Choose laminate or wood filler for gaps, color-matched putty for surface touch-ups, and adhesive for loose boards.
Keep caulk for small seams and backer rod for wide gaps before filling.
Match colors and test a small area first.
- Laminate or wood filler
- Color-matched putty
- Adhesive
When to Use Specialty Products (foam filler, seam sealer, floor gap repair kits)
Although many gaps can be fixed with basic fillers, you’ll want specialty products when standard putty or adhesive can’t deliver a durable, invisible repair.
Use foam filler for deep, compressible gaps; seam sealer for water-resistant joins; and repair kits when matching profile and color matters.
Choose products rated for laminate movement and moisture, and follow manufacturer instructions for best results.
- Foam filler
- Seam sealer
- Floor gap repair kit
Step-by-Step Repairs for Common Gap Types
You’ll learn straightforward fixes for small seam gaps, larger separations, and end gaps near walls, including how to address moisture-related openings.
For wider end gaps, you’ll insert backer rod then seal with flexible caulk or silicone to keep the joint stable.
Follow the step-by-step instructions for each gap type so you can choose the right repair and get your floor looking tight again.
Repairing Small Seam Gaps Between Planks
Start by cleaning the gap and inspecting the edges for debris or damage so you know what you’re working with.
Then apply a color-matched putty or filler into the seam, pressing it in to fully close the gap.
Finally, level and smooth the filler, let it cure, and check the finish for color and texture match.
Step 1: Clean and Inspect
Step 1 is to clean and inspect the gap so you can diagnose its cause and choose the right fix.
Remove dust, debris, and old adhesive with a vacuum and soft brush. Wipe with a damp cloth and let dry.
Check for moisture, swelling, loose locking joints, or subfloor movement. Note gap width and location before proceeding to repairs.
Step 2: Use Color-Matched Putty or Filler to Close Small Gaps
With the gap cleaned and inspected, decide whether a color-matched putty or laminate filler will work—these products are best for narrow seam gaps (typically under 1/8 inch) where boards haven’t shifted or buckled.
Choose a matching shade, apply with a putty knife or applicator into the seam, press gently, and remove excess.
Let the product settle per label before light traffic.
Step 3: Level and Smooth Filler; Finish and Cure
Smooth the filler so it sits flush with the plank surfaces and blends into the seam; you’ll want to use a damp cloth or a flexible putty knife to remove excess and feather the edges while the product is still workable.
Let it dry per manufacturer instructions, lightly sand any high spots with fine-grit paper, wipe clean, then apply a matching finish or sealant and allow full cure before traffic.
Fixing Larger Separation Between Planks
If you’ve got a large gap between planks, start by checking the underlayment and subfloor for unevenness or damage.
Then use a pry bar and tapping block to gently reposition the boards back together.
Finish by applying adhesive or installing repair clips to keep the joint stable.
Step 1: Check Underlayment and Subfloor
Start by removing baseboards and any trim around the room so you can inspect the underlayment and subfloor where the gap runs; you’ll want clear access to see whether the issue comes from a warped underlayment, uneven subfloor, or loose fasteners.
Check for moisture damage, bumps, or gaps in the underlayment and fastener integrity.
Note uneven areas and mark spots that need leveling or repair.
Step 2: Use a Pry Bar and Tapping Block to Reposition Planks
Grab a pry bar and a tapping block and get ready to shift the planks back into place; for larger separations this combination gives you controlled leverage without damaging the edges.
Slide the tapping block against the plank edge, tap gently with a mallet, and use the pry bar to nudge stubborn boards.
Work gradually along the gap, checking alignment as you go.
Step 3: Apply Adhesive or Repair Clips for Stability
3 simple options can secure wide gaps: adhesive, repair clips, or a combination of both depending on the plank type and how the boards interlock.
Choose a manufacturer-recommended laminate adhesive for glued joints, injecting it into the seam then clamping until set.
For click-lock systems, slip repair clips under adjacent planks and tighten.
Clean excess adhesive and let cures fully before traffic.
Closing End Gaps Near Walls
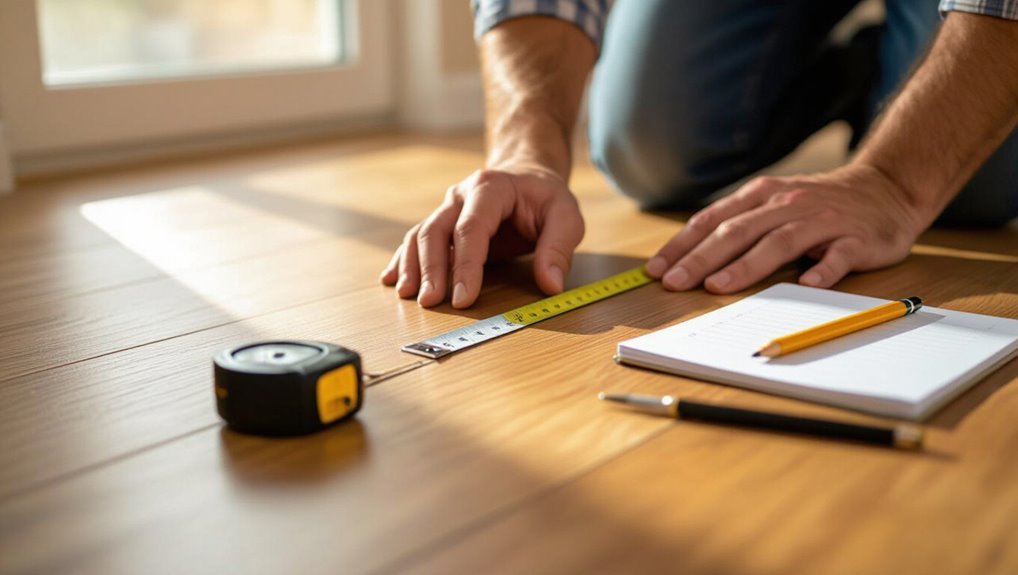
Start by measuring the gap at the end of the last row and the space between the boards and the wall to confirm how much expansion room you need.
Use a tape measure and note the largest distance so you can pick the right filler or adjustment method.
Accurate measurements let you close the end gap without restricting the floor’s ability to expand.
Step 1: Measure Expansion Space Needs
Before you pull up any boards, measure the required expansion gap so your repair doesn’t cause future buckling or gaps; laminate needs about 1/4 inch to 3/8 inch of clearance at walls and fixed objects, but check the manufacturer’s spec for your product to be sure.
Use a ruler or feeler gauge at multiple points, note variations, and mark where shims or trim must restore correct spacing.
Step 2: Insert Backer Rod and Seal with Flexible Caulk or Silicone
Reach for a backer rod and flexible caulk or silicone to fill wider gaps where floating laminate won’t close on its own; the rod gives the sealant a consistent base so the bead stays flexible and bonds properly to the edges.
Press the rod into the gap, trim flush, then apply a smooth bead of caulk.
Tool it for a neat finish and allow full cure before traffic.
Addressing Gaps Caused by Moisture
First, you’ll need to tackle the moisture problem before repairing any gaps.
Start by drying the area with fans or a dehumidifier and stop any water source so the boards can stabilize.
Once the floor is dry and humidity is controlled, you can assess which repair method will work best.
Step 1: Drying and Moisture Control
If moisture caused the gap, you’ll need to dry the area and control humidity before attempting repairs.
Remove rugs and furniture, increase ventilation, and run fans or a dehumidifier until boards feel dry.
Fix leaks and improve airflow to prevent recurrence.
Monitor humidity with a hygrometer, keeping it between 30–50%.
Only proceed with gap repairs once moisture is stabilized.
Step 2: Use Waterproof Sealants or Replace Affected Planks (if partial)
Decide whether to seal or replace the affected area based on how much damage you see and whether moisture has gotten underneath the planks.
If swelling or delamination is limited, remove debris, dry thoroughly, and apply a clear waterproof sealant into the gap, smoothing flush.
For partially damaged planks that won’t lock properly, remove and replace those boards, ensuring tight seams and a moisture barrier beneath.
Temporary/Quick Fixes for Visible Gaps (filler sticks, rope, trim solutions)
When a sealant or plank replacement isn’t practical right away, you can use quick, temporary fixes to hide gaps and keep out drafts and dirt until a permanent repair’s possible.
You’ll pick a method based on gap size and visibility, then install or press it in. Options include:
- Wax or filler sticks for narrow gaps
- Compression rope for wider cracks
- Quarter round or reducer trim around edges
Alternative Solutions That Avoid Full Replacement
If the gaps aren’t severe, you can hide them with junction strips or thresholds where two rooms meet.
You can also install quarter round or refresh baseboards to cover edge gaps without touching the floor panels.
For floating floors, try minor adjustments and retightening to close seams before considering a full replacement.
Using Transition Strips and Thresholds to Hide Gaps
You can often hide small to moderate gaps in laminate flooring without tearing up the whole floor by installing connector strips or thresholds, which bridge the gap between rooms or at doorways and create a clean, finished edge.
Choose a style and height that matches your flooring, cut to fit, anchor with screws or adhesive, and seal edges to prevent dirt and moisture intrusion.
Installing Quarter Round or Baseboard Touch-Ups to Conceal Edge Gaps
Anyone can tidy up small edge gaps without replacing the floor by installing quarter round or touching up baseboards. This simple trim work hides gaps while giving the room a finished look.
Measure gaps, choose matching trim, cut miters for corners, and nail or adhesive-secure the quarter round.
Caulk and paint or stain to blend seams for a neat, durable finish.
Floating Floor Adjustments and Retightening Techniques
After trimming and caulking the edges, check whether your laminate floor itself can be adjusted before thinking about replacement.
If you have a floating floor, try loosening molding, releasing planks, and gently tapping seams with a pull bar to close gaps.
Re-seat boards, add felt shims near walls to relieve pressure, and re-lock planks.
Test stability and gaps before reinstalling trim.
Common Mistakes and How to Avoid Them
Don’t rush into repairs without thinking about common pitfalls that can make gaps worse.
Using the wrong filler or color, ignoring moisture or subfloor issues, and overfilling or sanding improperly are the main mistakes you’ll want to avoid.
I’ll explain the consequences of each and show simple fixes so you can get it right the first time.
Mistake 1: Using the Wrong Filler or Color Consequences and Fixes
When you pick the wrong filler or mismatched color, gaps that were a minor nuisance can end up drawing the eye and shortening the life of your floor. The wrong compound can crack, shrink, or stain surrounding planks.
Test color and material in an inconspicuous spot, choose manufacturer-recommended fillers, and apply sparingly.
Sand and reseal edges if mismatch or texture issues appear.
Mistake 2: Ignoring Underlying Moisture or Subfloor Issues
If you overlook moisture or a flawed subfloor, small gaps can signal much bigger problems beneath the surface.
You should inspect for leaks, high humidity, or uneven plywood before filling gaps. Moisture can warp boards and void warranties; a soft or uneven subfloor needs repair or leveling compound.
Address underlying issues first so your gap fix lasts and flooring stays stable.
Mistake 3: Overfilling or Improper Sanding That Damages Laminate
After you’ve ruled out moisture and subfloor problems, pay close attention to how you fill and finish gaps—overfilling or aggressive sanding can wreck the laminate surface and the protective wear layer.
Use a minimal amount of manufacturer-recommended filler, apply in thin layers, and sand very lightly with fine-grit paper.
Test on a scrap piece, keep strokes even, and stop as soon as the seam blends.
Prevention and Best Practices to Keep Gaps from Reoccurring
Start with proper installation—use the right underlayment, leave recommended expansion gaps, and stagger seams so boards lock tightly.
Keep indoor humidity steady with a humidifier or dehumidifier as needed to prevent boards from shrinking or swelling.
Finally, make a habit of regular inspections, quick cleanings, and small touch-ups to catch and fix issues before gaps widen.
Proper Installation Tips to Minimize Future Gaps
When you install laminate correctly from the outset, you greatly reduce the chance of gaps later on; that means acclimating the planks, preparing a flat subfloor, spacing expansion gaps properly, and following the manufacturer’s locking and adhesive guidelines.
Use proper underlayment, stagger end joints at least 12 inches, check plank alignment frequently, trim doors for clearance, and tap joints snugly with a tapping block for a tight, lasting fit.
Humidity and Climate Control Advice for Laminate Floors
Because laminate reacts to moisture and temperature, keeping indoor humidity stable is one of the easiest ways you can prevent gaps from opening or boards cupping.
Use a dehumidifier in summer and a humidifier in dry winter months to maintain 35–55% RH.
Keep HVAC on a consistent schedule, avoid rapid temperature swings, and seal exterior doors to limit moisture-driven movement.
Regular Maintenance Checklist (inspection, cleaning, quick touch-ups)
A simple, regular maintenance routine will keep small issues from becoming big gaps: inspect your floor monthly, clean with manufacturer-approved products, and handle minor separations or damaged edges as soon as you spot them.
Check seams, wipe spills promptly, and touch up with matching filler or trim to prevent expansion.
- Inspect monthly
- Clean with approved products
- Touch up small gaps promptly
Cost, Time, and Effort Comparison of Repair Methods
You’ll want to weigh cost, time, and effort when choosing between DIY fixes and hiring help, especially if the gap signals underlying damage. If you’re unsure or the job looks major, call a professional to avoid costly mistakes. Below is a quick comparison to show when pro help is usually worth it:
| Scenario | DIY Suitability | When to Call a Pro |
|---|---|---|
| Small, isolated gap | High | If recurring or near doorways |
| Widespread gaps/warping | Low | Always recommended |
When a Professional Repair Is Recommended
If the gap’s cause is structural, extensive, or beyond simple float-floor fixes, call a pro—otherwise you might waste time and money on temporary patches.
You should hire a professional when gaps reflect subfloor issues, widespread moisture damage, or warped planks.
Pros diagnose root causes, offer durable repairs or partial replacements, and save time. Expect higher cost but reliable, long-lasting results.
Case Examples and Quick Scenarios
You’ll see three common situations that call for different fixes: a small seam gap in the living room you can handle quickly yourself, multiple plank separations in a high-traffic zone that need a bit more work, and moisture-driven gaps in a basement that require remediation steps.
For each, I’ll outline what to check, the tools you’ll need, and the likely time and cost. That way you can pick the right approach and avoid making the problem worse.
Scenario 1: Small Seam Gap in Living Room Fast DIY Repair
Start by evaluating the gap’s size and location so you know whether a quick DIY fix will do the job; for a narrow seam in the living room, clean debris, apply matching color wood filler or laminate repair caulk, press boards together, and wipe excess.
Use weights or clamps until cured. Touch up with marker or polish.
Check seasonal expansion to prevent recurrence.
Scenario 2: Multiple Plank Separation in High-Traffic Area Intermediate Repair
When multiple planks are separating in a high-traffic area, assess the pattern and extent of the gaps so you can choose an appropriate intermediate repair rather than a quick patch.
Identify loosened tongues, abrasion, or uneven subflooring. Stabilize edges with wood glue, use filler for intermittent gaps, and add discreet connector strips or weighted runners to redistribute traffic.
Monitor and re-tighten seams as needed.
Scenario 3: Moisture-Induced Gaps in Basement Remediation Steps
If moisture’s the culprit behind gaps in your basement laminate, you’ll need to treat the environment before you repair the flooring: identify the water source, dry and dehumidify the space, and only then decide whether to replace affected planks, use moisture-resistant underlayment, or reseal seams—otherwise gaps will just reappear.
After drying, inspect for mold, lift warped boards, trim swollen tongues, and install vapor barrier.
Frequently Asked Questions (FAQ)
You probably have a few common questions about gaps in laminate, like whether they can be permanently fixed without replacing planks and if fillers will match your floor.
You’ll also want to know how long repairs last, whether you can do the work yourself or should hire a pro, and if fixing gaps affects your warranty.
Below are clear answers to help you decide what to do next.
Can gaps in laminate be permanently fixed without replacing planks?
Can small gaps in laminate be fixed permanently without swapping out planks? You can often fix gaps long-term if causes like humidity or loose boards are addressed.
Tighten underlayment, secure loose rows, and control moisture. Use professional repair for damaged locking systems.
Temporary fillers help cosmetically, but lasting results depend on fixing structural or environmental issues rather than just cosmetic patches.
Will filler products match the color and texture of my laminate?
Wondering whether filler products will truly blend with your laminate? You’ll find many fillers come in multiple colors and can be mixed to match tones.
Grain and gloss aren’t always perfect—textured kits or tinted putties improve disguise. Test on a scrap, adjust color, and finish with the same sheen as your floor.
Small gaps blend best; large gaps may still show.
How long do these repairs typically last?
Matching color and texture helps the repair disappear, but lifespan depends on method and traffic.
Simple fillers and caulk can last months to a few years in low-traffic rooms.
Better epoxy, wood fillers, or professional seam repairs can hold 3–10 years or longer if moisture and movement are minimal.
Monitor gaps and touch up as needed to extend durability.
Can I close gaps myself or should I hire a pro?
Got questions about whether you should tackle those gaps yourself or call in a pro? You can fix minor gaps with simple tools and a bit of patience—rubber mallet, pull bar, filler—and save money.
Hire a pro for extensive separation, moisture issues, or when seams won’t close despite proper technique. Pros guarantee correct diagnosis and lasting results when problems are complex.
Does fixing gaps affect the warranty of my laminate flooring?
If you decide to fix gaps yourself, you should also check how that repair affects your laminate’s warranty.
Many manufacturers require professional installation or specific repair methods; DIY alterations can void coverage for related issues.
Review your warranty terms, keep receipts for materials, and contact the manufacturer before proceeding.
If in doubt, get written approval to preserve warranty rights.