How to Install a Subway Tile Backsplash: Step-by-Step for Beginners
You can install a subway tile backsplash yourself in a weekend if you plan and work methodically. Measure the wall, choose tile and grout, protect surfaces, and snap a level baseline. Apply thinset in small sections, press tiles with spacers, and cut edges as needed with a wet saw. Let thinset cure, grout, wipe haze, then seal and caulk junctions. Follow the step-by-step workflow here and you’ll see how to handle tools, cuts, and finishing details.
Quick Answer Can You Install a Subway Tile Backsplash Yourself?
Yes—you can install a subway tile backsplash yourself for a small kitchen area, but the scope ranges from a few square feet to a full wall which affects time and cost.
Expect a DIY project to take a weekend or two depending on prep, skill, and drying times, with moderate difficulty if you’re comfortable cutting tile and using thinset.
Materials and tools typically run $100–$600, while hiring a pro can cost several times more.
Short summary of scope, time, difficulty, and expected cost
If you’re handy with basic tools and willing to follow step-by-step instructions, you can install a subway tile backsplash yourself; a typical DIY job covers removing the outlet covers, prepping and leveling the wall, cutting and setting tile, grouting, and sealing.
You’ll learn how to install a subway tile backsplash, expect 1–3 days, moderate difficulty, and $100–$600 depending on materials.
- Scope: single wall area
- Time: 1–3 days
- Difficulty: moderate
- Cost: $100–$600
What Is a Subway Tile Backsplash and Why Choose It?
A subway tile backsplash is the classic rectangular tile look you’ll see in ceramic, porcelain, or glass options that stand up well to kitchen use.
You’ll get clean, versatile styling from common layouts like brick, stacked, or herringbone, so you can match modern or traditional kitchens.
Compared with other backsplashes it’s durable, easy to clean, and budget-friendly, though grout maintenance and limited visual variety can be drawbacks.
Definition and typical materials (ceramic, porcelain, glass)
Subway tile backsplashes are the classic, rectangular tiles laid in a running bond that protect your walls and give kitchens a crisp, timeless look.
You’ll find them in ceramic (affordable, glazed, easy to cut), porcelain (denser, more durable, water-resistant), and glass (reflective, modern, tougher to trim).
Choose material for budget, durability, and maintenance needs to match your project.
Design benefits and common layout patterns (brick, stacked, herringbone)
Although simple in form, subway tile delivers big design benefits: it brightens space, hides splatters, and creates a clean backdrop that complements any style.
You can choose brick (offset grout lines for classic warmth), stacked (modern, graphic symmetry), or herringbone (dynamic, upscale movement). Each pattern changes visual rhythm and perceived scale, so pick one that fits your room’s mood and proportions.
Pros and cons compared to other backsplash options
Picking a tile pattern helps pinpoint the look you want, but you’ll also want to weigh subway tile against other backsplash materials before deciding. You’ll get classic, durable, and easy-to-clean benefits, but grout upkeep and limited texture can be drawbacks. Compare options:
| Advantage | Drawback |
|---|---|
| Timeless look | Grout maintenance |
| Affordable | Less texture |
| Easy repair | Installation time |
| Versatile | Limited uniqueness |
Tools and Materials Needed
Before you start, gather the essential tools—trowel, spacers, level, wet saw or tile cutter—so you won’t stop mid-job.
Stock up on materials like tiles, thinset, grout, sealer, and backerboard to guarantee a solid, lasting install.
Consider optional helpers such as tile mats, nippers, and caulk to make the work quicker and neater.
Essential tools (trowel, spacers, level, wet saw, tile cutter)
You’ll need a handful of reliable tools to get a clean, durable subway tile backsplash: a notched trowel for spreading thinset, tile spacers to keep grout lines consistent, a level to guarantee straight rows, and a cutter (wet saw or manual tile cutter) to trim tiles to fit.
Use these to work accurately and safely:
- Notched trowel
- Tile spacers
- Carpenter’s level
- Wet saw or tile cutter
Materials and supplies (tiles, thinset, grout, sealer, backerboard)
Materials matter as much as technique when installing a subway tile backsplash, so gather tiles, thinset mortar, grout, a sealer, and backerboard that match your wall conditions and aesthetic.
You’ll choose tile size and finish, pick polymer-modified thinset for adhesion, select grout color and type, and use a topical sealer where needed.
- Subway tiles (allow extra)
- Polymer thinset mortar
- Grout (sanded/unsanded)
- Cement backerboard
Optional items for easier installation (tile mats, tile nippers, caulk)
Although you can install a subway tile backsplash with just basic tools, adding a few optional items—like disposable tile mats for cushioned work surfaces, tile nippers for small cuts, and paintable silicone caulk for seams—will speed the job and improve the finish.
You’ll work cleaner and make precise adjustments with these extras:
- Tile mats
- Tile nippers
- Paintable silicone caulk
- Pencil and masking tape
Preparing the Space
Before you start tiling, measure the wall carefully and calculate how many tiles, spacers, and adhesive you’ll need so you don’t run short.
Check the surface—drywall, plaster, painted walls, or existing tile—for flatness and damage, then clean and repair or install cement backerboard where required.
Protect counters, appliances, and adjacent surfaces with drop cloths and tape to keep everything clean during the work.
Measuring and calculating tile and material quantities
Start by measuring the full area you want to cover — height times width for each wall section — and note any cutouts for outlets, windows, or cabinets so you can subtract them from the total.
Convert square footage to tile counts using tile dimensions, add 10–15% waste, and calculate grout and adhesive based on manufacturer coverage.
- Measure each section precisely
- Calculate tiles per sq ft
- Add 10–15% waste
- Check adhesive/grout coverage
Surface assessment: drywall, plaster, painted walls, or existing tile
When you assess the wall, check its material and condition so you know what prep it needs—drywall and plaster may need patching or skim-coating.
Painted surfaces require adhesion testing and cleaning, and existing tile often needs roughening or a bonding primer before you apply new subway tile.
Note spots of damage, loose areas, moisture issues, and substrate changes so you can plan appropriate fixes.
Prepping the wall: cleaning, repairing, and installing backerboard
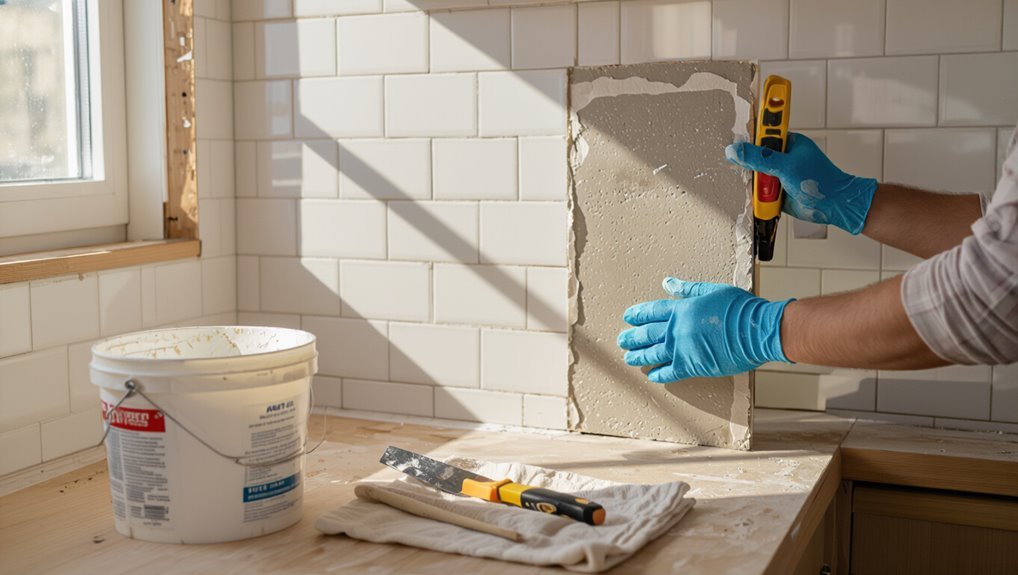
Although the assessment tells you what needs fixing, you’ll still need to clean, repair, and—where required—install cement backerboard to create a stable, moisture-resistant surface for your subway tile.
Remove grease, chalky paint, and loose material. Patch holes and level uneven spots with joint compound.
Screw backerboard to studs, stagger seams, tape joints with alkali-resistant mesh, and thinset before tiling.
Protecting counters, appliances, and adjacent surfaces
Before you lay a single tile, protect counters, appliances, and nearby surfaces so dust, mortar, and drops of thinset won’t create extra work or damage.
Cover counters with cardboard or drop cloths, tape plastic over appliances, remove small items, and use painter’s tape on adjacent trim.
Work from clean areas and replace barriers as needed to keep workspace tidy.
- Cardboard/drop cloths
- Plastic/tape appliances
- Remove small items
- Tape adjacent trim
Layout Planning and Dry Fit
Decide on your grout line width and whether you’ll run the tiles horizontally, vertically, or in a pattern so the look and spacing are consistent.
Find and mark the centerline and reference lines on the wall to keep rows straight and balanced.
Dry-fit tiles across the area to plan cuts and adjust layout so you avoid tiny edge pieces.
Choosing grout line width and tile orientation
When planning your subway tile layout, pick a grout line width and tile orientation that match your style and practical needs.
Choose narrow (1/16–1/8″) grout for a sleek, modern look or 3/16–1/8″ for classic appeal.
Decide between horizontal, vertical, stacked, or herringbone patterns.
Dry-fit sections to confirm sightlines, edge cuts, and how grout color will affect the final appearance.
Finding and marking the centerline and reference lines
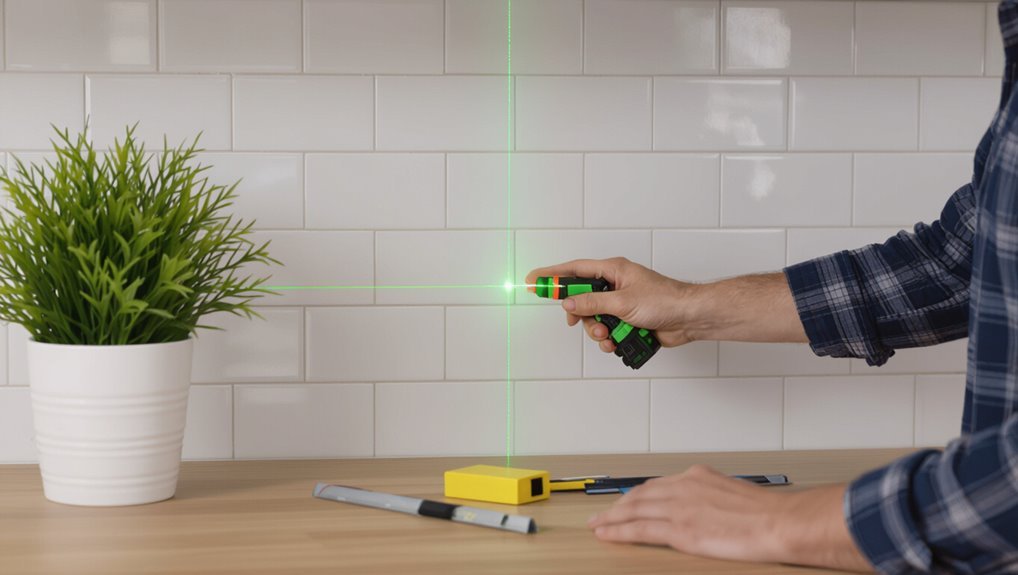
Start by finding the visual center of the wall and marking a vertical centerline so your layout looks balanced; measure the full width, snap a chalk line at the midpoint, and transfer that line down from the top edge to account for any out-of-plumb conditions.
Then mark a horizontal baseline at the lowest visible row, use a level to extend reference lines, and note appliance or outlet centers.
Dry-fitting tiles to plan cuts and minimize small edge pieces
Although it takes a bit of time, dry-fitting your subway tiles before you set any adhesive lets you see exactly where cuts will fall and avoid awkward, tiny slivers at the edges.
Lay out rows, adjust spacing, and shift the centerline if needed so edge pieces are at least half a tile. This saves cuts and creates a balanced look.
- Lay full tiles first
- Work outward symmetrically
- Aim for ≥½-tile edges
- Mark cut lines clearly
Step-by-Step Installation
Now you’ll mix and spread thinset, then set the first row carefully so it stays perfectly level.
You’ll keep placing tiles with spacers, cut pieces for outlets, corners, and edges as needed, and check alignment as you go.
Let the thinset cure fully before you move on to grouting.
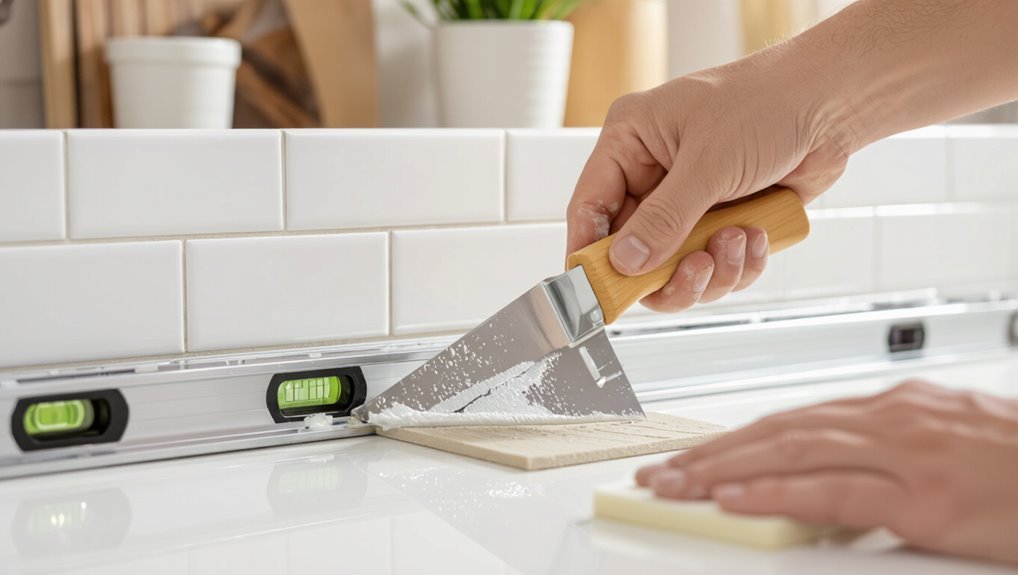
Step 1: Mixing and applying thinset mortar
Mix the thinset to a peanut-butter consistency, then spread it evenly with a notched trowel so each tile gets full support and proper adhesion.
Work in small sections to prevent skinning, combing thinset in one direction for uniform ridges.
Remove excess mortar, keep edges clean, and periodically check for lumps.
Clean tools and hands before the mortar cures.
Step 2: Setting the first row and maintaining level
Before you lay the first subway tile, snap a straight reference line at the height of the countertop or ledge and dry-fit a few tiles to confirm spacing and cuts; this lets you correct any unevenness and guarantees the first row sits perfectly level.
Press each tile into the thinset, wiggle slightly to bond, check with a level frequently, and adjust thinset or shims as needed for a uniform baseline.
Step 3: Continuing tile placement and using spacers
With the first row secure and level, continue up the wall by buttering small sections of thinset and setting tiles one row at a time.
Press each tile firmly into the mortar, insert spacers at every corner to maintain consistent grout lines, and check alignment frequently with a level.
Remove excess thinset and adjust before it skins over.
Step 4: Cutting tiles for outlets, corners, and edges
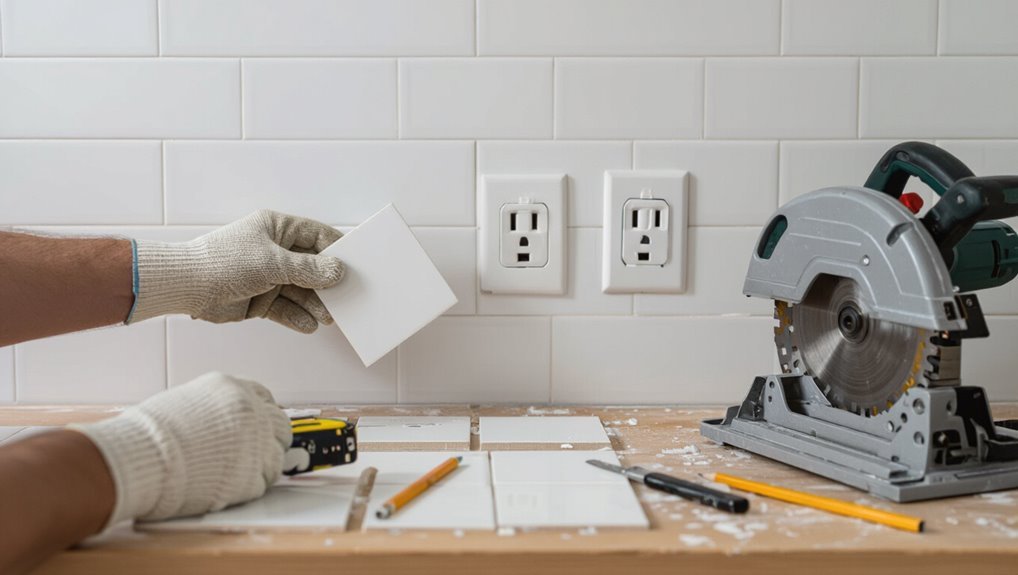
When you reach outlets, corners, and edges, you’ll need to cut tiles to fit snugly and maintain a professional look; use a pencil to mark each tile against the wall or adjacent tiles, transfer those marks to the tile, and plan your cuts so exposed edges face the least visible areas.
Use a wet saw or tile nippers for precision, wear safety gear, and test-fit before applying adhesive.
Step 5: Allowing thinset to cure before grouting
After you’ve cut and test-fit all the tiles, let the thinset set properly before you grout so your work stays put.
Check manufacturer cure times—usually 24–48 hours. Keep tiles undisturbed, avoid moisture and vibration, and protect edges with painter’s tape or temporary barriers.
Verify firmness by gently pressing a hidden tile corner; if it doesn’t move, you’re ready for the next step.
Step 6: Grouting: mixing, applying, and cleaning excess
Mix the grout to a smooth, peanut-butter consistency following the manufacturer’s water ratios, then use a rubber float to press it firmly into the joints at a 45-degree angle so every gap is fully filled.
Let grout stiffen slightly, then wipe excess with a damp sponge using diagonal passes. Rinse the sponge frequently, reshape joints for uniform lines, and allow grout to cure per instructions.
Step 7: Sealing grout and tiles (when and how)
Once the grout has set to the firmness your manufacturer recommends, you’ll seal to protect joints and tiles from stains and moisture.
Choose a penetrating grout sealer for porous grout and a tile sealer only if your tiles need it.
Test first on a scrap.
Apply with a small brush or applicator, wipe excess promptly, and allow full cure per product instructions.
Step 8: Caulking transitions and final cleanup
Finish strong by caulking all connections and cleaning your workspace so the backsplash looks professional and stays watertight.
You’ll run a smooth bead where tile meets counter, cabinet, or sink, tool it neatly, and remove excess with a damp finger or tool.
Let caulk cure per directions, then wipe surfaces and polish grout for a finished look.
- Use silicone for wet areas
- Cut tip small
- Tool for concave finish
- Clean immediately
Common Problems and How to Fix Them
You’ll run into a few common issues—like lippage or uneven tiles, cracked or loose tiles, and grout haze or stains—and you’ll want to spot them early.
For lippage you can grind or re-set tiles.
For cracks or poor adhesion you’ll replace or re-mortar affected pieces.
For grout haze a proper cleaning or sealer will usually do the trick.
Below are quick fixes and when to call a pro.
Uneven tiles or lippage and corrective techniques
If tiles sit at different heights or edges don’t line up, that’s lippage—and it not only looks sloppy, it can catch on cloth and make grout wear unevenly.
You can fix it by removing and re-setting tiles or shaving high spots before grouting. Use level, spacers, and wedges to align.
- Lift and re-bed problem tiles
- Tap down high edges gently
- Use leveling clips/wedges
- Check continuously with a level
Cracked tiles, loose adhesion, and repair options
Cracked tiles or sections that won’t stick usually mean the substrate, adhesive, or installation methods failed, but you can often repair them without redoing the whole backsplash.
Remove damaged tiles, clean and dry the substrate, replace or level backerboard if needed, apply fresh thin-set, and reset new tiles with proper spacing.
Regrout and seal; press firmly and cure per manufacturer directions.
Staining or haze after grouting and cleanup solutions
Once repaired tiles are set and grout has cured, you might still see a film, haze, or discoloration across the backsplash—often caused by grout residue, efflorescence, or improper cleanup.
You can remove haze by wiping with a damp sponge, then using a grout haze remover or diluted vinegar solution on glazed tile.
Rinse thoroughly, buff dry, and seal grout once fully clean to prevent recurrence.
Best Practices and Expert Tips
Start by planning your tile pattern so lines flow across corners and focal points stay symmetrical.
Pick a grout color and finish that hides stains and makes cleaning easier.
Use time-saving hacks like pre-mixed mortar, a wet saw stand, and always wear eye and hand protection.
Tile pattern tricks for visual continuity and symmetry
When you want a backsplash that looks intentional and balanced, small pattern choices make a big difference.
Align grout joints across rows, center focal tiles over sinks or ranges, and use full tiles at edges to avoid awkward half-tiles.
Stagger offsets consistently—one-third or half brick—and dry-lay a row to confirm symmetry before adhering to guarantee clean, continuous lines.
Choosing grout color and maintenance-friendly finishes
Having settled your pattern and alignment, pick a grout color and finish that reinforces that clean, balanced look while making upkeep manageable.
Choose grout that complements tile—matching for seamless, contrasting for definition.
Opt for epoxy or stain-resistant grout and a satin or semi-gloss sealant on porous tiles.
These choices reduce staining, simplify cleaning, and maintain appearance with minimal scrubbing.
Time-saving hacks and safety reminders
Because every minute counts on a weekend renovation, prioritize a few time-saving hacks that won’t compromise quality: pre-cut spacers and a marked layout sheet speed alignment, a wet saw with a scoring guide reduces repeat cuts, and batching tasks—like mixing grout while tiles set—keeps momentum.
- Wear safety glasses and cut-resistant gloves
- Use a dust mask with wet cuts
- Keep a tidy workspace
- Label offcuts for quick replacements
Cost, Time Estimates, and When to Hire a Pro
You can usually tackle a subway tile backsplash for a few hundred dollars in materials and a weekend of work, with labor and specialty tools raising the price and timeline.
Watch for signs you should hire a pro—complex cuts, severely uneven walls, or work near plumbing and electrical can turn a simple job into a costly mess.
I’ll outline a typical DIY cost breakdown and realistic time estimates next, plus clear guidance on when to call in an expert.
Typical DIY cost breakdown and timeline
A simple 10–15 square-foot subway tile backsplash typically costs a homeowner $150–$600 in materials and can take a weekend to install if you’re reasonably handy; labor from a pro usually adds $300–$800 depending on complexity. Plan: buy tiles/grout, allocate prep/tile/grout time, and budget contingency.
| Item | Estimate |
|---|---|
| Materials | $150–$600 |
| Time | 1–2 days |
| Contingency | 10–20% |
Signs you should hire a professional (complex cuts, uneven walls, plumbing/electrical)
When your backsplash involves lots of intricate cuts, severely uneven walls, or work near plumbing and electrical lines, call a pro—these issues quickly turn a weekend DIY into a risky, time-consuming project.
If you lack tile-cutting tools, experience leveling irregular surfaces, or need safe hookups, hiring a licensed contractor saves headaches.
Expect higher cost but faster, code-compliant results and warranty protection.
Tools, Materials, and Tile Comparison
You’ll weigh ceramic, porcelain, glass, and natural stone by durability, cost, and maintenance to pick what fits your kitchen use and style.
For kitchens, use a dense, low-porosity tile like porcelain for high-traffic areas and glass or ceramic for easy cleaning on smaller runs.
Choose a sanded grout for joints ≥1/8″ or unsanded for narrower joints, and seal natural stone (and porous grout) with a penetrating sealer designed for kitchens.
Quick comparison of tile materials and recommended use cases
If you’re choosing tile for a subway backsplash, think about durability, maintenance, and style first—porcelain is hard-wearing and stain-resistant for busy kitchens, ceramic is budget-friendly and easy to cut, glass gives a sleek, modern look but can show smudges and needs careful grouting, and natural stone adds warmth and texture but requires sealing and more upkeep.
| Tile | Best use |
|---|---|
| Porcelain | High-traffic kitchens |
| Ceramic | DIY, budget installs |
| Glass | Modern accents |
| Stone | Rustic or upscale looks |
Recommended grout types and sealers for kitchens
Because grout affects both durability and appearance, pick a type that matches your tile, traffic, and cleanup routine.
You’ll usually choose sanded for wider joints, unsanded for narrow joints, epoxy for stain resistance, or urethane for flexibility.
Sealers prevent staining and make cleaning easier; apply a penetrating sealer after curing.
- Sanded grout: wide joints
- Unsanded grout: narrow joints
- Epoxy grout: stainproof
- Penetrating sealer: routine protection
Project Checklist and Step-by-Step Workflow
Before you start, run through a simple pre-project checklist: confirm tile and grout quantities, gather all tools, and prep the wall and countertops.
Then follow a beginner-friendly, day-by-day workflow that breaks the job into manageable steps—measuring and layout, cutting and installing, then grouting and cleanup.
Stick to the schedule and you’ll keep the project organized and avoid last-minute trips to the store.
Pre-project checklist (purchase, tools, prep)
When you’re ready to start, gather everything you need so the job won’t stall: confirm tile and grout quantities, pick up thinset, spacers, and a suitable backer board if required, and assemble tools like a wet saw or tile cutter, notched trowel, level, and grout float.
Protect counters, clear the wall, check power/ventilation, buy sealant and clean rags, and measure twice.
Day-by-day workflow for a beginner-friendly schedule
Now that you’ve gathered materials and prepped the space, set a realistic, beginner-friendly timeline so each step gets the attention it needs.
Plan four focused days: demolition and wall prep, layout and tile cuts, adhesive and setting tiles, grout and cleanup. Pace yourself, test fits, and let adhesive cure fully. Track tasks and materials to avoid delays.
- Day 1: Prep walls
- Day 2: Layout/cuts
- Day 3: Set tiles
- Day 4: Grout/finish
Frequently Asked Questions
You’ll find answers here to common concerns like how long the install takes and whether you can tile over existing surfaces or wallpaper.
You’ll also get guidance on ideal grout width, safe tile cuts around outlets and corners, and simple maintenance and cleaning tips.
If you have a specific situation or measurement, mention it and we’ll give tailored advice.
How long does a subway tile backsplash installation take?
How long will your subway tile backsplash take?
Typical installations for an average kitchen run 1–3 days: one day for prep (measuring, cutting, surface priming), one day for setting tiles, and 24 hours for thinset to cure before grouting.
Grouting and sealing add another day.
Expect longer if you need extensive cutting, plumbing adjustments, or custom patterns; plan accordingly.
Can I install subway tile over existing tile or wallpaper?
Can you put new subway tile over existing tile or wallpaper? You can sometimes, but surface must be sound, clean, and level.
Remove loose wallpaper and sand glossy tile; use a good bonding primer or thinset and a suitable membrane.
If tiles are hollow, cracked, or uneven, demo and start fresh.
Always check manufacturer’s adhesion guidelines before proceeding.
What grout width looks best with subway tile?
Wondering what grout width will make your subway tile look its best? Choose based on style and tile tolerance:
1/16″ gives a crisp, modern look if your tiles are uniform;
1/8″ is the versatile standard, forgiving slight size variations and offering clean lines.
For a classic, vintage feel, go up to 3/16″.
Test samples with your tile and grout color before committing.
How do I cut tiles for outlets and corners safely?
When you’re cutting tiles for outlets and corners, measure twice, mark clearly, and use the right tools so each cut is clean and safe.
Use a carbide nipper for small notches, a wet tile saw for straight cuts, and a tile scribe for adjustments.
Wear goggles and gloves, clamp tiles, score lines steadily, and test-fit pieces before installing to avoid mistakes.
How do I maintain and clean a subway tile backsplash?
If you keep up with simple, regular care, your subway tile backsplash will stay bright and hygienic with minimal effort.
Wipe tiles daily with a damp microfiber cloth and mild dish soap.
For grout, scrub monthly with a baking soda paste or grout cleaner and a stiff brush.
Reseal grout yearly, address stains promptly, and avoid harsh abrasives to preserve finish.