How to Install Outdoor Tile That Lasts Through Every Season
You can make outdoor tile last through every season by picking frost-rated, slip-resistant materials like porcelain or sealed stone, creating a sloped, well-draining subbase, and using polymer-modified thin-set and weatherproof grout. Leave proper joint widths and install expansion joints for movement, then seal and inspect regularly to prevent moisture damage and UV fading. Protect tiles during curing and adjust de-icing and cleaning seasonally; continue for step-by-step guidance and climate-specific tips.
Quick Answer Can Outdoor Tile Be Installed to Last Through Every Season?
Yes—you can install outdoor tile to withstand every season if you follow the right steps and use proper materials.
You’ll need frost-resistant tiles, a sloped, well-draining base, weatherproof thinset and grout, and expansion joints to handle freeze-thaw cycles.
Proper substrate preparation, correct installation techniques, and regular maintenance are the keys to long-lasting results.
Direct summary of key steps and requirements
1 clear plan and the right materials will let outdoor tile survive every season: choose frost-rated, slip-resistant tiles, set them on a properly sloped, well-draining substrate, use a polymer-modified, weatherproof thin-set or mortar, and grout/seal with a flexible, weatherproof product designed for exterior use.
- Pick suitable tiles
- Prep drainage and slope
- Use proper thin-set
- Maintain correct joint width
- Seal and inspect regularly
Understanding Outdoor Tile What It Is and Why Seasonal Durability Matters
You’ll want to know what each outdoor tile material—porcelain, natural stone, concrete, pavers, and ceramic—actually does in different seasons so you can pick the right one.
Consider how freeze-thaw cycles, UV, moisture, salt, and big temperature swings will affect performance and lifespan.
Also check local codes and standards for slip resistance, frost rating, and outdoor-grade certification before you buy.
Types of outdoor tile materials and seasonal performance (porcelain, natural stone, concrete, pavers, ceramic)
When choosing outdoor tile, you’ll want to match material to climate and use—porcelain resists freeze-thaw cycles, natural stone offers beauty but needs sealing, concrete and pavers handle heavy loads and thawing well, and ceramic is best left for covered areas. Choose wisely to protect investment and mood.
| Material | Feeling |
|---|---|
| Porcelain | Secure |
| Stone | Elegant |
| Concrete | Rugged |
| Ceramic | Cozy |
Climate factors that affect outdoor tile longevity (freeze-thaw, UV, moisture, salt, temperature swing)
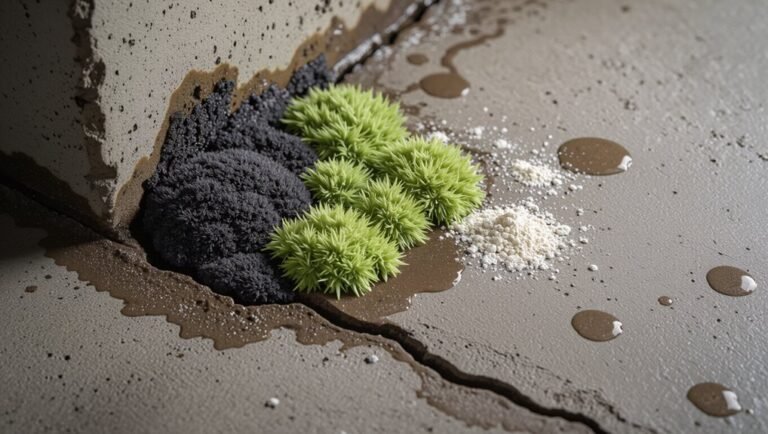
Because outdoor tiles face wide swings in weather, you’ll want to contemplate freeze-thaw cycles, UV exposure, moisture, salt, and temperature swings before you pick a material—the wrong choice can crack, fade, or spall over a few seasons.
- Freeze-thaw: resist water absorption to prevent cracking.
- UV: choose fade-resistant finishes.
- Moisture: guarantee proper drainage and sealants.
- Salt: pick tolerant materials near sidewalks/sea.
- Thermal swing: allow for expansion joints and flexible adhesives.
Codes and standards to consider (slip resistance, frost rating, outdoor grade)
Several key standards will guide your outdoor tile choices so the installation stays safe and durable through seasons.
You should check slip-resistance (R or COF ratings), frost rating (freeze-thaw resistance), outdoor grade (PEI or manufacturer spec), water absorption, and local building codes.
Match ratings to use: entryway, patio, pool, or walkway for long-term performance.
- Slip resistance (COF/R)
- Frost rating
- Outdoor/PEI grade
- Water absorption
- Local code requirements
Planning Your Project Site Assessment and Material Selection
Before you start, survey the site for drainage, slope, soil, sun exposure, and the condition of any existing substrate so you can plan proper prep.
Pick tiles rated for your climate and planned use—consider freeze-thaw ratings, surface texture for slip resistance, size, and edge finish—and make a concise tools and materials checklist.
Finally, set a realistic budget and timeline that account for prep work, materials, and potential delays.
Assessing site conditions (drainage, slope, soil type, sun exposure, existing substrate)
When you’re planning outdoor tile, start by evaluating the site: check drainage patterns, measure the slope, test the soil type, note sun and wind exposure, and inspect the existing substrate for stability and cracks so you can choose materials and underlayment that won’t fail.
- Map water flow and low spots
- Verify slope away from structures
- Classify soil drainage and compaction
- Record sun/shade and prevailing winds
- Assess substrate flatness and cracks
Choosing the right tile for your climate and use (ratings, surface texture, size, edge finish)
Since outdoor tiles face weather, traffic and seasonal freeze-thaw cycles, pick products rated for exterior use in your climate and suited to the planned activity level.
Consider slip resistance, frost rating, size for movement control, and edge finish for drainage and safety. Match texture to use and maintenance needs.
- Porcelain frost-rated
- R11 slip rating for wet areas
- Larger tiles for low-movement zones
- Beveled or rounded edges
- Textured finish for grip
Required tools and materials checklist
As you assess the site and finalize materials, create a clear checklist of tools and supplies so you won’t interrupt work to run for missing items.
Verify tile count, mortar type, grout, and sealant suited to your climate. Gather safety gear and substrate prep tools, and confirm equipment condition before starting.
- Wet saw with diamond blade
- Polymer-modified thinset
- Weatherproof grout and sealer
- Leveling system and spacers
- Safety glasses, knee pads, gloves
Budgeting and timeline considerations
Before you cut or lay a single tile, map out a realistic budget and timeline so surprises don’t derail the job: plan labor, materials, permits, and contingency.
Break tasks into phases, set milestone dates, and track progress to avoid weather or supply delays.
- Estimate material and tool costs
- Allocate labor hours and rates
- Add 10–20% contingency
- Schedule around weather
- Reserve delivery/permit windows
Step 1: Preparation Site Prep and Subbase Construction
Start by clearing and measuring the area, then mark your tile layout and any required expansion joints so everything fits and moves correctly.
Excavate to the proper depth based on whether you’re in a freeze-prone or mild climate and build the specified subbase layers and compaction.
Finally, establish drainage and a minimum slope (usually 1/8–1/4 inch per foot) toward drains or away from structures to prevent water pooling.
Clearing and measuring the area; marking layout and expansion joints
Clear the area of debris, vegetation, and any loose materials, then measure and square the space so your tile layout will fit evenly and drains or slopes work properly.
- Mark centerlines and dry-fit tiles to find best starting point.
- Note slope direction toward drains.
- Snap chalk lines for grout joints.
- Plan 3–10 mm expansion gaps at edges and junctions.
- Record measurements for material ordering.
Excavation depth and subbase specifications for freeze-prone vs mild climates
Because ground conditions and frost depth dictate how deep you need to dig, determine excavation depth by local frost line and anticipated loads:
You’ll excavate deeper in freeze-prone areas, build thicker subbase layers, and compact thoroughly.
Consider material choices and load ratings for tiles and traffic.
- Freeze-prone: 12–24″ subexcavation, 6–12″ compacted crushed stone
- Mild: 6–12″ total
- Geotextile underlayment
- 4″ compacted bedding sand
- Proof-roll before installing
Installing proper drainage and slope (minimum slopes, drain placement)
1 key to a long-lasting outdoor tile installation is getting the drainage and slope right from the outset, so water runs away from the tile and substrate rather than pooling beneath it.
You’ll grade surfaces a minimum 1/4″ per foot, position linear or point drains at low points, and guarantee waterproof membranes tie into drains for positive flow.
- Minimum slope: 1/4″ per foot
- Direct flow to drains
- Use linear drains where possible
- Tie membrane into drainage
- Check fall with level and string
Step 2: Substrate and Underlayment Creating a Stable Base
Next, you’ll pick and install the right substrate and underlayment to keep your outdoor tile stable for years.
Decide between a compacted aggregate base with proper compaction specs, a concrete slab, a mortar bed, or a bonded mortar system based on your climate and load requirements.
Plan for waterproofing, crack-isolation membranes, and any needed vapor barriers.
Properly chosen and installed layers prevent movement, moisture problems, and premature tile failure.
Choosing and installing compacted aggregate base (types, compaction specs)
A solid compacted aggregate base gives outdoor tile the support and drainage it needs, so choose a material and compaction method that match your soil, climate, and tile type.
Compact crushed stone or gravel in 4–6 inch lifts, aim for 95% relative compaction, guarantee 2% slope for drainage, and add a geotextile over weak soils.
- Crushed stone (3/4″)
- Washed gravel
- Recycled aggregate
- Compaction plate
- Geotextile membrane
Installing a concrete slab vs mortar bed vs bonded mortar (pros/cons by climate)
When you’re creating the stable base for outdoor tile, choosing between a concrete slab, a traditional mortar bed, or a bonded mortar layer depends on your climate, soil conditions, and the tile type you’ll use—each method offers different strength, drainage, and freeze-thaw performance. Choose slab for stable soils/cold climates; mortar bed for slope/drainage; bonded mortar for thin tiles/warm climates.
| Method | Best climate | Key pro/con |
|---|---|---|
| Concrete slab | Cold/stable | Durable / heavy |
| Mortar bed | Variable | Adjustable slope / thicker |
| Bonded mortar | Warm | Thin profile / less tolerant |
Waterproofing, crack isolation membranes, and vapor barriers
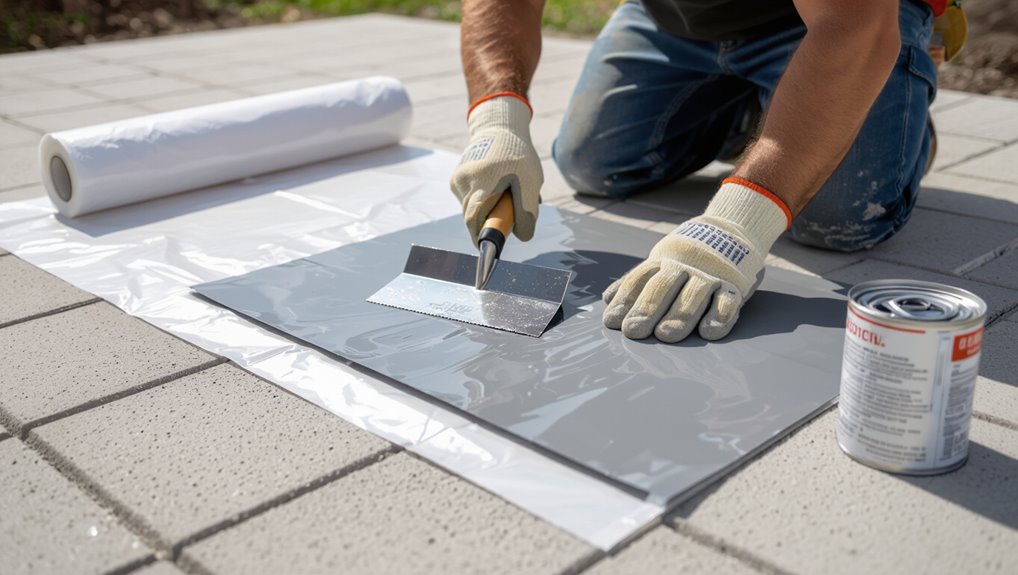
Because outdoor tile sits between weather and structure, you’ll want to stop water and movement before they damage the installation: apply a continuous waterproof membrane, use a crack isolation layer over joints, and add a vapor barrier under slabs in freeze-prone areas.
Choose compatible materials and follow manufacturer seams/seal methods.
- Liquid-applied waterproofing
- Sheet membranes
- Crack isolation mats
- Vapor barriers
- Proper flashing and drains
Step 3: Tile Installation Process Laying Outdoor Tile That Lasts
You’ll pick adhesives and mortars rated for outdoor and freeze-thaw conditions, then plan a layout that minimizes cuts and waste by dry-fitting tiles first.
Set tiles with consistent bed thickness and even pressure, maintain correct spacing with expansion joints and proper edge treatments to allow movement.
Finish with the right grout and joint materials chosen for weather resistance and long-term durability.
Mixing and selecting adhesives and mortars for outdoor/freeze conditions
If you’re installing tile where temperatures drop below freezing, choose adhesives and mortars formulated for exterior, freeze-thaw conditions so the bond stays strong despite expansion and contraction.
Mix per manufacturer ratios, avoid adding extra water, and work within pot life. Cure times matter.
- Use polymer-modified thinset rated for freeze-thaw
- Select rapid-set if rain/schedule risk
- Follow temperature limits
- Measure accurately
- Store materials dry and warm
Layout, cutting, and dry-fitting tiles to minimize waste
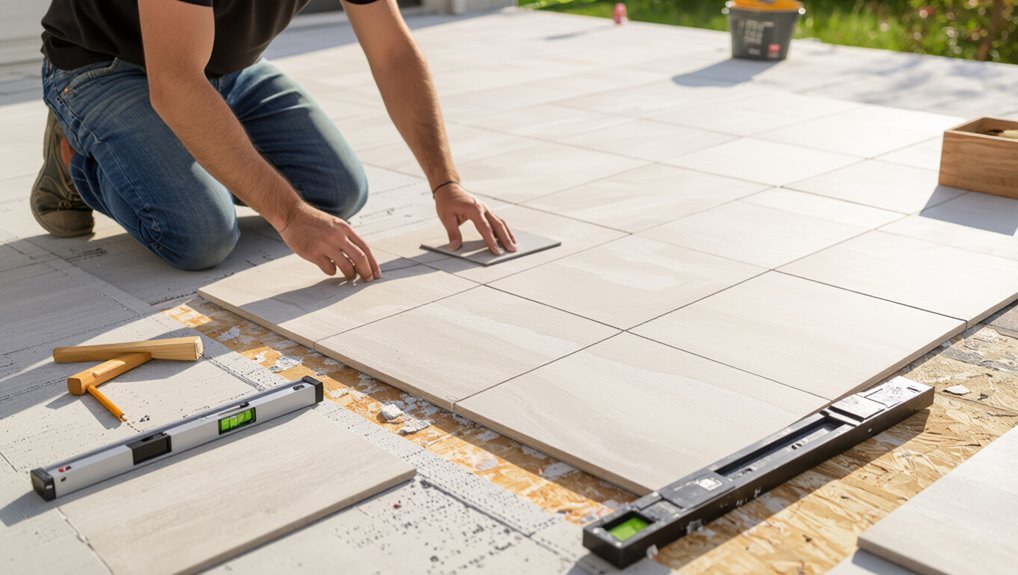
When you plan the layout and dry-fit tiles before spreading adhesive, you cut waste, prevent awkward small edge pieces, and make sure grout lines land where they look best.
Walk the pattern, adjust for focal points, and mark cuts. Use a wet saw for accuracy and score for small trims.
- Measure twice, cut once
- Start from a focal line
- Dry-fit full rows
- Minimize tiny edge pieces
- Label cut tiles
Setting tiles: techniques for even bedding and ensuring proper bed thickness
Spread the mortar carefully and set each tile with firm, even pressure so the bedding is uniform and the slab sits at the proper thickness.
You’ll check thickness with a straightedge and adjust mortar to prevent hollow spots. Tap tiles gently with a rubber mallet and re-level as needed for consistent contact and slope.
- Use a notched trowel
- Back-butter large tiles
- Check with straightedge
- Tap and re-seat
- Remove excess mortar
Spacing, expansion joints, and edge treatments to accommodate movement
After you’ve leveled and seated the tiles, plan grout spacing, expansion joints, and clean edge details to let the installation shift without cracking.
You’ll size gaps for thermal movement, align joints with substrates, and protect exposed edges.
- Keep consistent grout joints per tile size
- Place movement joints at 8–12 ft intervals
- Isolate around fixed structures
- Use flexible edge trim
- Seal connections to prevent water intrusion
Grouting and joint materials: types, installation, and weather resistance
Because grout and joint materials lock your layout together and control water and movement, choose types and installation methods that match your climate and tile system.
Use flexible polymer-modified grout or epoxy for freeze/thaw and moisture. Backer rod in wide joints prevents grout sag. Tool joints concisely and cure fully before traffic.
- Polymer-modified cement grout
- Epoxy grout
- Sanded vs unsanded
- Backer rod
- Proper joint tooling
Sealing tiles and grout: when and which sealers to use
When should you seal outdoor tile and grout, and which sealer fits your job?
You’ll seal after grout cures (usually 72 hours) and before heavy use.
Choose based on tile porosity, UV exposure, and freeze-thaw cycles.
Apply penetrating sealers to stone, topical to porcelain, and silicone-based for high water resistance.
- Penetrating (natural stone)
- Topical (porcelain)
- Acrylic (economical)
- Silicone (waterproofing)
- Epoxy (high traffic)
Step 4: Finishing Touches and Curing Post-Installation Care
After the tiles are set and grout’s tacky, you’ll protect the surface from foot traffic and heavy items while it cures.
Take precautions through the first season—avoid pressure washing, use gentle cleaners, and keep planters elevated to prevent stains and trapped moisture.
If winter’s coming, winterize by sealing if recommended and shielding the patio from freeze-thaw cycles with coverings and proper drainage.
Protection during curing and first-season precautions
Although the mortar and grout feel firm within a day, they need time to reach full strength, so shield the new surface from traffic, heavy loads, and rapid temperature swings during the curing period.
You’ll limit damage and staining by controlling moisture and access. Follow these steps:
- Keep foot traffic off for 24–48 hours
- Avoid furniture and grills for a week
- Protect from rain with tarps
- Maintain steady moisture, not soaking
- Clean spills promptly
Seasonal considerations for initial months (winterizing newly installed tile)
You’ve protected the new surface during curing; now think about how seasonal changes will affect those first months.
You’ll need to shield grout from freeze-thaw cycles, avoid heavy salt, and maintain gentle drainage. Monitor for movement and repair promptly. Follow manufacturer temperature limits and delay heavy use until fully cured.
- Cover during frosts
- Use non-corrosive deicer
- Guarantee slope/drainage
- Inspect weekly
- Delay heavy loads
Maintenance Plan Long-Term Care to Withstand Every Season
To keep your outdoor tile looking great year after year, stick to a routine of sweeping, gentle washing, and timely stain removal, plus a re-sealing schedule to protect surfaces.
Check and repair grout, joints, and any cracked tiles as soon as you spot issues to prevent water damage.
Adjust care for the season—avoid salt-based de-icers and allow for thermal movement in summer to prevent cracking.
Routine cleaning, re-sealing schedule, and stain removal
Because outdoor tile faces sun, rain, freeze and foot traffic, a simple maintenance routine keeps it looking sharp and prevents costly repairs.
You’ll clean regularly, re-seal on schedule, and tackle stains promptly to extend life.
- Sweep and rinse weekly
- Deep clean with pH-neutral soap monthly
- Re-seal every 1–3 years
- Blot stains immediately
- Use appropriate stain remover for tile type
Inspecting and repairing grout, joints, and cracked tiles
When seasons change, inspect grout, joints, and tiles at least twice a year so small issues don’t turn into costly repairs.
Check for loose, cracked, or missing grout; replace or repair promptly to keep water out. Remove debris, reseal joints as needed, and swap damaged tiles to prevent spread.
- Check grout lines for gaps
- Probe joints for movement
- Clean debris from cracks
- Reseal repaired areas
- Replace cracked tiles
Winter and summer-specific maintenance tips (de-icing, thermal expansion)
After you’ve repaired grout, joints, and any cracked tiles, shift focus to seasonal threats that can undo your work: freezing water and repeated temperature swings in winter, and intense heat plus UV exposure in summer.
You’ll prevent damage by adjusting care and materials.
- Use calcium chloride, not rock salt
- Clear snow promptly
- Allow for expansion gaps
- Seal surfaces annually
- Shade or UV-stable sealant
Common Mistakes and How to Avoid Them
Watch for four common problems that’ll doom an outdoor tile job: poor substrate prep and compaction, choosing the wrong tile or adhesive for your climate, bad joint design or drainage, and exposing work before it’s cured.
You can prevent most failures by preparing a stable base, picking materials rated for freeze/thaw and UV, designing joints and slopes for water run-off, and protecting new installations until they reach full strength.
Follow those rules and you’ll avoid costly repairs and replacements.
Mistakes in substrate preparation and compaction
One of the most common mistakes you’ll make during substrate preparation and compaction is underestimating how critical a stable base is to long-term tile performance.
Skipping proper grading, inadequate compaction, or mixing fines into drainage layers leads to settling, cracking, and water pooling. You must test, grade, compact in lifts, and keep drainage clean to avoid failures.
- Check soil-bearing capacity
- Grade to slope
- Compact in layers
- Use clean aggregate
- Verify moisture control
Wrong tile or adhesive selection for climate
Even with a rock-solid base, choosing the wrong tile or adhesive for your climate will undo your prep work—freeze-thaw cycles, extreme heat, and prolonged moisture each demand specific materials.
You should match frost-rated tiles and polymer-modified thinset to conditions, avoid interior adhesives, and verify thermal expansion compatibility.
- Pick frost-resistant porcelain
- Use flexible, polymer thinset
- Avoid mastic outdoors
- Check manufacturer ratings
- Allow proper curing times
Improper joint design and drainage issues
If you don’t plan joints and drainage correctly, water will collect, freeze, and crack tiles or wash out the bedding beneath them.
You must design slope, weep channels, and expansion joints so moisture moves away. Inspect grout and sealants, and avoid flat pockets where water pools.
- Guarantee 1/8–1/4″ expansion joints
- Create 1–2% slope to drains
- Use flexible sealant
- Include perimeter drainage
- Check for low spots
Insufficient curing and premature exposure
When you expose newly laid outdoor tile too soon, the mortar and grout haven’t developed full strength and can crack, crumble, or wash away under traffic and weather; you should protect and cure properly to avoid costly repairs.
Follow these steps:
- Keep area dry and shaded for recommended cure time
- Avoid foot or vehicle traffic
- Follow manufacturer cure times
- Use curing compounds if advised
- Cover during rain
Comparison: Best Tile Systems by Climate and Use
You’ll choose different tile assemblies depending on climate and exposure: for cold/freezing areas you’ll want frost-resistant tiles, a sloped waterproof membrane, and flexible adhesives;
in hot/arid zones you should use UV-stable, low-absorption tiles with expansion joints and heat-tolerant mortars;
and on coastal sites pick corrosion-resistant metal fixes, stainless or polymer anchors, and grout/sealants rated for salt exposure.
Cold/freezing climates recommended assemblies and materials
Because freezing cycles and moisture movement stress every layer of an outdoor tile assembly, you need systems that resist freeze-thaw damage, allow controlled drainage, and keep tiles bonded to a stable substrate. Use frost-resistant porcelain, polymer-modified mortars, fluid-applied membranes, and drainage mats to prevent uplift and spalling.
| Component | Material | Purpose |
|---|---|---|
| Tile | Porcelain | Low absorption |
| Mortar | Polymer-modified | Flexible bond |
| Underlayment | Drainage mat | Water control |
| Membrane | Fluid-applied | Crack isolation |
Hot/arid climates recommended assemblies and materials
While dry heat and intense sun put different stresses on outdoor tile assemblies than freezing cycles do, you can protect installations by choosing materials that tolerate thermal movement, resist UV and salt exposure, and shed water quickly during occasional storms. Use large-format porcelain, decoupling membranes, and flexible, high-temperature-rated adhesives to prevent cracking and debonding.
| Material | Benefit |
|---|---|
| Porcelain | Low porosity, UV stable |
| Flexible adhesive | Accommodates movement |
| Decoupling membrane | Prevents stress transfer |
Coastal/salt-exposure environments recommended assemblies and materials
If you move from hot, arid sites to coastal settings, prioritize materials that stand up to salt spray, wind-driven moisture, and high humidity. Choose porcelain, stainless or coated metals, polymer-modified mortars, and epoxy grouts; avoid untreated steel. Regular rinsing and sacrificial coatings extend life.
| Material | Purpose |
|---|---|
| Porcelain | Low porosity |
| Epoxy grout | Chemical resistant |
| Stainless trim | Corrosion resistant |
| Polymer mortar | Flexible bond |
| Sacrificial coating | Surface protection |
Cost Estimates and When to Hire a Pro
You can save money doing outdoor tile yourself by buying materials and handling simple prep, but factor in tools, membrane, and potential mistakes.
If grading is complex, the substrate needs structural work, or you want a warranty, you’ll want to hire a contractor.
Below we’ll compare DIY estimates to pro bids and list clear signs to call in help.
DIY cost breakdown vs professional installation
Budgeting for outdoor tile comes down to materials, labor, and the unexpected—so know what you’ll tackle yourself and what’s worth hiring out.
You can save on basic prep, adhesive, and tile but expect tool costs and time. Pros add speed, guarantees, and quality control.
- Tile and adhesive costs
- Tool rental or purchase
- Your labor time
- Professional labor rates
- Contingency fund
Signs you should hire a contractor (complex grading, structural substrate, warranties)
When a project involves complex grading, structural substrate work, or you want a formal warranty, bring in a licensed contractor who’s equipped to manage permits, proper drainage, and long-term performance.
You’ll save time, avoid costly mistakes, and secure liability coverage and guarantees.
Consider hiring one when:
- Slope or drainage is unclear
- Load-bearing structures are affected
- Local permits are required
- Warranty is desired
- Timeline or safety risks are high
FAQ Common Questions About Installing Outdoor Tile
You probably have a few quick questions before you start, like whether you can tile over an existing concrete patio and how soon you can use the space after installation.
You’ll also want to know how to prevent tiles from popping after freeze‑thaw cycles, which grout and sealer resist salt and de‑icers, and how much slope is required for proper runoff.
Below are clear answers to those common concerns to help you plan the job.
Can I install outdoor tile over an existing concrete patio?
Yes — in most cases you can install outdoor tile over an existing concrete patio, but the slab must be sound, clean, and properly prepared first.
Check for cracks, spalling, and level; repair and fill as needed.
Remove contaminants, etch or mechanically profile smooth surfaces, and guarantee proper slope and drainage.
Use a suitable exterior mortar and flexible grout for long-lasting adhesion.
How do I prevent tiles from popping up after freeze-thaw cycles?
If your tiles keep popping after freeze-thaw cycles, prevent damage by using frost-resistant materials, proper substrate preparation, and a flexible installation system that accommodates movement.
You should install a stable, well-draining base, include expansion joints, use an elastic thinset or mortar, and bond tiles fully with correct coverage.
Monitor slope for runoff and address cracks promptly to stop water intrusion and repeated freeze damage.
What grout and sealer will resist salt and de-icing chemicals?
After protecting tiles from freeze-thaw movement, pick grout and sealer that stand up to salt and de-icing chemicals to prevent staining, surface erosion, and joint breakdown.
Use epoxy or polyurethane grout; they’re non-porous, flexible, and chemical-resistant.
Seal with a penetrating silane/siloxane or fluorinated sealer rated for chlorides and salts.
Reapply per manufacturer guidelines and clean residues promptly to extend durability.
How much slope is required for water runoff on outdoor tile?
A minimum slope of 1/4 inch per foot (about 2%) is generally required for outdoor tile to guarantee proper water runoff; for heavy rainfall areas or long runs increase that to 1/2 inch per foot (about 4%) where possible.
You should pitch surfaces away from the house, maintain consistent slope across the field, and avoid low spots.
Use a level or laser to check runs during installation.
How soon can I use the patio after installation?
Because tile, thinset, grout, and any curing compounds need time to set properly, you should wait before using the patio so you don’t damage the installation.
Generally, wait 24–48 hours for light foot traffic, 72 hours for heavier use, and at least seven days before moving furniture or grills.
Check product instructions and local climate—cooler or damp conditions can extend curing times.