How Long Does It Take to Lay Laminate Flooring? (Room-by-Room Timeline)
You can usually lay laminate flooring in a small room in a few hours, a standard bedroom or living room in most of a day, and large open-plan areas or kitchens in a full day or more depending on prep and obstacles. Allow extra time for subfloor repairs, underlayment, cuts around fixtures, and acclimation. With a helper and simple layout you’ll move faster; keep going for a room-by-room timeline and stepwise tips to speed the job.
Quick Answer How Long It Takes to Lay Laminate Flooring
For a quick estimate, you can expect a small room (under 100 sq ft) to take a few hours.
A medium room (100–300 sq ft) most of a day, and a large open area a full day or more.
Your actual time will shift based on prep work, room shape, doorways, and how experienced you or your installer are.
Keep those factors in mind when planning so you don’t underestimate the schedule.
Typical time ranges for different room sizes
A small bedroom or hallway usually takes about 2–4 hours to lay, while a typical 10×12 room will often be finished in 4–8 hours if you’re working steadily and the subfloor is ready.
Larger spaces like open-plan living areas typically require 8–16 hours. Expect a full 200–400 sq ft area to take a day, while very large rooms may span two days.
Factors that make projects take longer or shorter
Those time ranges give you a baseline, but several factors can speed things up or slow you down.
You’ll be faster with straight layouts, good subfloor prep, and fewer obstacles. Unexpected issues or complex patterns add time.
Consider your skill level and tools when estimating.
- Subfloor condition
- Room layout/obstacles
- Installer experience
Basic Understanding What Laminate Flooring Installation Involves
To get a realistic sense of timing, you should first know what laminate flooring is—layers of wear, design, core, and backing—and the common types like AC-rated commercial planks or water-resistant options.
You’ll also want to understand the main installation methods (floating click-lock, glue-down, or adhesive-backed) since each affects prep and pace.
Finally, gather the right tools and materials—underlayment, spacers, saw, tapping block, and adhesive or trim—so you won’t slow the job down.
What laminate flooring is and common types
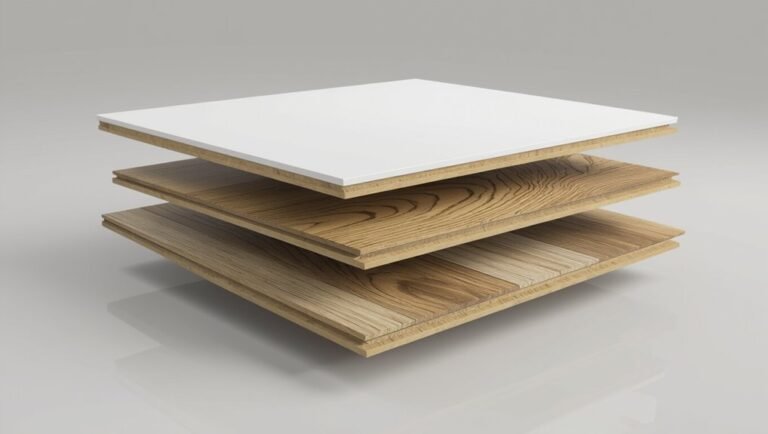
Think of laminate flooring as a layered, engineered surface that mimics wood or stone while resisting scratches and moisture better than real hardwood.
It’s made of a wear layer, decorative image, core, and backing.
You’ll choose from AC ratings (durability), standard HDF cores, moisture-resistant or water-resistant varieties, textured vs. smooth finishes, and plank widths/colors to fit traffic, room function, and your style.
Installation methods (floating, glue-down, click-lock)
There are three common ways to install laminate flooring—floating, glue-down, and click-lock—each with different prep, tools, and performance you should consider.
You’ll choose floating for quick, gap-tolerant installs over underlayment; glue-down for permanent adhesion on suitable subfloors and better sound; and click-lock for DIY-friendly, fast assembly without adhesive, allowing easier panel replacement later.
Tools and materials required
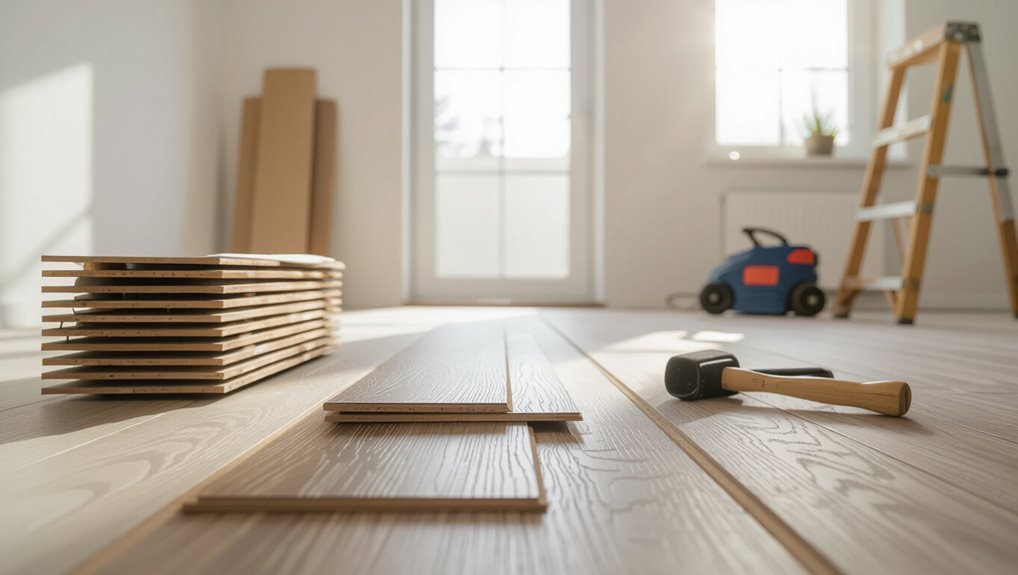
Tools and materials you’ll need depend on the installation method, room size, and subfloor condition, but a reliable core kit is consistent: a tape measure, utility knife, saw (miter, circular, or laminate-specific), spacers, tapping block and pull bar, level, chalk line, and underlayment or adhesive as required.
You’ll also want safety gear and extra planks for cuts and damage.
- Preparation
- Cutting
- Finishing
Room-by-Room Timeline Estimates (Primary Section)
Next you’ll get room-by-room time estimates so you can plan the job and your schedule.
I’ll cover typical hours and step-by-step workflow for small and master bedrooms, living/family rooms, kitchens, and bathrooms.
For kitchens and bathrooms I’ll also point out special considerations like cabinets, appliances, and moisture control.
Small bedroom (8—10 to 10—12) estimated hours and workflow
If your bedroom falls between about 8×10 and 10×12 feet, you can typically finish the laminate install in roughly 4–6 hours with one experienced installer—less if you work with a helper.
Start by clearing and prepping the subfloor (30–60 minutes), lay underlayment, then click panels row by row (2–4 hours).
Allow 15–30 minutes for trim and cleanup.
Master bedroom (12—16+) estimated hours and workflow
Moving up to a master bedroom (roughly 12×16 feet or larger) increases the time mostly because of square footage and longer runs you’ll have to manage.
Expect 6–10 hours for a two-person team: acclimate planks, remove trim, underlayment, lay field with staggered seams, cut perimeter boards, install connections and baseboards, then clean and inspect.
Complex closets or thresholds add time.
Living room / family room estimated hours and workflow
A typical living or family room (often 15×20 feet or larger) usually takes a two-person crew about 8–12 hours to complete:
You’ll clear furniture, remove trim as needed, lay underlayment, and install planks across the longest sightline.
Expect extra time for door jambs, changes, fireplace surrounds, and irregular walls.
Finish with trim reinstall and cleanup; allow contingency for unexpected subfloor prep.
Kitchen estimated hours and workflow and considerations
Kitchens usually take a bit longer than living rooms because you’ll work around cabinets, appliances, and plumbing—plan on 10–16 hours for a two-person crew in a typical mid-sized kitchen.
Start by removing appliances, undercutting trim, and laying moisture barrier. Work from longest unobstructed wall, stagger joints, and fit around islands.
Allow extra time for appliance reconnects and threshold changes.
Bathroom estimated hours and moisture considerations
Bathrooms demand extra care and usually take a bit longer than other small rooms because you’ll be working around fixtures and higher moisture exposure.
Expect 4–8 hours for a small bathroom: remove trim, cut around toilets and vanities, and fit boards precisely.
Use water-resistant underlayment, seal connections, and leave expansion gaps.
Allow extra time for adhesive curing and reinstalling fixtures.
Hallways and staircases estimated hours and special steps
If you handled a bathroom, you’ll know hallways and staircases bring their own challenges and usually take longer than a single room.
You’ll spend extra time measuring runs, cutting narrow planks, and fitting connectors.
Stairs require precise nosing, secure attachments, and may need underlayment adjustments.
Expect 1–3 hours per hallway segment and 30–60 minutes per stair, depending on complexity.
Open-concept spaces and combined rooms estimated timeline and coordination
Because open-concept areas combine multiple functions and long sightlines, you’ll spend more time coordinating shifts and sequencing work than you’d in isolated rooms.
Plan for 1.5–3× the single-room installation time: expect 1–3 days for 300–800 sq ft depending on prep, changes, and furniture removal.
Stage materials, protect sightlines, and work from the farthest corner toward main entrances.
Step-by-Step Installation Timeline (Detailed How-To Workflow)
Before you start, you’ll plan and measure the room to figure materials and layout.
Then you’ll prepare the subfloor, acclimate the boards and underlayment, and begin laying the first rows while keeping lines straight.
Finally, you’ll make precise cuts around obstacles and doorways to finish the installation.
Step 1 Pre-installation planning and measuring
Step 1 sets the foundation: measure the room, check subfloor condition, and plan the layout so you won’t hit surprises during installation.
You’ll calculate square footage, note doorways, and decide plank direction. Accurate planning saves time and materials.
- Measure and add 10% waste
- Map seams and junctions
- List needed tools and trim pieces
Step 2 Preparing the subfloor (cleaning, leveling, moisture testing)
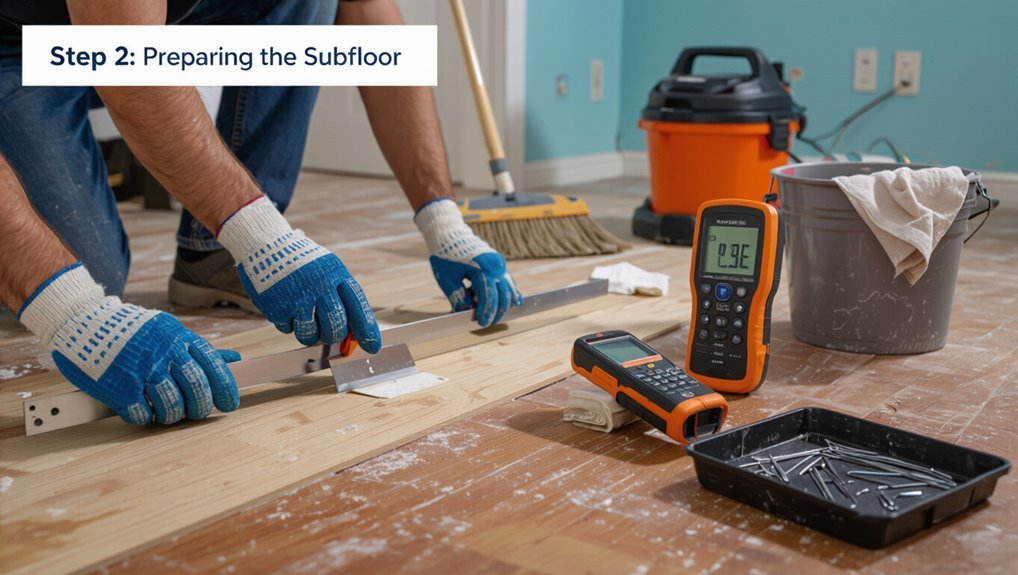
While you’re done with measurements and layout, preparing the subfloor is the critical next move: clean thoroughly, correct any unevenness, and test for moisture so the laminate locks and lasts.
Remove debris, pull staples, and vacuum. Fill low spots with floor patch, sand high areas, and verify flatness with a straightedge.
Use a reliable moisture meter and address any excess before proceeding.
Step 3 Acclimating the flooring and laying underlayment
Allow the laminate planks to acclimate in the room for at least 48 hours and then roll out the underlayment so the floor performs and locks correctly.
Keep boxes closed but open enough for airflow. Check moisture levels again.
Trim underlayment at walls, overlap seams as manufacturer directs, and tape them.
Leave expansion gaps at perimeters and secure vapor barrier where required.
Step 4 Laying the first rows and maintaining straight lines
Before you snap the first row together, lay out a straight reference line and dry-fit several planks to confirm the pattern and spacing—this keeps your rows true from the start.
Start in a corner, tongue toward the wall, maintain expansion gap with spacers, and tap joints snugly with a mallet and block.
Check alignment frequently and straighten any drift as you go.
Step 5 Cutting around obstacles and doorways
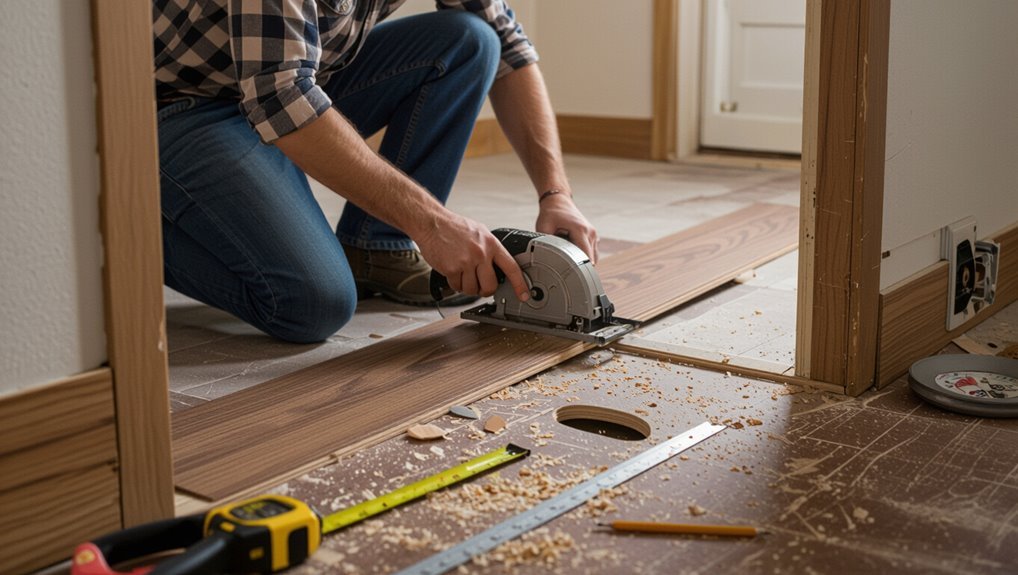
Step 5 is where you cut planks to fit around pipes, vents, and doorways. You’ll want to measure carefully, mark precisely, and cut cleanly so seams stay tight and gaps remain within the expansion allowance.
Use a template for awkward profiles, score and snap for straight cuts, a jigsaw for curves, and dry-fit each piece. Protect exposed edges and double-check clearances.
Step 6 Finishing rows and installing transitions/trim
Finish the last rows by cutting the planks to fit, dry-fitting each piece, and snapping or gluing seams as your system requires;
then install thresholds and trim to cover expansion gaps and create a clean edge where the laminate meets other flooring or walls.
Attach junction strips at doorways, scribe trim to baseboards, and secure quarter round or shoe molding without constraining the flooring’s movement.
Step 7 Cleanup, inspection, and post-installation care
Start by clearing the work area of debris, offcuts, and adhesive residue so you can thoroughly inspect the floor for gaps, lifted edges, or color mismatches.
Then vacuum and damp-mop with the manufacturer’s recommended cleaner to remove dust without harming the finish.
Check seams, junctions, and undercut trim.
Reinstall baseboards, allow recommended acclimation time before heavy use, and follow maintenance guidelines to protect warranty.
Time Estimates by Task (Breakdown Table)
Before you start cutting boards, you’ll want a clear table of task-by-task time estimates so you can schedule the job.
It should list measuring and planning times, subfloor prep durations, and expected laying productivity in square feet per hour.
Use those figures to set realistic daily goals and track progress.
Measuring and planning times
When you measure and plan carefully, you’ll save time and avoid costly mistakes later; this section breaks down the specific tasks—measuring rooms, calculating materials, and sketching layouts—and gives realistic time estimates for each so you can schedule the job accurately.
| Task | Time |
|---|---|
| Measure room dimensions | 15–30 min |
| Calculate materials + waste | 10–20 min |
| Sketch layout and cuts | 20–40 min |
Subfloor prep times
With measurements and a layout in hand, you’ll shift focus to the subfloor—its condition and preparation determine how smoothly the planks go down. Inspect, clean, level, and repair: small cracks take minutes, larger repairs a few hours. Plan for moisture testing. Here’s a quick task breakdown:
| Task | Time Estimate |
|---|---|
| Clean & sweep | 15–30 min |
| Moisture test | 30–60 min |
| Minor leveling | 30–90 min |
| Major repairs | 2–6 hrs |
Laying per-square-foot/hour productivity rates
Once you start installing, productivity usually gets measured in square feet per hour, so knowing typical rates helps you schedule crews and estimate total time. You’ll vary by skill, room complexity, and breaks. Use this quick reference to plan labor and timelines.
| Task | Skill Level | ft²/hour |
|---|---|---|
| Straight run | Pro | 200 |
| Complex cuts | Experienced | 120 |
| Finish/trim | Any | 60 |
Common Problems That Slow Down Installation
You’ll run into a few common issues that add time if you don’t spot them early.
Uneven or damaged subfloors, moisture or humidity problems, bad measurements or layout mistakes, missing or damaged planks, and door clearance or trim complications all force pauses for fixes.
Planning for those setbacks up front will keep the job on schedule.
Uneven or damaged subfloors
Floors that’re uneven or have damaged spots can stall your laminate installation fast—these issues create gaps, cause locking systems to fail, and can lead to squeaks or premature wear.
You’ll need to assess, sand high spots, fill low areas with leveling compound, and replace rotten sections. That prep can add hours or a day, but it’s essential for a stable, long-lasting floor.
Moisture and humidity issues
If moisture’s trapped beneath the laminate or the room’s humidity swings wildly, the planks can swell, warp, or buckle and ruin the locking system—so you’ve got to test for moisture, control humidity, and let materials acclimate before you start.
Use a moisture meter, install a proper vapor barrier on concrete, keep humidity between 35–65%, and delay installation until readings stay stable.
Poor measurements and layout mistakes
Controlling moisture and getting accurate acclimation readings matter, but measurement and layout errors will still derail a smooth install.
If you miscalculate room dimensions, forget expansion gaps, or ignore doorway changes, you’ll waste time cutting and redoing rows.
Plan a balanced layout, snap chalk lines, dry-fit planks, and measure twice before cutting so your installation stays efficient and professional.
Material shortages or damaged planks
A few missing or damaged planks can halt your progress fast, so check shipments as soon as they arrive and set aside extras before you start installing.
If you discover shortages or defects, contact the supplier immediately and reorder matching batches. Don’t force mismatched or damaged pieces; they’ll cause gaps and callbacks.
Keep a small stash of spares for repairs and future matching needs.
Door clearances and trim complications
When doors don’t clear the new laminate, you’ll stall the job fast—measure the gap before laying the first plank so you know whether to trim doors, shave jambs, or add undercutting.
If you skip this, expect pauses to refit trim, re-cut thresholds, or reinstall casings.
Plan tools and time: a jamb saw, planer, and patience will prevent last-minute delays and uneven shifts.
Tips to Speed Up Installation and Avoid Delays
You can save hours by pre-cutting and staging boards before you start laying them.
Prep the room quickly by clearing furniture, checking the subfloor, and organizing tools so you won’t stop mid-job.
If time is tight, consider hiring a pro for complex rooms and use clear roles when working with helpers to keep things moving.
Pre-cutting and staging materials
Although it takes a bit of upfront work, pre-cutting and staging your laminate planks will save hours during installation and prevent frustrating trips back to the garage for missing pieces.
You’ll work faster if you:
- Label bundles by row and doorway.
- Trim end pieces and sort by length.
- Stage underlayment, spacers, and junction strips near each work zone.
How to prep the room fast and efficiently
After pre-cutting and staging your planks, get the room ready so work flows without interruptions.
Remove furniture, trim door casings, and clear baseboards. Sweep and vacuum thoroughly, then check subfloor for bumps or soft spots—repair or shim as needed.
Lay underlayment and tape seams. Keep tools, spacers, and trash bin within reach to maintain momentum and avoid wasted trips.
When to hire a pro vs. DIY for time savings
When tight deadlines or tricky layouts are at stake, weigh the time you’ll spend learning and fixing mistakes against hiring a pro who can finish faster and cleaner.
Choose a pro if rooms have odd angles, changes, or underfloor issues, or if your schedule’s tight.
Go DIY for simple rectangular rooms, matched tools, and if you can commit uninterrupted time to finish correctly.
Best practices for working with helpers
If you decide to bring helpers in—whether friends, family, or hired labor—set clear roles and a simple workflow before any boards get unboxed.
Assign one person to measure and mark, another to cut, a third to fit and tap, and someone to clear debris.
Briefly demo the tongue-and-groove lock, agree on breaks, and keep tools organized to prevent bottlenecks.
Cost vs. Time Tradeoffs
You can save money by doing laminate yourself, but expect a bigger time commitment than hiring pros who finish much faster.
Paying more for labor or expedited scheduling can greatly shorten completion time, especially if you’re coordinating multiple rooms.
For multi-room projects, plan sequencing and contractor availability so higher costs actually buy the faster turnaround you need.
DIY time investment vs. professional faster turnaround
Although tackling laminate flooring yourself can save on labor, you’ll trade cash savings for a bigger time commitment and potential delays.
You’ll spend weekends learning cuts, prepping subfloors, and fixing mistakes.
Professionals work faster with crews, tools, and experience, but cost more.
Weigh your schedule, skill level, and tolerance for interruptions: pick DIY if you have time and patience, or hire if speed matters.
When paying more speeds up completion
Paying more usually gets your laminate floor finished faster because pros bring crews, specialized tools, and scheduling that cut downtime and surprises.
You’ll trade higher hourly or flat rates for speed: extra hands finish demolition, underlayment, and connections quickly.
If you value time, prioritize experienced teams, upgraded tooling, and materials staged in advance so the project moves steadily to completion.
Scheduling considerations for multi-room projects
When you’re planning laminate across multiple rooms, balance how long you’ll wait against how much you’re willing to spend: longer schedules let a single crew move room-to-room and save on labor, while overlapping teams speed completion but raise costs.
You should prioritize critical areas, stagger deliveries, allow acclimation time per room, and decide if convenience or lower expense matters more to your timeline.
Preventive Measures and Best Practices
Before you start laying boards, you’ll want to run moisture tests and work through a subfloor repair checklist to prevent cupping or gaps.
Let the planks acclimate in the room and store them flat as recommended so they settle to the home’s humidity and temperature.
Use a quality underlayment and the right tools—tapping block, pull bar, spacers—to make installation quicker and more durable.
Moisture testing and subfloor repair checklist
Because moisture is the leading cause of laminate failures, you should test the subfloor thoroughly and address any issues before you lay a single plank.
Use a moisture meter, inspect for rot or mold, and repair or replace damaged sections.
Follow this checklist:
- Test moisture levels across the room.
- Remove and replace soft or rotted subfloor.
- Seal cracks and gaps, then recheck moisture.
Optimal acclimation and storage guidelines
If you want your laminate to perform and look its best, acclimate the planks in the room where they’ll be installed for at least 48 hours at normal living temperature and humidity.
Store unopened bundles flat off the floor on a raised, breathable surface.
Keep installed boxes closed until use, avoid damp areas, rotate bundles periodically, and keep humidity between 35–65% to prevent warping.
Quality underlayment and tool recommendations
After acclimating and storing your planks properly, choose the right underlayment and tools to protect the floor and speed installation.
Pick a moisture barrier underlayment for concrete, foam for minor unevenness, or cork for sound reduction.
Use a tapping block, pull bar, and spacers to fit planks precisely.
Proper tools cut time and prevent damage, so don’t skimp.
FAQ Common Questions About Laminate Installation Time
You’ll want clear answers to common timing questions before you start: how long pros take per room, whether you can finish a job in a day, and how much extra time repairs or moisture mitigation need.
Don’t forget underlayment—ask if it adds significant time—and when the room will be ready for normal use.
I’ll walk through each point so you can plan accurately.
How long does it take for professional installers to finish a typical room?
How long will a pro take to install laminate in a typical room?
Expect a skilled two-person crew to finish a 12×12 to 15×15 room in about 3–6 hours: prepping, underlayment, cutting, laying, and trim.
Larger rooms, complex cuts, or removed baseboards add time.
They’ll usually clean up afterward, so your room’s usable by evening.
Can I install laminate flooring in a day?
Wondering if you can finish laminate flooring in a single day?
Yes, for small to medium rooms with a prepared subfloor and basic tools, you can lay laminate in a day.
You’ll need acclimation beforehand, efficient cutting, and focused work.
Larger spaces, complex layouts, or unexpected issues will extend time, so plan realistically and don’t rush final trims or changes.
How much time should I allow for subfloor repairs and moisture mitigation?
If your subfloor needs repairs or moisture mitigation, plan at least a few extra hours for minor fixes and a day or two for more involved work—don’t assume you can skip this step.
You’ll need time for inspection, patching, leveling, or sealing; drying times can add several hours to 48 hours depending on products.
Budget conservatively to avoid delays.
Does underlayment installation add significant time?
Once your subfloor’s sound and dry, adding underlayment won’t blow up your schedule—most rooms take 30–90 minutes to lay, depending on size and the underlayment type.
You’ll unroll or snap together foam, cork, or rubber, trim edges, and tape seams. It’s straightforward prep that slightly extends install time but improves comfort, acoustics, and moisture protection without major delay.
How long after installation can the room be used normally?
How soon can you walk on new laminate? You can walk lightly right away, but avoid heavy furniture or rolling items for 24–48 hours.
Wait 72 hours before replacing rugs or appliances to let adhesives set and seams settle.
For full normal use—moving sofas, beds, and heavy traffic—give it 3 days.
Longer if humidity or temperature extremes occurred during install.