How to Change Laminate Flooring Without Replacing Your Entire Floor
You can change laminate flooring without replacing the whole floor by removing only the damaged planks, preparing the subfloor, and installing matching click‑lock or glued replacements. Start by identifying and marking bad boards, remove trim, disengage seams carefully, and slide in new planks while ensuring proper underlayment and moisture checks. Match color and profile or use blending techniques for visible spots. Follow step‑by‑step tips and troubleshooting to get a professional finish and learn practical alternatives and precautions.
Quick Answer Can You Change Laminate Flooring Without Replacing the Entire Floor?
Yes — you can often change parts of laminate without replacing the whole floor by repairing, replacing individual planks, or refinishing compatible surfaces.
Use repairs for minor damage, swap planks when seams are accessible and matching stock exists, and consider floating-floor refinishing or overlays when the underlayment and profile allow it.
Decide based on the extent of damage, availability of matching pieces, and your skill level.
Short summary of options and when each applies
If you’re not ready to rip up the whole floor, you’ve got several practical options: repair individual planks, refinish or overlay with engineered wood or luxury vinyl planks, or replace just the damaged area using floating-floor techniques.
You’ll learn how to change laminate flooring in targeted ways. Choose by damage size, matching concern, budget, and skill:
- Patch
- Local replace
- Overlay
- Full section replacement
Understanding Laminate Flooring Basics
You’ll want to know that laminate is manufactured planks installed over underlayment, either clicked together or glued down.
The typical components are the wear layer, printed design, core, planks and the underlayment beneath them.
Which installation method was used—click-lock or glued—directly determines how easily you can remove and replace individual boards.
What laminate flooring is and how it’s installed
Laminate flooring mimics wood or stone using a durable, multi-layer construction that locks together for a floating installation, so you won’t need glue or nails in most rooms.
You cut planks to fit, stagger joints, and leave expansion gaps at walls.
You’ll prep a clean, level subfloor, roll out underlayment where required, and snap or tap boards together following manufacturer instructions.
Common components: planks, underlayment, click-lock vs. glued
Planks, underlayment, and the joining system are the core parts you’ll deal with when putting down laminate flooring.
Planks are tongue-and-groove panels with wear layers; underlayment cushions, reduces noise, and evens minor subfloor flaws.
Joining systems come as click-lock floating profiles or glued seams; click-lock lets you lift individual boards, while glued joins create a firmer, more permanent surface.
How installation method affects partial replacement options
How your boards are joined and whether you used underlayment will determine how easy it’s to replace just a few damaged pieces later on.
If you used click-lock over underlayment, you can disengage and lift sections to swap boards.
Glued or fully adhered planks bond to subfloor, making partial repairs harder and messier.
Plan for access and keep spare planks.
When to Repair or Replace Only Part of a Laminate Floor
If you’re facing isolated issues like surface scratches, a few swollen planks from minor water exposure, or loose boards, you can often replace just the affected pieces.
But widespread warping, chronic moisture problems, or mismatched wear usually mean a full replacement is the safer bet.
Before you start, check the subfloor and moisture levels so you don’t reinstall over a hidden problem.
Typical damage types suitable for partial change (scratches, water damage, loose planks)
When parts of your laminate show isolated wear rather than widespread failure, you can often fix just those areas instead of replacing the whole floor.
Scratches and surface scuffs can be buffed, filled, or patched; small water stains or swollen edges often require replacing a few planks; and loose or buckling boards usually need re-seating or targeted replacement to restore stability and appearance.
When full replacement is necessary
Although small fixes can stretch a floor’s life, you should opt for full replacement when damage is widespread, structural, or repeatedly recurring — for example, pervasive water damage, chronic warping across multiple rooms, extensive surface wear beyond repair, or persistent subfloor problems that compromise stability.
Choose replacement when repairs are frequent, mismatched patches look worse, or when long-term performance and resale value demand a unified, reliable surface.
Assessing subfloor and moisture risks before proceeding
Before you start replacing or patching pieces, check the subfloor and moisture conditions carefully so you don’t fix the surface only to have the problem return.
Inspect for soft spots, mold, buckling, and gaps. Use a moisture meter on subfloor and laminate.
Address leaks, ventilation, or damaged underlayment first. Only proceed with repairs when the substrate is dry and structurally sound.
Step-by-Step Guide to Changing Laminate Planks Without Replacing the Entire Floor
Before you start, gather the right tools, safety gear, matching planks, and materials so you won’t stop midway.
First locate and mark the damaged planks, then remove baseboards and connector strips to access them.
I’ll show how to remove click-lock planks and, separately, glued-down or tongue-and-groove planks so you can replace only the affected pieces.
Preparation: tools, materials, safety, matching planks
Gather the right tools and materials, and take a few safety steps so your plank swap goes smoothly and without injury.
You’ll need basic tools, matching planks, and safe work habits. Check plank codes for color/grain, keep extra pieces, and wear PPE. Prepare subfloor and underlayment if needed.
- Tape measure
- Pull bar
- Matching planks
- Gloves and goggles
Step 1 Locate and mark damaged planks
Start by walking the room and scanning the floor to find any planks that are warped, cracked, stained, or loose.
Mark each damaged plank with painter’s tape and a small pencil number so you can track order and orientation.
Note surrounding gaps, direction of the grain, and any matching features on replacement pieces to guarantee seamless installation later.
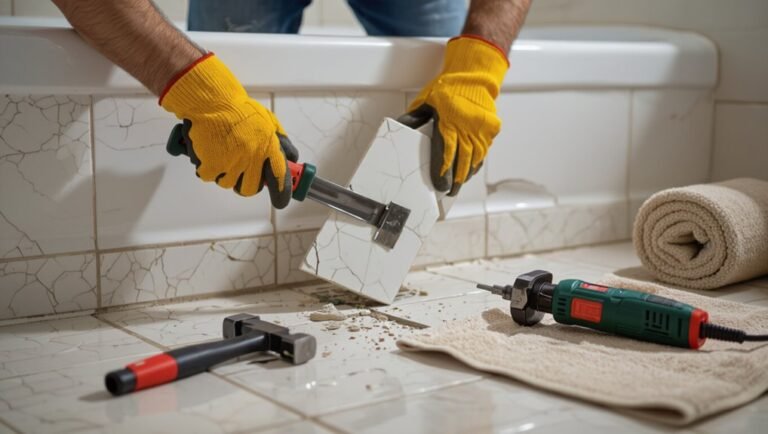
Step 2 Remove baseboards and transition strips
Pull off the baseboards and junction strips carefully so you don’t damage them — you’ll want to reuse these pieces to keep the repair seamless.
Use a flat pry bar and putty knife, working gently from one end. Label each piece and set nails aside.
Keep trim and connections organized by room and orientation so reinstallation is quick and accurate after you replace planks.
Step 3 How to remove individual planks (click-lock method)
Now you’ll remove the damaged plank without disturbing the rest of the click-lock floor.
Score along the plank seam with a utility knife, lift the short edge gently with a pry bar or pull bar to disengage the tongue, then slide the plank toward the nearest free edge to release.
Work slowly to avoid snapping neighboring joints; keep removed pieces for template use when installing the replacement.
Step 4 How to remove glued-down or tongue-and-groove planks
Removing glued-down or tongue-and-groove planks takes a bit more care than click-lock pieces because you’ll be separating bonded joints or hidden fasteners without damaging surrounding boards.
Score seams, heat adhesive with a heat gun, and pry gently with a putty knife or pull bar.
For tongue-and-groove, lift along the joint and work progressively.
Clean residual glue and inspect subfloor before installing replacements.
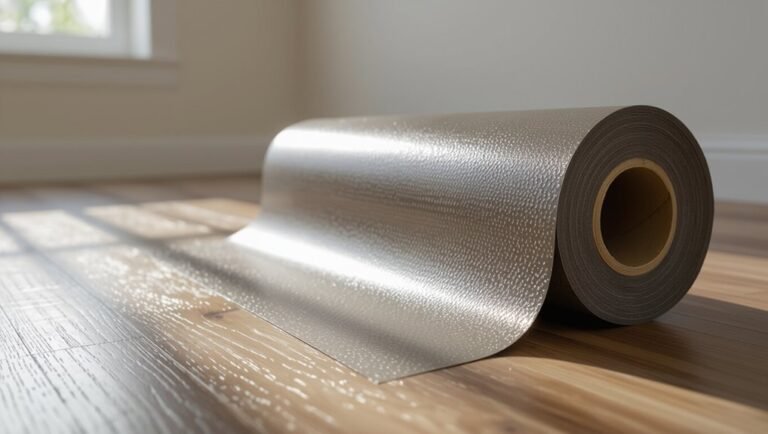
Step 5 Preparing replacement planks and underlayment
With the old plank out and the subfloor cleaned, get the replacement plank and underlayment ready so installation goes smoothly.
Measure and trim the replacement to match length and profile. Cut underlayment pieces slightly larger than the repair area, then trim after fitting.
Dry-fit the plank to confirm gap and orientation. Keep extra spacers and adhesive handy for a tight, stable fit.
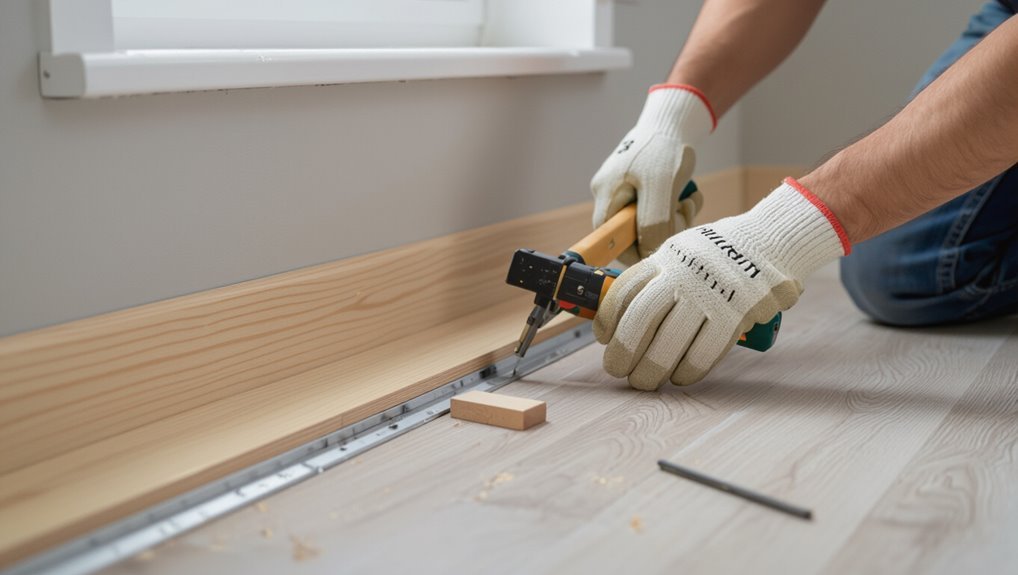
Step 6 Installing replacement planks and ensuring proper seam alignment
Begin by positioning the trimmed replacement plank into the gap, angling its tongue into the groove of the adjoining board and lowering it slowly to engage the lock; you’ll feel or hear a click when it seats properly.
Press seams together, tap gently with a block and mallet to close gaps, verify alignment along row, and check for levelness.
Trim or shim if needed.
Step 7 Reinstalling baseboards and transitions; finishing touches
Step 7 wraps up the job by putting baseboards and connection strips back in place and adding final checks so your repair blends seamlessly with the rest of the floor.
Reattach baseboards gently, nail or glue as needed, reinstall threshold strips, and caulk gaps.
Clean the area, inspect seams and height changes, touch up paint or trim, and let adhesive or caulk cure before full use.
Alternative Methods When Planks Can’t Be Removed Individually
If you can’t lift individual planks, you can cut a discreet repair access panel to reach the damaged area.
You might also remove and replace a full room strip or section for a cleaner match, or use patch kits and surface repair products for minor chips and scratches.
I’ll explain how to choose and execute the best option for your situation.
Creating a repair access panel
When you can’t lift individual laminate planks without cutting the floor, creating a discrete repair access panel gives you a neat way to reach subfloor or utilities without ripping out large sections.
You’ll cut a panel into a run of planks and secure it so it blends with the surrounding floor while remaining removable for future work.
Mark a rectangle between joints, cut cleanly, reinforce edges with plywood, and fit a removable trim.
Replacing an entire room strip or section
Sometimes you’ll need to replace a whole strip or section of laminate because individual planks won’t budge; in that case you’ll remove the entire run and reinstall a matching strip, working from the far wall toward the door so you can preserve the floor’s expansion gap and keep joins tight.
Score and lift tongues, trim undercut door casings, test-fit new boards, and glue or click them together, tapping seams flush.
Using patch kits and surface repair products
Reach for a patch kit or surface repair product when you can’t pull a plank without damaging surrounding boards — these kits let you fix scratches, chips, and small gouges without ripping up the floor.
You’ll match color, fill voids, sand smooth, and seal for durability. Apply carefully and test on scrap first.
- Color match
- Fill
- Sand
- Seal
Matching New Planks to Existing Floor
You’ll want to identify the exact model, color and wear layer of your existing planks before shopping.
Check leftover stock, contact the manufacturer, or search classifieds and local flooring yards to source matching pieces.
If you can’t find an exact match, blend new and old planks with a deliberate pattern or connecting strip to minimize the visual difference.
How to identify model, color, and wear layer
Want the new planks to disappear into the room? Inspect an unseen seam or closet plank for the product code, then photograph grain and tone in natural light.
Measure plank dimensions and count grooves. Check the wear-layer thickness (often printed or request lab info) and note finish sheen.
Record all details so replacements match color, texture, and durability.
Strategies for sourcing matching planks (leftover stock, manufacturer, classifieds)
Now that you’ve documented the model, color, and wear layer, it’s time to find planks that blend with the existing floor.
Check leftover boxes from your installer, contact the original manufacturer or distributor for matching runs, and search classifieds, salvage yards, and online marketplaces for same-batch stock.
Ask sellers for photos, production codes, and plank dimensions to confirm compatibility before buying.
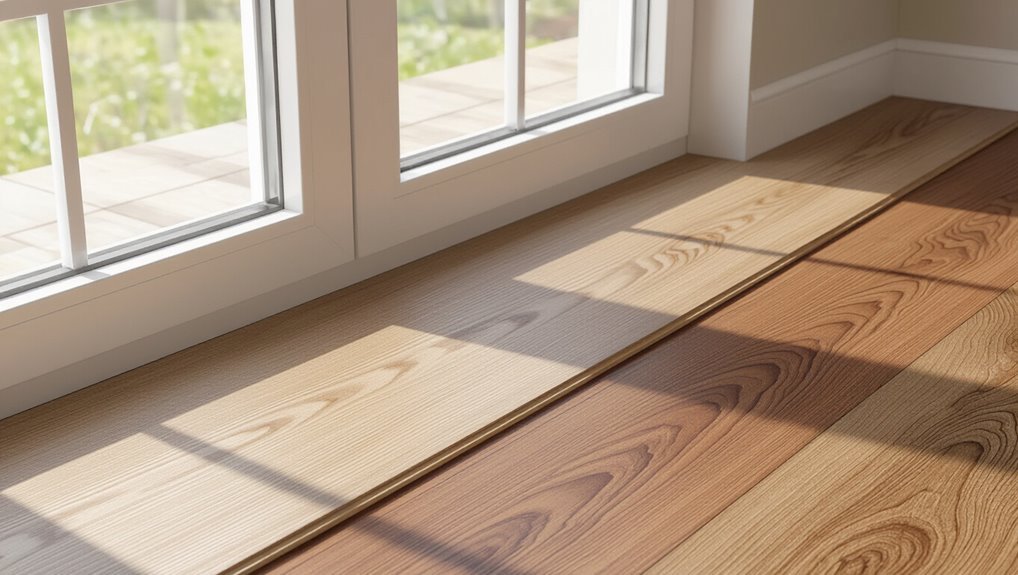
Blending new and old planks when exact match isn’t possible
Even when you can’t find an exact match, you can make new planks blend by planning for gradual shifts, complementary tones, and consistent wear patterns.
Use changeover rows, mix new planks with old randomly, stain edges or sand for texture, and keep grout or seams consistent.
You’ll test layouts beforehand and keep lighting consistent to minimize contrast.
- Changeover rows
- Random mixing
- Edge finishing
- Consistent seams
Common Mistakes and Problems to Avoid
Don’t force planks into place—you’ll damage the locking system and create gaps or squeaks.
Check the subfloor and moisture levels before you start, or you’ll get buckling and uneven seams.
Match color and finish carefully to avoid patchy wear, and be ready to troubleshoot gaps, squeaks, and misaligned seams as you work.
Mistake: Forcing planks and damaging locking systems
If you force planks into place, you’ll likely damage the tongue-and-groove or click-lock mechanisms and create gaps, squeaks, or pieces that won’t stay locked.
Work slowly, align ends and edges, and use tapping blocks and pull bars gently.
Don’t hammer or pry; stop if resistance appears.
Inspect damaged locks and replace affected planks rather than forcing them, preserving fit and stability.
Mistake: Ignoring moisture and subfloor issues
Since moisture and subfloor problems can silently wreck your laminate, check them before you lay a single plank.
Test for dampness, unevenness, and rot; a moisture meter and straightedge help. Fix leaks, dry and level the subfloor, and replace damaged underlayment.
Don’t assume existing conditions are fine—addressing these issues now prevents buckling, warping, mold, and costly repairs later.
Mistake: Poor color/finish matching and inconsistent wear
When you mix planks with different tones, finishes, or wear levels, the floor will read as patchy and unprofessional rather than cohesive.
You should match replacement planks by batch, sheen, and wear pattern. Test a few pieces in natural and artificial light, and avoid mixing visibly aged boards with new ones.
Blend gradually or replace contiguous sections for a uniform appearance.
Troubleshooting gaps, squeaks, and uneven seams
Gaps, squeaks, and uneven seams are usually signs that the installation or subfloor prep wasn’t right, but you can often fix them without ripping up the whole floor.
Inspect for loose planks, warped boards, or subfloor movement.
Tighten or reglue joints, add shims under hollow spots, replace individual damaged planks, and guarantee proper acclimation and expansion gaps to prevent recurrence.
Best Practices and Preventive Maintenance
To keep your new laminate looking great, control moisture, use protective pads under furniture, and clean spills quickly to minimize future damage.
You should follow a simple routine for sweeping and damp-mopping, touch up small scratches or loose planks promptly, and replace worn underlayment when needed.
Call a professional if you spot persistent warping, large gaps, or problems that outpace your DIY fixes.
How to minimize future damage (moisture control, protective pads)
Although laminate holds up well, preventing future damage depends on controlling moisture and reducing wear from furniture and foot traffic.
Use vapor barriers under floating floors, keep humidity between 35–55%, and wipe spills immediately.
Add felt or rubber pads to chair and table legs, use area rugs in high-traffic zones, and avoid dragging heavy items.
Check under appliances for leaks regularly.
Routine cleaning and minor repair tips
Keeping moisture and furniture wear in check lays the groundwork for easy upkeep, and regular cleaning plus small repairs will keep your laminate looking new longer.
Sweep or vacuum weekly, and use a damp mop with laminate-safe cleaner. Wipe spills immediately.
Replace protective pads and tighten loose trim. Fill small scratches with color-matched filler and seal seams with recommended sealant to prevent further damage.
When to schedule professional help
If you notice buckling, widespread gaps, persistent swelling, or repeated water damage despite basic fixes, call a professional—these problems signal underlying issues that DIY methods won’t reliably solve.
You should also hire help if you lack tools, need subfloor repair, face mold, or plan layout changes.
A pro assesses moisture, repairs structural damage, guarantees warranty compliance, and prevents costly mistakes.
Cost, Time, and Tools Comparison
You’ll want to compare estimated DIY versus professional costs and time for common scenarios like replacing a few planks, a full room, or an entire house.
DIY can save labor costs but usually takes longer and may need tool rentals; pros cost more up front but finish faster with guaranteed work.
Use these comparisons to decide what fits your budget, schedule, and skill level.
Estimated DIY vs. professional cost and time for common scenarios
Whether you’re swapping out a single room or redoing your whole house, knowing the typical DIY versus pro costs, time, and essential tools helps you decide the best route.
For a 200 sq ft room expect DIY $200–$600 and 1–2 days; pro $600–$1,200 in a day.
Whole-house DIY saves labor but takes weeks; pros cost more upfront yet finish faster with specialized tools.
##
You’ll want a tight checklist so you don’t get halfway through the job and wish you’d planned better. Below is a simple table to remind you which must-haves will save time, frustration, and money. Keep these tools handy before you start.
| Must-have tool | Why you need it | Emotion it prevents |
|---|---|---|
| Pull bar & tapping block | For fitting and removing planks | Frustration |
| Saw (jigsaw or miter) | For accurate cuts | Anxiety |
| Pry bar & hammer | For dismantling old flooring | Regret |
| Tape measure & spacer | For precise layout | Stress |
Essential tools checklist
Start with a compact set of reliable tools so the job stays smooth and fast: a tapping block and pull bar for tight seams, a quality saw (miter, jigsaw, or laminate-rated circular saw) for accurate cuts, spacers and a rubber mallet to maintain expansion gaps, a tape measure and carpenter’s square for layout, and safety gear like goggles and knee pads.
- Measuring tools
- Cutting tools
- Installation aids
- Safety gear
FAQs
You’ll often wonder whether you can replace glued-down planks without ripping up the whole floor and if seams between old and new pieces will show.
You’ll also ask how to find matching replacement planks, whether you can reuse removed boards from another room, and if small repairs are worth it versus replacing everything.
Below are clear answers to help you decide the best, most practical approach.
Can I replace laminate planks that are glued down without tearing up the whole floor?
Can you replace glued-down laminate planks without ripping up the whole floor? You can, but it’s harder than floating installations.
Expect careful cutting around damaged boards, solvent or heat to soften adhesive, and possible underlayment repair.
Use a circular saw at shallow depth, pry gently, and plan for precise replacements.
If adhesive or subfloor is badly damaged, full removal may be necessary.
Will the seams between old and new planks be visible?
Usually yes—but how noticeable the seams are depends on several factors.
You’ll see seams more if plank batches differ in wear, finish sheen, or thickness, or if installation gaps aren’t tight.
Lighting, grain direction, and expansion gaps also affect visibility.
Properly acclimating and fitting new planks, leveling subfloor irregularities, and minimizing gap width will reduce how obvious the joins look.
How do I find replacement planks that match my existing floor?
Wondering where to start? Inspect a hidden plank to note brand, color, plank size, pattern, wear layer, and locking profile.
Photograph close-up in natural light and take measurements. Check leftover boxes, manufacturer websites, or retailer samples.
Bring photos to flooring stores; they’ll help match dye lots or recommend the closest alternative.
Order extra for wedges and future repairs.
Can I reuse old planks removed from another area?
Thinking about reusing planks from another room? You can, but inspect each plank for wear, water damage, edge chips, and locking-tongue integrity.
Clean and dry them thoroughly, and sort by shade and batch to avoid visible mismatches. Test-fit before gluing or locking.
Keep extras for future repairs; don’t reuse severely warped or compromised pieces that won’t lock securely.
Is it worth repairing small damaged areas or should I replace the whole floor?
How much damage can you live with before replacing the whole floor? If damage is isolated—few scratched, swollen, or chipped planks—you can patch or swap individual boards and save time and money.
Replace sections when pattern, color, or moisture damage is widespread, joints fail, or repairs keep recurring.
Balance repair costs versus resale value and appearance to decide whether full replacement makes sense.