How to Clean Black Floor Tiles Without Streaks or Water Spots
You can get streak-free black floor tiles by dry-cleaning first, choosing a cleaner for your tile type (pH-neutral for stone, mild acidic or ammonia dilution for glazed), and using a clean microfiber mop with warm water in overlapping S-strokes. Rinse often with fresh water, wring the mop well, then immediately buff dry with a microfiber cloth or squeegee to prevent mineral spots. Avoid excess soap and hard water; follow these steps and you’ll find more tips and fixes ahead.
How to Clean Black Floor Tiles Without Streaks or Water Spots
Want a quick method to get spotless black tiles without streaks or water spots?
Start by understanding what causes streaking—hard water, residue from cleaners, and surface texture—and then match your approach to the tile type (glossy, matte, or textured).
With the right cleaner, technique, and drying method for your specific surface, you’ll cut down on spots and shine.
Quick Answer Best Simple Method to Get Spotless Black Tiles
One simple routine gives you streak-free, glossy black tiles every time: sweep, mop with a mild pH-neutral cleaner diluted in warm water, then immediately squeegee or dry with a microfiber cloth.
For quick touch-ups, spray a water-vinegar mix (small amount) and buff dry.
This straightforward approach shows how to clean black floor tiles fast, leaving no streaks or water spots.
What Makes Black Tiles Show Streaks and Water Spots? (Basics)
Because black reflects light sharply, even tiny residues, water droplets, and streaks stand out more than on lighter floors; you’ll notice mineral deposits, soap film, and uneven drying as visible marks where the surface should look uniform.
Oils, footprints, and cleaning residues create contrast. Hard-water minerals leave white spots.
Uneven wiping or leftover cleaner produces streaks, so thorough rinsing and consistent drying matter.
Types of Black Tile Surfaces and How They Differ
Small differences in finish and material make a big difference in how black tiles show streaks and water spots, so you’ll clean a matte porcelain tile differently than a glossy ceramic or natural stone. Know texture, porosity, and sheen: matte hides streaks, glossy shows spots, stone soaks cleaners. Choose cleaner and drying method accordingly.
| Surface | Porosity | Best tip |
|---|---|---|
| Porcelain (matte) | Low | Microfiber, less water |
| Ceramic (glossy) | Low | Squeegee, buff dry |
| Natural stone | High | pH-neutral, seal first |
Preparation What You Need Before Cleaning
Before you start, gather the right tools and materials—broom, mop, pH‑neutral cleaner, microfiber cloths, and a bucket.
Guarantee good ventilation, wear gloves, and follow basic safety steps to protect your skin and lungs.
Test any cleaner on a small, hidden tile area first to avoid damage or discoloration.
Tools and Materials Checklist
1 clear checklist will save you time and prevent mistakes when cleaning black floor tiles.
Gather the right items so you’ll work efficiently and avoid streaks.
- Microfiber mop and cloths
- Neutral pH tile cleaner
- Bucket with wringer
- Soft-bristled brush or grout brush
- Squeegee or dry microfiber for drying
Safety Precautions and Ventilation
Because cleaning products and wet floors can create hazards, take a moment to set up safety and ventilation so you work confidently and avoid accidents.
Open windows and run fans to disperse fumes. Wear gloves and non-slip shoes. Keep children and pets away.
Place warning signs or cones for wet areas. Store cleaners upright and label any diluted mixtures immediately.
How to Test Cleaners on a Small Area
With safety and ventilation in place, you’ll want to test any cleaner on a small, inconspicuous patch of tile and grout first.
Apply a diluted mixture, wait the manufacturer’s recommended time, then blot and rinse.
Look for color change, dulling, or grout damage.
If it’s safe, proceed; if you see issues, stop and try a milder product or consult manufacturer guidance.
Step-by-Step Cleaning Method (Proven Routine)
Start by dry-cleaning the floor to remove dust and loose debris so you won’t grind dirt into the tiles.
Then pick a cleaner that’s safe for your tile type, mix it to the proper dilution, and use a mop technique with the right water temperature and wringing to avoid streaks.
Finish with a careful rinse method to prevent water spots and leave the black tiles glossy.
Step 1 Dry Cleaning: Dusting and Debris Removal
Step 1 is dry cleaning: remove loose dust and debris so your black tiles look their best and avoid scratching during wet cleaning.
You’ll prep surfaces quickly with these actions:
- Sweep corners and edges first
- Use a soft-bristle broom or dust mop
- Vacuum with hard-floor setting
- Pick up grit by hand where needed
- Replace mop pads or brushes clean before wet cleaning
Step 2 Choosing the Right Cleaner for Your Tile Type
1 clear rule will guide your choice: match the cleaner to your tile material—ceramic, porcelain, natural stone, or glazed finishes require different pH levels and ingredients—so you won’t damage the surface or dull the black sheen. Choose pH-neutral for stone, mild acidic for glazed ceramic, and non-abrasive for porcelain. Test in a corner first.
| Tile Type | Recommended Cleaner |
|---|---|
| Natural stone | pH-neutral |
| Glazed ceramic | Mild acidic |
| Porcelain | Non-abrasive |
Step 3 Mixing Solutions and Proper Dilution Ratios
Now that you’ve matched your cleaner to the tile type, you’ll mix solutions at the right strength to protect the finish and get real results.
Measure concentrates carefully: follow label dilution (usually 1:32 to 1:128 for daily cleaners; stronger for heavy grime).
Use clean water, mix in a bucket, label the mix, and only prepare what you’ll use to maintain effectiveness and avoid residue.
Step 4 Mopping Technique to Avoid Streaks (tools, water temperature, wringing)
Grab the right tools and set the water temperature before you start: use a microfiber mop or a well-wrung flat mop, a clean bucket, and warm (not hot) water so the cleaner activates without causing streaks or damaging grout sealers.
Mop in overlapping S-patterns, rinse the mop frequently, and wring thoroughly so it’s damp—not dripping—checking edges and corners for even coverage.
Step 5 Rinsing Strategy to Prevent Water Spots
Because rinsing is what removes residue that causes water spots, finish each mop pass with a clean-water rinse to keep your black tiles glossy and streak-free.
Change rinse water frequently, use a separate bucket for clean water, and mop in straight lines toward a drain or exit.
Inspect for soap film and repeat quick rinses on dull areas to prevent mineral buildup.
Step 6 Drying and Buffing for a Streak-Free Finish
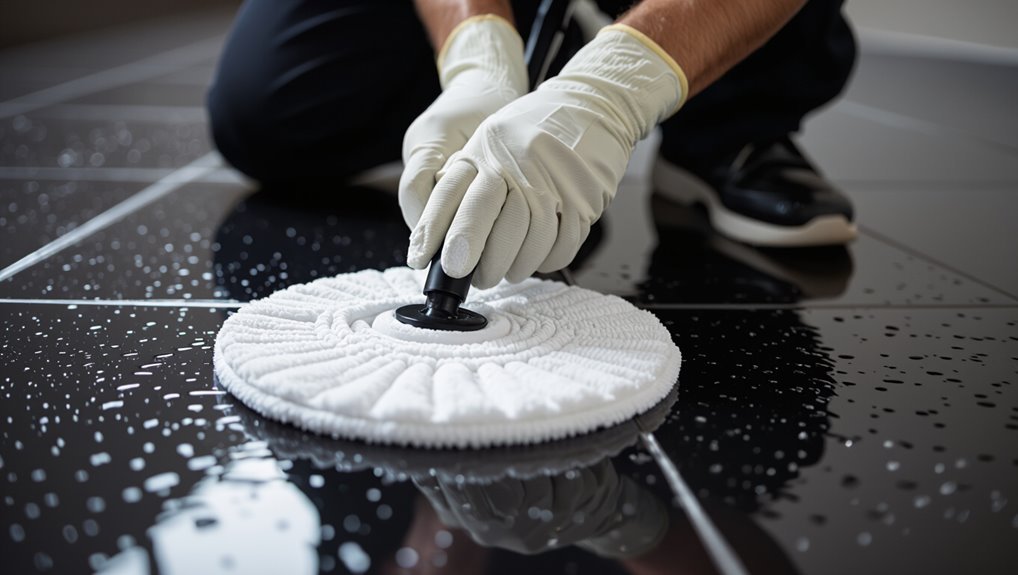
After rinsing, dry the tiles promptly and buff them while the surface is slightly damp to eliminate streaks and restore deep shine.
Use a microfiber mop or towel, working in small sections with circular motions. Change towels when damp, and follow grout lines.
For extra gloss, finish with a dry microfiber buff; avoid harsh pressure to prevent swirl marks and residue buildup.
Alternative Methods and DIY Solutions
You’ll find several alternative cleaners that work well on black tiles, but each has specific pros and cons you should know.
I’ll cover when vinegar helps or harms, when alcohol or ammonia are useful for quick drying, which commercial products are recommended, and the basics of steam cleaning.
Use this section to pick the safest, most effective option for your tile type and finish.
Vinegar-Based Cleaners When to Use and When to Avoid
Wondering if vinegar is the right choice for your black floor tiles?
You can use a diluted solution (one part white vinegar to four parts water) for glazed ceramic or porcelain to cut grease and dulling residue.
Avoid vinegar on natural stone, sealed grout, or waxed finishes—it can etch, strip sealers, or degrade coatings.
Always test a hidden spot first.
Alcohol and Ammonia Options for Quick Evaporation
A quick-drying mix of isopropyl alcohol or a mild ammonia solution can be a handy alternative when you need fast evaporation and streak-free black floor tiles; use about 70% rubbing alcohol diluted with an equal part of water, or one cup of household ammonia per gallon of water for resilient glazed surfaces.
Test a small area first, work in shade, ventilate, and avoid porous or unsealed stone.
Commercial Products Recommended for Black Tiles
Several reliable commercial cleaners can save you time and give streak-free results on black tiles, especially when DIY mixes won’t cut it.
- pH-neutral floor cleaner for daily shine
- Tile-specific degreaser for kitchen grime
- Microfiber mop-compatible spray for quick touchups
- Water-spot guard or rinse aid to prevent spotting
- Grout brightener for contrast without residue
Test small areas and follow label instructions.
Steam Cleaning: Pros, Cons, and Best Practices
Steam cleaning can revive black floor tiles fast by loosening dirt and sanitizing grout without harsh chemicals.
However, you’ll need to weigh benefits against risks like moisture damage and streaking. You should test a hidden spot, use low-heat settings, and move quickly to avoid excess water penetration.
Avoid steam on unsealed grout or damaged tiles, and dry thoroughly with a microfiber cloth.
Deep Cleaning and Stain Removal
When soap scum, hard water deposits, or mineral buildup dull your black tiles, you’ll need targeted cleaners and scrubbing tools to restore the shine.
For oil, grease, and stubborn dark stains use degreasers or poultices and spot-treat promptly to prevent permanent discoloration.
Don’t forget grout — whitening methods and sealants can revive lines, and call a professional when stains or damage won’t budge.
Removing Soap Scum, Hard Water Deposits, and Mineral Buildup
Tackle soap scum, hard water and mineral deposits with targeted cleaners and a little elbow grease—these buildups bond to black tile and grout, dulling the finish and trapping grime.
Apply a vinegar-water or citric solution to affected areas, let sit briefly, then scrub with a nylon brush.
Rinse thoroughly, dry with a microfiber cloth, and repeat for stubborn spots until tiles regain their deep, even shine.
Treating Oil, Grease, and Dark Stains
After rinsing away mineral buildup, you’ll often find darker, greasy spots that need a different approach.
Blot fresh oil with paper towels, then apply a small amount of dish soap directly, scrubbing with a soft brush.
For set-in stains, use a baking soda paste or a commercial degreaser, rinse thoroughly, and dry to avoid residue.
Repeat if necessary.
Grout Cleaning and Whitening Techniques
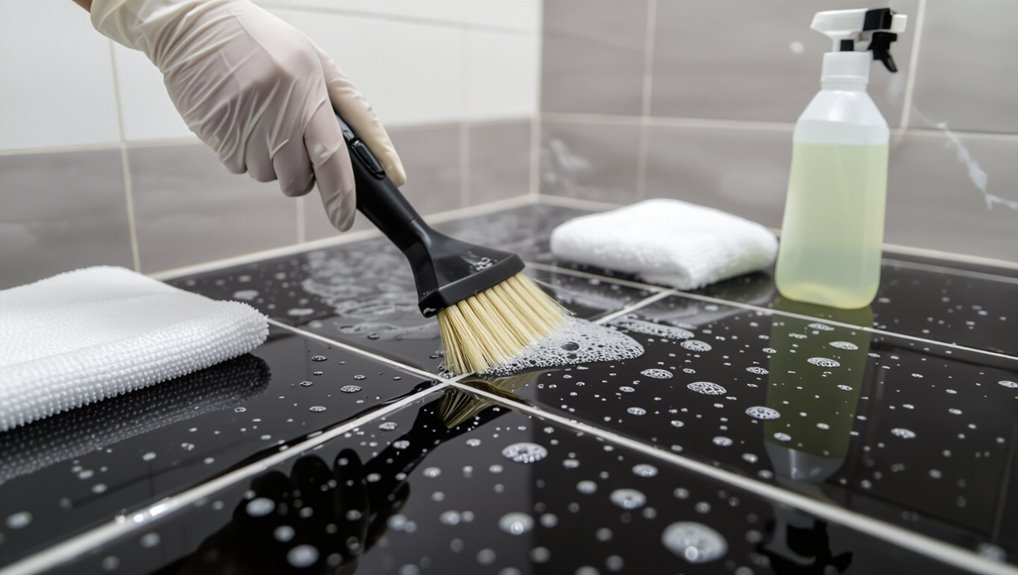
Grout can make black tiles look dull, so you’ll want to deep-clean and whiten it regularly to restore contrast and prevent staining.
Scrub grout with a stiff brush and a paste of baking soda and hydrogen peroxide, rinse thoroughly, then dry.
For stubborn stains use a pH-neutral grout cleaner or oxygen bleach.
Seal grout after it’s fully dry to protect and maintain brightness.
When to Call a Professional
If you’ve tried scrubbing and whitening your grout but stains or deep soil won’t budge, it’s time to contemplate professional help for deep cleaning and stain removal.
Call a pro when odors persist, grout is crumbling, or high-traffic areas look permanently dull.
Professionals use industrial-grade cleaning, steam, or chemical treatments safely, saving time and reducing risk of tile damage.
Common Mistakes That Cause Streaks or Spots
Don’t overdo the cleaner or use the wrong pH products, because excess residue and harsh chemicals leave streaks and spots.
You’ll also get marks from over-wetting, poor rinsing, dirty mops, worn microfiber, or abrasive tools that damage the finish.
Always check and follow the tile manufacturer’s recommendations to avoid avoidable problems.
Using Too Much Cleaner or Wrong PH Products
One common cause of streaks and cloudy spots on black floor tiles is using too much cleaner or products with the wrong pH; they leave residue that’s especially visible on dark surfaces.
Use a mild, pH-neutral cleaner and dilute it per instructions. Test a small area first, apply sparingly, and buff with a clean microfiber cloth to remove any film so tiles stay glossy.
Over-Wetting and Poor Rinsing
Because black tiles show watermarks and detergent rings so clearly, over-wetting or failing to rinse properly will leave streaks and cloudy spots, even when you use the right cleaner.
Don’t drench the floor; work in small sections, wring your mop often, and rinse with clear water.
Finish by squeegeeing or buffing dry so no residue remains to catch light.
Using Dirty Mops, Microfiber Issues, and Abrasive Tools
If you keep using a dirty mop or the wrong microfiber pad, you’ll just spread grime and leave streaks instead of cleaning the tiles.
Change or rinse pads frequently, wring mops well, and use lint-free microfiber designed for wet cleaning.
Avoid abrasive scrubbing pads or steel wool that dulls finishes and traps dirt, causing spots and uneven shine on black tiles.
Ignoring Tile Manufacturer Recommendations
When you skip the manufacturer’s care instructions, you risk using cleaners or techniques that leave streaks, haze, or permanent spots on black tiles.
You should follow recommended pH ranges, sealing guidance, and approved products. Test any cleaner in an inconspicuous spot first.
Ignoring specs can void warranties and cause irreversible damage, so stick to the manufacturer’s directions to maintain finish and avoid water spots.
Prevention and Ongoing Maintenance
Keep grime from building up with simple daily and weekly routines—sweeping or vacuuming daily and mopping with minimal water once or twice a week.
Use entry mats, a no-shoes policy where practical, and apply sealant as recommended to protect finish and grout.
Plan a seasonal or annual deep clean to strip buildup and refresh grout so regular maintenance stays easy.
Daily and Weekly Maintenance Routines
Because regular care prevents grime from settling, daily and weekly routines make black floor tiles look consistently sharp and cut down on deep cleans.
- Sweep or vacuum high-traffic areas each day.
- Spot-clean spills immediately with a microfiber cloth.
- Dust mop weekly to lift grit.
- Use a pH-neutral cleaner sparingly for weekly touch-ups.
- Check grout and seal edges monthly to avoid buildup.
Best Practices for Mopping Frequency and Water Use
Aim to mop your black floor tiles with just enough frequency to remove soil without over-wetting them—typically once a week in low-traffic rooms and two to three times in busy areas—and cut back after spot-cleaning visible messes.
Use a damp, well-wrung mop, change water when cloudy, and rinse with clean water to prevent residue.
Dry or buff to avoid streaks.
Protective Measures: Mats, Shoe Rules, and Sealants
Three simple habits—using mats, enforcing shoe rules, and applying a sealant—will go a long way toward protecting your black tiles from scratches, grit, and stains.
Place low-profile mats at entries and high-traffic zones, ask family and guests to remove shoes or use indoor slippers, and apply a compatible penetrating sealant per manufacturer instructions to repel spills and simplify routine cleaning.
Seasonal or Annual Deep-Clean Schedule
Set a simple schedule for seasonal deep-cleans so you don’t let dirt, grout haze, or dulling buildup become permanent problems.
Every 3–4 months, scrub grout, mop with pH-neutral cleaner, and inspect sealant.
Once a year, do a thorough deep-clean: steam or heavy-duty cleaner, reseal porous grout or tile if needed, and polish any honed finishes.
Track dates and results for consistency.
Comparison: Best Tools and Cleaners for Black Tiles
While black tiles look sleek, they show streaks, dust, and residue more easily than lighter floors, so choosing the right tools and cleaners matters.
You’ll want microfiber mops, pH-neutral cleaners, squeegy-like squeegees, soft-bristle brushes, and diluted vinegar solutions for tough grime. Pick products labeled streak-free and test in a corner.
| Tool/Cleaner | Best Use |
|---|---|
| Microfiber mop | Daily dusting |
| pH-neutral cleaner | Regular wash |
| Squeegee | Water removal |
| Soft brush | Grout |
| Diluted vinegar | Stubborn spots |
Troubleshooting Quick Fixes for Persistent Streaks or Spots
If streaks or spots keep showing up, check what surface you’re dealing with—glossy ceramic, matte porcelain, or natural stone each need different quick fixes.
For ceramic and porcelain, a microfiber mop and a diluted vinegar or mild detergent rinse can lift streaks without harm; for stone, use a pH-neutral cleaner and blot instead of scrubbing.
To recover shine without damaging the tile, buff damp areas with a soft cloth or use a manufacturer-approved polish sparingly.
Surface-Specific Short Solutions
Because different surfaces react to cleaners and moisture in unique ways, you’ll need a few quick, surface-specific fixes when streaks or spots keep reappearing.
For glazed ceramic, buff with a microfiber dampened in plain water.
For matte or honed stone, use pH-neutral cleaner and blot, not wipe.
For sealed porcelain, dry immediately with a soft towel to prevent spotting.
How to Recover Shine Without Damaging Tile
Those quick, surface-specific fixes handle most streaks, but persistent haze or dullness needs careful recovery so you don’t damage the tile.
Gently scrub with a microfiber mop and diluted pH-neutral cleaner, rinse thoroughly, then dry with a clean microfiber towel.
For stubborn haze, buff with a dry microfiber or use a tiny amount of tile-safe polish, testing first in a hidden area.
FAQ
You probably have a few quick questions about cleaning black tiles, like whether vinegar will leave streaks or if steam will harm a polished finish.
I’ll cover how often to deep-clean, the best way to dry to prevent water spots, and how to keep grout from ruining the tile’s look.
Read on for straightforward answers and practical tips.
Can I use vinegar on black tiles without causing streaks?
Wondering if vinegar will streak your black tiles? You can, but dilute it: mix one part white vinegar with four parts warm water.
Test first in an inconspicuous spot. Use a microfiber mop and dry promptly to prevent streaks.
Avoid undiluted vinegar on sealed natural stone or damaged grout. For best shine, finish with a quick buff using a dry microfiber cloth.
How often should I deep-clean black floor tiles?
How often should you deep-clean black floor tiles? Aim for a thorough deep clean every 1–3 months, depending on foot traffic, pets, and spills.
High-traffic areas need monthly attention; low-traffic rooms can wait two to three months.
Between deep cleans, sweep or vacuum daily and mop weekly to prevent grime buildup and preserve the tile’s dark, streak-free appearance.
Will steam cleaning damage polished black tiles?
Can steam cleaning harm polished black tiles? You can use steam cautiously: high heat and pressure may dull sealant or loosen grout if tiles aren’t properly sealed.
Test a hidden spot first, use a low-pressure setting, and avoid prolonged exposure.
If tiles are unsealed, cracked, or vintage, skip steam and choose a gentle, pH-neutral cleaner to protect finish and grout.
What’s the best drying method to eliminate water spots?
If you tried steam or a gentle cleaner, you’ll want to remove moisture quickly to prevent water spots on polished black tiles.
Use a microfiber mop or soft towel to blot and then wipe in straight lines, changing cloths as they dampen.
Finish with a dry, lint-free cloth or squeegee, working toward an exit to avoid streaks and trapped moisture.
How do I maintain grout so it doesn’t affect the tile’s appearance?
While grout naturally darkens or stains over time, you can keep it looking fresh by sealing it, cleaning spills promptly, and using gentle scrubbing tools so the dark tile’s finish stays the focus.
Reseal grout every year, scrub with a soft brush and pH-neutral cleaner, avoid bleach on colored grout, and address mold with diluted vinegar or a commercial grout cleaner to prevent discoloration.