How to Install Shower Wall Tile: A Step-by-Step Guide for DIYers
You can install shower wall tile yourself if you’ve got basic DIY skills and patience. Start by prepping a solid, waterproof substrate—cement board or waterproof panels—and choose tiles, thinset, and grout rated for wet areas. Measure, plan your layout, then set tiles with spacers and a level, let thinset cure, and grout, sealing joints and any natural stone. Expect a weekend for simple jobs; keep going for tips on waterproofing, tools, and common pitfalls.
Quick Answer Can You Install Shower Wall Tile Yourself?
Yes—you can often install shower wall tile yourself if you have basic DIY skills, steady time (a weekend to several days), and modest tools, which keeps costs lower than hiring pros.
Choose DIY for straightforward, small showers with simple tile; hire a professional if waterproofing, complex patterns, or plumbing adjustments are involved.
We’ll cover time, costs, skill level, and clear signs that it’s better to call an expert.
Short summary of feasibility, time, cost, and skill level
Although it takes some planning and careful work, you can install shower wall tile yourself if you’re reasonably handy and willing to learn; expect a weekend for a simple retrofit or several days for a full waterproofing and tile job, moderate costs for materials (tile, backer board, waterproofing, thinset, grout) and tools, and a moderate skill level—basic tiling is approachable, but proper waterproofing and drain/fixture work often benefit from a pro.
You’ll need patience, attention to detail, and basic tools; reuse or rent specialty items to cut costs.
When to hire a professional vs DIY
Wondering if you should tackle shower wall tile yourself or call in a pro?
If you’re handy, patient, and the job’s straightforward—small shower, simple layout—you can save money DIYing.
Hire a pro if waterproofing, complex layouts, large-format tile, or plumbing adjustments are involved, or if you lack time or confidence.
Pros guarantee code-compliant waterproofing and faster, reliable results.
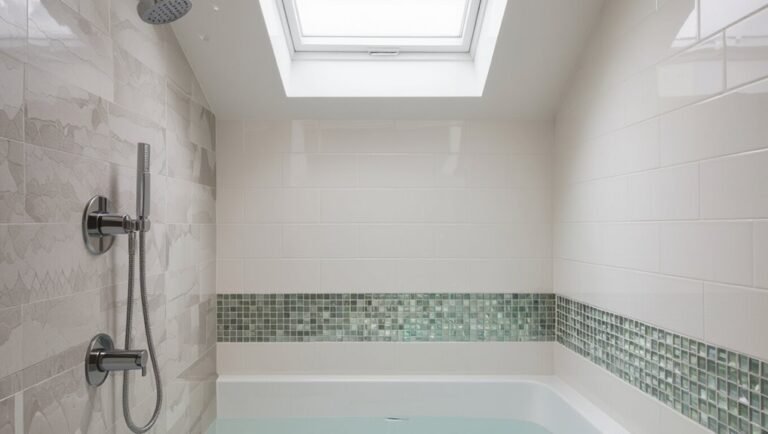
Basic Understanding What Is Shower Wall Tile and Why It Matters
Before you start, you’ll want to know the common tile types—ceramic, porcelain, natural stone, glass, and large-format—because each behaves differently and needs specific handling.
You’ll also need to pick the right backing and waterproofing system—cement/backer board, waterproof panels, or Schluter-style assemblies—to keep water out of the wall.
Learn a few key terms like trowel notch, thinset, grout, weep holes, and waterproof membrane so you can follow instructions and avoid costly mistakes.
Types of shower wall tile (ceramic, porcelain, natural stone, glass, large-format)
Choosing the right shower wall tile means balancing look, durability, maintenance, budget, and each material—ceramic, porcelain, natural stone, glass, and large-format—brings distinct strengths and trade-offs.
Ceramic is affordable and easy to cut; porcelain is denser and water-resistant; natural stone offers texture but needs sealing; glass provides shine and light; large-format reduces grout lines for a cleaner, modern finish.
Tile backing systems and waterproofing options (cement board, backer board, waterproof panels, Schluter systems)
One essential part of a durable, leak-free shower is the wall backing and waterproofing system you install, because tile alone won’t stop moisture from reaching the studs.
Choose cement or fiber-cement backer for stability, rigid waterproof panels for speed, or integrated Schluter systems for tanking and profiles.
Install per manufacturer instructions, seal seams, and secure properly to prevent mold and structural damage.
Key terms DIYers should know (trowel notch, thinset, grout, weep holes, waterproof membrane)
Think of this section as your quick-reference glossary: you’ll learn what a trowel notch looks like and why its width matters, how thinset differs from grout and when to use each, what weep holes do for a drainable system, and why a continuous waterproof membrane is critical behind tile.
- Trowel notch: controls mortar bed thickness.
- Thinset: adhesive for tiles.
- Grout: seals joints.
- Weep holes: let water escape.
Tools and Materials You’ll Need
Before you start, gather the essential tools—tile cutter or wet saw, notched trowel, level, spacers, rubber float, and a grout sponge—so you won’t be stopping mid-job.
Stock up on materials and consumables like tiles, thinset, grout, cement backer board, waterproof membrane, screws, and sealant.
Consider optional items (tile leveling system, mixing drill, tile nippers) to speed work and improve the finish.
I’ll also give you an estimated cost breakdown so you can set a realistic budget before buying anything.
Essential tools (tile cutter/wet saw, trowel, level, spacers, rubber float, grout sponge)
A few reliable tools will make installing shower wall tile go faster and give you a cleaner result: a tile cutter or wet saw for accurate cuts, a notched trowel to spread thinset, a level to keep tiles plumb and even, spacers to maintain uniform grout lines, a rubber float for applying grout, and a grout sponge for wiping excess—have these on hand and in good condition before you start.
- Inspect tools for damage.
- Keep blades sharp.
- Clean trowel and float after use.
- Organize spacers and levels within reach.
Materials and consumables (tiles, thinset mortar, grout, backer board, waterproof membrane, screws, sealant)
Materials matter as much as skill when you install shower wall tile, so gather the right tiles, thinset mortar, grout, cement backer board, a waterproof membrane, corrosion-resistant screws, and silicone sealant before you begin.
You’ll choose tile type, matching grout color, and appropriate polymer-modified thinset. Inspect backer board for damage and prep the membrane to guarantee a watertight install.
- Tile selection
- Thinset & grout
- Backer board & screws
- Waterproof membrane & sealant
Optional tools for efficiency and finish (tile leveling system, mixing drill, tile nippers)
Speed up your project and improve the finish by adding a few optional tools: a tile leveling system to eliminate lippage, a mixing drill with a paddle for lump-free thinset, and tile nippers for small cuts and shaping around fixtures.
- Tile leveling clips and wedges for flat seams.
- Paddle mixer on a drill for consistent thinset.
- Tile nippers for irregular cuts.
- Tile file or rasp for smoothing edges.
Estimated costs and budget breakdown
Before you buy anything, get a clear budget so you’ll know what to prioritize and avoid surprises. Estimate materials, tools, and contingency (10–20%). Compare tile price per square foot, adhesive, grout, backer board, waterproofing, and rental tools. Use this quick breakdown:
| Item | Typical cost |
|---|---|
| Tile (per sqft) | $2–$15 |
| Thinset/grout | $20–$80 |
| Backer/waterproofing | $50–$200 |
| Tools/rental | $30–$150 |
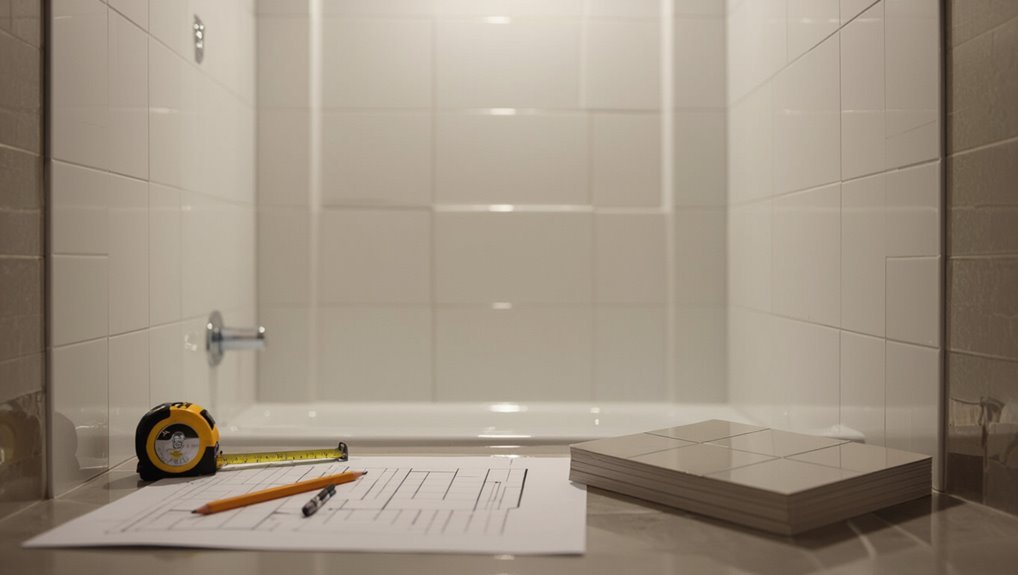
Preparation Measuring, Planning, and Safety
Before you mix mortar, measure each shower wall and calculate tile needs including a waste allowance so you don’t run short.
Plan your layout and pattern—mark focal points, decide on vertical or horizontal orientation, and identify where cuts will fall.
Inspect and prepare the substrate by removing old tile, checking and repairing studs or framing, and use proper PPE (gloves, eye protection, and ventilation) while you work.
How to measure walls and calculate tile quantities (waste allowance)
Accurate measurements and a smart waste allowance keep your project on budget and prevent mid-job trips to the store.
Measure each wall height and width; multiply for square footage. Subtract areas for niches or windows.
Convert tile size to coverage per piece, then divide wall area by coverage.
Add 10–15% waste for cuts and breakage; round up to whole boxes.
Planning tile layout and pattern (focal points, cuts, vertical vs horizontal orientation)
Once you’ve got measurements and tile quantities set, lay out your pattern on the floor or with paper templates so you can visualize focal points, cuts, and orientation.
This lets you shift grout lines away from corners, center a full tile on a shower niche, and decide whether vertical or horizontal placement will make the space feel taller or wider.
Then mark cut tiles, balance edges, and plan grout joint lines.
Preparing the existing substrate (removing old tile, checking studs, repairing framing)
Start by stripping the old finish down to the framing so you can see what’s actually behind the tile and make any structural repairs needed for a long-lasting installation.
Remove loose tile and thinset, pry back water-damaged backer, and inspect studs for rot or mold.
Replace or sister compromised studs, plane uneven framing, and guarantee a flat, solid substrate before installing new water-resistant backer.
Safety precautions and PPE (gloves, eye protection, ventilation)
Before you cut, demo, or mix anything, gear up with proper personal protective equipment: heavy-duty gloves, shatterproof eye protection, a dust mask or respirator rated for silica, and hearing protection for power tools.
Use ventilation—open windows, run a shop vac or exhaust fan, and isolate the area.
Inspect PPE for damage, replace filters as needed, and never skip protection when handling tile, mortar, or grout.
Step-by-Step Installation Guide
Now you’ll follow a clear sequence to turn your prepped shower into finished walls.
Start by installing or fixing the backer board and framing, then choose and apply a waterproofing membrane (liquid or sheet).
Next, mark your layout, mix and trowel thinset to bed the first row, and continue tiling with spacers and a leveling system.
Step 1 Install or repair backer board and framing
Check the studs and subfloor for rot, plumb, and proper spacing so you can install or repair the backer board and framing with confidence.
Remove damaged studs, sister new ones, and guarantee studs are 16″ on center unless local code requires otherwise.
Fit cement board tightly, stagger seams, screw every 8″ with corrosion-resistant screws, and tape seams with alkali-resistant mesh for a sturdy substrate.
Step 2 Apply waterproofing membrane or system (liquid membrane vs sheet)
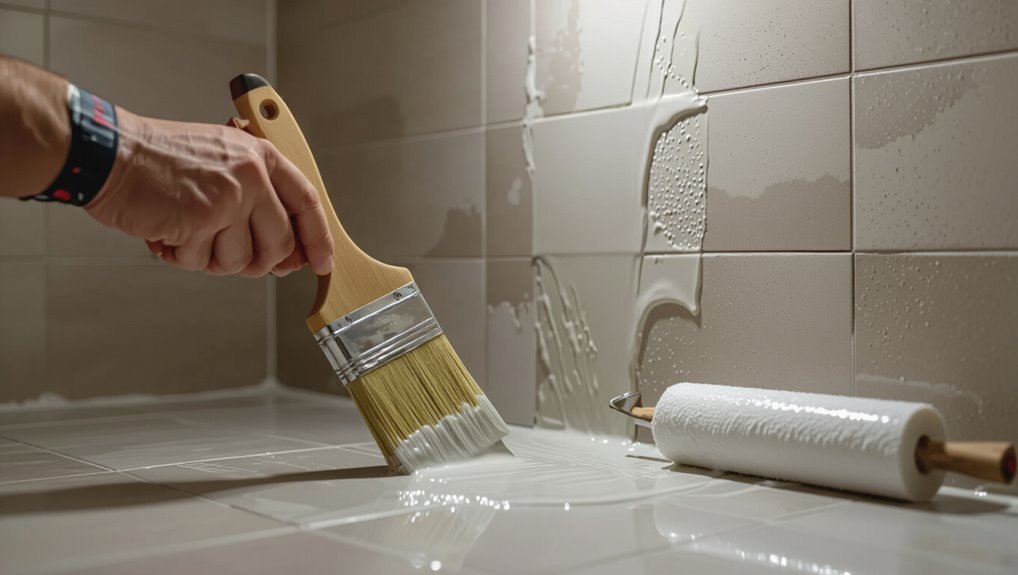
Choose a reliable waterproofing system and apply it carefully so your new backer board stays dry and mold-free.
Decide between liquid-applied membranes—easy to brush or roll into seams and corners—or waterproof sheets that bond mechanically or with thinset.
Seal all joints, corners, penetrations, and floor-to-wall changes per manufacturer instructions.
Allow proper cure time before tiling to guarantee a watertight substrate.
Step 3 Mark layout lines and establish a starting point
With the waterproofing cured, you’re ready to establish a reliable tile layout.
Snap vertical and horizontal chalk lines from the center of the niche or shower floor up the wall to guarantee level rows.
Dry-fit a few tiles to check spacing and edge cuts.
Choose a starting point that hides cut tiles in less visible areas and aligns grout joints.
Step 4 Mix and apply thinset; bedding the first row of tiles
Mix the thinset to a smooth, peanut-butter consistency and trowel a butter coat on the back of each tile before bedding the first row, so you get full coverage and a solid bond.
Spread thinset on the wall with a notched trowel, press each tile firmly into place, twist slightly, and check alignment.
Remove excess thinset and maintain consistent contact.
Step 5 Continue tiling wall sections, using spacers and leveling system
Continue tiling in manageable sections, pressing each tile into the thinset, inserting spacers between tiles for consistent grout lines, and engaging a leveling system as you go to prevent lippage.
Work row by row, checking alignment and adjusting clamps or wedges before the thinset skins.
Clean excess mortar from joints frequently, maintain consistent pressure, and let each section set per manufacturer instructions before proceeding.
Step 6 Cutting tiles for edges, corners, and fixtures (tips for clean cuts)
When you reach edges, corners, and fixtures you’ll need to cut tiles to fit precisely; plan each cut, mark the tile carefully, and choose the right tool for the material and shape.
Use a wet saw for straight or angled cuts, a tile nipper for small notches, and a carbide scoring tool for ceramic.
Smooth edges with a rubbing stone or file.
Step 7 Allow curing time before grouting (manufacturer recommendations)
After you’ve cut and set all tiles, let the adhesive or thinset cure fully before you grout; follow the manufacturer’s specified waiting time on the bag or data sheet, since cure times vary by product, temperature, and humidity.
Check ambient conditions, maintain recommended temperature and ventilation, and avoid disturbing tiles.
If unsure, err on the side of longer curing to guarantee proper bond and prevent grout or tile failure later.
Step 8 Grout application, cleaning, and sealing grout
Mix the grout to a creamy, lump-free consistency and start filling the joints with a rubber float, working diagonally across the tiles to fully pack each seam.
Wipe excess grout from the tile faces with a damp sponge before it hardens, then let the grout set per the manufacturer’s timing before buffing haze and applying a penetrating sealer if specified for your grout type.
After curing, inspect joints, touch up, and clean.
Step 9 Install trim, niche flashing, fixtures, and final sealants
Finish the job by installing trim, flashing, fixtures, and final sealants so your shower is watertight and ready to use.
Fit metal or PVC trim at edges, back-butter and seal niche flashing, and secure fixtures per manufacturer torque specs.
Apply low-modulus silicone at all perimeter joints and around fittings, tooling smooth beads.
Wipe residue, allow cure time before testing water.
Step 10 Final inspection and post-installation care instructions
When you’ve completed the trim, flashing, and sealing, perform a thorough final inspection to confirm every joint, tile, and fixture meets standards and is fully watertight.
Check grout and caulk for gaps, tightness, and smooth tooling.
Run a controlled water test, look for leaks, and tighten fixtures.
Clean surfaces, wait recommended cure times, and follow maintenance tips to preserve grout and sealant integrity.
Time Estimates and Project Phases
Expect a single shower job to fall into clear phases: prep (waterproofing and backerboard), tiling, grout/mortar curing, and finishing trim and sealant.
A typical timeline runs a few days to a week depending on drying times, but some tiles or slow-setting mortars can extend that.
Also factor in room conditions—temperature and humidity affect cure times—so plan your schedule accordingly.
Typical timeline for single shower installation (prep, tiling, curing, finishing)
A typical single-shower installation breaks into clear phases—prep, waterproofing and backerboard, tile setting, grout and seal, then trim and cleanup—each with its own time window so you can plan workdays and dry times without surprises.
Expect 1 day for demolition/prep, 1 day for waterproofing/backerboard, 1–2 days for setting tile, 24–48 hours before grout, then 24 hours for sealant and final trim.
How tile type and room conditions affect schedule
Because different tiles vary in weight, thickness, porosity, and size, they’ll change how long each phase takes and what tools or materials you’ll need.
Heavy or large format tiles slow layout and require backerboard reinforcement and mortar bed curing.
Porous natural stone needs sealing and longer grout cure.
Humid or cold rooms extend drying times; heated or ventilated spaces speed progress.
Common Mistakes and How to Avoid Them
Don’t skimp on waterproofing or you’ll pay for leaks later.
Layout accurately, pick the correct thinset and grout, and take time to level tiles to prevent awkward cuts, lippage, and grout failure.
Follow curing times and you’ll avoid most common problems.
Poor waterproofing and resulting leaks
If you skimp on waterproofing, moisture will find its way into seams and behind tiles, causing mold, loose tiles, and costly repairs.
You must install a proper waterproof membrane, seal joints with waterproof tape and compatible caulk, slope the shower floor, and waterproof around fixtures.
Test for leaks before tiling and follow manufacturer instructions—shortcuts here lead to expensive, preventable damage.
Inaccurate layout leading to awkward cuts
When you rush the layout, you’ll end up with awkward cuts that draw the eye and weaken the shower’s look.
Measure and dry-fit tiles, establish centered reference lines, and plan cut locations at edges or less visible spots.
Use a level and chalk lines, check pattern repeats, and adjust starter rows so narrow slivers don’t appear where they’ll be most noticeable.
Using wrong thinset or grout for tile type
Although you might be enthusiastic to grab the first bag of mortar or the cheapest grout at the store, choosing the wrong thinset or grout can ruin adhesion, discolor tiles, or cause premature failure.
Check manufacturer recommendations for your tile and substrate, use modified thinset for porcelain/large-format tiles, choose epoxy or sanded grout per joint width, and avoid generic mixes that don’t match performance needs.
Uneven tiles, lippage, and poor leveling
Because uneven tiles and lippage catch light and water, they’ll make a new shower look unprofessional and can create tripping points or grout failures down the line.
Check substrate flatness, use a straightedge, and shim or back-butter tiles as needed.
Employ tile spacers, a level frequently, and a rubber mallet to align faces.
Fix high or low tiles immediately before adhesive sets.
Rushing curing times and causing grout failure
Fixing lippage and leveling won’t matter much if you rush curing times and undermine the grout’s strength.
Don’t grout or expose the shower to water before adhesives and grout fully cure—check manufacturer times, usually 24–72 hours.
Speeding steps causes shrinkage, cracking, and stains.
Wait patiently, control humidity and temperature, and only test areas gently to guarantee a durable, watertight finish.
Best Practices, Tips, and Professional Tricks
When you’re tiling a shower, pick adhesives and grout rated for constant moisture and plan whether to work from the bottom up or start at the center for the best fit.
Keep joint widths consistent and use leveling tools to minimize lippage, and follow tidy grouting techniques to guarantee neat lines and long-term durability.
Finally, manage moisture with proper waterproofing and good ventilation to protect your work and the surrounding structure.
Choosing the right adhesive and grout for wet environments
Anyone installing shower tile needs to pick adhesives and grout that resist constant moisture, mold, and movement; choose products rated for wet environments and compatible with your substrate and tile type.
Use polymer-modified thinset for porcelain or stone, epoxy grout where water and stains are a concern, and sanded vs. unsanded grout per joint width.
Always follow manufacturer cure times and waterproofing recommendations.
Working from bottom up vs center starting techniques
Curious which layout method will save you time and keep tiles straight?
You’ll usually start bottom-up when gravity and waterproofing demand solid support; it’s fast for full-height runs and lets you shim and level rows.
Start at the center when focal symmetry matters or when walls are uneven; you’ll cut edges equally and guarantee a balanced look.
Plan changes and test dry layouts.
Maintaining consistent joint width and minimizing lippage
Once you’ve laid out your starting rows, focus on keeping joint widths uniform and lippage minimal to get a flat, professional-looking surface.
Use consistent spacers, check gaps with a gauge, and snap chalk lines for alignment.
Press tiles evenly into mortar, adjust with a beating block or rubber mallet, and constantly sight across the plane to catch high or low tiles before mortar sets.
Tips for neat grout lines and long-term durability
Although grout can seem like a finishing touch, neat lines and proper sealing are what keep your shower waterproof and looking sharp for years.
Moisture management and ventilation recommendations
Because steam and trapped moisture are the main enemies of tile and backing materials, you should design ventilation and moisture control into the shower from day one: install a properly sized exhaust fan vented outside, slope the shower pan and threshold, use waterproof membranes and cement board, seal joints with caulk and waterproof tape, and allow drying time between tile stages to prevent mold and delamination.
Comparison Tile Types and Waterproofing Options
You’ll choose between ceramic, porcelain, or natural stone based on durability, cost, and how much upkeep you’re willing to do.
You’ll also pick a waterproofing method—liquid membrane, sheet systems, or waterproof backer board—each has clear pros and cons for ease of installation and long-term protection.
Comparing those trade-offs up front will help you match materials and waterproofing to your budget and skill level.
Ceramic vs porcelain vs natural stone (durability, cost, maintenance)
When choosing tile for your shower walls, think about how each material performs under wet conditions and what you’ll spend on installation and upkeep. Ceramic is affordable, easy to cut, and low-maintenance; porcelain is denser, more water-resistant, pricier; natural stone is elegant but porous and needs sealing.
| Material | Durability | Maintenance |
|---|---|---|
| Ceramic | Good | Low |
| Porcelain | Excellent | Low |
| Natural stone | Variable | High |
Liquid membrane vs sheet waterproofing vs waterproof backer board (pros and cons)
If you want a reliable wet-area barrier, pick the waterproofing type that matches your skill, budget, and shower design: Liquid membranes are flexible and easy for DIYs but need careful coats; sheet membranes offer consistent coverage but need seams sealed; waterproof backer boards are rigid, durable, and forgiving under tile but require correct substrate.
| Option | Strength |
|---|---|
| Liquid membrane | Flexibility |
| Sheet membrane | Consistency |
| Backer board | Durability |
| Cost | Varies by option |
Troubleshooting Problems After Installation and Fixes
After installation you’ll want to watch for grout that’s discolored or cracking. I’ll show simple remediation steps like cleaning, regrouting, or sealing.
If tiles feel loose or sound hollow, you’ll learn how to remove, reset, or use epoxy injections to repair them.
Finally, I’ll cover how to detect persistent moisture and hidden leaks so you can stop water damage before it spreads.
Grout discoloration or cracking and remediation steps
Because grout sits between tiles and absorbs moisture and dirt, it can stain, fade, or crack over time, especially in a shower’s wet environment.
If you see discoloration, scrub with a pH-neutral cleaner or oxygen bleach; reseal grout yearly.
For hairline cracks, remove damaged grout and regrout; for wider failures, replace grout and guarantee proper drying.
Monitor ventilation to prevent recurrence.
Tile looseness or hollow spots and repair methods
Many showers develop hollow-sounding spots or loose tiles over time, and you’ll want to address them quickly to prevent water damage and mold.
Tap tiles to locate hollows, remove affected grout, and pry off loose tiles.
Clean substrate, inspect for crumbling backerboard, apply thinset or epoxy, re-bed tiles, and regrout.
Seal edges and test stability before regular use.
Persistent moisture and detecting hidden leaks
When you notice damp grout, musty smells, or paint peeling outside the shower, persistent moisture often signals a hidden leak that needs prompt diagnosis to avoid structural damage and mold.
Act quickly: inspect grout, grout lines, and caulk; run a water test to isolate the source; check behind panels and the shower pan; use a moisture meter or call a pro if readings stay high.
Maintenance and Long-Term Care
Keep your tile looking and performing its best with simple routine cleaning using pH-neutral cleaners and a soft brush or microfiber cloth to avoid damaging grout or stone.
You’ll want to re-seal grout and natural stone on a schedule—typically every 6–18 months depending on product and use—and follow manufacturer instructions for proper application.
Regularly inspect grout lines, corners, and behind fixtures for mold, mildew, or signs of water damage so you can address issues early.
Routine cleaning methods and recommended products
Regularly wiping down tile and grout after each shower prevents soap scum and mineral buildup from taking hold.
Use a microfiber cloth or squeegee, then ventilate to dry.
For weekly cleaning, apply a pH-neutral tile cleaner or diluted vinegar solution for glazed ceramic; avoid acidic cleaners on natural stone.
Scrub grout with a soft brush and rinse thoroughly.
Test products in an inconspicuous spot first.
Re-sealing grout and stone tiles: frequency and technique
Because grout and natural stone are porous, you’ll need to re-seal them to keep moisture, stains, and mold at bay; frequency depends on tile type and traffic—typically every 6–24 months for grout and 1–3 years for most stone.
Test with water droplets, clean and dry surfaces, apply an appropriate penetrating sealer evenly, wipe excess, and allow full cure before use.
Inspecting for mold, mildew, and water damage
When you inspect for mold, mildew, and water damage, move methodically from the ceiling down to the floor and check grout lines, corners, and behind fixtures where moisture hides; use a flashlight and a mirror to spot discoloration, soft spots, or efflorescence.
If you find issues, dry the area, remove affected grout or caulk, treat mold with an appropriate cleaner, and repair waterproofing promptly.
Costs, When to DIY vs Hire, and Hiring Checklist
You’ll weigh material costs against labor, since pricey tile or complex waterproofing can push the budget higher than a DIY job.
Hire a pro if the project needs intricate membrane work, a curb shower pan, or a steam system—those are easy to get wrong.
When interviewing contractors, ask about experience with showers, warranty, insurance, timeline, and request references and a written estimate.
Detailed cost factors (labor vs materials)
If you’re weighing labor against materials, start by breaking total cost into those two buckets so you can see where money’s actually going.
Materials: tile, backerboard, waterproofing, adhesive, grout, trim, and waste allowance—estimate brands and quantities.
Labor: demolition, surface prep, waterproofing skill, tile setting, and cleanup—get hourly rates and project hours.
Compare quotes and factor permits or unexpected repairs.
Signs you should hire a pro (complex waterproofing, curb shower pans, steam showers)
Because waterproofing mistakes can ruin a room, hire a pro for anything beyond simple tile-on-board jobs—especially for complex waterproofing systems, curb shower pans, or steam shower installs.
If you spot structural issues, uneven substrate, or plumbing relocation, don’t DIY.
Professionals reduce leak risk, meet code for steam showers, and build durable pans.
Expect higher costs but greater long-term savings.
Questions to ask and checklist when hiring a tile contractor
Wondering what to ask before hiring a tile contractor? You’ll want clear costs, timeline, warranty, and proof of insurance.
Ask for references and photos of similar jobs. Know when DIY saves money versus when complexity demands a pro.
- Request written estimate and payment schedule
- Verify licenses, insurance, and warranty
- Check references and past work
- Confirm timeline and cleanup policies
FAQ Common Questions About Installing Shower Wall Tile
You probably have a few practical questions before you start — like how long to wait before using the shower, whether you can tile over existing surfaces, and which grout works best.
You’ll also want clear answers on waterproofing a shower niche and which tile sizes suit small showers.
Keep reading for straightforward guidance on each point.
How long does it take before I can use the shower?
How long before you can run water over the new tile?
Wait at least 24–48 hours after thinset sets before light exposure; grout needs 48–72 hours to cure before regular wet use.
Seal grout after full cure, usually 7 days, for best protection.
If you used fast-setting products follow manufacturer times—they can shorten waiting but always confirm before heavy use.
Can I tile over existing tile or drywall?
Can you tile over existing tile or drywall? You can sometimes tile over sound, well-bonded tile if you roughen the surface and use a proper bonding mortar.
Tiling over drywall in a shower is risky—use cement backer board or waterproof backer instead.
Always check for moisture damage, guarantee a flat substrate, and follow local codes and manufacturer recommendations before proceeding.
What grout should I use in a shower?
Which grout should you pick for a shower depends on the tile type and exposure to water: choose a cement-based grout mixed with an additive or an epoxy grout for constant wet conditions, and avoid unsealed, sanded or unsanded cement grouts alone unless you seal them and maintain the seal regularly.
Use epoxy for high-moisture, resin-enhanced for flexibility, and seal cement grouts; follow manufacturer cure times.
How do I waterproof a shower niche?
A properly waterproofed shower niche prevents leaks behind your tile and protects the surrounding wall from moisture damage.
You should build the niche with a continuous waterproof plane that ties into the shower pan and wall liner.
Flash the niche with bonded waterproof membrane or use a pre-formed waterproof niche.
Seal seams with waterproof tape or sealant, and slope the shelf slightly toward the shower for drainage.
What tile size is best for small showers?
Wondering what tile size works best in a small shower? You’ll get the cleanest look with smaller tiles—2×2 or 4×4 mosaic sheets—or elongated subway tiles like 3×6 or 4×8 laid horizontally to visually widen the space.
Smaller grout joints reduce busy patterns; larger tiles can work if you minimize grout lines. Choose slip-resistant floor tiles separately.