How Much Does It Cost to Install LVP Flooring? (Full Price Breakdown)
You’ll typically pay $3–$8 per sq ft to install LVP, with small rooms often $200–$800 and larger or complex jobs $1,600–$4,000. Costs cover materials (entry to premium), underlayment, trims, adhesive for glue-down, disposal, and labor; DIY can cut 30–50% of labor costs but raises risk. Prep, moisture barriers, and layout complexity drive price up. Keep reading and you’ll get a full breakdown of options, steps, and savings tips.
Quick Answer Typical Total Cost to Install LVP Flooring
You can expect LVP installation to run roughly $2 to $7 per square foot, or about $200 to $1,400 for a typical 100–200 sq ft room depending on materials and labor.
For a budget job you’d pay toward the low end with basic planks and DIY or economy installers; mid-range uses better wear layers and pro installation; premium projects use high-end planks, extensive prep, and top installers.
Below we’ll compare those national averages and show example scenarios so you can pick the right option for your home.
National average cost ranges (per square foot and per room)
While prices vary by region and project complexity, the national average to install luxury vinyl plank (LVP) runs roughly $3 to $8 per square foot for materials and labor combined. If you’re asking how much to install LVP flooring, expect about $150–$600 for a small room, $300–$1,200 for medium, and higher for large spaces.
| Area | Typical Cost |
|---|---|
| Small (100 sq ft) | $300–$800 |
| Medium (250 sq ft) | $750–$2,000 |
| Large (500 sq ft) | $1,500–$4,000 |
| Per sq ft | $3–$8 |
Typical homeowner example scenarios (budget, mid-range, premium)
If you’re budgeting for LVP, think in three clear tiers—budget, mid-range, and premium—so you can match material quality and installation choices to your price point.
You’ll likely pay less per sq ft for glue-down basics, more for thicker wear layers and underlayment, and top dollar for designer planks with complex layouts.
- Budget: DIY, basic planks
- Mid-range: pro install, better wear layer
- Premium: luxe planks, patterns
Consider room prep and trim.
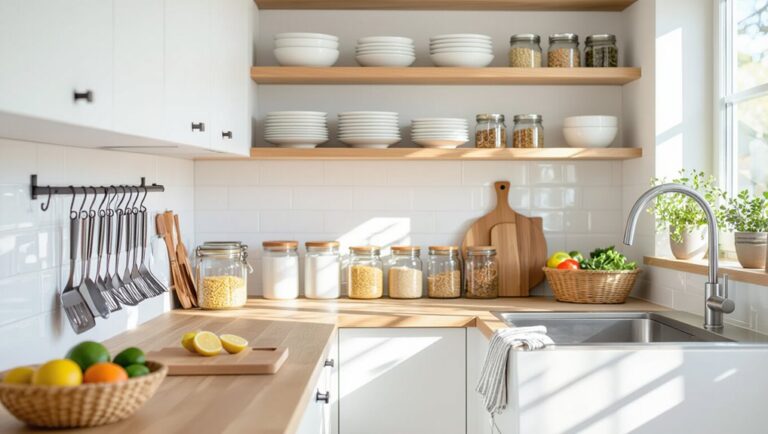
What Is LVP Flooring and Why Choose It?
Luxury vinyl plank (LVP) is a layered flooring made from PVC and stabilizers with a printed wood-look surface and a durable wear layer, so it mimics hardwood without the upkeep.
You’ll choose LVP for its toughness, water resistance, easy maintenance, and realistic aesthetics that hold up in high-traffic areas.
It works great in kitchens, bathrooms, basements, and busy family rooms where moisture and wear are concerns.
Definition and materials (luxury vinyl plank composition)
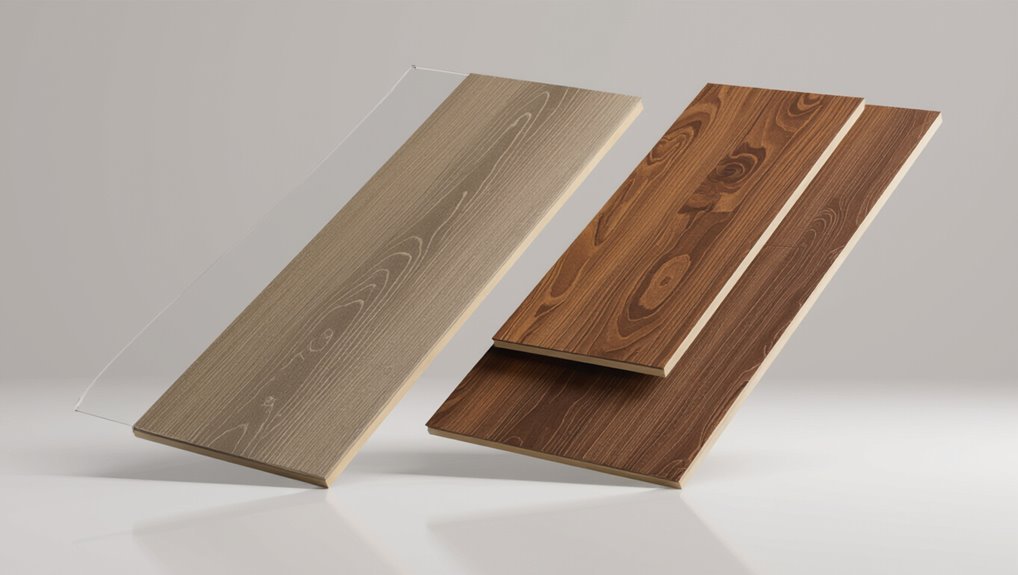
Think of luxury vinyl plank (LVP) as a layered, engineered floor designed to mimic real wood or stone while giving you superior durability and ease of care.
Each plank pairs a wear layer, printed decorative film, rigid core (WPC or SPC), and backing.
Materials include PVC vinyl, stabilizers, and mineral fillers; click-lock or glue-down formats affect installation, thickness, and performance.
Key benefits: durability, water resistance, aesthetics, maintenance
The layered construction you just read about gives LVP several clear advantages you’ll notice in everyday use: outstanding durability, reliable water resistance, convincing aesthetics, and very low maintenance.
You’ll get a wear layer that resists scratches and dents, a waterproof core that tolerates spills, realistic wood or stone visuals, and simple cleaning—sweeping and occasional mopping—so you spend less time maintaining floors and more enjoying them.
Where LVP is best used (rooms and traffic levels)
You’ll find LVP works well almost anywhere in your home because it handles high traffic, moisture, and everyday wear with ease; it’s ideal for kitchens, bathrooms, entryways, mudrooms, and basements.
It stands up to busy living rooms and hallways where families and pets come and go. Use thicker, high-wear LVP in entryways and hallways, waterproof options in baths and basements, and mid-range planks in bedrooms.
Cost Components What You’re Actually Paying For
When you budget for LVP, you’re paying for more than just the planks — quality, style, underlayment, trims, changes, and other accessories all add up.
Labor varies with the installation method and time needed, and costs can jump if the subfloor needs prep or repair.
Don’t forget removal and disposal of existing flooring, which is often billed separately.
Material costs: LVP planks by quality and style
Different grades of LVP—entry-level, mid-range, and premium—drive most of the material cost differences, and each grade reflects specific features you’re paying for like wear layer thickness, core density, embossing realism, and edge profiling. You’ll choose based on durability, appearance, and budget.
| Grade | Typical Features |
|---|---|
| Entry | Basic wear layer, thinner core |
| Mid | Better texture, thicker wear layer |
| Premium | Deep embossing, rigid core, long warranty |
Underlayment, trims, transition strips, and accessories
One of the often-overlooked costs is the underlayment, trims, junction strips, and small accessories that make your LVP installation perform and look finished.
You’ll pay for underlayment (moisture barrier, sound reduction), baseboards and quarter-round, T-molding and reducers for doorways, and adhesives or seam tape.
These items add $0.50–$3 per sq ft depending on quality and room complexity.
Labor costs: installation methods and time factors
Although labor can feel like a single line item on your estimate, it actually reflects the installation method, installer experience, site prep, and time required for your specific layout.
You’ll pay more for complex patterns, diagonal cuts, or multiple rooms with door thresholds.
Experienced crews work faster but cost more; expect hourly or per-square-foot pricing, with project duration driving total labor charges.
Subfloor preparation and repair costs
Subfloor prep and repair can add several hundred dollars to your LVP project because installers must assess, clean, level, and sometimes replace underlying materials to meet manufacturer specs.
You’ll pay for moisture testing, patching cracks, sanding high spots, installing underlayment or plywood, and sealing.
Costs vary by damage extent and room size, so get an inspection and written estimate before work begins.
Removal and disposal of existing flooring
When installers remove old flooring, you’re paying for more than just labor — you’re covering assessment, detachment, hauling, and proper disposal or recycling of materials.
They’ll clear adhesives, trim edges, and protect surrounding surfaces, then load debris for landfill or recycling fees.
Costs vary by material type, square footage, accessibility, and local disposal rates, so expect per-square-foot or flat removal charges.
Additional services: moisture testing, leveling, and mold remediation
Once the old flooring’s out, installers often run moisture tests, level uneven areas, and address any mold they find before laying LVP — and you’ll pay for each step.
Moisture testing prevents adhesive failure; leveling fixes dips or high spots; mold remediation stops health risks.
Expect these as line items: testing ($50–$200), floor leveling ($1–$3/ft²), mold cleanup (variable, often $500+).
Local factors affecting price (region, season, contractor demand)
Because labor and materials vary by where and when you hire them, local factors can shift your LVP install cost more than you might expect.
You’ll pay more in high-cost regions, during peak seasons, or when contractor demand spikes. Rural areas may charge travel fees; busy months inflate labor rates.
Compare local quotes, ask about timing discounts, and book when demand eases to save.
Price Breakdown by Installation Type and Room Size
You’ll see big price differences depending on installation method—floating click-lock is usually quoted per sq ft while glue-down adds labor and materials.
Full-spread adhesive and commercial installs carry higher rates for durability and subfloor prep.
Below I’ll give concrete cost examples for a small bathroom, an average kitchen, and open-plan spaces from 300 to 1,000 sq ft.
Floating click-lock installation (cost per sq ft vs total)
When you choose floating click-lock LVP, you’ll often see prices quoted two ways: a per-square-foot rate for straightforward budgeting and a total-project estimate that accounts for room shape, changes, and labor. You’ll pay roughly $2–$6/sq ft for materials+DIY labor, or $500–$2,500 total for typical rooms when pros handle details and trimming.
| Room Size | $/sq ft | Total est |
|---|---|---|
| Small | $2–$4 | $500–$800 |
| Medium | $3–$5 | $800–$1,600 |
| Large | $4–$6 | $1,600–$2,500 |
| Complex | $4–$6+ | $1,800–$2,800 |
Glue-down installation (cost implications)
If floating click-lock sounds simple and budget-friendly, glue-down LVP offers a different set of trade-offs you should weigh.
You’ll pay more for adhesive, skilled labor, and longer installation time, especially in larger rooms or irregular layouts.
Adhesive prevents movement and can improve durability, but expect higher upfront costs per sq ft and slightly higher cleanup and prep expenses.
Full spread adhesive and commercial installations
Because full-spread adhesive bonds every plank to the substrate, commercial LVP installs demand more material, labor, and time than residential glue-down or floating methods.
That raises per-square-foot costs—especially in large open areas or high-traffic facilities where moisture mitigation and substrate prep are required.
You’ll pay higher labor rates, more adhesive, specialized equipment, and longer prep and curing times, all increasing total project cost.
Cost examples: small bathroom, average kitchen, 300“1,000 sq ft open plan
To give you concrete expectations, here are price examples for three common scenarios—small bathroom, average kitchen, and a 300–1,000 sq ft open-plan area—broken down by installation type so you can compare floating, residential glue-down, and full-spread commercial installs side by side.
Small bathroom: floating $250–$600, glue-down $400–$900, full-spread $600–$1,200.
Average kitchen: floating $800–$1,800, glue-down $1,200–$2,800, full-spread $1,800–$4,000.
Open-plan 300–1,000 sq ft: floating $1,200–$6,000, glue-down $2,000–$10,000, full-spread $3,000–$15,000.
Step-by-Step Installation Process and Where Costs Occur
You’ll start by measuring the room to estimate how much LVP and underlayment you need, and that initial step already affects material cost.
Next you’ll prepare and repair the subfloor, add any moisture barrier and underlayment, then lay and cut planks to fit — each phase adds labor and occasional material expenses.
Finally you’ll install trims and connections and handle cleanup, which are smaller but necessary costs to finish the job.
Step 1 Measuring and estimating material needs
Start by measuring each room’s length and width and multiply them to get square footage for every space you plan to cover.
Add 10%–15% for waste, then sum totals. Choose plank size and pattern to refine quantity. Consider thresholds and closets separately.
- Measure each area precisely
- Add waste allowance
- Note junctions and trim
- Track leftover for repairs
Step 2 Preparing and repairing the subfloor
Once you’ve got accurate measurements and ordered the right amount of LVP, prepare the subfloor so your new planks sit flat and last.
Remove old flooring, nails, and debris; sand high spots and fill low areas with floor patch.
Check for rot or moisture; replace damaged plywood or level concrete.
Proper prep prevents squeaks, uneven seams, and costly repairs later.
Step 3 Underlayment and moisture barrier installation
Lay down the right underlayment and moisture barrier to protect your LVP and keep the floor feeling solid underfoot.
Choose foam or cork underlayment for comfort and sound control; use a 6-mil or thicker polyethylene sheet where moisture’s a concern.
You’ll pay for material per square foot and for labor to tape seams, trim edges, and secure connections before plank installation.
Step 4 Laying the planks and cutting to fit
1. You’ll begin laying planks row by row, staggering seams for strength and appearance. Click-lock systems snap together; glue-down requires adhesive.
Measure and cut end pieces with a utility knife or wet saw, keeping 1/4″ expansion gaps at walls.
Account for labor time, tool rental, and waste from cuts when estimating costs—accurate planning reduces surprises and extra expense.
Step 5 Finishing touches: trims, transitions, cleanup
After the last row is fitted, you’ll move on to trims, thresholds, and cleanup to finish the job and lock in your final cost picture.
Install baseboards, quarter-rounds, and border strips, sealing gaps and matching heights.
Dispose of debris, sweep, and vacuum.
Factor material costs for trims, adhesive or fasteners, and disposal fees—those small expenses finalize your installation budget.
Time estimates and labor-hours per step
Estimate about 6–10 hours for a typical 200–400 sq ft LVP job, broken into focused tasks so you can assign accurate labor-hours and track where costs occur. Plan time per step, adjust for room complexity, and log hours for precise quoting.
| Step | Hours | Notes |
|---|---|---|
| Prep | 1–2 | Remove flooring |
| Layout | 0.5–1 | Measure, plan |
| Install | 3–5 | Click-lock rows |
| Finish | 1 | Trim, clean |
DIY vs Professional Installation Cost, Risk, and Savings
You can save several dollars per square foot by installing LVP yourself if you already have basic tools and buy materials wisely, but factor in underlayment, spacers, and a good saw.
Mistakes like improper subfloor prep, poor seams, or installing over moisture-prone areas can increase costs or shorten the floor’s life.
Hire a pro for complex layouts, moisture issues, or if you want warranty protection and faster, guaranteed results.
Typical DIY cost savings and tool/material needs
While taking on LVP installation yourself can cut labor costs considerably, you should weigh those savings against the time, tools, and potential mistakes you’ll face. You can save 30–50% but must buy or rent tools and materials. Budget for underlayment, spacers, saw, tapping block, and adhesives. Expect a weekend project unless experienced.
| Item | Typical cost |
|---|---|
| Underlayment | $0.50–$1/ft² |
| Saw | $30–$150 |
| Adhesive | $20–$60 |
| Misc tools | $10–$50 |
Common DIY pitfalls that increase cost or reduce lifespan
If you skip proper subfloor prep, buy cheap tools, or rush cuts, those DIY shortcuts will quickly eat into your savings and shorten your floor’s life.
You’ll face gaps, uneven wear, and moisture failures.
Mistimed acclimation, poor underlayment, and improper changes force repairs or replacement.
Factor in lost time, wasted materials, and frustration—DIY can cost more than you expect if you cut corners.
When to hire a pro: complex layouts, moisture issues, warranties
Because complex layouts, moisture challenges, and warranty requirements change the stakes, hiring a pro often makes more sense than a DIY approach.
You’ll save time and avoid installation mistakes in tricky rooms, basements, or irregular spaces. Pros diagnose moisture, recommend correct underlayment, and preserve warranty coverage.
Compare labor costs to potential repair or voided-warranty expenses before deciding.
Comparing LVP Cost to Other Flooring Options
When you compare LVP to laminate, hardwood, and tile, you’ll see tradeoffs in upfront cost and expected lifespan.
LVP often sits between budget laminate and pricier hardwood or tile, offering strong water resistance and decent durability.
Consider value-for-money by weighing purchase plus installation against maintenance, repairs, and replacement over the floor’s lifecycle.
LVP vs laminate vs hardwood vs tile (cost and longevity)
Choosing between LVP, laminate, hardwood, and tile comes down to balancing upfront cost, long-term durability, and maintenance needs. You’ll find LVP offers water resistance and moderate lifespan; laminate is cheap but less water-tolerant; hardwood lasts long with higher cost and refinishing; tile is durable and water-proof but has higher installation labor.
| Type | Quick note |
|---|---|
| LVP | Water-resistant, mid cost |
| Laminate | Low cost, less durable |
| Hardwood | High cost, long life |
| Tile | Durable, high install cost |
Value-for-money analysis and lifecycle cost considerations
If you’re focused on getting the most value over time, compare not just price per square foot but expected lifespan, maintenance costs, and replacement or refinishing needs;
LVP often hits a sweet spot by combining moderate upfront cost, strong water resistance, and a typical 10–20 year lifespan that delays replacement compared with cheaper laminates while avoiding hardwood’s higher install and refinishing expenses.
You’ll also factor warranty, traffic level, and resale impact.
Common Problems and Costly Mistakes to Avoid
Watch for common pitfalls that can wreck your LVP job and add unexpected costs.
Skipping subfloor prep or moisture control, buying the wrong grade or too few planks, and neglecting proper acclimation and installation all lead to problems down the line.
Also don’t skimp on quality underlayment, trims, and accessories if you want the floor to last.
Inadequate subfloor prep and moisture control
While LVP looks forgiving, poor subfloor prep and missed moisture issues can wreck a new floor fast.
You’ll face gaps, cupping, adhesive failure, or mold if you skip leveling, cleaning, or moisture testing.
Always fix dips, secure loose boards, and use a moisture barrier where needed.
Paying for proper prep prevents costly repairs and shortens replacement cycles.
Buying too little or wrong grade of planks
Because ordering the wrong quantity or grade of LVP can derail your installation, double-check measurements and product specs before you buy.
Buying too little forces costly rush orders and mismatched batches; choosing a lower-grade plank can lead to premature wear, visible defects, or warranty issues.
Order 10%–15% extra for cuts and mistakes, and match plank lot numbers to guarantee consistent color and texture.
Poor acclimation and installation techniques
If you skip proper acclimation or rush installation steps, you’ll likely face warped planks, gaps, and costly callbacks.
You should let LVP sit in the room 48–72 hours, maintain recommended humidity and temperature, and follow layout, expansion gap, and locking procedures.
Cutting corners on sequencing, adhesive application, or tapping can cause failures that require partial or full replacement — increasing labor and material costs.
Choosing low-quality accessories or underlayment
Even after you get acclimation and installation right, cheap accessories or underlayment can undo your work fast.
If you skimp on vapor barriers, adhesives, or padding, you’ll face premature wear, squeaks, and moisture damage.
Invest in manufacturer-recommended underlayment and quality trims to preserve warranty, improve comfort, and prevent costly repairs.
Cheap saves now but costs more later.
Tips to Reduce Installation Costs Without Sacrificing Quality
To cut LVP installation costs without hurting quality, focus on accurate measuring and ordering so you don’t pay for wasted material.
Know where to splurge (like good underlayment and skilled labor) and where to save. Get multiple bids and negotiate quotes, and plan the job during slower seasons for lower rates.
Following these steps will help you balance upfront costs with long-term performance.
Best practices for accurate measuring and ordering
Measure carefully and order precisely to avoid costly waste and delays when installing LVP.
You’ll measure room dimensions, include alcoves and closets, and subtract fixed cabinetry. Add 5–10% for cuts and pattern matching, more for diagonal layouts.
Double-check measurements, confirm plank size and batch numbers, and order from one supplier to guarantee color consistency.
Keep receipts for returns or adjustments.
Where to splurge and where to save (materials and labor)
When you’re planning LVP work, prioritize splurging on high-traffic planks, quality underlayment, and a skilled installer while trimming costs on trim, junction strips, and basic tools you can reuse or buy affordably.
That balance keeps the floor durable and attractive without blowing your budget.
Pick mid-range visuals for low-use rooms, buy extra planks for cuts, and choose a pro for tricky changes.
Negotiating contractor quotes and getting multiple bids
Although getting multiple bids takes extra time, it gives you leverage to compare pricing, scope, and workmanship so you don’t overpay for LVP installation.
Get at least three quotes, ask for itemized breakdowns, and negotiate terms. Verify references and warranties.
Consider these comparison points:
- Material quality and brand
- Labor hours and rates
- Prep and disposal fees
- Warranty and timeline
Timing your project for lower labor rates
Plan your LVP install for off-peak seasons and weekdays to catch lower labor rates—contractors often drop prices during slower months or fill gaps in their schedules with discounted projects.
You can ask for short-notice discounts, bundle rooms to reduce per-room setup charges, and avoid peak renovation times like spring.
Being flexible with start dates gives you bargaining power without sacrificing workmanship.
Warranty, Lifespan, and Long-Term Value Considerations
When budgeting for LVP, you’ll want to compare manufacturer warranties with installer guarantees to know who’s responsible if problems arise.
Consider expected lifespan by product grade and the maintenance required to keep that warranty valid.
Also weigh how different LVP choices affect resale value and your ROI over time.
Manufacturer warranties vs installer guarantees
If you want long-term protection for your LVP, you’ll need to weigh manufacturer warranties against installer guarantees, since they cover different risks and have different conditions.
Manufacturers protect against defects and wear under specified use, while installers guarantee workmanship and installation quality.
You should review claim procedures, coverage duration, transferability, and required maintenance to know which issues each party will resolve.
Expected lifespan by product grade and maintenance needs
Beyond warranties and installer guarantees, you should also consider how product grade and upkeep affect how long LVP will actually last and retain value.
Higher-grade, thicker wear layers resist dents and abrasions and can last 20–30 years with proper care. Lower-grade options may wear in 5–10 years.
Regular cleaning, avoiding standing water, and using protective pads extend life and preserve appearance.
Resale value impact and ROI estimates
Although warranties and lifespan estimates don’t guarantee a higher sale price, they do shape buyer perception and can improve your return on investment by signaling durability and lower future maintenance costs.
When you choose quality LVP with solid warranty coverage, expect modest resale premiums and faster sale times.
Calculate ROI by comparing material and installation costs against estimated added home value and reduced future upkeep.
Sample Cost Estimates and Real-World Case Studies
You’ll see three clear case studies: a budget install with a full cost breakdown, a mid-range project highlighting key decisions and trade-offs, and a premium job using high-end materials and labor.
Each example will show exact numbers and where money was saved or splurged. Use these real-world scenarios to compare outcomes and plan your own budget.
Budget install case study with full cost breakdown
When you’re working with a tight budget, a real-world case study shows how strategic choices — like selecting a mid-grade LVP, prepping floors yourself, and hiring labor for just the installation — can cut total costs dramatically; the following breakdown walks through exact line-item prices and decisions so you can see where to save and where not to skimp.
| Item | Cost | Notes |
|---|---|---|
| LVP (200 sq ft) | $400 | mid-grade |
| Adhesive/trim | $60 | DIY |
| Labor (install) | $300 | contractor |
| Misc/contingency | $70 | unexpected issues |
Mid-range install case study with decisions and trade-offs
If you want better durability and a more finished look without moving into luxury pricing, a mid-range LVP install balances material quality, labor choices, and prep work to deliver solid value. You’ll choose 20–30 mil wear layers, moderate underlayment, and pro installation for tricky rooms. Expect trade-offs: lower plank variety and slower timelines.
| Item | Choice | Effect |
|---|---|---|
| Wear layer | 20–30 mil | Better longevity |
| Underlayment | Mid | Improved comfort |
| Labor | Pro | Cleaner finish |
Premium install case study with high-end materials and labor
Because you’re investing in top-tier results, a premium LVP install pairs 30–40+ mil wear layers, luxury underlayment (sound-reducing, moisture-barrier, and cushioned), wide-format planks with beveled edges, and full pro installation—including acclimation, meticulous subfloor prep, and custom connections—to maximize longevity, finish, and resale appeal.
| Item | Estimated Cost |
|---|---|
| High-end LVP | $6–$12/sq ft |
| Underlayment | $1–$3/sq ft |
| Labor | $4–$8/sq ft |
| Total | $11–$23/sq ft |
How to Get an Accurate Quote Checklist for Homeowners
Before you contact installers, get accurate measurements and clear photos of each room to share with contractors.
Prepare a shortlist of questions about materials, timeline, warranties, and prep work so you can compare bids side-by-side.
Watch for red flags like vague scopes, unusually low prices, or missing written guarantees in the estimate and contract.
Measurements and photos to provide contractors
Gathering clear measurements and photos gives contractors the exact info they need to provide accurate LVP quotes, so take time to capture room dimensions, doorways, and any irregular areas.
Measure wall-to-wall, note thresholds and closets, and photograph trouble spots. Share dimensions in a labeled sketch plus photos so contractors can quote material, underlayment, and labor accurately.
- Room dimensions
- Doorway widths
- Irregular cuts
- Photo references
Questions to ask potential installers
Want to make sure you get a fair, accurate LVP install quote? Ask about experience with LVP, licensing and insurance, timeline, labor vs. material costs, subfloor prep needs, warranty details, removal and disposal fees, moisture testing, and whether they handle changes, trim, and moldings.
Request written estimates, itemized costs, and references or photos of recent similar jobs before deciding.
Red flags in estimates and contract terms to watch for
When reviewing estimates and contracts, watch for vague line items, unusually low bids, or clauses that shift extra costs to you—these are common red flags that signal potential problems down the road.
Insist on detailed scopes, material brands, labor rates, waste allowances, start/end dates, and change-order procedures.
Avoid verbal promises; get everything written, compare multiple bids, and confirm licensing and insurance before signing.
Frequently Asked Questions (FAQ)
You’ll find answers here to the common cost and installation questions homeowners ask about LVP, like per-square-foot installed price and whether underlayment is needed.
We’ll cover if LVP can go over existing floors, how long a typical room takes, and whether the new floor will raise thresholds or affect doors.
If you have a specific room size or flooring scenario, mention it so we can give more precise guidance.
How much does LVP cost per square foot installed?
Curious how much LVP will set you back per square foot installed?
Expect installed LVP to run roughly $3 to $8 per sq ft for standard options, $8 to $12 for premium styles, and higher for specialty designs.
Prices vary by region, contractor rates, and prep needs.
Get multiple quotes and factor in warranty and labor quality when choosing.
Do I need underlayment for LVP and how much does it add?
Do you need underlayment for LVP? You usually do—underlayment improves sound, comfort, and minor subfloor imperfections, and provides moisture barrier when required.
Costs run about $0.30–$1.00 per sq ft for basic foam; premium options or integrated vapor barriers can be $1–$2 per sq ft.
Expect labor to add if installer supplies and lays it, roughly $0.25–$0.50 per sq ft.
Can LVP be installed over existing flooring?
Can you install LVP over your existing floor? Yes—you can often float LVP over vinyl, tile, or sealed hardwood if the surface is flat, clean, and dry.
Remove loose trim, fix high/low spots, and make sure joints align. Don’t install over carpet, wet subfloors, or uneven surfaces.
Follow manufacturer guidelines to keep warranties valid and prevent issues.
How long does LVP installation take for an average room?
How long will LVP take in an average room? You can expect a 10×12 room to take about 4–8 hours for a pro team: acclimation may be pre-done, underlayment and prep 1–2 hours, laying planks 2–4 hours, and trim/cleanup 1–2 hours.
DIYers should budget a full day or weekend depending on experience and tools.
Will LVP raise my floor height and affect doors/thresholds?
Because LVP is relatively thin—typically 2 to 8 mm—it usually only raises your finished floor by a small amount.
However, that small change can matter around doors, thresholds, and junctions. You’ll often trim door bottoms, adjust hinges, or replace thresholds.
Plan connections where LVP meets carpet or tile, and account for underlayment thickness to avoid binding or gaps at doorways.