How to Install Laminate Flooring With Underlayment (The Right Way)
You can install laminate with underlayment the right way by prepping a clean, dry, level subfloor, acclimating boards 48+ hours, and rolling underlayment perpendicular to the planks with taped seams. Use spacers for the required expansion gap, stagger end joints 12–18 inches, and lock boards with a tapping block and pull bar. Trim doorways and install trim without closing gaps. Follow manufacturer moisture and underlayment specs, and keep going to learn step‑by‑step tips and troubleshooting.
Quick Answer Can You Install Laminate Flooring With Underlayment?
Yes — you should usually install laminate with underlayment, and it’s required if your subfloor is uneven or you need moisture or sound protection.
Lay the underlayment roll perpendicular to the boards, trim and tape seams, then float the laminate over it; the whole room typically takes a skilled DIYer a day or two.
If your subfloor is smooth and moisture isn’t an issue, some manufacturers allow the laminate without underlayment—check the warranty first.
Short direct answer and when it’s necessary
Although laminate can often be floated directly over a clean, flat subfloor, you should use underlayment when you need moisture protection, sound reduction, or a smoother surface to hide minor imperfections.
In short: yes, use underlayment when moisture, acoustics, or unevenness matter.
If you’re learning how to install laminate flooring with underlayment, choose the right type for subfloor and room conditions.
One-sentence summary of key steps and time estimate
If you’ve decided to use underlayment for moisture control, sound reduction, or a smoother surface, here’s a one-sentence summary:
Prep and clean the subfloor, roll out and tape underlayment, acclimate and stagger laminate planks, click them together with spacers for expansion, trim edges and install trim/molding; expect a weekend for a single room (4–10 hours) depending on room size and your skill.
Basic Understanding What Is Underlayment and Why It Matters
Underlayment is the thin layer you put between your laminate and the subfloor, and it comes in foam, cork, rubber, and combination types that offer different benefits.
You’ll want it for moisture protection, sound reduction, minor leveling, and added insulation, though some installations (like glue-down planks over flat, dry concrete) may not need it.
Check compatibility with your laminate and subfloor—manufacturers recommend specific thicknesses and materials for best performance.
Types of underlayment for laminate (foam, cork, rubber, combination)
Anyone choosing laminate flooring will need to pick an underlayment, since it cushions, evens minor subfloor imperfections, and controls moisture and sound; common options include foam, cork, rubber, and combination products, each suited to different needs and budgets.
Foam is affordable and easy to install; cork is eco-friendly and durable; rubber excels for heavy traffic; combination rolls pair layers for added performance and convenience.
Functions: moisture barrier, sound reduction, leveling, insulation
Think of underlayment as the unsung hero beneath your laminate: it keeps moisture out, reduces noise, evens small subfloor imperfections, and adds thermal cushioning so your floors feel warmer underfoot.
You’ll block vapor from concrete, dampen footfall and echo, smooth minor dips for stable locking, and improve insulation.
Choose underlayment that matches your priorities for protection, comfort, and acoustic performance.
When underlayment is required vs optional
A good rule of thumb is that you’ll need underlayment any time your subfloor is concrete, uneven, or likely to transmit moisture or noise—otherwise it can be optional.
If your subfloor is clean, dry, level, and in a low-moisture area, you may skip it.
But if you want extra sound dampening, minor leveling, or thermal comfort, underlayment is worth adding.
Compatibility: laminate types, subfloor types, and recommended thicknesses
Which underlayment works best depends on the laminate type, the subfloor material, and the thickness you need for comfort and performance. You should match foam for floating laminate, cork for sound, and rubber for moisture-prone areas. Thicker underlayment adds comfort but requires larger expansion gaps. Choose based on subfloor (plywood, concrete, or OSB) and manufacturer specs.
| Laminate | Recommended Underlayment |
|---|---|
| Floating | Foam (2–3 mm) |
| High-traffic | Cork/rubber (3–6 mm) |
| Concrete | Moisture barrier + foam |
| Engineered | Thin foam or manufacturer-specified |
Tools, Materials, and Prep Checklist
Before you start laying planks, gather the essential tools (saw, spacers, tapping block, pull bar, measuring tape) and materials plus optional upgrades like a vapor barrier, connector strips, and adhesives.
You’ll also need to prep the site by acclimating the laminate, stabilizing room conditions, removing old flooring, and inspecting the subfloor for level, cleanliness, and dryness.
Don’t skip moisture testing (meter or calcium chloride) and any necessary repairs to guarantee a stable installation.
Essential tools list
When you’re ready to lay your laminate, gather a compact set of tools and materials so each step flows smoothly: you’ll need a tapping block, pull bar, spacers, rubber mallet, tape measure, carpenter’s square, utility knife, jigsaw or circular saw, level, and safety gear (glasses, gloves, ear protection).
You’ll also need underlayment, vapor barrier, and adhesive or connector pieces as specified by your flooring.
- Measure and mark accurately.
- Cut with proper safety.
- Fit panels using tapping block.
Materials and optional upgrades (vapor barrier, transition strips, adhesives)
Now that your tool kit and measurement prep are set, pick the right materials and optional upgrades to match your room and subfloor.
Choose underlayment thickness and type for sound and cushioning.
Consider a vapor barrier for moisture, threshold strips for doorways, and adhesive for high-traffic seams.
- Vapor barrier options
- Threshold strip types
- Adhesives and cleaners
Site preparation: acclimation of laminate, room conditions, removing old flooring
Give the laminate at least 48 hours in the room to acclimate to temperature and humidity so boards won’t expand or gap after installation.
Maintain stable indoor temp (60–80°F) and 30–50% humidity.
Remove baseboards, trim thresholds, and any carpet or tack strips.
Clear furniture and sweep thoroughly.
Gather underlayment, spacers, saw, tape measure, and a pry bar before you begin.
Subfloor inspection: level, clean, dry, moisture testing methods
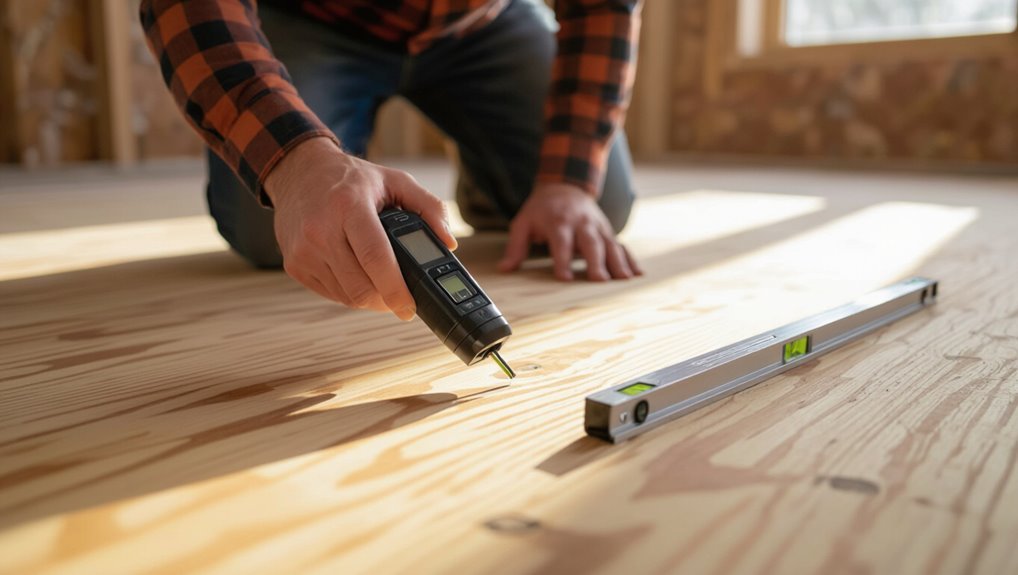
Before you lay a single plank, inspect the subfloor for level, cleanliness, and dryness so your laminate will lock and last.
Check for gaps, squeaks, high spots, and adhesive residue. Use a straightedge, level, vacuum, and moisture meter.
Repair, sand, or shim as needed. Then install a vapor barrier if moisture readings exceed manufacturer limits.
- Use straightedge and level
- Vacuum thoroughly
- Test with moisture meter
Step-by-Step Installation Process
Start by measuring the room and planning the layout so you can stagger joints, choose the right board direction, and allow proper expansion gaps.
If needed, install a vapor barrier (especially over concrete) and roll out underlayment, sealing seams and cutting neatly around obstacles.
Snap the first row in place, maintain the expansion gap, then continue installing rows—staggering joints, tapping boards with a block, and checking alignment as you go.
Step 1 Measure the room and plan layout (staggering, direction, expansion gaps)
Measure the room carefully and map out your layout so panels run lengthwise with the main light source and high-traffic areas in mind; this lets you plan staggered seams and guarantee proper expansion gaps around the perimeter.
You’ll measure and mark starting walls, calculate plank widths to avoid thin end pieces, plan staggering (minimum 12-inch offsets), and note doorways and passages.
Step 2 Install vapor/moisture barrier if required (over concrete vs wood)
If your subfloor is concrete or the room has high humidity, you’ll need a vapor or moisture barrier to protect the laminate from swelling and mold; for plywood or OSB over conditioned space you can usually skip it.
Choose a 6–10 mil polyethylene or manufacturer-recommended membrane, unroll and fit it loosely, overlap seams per spec, and tape edges at walls to create a continuous barrier.
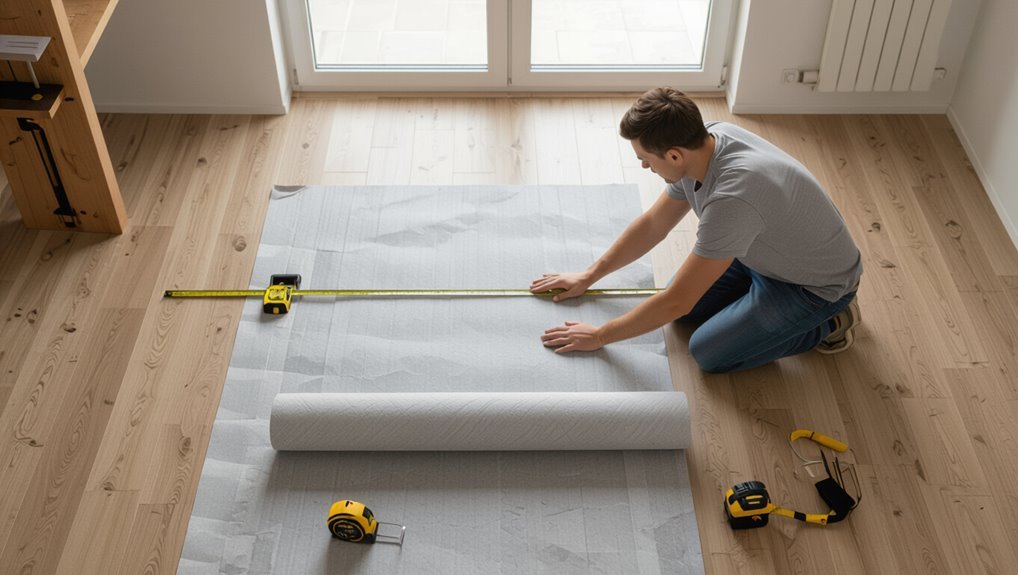
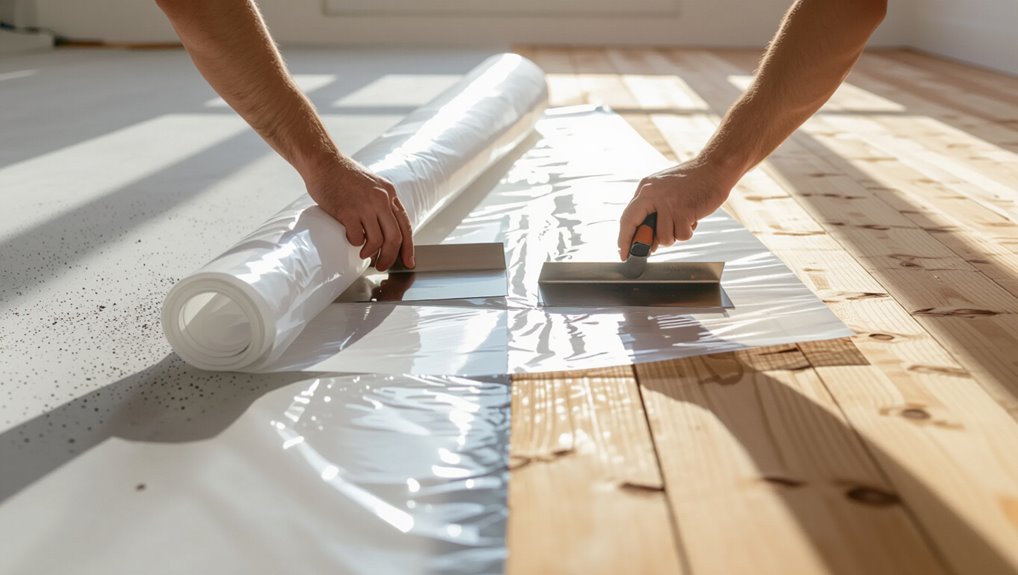
Step 3 Lay underlayment: seams, overlaps, tape, cutting around obstacles
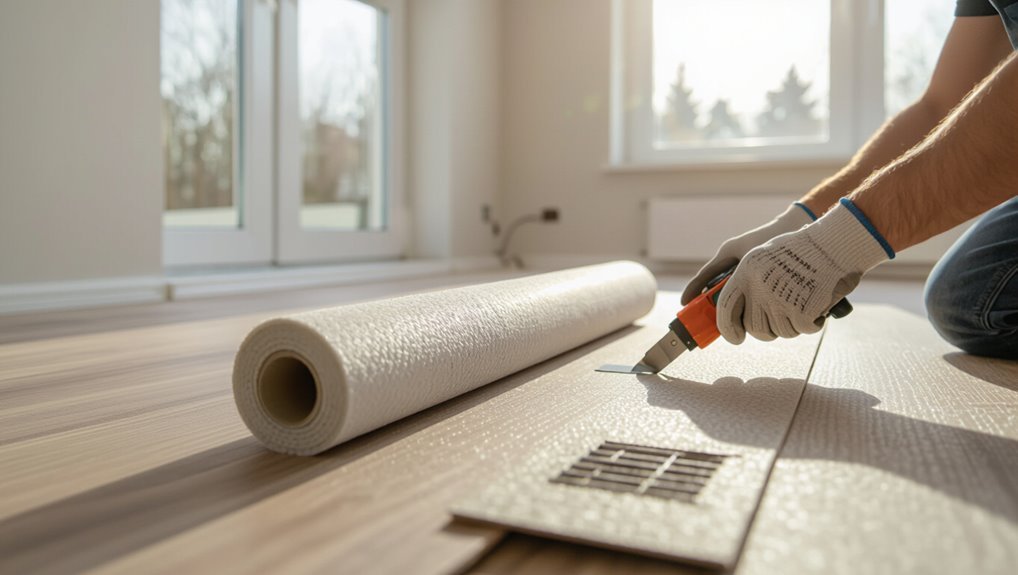
With the vapor barrier in place (or confirmed unnecessary), roll out the underlayment across the subfloor, aligning seams perpendicular to the direction you’ll lay the laminate.
Butt seams tightly or overlap per manufacturer, then tape seams with recommended tape.
Trim around door frames, pipes, and vents with a utility knife.
Keep underlayment flat, secure edges, and leave no gaps beneath the flooring.
Step 4 Snap/lock first row of laminate and maintain expansion gap
Begin by laying the first plank along your longest wall, groove side facing the wall, and use spacers to maintain the required expansion gap between the plank and the wall.
Angle the next plank, engage the tongue into the groove, then press down or snap it flat.
Check each connection for a tight seam and consistent gap; cut the last piece to fit.
Step 5 Continue installing rows: stagger joints, tapping/block use, checking alignment
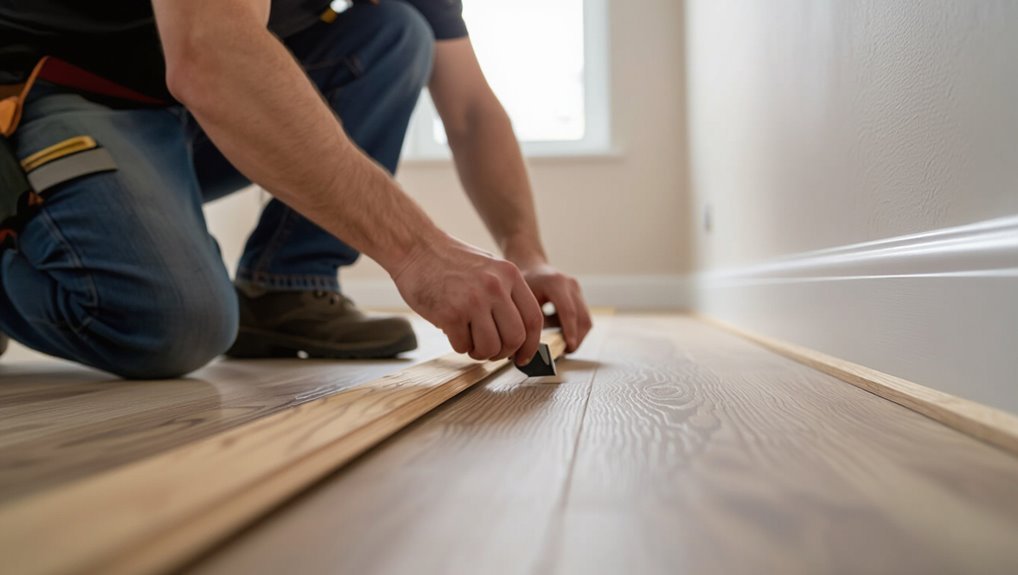
Now keep laying rows across the room, staggering end joints by at least 12–18 inches so seams don’t line up, and tapping each plank into place with a tapping block and mallet to guarantee tight, even connections.
Work left to right (or vice versa), trim starter pieces as needed, check each row for straightness, remove debris from joints, and periodically measure to maintain consistent expansion gaps.
Step 6 Fitting undercut door jambs and inside/outside corners
You’ll need to undercut door jambs and carefully handle inside and outside corners so the flooring fits cleanly and the expansion gap stays consistent.
Use a jamb saw or handsaw with a spacer under the plank to cut jambs flush.
For inside corners, scribe and trim planks; for outside corners, miter or leave small reveal.
Maintain gaps and test fit before final placement.
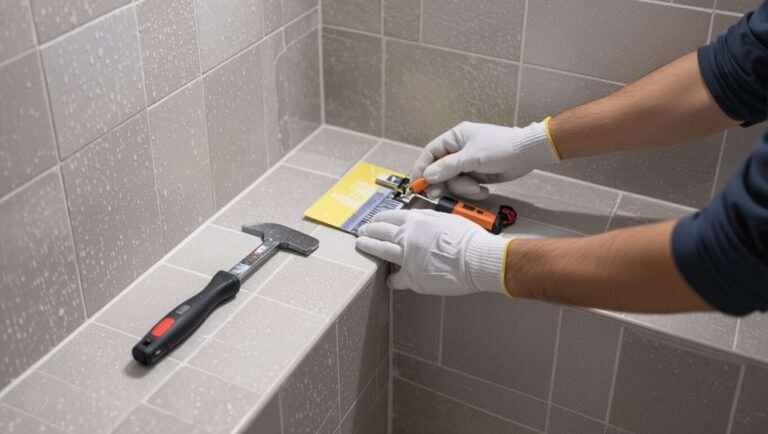
Step 7 Install trim, transitions, and baseboards while preserving expansion gap
After the planks are laid and checked for proper gaps, install trim, connections, and baseboards so they cover the edge without restricting the floor’s ability to expand and contract.
Fit threshold strips at doorways, stagger seams, and nail or clip moldings to the wall only.
Leave the expansion gap visible behind trim, caulk sparingly for a clean finish, and trim door jambs as needed.
Step 8 Final checks, cleaning, and cure time before heavy use
Once you’ve finished trim and changes, do a final walk-through to check seams, gaps, and changes for tightness and alignment before you clean and leave the floor to settle.
Remove debris, vacuum, and damp-mop with a manufacturer-approved cleaner. Protect surfaces with felt pads.
Wait the recommended cure time—usually 24–48 hours—before heavy furniture or foot traffic to allow the underlayment and joints to stabilize.
Comparison Underlayment Options and When to Choose Each
When choosing underlayment, you’ll weigh foam, cork, rubber, and bonded options for cushioning, sound control, and durability.
Decide whether you need an integrated vapor barrier or can lay a separate one based on moisture risk and installation ease.
Balance cost against performance—cheaper foam saves money but may cost you in noise or longevity compared with cork or rubber.
Foam vs cork vs rubber vs bonded underlayment
Although all underlayments cushion and protect your laminate, foam, cork, rubber, and bonded options perform differently and suit different needs. You’ll pick foam for budget and sound, cork for eco and thermal, rubber for superior sound and resilience, and bonded for moisture control and stability.
| Type | Strength | Best Use |
|---|---|---|
| Foam | Cheap | Low-traffic |
| Cork | Eco | Bedrooms |
| Rubber | Durable | Loud areas |
Underlayment with integrated vapor barrier vs separate vapor barrier
Pick underlayment with an integrated vapor barrier if you want a faster, foolproof install, and choose a separate vapor barrier when you need more flexibility for tricky subfloors or higher moisture concerns. You’ll prefer integrated for speed and seam-sealed edges; use separate sheets to overlap, tape, or add heavier protection where moisture varies.
| Option | Best for | Notes |
|---|---|---|
| Integrated | Quick installs | Simple seams |
| Separate | Challenging subs | Flexible coverage |
| Both | Connecting rooms | Layer as needed |
Cost vs performance trade-offs
Deciding between underlayment types comes down to balancing upfront cost against long-term performance and installation ease.
You’ll choose based on budget, moisture risk, and sound or comfort needs.
- Cheap foam: low cost, minimal sound dampening, good for dry areas.
- Felt or cork: mid-price, better insulation and longevity.
- Integrated vapor: higher cost, simplest install, best moisture protection.
Common Mistakes and How to Avoid Them
Don’t start laying underlayment over uneven or damp subfloors — you’ll trap moisture and ruin the flooring.
Make sure seams are handled correctly (no overlaps, tape the vapor barrier when needed), leave proper expansion gaps, and use an underlayment that’s compatible with your laminate’s click system.
Also don’t rush acclimation or skip moisture tests, since those steps prevent warping and other failures.
Installing underlayment over uneven/wet subfloors
Start by inspecting the subfloor carefully—underlayment won’t fix significant unevenness or trapped moisture, and installing it over these conditions leads to squeaks, buckling, and shortened flooring life.
You should level dips with a proper patch or sanding, repair loose boards, and address moisture with a vapor mitigation system or fix leaks.
Never cover issues; fix them first for a stable floor.
Overlapping seams incorrectly or failing to tape vapor barrier
Once you’ve corrected unevenness and moisture issues, make sure your underlayment and vapor barrier are joined correctly—poorly overlapped seams or untaped vapor barriers let moisture and air move under the laminate, causing warping and mold.
Overlap seams per manufacturer specs, tape all joints with approved vapor-barrier tape, and seal edges at walls and penetrations so the barrier stays continuous and effective.
Not leaving adequate expansion gaps
Because laminate expands and contracts with temperature and humidity, you need to leave consistent expansion gaps around the room; failing to do so lets boards press against walls or each other, causing buckling, popping seams, or gaps later.
Use spacers at perimeter and around fixed objects, follow manufacturer gap recommendations (usually 1/4–1/2 inch), and don’t remove gaps when installing trim or junctions.
Using incompatible underlayment with specific laminate click systems
Although the click profile may look the same, some laminate locking systems require underlayment with specific thickness, compressibility, or vapor-barrier properties.
Using the wrong one can prevent proper engagement, cause uneven joints, or void the warranty.
Check the flooring manufacturer’s underlayment specs, match density and vapor requirements, and test fit a few planks before installing to guarantee secure, even clicks.
Rushing acclimation or skipping moisture tests
After confirming your underlayment matches the manufacturer’s specs, don’t rush the acclimation or skip moisture testing—those steps protect the floor after installation.
Give boards 48–72 hours to adjust in the room, keeping cartons closed.
Test concrete with a moisture meter and wood subfloors with a hygrometer; follow limits in manufacturer guidelines.
Address excess moisture before installing to avoid warping and warranty issues.
Best Practices, Tips, and Troubleshooting
Start by planning your layout so rows stay straight and waste stays minimal. Then consider underlay options that boost soundproofing and thermal comfort.
If you spot small gaps, squeaks, or damaged planks later, you can often fix them with targeted repairs or by replacing individual boards.
Call a pro if the subfloor is badly uneven, moisture is an issue, or the repairs are beyond simple swaps.
Tips for straight rows and minimal waste (layout strategies)
If you want straight rows and minimal waste, plan your layout before you snap your first chalk line: You’ll measure room width, decide starter wall, and stagger joints for stability.
Follow these steps:
- Measure and mark centerline, dry-lay a row to check edge widths.
- Cut end boards so both edges stay at least half-board width.
- Alternate plank lengths to avoid repeated seams.
Soundproofing and thermal performance improvements
When you want quieter, warmer floors, focus on underlayment, seam sealing, and perimeter insulation to get the biggest gains; choose a quality acoustic underlay with thermal properties, seal gaps at junctions and around pipes, and insulate sill plates or joist cavities where the laminate sits.
Use vapor-retardant layers in moist areas, stagger seams, compress edges for contact, and test for uniform coverage.
Repairing small gaps, squeaks, and damaged planks after installation
Tackle small gaps, squeaks, and damaged planks promptly to keep your laminate floor looking and performing its best; addressing issues early prevents moisture intrusion, further movement, and more extensive repairs.
Use laminate filler or matching putty for hairline gaps, tighten loose boards or add adhesive for squeaks, and replace or swap damaged planks using the floating-floor removal method to preserve finish and alignment.
When to call a pro vs DIY
Wondering whether you can handle a laminate-floor issue yourself or need a pro?
If it’s minor—small gaps, a squeak, or one damaged plank—you can usually DIY with basic tools.
Call a pro for extensive subfloor damage, moisture issues, uneven floors, or whole-room replacement.
Also hire a pro if you lack tools, time, or confidence; it’ll save money and headaches long-term.
Cost, Time, and ROI Estimates
Expect to see a wide range in material and labor costs depending on product quality and who installs it.
Plan your time based on room size and your experience—a small room can take a few hours for a pro or a weekend for a DIYer, while larger spaces take proportionally longer.
Also consider how long different laminates last and how maintenance affects lifespan and return on investment.
Typical material and labor cost ranges
A typical DIY laminate flooring job will cost you between $1 and $5 per square foot for materials and about $2 to $8 per square foot for professional installation, though prices vary by plank quality, underlayment, and room complexity. Expect mid-range laminate plus underlayment to run $2–$4/ft²; premium options push labor and materials higher.
| Item | Typical range |
|---|---|
| Materials | $1–$5/ft² |
| Installation | $2–$8/ft² |
Time estimate by room size and skill level
Now that you have a sense of material and labor costs, you’ll want to plan how long the job will take based on room size and your experience level.
- Small room (100–200 sq ft): DIY novice 6–10 hours; experienced 3–5 hours.
- Medium room (200–400 sq ft): DIY novice 1–2 days; experienced 6–10 hours.
- Large/open plan (400+ sq ft): DIY novice 2–4 days; experienced 1–2 days.
Longevity expectations and maintenance impact
Lifespan for laminate flooring typically ranges from about 10 to 25 years depending on wear, quality, and upkeep, and that span directly affects cost, time, and return on investment.
You’ll pay more for higher-grade boards and better underlayment, but they resist scratches and moisture longer.
Regular cleaning, prompt spill response, and felt pads cut replacement frequency and boost long-term ROI.
FAQ
You’ll have common questions about underlayment and moisture control, like whether you always need a vapor barrier and how thick the underlayment should be.
You’ll also want to know if underlayment works with radiant heat, prevents squeaks, or lets you float laminate over existing vinyl.
Read on for clear, practical answers to each of these points.
Do I always need a vapor barrier under laminate?
Do you always need a vapor barrier under laminate? Not always.
You should use one over concrete or other moisture-prone substrates to protect the floor and warranty.
Over wood subfloors or in dry, climate-controlled spaces, underlayment with integrated moisture protection or none may suffice.
Check manufacturer requirements and local conditions—when in doubt, install a barrier to prevent costly moisture damage.
Can I install underlayment over radiant heat?
Can you install underlayment over radiant heat? Yes — but choose underlayment rated for radiant systems and follow manufacturer guidelines.
Make certain the heat source’s temperature won’t exceed the underlayment’s limit, maintain proper clearance, and use adhesive or vapor barriers approved for heated floors.
Test system performance before laying laminate, and consult both flooring and radiant-heat manufacturers for compatibility and warranty compliance.
How thick should underlayment be for laminate flooring?
How thick should underlayment be for laminate flooring?
You’ll typically choose 2mm to 3mm for standard laminate; it provides cushioning, minor height adjustment, and moisture protection.
Thicker options (4mm–6mm) suit uneven subfloors or added sound control but can affect door clearances and connections.
Check manufacturer recommendations—some laminates require integrated or specific-thickness underlayment to maintain warranty and performance.
Will underlayment prevent laminate from squeaking?
Wondering if underlayment will stop your laminate from squeaking? It helps a lot by cushioning joints, reducing movement, and damping sound transfer, especially over imperfect subfloors.
It won’t fix installation errors or loose boards, though. Use quality underlayment, follow manufacturer recommendations, maintain expansion gaps, and guarantee a flat, secure subfloor to minimize or eliminate those annoying squeaks.
Can I install laminate over existing vinyl with underlayment?
Yes—you can often float laminate over existing vinyl using underlayment, provided the old floor is securely glued or fully adhered, flat, and free of soft spots, bubbles, or loose seams.
You should clean and degrease the vinyl, repair imperfections, and use a quality underlayment rated for moisture and sound.
If vinyl is cushioned or unstable, remove it first for a reliable installation.