How to Restore Laminate Flooring That Looks Dull, Scratched, or Worn
You can often revive dull or mildly scratched laminate by cleaning with a pH‑neutral solution, removing grit, and drying thoroughly, then disguising light scratches with color‑matched markers or wax and buffing; apply a compatible laminate polish or clear coat in thin, even layers to restore sheen and texture. Deep gouges, warped or water‑damaged planks usually need replacement. Take safety precautions, test products first, and keep humidity controlled—keep going to learn specific steps, tools, and when to hire pros.
Quick Answer Can You Restore Dull, Scratched, or Worn Laminate Flooring?
You can often restore dull or mildly scratched laminate with cleaning, polishing products made for laminate, or spot repairs.
However, deep gouges, warped boards, or worn-through wear layers usually need replacement.
If scratches are superficial and the boards sit flat, try repair kits or a refinishing polish first.
Replace sections or the whole floor when damage affects structural integrity, moisture has warped boards, or the wear layer is gone.
Short summary of what restoration can and cannot achieve
Although laminate can’t be refinished like real hardwood, you can often improve dull, lightly scratched, or worn-looking boards with cleaning, buffing, and targeted repairs.
You’ll remove grime, reduce surface scratches, and hide small chips with fillers or touch-up kits.
Deep gouges, warped planks, or delamination usually need board replacements.
Ask yourself: how do you restore laminate flooring realistically and which fixes will last?
When to repair vs. replace
When evaluating dull, scratched, or worn laminate, weigh surface fixes against full replacement based on damage depth and budget: if scratches are superficial, clean, buff, and apply repair kits; if wear affects the printed layer, consider plank replacement; if multiple areas show deep gouges, moisture damage, or delamination, replace the floor.
Factor time, cost, matching availability, and long-term resale value when deciding.
How Laminate Flooring Works and Why It Gets Dull or Damaged
Laminate flooring has a layered construction topped by a clear wear layer that protects the printed design and core board, and knowing that helps you spot what can be fixed.
Everyday causes like dirt abrasion, grit, UV fading, and heavy traffic wear that protective layer down or create scratches.
Look for surface-only signs—scuffs, loss of sheen, or shallow scratches—versus structural issues like swollen seams, deep gouges, or core delamination.
Laminate construction and protective wear layer
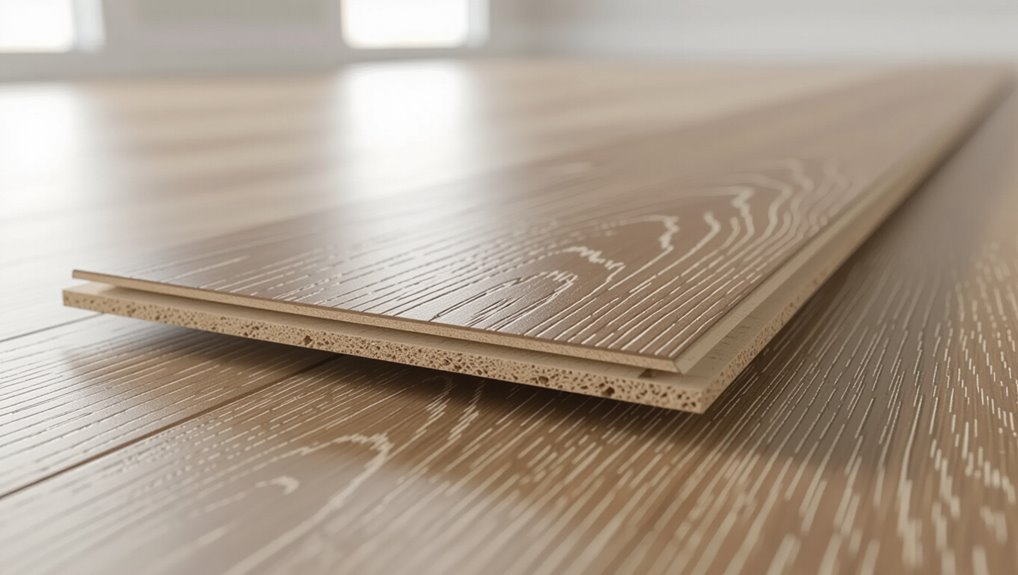
Flooring manufacturers build laminate from several layered materials—typically a dense fiberboard core topped with a photographic décor layer and a clear wear layer—so you get wood-like looks without solid-wood costs.
You rely on that transparent wear layer to resist scratches, stains, and UV. Thicker, tougher wear layers (measured in AC ratings) provide better protection and longer-lasting appearance before restoration is needed.
Common causes of dullness, scratches, fading, and wear
Because the clear wear layer does the heavy lifting, you’ll notice problems once that surface gets compromised—abrasion from foot traffic, grit tracked in on shoes, and moving furniture all create fine scratches that scatter light and make boards look dull.
UV exposure fades printed décor, spills and cleaners dull finish, and moisture swells edges.
- Foot traffic and grit
- Furniture abrasion
- UV, spills, and moisture
Signs that damage is surface-level vs. structural
When damage appears, you can often tell whether it’s just cosmetic or something that needs repair by checking a few key signs.
Surface wear shows faded finish, light scratches, and dirt trapped in texture that cleans or buffs out.
Structural issues include swollen seams, buckling, deep gouges through the wear layer, or uneven boards that flex—these need panel replacement or subfloor fixes.
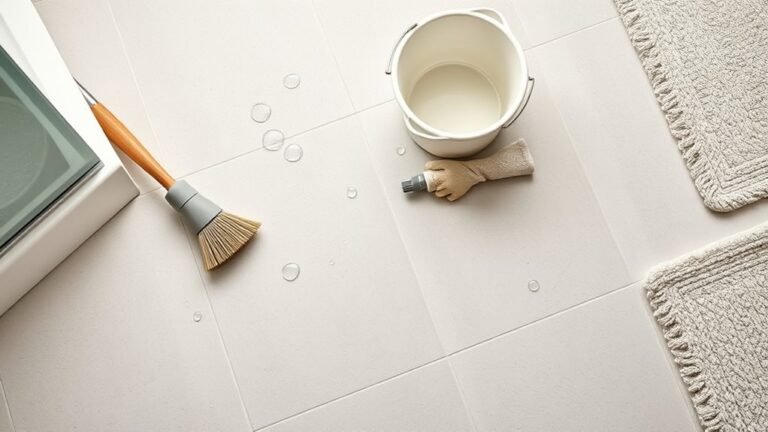
Materials, Tools, and Safety Precautions You’ll Need
Before you start, you’ll want the right cleaning products, laminate repair kits, and finishing products on hand so you can match the job to the damage.
Gather basic tools for light repairs—like a putty knife and microfiber cloths—and heavier tools for deep restoration, such as a heat gun or replacement planks.
Take simple safety steps and test the surface first to avoid chemical reactions or hidden structural issues.
Cleaning products, repair kits, and finishing products
Gather the right cleaning products, repair kits, and finishing materials so you can tackle stains, scratches, and edge wear without causing more damage.
Use pH-neutral laminate cleaner, microfiber pads, and sparing water; color-matching repair wax or pens for scratches; and a clear laminate-safe seal or restorative polish for dull areas.
Follow label instructions and ventilate.
- pH-neutral cleaner
- Repair wax/pen
- Laminate-safe polish
Tools for light repairs vs. deep restoration
Although small scuffs and stains can usually be fixed with a handful of basic tools, deep restoration demands different gear and stricter safety steps.
So you should pick your kit based on the job’s scope. For light jobs, you’ll need simple cleaners and touch-up pens.
For deep work, you’ll want sanders, replacement planks, and stronger finishes.
- Touch-up pens, microfiber cloths
- Orbital sander, pry bar
- Replacement planks, finishing coat
Safety tips and surface testing
Safety matters: check the room and your laminate carefully so you know what you’re dealing with and can work without risking injury or damage.
Wear gloves, eye protection, and a mask when sanding or using solvents.
Test a hidden plank for finish compatibility and adhesion before applying products.
Guarantee good ventilation, remove rugs, and keep pets and kids away until surfaces fully cure.
Step-by-Step Restoration: From Cleaning to Refinishing
Start by giving the floor a thorough cleaning so you can see its true condition.
Then you’ll remove scuffs, repair scratches, chips, and edge damage, and restore shine with approved polishes and treatments.
Finally, blend color and pattern to make visible repairs match the rest of the floor.
Step 1 Thorough cleaning to reveal true condition
Before you decide on repairs or refinishing, give the floor a deep, systematic cleaning so you can see its true condition.
Sweep/vacuum debris, mop with a manufacturer-approved cleaner, and tackle grime in seams with a soft brush and microfiber.
Rinse residue, dry thoroughly, and inspect under good light for wear, staining, or damage that dictates whether simple maintenance or fuller restoration’s needed.
Step 2 Removing scuffs and light surface dullness
Once your cleaning has exposed the floor’s true surface, you can tackle scuffs and light dulling with targeted, low-effort fixes that restore shine without stripping the wear layer.
Gently buff scuffs with a microfiber cloth and a bit of laminate polish or baking soda paste. Test in an inconspicuous area, work in small sections, and wipe away residue to reveal consistent sheen.
Step 3 Repairing scratches, chips, and edge damage
Assess the damage carefully so you can pick the right fix for each area: light surface scratches, deeper gouges, small chips, and worn or lifted edges all call for different materials and techniques.
For surface scratches, use a laminate repair pen or fine abrasive.
Fill deeper gouges and chips with color-matched putty.
Re-glue or replace lifted edges, ensuring seams align before securing.
Step 4 Restoring shine with approved polishes and treatments
Having repaired scratches and tightened seams, you’ll now focus on bringing back the floor’s sheen with products made for laminate.
Choose manufacturer-approved polishes or water-based finishes, test in an inconspicuous spot, then apply thin, even coats with a microfiber pad.
Let each coat dry fully, buff lightly if recommended, and avoid oil-based waxes or harsh cleaners that can dull or damage the wear layer.
Step 5 Blending color and pattern for visible repairs
Want the repair to disappear into the rest of the floor? Match color, grain, and sheen by testing stain markers and tinted fillers on a scrap or hidden edge.
Apply thin layers, blending with a fine brush or cotton swab, feathering outward. Let each layer dry, then check under room light.
Finish with a compatible clear coat to unify texture and gloss.
Step 6 Deep restoration options for heavily worn areas
When wear goes beyond surface scratches and small chips, you’ll need deeper restoration methods like patching core material, replacing planks, or resurfacing with a compatible overlay; choose the approach based on damage depth, pattern repeat, and how visible the area is.
For deep gouges or delamination, remove damaged laminate locally, stabilize or replace the core patch, sand edges, and use matching sealant and finish to blend connections.
Step 7 Replacing planks when repair isn’t feasible
Start by identifying the exact planks that need replacement and clear the surrounding area so you can work without disturbing adjacent pieces; replacing whole planks is the most reliable fix when scratches, warping, or core damage can’t be patched.
Remove damaged boards carefully, save matching pieces, dry-fit replacements, apply manufacturer-recommended adhesive or locking method, and trim as needed for a seamless, level finish.
Comparison of Restoration Methods and Products
You’ll want to weigh temporary fixes against semi-permanent and permanent options based on how long you need the repair to last and how much effort you’ll invest.
Consider the pros and cons of commercial polishes, DIY kits, and professional resurfacing—each varies in cost, durability, and finish quality.
Start by matching your budget and expected lifespan to the method that best fits your floor’s condition.
Temporary fixes vs. semi-permanent vs. permanent solutions
Although small scratches and loose boards can often be handled quickly, choosing between temporary fixes, semi-permanent repairs, and permanent restorations depends on the damage extent, budget, and how long you want the repair to last. You’ll pick quick touch-ups for minor wear, fillers or replacements for bigger spots, or full plank replacement for lasting results.
| Option | Best use |
|---|---|
| Quick touch-up | Minor scratches |
| Fillers/reseal | Moderate damage |
| Full replacement | Severe or lasting repair |
Pros and cons of commercial polish, DIY kits, and professional resurfacing
When you’re weighing commercial polish, DIY kits, and professional resurfacing, think about cost, time, skill, and the finish you want—commercial polishes are quick and cheap but offer temporary shine;
DIY kits give more control and better repair for moderate issues if you’re careful;
and professional resurfacing costs more but delivers the most durable, uniform result with minimal risk of mistakes.
- Fast, low-cost polish
- Moderately skilled DIY repair
- Durable professional resurfacing
Common Mistakes to Avoid When Restoring Laminate
Don’t use abrasive cleaners or waxes meant for real wood, because they’ll scratch or build up on laminate.
Don’t overuse polish or mix products that aren’t compatible, since that creates cloudy films and slipperiness.
And don’t attempt risky DIY fixes—excess moisture, improper sanding, or poor blending can make damage worse.
Using abrasive cleaners or improper waxes
If you reach for heavy-duty scouring pads or harsh chemical cleaners thinking they’ll speed the job, you’ll likely damage the wear layer on laminate and make scratches and dull spots worse.
Don’t use abrasive powders, steel wool, or solvent-based cleaners. Avoid waxes designed for real wood or vinyl; they can leave residue, attract dirt, and create uneven sheen.
Stick to manufacturer-approved, pH-neutral products.
Overusing polish or applying incompatible products
Be careful not to overdo polish or mix incompatible products, because piling on shine or combining formulas can leave a sticky residue, haze, or uneven patches that attract dirt.
Test any cleaner or polish in a hidden spot first, follow manufacturer recommendations, and use only products labeled safe for laminate.
Wipe off excess and avoid frequent reapplications that build up layers.
DIY errors that cause more damage (moisture, sanding, incorrect blending)
When you tackle laminate repairs yourself, a few common mistakes—like letting moisture seep into seams, over-sanding textured wear layers, or botching color blends—can turn a small flaw into a major problem; work slowly, follow proper techniques, and stop if something feels off.
Don’t flood joints, avoid aggressive sanding that removes the print layer, and match tones carefully—or call a pro.
Prevention and Best Practices to Keep Laminate Looking New
Keep up simple daily and weekly routines like sweeping and damp-mopping to prevent grit and spills from wearing the surface.
Use protective measures—area rugs in high-traffic zones, felt pads under furniture, and a humidifier or dehumidifier—to minimize scratches and warping.
Also plan seasonal and long-term care, such as refinishing touch-ups where possible and checking seams and shifts before extreme weather changes.
Daily and weekly maintenance routines
Although laminate’s finish is durable, simple daily and weekly routines will prevent scratches, warping, and dulling so your floors stay like new.
You should sweep daily, mop weekly with a damp (not wet) microfiber mop, and clean spills immediately. Follow gentle cleaners and avoid abrasive tools to preserve the finish.
- Sweep or vacuum soft-brush daily
- Damp-mop weekly with mild solution
- Wipe spills immediately
Protective measures (rugs, pads, humidity control)
Those simple daily routines will cut down on most wear, but adding protective measures will guard against the bigger risks like chair scuffs, sun fading, and moisture damage.
Use rugs in high-traffic areas, felt pads under furniture, and door mats to trap grit.
Keep indoor humidity between 35–55% to prevent swelling or gaps.
Rotate rugs and avoid rubber-backed mats that can stain.
Seasonal and long-term care strategies
When you plan for each season and think long-term, your laminate will stay attractive and last far longer; establish a simple routine of quarterly inspections, seasonal deep cleans, and annual checks for gaps, seams, or wear to catch problems early.
Rotate rugs, trim pet nails, maintain humidity 35–55%, use felt pads, avoid wet mopping, and replace damaged planks promptly to prevent spread.
Cost, Time, and When to Call a Professional
You’ll compare typical DIY costs (usually lower) with professional restoration quotes that can be several times higher.
Expect a few hours for cleaning and spot repairs, a day for sanding or plank replacement, and more time if moisture damage or subfloor work’s needed.
If damage’s widespread, boards are buckling, or you’re unsure about structural issues, call a flooring professional.
Typical cost ranges for DIY vs. pro restoration
Although costs vary by damage and region, restoring laminate flooring yourself usually runs far cheaper than hiring a pro. You’ll pay for cleaners, repair kits, or replacement planks; pros add labor and travel. Use DIY for minor scuffs; call a pro for extensive damage.
| Option | Typical DIY Cost | Typical Pro Cost |
|---|---|---|
| Minor repairs | $10–$75 | $75–$200 |
| Moderate | $50–$200 | $200–$600 |
| Major | $150–$500+ | $600–$2,000+ |
Time estimates for each restoration step
Estimate the time each restoration step will take so you can plan projects, errands, or a pro’s visit without surprises.
Cleaning and drying: 30–90 minutes.
Minor scratch repair and filler: 15–60 minutes per area.
Buffing or applying finish products: 1–3 hours including cure time.
Board replacement: 1–3 hours per board depending on access.
Full-room refinishing: 4–8 hours plus drying.
Signs you should hire a flooring professional
When should you call in a pro? If damage is extensive—deep scratches, warped planks, or water stains—you’ll save time and money hiring a pro.
Expect higher cost but faster, guaranteed results. Call a professional when repairs exceed your skill, when matching replacements is hard, or when project timing matters.
They’ll assess, quote, and complete the job safely and efficiently.
Before-and-After Case Examples and Quick Scenarios
You’ll see three quick examples that show what actually works: cleaning and polish to restore light dulling, scratch repair with color blending for worn areas, and when full plank replacement was the only practical fix.
You’ll get before-and-after notes on time, tools, and results so you can compare options.
Use these scenarios to decide which approach fits your floor and budget.
Light dulling restored with cleaning and polish
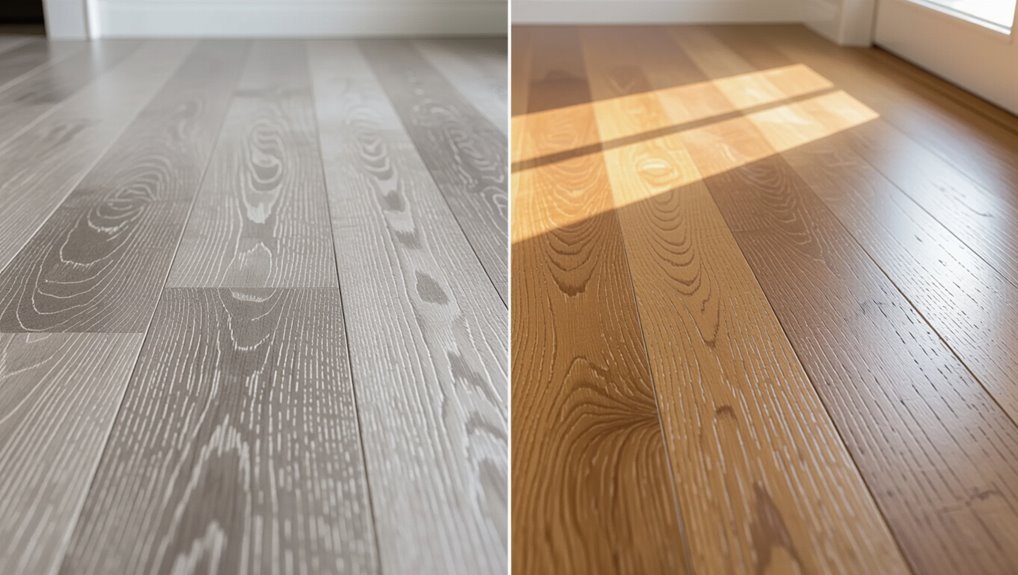
Start by evaluating the problem: light dulling from dirt buildup, dulling cleaners, or worn polish is often reversible with a targeted cleaning and a fresh coat of laminate polish.
You’ll clean with a pH-neutral laminate cleaner, remove residue, and dry thoroughly.
Test polish in a small area, then apply thin, even coats.
Results often restore sheen and uniform appearance quickly.
Scratch repair and color blending example
Although small surface scratches can look permanent, you can often disguise or fix them quickly with the right products and a careful color blend.
Test markers and wax sticks on an inconspicuous plank, match tones, then fill and buff. Work in thin layers, let each cure, and reassess under room light.
The result should be subtle, not glossy or patchy.
When replacement of planks was the only option
When damage goes beyond surface scratches and blending won’t hide gaps, warped planks, or deep water stains, replacing individual boards is often the only practical fix.
You’ll assess matching pattern and thickness, remove damaged planks carefully, and prep the subfloor.
Install replacements, ensuring tight seams and correct directional alignment.
Finish by cleaning and inspecting for level, color consistency, and secure locking.
FAQ Restoring Laminate Flooring
You probably have a few quick questions before you start, like whether laminate can be refinished like hardwood or if polish will hide deep scratches for good.
You’ll also want to know whether oil-based products or wax are safe, how long results typically last, and if restoration works in high-moisture areas.
Below we’ll answer each point so you can pick the right approach for your floors.
Can I refinish laminate like hardwood?
Can you refinish laminate the same way you’d hardwood?
No — laminate has a thin wear layer and printed design under a protective coating, so sanding and refinishing like wood will ruin it.
You can clean, buff with appropriate products, or use repair kits and replacement planks for damage.
For extensive wear, replacing boards or the whole floor is usually the practical option.
Will polish hide deep scratches permanently?
How well polish hides deep scratches depends on how deep they’re and what product you use; it won’t permanently erase gouges that cut through the wear layer.
You can mask light surface scratches with a quality laminate polish or repair kit, improving appearance temporarily.
For deeper damage you’ll need targeted repairs—fillers, replacement planks, or professional fixes—to restore integrity and look.
Is it safe to use oil-based products or wax on laminate?
Although oil-based products and wax might seem like quick fixes, they’re generally a poor choice for laminate because they can leave residue, attract dirt, and make the surface slippery or look blotchy.
You should avoid them; they don’t bond to the protective wear layer. Use water-based cleaners or manufacturer-recommended products and spot-test before treating larger areas to prevent buildup and finish damage.
How long will restoration results last?
Since oil-based products and wax won’t bond to laminate, they’ll often give only temporary shine and can cause buildup that shortens the life of any restoration work.
Expect results to last months to a few years depending on traffic, pets, and cleaning habits.
Proper low-moisture cleaners, protective pads, and gentle care extend lifespan.
Reapply or refresh treatments when wear becomes visible.
Can I restore laminate in high-moisture areas?
Can you restore laminate in high-moisture areas? You can refresh surface wear, but restoration won’t fix water-damaged core or swollen boards.
Use moisture-resistant cleaners, quick-dry methods, and sealant sparingly on seams.
For bathrooms, kitchens, or basements, consider replacing with water-resistant laminate or vinyl plank.
Always address leaks and humidity first to prevent recurring damage and failed restoration.