
How to Install Peel and Stick Vinyl Plank Flooring the Right Way
You can install peel-and-stick vinyl plank flooring yourself if you prep properly and work carefully. Start with a clean, flat, dry subfloor, test for moisture, and let planks acclimate 48–72 hours. Measure and snap a straight layout line, stagger seams, keep expansion gaps, and cut with a utility knife or jigsaw. Peel backing gradually, press and tap seams, and trim edges for a finished look. Keep going to learn tips on tricky cuts, repairs, and timing.
Quick Answer Can You Install Peel and Stick Vinyl Plank Flooring Yourself?
Yes — you can install peel-and-stick vinyl plank flooring yourself: wipe and level the subfloor, plan your layout, then stick and trim the planks for a finished look.
It’s a quick, budget-friendly DIY if your room is small, flat, and you’re comfortable with measuring and cutting.
Hire a pro if the subfloor needs major prep, the layout is complex, or you want guaranteed long-term performance.
Short summary of process and outcome
You can install peel-and-stick vinyl plank flooring yourself if you’re comfortable with basic DIY tasks and have a few hours of focused work. The process involves prepping a flat, clean subfloor, planning a layout, sticking down the planks row by row, and trimming edges for a snug fit.
Follow instructions, use a straightedge and sharp cutter, and expect a durable, attractive floor when done.
When DIY is appropriate vs hire a pro
Wondering whether to tackle peel-and-stick vinyl plank flooring yourself or call a pro?
You can DIY if your subfloor is flat, dry, and straightforward, rooms are small, and you’re comfortable with cutting, layout, and adhesive.
Hire a pro for large areas, uneven or damp substrates, complex patterns, changes, or if you want guaranteed warranty and faster, precise results.
What Is Peel and Stick Vinyl Plank Flooring?
Peel-and-stick vinyl planks are self-adhesive flooring available in formats like luxury vinyl plank (LVP), rigid SPC, and cushioned WPC, each with different core materials and durability.
You’ll get easy DIY installation and waterproof surfaces, but expect thinner options to be less impact-resistant and potentially show seams on uneven subfloors.
Compare costs, wear layers, and stability against click-lock or glued systems to pick what fits your room and traffic.
Materials and common formats (luxury vinyl plank, SPC, WPC)
Vinyl plank flooring comes in several common formats—luxury vinyl plank (LVP), stone plastic composite (SPC), wood plastic composite (WPC), and peel-and-stick—each built for different needs and installation methods.
You’ll find LVP soft and realistic, SPC rigid and dense, WPC cushioned with a foam core, and peel-and-stick thin and adhesive-backed.
Choose based on durability, subfloor, and room use.
Pros and cons compared to other flooring types
If you’re weighing options, peel-and-stick plank flooring offers a very different set of trade-offs compared with LVP, SPC, or WPC. You’ll enjoy low cost and easy DIY installs, but less durability and thinner feel. It’s fine for rentals and low-traffic rooms, not heavy-use or uneven subfloors.
| Strength | Cost | Best use |
|---|---|---|
| Easy install | Low | Rentals |
| Lightweight | Low | Low-traffic rooms |
Tools, Materials, and Preparation Checklist
Before you start, gather the essential tools and materials—saw, tapping block, spacers, underlayment (if needed), adhesive, and any optional supplies like threshold strips.
Measure your room carefully and order about 10% extra to account for cuts and mistakes.
Check your subfloor for flatness and moisture so you can address any issues before installation.
Tools required
A small set of reliable tools will make installing vinyl plank flooring faster and more accurate, so gather everything on this checklist before you start.
You’ll need basic hand tools and measuring gear to cut, fit, and smooth planks precisely.
- Tape measure and straight edge
- Utility knife with extra blades
- Rubber mallet and tapping block
- Pull bar and spacers
Materials and optional supplies
Materials: you’ll need the vinyl planks themselves plus underlayment (if your product doesn’t have one attached), junction strips, adhesive or seam sealer for glue-down or loose-lay installations, and trim/molding to finish edges;
optional items like a knee pad, pry bar, floor primer, and moisture barrier can make the job easier and protect your subfloor.
- Stack of planks
- Roll of underlayment
- Tube of seam sealer
- Trim and junction pieces
Measuring and ordering the right amount of flooring
Start by measuring each room’s length and width and jot down the numbers for every area you’ll cover; you’ll multiply length × width for square footage and add separate measurements for closets, alcoves, or oddly shaped spaces.
Add 5–10% waste for cuts and pattern matching, round up to full cartons, confirm plank dimensions per box, and order from one batch to guarantee color consistency.
Subfloor compatibility and testing (moisture, flatness)
Now that you’ve measured and ordered enough planks, check the subfloor for compatibility and proper conditions before you open cartons.
Confirm it’s clean, dry, structurally sound, and compatible with peel-and-stick vinyl.
Test moisture with a meter or tape method; repair high spots and fill low spots so surface is flat within manufacturer’s tolerance (usually 3/16″ over 10′).
Remove adhesives, paint, and loose material.
Surface Preparation Make the Subfloor Perfect
Before you start laying planks, thoroughly inspect the subfloor—repair cracks in concrete, replace or secure damaged plywood, and smooth any old vinyl that’s staying.
Test for moisture and address high readings with sealers or a vapor barrier to prevent future problems.
Finally, level low spots and clean the surface so adhesive and click-lock seams bond correctly.
Inspecting and repairing subfloor (concrete, plywood, existing vinyl)
Walk the room and examine the subfloor closely for cracks, soft spots, high or low areas, moisture issues, and old adhesive residues—these problems will dictate the repairs you’ll need.
Patch cracks, sand high spots, fill low areas with leveling compound, and remove old glue. If plywood is soft, replace panels.
For existing vinyl, verify it’s flat and firmly bonded.
- Cracked concrete
- Squeaky plywood
- Bubbled vinyl
- Uneven spots
Moisture testing and mitigation methods
Because moisture is the biggest threat to vinyl plank flooring, you should test every subfloor surface and address any issues before you lay a single plank.
Use a reliable moisture meter or perform a calcium chloride or RH test for concrete. If readings exceed manufacturer limits, install a vapor barrier, moisture-mitigating primer, or a compatible waterproofing membrane.
Re-test before installation to confirm dryness.
Leveling low spots and cleaning for adhesion
Once you’ve confirmed the subfloor is dry, locate and mark low spots with a straightedge and level so you can address them systematically.
Patch depressions with a polymer-modified floor patch, feathering edges smooth. Sand high ridges and vacuum thoroughly.
Degrease and wipe with a solvent or recommended cleaner, then let dry.
Proper leveling and cleaning guarantees full adhesive contact and long-lasting plank performance.
Step-by-Step Installation
Before you start laying planks, acclimate them and plan your layout so you can stagger seams and set any pattern.
Establish a straight reference line at the starting wall, then cut planks to fit using the right tools and techniques.
Peel the backing, apply the first row squarely, and keep installing rows while maintaining your stagger and required expansion gaps.
Step 1 Acclimate planks and plan layout (staggering, pattern)
Anyone installing vinyl plank flooring should let the planks acclimate and map out your layout before you glue or click anything together.
Keep them flat in the room for 48 hours, then dry-fit rows. Stagger end joints at least 6–12 inches, vary plank lengths, and test patterns to avoid short pieces at walls.
Mark cuts and connections for a balanced final look.
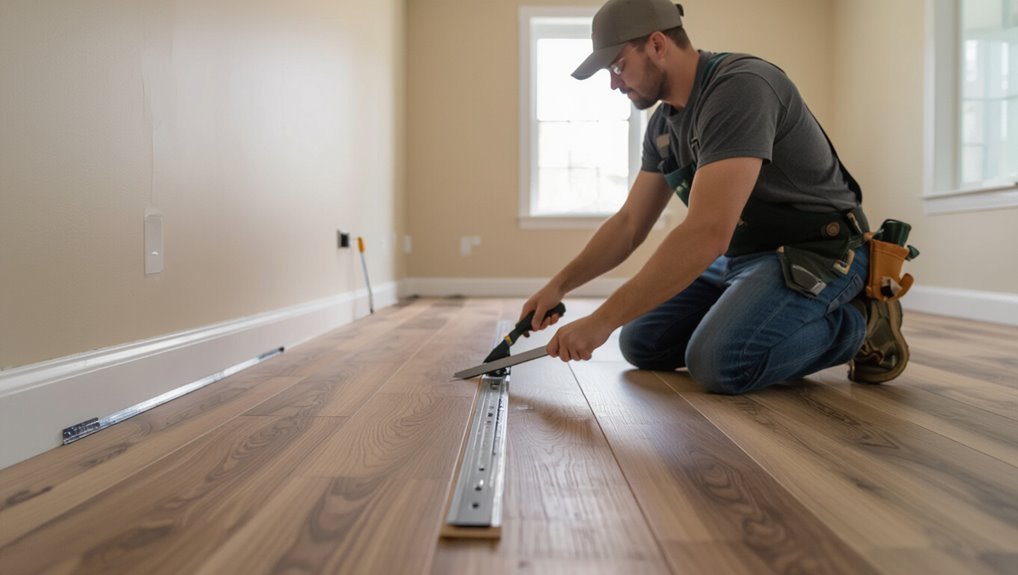
Step 2 Establish reference line and starting wall
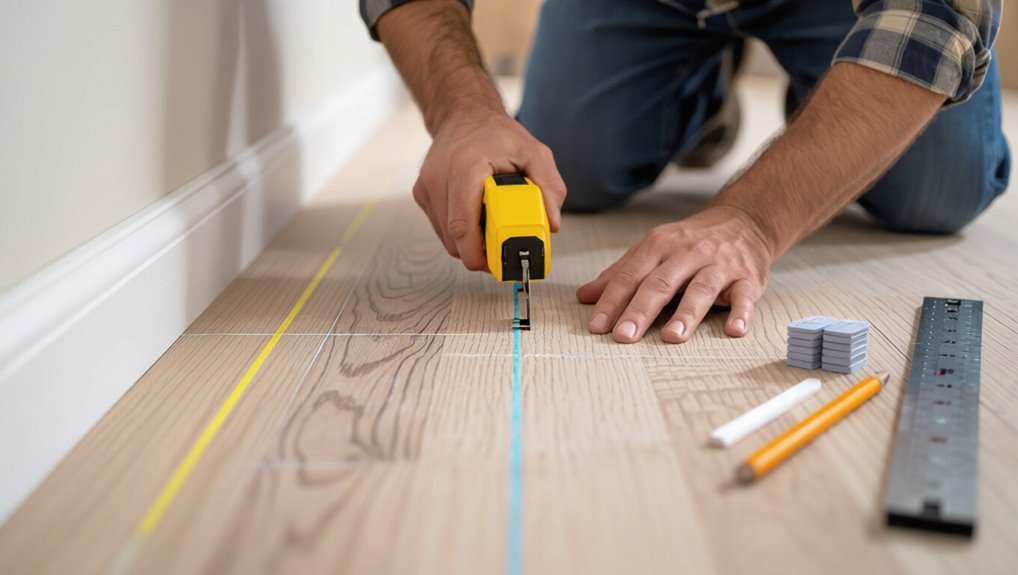
Pick a straight wall to start from and snap a chalk line parallel to it about 1/4 inch away from the anticipated finished edge to account for expansion and your trim profile.
Work outward from that line so your first row stays straight.
Check corners and doorways, square the layout with a 3-4-5 or laser, and dry-fit the first row to confirm alignment.
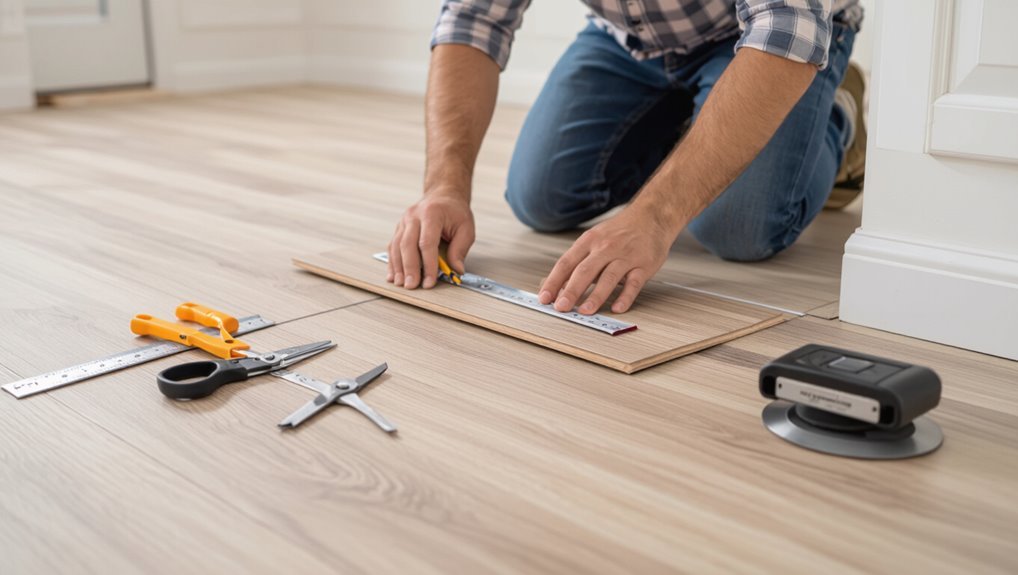
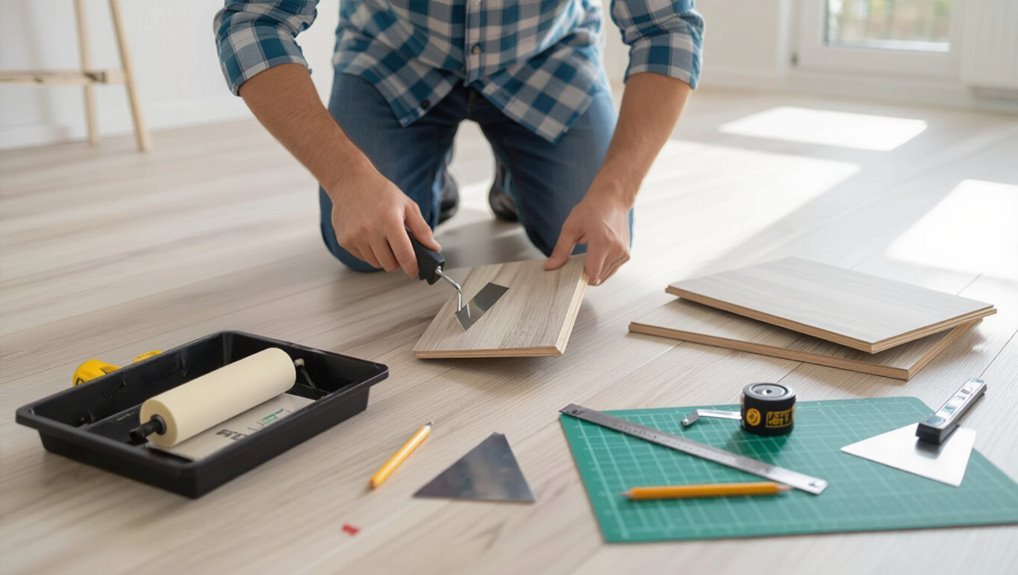
Step 3 Cutting planks (tools and techniques)
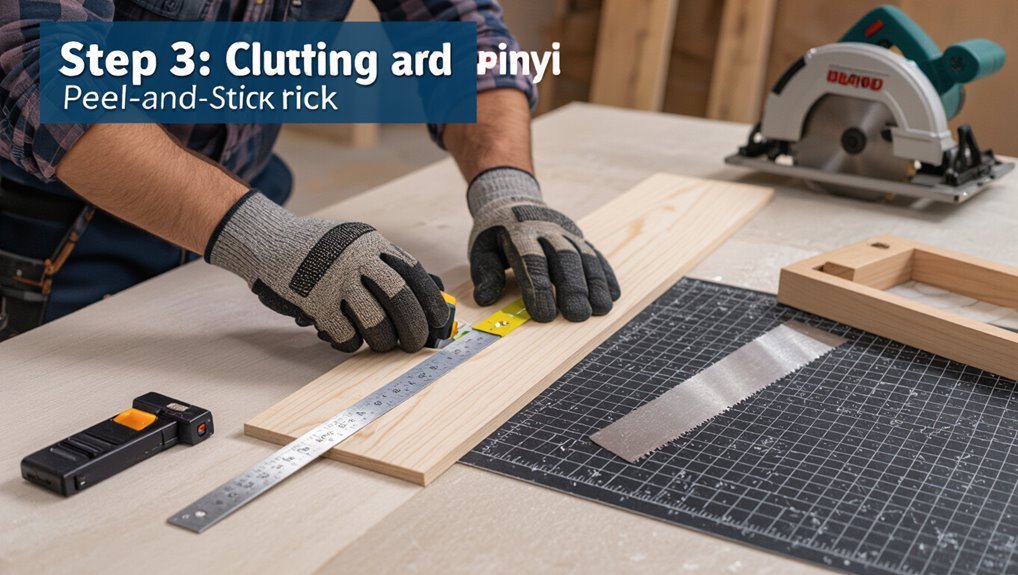
With your starter row aligned, you’re ready to cut planks to fit edges, doorways, and obstructions.
Measure twice, mark the cut line on the plank backing, and score with a utility knife for straight cuts.
For curves or notches, use a jigsaw or coping saw. Keep blades sharp, cut slowly, and test-fit pieces before final placement to guarantee clean edges.
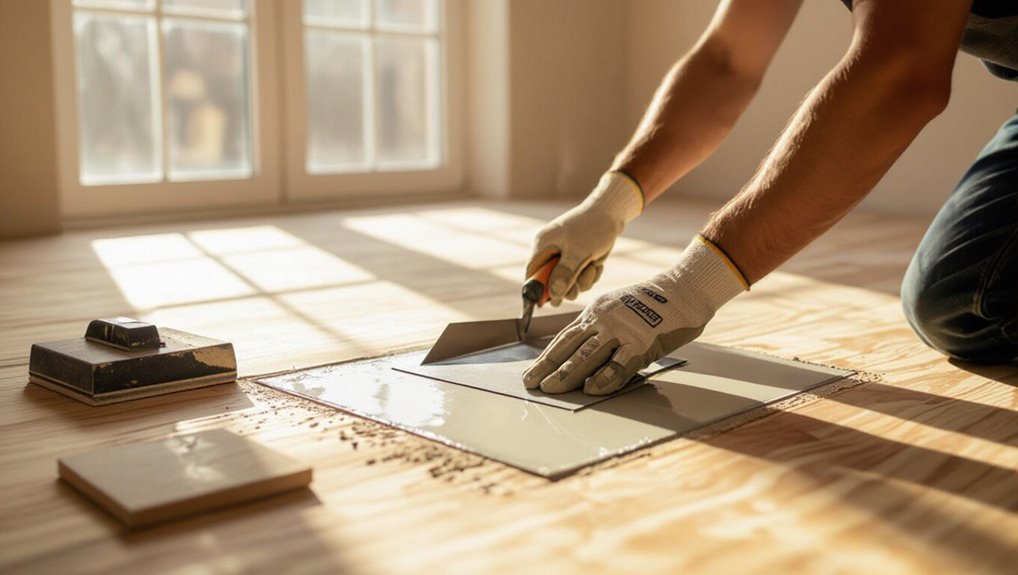
Step 4 Peeling backing and applying first row (alignment tips)
1. Peel a few inches of backing from the first plank, keeping adhesive covered until you position it. Align the tongue side toward the wall, use spacers for a consistent gap, and press the exposed adhesive firmly.
Gradually remove the rest of the backing, smoothing from the center outward to avoid bubbles. Check alignment frequently against your chalk line.
Step 5 Continue rows and maintain stagger/expansion gaps
Continue laying planks row by row, locking each board into the previous one and tapping gently with a mallet and tapping block to guarantee snug seams; stagger end joints at least 6–8 inches (or per manufacturer spec) from the previous row to create a natural pattern and maintain floor stability.
Keep a consistent expansion gap at walls using spacers, check alignment frequently, and trim end pieces for tight fits.
Step 6 Fitting around obstacles, doorways, and transitions
After you’ve finished several full rows and confirmed your stagger and expansion gaps, it’s time to address obstacles, doorways, and flooring junctions.
Measure and trace around pipes, cabinets, and door frames, cut planks precisely, and dry-fit pieces.
Use a utility knife for clean cuts, a jigsaw for curves, and connector strips at room joints.
Maintain gaps and adhesive coverage.
Step 7 Trimming final row and finishing edges
Finish the job by trimming the final row to fit and completing the perimeter so the floor looks polished and functions correctly.
Measure and mark each plank, allow expansion gap, then cut with a utility knife or pull saw for a clean edge.
Install the trimmed planks tight to the preceding row, apply edge trim or quarter round at walls and doorways, and secure junctions as needed.
Step 8 Rolling and final adhesion checks
With the final row in place and trim installed, you’ll prepare the floor for long-term stability by rolling and checking adhesion.
Use a 100–150 lb flooring roller, roll slowly across each plank lengthwise and crosswise, focusing seams and edges.
Inspect for lifted corners, bubbles, or gaps; press or re-roll problem areas.
Allow recommended dwell time before furniture return.
Special Situations and Advanced Tips
You’ll also handle special situations like installing over radiant heat, in basements with moisture concerns, or in rooms with uneven walls and irregular shapes.
Pay attention to pattern and grain direction so seams read like a single surface, and plan cuts to minimize visible short pieces.
Finish with the right junction strips and thresholds to protect edges and create a clean, professional look.
Installing over radiant heat, basements, or basements with humidity
Basements, radiant-heat systems, and humid environments each demand extra care when you install vinyl plank flooring, so you should assess moisture, temperature limits, and manufacturer guidelines before you begin.
Use a vapor barrier or moisture-mitigating primer in basements, confirm plank compatibility with your radiant system, maintain stable temperatures during and after installation, and allow proper acclimation to prevent warping, lifting, or adhesive failure.
Working with uneven walls or irregular room shapes
If walls aren’t straight or the room has odd angles, plan your layout so the visible edges look intentional rather than haphazard. Measure irregular walls, scribe planks to fit curves, and cut wedges for tight corners.
Start from the longest straight run, maintain consistent expansion gaps, dry-fit sections, and use junction strips where shapes force short pieces. Take time; precise cuts hide irregularities.
Matching patterns and grain direction for a professional look
Once your cuts and gaps blend with irregular walls, focus on matching plank patterns and grain direction to give the whole floor a finished, professional look.
Lay planks so grain runs lengthwise toward the room’s focal point. Stagger end joints for natural variation, avoid repeating identical patterns in adjacent rows, and rotate planks if needed to maintain consistent color flow and realistic wood appearance.
Using transition strips and thresholds
1 essential finishing touch is choosing the right connector strips and thresholds to bridge changes in flooring height, material, or room function.
Pick junctions that match profile and height, secure them per manufacturer instructions, and allow expansion gaps beneath.
Use T-molds for equal heights, reducers for higher-to-lower edges, and thresholds at doorways to protect edges and create a neat, durable finish.
Common Mistakes and How to Avoid Them
Before you start finishing up, watch for four common mistakes that can ruin your floor: poor surface prep and moisture problems, an incorrect layout with improper staggering, rushed cuts that damage planks, and failing to allow expansion or using improper connections.
You can prevent most issues by testing and leveling the subfloor, planning your layout and stagger pattern, cutting carefully with the right tools, and leaving the recommended expansion gaps with proper transition strips.
Check each of these points as you go so small errors don’t become big repairs.
Mistake 1 Poor surface prep and moisture issues
Any installer can ruin a vinyl plank job by skipping proper surface prep or ignoring moisture, so you need to inspect and fix the subfloor before you lay a single plank.
Check for level, clean debris, remove old adhesives, and repair cracks. Measure moisture with a meter; address high readings with drying, vapor barriers, or alternate underlayments so adhesive bonds properly.
Mistake 2 Incorrect layout and improper staggering
If you start without a plan, you’ll quickly end up with visible seams, weak joints, or short rows that make the floor look amateurish.
Measure and dry-fit rows, staggering end joints at least 6–12 inches to avoid repeating seams. Balance plank widths at walls so narrow strips aren’t left.
Snap chalk lines, work outward from a straight reference, and keep consistent expansion gaps.
Mistake 3 Rushing cuts and damaging planks
Don’t rush cuts—hasty sawing or snapping is the quickest way to chip edges, splinter cores, or ruin a plank’s locking profile.
Take measured cuts with the right blade or utility knife, clamp planks, and score repeatedly for clean breaks.
Measure twice, cut once, and keep a scrap stash for practice.
Clean debris before fitting to prevent gaps or tears.
Mistake 4 Not allowing expansion or improper transitions
After careful cutting, the next big mistake is skipping proper expansion gaps and using wrong connection pieces—both cause buckling, gapping, or popping seams as the floor moves.
You should leave manufacturer-recommended gaps at walls, doorways, and between sections. Install appropriate T-molds or reducers at junctions, secure thresholds correctly, and never glue floating seams.
This preserves movement and prevents damage.
Maintenance, Repair, and Longevity
To keep your vinyl planks looking and performing their best, you’ll want a simple routine for cleaning and a short list of products to avoid.
If a plank gets damaged, you’ll learn when a patch will do versus when swapping the whole plank is necessary.
Finally, we’ll cover signs that mean you should refinish, fully replace, or call a pro for lasting results.
Routine cleaning and products to avoid
When you keep a simple cleaning routine, vinyl plank floors stay attractive and last longer.
You should sweep or vacuum weekly, mop with a manufacturer-approved pH-neutral cleaner, blot spills immediately, and use felt pads under furniture.
Avoid abrasive scrubbers, wax, oil soaps, and steam cleaners that can damage the wear layer or adhesive.
- broom
- mop
- blot
- pads
Repairing damaged planks (patch vs full plank replacement)
1 clear decision you’ll make when a vinyl plank gets damaged is whether to patch the surface or replace the whole plank.
Patch small scratches or chips with matching filler and a textured finish; it’s quick and low-cost.
Replace planks for deep gouges, structural damage, or adhesive failure—remove the damaged piece, prep the subfloor, and fit a new plank for a seamless repair.
When to refinish, replace, or call a professional
If your vinyl still looks good and wears evenly, you can usually stick with routine cleaning and spot repairs.
But if the surface shows widespread fading, peeling, or repeated damage, it’s time to contemplate refinishing, replacing planks, or calling a pro.
Assess adhesive failure, moisture damage, and substrate issues.
Replace sections when damage’s localized; refinish or hire a pro for widespread issues, moisture, or unpredictable substrates.
Cost, Time Estimate, and ROI
You’ll want to budget for materials and tools, which can range from budget planks and basic hand tools to higher-end boards and power tools.
Plan your time by room size and experience—what takes a weekend for a skilled DIYer might take several days for a beginner in a large room.
Finally, weigh the resale value and durability of vinyl plank against alternatives to judge your ROI.
Typical material and tool cost ranges
Expect to spend anywhere from a few hundred to a couple thousand dollars on materials and tools depending on room size, plank quality, and whether you buy or rent specialty equipment. You’ll pay for planks, underlayment, adhesive, trims, a cutter, and maybe a floor roller. Budget extra for waste and unexpected repairs.
| Item | Typical Cost |
|---|---|
| Planks | $1–$5/ft² |
| Tools & misc | $50–$600 |
Time estimates by room size and skill level
Now that you’ve budgeted for materials and tools, plan how long the job will take based on room size and your experience.
Small rooms (up to 100 sq ft) take 2–6 hours for beginners, 1–3 for experienced DIYers.
Medium rooms (100–300 sq ft) run 6–16 hours vs. 3–8.
Large areas or complex layouts add cutting and changes, increasing time accordingly.
Value added to property vs other flooring options
While vinyl plank costs and installation time are usually lower than hardwood or tile, it still delivers strong resale value when you pick quality materials and install properly.
You’ll spend less upfront and finish faster than with hardwood or tile, yet gain durable, attractive floors buyers like.
Expect modest ROI—better than carpet, slightly below high-end hardwood—depending on brand, finish, and installation quality.
FAQ
You’ve probably got practical questions like whether peel-and-stick works in bathrooms or kitchens and how long planks should acclimate before installation.
You’ll also want to know if you can lay them over tile or old vinyl, what adhesive failures look like and how to fix them, and when it’s safe to move furniture back onto the floor.
Let’s answer those FAQs so you can avoid common problems and finish the job confidently.
Can peel and stick vinyl planks be installed in bathrooms or kitchens?
Can you use peel-and-stick vinyl planks in bathrooms or kitchens? Yes—if you choose waterproof-rated planks, prepare a clean, dry subfloor, and seal edges and seams.
Avoid areas with standing water or poor drainage. Use proper underlayment where recommended and trim tightly around fixtures.
Regularly check seals and caulking to prevent moisture intrusion and prolong the floor’s life.
How long should planks acclimate before installation?
After sealing edges and checking for moisture, you’ll want to let the planks acclimate so they adjust to the room’s temperature and humidity.
Leave boxed planks sealed for 48 hours, then open and spread them out for another 24–48 hours.
In most cases 72 hours total is sufficient; longer may be needed for extreme temperature or humidity differences.
Can you install peel and stick over tile or existing vinyl?
Wondering whether peel-and-stick planks will go down over tile or existing vinyl? Yes—you can, but surface prep matters.
Clean thoroughly, repair loose or cracked tiles, and sand glossy finishes to promote adhesion. Confirm floors are level, dry, and free of wax or residue.
For vinyl already welded or cushioned, consider removing it if it’s soft or unstable to confirm a durable bond.
What adhesive failures look like and how to fix them?
If your planks start lifting, shifting, or developing gaps, those are the most common signs of adhesive failure and you’ll want to act quickly to prevent further damage.
Peel back affected planks, clean old adhesive with a recommended solvent, dry thoroughly, then apply fresh manufacturer-approved adhesive or double-sided tape.
Press and roll firmly, weight edges, and trim any swollen or damaged boards for a secure finish.
How long before you can move furniture back onto the floor?
Once you’ve re-secured any lifted planks and let adhesive set, you’ll want to wait before returning furniture so you don’t undo your work.
Generally wait 24–48 hours for full initial bond; heavier pieces need 72 hours.
Use furniture sliders or lift items when possible. If humidity or cold slowed curing, extend wait time.
Test a small area before placing delicate legs.