
How to Install Wood Tile Flooring for a Natural Look That Lasts
You can get a convincing, long-lasting wood look by choosing high-quality wood-look porcelain, prepping a stable, dry subfloor, and using proper thinset and grout. Measure carefully, dry-fit tiles to establish a pleasing layout, set tiles from reference lines, tap them level, then grout and seal grout and any porous tiles. Allow proper cure times and maintain with regular cleaning and periodic grout resealing. Keep going to learn step-by-step tips and pro tricks.
Quick Answer Can You Get a Natural Wood Look with Tile and How Long It Lasts?
Yes — you can get a convincing natural wood look with wood-look tile, and it’s worth weighing the pros and cons before you install.
Tile gives you great durability, moisture resistance, and low maintenance but can feel colder and heavier than real wood and needs grout upkeep.
With proper installation and care, wood-look tile commonly lasts 25–50 years, though lifespan depends on tile quality, subfloor prep, traffic, and maintenance.
One-paragraph direct answer
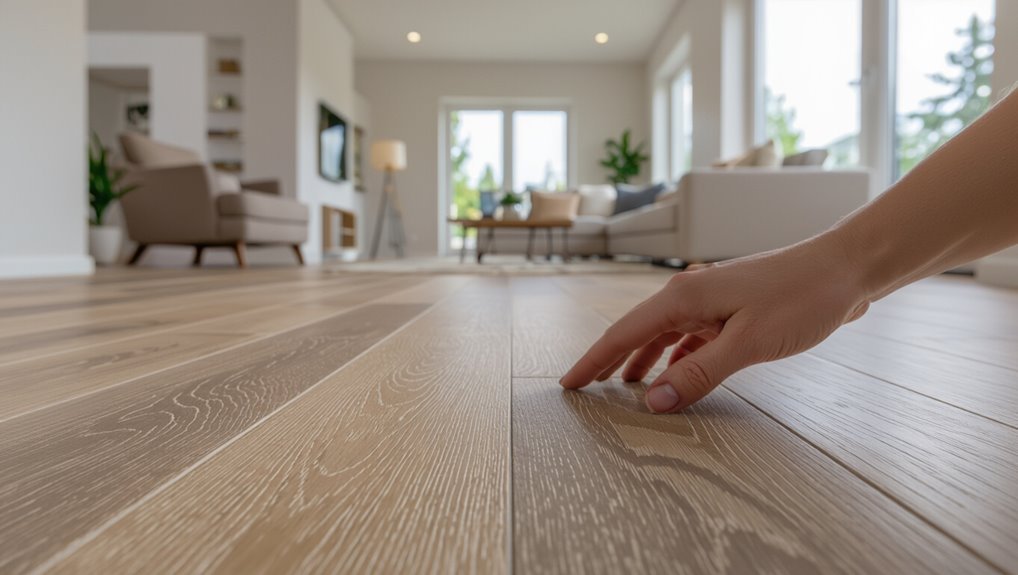
You can achieve a convincing natural wood look with wood-look tile—modern porcelain and ceramic planks reproduce grain, color variation, and texture so well most people won’t tell the difference at a glance—and they’ll typically last 20–50 years or more with proper installation and care, often outlasting actual hardwood in high-traffic or moisture-prone areas.
To get durable results, learn how to install wood tile correctly, use quality underlayment, and follow manufacturer adhesive, grout, and sealing guidelines to prevent movement, staining, and premature wear.
Summary of pros and cons
Although tile can mimic wood so closely most people won’t notice, it comes with clear trade-offs:
- Looks authentic and resists moisture, so you get style without warping.
- Cooler and harder underfoot than real wood.
- Easier to clean but can feel less cozy.
- Installation can be labor-intensive and more permanent.
- More durable against scratches but grout needs occasional care.
Typical lifespan and factors that affect longevity
If you like the look of wood but want something tougher, wood-look tile can give you decades of service when installed and maintained properly. You’ll get 20–50+ years depending on quality, traffic, grout care, and subfloor prep. Regular cleaning and resealing grout extend life. Consider installation, tile wear rating, and moisture control.
| Factor | Impact | Action |
|---|---|---|
| Material | High | Choose PEI-rated tile |
| Installation | Critical | Proper subfloor prep |
| Maintenance | Ongoing | Clean, reseal grout |
Basic Understanding What Is Wood Tile Flooring?
Wood tile flooring usually means ceramic or porcelain made to mimic hardwood, and it’s different from engineered wood or solid real wood in makeup and installation.
You’ll notice visual differences like grout lines and a slightly more uniform pattern in tile, while performance varies—tile resists moisture and scratches better but feels cooler and harder underfoot.
Choose wood-look tile when you need durability and moisture resistance (bathrooms, kitchens, basements) or lower maintenance, and pick real or engineered wood when authentic feel and refinishing options matter.
Definitions: wood-look ceramic/porcelain vs engineered wood vs real wood
When you’re choosing flooring that looks like timber, it’s important to know the difference between wood-look ceramic or porcelain tile, engineered wood, and solid (real) wood.
You’ll find ceramic/porcelain are durable, water-resistant tiles printed to mimic grain.
Engineered wood has a real veneer over plywood for stability.
Solid wood is a single-species plank you can sand and refinish multiple times.
Visual and performance differences
Think of wood-look tile as a practical mimic: it gives you the grain, color, and plank patterns of timber but performs like ceramic or porcelain, resisting scratches, stains, and moisture far better than real wood.
You’ll notice uniform plank sizing, consistent color batches, and lower maintenance. Tile feels cooler and firmer underfoot and demands different installation techniques and grout lines compared with real or engineered wood.
When to choose wood-look tile over real wood
If you need the look of hardwood but require greater durability, moisture resistance, or easier upkeep, wood-look tile is often the smarter choice.
You’ll pick tile when pets, high traffic, bathrooms, or basements challenge wood, or when you want consistent color and low maintenance.
Consider these scenarios:
- Pets and scratches
- High-traffic entryways
- Bathrooms and laundry rooms
- Basements or moisture-prone areas
- Low-maintenance preferences
Materials, Tools, and Costs What You Need Before You Start
Before you start, you’ll want to compare wood-look tile types—glazed vs. rectified and plank formats—to pick the right style and edge profile.
Gather the required materials and finishes, plus essential tools (and a few optional ones that make the job easier).
Finally, estimate costs for materials, labor, and long-term maintenance so you can budget accurately.
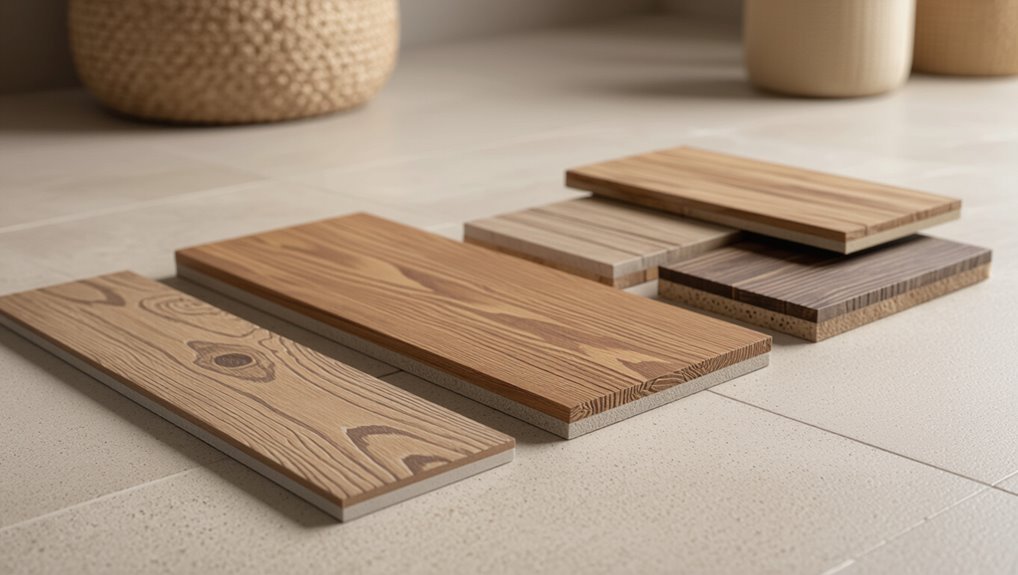
Types of wood-look tile (glazed, rectified, plank formats)
While you’re planning, know that wood-look tile comes in distinct types—glazed, rectified, and various plank formats—each affecting appearance, performance, and installation technique. Choose glazed for rich color, rectified for tight grout lines, and plank sizes to mimic real wood grain and layout. Consider slip resistance and room size when selecting.
| Type | Benefit | Best use |
|---|---|---|
| Glazed | Color depth | Living areas |
| Rectified | Precise edges | Modern look |
| Plank | Realistic grain | Long runs |
Required materials and finishes
You’ve picked the tile type and layout; now gather the materials, tools, and finishes you’ll need so the job goes smoothly.
You’ll need adhesive suited to porcelain or ceramic, grout, spacers, underlayment or backer board, and a sealer or finish that matches the room’s wear.
Estimate quantities and budget for extras.
- Thin-set adhesive
- Grout (sand or unsanded)
- Tile spacers
- Backer board/underlayment
- Sealer/finish
Essential tools and optional tools
Once you’ve gathered your materials, make sure you’ve got the right tools on hand—some are essential, others just make the job faster or neater.
You’ll need basics for layout, cutting, adhesion, and finishing, plus optional power tools to speed things up. Choose quality for accuracy and longevity.
- Tile saw or wet saw
- Notched trowel
- Rubber mallet and spacers
- Tile nipper
- Knee pads and tape measure
Cost breakdown: materials, labor, and long-term maintenance
Before you start, get a clear estimate of what you’ll spend on materials, tools, labor, and future upkeep so there are no surprises down the line. Calculate tile, underlayment, adhesive, grout, and sealant costs; factor installer rates and warranty. Plan annual sealing and occasional repairs.
| Item | Estimated Cost |
|---|---|
| Tiles | $ |
| Labor | $ |
| Maintenance | $ |
| Tools | $ |
Prep Work Assessing and Preparing the Space
Start by measuring the room carefully and ordering tiles with a 10–15% waste allowance so you won’t run short.
Inspect the subfloor for material and soundness—check concrete, plywood, and any radiant-heat systems—and perform moisture tests and apply leveling compound where needed.
Remove old flooring, adjust thresholds and door clearances, and make any repairs before you lay the first tile.
Measuring the room and ordering tile with waste allowance
Measure the room carefully so you know exactly how much wood-look tile to order, including the waste you’ll need for cuts and mistakes.
Measure length and width in multiple spots, calculate square footage, and add 10–15% for waste.
Account for pattern repeats, diagonal layouts, and oddly shaped areas.
Round up per box counts, and confirm tile lot numbers for color consistency.
Subfloor inspection: concrete, plywood, radiant heat compatibility
With your tile ordered, inspect the subfloor to confirm it’s sound and compatible with wood-look tile—issues now will dictate prep steps.
Check concrete for cracks, spalling, and stable thickness; guarantee plywood is exterior-grade, properly fastened, and at least 3/4″ over joists.
If you have radiant heat, verify system type, temperature limits, and manufacturer approval; document any repairs before proceeding.
Moisture testing and leveling compounds
Because excess moisture can ruin wood-look tile and the thinset bond, you’ll test substrates before laying anything and address dampness with the right products.
Use a reliable moisture meter and perform calcium chloride or RH tests for concrete. Fix high readings with vapor barriers, epoxy moisture mitigators, or Portland-based primers.
Then feather and level low spots with a compatible self-leveling compound per manufacturer directions.
Removing old flooring and addressing thresholds/doors
Before you lay a single tile, strip out old flooring and sort threshold and door issues so your new surface sits flat and shifts cleanly.
Remove baseboards, nails, and adhesive; assess subfloor damage; trim doors for clearance; adjust or replace thresholds; verify connections match height.
- Clear debris thoroughly
- Use pry bar carefully
- Check plywood thickness
- Test door swing
- Keep spare trim pieces
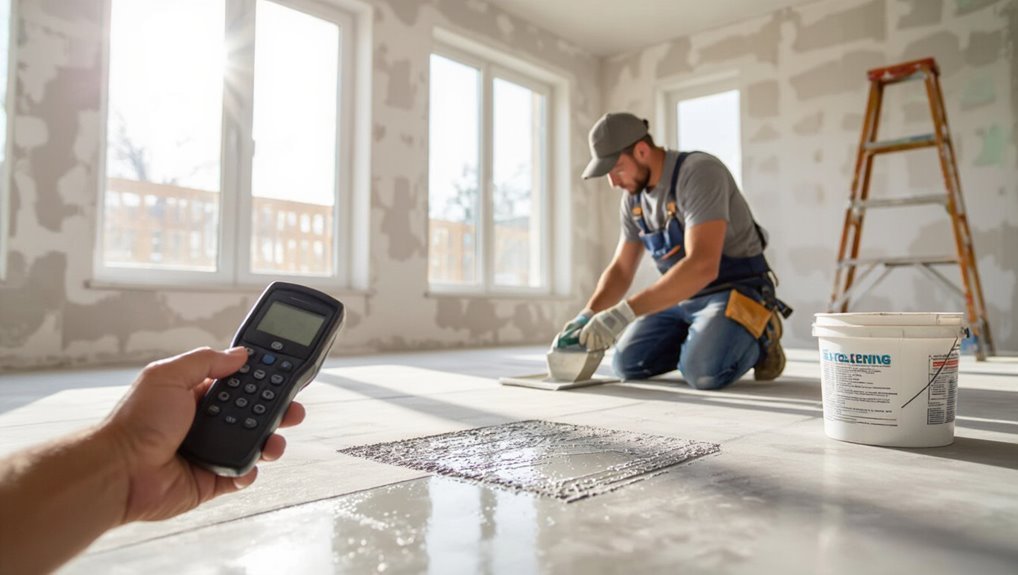
Step-by-Step Installation Guide
Now you’ll follow a clear, step-by-step installation process, starting with planning your layout and pattern—stagger, herringbone, or straight.
You’ll dry-lay tiles and mark reference lines, then mix and apply the appropriate thinset before setting tiles with spacers to maintain joints.
Finally, you’ll cut tiles for edges, outlets, and corners using the right tools and techniques.
Step 1 Planning layout and pattern (stagger, herringbone, straight)

A good layout plan saves time and gives your wood tile floor a balanced, professional look, so decide on a pattern—staggered, herringbone, or straight—based on room size, traffic flow, and the tile’s proportions.
Choose staggered for a relaxed, forgiving seam look; herringbone for visual impact in focal rooms; straight for simplicity and elongation.
Consider connections, focal points, and symmetry when planning.
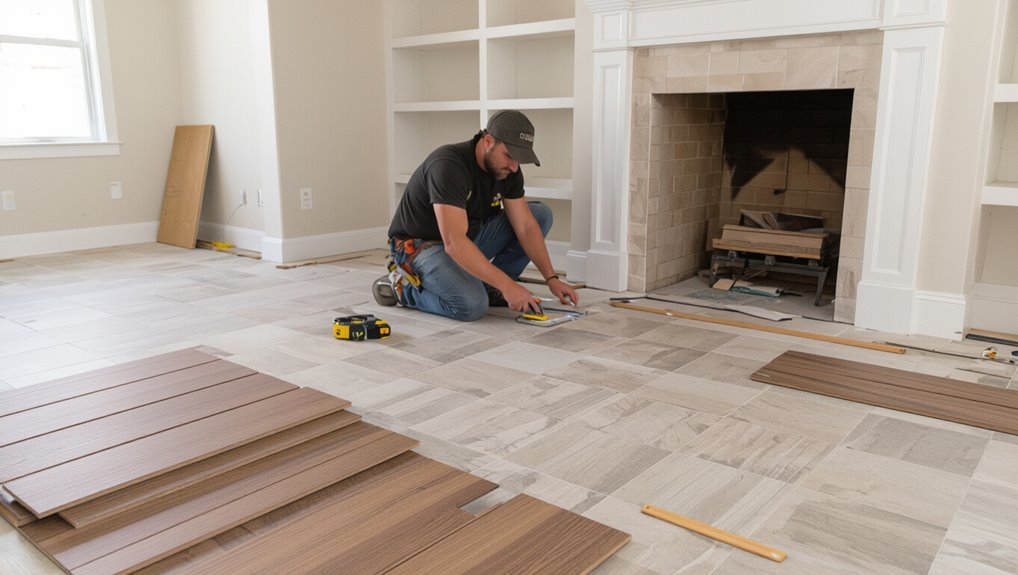
Step 2 Dry-laying tiles and marking reference lines
Start by dry-laying a few rows of tiles across the room to test your pattern and fit; this lets you spot awkward cuts, uneven spacing, and color variations before you commit.
Walk the layout, adjust joints, and snap chalk lines from the center to walls for straight reference.
Then:
- Check tile orientation
- Measure edge cuts
- Confirm grout gaps
- Mark starter line
- Note high spots
Step 3 Mixing and applying thinset or mortar (type and technique)
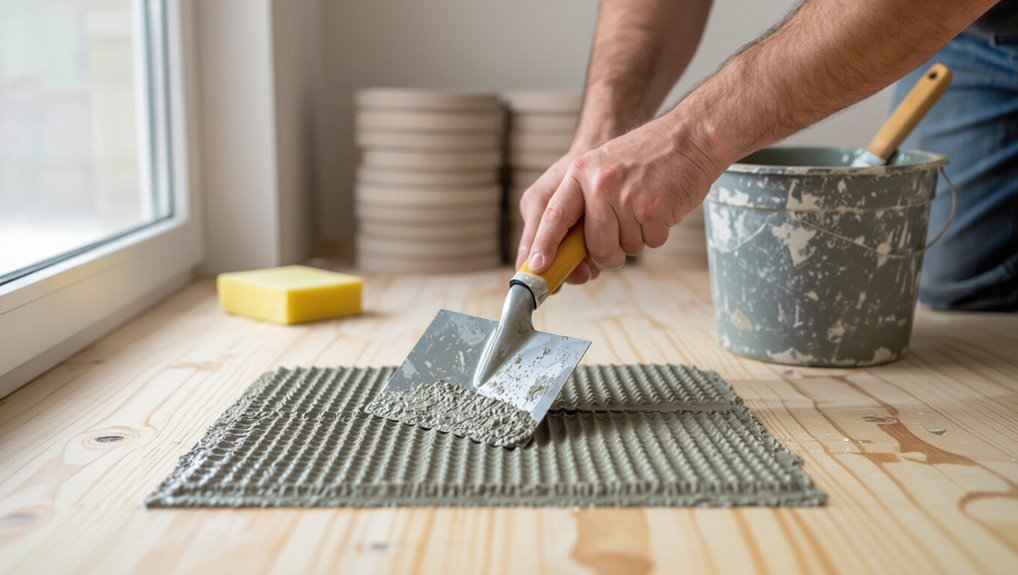
Because a strong bond and level surface depend on your mortar choice and mixing, take time to select the right thinset and mix it exactly to the manufacturer’s specs before spreading.
Use a square-notched trowel sized for tile thickness, apply from a clean, primed substrate, comb in straight lines, and work in small sections.
Maintain pot life and discard stiffened mortar.
Step 4 Setting tiles, maintaining joints, and using spacers
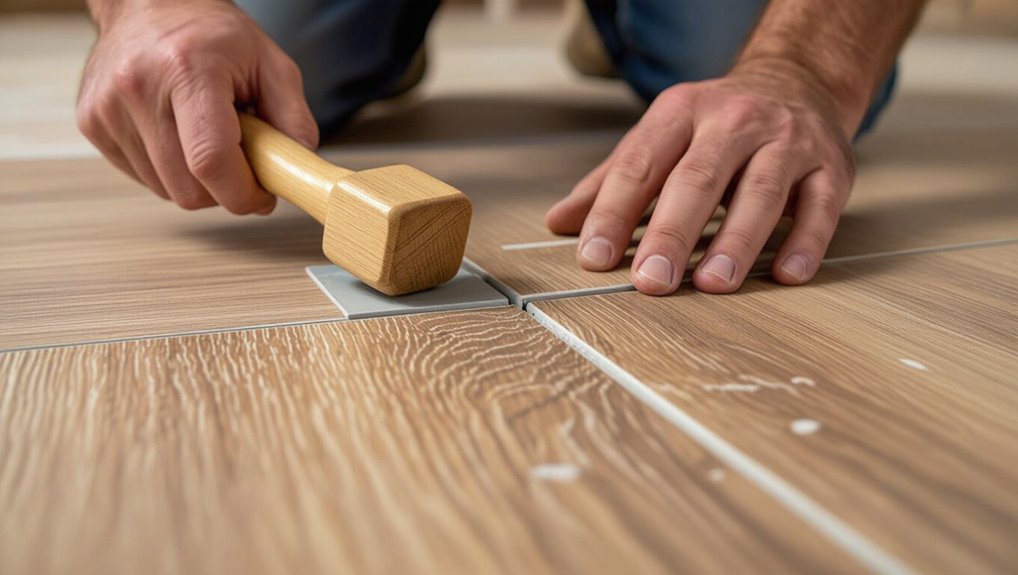
Begin laying tiles from your reference lines, pressing each piece firmly into the freshly combed thinset while keeping consistent pressure so you get full contact without voids.
Space tiles evenly with appropriate spacers, checking alignment and grout joint width frequently.
Tap tiles level with a rubber mallet, remove excess thinset from joints, and periodically confirm straight lines so seams remain consistent across the floor.
Step 5 Cutting tiles for edges, outlets, and corners (tools and tips)
Cuts and fittings demand patience and the right tools, so measure twice and mark carefully before you cut.
Use a wet saw for straight cuts, a tile nipper for small notches, and a carbide scoring tool for thin trims.
Drill outlet holes with a diamond bit.
Test-fit pieces, sand rough edges, and keep spacers aligned so joints remain consistent at walls and corners.
Step 6 Grouting: selecting grout type, application, and cleaning
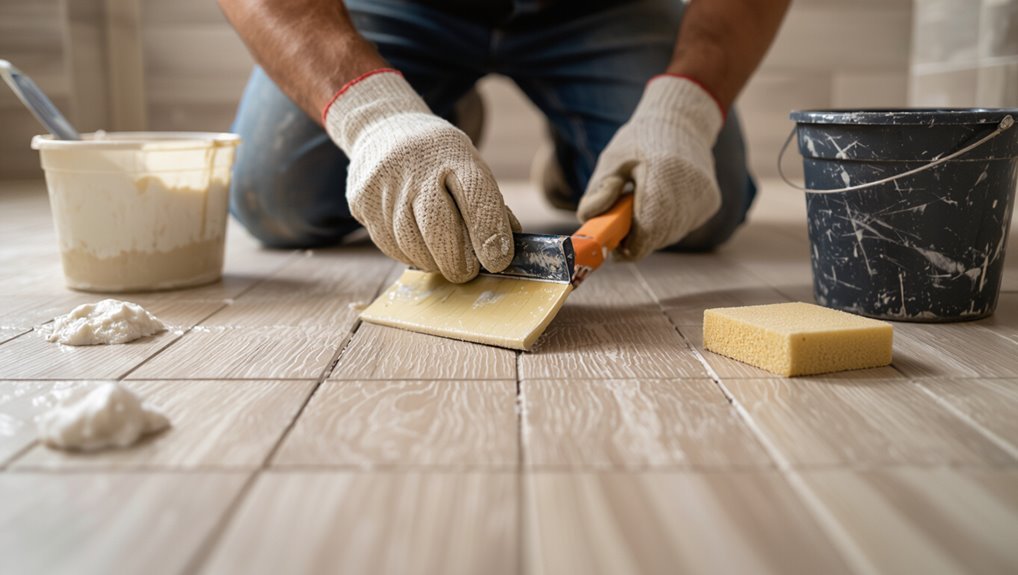
With the tiles cut and test-fitted, it’s time to fill the joints—grouting locks the layout, stabilizes edges, and seals gaps against moisture and dirt.
Choose sanded grout for wider joints, unsanded for narrow or delicate tile.
Mix to a creamy consistency, force grout into joints with a rubber float, wipe haze with a damp sponge, and let cure per manufacturer instructions.
Step 7 Sealing grout and (if applicable) tiles; finishing trims and transitions
Seal the grout—and any porous wood-look tiles—once the grout has fully cured to lock out moisture, prevent stains, and make cleaning easier.
- Choose a quality sealer and test in an inconspicuous spot.
- Apply evenly with a low-nap applicator; wipe excess promptly.
- Seal edges and junction strips carefully.
- Install baseboards, reducers, and thresholds to allow movement.
- Reinspect seals and touch up any thin areas before finishing.
Step 8 Curing time, protective measures, and when to walk on new floor
After you’ve finished sealing and installing trims, let the floor cure before heavy use so the grout and any applied sealers can reach full strength; most sealers set within 24–72 hours while grout often needs 7 days to fully cure.
During curing, keep traffic light, use felt pads and rugs, avoid heavy furniture for 7–14 days, and monitor humidity.
Walk gently after initial set.
Common Installation Scenarios and Adjustments
You’ll face a few common scenarios that change how you install wood tile: laying over radiant heat, fitting around irregular room shapes and built-ins, and handling doorways, thresholds, and connections to other floors.
For radiant heat you’ll follow manufacturer temperature and adhesive guidelines, while odd shapes and built-ins mean careful measuring and custom cuts.
Plan connections and thresholds ahead so seams stay tight and movement gaps are respected.
Installing over radiant heat systems
When installing wood tile over radiant heat systems, you’ll need to contemplate system type, temperature limits, and the appropriate adhesive and movement joints to prevent cracking or bond failure.
Check manufacturer maximum surface temperatures (usually 85°F/29°C), use flexible, heat-rated thinset or adhesive, and stagger expansion joints with the heating layout.
Test system operation before and after installation to guarantee stable temperatures and adhesion.
Working around irregular room shapes and built-ins
If your room has odd angles, alcoves, or built-ins, plan cuts and layout before you mix thinset so you won’t be scrambling mid-job.
Measure carefully, scribe tiles to fit against cabinets and pipes, and dry-fit sections. Use a carbide blade for precise trimming, keep consistent grout reveals, and label pieces.
Work outward from focal areas to maintain symmetry and minimize visible small cuts.
Doorways, thresholds, and transitions to other floors
Because doorways and floor shifts are high-traffic edges, you should plan them before laying the first tile so cuts, height differences, and thresholds look intentional and function smoothly.
- Measure clearances and door swing first.
- Trim doors if tiles raise the floor.
- Use connector strips for height changes.
- Allow expansion gaps at thresholds.
- Match tile orientation for a cohesive look.
Mistakes to Avoid and Troubleshooting
Don’t skip proper subfloor prep or rush layout—those are the most common mistakes that cause problems later.
You’ll learn simple fixes for lippage, loose tiles, and cracked grout, plus when a repair is enough versus when to call a pro.
If an issue risks structural damage or keeps recurring, get a professional opinion.
Common mistakes during prep and installation
When you rush through prep or ignore manufacturer guidelines, small missteps quickly become visible flaws like lippage, uneven seams, or premature grout cracking.
- Skipping substrate inspection or moisture testing
- Using wrong thinset or grout consistency
- Neglecting proper trowel size and bed coverage
- Ignoring expansion joints and layout planning
- Installing on an uneven or dirty subfloor
How to fix lippage, loose tiles, and cracked grout
Spotting lippage, loose tiles, or cracked grout early lets you address small issues before they spread and cost more to fix.
You can level lippage with a grinder and replace loose tiles with thinset and back-buttering; remove cracked grout, clean joints, and regrout. Keep repairs small and use matching grout.
- Check seam elevation
- Remove damaged tile
- Clean substrate
- Apply adhesive correctly
- Regrout neatly
When to call a professional
Small repairs like grinding lippage or regrouting can keep your floor sound, but some problems demand a pro.
Know when to stop: big substrate issues, widespread tile failure, persistent moisture, uneven heating, or structural movement need expertise.
Calling a pro prevents costly mistakes and preserves warranty.
- major substrate cracks
- recurring mold or moisture
- extensive tile delamination
- uneven floor levels
- heating system failures
Maintenance and Care for Longevity
To keep your wood-look tile looking great, you’ll want simple daily and weekly cleaning routines that remove grit and spills before they cause wear.
Schedule periodic tasks like resealing grout, repairing chips, and a professional deep clean to restore the finish.
Use preventive measures—entry mats, furniture pads, and consistent humidity control—to minimize damage and extend the floor’s life.
Daily and weekly cleaning routines
Daily and weekly cleaning routines keep wood tile flooring looking its best and prevent grime from damaging grout or seams.
You should sweep or vacuum daily, spot-wipe spills immediately, and mop weekly with a pH-neutral cleaner. Avoid excess water.
Rotate rugs and use felt pads under furniture.
- Sweep or vacuum daily
- Spot-clean spills right away
- Mop weekly, minimal water
- Use pH-neutral cleaner
- Protect with rugs and pads
Periodic maintenance: resealing grout, repairs, and deep cleaning
Plan for periodic maintenance to keep your wood tile floor durable and looking new: reseal grout every 1–3 years (or sooner in high-traffic areas), address chips or cracked tiles promptly, and schedule deep cleanings to remove embedded dirt and restore grout color.
Use appropriate grout sealer, replace damaged tiles with matching pieces, and employ a pH-neutral cleaner and soft brushes to lift grime without harming grout.
Preventive measures: mats, furniture pads, humidity control
A few simple preventive steps will keep your wood tile floor looking great and cut down on repairs.
Use mats at entries, felt pads under legs, stable humidity, avoid standing water, and lift rather than drag furniture.
- Place durable entry mats to trap grit
- Use felt pads on all furniture
- Keep indoor humidity 35–55%
- Wipe spills promptly
- Use furniture sliders when moving items
Best Practices and Pro Tips from Installers
You’ll want to stagger boards and vary plank lengths to mimic real wood and hide repeats in the pattern.
Pick colors, grout widths, and matte or satin finishes that match your room’s lighting and scale to sell the illusion.
Use batching, proper spacers, and the right adhesive technique to save time without sacrificing a clean, durable install.
Layout tricks to maximize natural wood look
When you stagger boards and vary plank lengths like pros do, the installation reads more like real hardwood than tile, letting natural grain and end seams flow without obvious repeats.
You’ll offset seams at least 6–8 inches, mix plank lengths randomly, and avoid H-patterns.
Start with a balanced centerline, dry-lay sections to check rhythm, and trim end pieces to keep varied, natural joints.
Choosing colors, grout lines, and finishes for realism
Although subtle choices make the biggest difference, picking the right tile color, grout line, and finish will sell the illusion of real wood—so match tones, grout width, and sheen to the species and wear pattern you’re imitating.
Choose grout a shade darker for depth, narrow lines for modern planks, wider for rustic.
Matte or low-sheen finishes mimic aged wood; gloss reads new hardwood.
Time-saving and quality-preserving techniques
Because small choices add up fast, pros focus on a few high-impact habits that save time and keep quality consistent: plan your layout, batch-cut tiles, and use a quality tile spacer system.
Pre-mix thinset for small sections, work in zones, and clean joints as you go.
Check alignment often, maintain consistent grout depth, and finish with a protective seal.
Comparison Wood Tile vs Real Wood vs Luxury Vinyl
When you’re choosing between wood tile, real wood, and luxury vinyl, focus on durability, maintenance, and how each handles moisture.
Consider upfront cost versus long-term resale value and which option best fits your budget.
Finally, weigh the look and underfoot feel—real wood warms a room, tile mimics grain with better moisture resistance, and vinyl offers many looks at lower cost.
Durability, maintenance, and moisture resistance
Durability matters most once the floor’s in place, and you’ll find clear trade-offs between wood tile, real hardwood, and luxury vinyl. You’ll choose based on scratch resistance, upkeep, and water tolerance; tile resists moisture, hardwood needs care, vinyl withstands spills.
| Material | Maintenance | Moisture Resistance |
|---|---|---|
| Wood Tile | Low | High |
| Hardwood | Moderate | Low |
| Luxury Vinyl | Low | Moderate |
Cost and resale value considerations
You’ve weighed upkeep and moisture tolerance, now let’s look at how those choices affect your wallet and a home’s market appeal. You’ll compare installation cost, longevity, and perceived buyer value so you can choose wisely.
| Flooring | Avg cost/sq ft | Resale impact |
|---|---|---|
| Wood tile | $3–$10 | Neutral–positive |
| Real wood | $5–$15 | Positive |
| Luxury vinyl | $2–$7 | Neutral |
Aesthetic and feel comparison
Although all three can mimic a warm, wood-like look, they differ in texture, warmth underfoot, and how authentic they’ll feel to someone standing in the room.
You’ll weigh appearance, feel, and maintenance when choosing.
- Wood tile: cool, hard, very durable
- Real wood: warm, natural grain, refinishable
- Luxury vinyl: softer, warmer underfoot
- Cost vs feel trade-offs
- Room use guides choice
FAQ
You probably have a few practical questions about wood-look tile, like whether it’s suitable for bathrooms and basements or if it feels colder and harder than real wood underfoot.
You’ll also want to know how to match it to existing wood floors, whether damaged tile can be repaired or restored, and how long installation usually takes for an average room.
I’ll answer each of these so you can plan the right product and timeline.
Can wood-look tile be installed in bathrooms and basements?
If you want a warm, natural look in moisture-prone areas, wood-look tile’s durable, water-resistant surface makes it ideal for bathrooms and basements; just be certain to use proper underlayment, a waterproof membrane where needed, and an appropriate grout and sealant to prevent moisture issues.
You’ll also guarantee substrate is level, allow for expansion joints, and choose a slip-resistant finish for safety.
Do wood-look tiles feel cold or hard underfoot compared with wood?
Wondering whether wood-look tile feels colder or harder than real wood? You’ll notice tile usually feels firmer and can be cooler, especially over concrete.
You can soften the feel with area rugs, underfloor heating, or padded underlayment when appropriate.
Compared to wood’s natural spring and warmth, tile is denser, so expect a different sensory experience though it’s durable and low-maintenance.
How do I match existing wood floors to a wood-look tile?
Feeling the difference underfoot often leads homeowners to ask how to blend wood-look tile with existing wood floors.
Compare tone, grain, and plank width; bring samples home and view them in different light.
Match grout to join lines, choose connecting profiles, and align plank direction.
If colors conflict, use a narrow threshold or complementary stain to ease the visual shift.
Can I refinish or restore wood-look tile if damaged?
Can you refinish wood-look tile when it’s damaged? You can’t sand and refinish like real hardwood, but you can repair chips, scratches, and grout issues.
Use matching epoxy or porcelain repair kits for surface chips, color-matching touch-up pens for minor scratches, and regrout or seal grout to restore appearance.
For extensive damage, replace affected tiles for the best result.
How long does installation typically take for an average room?
How long will installation take for an average room? You can usually expect a full-day job for a 10×12 room with prep, or up to two days for complex layouts or subfloor repairs.
Factors like tile pattern, grout curing, and furniture moving affect timing.
- Room size
- Subfloor condition
- Tile layout complexity
- Grout drying time
- Installer experience