How to Dry Up Water Under Vinyl Flooring Before Mold Sets In
If water gets under your vinyl, act fast: stop the leak, cut power if needed, lift seams or edges, and remove standing water with towels or a wet/dry vacuum. Run high-capacity fans and a dehumidifier aimed under lifted sections, use gentle heat and desiccants, and keep airflow until a moisture meter reads safe levels (often 24–48 hours). Disinfect surfaces, watch for mold signs, and if problems persist, consider pro help — more practical steps follow.
Quick Answer How to Dry Up Water Under Vinyl Flooring Immediately
First, prioritize safety: cut power to the area, wear gloves and a mask, and stop the water source if you can.
Then act fast to remove standing water and lift vinyl where needed to let the subfloor dry.
Finally, run fans and a dehumidifier and treat damp spots with a mold inhibitor to prevent growth.
Immediate priorities and safety checklist
Start by making safety your top priority: cut power to affected areas if water reaches outlets or appliances, ventilate the room to reduce humidity, and block off the space to keep pets and kids out while you work.
Next, wear PPE (gloves, boots, mask), assess water source, document damage for insurance, and get help if contamination or structural issues exist while you learn how to dry up water under vinyl flooring.
One-line actionable steps to stop moisture and prevent mold
Cut off the water, unplug affected appliances, and dry standing puddles with towels or a wet/dry vacuum.
Lift vinyl edges if possible, blot underlayment, and prop flooring to air out.
Run fans, dehumidifiers, and open windows to speed drying.
Disinfect surfaces with a mildew-killing solution, monitor for dampness, and discard soaked padding.
Document damage and call a pro if mold appears.
Basic Understanding Why Drying Under Vinyl Matters
You need to know that vinyl can warp, loosen adhesive, or trap moisture in its seams when it gets wet.
Those damp conditions beneath the surface create the warm, dark environment mold loves, especially if ventilation and drying are poor.
Watch for musty odors, soft or buckled spots, and dark staining as signs water’s trapped under your flooring.
How vinyl flooring reacts to water
Although vinyl itself resists direct water damage, moisture trapped beneath it can still cause serious problems: the backing, adhesive and subfloor absorb water, swell, delaminate or grow mold, and those issues can ruin the floor’s appearance and structural stability if you don’t dry it promptly.
You’ll notice buckling, adhesive failure, stuck seams and odors; act quickly to lift, dry and restore materials before damage spreads.
Conditions that promote mold growth under vinyl
When moisture gets trapped under vinyl, it creates the warm, dark, and nutrient-rich environment mold needs to take hold.
You’ll want to remove dampness quickly to prevent growth. Mold thrives with humidity above ~60%, poor ventilation, organic debris (adhesives, dust, wood subfloor), and consistent temperatures between 60–85°F.
Limiting these factors stops spores from colonizing beneath your flooring.
Signs water is trapped beneath the vinyl
Soft patches, warped planks, or a musty smell are telltale signs that water’s trapped beneath your vinyl, and spotting them early helps you act before mold or structural damage sets in.
Check for these indicators so you can dry and repair promptly:
- Discolored seams or bubbling vinyl
- Persistent dampness or cold spots underfoot
- Allergic reactions or unexplained respiratory irritation
Assessment Determine Source, Extent, and Risk
Start by finding where the water’s coming from—check for obvious leaks, recent spills, condensation spots, or water seeping in from outside.
Use a moisture meter or simple DIY checks (lift edges, feel for dampness, watch for discoloration) to gauge how far and how wet the area is.
If you spot persistent leaks, structural damage, or signs of black mold, call a professional right away.
Locate the water source (leaks, spills, condensation, seepage)
Begin by tracing where the moisture is coming from: inspect plumbing fixtures, appliances, exterior walls, and the floor seams for obvious leaks, then look for signs of spills, condensation, or groundwater seepage.
Check nearby sinks, dishwashers, water heaters, HVAC drains, and window sills.
Note wet spots, warped vinyl, musty odors, and seasonal patterns to identify intermittent versus constant sources.
How to test moisture levels under vinyl (tools and DIY checks)
1 quick way to gauge how much moisture is under your vinyl is to use a combination of tools and simple DIY checks: a moisture meter (pin or pinless) gives quantitative readings, a hygrometer measures ambient humidity, a surface probe or calcium chloride test checks vapor emission, and DIY indicators—like lifting a small section of vinyl, feeling for dampness, or taping clear plastic overnight to watch for condensation—help reveal localized issues.
Use readings from multiple methods, map wet spots, and document levels to decide drying approach and monitor progress.
When to call a professional (plumbing, structural damage, black mold)
When you find persistent moisture under vinyl flooring, call a professional if you suspect a leaking pipe, visible structural damage, or any sign of black mold—these situations need prompt, expert assessment to determine the source, extent, and health risks.
You should act quickly to stop damage, document conditions, and follow professional remediation or repair plans.
- Plumbing leak or wet subfloor
- Sagging, rot, or compromised joists
- Musty odor with dark mold patches
Immediate Actions Step-by-Step Emergency Drying (Step 1“5)
First, stop the water and isolate the area so you’re not fighting more moisture.
Then remove standing water and wet materials, set up fans and dehumidifiers, and carefully lift seams of vinyl where safe to access the underside.
Finally, focus on drying the subfloor and vinyl underside with heat, airflow, or desiccants and monitor progress until the materials are fully dry.
Step 1 Stop the source: shut off water, fix leaks, isolate the area
Shut off the water and stop the leak immediately to prevent more moisture from seeping under the vinyl.
You’ll locate the shutoff, secure leaking fittings, and isolate the area to limit spread.
Wear gloves and turn off electricity if needed. Act fast to reduce mold risk.
- Turn main or fixture shutoff valves.
- Patch or tighten visible leaks.
- Rope off the affected zone.
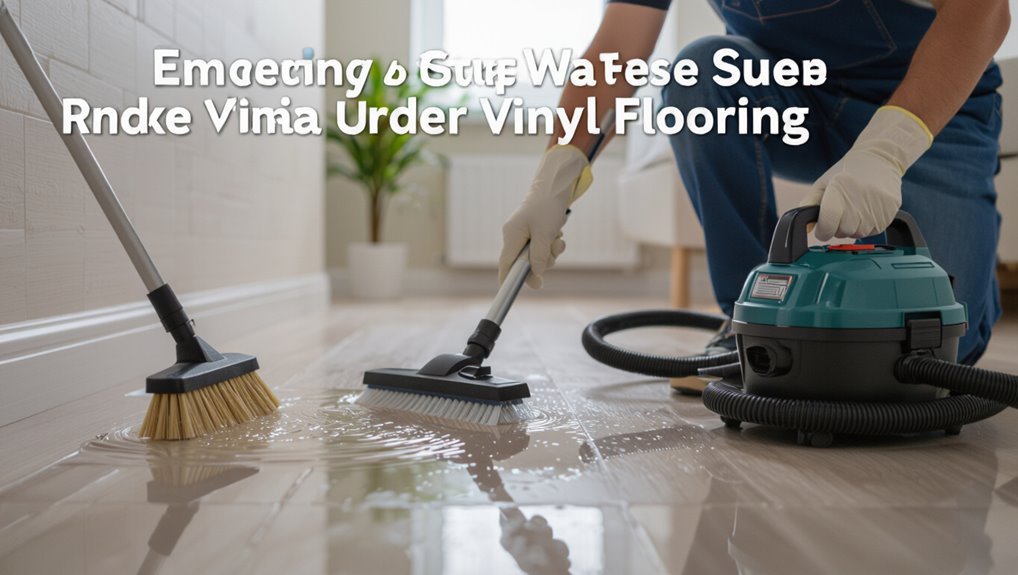
Step 2 Remove surface water and absorbent materials (mops, wet vacs)
Now that the leak’s stopped and the area is isolated, start removing standing water and any wet, absorbent items right away.
Use a wet vacuum or mop to extract pooled water, then dispose of saturated rugs, padding, and cardboard.
Wear gloves and a mask if contaminated.
- Wet vacuum high-traffic zones
- Bag and remove wet carpets/pads
- Sanitize hard surfaces afterward
Step 3 Create airflow and dehumidification (fans, dehumidifiers, HVAC adjustments)
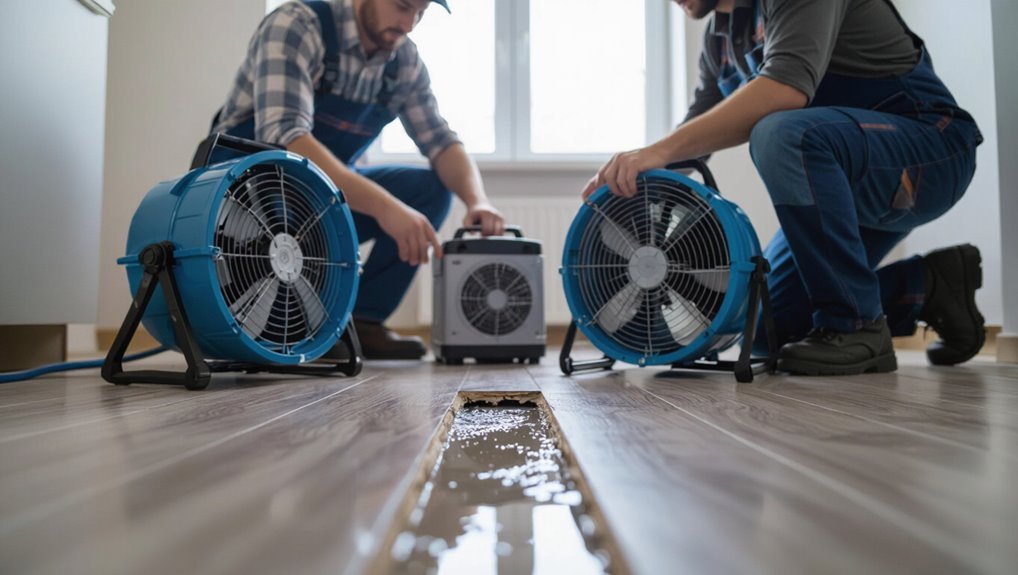
Once you’ve removed standing water and soaked materials, speed drying by creating steady airflow and lowering humidity to prevent mold and subfloor damage.
Position fans to pull air under edges and across seams, run a dehumidifier on continuous mode, and adjust HVAC to circulate dry air. Monitor humidity until below 50%.
- Point fans toward wet zones
- Use a capacity-matched dehumidifier
- Keep doors/windows managed
Step 4 Lift vinyl where necessary and safe to access underside (how to lift seams and seams to leave intact)
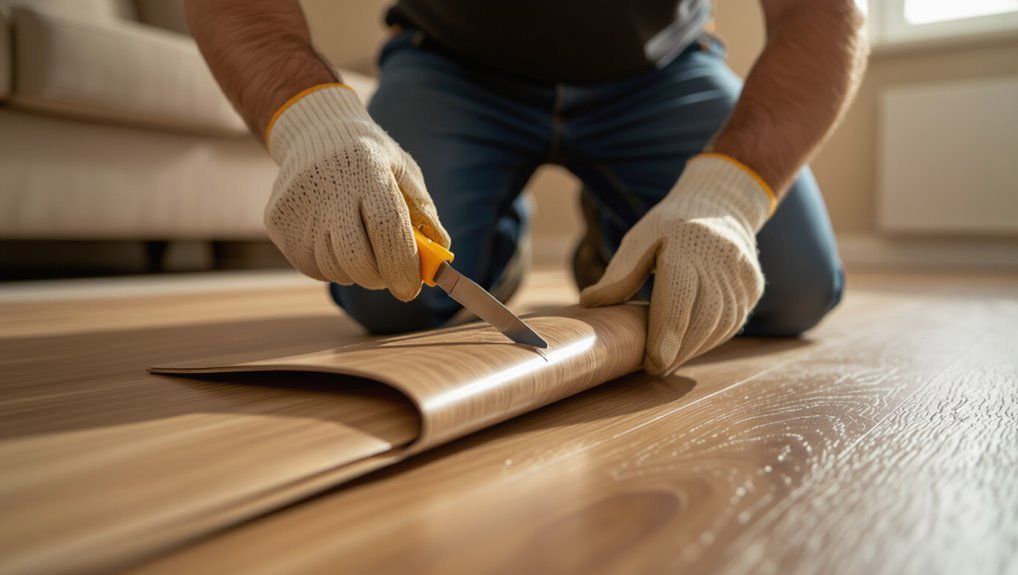
If you can safely reach wet areas beneath the vinyl, lift seams and planks carefully to expose the underside for drying without damaging the flooring.
Work slowly from edges, using a putty knife or seam roller to loosen adhesive, and lift only enough to access wet spots.
Keep seams intact where possible, label lifted sections, and avoid tearing or stretching the vinyl.
Step 5 Dry subfloor and underside of vinyl (heat, air, desiccants, drying timeline)
With the affected seams lifted and labeled, begin drying the subfloor and the backside of the vinyl immediately to prevent mold and adhesive damage.
Use heat, airflow, and desiccants together: place fans to force air under lifted sections, direct gentle heat (not too hot) to speed evaporation, and scatter silica or moisture absorbers.
Monitor moisture meters; expect 24–72 hours depending on saturation.
- Fans + venting
- Low heat source
- Desiccant placement
Cleaning and Mold Prevention After Drying
Once the area’s dry, inspect the vinyl and subfloor closely for visible mold, staining, or a musty smell so you can gauge contamination.
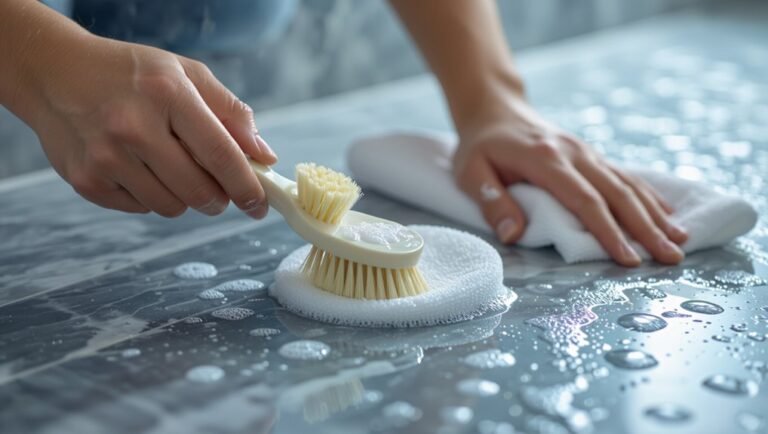
Use gentle cleaners safe for vinyl—mild detergent or a diluted vinegar solution—and avoid undiluted bleach on vinyl surfaces and adhesives unless a professional advises it.
If mold has penetrated the underlayment, the padding, or the vinyl shows warping or persistent odors, plan to remove and replace those materials.
Inspecting for mold and contamination
After you’ve dried the subfloor and lifted the vinyl, inspect every area for signs of mold, musty odors, discoloration, soft spots, or a slimy residue—these are clear indicators of contamination that need prompt attention.
Check seams, under trims, and inside closets. Use a flashlight and magnifier, note affected zones, and document photos.
If contamination is extensive, consider professional assessment.
Cleaning methods safe for vinyl and subfloor (detergents, vinegar, bleach cautions)
Having identified and documented any mold or contamination, you’ll need to clean both the vinyl and subfloor carefully to prevent recurrence while protecting materials.
Use mild detergent and warm water for routine cleaning; avoid saturating the subfloor. Be cautious with vinegar—it’s mild but not a disinfectant for heavy contamination.
Bleach can damage vinyl and adhesives; don’t overuse it.
- Mild detergent, warm water
- Vinegar for light cleaning only
- Avoid bleach on vinyl
When to discard and replace vinyl or underlayment
Decide quickly whether to keep or replace vinyl and underlayment based on visible damage, persistent odors, staining, or mold growth that didn’t go away with cleaning.
If the material is warped, delaminated, crumbling, or still smells musty, you should discard it and install new flooring and underlayment.
Remove affected layers, dry and sanitize the subfloor, then inspect for structural damage; replace anything compromised.
Tools, Materials, and Products You’ll Need
You’ll need a few key tools to find and remove water under vinyl: flashlights, pry bars, screwdrivers, and a good moisture meter for inspection.
Rent or buy a dehumidifier, high-capacity fans, and a wet vacuum to speed drying.
Use EPA-registered cleaners and an antimicrobial treatment to clean and prevent mold after the area’s dry.
Essential tools for DIY drying and inspection
Gather the right gear before you pull up any vinyl—proper tools speed inspection and drying while reducing damage.
You’ll need basics to assess, document, and protect the area, plus hand tools for careful lifting and cleanup. Stay safe and work methodically to limit moisture spread and spot early signs of mold.
- Utility knife and pry bar
- Flashlight and camera
- Protective gloves and mask
Recommended dehumidifiers, fans, wet vacs, moisture meters
Now that you’ve got the basic hand tools and PPE ready, pick the right drying equipment to actually remove moisture and prevent mold. Choose a low-grain dehumidifier, high-CFM fans, a wet vac with float shutoff, and a reliable moisture meter. Place devices strategically and monitor readings until panels and subfloor read normal.
| Device | Purpose |
|---|---|
| Dehumidifier | Extract moisture |
| Fan | Air circulation |
| Wet vac | Water removal |
Safe cleaning agents and antimicrobial products
Because damp underlayment can breed mold fast, choose cleaning agents and antimicrobials that kill microbes without damaging vinyl or the subfloor.
Use products labeled for mold prevention, follow dilution instructions, and test a small area first.
Wear gloves and ventilate the space.
- pH-neutral vinyl cleaner
- EPA-registered antimicrobial spray
- Isopropyl alcohol (70%) for spot treatment
Common Mistakes to Avoid
Don’t seal or replace vinyl until the subfloor is fully dry, because trapping moisture causes mold and warping.
Don’t use excessive heat or unapproved chemicals on vinyl, since they can warp, discolor, or release harmful fumes.
And don’t assume surface dryness—check for hidden moisture with meters or moisture tests before finishing the job.
Sealing or replacing without proper drying
If you seal or replace vinyl before the subfloor’s completely dry, you’ll trap moisture and invite mold, warping, and lingering odors that are far harder to fix than the original water issue.
Don’t rush repairs: confirm dryness with a moisture meter, allow extra drying time, and ventilate.
If in doubt, remove affected vinyl and address the subfloor thoroughly before installing new material.
Using excessive heat or unapproved chemicals on vinyl
When you try to speed drying with high heat or use unapproved solvents on vinyl, you can permanently warp, discolor, or dissolve the flooring and make repairs much harder.
Don’t blast vinyl with heat guns, hair dryers, or heaters, and avoid household solvents or strong cleaners.
Use manufacturer-approved methods: gentle drying, dehumidifiers, fans, and recommended cleaning products to protect material integrity.
Ignoring hidden moisture and assuming surface dryness
Even after the surface looks dry, you can still have moisture trapped under seams, around trim, or in the subfloor—so don’t assume visible dryness means the job’s done.
Check beneath edges, lift a plank or two where possible, and probe baseboards. Use moisture meters and continued drying cycles.
Ignoring hidden dampness lets mold take hold, costing more time and repairs.
Prevention and Best Practices to Keep Vinyl Dry Long-Term
To keep vinyl dry long-term, you should choose the right installation method and moisture-resistant underlayment from the start.
Check and maintain flooring regularly—look for gaps, loose seams, and any signs of moisture so you can act quickly.
Control indoor humidity and improve ventilation to prevent recurring dampness.
Proper installation and underlayment choices for moisture resistance
Because moisture starts at the subfloor, you’ll minimize problems by choosing the right underlayment and installing vinyl correctly from the start.
Pick a vapor‑retardant or waterproof underlayment compatible with your vinyl type, make certain subfloor is flat, clean, and dry, use recommended adhesives or click systems, seal seams and connections, and maintain proper perimeter expansion gaps to prevent trapped moisture and mold growth.
Routine inspection and maintenance tips
When you routinely inspect and maintain vinyl floors, you catch small issues—like leaks, loose seams, or trapped moisture—before they become costly problems.
Check seams, edges, and junctions weekly, dry spills immediately, and repair damaged sections fast.
Monitor under-cabinet areas and appliances for dampness.
- Inspect seams and edges
- Wipe and dry spills promptly
- Repair or replace damaged vinyl
Managing indoor humidity and ventilation strategies
Although vinyl resists surface spills, high indoor humidity invites moisture to creep underneath and warp adhesive, so control of humidity and ventilation is essential.
You should monitor humidity, improve airflow, and act fast when levels rise. Use these steps to prevent moisture buildup:
- Run dehumidifiers and set humidistat to 45% or lower.
- Ventilate with exhaust fans and open windows.
- Seal gaps and insulate subfloor.
Cost and Time Considerations
Expect drying and remediation to take anywhere from a day for minor DIY efforts to several weeks for full professional restoration.
DIY costs can be low if you handle fans and dehumidifiers yourself, while professional work—especially when mold removal or extensive subfloor repair is needed—can run into the hundreds or thousands.
The bigger and moldier the damage, the longer and more expensive the process will be.
Typical timelines for drying and remediation
If you act quickly, drying and remediation usually take anywhere from 24 hours for minor surface moisture to several weeks for deep saturation and mold mitigation.
Your specific timeline will hinge on the extent of water intrusion, the materials involved (vinyl, underlayment, subfloor), and whether structural repairs or mold remediation are required.
You’ll monitor moisture levels, remove wet materials, run fans/dehumidifiers, and reassess regularly to confirm dryness.
Approximate cost ranges for DIY vs professional remediation
Having a clear timeline helps you plan the budget, too — whether you handle the work yourself or hire pros will drive most of the cost differences. DIY often runs $50–$500 for fans, dehumidifiers, and materials; pros typically charge $300–$2,500 depending on scope. Compare time, tools, and guarantees when deciding.
| Option | Typical range |
|---|---|
| DIY basic | $50–$500 |
| Professional | $300–$2,500 |
| Partial pro help | $150–$1,200 |
Factors that increase cost and time (extent of damage, mold presence)
Because the scope of damage and any mold growth directly change what’s required, you’ll see costs and timelines rise quickly as problems worsen.
If water soaked subfloor or walls, expect demolition, drying, and replacement.
Visible or suspected mold needs testing, containment, and remediation by pros.
Hidden damage multiplies labor and material costs, extends drying times, and may require permits or specialty contractors, increasing total expense.
FAQ Fast Answers to Common Questions
You’ll find quick answers here to common worries like how fast mold can grow under vinyl and whether you can dry flooring without lifting it.
Expect clear guidance on using dehumidifiers, when bleach is appropriate for subfloors, and signs that the subfloor needs replacement.
If you have more detailed questions, ask and I’ll give concise next steps.
How long before mold sets in under vinyl?
How quickly will mold start growing under vinyl? You’ll often see mold beginning within 24–48 hours in warm, humid conditions with organic debris beneath the vinyl.
Cooler, drier environments slow growth, but spores can establish within several days.
Inspect promptly after any leak, remove moisture, and dry the subfloor to prevent colonies from forming and spreading under the flooring.
Can I dry vinyl flooring without lifting it?
If you spot moisture under vinyl and want to avoid lifting the floor, you can often dry it in place—depending on the leak size, subfloor type, and how long it’s been wet.
Use targeted fans, heat gun on low, and moisture absorbers.
Monitor with a moisture meter, remove trim to ventilate edges, and act fast; serious saturation or mold signs means you’ll need to lift and inspect.
Will a dehumidifier alone save wet vinyl?
While a dehumidifier can help lower room humidity and speed surface drying, it usually won’t be enough by itself to save wet vinyl that’s trapped moisture underneath.
You’ll need to lift edges, inspect underlayment, and use fans or inject air beneath planks to remove hidden water.
Dehumidification helps, but active removal and thorough drying prevent mold and adhesive failure.
Is it safe to use bleach on subfloors under vinyl?
Curious whether you can use bleach on subfloors under vinyl? You can, but use it cautiously.
Dilute household bleach (1 cup per gallon), ventilate, wear gloves and eye protection, and avoid soaking the wood — excessive moisture and harsh chemicals can damage adhesives and finish.
Test a small area first, rinse thoroughly, and dry completely before replacing vinyl to minimize odor and chemical residue.
How do I know if the subfloor needs replacement?
Bleach can help disinfect a damp subfloor, but you’ll still need to inspect the structure itself to decide whether repair or replacement is necessary.
Probe for soft spots, sagging, rotten odor, or mold growth through and under the plywood.
Measure moisture—readings above 15–18% in wood mean replacement is likely.
If joists are compromised or repairs don’t restore stiffness, replace the subfloor to prevent future problems.
Visual Guide and Quick Checklist
You’ll get a clear step-by-step checklist for emergency response so you can act fast when water shows up under vinyl.
Use the quick decision flowchart to determine whether to dry, clean, or replace based on damage and drying time.
Keep this visual guide handy for rapid, confident choices during a water incident.
Step-by-step checklist for emergency response
If water is pooling under your vinyl, act fast: this visual guide and quick checklist walks you through emergency steps so you can stop damage, dry the subfloor, and protect your flooring.
Follow these concise actions immediately:
- Remove surface water, lift edges, and blot soaked areas.
- Ventilate, use fans/dehumidifiers, and monitor moisture levels.
- Inspect for damage, document, and schedule repairs or professional drying.
Quick decision flowchart: dry, clean, replace
Now that you’ve stopped the immediate leak and started drying, use this quick decision flowchart to decide whether to dry, clean, or replace your vinyl and subfloor.
Inspect moisture levels, odor, and visible damage.
If dry <48 hours and no odor, dry and monitor.
If damp >48 hours or odor present, pull vinyl, clean and disinfect.
If delamination, mold, or structural damage, replace.