
How to Clean Black Floor Tiles Without Streaks
You can get streak-free black floor tiles by using a pH-neutral cleaner, distilled or filtered water, and soft microfiber tools; mop in small sections, wring the mop until just damp, then follow with a squeegee or lint‑free towel to dry each area immediately. Work in long, overlapping strokes and buff once in one direction to remove residue. Test cleaners on a hidden spot first, avoid waxes and harsh abrasives, and keep grout sealed for easier upkeep—more tips follow below.
Why Black Tiles Show Streaks
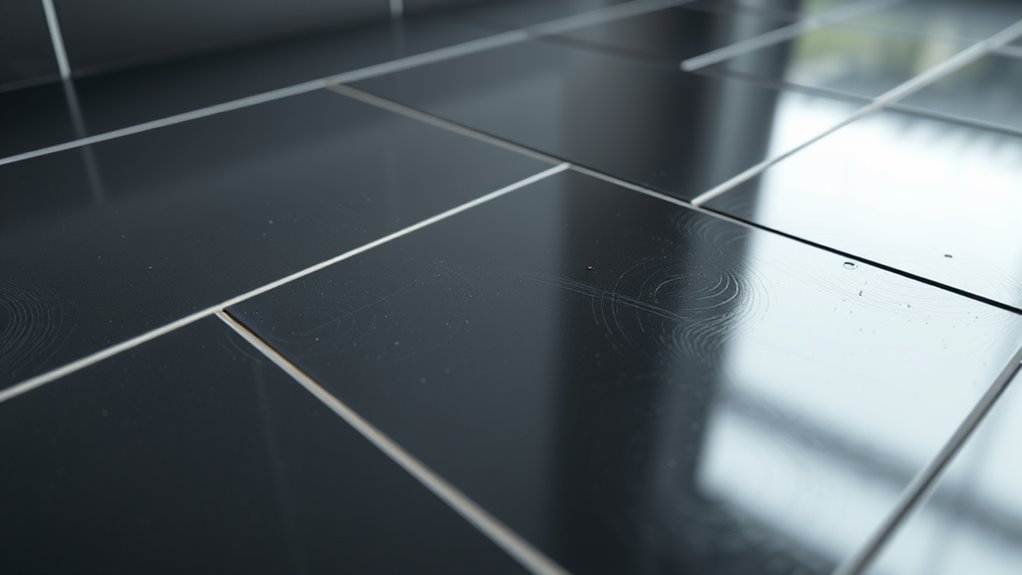
Why do streaks seem to stand out so much on black tiles? You notice every smear because dark surfaces contrast light residues and reflections, making streaks obvious. Fingerprints, soap film, and uneven drying catch your eye against deep tones and glossy finishes.
Your cleaning method, water hardness, and cloth choice affect Black tile patterns’ appearance—grout lines and textures reveal streaks differently. For effective Black tile maintenance, you’ll adopt consistent techniques: dilute cleaner correctly, rinse thoroughly, and dry with a microfiber or squeegee to avoid residue.
Understanding these factors helps you prevent streaks rather than chase them repeatedly.
Quick Answer: Get Black Tiles Streak-Free Fast
If you want streak-free black tiles fast, start with the right tools: a mild, residue-free cleaner, a bucket of clean water, a microfiber mop or cloth, and a rubber squeegee for large areas.
Work in small sections, mist cleaner lightly, and wipe with the microfiber in straight lines to avoid swirl marks.
Work in small sections, mist lightly, and wipe in straight lines to prevent swirl marks.
Rinse often with clean water to prevent residue buildup that highlights black tile patterns and changes how grout color reads.
Finish by squeegeeing excess water, then buff with a dry microfiber for a mirror finish.
Deal with spills promptly and avoid oily or waxy products that cause streaks.
How Care Differs: Ceramic, Porcelain, and Stone
Those quick, streak-free steps will work for many surfaces, but different tile types demand tweaks: ceramic, porcelain, and natural stone each react differently to cleaners, water, and scrubbing.
You’ll treat ceramic as forgiving—use mild detergent and soft mop, avoid abrasive pads that dull glaze.
Porcelain resists stains and tolerates stronger cleaners, but test concentrated solutions first.
Natural stone needs pH-neutral cleaners and minimal water; seal periodically to protect finish.
Consider design: black tile patterns can hide grime differently, and knowing black tile history helps you appreciate material choices.
Match cleaning method to tile type for streak-free results.
Gloss Level: Cleaning Tips for Matte vs. Glossy Tiles
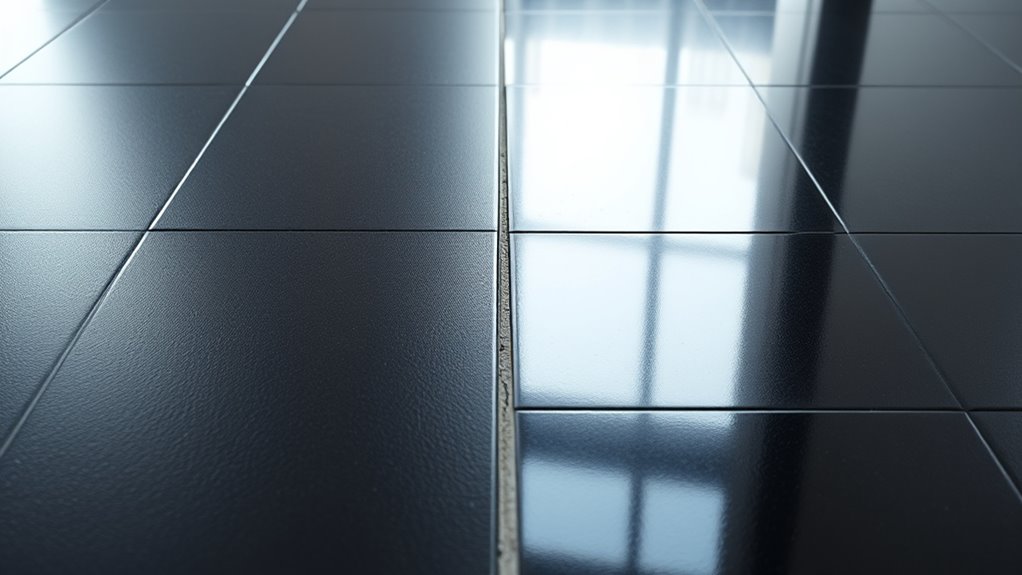
Because finish affects how dirt, water, and light behave on black tiles, you’ll need different approaches for matte versus glossy surfaces.
For matte sheen tiles, use a microfiber mop with minimal water to avoid darkening and spotting. Gentle, pH-neutral cleaners prevent buildup that dulls the finish. Don’t polish matte surfaces—light scrubbing removes grime without creating shine.
For a gloss finish, you can use slightly more water and a streak-free cleaner, drying quickly with a soft cloth to prevent watermarks and rainbowing.
In both cases, test cleaners in an inconspicuous spot and work in small sections for even results.
Must-Have Tools for Streak-Free Black Floors
Now that you know how finish affects cleaning, gather the right tools to make streak-free results reliable. You’ll want microfiber mops, a squeegee, soft-bristle broom, and lint-free towels to control residue and highlight color contrast. Good lighting fixtures help you spot streaks while you work. Keep tools dedicated to black floors to avoid cross-contamination.
| Tool | Purpose | Tip |
|---|---|---|
| Microfiber mop | Picks up fine particles | Rinse and wring well |
| Squeegee | Removes excess water | Use straight pulls |
| Lint-free towels | Final buffing | Fold for even pressure |
Store tools dry and inspect regularly.
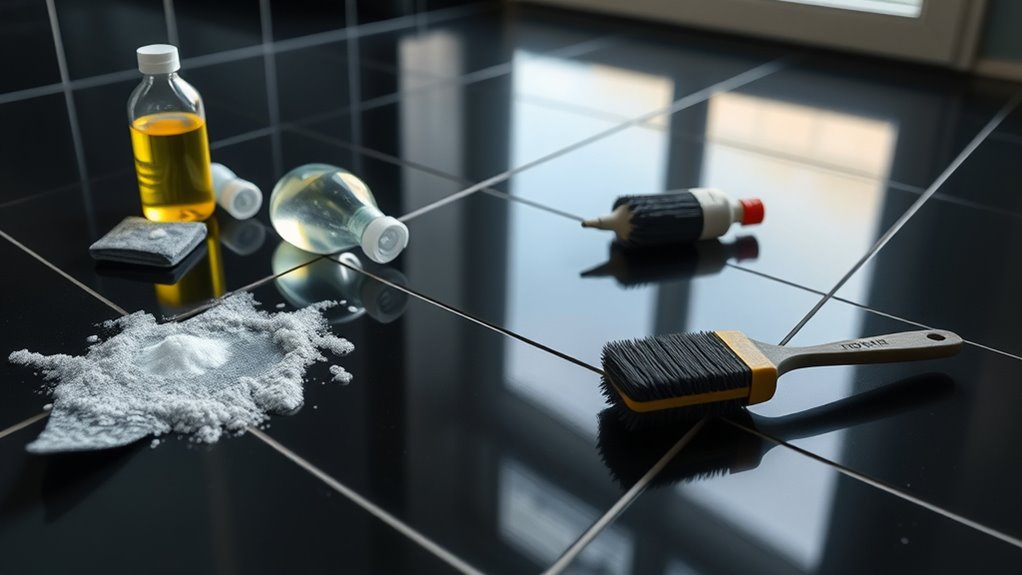
Best Cleaners and Solutions for Black Tiles
When you pick cleaners for black tiles, choose products that clean without leaving residue or dulling the finish. Use pH-neutral floor cleaners or a mild dish soap diluted in warm water for routine cleaning; they remove grime while preserving shine and preventing color fading.
For textured black tile patterns, use a soft-bristle brush to reach grout and grooves, then rinse thoroughly.
For spot cleaning, a vinegar-water mix works sparingly, followed by a clear water rinse to avoid streaks.
Always test any solution in an inconspicuous area first, dry with a microfiber cloth, and store cleaners safely.
Cleaners and Chemicals to Avoid on Black Floors
If you want to keep black floors looking glossy and streak-free, avoid harsh acids, bleaches, and abrasive scrubs that can etch, fade, or dull the surface. You should also steer clear of ammonia, oil-based cleaners, and waxes that leave filmy residues.
Instead, focus on Eco friendly solutions and gentle DIY cleaning tips that protect finishes. Don’t mix chemicals — that risks damage and toxic fumes. If a commercial product worries you, opt for mild pH-neutral cleaners.
- Shock: bleach ruins glossy depth
- Frustration: residue hides shine
- Regret: etched grout lines
- Anger: stubborn streaks from oils
- Relief: safer DIY cleaning tips
Test a Cleaner Safely on a Hidden Tile Spot
Pick a tile that’s out of sight—behind a cabinet or under a rug—so any damage stays hidden.
Mix the cleaning solution exactly as the label directs and apply a small amount with a cloth.
Check the spot over the next hour for any color change or finish dulling before you use the cleaner on the rest of the floor.
Choose An Out-of-Sight Tile
Because tile finishes and grout can react differently to cleaners, test your solution on a hidden tile spot before you treat the whole floor. Pick a tile where color contrast and tile pattern won’t show damage — under cabinets, behind appliances, or inside a closet.
Clean just a small corner, wait, then inspect in different light. If it’s safe, you’ll feel confident; if not, you’ll avoid visible mistakes.
- Relief: you won’t risk ruining visible tiles
- Confidence: you’ll know the cleaner works
- Caution: you protect grout and finish
- Surprise: spotting unexpected reactions early
- Control: you decide the next step
Prepare The Cleaning Solution
Before you mix anything, gather the cleaner, water, a spray bottle, and a microfiber cloth so you can make and apply a consistent test solution.
Dilute the cleaner per label directions or start with a mild 1:10 ratio (cleaner:water) if unsure.
Label the spray bottle and shake gently to mix.
Choose a hidden tile spot near grout or a baseboard that represents the range of tile textures in the room.
Spray lightly, wait a few minutes, then blot with the microfiber cloth rather than rubbing.
Record the mixture and spot location so you can repeat or adjust with other cleaning tools later.
Monitor For Color Change
After you’ve tested the solution on a hidden tile spot and blotted it dry, watch that area for fifteen to thirty minutes for any change in color, gloss, or texture. You’re doing color monitoring to confirm pigment stability and to prevent surprise discoloration.
If nothing shifts, you can proceed; if you see dulling, darkening, or a patchy finish, stop and rinse immediately. Trust your eyes and instincts.
- Fear of ruining a tile is normal.
- Relief comes with a clean, unchanged surface.
- Anxiety fades when pigment stability holds.
- Frustration spikes if color shifts.
- Satisfaction follows a safe result.
Prep the Room Before Cleaning Black Tiles
Start by clearing the floor space so you can reach every black tile without obstacles.
Sweep or vacuum to remove dust and debris before any wet cleaning, since dry particles cause streaks and scratches.
Gather and organize your cleaning supplies nearby so you can work efficiently and avoid recontaminating cleaned areas.
Clear The Floor Space
Once you’ve parked shoes and rugs to the side, remove furniture and loose items so you can work without obstacles. Clearing the floor gives you full access to every tile and prevents accidental streaks from dragging dirt around.
Open windows for floor ventilation and check lighting conditions so you’ll spot smudges. Move items methodically to keep pathways clear and protect belongings from splash. You’ll feel relief seeing the whole surface ready.
- Light, airy space that invites cleaning
- Calm from uncluttered sightlines
- Confidence in your technique
- Satisfaction watching dark tiles gleam
- Pride in a flawless result
Remove Dust And Debris
With the floor cleared, tackle loose dust and debris so your cleaning solution won’t turn dirt into streaks. Start by sweeping or vacuuming along grout lines and under decorative accents; use a soft broom to preserve color contrast and finish with a microfiber dust mop. Check corners and edges; lift rugs briefly to catch trapped grit. Dispose of collected debris promptly so it won’t scatter back.
| Tool | Area to Focus | Tip |
|---|---|---|
| Broom | Corners | Soft bristles |
| Vacuum | Grout lines | Brush setting |
| Dust mop | Open areas | Microfiber |
| Hand brush | Edges | Gentle strokes |
| Dustpan | Disposal | Empty often |
Organize Cleaning Supplies
Before you begin wet cleaning, gather and arrange all supplies so you won’t interrupt the process. You’ll feel calmer and work faster when everything’s in place. Focus on organizing storage for quick reach and labeling shelves so you grab the right bottle every time. Place essentials near the door, towels folded, and trash bin empty.
- Bright cleaner for grout (handle with care)
- Microfiber mop and spare cloths (soft comfort)
- Bucket with measured solution (steady confidence)
- Gloves and knee pads (protected posture)
- Small squeegee for edges (satisfying finish)
Now you’re ready to clean without pauses.
Remove Loose Dirt and Grit Without Scratches
While sweeping might seem routine, you should remove loose dirt and grit gently to avoid scratching black tile surfaces. Use a soft-bristle broom or a microfiber dust mop, moving with the grain of any tile texture.
Pick up grit before wet cleaning so particles won’t abrade the finish or dull color enhancement and decorative accents.
For edges and grout lines, vacuum with a brush attachment or use a soft hand brush. Empty the vacuum canister or rinse mop heads frequently to avoid reintroducing grit.
Check shoes and pet paws at entryways to minimize tracked-in debris between deep cleans.
Tackle Greasy or Oily Spots First
When you spot grease or oil, pre-treat the area with a suitable degreaser to break down the residue.
Blot the loosened grime with a clean microfiber or paper towel—don’t rub, which can spread the stain.
Treating these spots first prevents streaks and makes your overall cleaning easier.
Pre-Treat With Degreaser
If greasy spots are left untreated, they’ll repel your cleaning solution and leave dull, streaky patches on black tiles. So you should pre-treat oily areas with a degreaser first.
You’ll protect Black tile colors and matte finishes by breaking down oil before mopping. Choose a pH-neutral or citrus degreaser safe for your surface, test a hidden spot, then apply sparingly.
Let it dwell per label instructions, agitate gently with a soft brush, and rinse thoroughly. Don’t let residue dry.
- Relief: stains fade fast
- Confidence: tiles look restored
- Ease: simple steps
- Safety: no harsh damage
- Pride: pristine black floors
Blot, Don’t Rub
Because rubbing spreads grease and embeds it deeper into grout and tile texture, blot oily spots with a clean, absorbent cloth or paper towel instead. You’ll lift oil without smearing it across black tiles, preserving consistent color variation and avoiding dull patches.
Press firmly, swapping to a fresh section as the cloth soaks up residue. For stubborn grease, apply a small amount of degreaser, wait, then blot again—don’t scrub.
Once blotting removes the bulk, follow with your regular streak-free cleaning method. This protects grout lines and maintains pattern contrast so your black floor looks sharp and uniform.
Lift Stuck-On Grime and Scuff Marks
Stubborn grime and scuff marks can ruin the look of black tiles, so you’ll want to tackle them with targeted tools and a bit of elbow grease. Start with dry grit removal using a soft brush to prevent scratches, then apply a gentle cleaner to lift residue.
Use a nonabrasive pad for scuffs, working in circles until marks fade. Rinse and dry to aid stain prevention.
- You’ll feel relief as marks vanish
- You’ll regain pride in your floors
- You’ll avoid harsh scrubbing that damages
- You’ll save time with the right steps
- You’ll enjoy streak-free shine
Choose the Right Mop for Black Tiles
Which mop will give you the cleanest, streak-free finish on black tiles? You’ll want a flat microfiber mop or a sponge mop with a wringer—both minimize streaks and enhance color contrast under varied lighting effects. Choose a mop head that lays flat, avoids excess water, and’s easy to rinse.
| Mop Type | Best Use |
|---|---|
| Flat microfiber | Quick, even coverage |
| Sponge with wringer | Heavy spills, controlled dampness |
| String mop | Avoid for black tiles |
| Steam mop | Use cautiously—test grout |
| Dust mop | Daily dry pickup |
Pick one that keeps water minimal and surfaces gleaming.
Pick Microfiber Cloths and Towels That Work
Pick high-quality microfiber that traps dirt and won’t leave lint on your black tiles.
Match the towel’s texture to your tile finish—use plush microfiber for matte surfaces and smoother cloths for glossy ones. That choice helps you wipe streaks away instead of spreading them around.
Choose High-Quality Microfiber
Why settle for anything less than microfiber designed for cleaning floors? You want cloths that lift dirt without smearing, so choose ones boasting Microfiber durability and reliable color retention. Feel the difference in quality as you work—less lint, fewer streaks, longer life.
Check weave density and edge construction before buying; they’ll save time and frustration.
- Confident grip that speeds cleaning
- Soft touch that protects tile
- Consistent performance wash after wash
- Reduced lint for flawless shine
- Satisfaction knowing you picked the best
Use high-quality microfiber and enjoy streak-free black tiles every time.
Match Towel Texture to Finish
When you’re choosing microfiber for black floor tiles, match the cloth’s texture to your tile finish. If you have polished or glossy tiles, pick a plush, low-pile microfiber that lifts smudges without leaving lint; its fine fabric weave traps oils and prevents streaks.
For matte or textured tiles, use a slightly coarser towel texture with visible loops to scrub residue from grooves. Always test a small area to guarantee no abrasion.
Rinse and wring towels often so the fabric weave stays effective, and rotate dry cloths for final buffing to achieve an even, streak-free shine.
Mix a Streak-Free Cleaning Solution at Home
Because homemade cleaners let you control ingredients, you can make a streak-free solution that’s safe for black tile and easy to rinse away. Mix warm water with a few drops of mild dish soap and a splash of white vinegar to cut grime; the vinegar won’t dull shine if diluted.
Test small areas around grout and tile patterns to preserve color contrast. Use a microfiber mop and wring well to avoid excess moisture.
Feel confident and calm as you clean.
- Satisfying
- Empowered
- Proud
- Relaxed
- Bright
Use Distilled or Filtered Water to Prevent Spots
If your tap water’s mineral content leaves fine white spots as it dries, switch to distilled or filtered water for the final rinse and mop solution to keep black tiles streak-free.
You’ll notice immediate improvement because better water quality prevents residue that highlights on dark surfaces. Use distilled or a good carbon-filtered jug for mixing your cleaning solution and for the last rinse.
Store water in a clean container to avoid reintroducing impurities. This small change supports spot prevention without changing cleaners or technique, making dark floors look uniformly deep and glossy while reducing repeat touch-ups.
Mop Black Tiles Without Leaving Lines
While you mop, move in long, continuous strokes and overlap each pass slightly so you don’t leave drying lines or streaks on black tiles. You’ll notice seams more under harsh lighting conditions, so work with soft, even light and check color contrast against grout.
Keep movements steady, follow a pattern (rows or a figure-eight), and finish edges last so moisture evens out. Pause to inspect for streaks while damp and correct immediately.
Embrace the ritual—cleaning can feel rewarding.
- Satisfaction when tiles gleam
- Pride in a flawless floor
- Calm from steady motion
- Confidence in your technique
- Joy in deep contrast
Wring and Maintain a Mop to Avoid Residue
Wring the mop firmly each time you start a pass so you’re not leaving excess water or cleaner on the tile.
Rinse and squeeze the head often while you work to prevent dirt buildup and streaky residue.
When you’re done, dry the mop completely before storing to stop odors and keep it effective.
Proper Mop Wring Technique
Because excess water and trapped dirt leave streaks, you need to wring your mop properly every time you clean black tile. You’ll feel the difference: less residue, truer color contrast, and lighting effects that actually flatter the floor.
Hold the mop over a bucket, twist firmly, and squeeze until it’s damp, not dripping. Use your core, not just your arms, to get consistent pressure.
Replace dirty heads right away and hang to dry.
- Relief when streaks vanish
- Pride in glossy results
- Confidence in quick routines
- Satisfaction from preserved grout
- Calm knowing maintenance’s simple
Rinse And Squeeze Often
Now that you’ve got the wring technique down, keep rinsing and squeezing throughout the job so the mop head never carries old cleaner or grit back onto the tiles. Rinse in clear water after each pass and squeeze until the mop releases no more drips; that prevents streaky residue and trapped particles that mar color contrast on black floors.
Change rinse water when it looks cloudy. Work with ambient lighting to spot missed streaks or residue as you go. If the mop feels heavy or gritty, repeat rinsing—clean water and frequent squeezing keep tiles uniformly glossy without reintroducing dirt.
Dry Mop After Use
After you finish rinsing and squeezing, dry-mop the floor to lift any remaining moisture and prevent streaks. You’ll remove tiny droplets and avoid residue that dulls black tiles. Wring the mop tightly, change pads when damp, and use light, overlapping strokes.
Dry-mopping also aids dust removal and improves air quality by reducing airborne particles. Treat the mop gently after use: rinse, wring, hang to dry, and replace worn heads.
- Satisfaction of a glossy finish
- Relief knowing streaks are gone
- Pride in spotless black tiles
- Calm from cleaner air
- Confidence in lasting results
Dry Black Tiles Quickly to Prevent Streaks
If you want spotless black tiles, dry them quickly to keep water spots and streaks from forming. After rinsing or mopping, work in sections so moisture doesn’t sit; use a microfiber mop or absorbent towel and a squeegee for large areas.
Move diagonally to avoid missed patches, and finish with a soft, lint-free cloth to buff. Rapid drying preserves the deep color contrast and minimizes uneven reflections from lighting effects, so your floor looks uniformly dark and glossy.
Drying promptly also reduces residue buildup, letting your cleaning solution perform better without leaving streaky remnants.
Clean Grout on Black Tile Floors Safely
Because grout soaks up dirt and cleaning solutions, you should treat it gently to avoid weakening the seal or discoloring the black tile. Use methods that remove grime without damaging surfaces.
You’ll want to test cleaners in a hidden spot, use a soft brush, and avoid bleach that can fade black grout. After cleaning, rinse thoroughly and dry to prevent residue.
Consider professional tile sealing if grout’s porous. Embrace careful maintenance to keep contrasts sharp.
- Relief when grout looks renewed
- Pride in a pristine floor
- Confidence in safe methods
- Calm from gentle care
- Satisfaction after sealing
Remove Hard-Water Stains From Black Tiles
When hard-water stains dull your black tiles, you can remove the mineral buildup without harming the finish by using mild acids and careful technique.
Mix equal parts white vinegar and water, test a hidden area, then apply with a soft cloth or spray bottle. Let sit one to three minutes—don’t let it dry—then gently scrub with a nonabrasive pad.
Mix equal parts white vinegar and water, test discreetly, apply, wait 1–3 minutes, then gently scrub with a nonabrasive pad.
Rinse thoroughly with clean water to eliminate vinegar and loosened lime buildup.
For persistent deposits, repeat once, or use a diluted citric-acid solution.
Avoid harsh scrubs or metal tools that scratch the glaze; dry with a microfiber towel.
Remove Soap Scum and Cleaner Residue
You’ll get streak-free black tiles by choosing a cleaner formulated for glossy surfaces or pH-neutral formulas that won’t leave film.
Use only the recommended dilution, then rinse thoroughly with clean water to remove soap scum and any cleaner residue.
Finish by drying with a microfiber mop to prevent streaks and water spots.
Choose The Right Cleaner
Pick a cleaner that dissolves soap scum and lifts residue without leaving a film, because that film is what causes streaks on black tile. You want a formula that respects grout and boosts color coordination and aesthetic appeal by letting the true depth of black shine. Test any product on a small patch first.
Choose pH-neutral or specifically labeled streak-free cleaners. Consider dilution instructions and microfiber compatibility.
Emotions matter—cleaning should feel satisfying, not frustrating:
- Relief when streaks vanish
- Confidence in a glossy finish
- Pride in a spotless floor
- Calm from predictable results
- Joy in a polished space
Rinse Thoroughly After Cleaning
Why rinse again after cleaning—won’t your cleaner have done the job? You should rinse to remove soap scum and cleaner residue that dulls black tile and causes streaks.
Use plain water with a clean mop or microfiber cloth, changing water often to avoid redepositing grime. For stubborn residue, rinse twice and dry with a microfiber towel to prevent water spots.
Thorough rinsing preserves color enhancement from your cleaner and restores the tile’s true finish, boosting overall aesthetic appeal.
Don’t skip this step: residue left behind undermines shine and draws attention to streaks and film.
Handle Wax or Polish Build-Up and Film
If your black tiles look dull or hazy despite regular cleaning, a wax or polish film may be building up and scattering light—so you’ll need to remove it before deeper shine returns. You’ll tackle wax build-up and polish residue with simple supplies: warm water, a pH-neutral stripper or diluted vinegar solution, microfiber mop, soft scrubber, and clean towels.
Work small areas, rinse often, and dry fully to prevent streaks. Be gentle to avoid damage. If stubborn film remains, repeat once. Trust the process—you’ll bring back the rich, reflective depth your black floors deserve.
- Frustration melts away
- Relief at clarity
- Satisfaction restored
- Confidence in care
- Pride in shine
Deep-Clean Glazed Ceramic and Porcelain Tiles
When you want black glazed ceramic or porcelain tiles to truly gleam, deep-cleaning targets the grout lines and any embedded grime that routine mopping misses. You’ll start by sweeping, then use a pH-neutral cleaner diluted per label to avoid dulling glaze.
Scrub grout with a soft-bristled brush and a baking soda paste for stubborn stains, rinsing thoroughly.
For Black tile patterns, clean along grout lines to preserve contrast and avoid streaks by using microfiber mops and wiping dry.
Regular Black grout maintenance includes sealing grout after drying and spot-cleaning spills immediately to keep tiles looking uniform and glossy.
Deep-Clean Natural Black Stone Tiles Safely
Because natural black stone—like slate, honed granite, and marble—reacts differently to cleaners and abrasion, you’ll need a gentler, stone-safe approach for deep cleaning that removes dirt and lifts stains without etching or dulling the surface.
You’ll test a small area, use soft tools, and work in sections so Black tile patterns and natural stone variations stay striking. Handle stains patiently; don’t scrub hard.
- Feel relieved when dirt lifts slowly
- Enjoy the calm of methodical care
- Celebrate restored depth and contrast
- Avoid panic over sensitive areas
- Take pride in preserving unique textures
Choose Stone-Safe Cleaners and Sealers
When cleaning natural black stone, pick pH-neutral cleaners so you won’t etch or dull the surface. Check product labels and test them in an inconspicuous spot before treating the whole floor.
After cleaning, use a sealer that’s explicitly compatible with your stone type to lock in protection and prevent streaking.
Pick pH-Neutral Cleaners
If your black tiles are natural stone or have a stone-like finish, pick pH-neutral cleaners labeled safe for stone and sealed surfaces to avoid etching or dulling. Acidic or alkaline products can strip sealers and leave streaks or damage the finish. You’ll protect shine and avoid haze by using gentle formulas. Look for eco-friendly solutions and test small areas first.
Prefer products that advertise “stone-safe” and follow dilution instructions. Consider DIY cleaning methods using mild soap and water when appropriate.
- Relief: no more worry about ruining tiles
- Pride: your floor looks cared for
- Confidence: streaks vanish
- Calm: safe routine
- Joy: lasting luster
Use Compatible Stone Sealers
Although you’ve picked a pH‑neutral cleaner, you’ll also need a sealer that’s compatible with both your tile material and the cleaning products you use. Mismatched sealers can trap residues or react with cleaners and cause streaks, haze, or breakdown of the finish.
You should test sealers labeled for your stone—granite, marble, slate—and follow manufacturer instructions. Apply thin, even coats when sealing surfaces, allow full cure times, and avoid waxes that attract buildup.
Proper sealing surfaces improves stain prevention and reduces cleaning frequency. Reapply sealant per recommended intervals to maintain protection and keep black tiles streak‑free.
Spot-Clean Everyday Spills on Black Tiles
Because spills happen daily, you’ll want a quick, targeted approach to keep black tiles streak-free. Act fast: blot liquids with a soft cloth, avoiding rubbing that spreads residue. Use pH-neutral cleaner for gentle stain removal and test on an inconspicuous spot for color matching. Rinse with clean water and dry immediately to prevent streaks.
- Feel relief when a mess vanishes.
- Enjoy pride in glossy, even tiles.
- Avoid panic with a simple routine.
- Save time by handling spots promptly.
- Love how small habits protect your floors.
Repeat as needed; don’t let spills sit.
Remove Ink, Dye, and Deep Stains From Black Tiles
When ink, dye, or other stubborn stains mar your black tiles, tackle them quickly with the right tools and method so the color doesn’t set and become permanent. Blot fresh marks with a clean cloth; don’t rub.
Apply isopropyl alcohol or a diluted bleach solution to stubborn spots, test first in an inconspicuous area of your black tile patterns, and work gently with a soft brush.
For deep stains, use a paste of baking soda and water, let it sit, then rinse.
Watch grout discoloration—clean grout separately with a grout brush and mild cleaner to avoid spreading stains.
Restore Shine to Dull Black Tiles Without Streaks
If your black tiles have lost their mirror-like finish, you can bring back that shine without leaving streaks by using the right cleaners, tools, and technique. You’ll gently lift grime, preserve Black tile patterns, and follow Color maintenance habits that prevent dulling.
Work small sections, rinse thoroughly, and buff with a microfiber cloth in one direction. Avoid waxes that yellow or build residue.
- Pride at seeing the glossy surface return
- Relief that streaks don’t reappear
- Confidence in your cleaning routine
- Satisfaction with preserved color depth
- Joy in a showroom-like floor
Steam Mops on Black Tiles: When to Use or Avoid
You can use a steam mop on glazed, uncracked black tiles to lift dirt without leaving streaks, but you should avoid them on unsealed grout, natural stone, or tiles with hairline damage.
When you do use one, keep the steam setting low, move slowly, and wipe up excess moisture immediately to prevent spots.
If you’re unsure about your floor, test a small hidden area first or opt for a microfiber mop and mild cleaner instead.
When To Use
Although steam mops can cut through grime quickly, you should only use them on black tiles that are glazed, properly sealed, and free of cracks. Use them when you want color enhancement and gentle texture preservation without harsh chemicals.
Test a small hidden area first, then proceed in sections. You’ll get a glossy, streak-free finish if you follow manufacturer guidelines and avoid soaking grout.
- Relief: see grime vanish instantly
- Pride: your black floor looks showroom-new
- Confidence: you respected the tile’s limits
- Joy: minimal effort, maximum shine
- Calm: safe, controlled cleaning every time
When To Avoid
Even when steam mops work wonders on properly glazed, sealed black tiles, there are clear situations where you shouldn’t use them.
Don’t steam porous, unglazed, cracked, or loose tiles—you’ll risk lifting grout, worsening chips, and undoing any color restoration efforts.
Avoid steam on recently sealed floors; high heat can break down sealers instead of aiding stain prevention.
If you have delicate inlays, natural stone, or adhesive-backed tiles, skip steam cleaning to prevent discoloration or bond failure.
Also steer clear when electronics, wood thresholds, or pets occupy the area.
When unsure, test a small patch or choose a gentler method.
Best Practices
When you choose to use a steam mop on black tiles, follow clear best practices to get a streak-free shine without damaging the floor. You’ll test a hidden area first, avoid excessive heat on delicate finishes, and keep sessions short to protect black tile patterns and black grout maintenance.
Use distilled water, soft microfiber pads, and low-steam settings. Don’t scrub stained grout with steam alone; combine gentle cleaners and brushes when needed. Stay mindful of manufacturer limits and finish type before steaming.
- You’ll feel confident seeing a deep, even gloss.
- You’ll avoid panic over damage.
- You’ll appreciate subtle texture.
- You’ll maintain richer depth.
- You’ll enjoy lasting results.
Keep Streak-Free Black Floors in High-Traffic Areas
If you want your black floors to stay streak-free in busy zones, focus on prevention and quick spot care. You’ll set up entry mats, use soft-soled shoes, and mop spills immediately to avoid grit that causes streaks.
Pay attention to color patterns and lighting effects when placing rugs and furniture so dust and smudges aren’t obvious. Carry a microfiber cloth and spray bottle for on-the-spot cleaning after high traffic events.
Choose a neutral, low-residue cleaner and wring mops well to prevent puddles. Train household members to clean as they go so floors stay consistently neat.
How Often to Clean Black Tiles to Prevent Streaks
You should do light daily maintenance like sweeping or a quick microfiber mop to stop dirt and water spots from building up.
Schedule a deeper clean—mopping with a tile-safe cleaner and spot-treating grout—every one to two weeks depending on foot traffic.
High-traffic areas may need the deep clean more often, while low-traffic rooms can go longer between treatments.
Daily Light Maintenance
How often should you do a quick wipe to keep black tiles streak-free? You should wipe daily in high-traffic zones and every other day elsewhere to control dust, smudges, and water spots that amplify color contrast and lighting effects. Short, focused wipes prevent buildup without overworking surfaces.
- Relief when floors look instantly tidy
- Pride in maintaining a glossy finish
- Calm from avoiding sudden glaring streaks
- Satisfaction seeing natural light play cleanly
- Confidence guests notice the shine, not flaws
Use a microfiber cloth and a damp mop for swift, streak-free maintenance.
Deep Cleaning Schedule
Because deep cleaning tackles embedded grime that daily wipes miss, set a regular schedule so your black tiles never build up the kind of residue that shows as streaks.
Aim for a full, hands-on deep clean every 4–6 weeks in high-traffic areas and every 8–12 weeks elsewhere. Adjust frequency based on color contrast and lighting conditions: darker grout or bright lighting reveal streaks sooner, so clean more often.
Before cleaning, test your chosen cleaner on a small patch.
Use microfiber mops, a gentle scrub brush, and a squeegee finish to remove moisture.
Keep records to refine the interval over seasons.
How Seasonal Changes and Water Quality Affect Cleaning
When seasons shift, your cleaning needs change too. You’ll notice seasonal moisture brings more grime and streak-prone residue; water mineralization leaves cloudy deposits after mopping. Adjust frequency, drying, and product strength to match conditions so black tiles stay flawless.
- You feel frustrated when hard water spots won’t budge.
- You’ll crave the crisp look after a fast, effective dry.
- You dread streaks after humid, rainy days.
- You’ll celebrate when filtration or distilled water clears marks.
- You’ll relax knowing tailored routines counter seasonal messes and protect shine.
Prevent Scratches That Show as Streaks on Black Tiles
Although black tiles hide dirt, they don’t hide scratches — and those scratches catch light and read like streaks, so you’ll want to prevent them before they show. You’ll protect finish by using felt pads on furniture, lifting heavy items, and choosing soft-bristled brooms. During tile installation, avoid dragging tools across surfaces and match grout lines to Black tile patterns to minimize visible wear. Clean grit promptly and use pH-neutral cleaners.
| Cause | Prevention | Result |
|---|---|---|
| Furniture | Felt pads | Fewer scratches |
| Grit | Sweep daily | Less abrasion |
| Moving | Lift items | Protected finish |
| Tools | Careful work | Cleaner look |
Choose Mats and Rugs That Protect Black Floors
When you pick mats and rugs for black tiles, choose ones with durable non-slip backing so they stay put and won’t scuff the surface.
Look for low-lint materials like tightly woven synthetic fibers that won’t shed and leave particles that show as streaks.
Regularly shake out or vacuum the rugs to keep dirt and lint off your floors.
Durable Non-Slip Backing
If you want to keep black floor tiles looking pristine, pick mats and rugs with a durable non-slip backing that won’t scuff or trap dirt against the surface. You’ll want durable backing that offers reliable slip resistance, so moisture and movement won’t smear tiles or force constant cleaning.
Look for materials that stay put, shed dirt, and resist wear without rough textures that abrade finishes. A good backing protects tile shine and reduces accidents.
Consider these emotional benefits when choosing:
- Confidence walking barefoot
- Relief from constant sweeping
- Pride in spotless floors
- Comfort underfoot
- Peace of mind knowing tiles are safe
Low-Lint Materials
Because fibers that shed show up plainly on black tiles, choose low-lint materials for mats and rugs so you’re not chasing fuzz with every sweep. Pick tightly woven or low-pile rugs that resist shedding and dry quickly after mopping.
Match color contrast thoughtfully—lighter rugs hide dust differently than dark ones—so you can see dirt without highlighting every speck. Favor synthetic blends or treated natural fibers for durability and minimal lint.
Consider subtle texture variation to add interest without trapping debris. Rotate and vacuum mats regularly, and launder according to label instructions to maintain low-lint performance over time.
Safely Use Commercial Cleaners on Black Flooring
1 key rule: always read the label before using a commercial cleaner on black floors, since manufacturers list safe surfaces, dilution rates, and required PPE. You’ll protect finishes and avoid streaks by testing a hidden spot, following dilution, and rinsing thoroughly.
Blend commercial strength with Eco friendly solutions when possible, and balance with DIY cleaning tips for delicate areas.
- Relief when a product works
- Confidence from a safe test spot
- Frustration avoided by proper dilution
- Calm knowing you followed PPE guidance
- Pride in a streak-free finish
Always ventilate, use soft tools, and store products safely.
Read Product Labels for Streak-Causing Ingredients
When you check a cleaner’s label before use, you’ll spot ingredients that commonly leave streaks—like high‑pH surfactants, waxes, or concentrated solvents—and prevent surprises on your black tiles.
Read active ingredients and pH levels; alkaline products can cause color fading over time, while waxes build film that shows streaks. Watch for dyes or optical brighteners that might alter appearance or lead to grout discoloration where residue collects.
Choose mild, neutral-pH cleaners and rinse thoroughly. If a product lacks clear labeling, test a small, inconspicuous area first to ensure it won’t dull, stain, or streak your floors.
Fix Uneven Sheen Across Black Tile Rooms
Look around the room to assess how light hits different tiles and whether finishes vary, since sheen differences often come from lighting and surface treatment.
Adjust your cleaning frequency to prevent some areas from looking dull while others stay glossy.
If finishes are uneven, apply sealant evenly across the floor to balance the sheen.
Assess Light And Finish
Because black tiles show every variation, start by checking the room under its usual lighting and from different angles to spot uneven sheen or dull patches. You’ll assess lighting conditions and finish textures to decide what needs attention. Walk the space slowly, note reflections, and mark trouble spots.
- You’ll feel frustrated by dull patches.
- You’ll notice glossy streaks that shout “repair me.”
- You’ll want consistent depth and calm.
- You’ll be relieved when sheen matches across the room.
- You’ll appreciate knowing exactly where to act.
Use your observations to choose targeted cleaning and finishing steps next.
Balance Cleaning Frequency
If you clean too often or not enough, sheen will vary across the room, so set a steady schedule that matches traffic and finish type. You’ll avoid cleaning myths like “more is better” and reduce risk of color fading from harsh products. Match frequency to use: daily spot-clean, weekly mild mop, monthly deep care. Track results and adjust.
| Area | Suggested Frequency |
|---|---|
| High traffic | Daily spot, weekly mop |
| Medium traffic | Weekly mop |
| Low traffic | Biweekly mop |
| Entryway | Daily wipe, weekly mop |
Evenly Distribute Sealant
When uneven sheen shows up across your black tile, you can correct it by reapplying a consistent, thin layer of sealant—work methodically from one wall to the next so every tile gets the same coverage and drying conditions. You’ll prep by cleaning and allowing full drying, then test a small area.
During Sealant application move in overlapping strokes, keep tools clean, and maintain identical pressure. Aim for Color restoration without buildup. Watch drying times and room conditions so sheen matches.
- Relief when tiles look unified
- Confidence in your method
- Pride in restored depth
- Calm from predictable results
- Satisfaction with a streak-free floor
Remove Renovation Haze and Construction Residue
After a remodel, your black tiles often wear a dull film of dust, paint splatter, and grout haze that masks their shine. So start by sweeping or vacuuming thoroughly to remove loose debris before you tackle the stubborn residue.
Next, mix warm water with a few drops of pH-neutral cleaner and mop, changing water often to prevent redepositing renovation dust and construction debris.
For paint spots or grout haze, soften with a damp microfiber and gently scrape with a plastic scraper. Rinse with clean water and dry with a microfiber towel to avoid streaks and restore deep, even gloss.
Troubleshoot Persistent Streaks and White Residue
Although you’ve cleaned carefully, stubborn streaks and white residue can still appear from hard water, soap buildup, or leftover cleaners, so you’ll want to identify the source before treating the tiles. Check grout, rinse thoroughly, and note any black tile discoloration that hints at mineral or chemical reactions.
Adjust your cleaning frequency to prevent buildup and test solutions in a hidden spot. If streaks persist, isolate variables: mop, water, detergent, or cloth. Consider professional testing for salts.
- Frustration at unseen marks
- Relief when cause is found
- Anxiety about damage
- Satisfaction after correction
- Confidence in future care
Fix Streaks Caused by Hard Water Deposits
If hard water’s left mineral streaks on your black tiles, you can remove them with a simple acid rinse and the right technique to avoid new marks.
Start by testing a hidden tile with diluted white vinegar (or a commercial descaler) to confirm it won’t dull the finish. Work in small sections, apply the solution, let it sit briefly, then scrub gently with a non-abrasive pad. Rinse thoroughly with clean water and dry immediately with a microfiber cloth to preserve Black tile aesthetics.
Address water hardness at the source with a water softener to reduce recurring mineral buildup and streaks.
Test and Adjust pH for Streak-Free Solutions
When you want streak-free results, start by testing the cleaning solution’s pH so you know it won’t leave residue on your black tiles. You’ll measure, adjust, and retest until the solution sits near neutral for most tile finishes. That prevents dulling of color contrast and preserves your tile pattern.
Use pH strips or a meter, dilute cleaners, and neutralize acids with baking soda or alkaline residue with vinegar rinse sparingly. Follow safe dilution and patch-test steps.
- Relief when streaks vanish
- Pride in deep black shine
- Calm knowing you protected grout
- Joy at restored contrast
- Confidence in lasting results
Create a Weekly Routine to Prevent Streaks
Set aside a small caddy with your broom, mop, microfiber cloths, and the tested cleaning solution so you’re ready each week. Follow the same sequence every time—sweep, spot-treat, mop with the pH-balanced solution, then buff with a dry microfiber—to avoid missed residue.
Sticking to this simple routine keeps streaks from building up and saves time in the long run.
Prep Supplies Ahead
Because consistency beats crisis, gather your cleaning tools before you start and keep them in a single caddy so you’re ready for a short weekly routine that prevents streaks. You’ll notice color contrast and lighting effects more clearly when you prep: clean water, microfiber mop, mild detergent, and a squeegee cut time and glare. Arrange supplies so grabbing them feels automatic. Keep replacements handy and label bottles for quick choice.
- Satisfaction of a ready ritual
- Calm from predictable steps
- Pride in glossy, streak-free tiles
- Relief avoiding last-minute scrubbing
- Joy seeing true black restored
Consistent Weekly Steps
With your supplies ready, make a simple weekly routine you can stick to so streaks never get a foothold.
Each week, sweep or vacuum first to remove grit, then mop with a diluted cleaner using a microfiber pad in overlapping strokes.
Rinse with clean water and dry immediately with a soft cloth to prevent residue.
Check edges and grout for buildup and spot-clean as needed.
Rotate your mop head and change solution midweek if traffic is heavy.
Monitor how color contrast and lighting effects reveal remaining streaks; adjust timing or technique until your black tiles look uniformly clean.
Train Household Members to Avoid Streak-Causing Habits
Although it may seem minor, getting everyone on the same cleaning habits prevents streaks before they start: Teach your household simple, consistent actions for Black tile maintenance and Streak prevention so glossy floors stay flawless. Give clear reasons, not lectures, and model the behavior.
- Ask shoes-off at the door to protect the finish.
- Wipe spills immediately to prevent residues.
- Use only the approved cleaner and dilute correctly.
- Rinse mop heads and hang them to dry after use.
- Avoid over-wetting the floor; less water, fewer streaks.
Reinforce habits with short reminders and praise when everyone follows the routine.
Budgeting for Pro Cleaning and Periodic Sealing
Good daily habits will cut down on heavy buildup, but you’ll still want to plan for periodic professional cleaning and sealing to keep black tiles looking factory-new.
Factor pro visits into budget planning by estimating one deep clean and reseal every 1–3 years depending on traffic. Get several quotes, note what each includes, and set aside a small emergency fund for spot treatments.
Create a sealing schedule aligned with manufacturer recommendations and local wear patterns, then mark reminders on your calendar.
Regular maintenance between services stretches dollars and extends sealant life, keeping tiles glossy without surprise expenses.
When to Hire a Pro for Black Tile Restoration
If your black tiles show stubborn stains, etching, deep grout discoloration, or loss of sheen despite regular care, it’s time to call a pro for restoration. You’ll want expert help when DIY methods risk harming classic black tile designs or when you value the surface’s authenticity tied to black tile history.
A pro restores depth, matches finishes, and prevents recurring problems.
- Frustration from failed cleanings
- Worry over permanent etching
- Pride in preserving original style
- Relief when staining vanishes
- Confidence in long-term protection
Hire someone experienced, ask for references, and get a clear scope and warranty.
Decide Between Restoration and Replacement
Once you’ve decided to bring in a pro, weigh whether restoration will truly meet your needs or if replacement makes more sense long-term. You’ll assess damage depth, grout condition, and whether stains or etching are surface-level.
Before hiring a pro, decide if restoration will suffice or if full replacement is the smarter long-term choice.
Restoration saves money and preserves original tile patterns, but won’t fix chips, severe color contrast issues, or mismatched tiles.
Replacement lets you change layout, update tile patterns, and eliminate persistent imperfections for a cohesive look.
Factor budget, timeline, and resale value. Ask the pro for before-and-after examples and a clear estimate for both options so you can choose a cost-effective, lasting solution.
Long-Term Care: Keep Black Tiles Flawless
When you commit to long-term care, a simple routine keeps black tiles looking showroom-fresh: sweep or vacuum daily to remove grit, mop weekly with a pH-neutral cleaner, and spot-treat spills immediately to prevent staining. You’ll preserve rich color contrast and avoid dulling finishes by protecting surfaces from abrasive dirt.
Prioritize grout maintenance to keep lines crisp; reseal grout yearly if needed. Build habits that feel satisfying and rewarding:
- Enjoy the instant shine after a gentle mop
- Love the dramatic black that pops against clean grout
- Feel proud of a streak-free floor
- Celebrate small daily wins
- Relax in a pristine space
Frequently Asked Questions
Can Black Tile Grout Discolor Differently Than the Tiles Themselves?
Yes — you’ll see black grout discoloration differently than tiles because tile grout staining reacts to moisture, cleaners, and wear distinctively, so grout can fade, darken, or stain while tiles themselves often remain unchanged.
Will Sunlight Cause Black Tiles to Fade or Change Color Over Time?
About 80% of pigments show measurable fade after prolonged UV exposure: you’ll see sunlight fading and gradual color change in black tiles, especially untreated or dyed ones, so rotate rugs, use UV film, or seal surfaces.
Can Pets’ Nails or Accidents Permanently Damage Black Tile Finish?
Yes — pet nail scratches and accidents can permanently damage black tile finish, but you can minimize harm with filing, polishing, and prompt stain removal techniques; you’ll need repairs or sealant touch-ups for deeper gouges.
Are There Safe Anti-Slip Treatments for Glossy Black Tiles?
Yes — you can use safe anti slip coatings to boost slip resistance on glossy black tiles; you’ll choose low-profile, transparent treatments or textured clear films, test in an inconspicuous spot, and follow manufacturer safety instructions.
How to Remove Adhesive Residue From Labels or Tape on Black Tiles?
You’ll remove label residue by softening adhesive with warm soapy water, rubbing gently, then using rubbing alcohol or a citrus-based adhesive removal product; finish by rinsing and drying to prevent streaks and restore the tile’s shine.
Conclusion
You’ve got this — keeping black tiles streak-free is mainly about removing soap residue, using the right cleaner for your tile type, and drying with a clean microfiber. Treat glossy and matte finishes differently, seal stone as needed, and call a pro for deep scratches or uneven grout. With routine care and occasional restoration instead of replacement, your floors will gleam like a Victorian mirror in sunlight. Stick to the basics and check periodically.