How to Clean Bathroom Floor Tiles Easily
Sweep or vacuum loose dirt, clear the area, and mix a mild floor cleaner with warm water in a bucket. Dip a mop or microfiber cloth, wring well to avoid soaking grout, and mop in sections, paying extra attention to grout lines and high-traffic spots. Rinse the mop often, then do a final pass with plain water and let the floor air-dry or dry with a clean cloth. Keep supplies handy and you’ll pick up a few more time-saving tips ahead.
Quick Method: Clean Bathroom Tiles in 15 Minutes
If you’re short on time but want noticeable results, this 15-minute routine gets your bathroom tiles clean without a lot of elbow grease.
Start by sweeping or vacuuming loose debris, then mix a mild cleaner with warm water in a bucket.
Sweep or vacuum loose debris, then combine a mild cleaner with warm water in a bucket.
Use a microfiber mop or scrub brush to apply the solution, focusing on grout lines and visible spots.
For stubborn marks, grab a targeted cleaning gadget—like a grout brush or spin scrubber—for quick stain removal.
Rinse with clean water and dry with a towel to prevent streaks.
Finish by ventilating the room to speed drying and deter mildew.
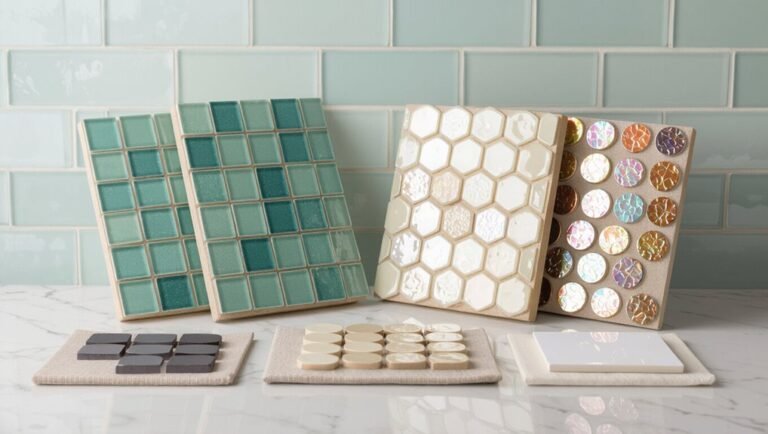
Which Bathroom Tiles Do You Have? (Ceramic, Porcelain, Vinyl)
Before you start cleaning, identify what kind of tile you have—ceramic, porcelain, or vinyl—because each needs different cleaners and care.
Look closely: ceramic often has a glazed surface and visible body on a chipped edge. Porcelain is denser and usually less porous. Vinyl feels softer and may be a sheet or plank.
Check grout lines and any manufacturer labels from tile installation or paperwork.
Knowing your tile ties into bathroom decor choices and future maintenance.
If unsure, test a small inconspicuous area or consult the installer.
Correct ID prevents damage and keeps your floor looking its best.
Why Tile Type Matters for Cleaning Methods and Cleaners
If you have porcelain or ceramic tiles, you’ll find they’re durable but respond differently to cleaners—porcelain is denser and tolerates stronger solutions, while ceramic’s glaze can be more sensitive.
Natural stone like marble or travertine needs special, pH-neutral products because acidic or abrasive cleaners can etch or stain it.
Knowing your tile type helps you pick methods and cleaners that clean effectively without causing damage.
Porcelain Vs. Ceramic
Because porcelain and ceramic tiles look similar at a glance, you might not realize they need different care; knowing which you’ve got will help you choose the right cleaners and avoid damage. You’ll favor porcelain for heavy-traffic areas because of porcelain durability and dense glaze—use mild pH-neutral cleaners. Ceramic’s porous ceramic texture may trap grout and grime—scrub gently and avoid acidic cleaners. Match cleaner strength to tile type and test a small area first.
| Feature | Porcelain | Ceramic |
|---|---|---|
| Porosity | Low | Higher |
| Recommended cleaner | pH-neutral | Gentle scrub |
Natural Stone Considerations
Want to keep natural stone tiles looking their best? You should treat natural stone differently: it’s porous, sensitive to acids, and can etch or stain.
Use pH-neutral cleaners and avoid vinegar, bleach, or abrasive scrubs. Test any new product in a small, hidden area first.
Mop with warm water and a soft microfiber to protect the surface.
Reseal regularly—follow manufacturer guidelines—because sealing techniques prolong life and prevent staining. Do a water-drop test to check seal integrity.
For grout, use gentle brushes and stone-safe cleaners.
When in doubt, consult a pro for maintenance or restoration.
Common Soils on Bathroom Floors: Soap Scum, Mildew, Hard Water
You’ll often find three common soils on bathroom floors: filmy soap scum that builds up from bathing products, dark or fuzzy mildew in damp corners, and chalky hard water deposits near fixtures.
Learn to spot soap scum by its slippery, cloudy residue, mildew by its musty smell and staining, and hard water by white, mineral crusts.
Knowing these differences helps you choose the right cleaners and techniques.
Soap Scum Basics
Ever notice a filmy haze clinging to your tiles after a shower? Soap scum’s a mix of soap residue, body oils, and minerals that dulls surfaces and traps grime. You’ll remove it faster if you address buildup regularly and use appropriate cleaners.
Focus on these steps:
- Dry tiles after use to reduce residue.
- Use a mild detergent or vinegar solution for light buildup.
- Scrub grout gently; consider grout sealing to prevent deeper accumulation.
- Rinse thoroughly to avoid streaks.
Keeping surfaces drier also aids mildew prevention, so you’ll limit future problems while preserving tile finish.
Mildew Identification Tips
Soap scum often shares space with mildew, so once you’ve tackled residue it’s smart to check for fungal growth next.
Look for gray, black, or greenish spots in grout lines, corners, and around drains; mildew has a musty odor and feels slimy when wet. Test suspicious areas with a damp cloth—mildew will smear.
Note recurring patches after cleaning; that signals poor moisture control. For mildew prevention, dry floors and grout promptly, improve ventilation, and repair leaks.
Regularly inspect shaded or seldom-used spots so you catch growth early and avoid stubborn, spreading colonies.
Hard Water Deposits
When mineral-rich water evaporates on your tiles and grout, it leaves behind chalky white or cloudy films called hard water deposits that can dull finishes and trap dirt. You’ll spot water stains and mineral buildup around drains, faucets, and grout lines. Tackle them promptly to prevent etching and stubborn residue.
- Soak: apply white vinegar or a 1:1 citric acid solution to affected areas.
- Agitate: scrub gently with a nylon brush to lift deposits without scratching.
- Rinse: flush with warm water and wipe dry to prevent new water stains.
- Protect: seal grout and wipe tiles after use to reduce mineral buildup.
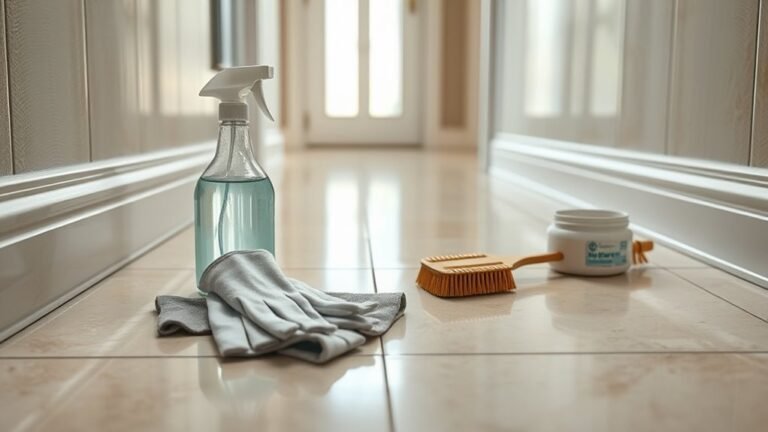
Quick Checklist: Tools and Supplies to Keep on Hand
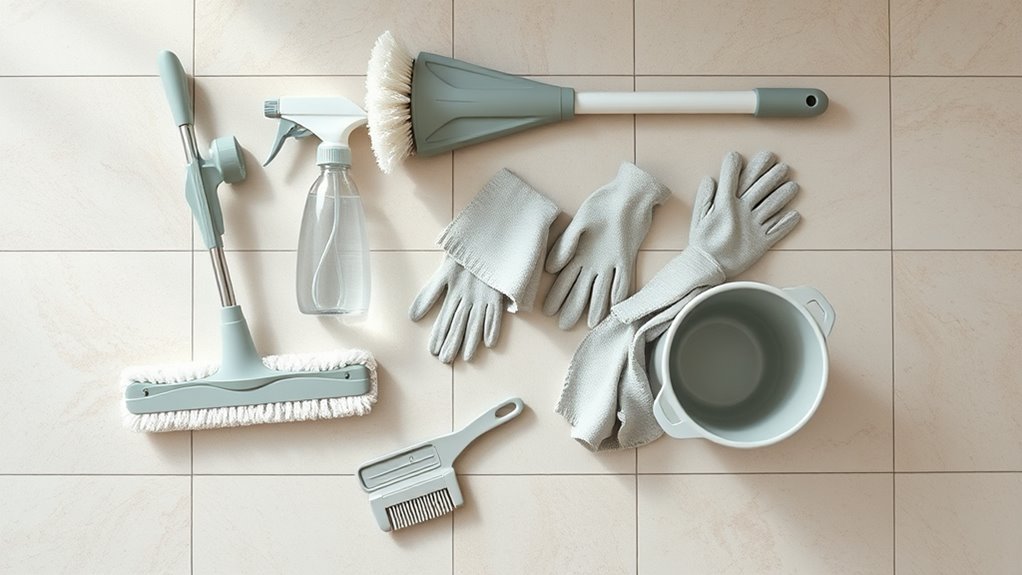
Before you start scrubbing, gather a few essential tools and supplies so you can work efficiently and avoid back-and-forth trips.
Before scrubbing, gather essential brushes, cleaners, cloths, and safety gear to work efficiently.
Grab a soft-bristled brush for grout and a stiff brush for textured tiles, plus a handheld scrubber for corners. Keep pH-neutral tile cleaner, a mild bleach or hydrogen peroxide for mold, and grout sealing product for after deep cleaning.
Have microfiber cloths, a bucket, rubber gloves, and knee pads nearby. Include a small spray bottle for diluted cleaner and a grout pick for repairs.
Note tile color patterns when spot-treating to avoid discoloration.
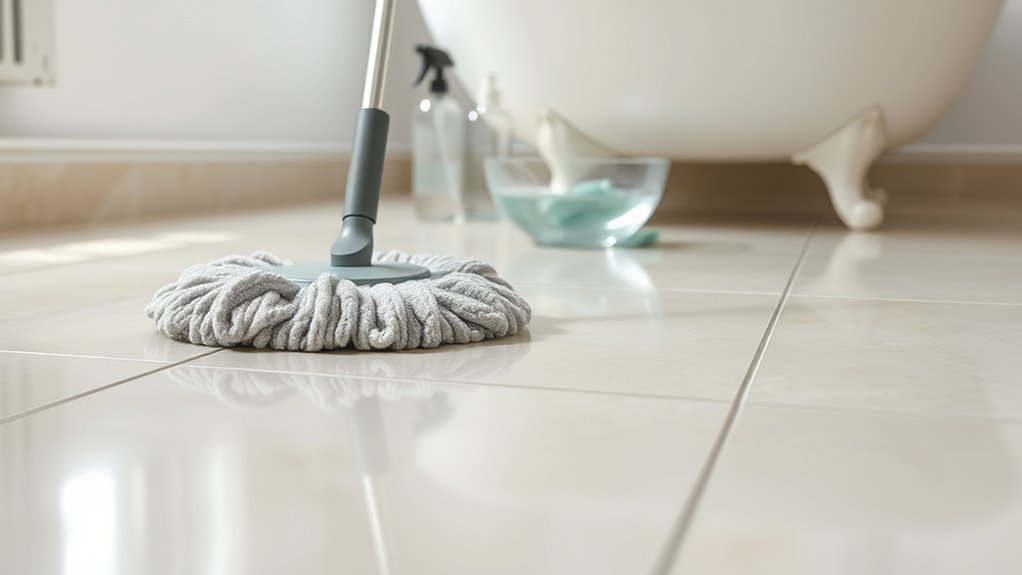
Best Mop: Microfiber, Sponge, or Steam?
Although all three mop types can keep tiles clean, picking the right one depends on your tile texture, cleaning habits, and how much elbow grease you want to use. Choose based on Mop materials and Cleaning frequency:
Microfiber grabs dirt and works for daily touch-ups.
Sponge mops soak up spills but need frequent rinsing.
Steam mops sanitize without chemicals but can damage delicate grout or sealed stone.
- Microfiber — low water, effective for frequent use.
- Sponge — absorbent, best for occasional deep spills.
- Steam — chemical-free, powerful for stubborn grime.
- Consider storage and replacement costs.
Hand Tools That Make Grout Cleaning Faster
If you want grout to look like new without hours of scrubbing, the right handheld tools cut the work and speed up results. You’ll want compact handheld scrubbers with stiff nylon bristles for grout lines; battery models save elbow strain and reach corners.
Use a small grout brush or a scraper for stubborn spots, and pair tools with a gentle eco-friendly tools approach—biodegradable cleaner and reusable pads—to protect surfaces and drains.
Use a small grout brush or scraper for tough spots, and opt for biodegradable cleaners and reusable pads to protect surfaces and drains.
Rubber grout erasers lift stains without chemicals.
Keep a narrow nozzle vacuum or brush to remove loose grit first so your tools work efficiently and finish faster.
Daily 2-Minute Bathroom Tile Wipe Routine
You can keep tiles looking fresh with a quick daily wipe that takes just two minutes. Use a good microfiber cloth to trap dust and moisture without scratching the surface.
For spots, treat spills immediately with a little cleaner and a gentle rub to prevent stains from setting.
Quick Daily Wipe
Want a spotless bathroom without spending time? You can maintain shine with a quick daily wipe that preserves bathroom decor and highlights tile patterns. Spend two minutes following this simple routine to prevent grime build-up.
- Sweep or dry-mop loose dust and hair.
- Spray a mild pH-neutral cleaner or diluted vinegar solution.
- Wipe tiles and grout lines with a flat cloth, working from far corner toward the door.
- Dry with a soft towel to prevent water spots.
Do this each morning or evening, and you’ll keep floors fresh, extend deep-clean intervals, and protect finishes.
Best Microfiber Cloths
Because a good microfiber cloth picks up dust, hair, and grime without streaks, choosing the right one makes your two-minute daily wipe truly effective. You’ll want a cloth with tight weave and soft pile so Microfiber advantages are real: trapping particles rather than smearing them.
Pick a size that fits your hand and a color system to avoid cross-contamination.
Check Cloth durability—reinforced edges and quality stitching mean it survives frequent washing and stays lint-free.
Rinse and wring between quick passes, replace when frayed, and store dry.
With the right cloth, daily maintenance stays fast and satisfying.
Spot Treatment Tips
When a quick wipe won’t cut it, tackle spots immediately with a targeted approach: dampen your microfiber, apply a drop of mild cleaner or vinegar to stubborn grime, and rub in small circular motions until the stain lifts. You’ll preserve color patterns and respect grout textures by using gentle pressure and testing in an inconspicuous area first.
For a fast daily 2-minute routine, follow these steps:
- Blot excess moisture or residue.
- Target with cleaner on cloth, not tile.
- Agitate gently along grout lines.
- Rinse cloth and buff dry.
Repeat weekly for consistent, spot-free tiles.
Weekly Quick-Clean Routine for Busy Homes
If you only have a few minutes each week, a quick-clean routine keeps bathroom floor tiles looking fresh without stress. Start by sweeping or vacuuming to remove hair and grit, paying attention to grout lines and around decorative mosaic features.
Mix a mild, pH-neutral cleaner with warm water—avoid harsh acids if you have floor heating. Damp-mop in a figure-eight pattern, rinsing the mop often so you’re not spreading residue.
Dry with a microfiber cloth or towel to prevent streaks and slips. Finish by wiping high-traffic spots and replacing rugs; this small habit prevents bigger chores later.
Monthly Deep-Clean Routine for Tile and Grout
Although a weekly quick clean keeps things tidy, you’ll want a monthly deep-clean to tackle embedded dirt, soap scum, and grout discoloration that regular mopping won’t remove. You’ll prep by airing the room and running bathroom ventilation to reduce humidity.
Next, lift loose debris and test a mild cleaner on an inconspicuous spot, especially if you have newer tile installation.
- Apply grout cleaner and let it sit per instructions.
- Scrub grout lines with a stiff brush, rinse thoroughly.
- Clean tile surfaces with a pH-appropriate solution, avoiding abrasives.
- Dry completely and run ventilation to prevent mildew.
How to Read Cleaner Labels for Bathroom Tiles
After a monthly deep clean, you’ll want to choose products that actually match your tile and grout needs; reading cleaner labels helps you do that safely and effectively.
Check Manufacturer labels for surface compatibility—ceramic, porcelain, natural stone—and follow dilution instructions.
Always read manufacturer labels: confirm compatibility with ceramic, porcelain, or natural stone and follow dilution instructions.
Look for active ingredients and warnings about acids or bleach, which can damage some tiles or grout.
If you prefer Eco friendly materials, verify certified claims and safe-disposal guidance.
Note contact time and ventilation requirements to protect finishes and your health.
Keep products clearly labeled, store per instructions, and test in an inconspicuous spot before full use.
Safe Homemade Cleaners: Vinegar, Baking Soda, and Hydrogen Peroxide
When you want a simple, budget-friendly approach to tile care, three pantry staples—white vinegar, baking soda, and hydrogen peroxide—cover most cleaning tasks safely when used correctly. You’ll mix, spot-test, and rinse thoroughly.
Use vinegar diluted for everyday shine, baking soda as a mild abrasive on dirt, and hydrogen peroxide to lift stains and help mold prevention in grout lines. After cleaning, consider grout sealing to protect joints.
Quick how-tos:
- Dilute 1:1 vinegar for mopping non-sensitive tiles.
- Make a baking soda paste for scuffs.
- Apply peroxide to stained grout.
- Rinse and dry well.
When to Avoid Vinegar and Acid Cleaners on Tiles
Vinegar and other acidic cleaners are great for many jobs, but you should avoid them on certain tile types and surfaces. You’ll want to skip vinegar on natural stone—marble, travertine, limestone—and on some sealed grout because Vinegar hazards include etching and dulling the finish.
Acid damage can strip sealers and weaken porous tiles, causing long-term staining and increased water absorption. Test any cleaner in an inconspicuous spot before wider use.
When in doubt, use pH-neutral cleaners or follow manufacturer recommendations. If you’re unsure about a surface, consult a pro rather than risking permanent harm.
Best Commercial Cleaners for Ceramic and Porcelain (Stain Removal & Routine Use)
When choosing commercial cleaners for ceramic and porcelain, you’ll want to match the product type to the job—degreasers for soap scum, oxygen bleach for organic stains, and mild pH-neutral cleaners for regular upkeep.
Look for stain-specific formulas labeled for grout, rust, or mold to get faster results without harming the tile.
For routine maintenance, pick a gentle daily or weekly cleaner that’s safe on glazed surfaces to preserve shine and sealant.
Commercial Cleaner Types
Looking for the right commercial cleaner for ceramic or porcelain tiles? You want options that protect grout, bathroom décor, and plumbing fixtures while removing dirt. Choose by soil type and frequency:
- Neutral pH daily cleaners — safe for glaze and sealed grout, gentle on fixtures.
- Alkaline degreasers — tackle soap scum and oils; rinse thoroughly.
- Mild acidic cleaners — remove mineral buildup around taps; avoid prolonged contact with metal.
- Enzymatic or oxygen cleaners — lift organic stains and brighten grout without harsh chemicals.
Test any product in a hidden spot first and always follow label instructions for best results.
Stain-Specific Formulas
After you’ve matched cleaners to general soil types, pick stain-specific formulas to tackle the stubborn spots that daily products miss. You’ll choose enzyme cleaners for organic stains, oxalic or acid-based gels for rust, and poultices for deep-set mineral marks on ceramic and porcelain.
For mold prevention, use mildew-specific sprays that kill spores and break biofilm; follow label directions and ventilate.
Avoid bleach on colored grout; instead, apply targeted grout cleaners and consider professional grout sealing after heavy stain removal.
Test any product on a hidden tile, work in small sections, and rinse thoroughly to protect finish and grout sealing.
Routine Maintenance Products
Because regular care keeps tiles looking their best, pick cleaners that balance stain-fighting power with gentle formulas for ceramic and porcelain. You’ll protect finishes while addressing everyday dirt and water marks.
Choose products that help mold prevention and support grout sealing routines. Consider these reliable options:
- pH-neutral tile cleaner for daily mopping and shine retention.
- Oxygen-based stain remover for occasional tough spots without harsh acids.
- Mild bleach alternative for mildew around edges when needed.
- Grout cleaner plus sealer maintenance solution to extend grout life.
Use as directed, rinse well, and test small areas first.
Best Commercial Cleaners for Vinyl (Including LVT)
When you need a commercial cleaner for vinyl or LVT, pick one formulated specifically for resilient floors so you won’t dull the finish or leave a sticky residue. Choose cleaners labeled safe for vinyl, low-VOC, and with eco friendly options if you prefer gentler chemistry. Test in a corner, follow dilution instructions, and avoid abrasive pads. Consider grout sealing after deep cleans to protect edges. Here’s a quick comparison:
| Feature | Recommendation |
|---|---|
| Low residue | pH-neutral formulas |
| Eco friendly options | Plant-based cleaners |
| Fast drying | Alcohol-based blends |
| Grout care | Compatible sealing products |
How to Use a Steam Cleaner Safely on Bathroom Tiles
Though steam cuts through grime without chemicals, you still need to use it correctly to protect your tiles, grout, and fixtures. You’ll practice steam safety and check tile compatibility before starting. Follow these steps:
Though steam cleans without chemicals, use it safely—check tile compatibility, protect grout and fixtures, and keep the cleaner moving.
- Read your steam cleaner manual and wear gloves and goggles.
- Confirm tiles are heat-safe; avoid unsealed natural stone or damaged grout.
- Use low-pressure/nozzle settings, keep the head moving, and don’t linger on one spot.
- Wipe surfaces after steaming to remove loosened dirt and moisture; dry grout lines to prevent damage.
If unsure about tile compatibility, consult the manufacturer before steam cleaning.
How to Test a Cleaner in an Inconspicuous Spot
Before you clean the whole floor, test any cleaner in an inconspicuous spot to make sure it won’t damage tile or grout. Choose a corner or behind a cabinet, apply a small amount, wait, then blot. Watch for color matching issues, dulling, or grout sealing breakdown. Record results.
| Spot chosen | Cleaner used | Result |
|---|---|---|
| Behind cabinet | Mild detergent | No change |
| Corner by tub | Vinegar mix | Light dulling |
| Under vanity | pH-neutral | Good color match |
| Threshold | Commercial | Grout staining |
If you see damage, stop and try a gentler product or reseal grout.
Step-by-Step: Deep Clean Ceramic Tile Floors
If you’ve already tested your cleaner and removed loose debris, start by sweeping or vacuuming the entire ceramic floor to pick up grit that could scratch tiles during scrubbing.
Next, follow a clear sequence to deep clean without damaging grout or glaze.
- Mix a pH-neutral cleaner with warm water and mop from far corner to exit.
- Scrub grout lines with a soft brush; use a stronger solution only on stained grout.
- Rinse thoroughly with clean water to avoid residue.
- Dry floors and run bathroom ventilation to speed drying and aid mold prevention.
Inspect, repeat spot-cleaning, then enjoy refreshed tiles.
Step-by-Step: Deep Clean Porcelain Tile Floors
Porcelain tiles share many care basics with ceramic, but their denser, less-porous surface means you can be a bit more aggressive while still protecting the finish.
Sweep or vacuum to remove grit, then mix a mild pH-neutral cleaner with warm water—mind the water temperature; too hot can affect grout sealers.
Mop in small sections, rinsing the mop frequently, and scrub grout lines with a soft brush or paste of baking soda and water.
Wipe edges and baseboards to protect bathroom decor.
Rinse thoroughly with clean water and dry with microfiber towels to prevent streaks and water spots.
Step-by-Step: Deep Clean Vinyl Bathroom Floors
When you want a thorough refresh, deep-cleaning vinyl bathroom floors removes embedded dirt, soap scum, and disinfects without damaging the resilient surface. Start by sweeping and vacuuming to lift grit. Good bathroom ventilation helps dry the floor faster and aids mold prevention.
Deep-clean vinyl bathroom floors to lift grit, banish soap scum, and disinfect—sweep, vacuum, mop, and ventilate for quick drying.
- Mix warm water with a mild pH-neutral cleaner.
- Mop gently, rinsing frequently to avoid residue.
- Scrub seams with a soft brush for trapped grime.
- Dry with microfiber towels and leave ventilation running.
You’ll avoid harsh chemicals and abrasive tools, preserving the finish while keeping the floor sanitary and reducing mold risk.
How to Remove Soap Scum From Tile Surfaces
Because soap scum builds up from hard water minerals and leftover soap residues, you’ll need targeted cleaners and the right tools to remove it without harming tile or grout.
Scrub with a pH-neutral soap scum remover or a vinegar-water mix on glazed tile; test a hidden spot first. Use a soft-bristled brush or microfiber pad to avoid scratching grout lines.
Rinse thoroughly and dry to prevent residue and support mildew prevention.
For stubborn buildup, apply a paste of baking soda and water, let sit, then scrub.
After cleaning, consider grout sealing to protect joints and reduce future scum.
How to Remove Hard Water Stains and Mineral Deposits
How do you tackle stubborn hard water stains and mineral deposits without damaging your tile or grout? You’ll use gentle acids and nonabrasive tools to dissolve mineral buildup while protecting surfaces. Try this quick method:
Tackle hard water stains gently with mild acids and soft scrubbing—protect tile and grout while dissolving mineral buildup.
- Rinse the area, then apply white vinegar or a citric solution to water stains.
- Let it sit 5–10 minutes to loosen deposits, never longer on sensitive stone.
- Scrub with a soft brush or nylon pad, targeting grout edges carefully.
- Rinse thoroughly and dry to prevent new buildup; repeat for persistent spots.
How to Remove Mildew and Mold From Grout Lines
Check grout for mold-prone spots like corners, shower edges, and areas with poor ventilation.
Use safe cleaners—diluted bleach, hydrogen peroxide, or a baking soda paste—to scrub stained grout without harsh fumes.
After cleaning, keep grout dry and sealed and improve airflow to prevent future growth.
Identify Mold-Prone Areas
When grout stays damp and lacks ventilation, mildew and mold will take hold in the thin lines between tiles. So you should focus inspections there first. Check grout color changes, soft spots, or musty odors. Note corners and edges where water pools.
Prioritize areas needing Mold prevention and Ventilation improvement. Use this quick checklist to identify trouble spots:
- Shower floor along drain and threshold
- Tile joints near tub seams
- Behind toilet base and under cabinets
- Near vents, windows, and grout adjacent to shower doors
Document findings and schedule targeted cleaning or repairs promptly.
Safe Cleaning Solutions
Because grout traps moisture and organic residue, you’ll want to tackle mildew and mold with safe, effective cleaners and the right tools to avoid damaging tiles or your health. Use a soft brush, gloves, and ventilation. For eco friendly options, mix baking soda and water into a paste, scrub grout, then rinse. For tougher stains, try diluted hydrogen peroxide or a vinegar spray for DIY cleaning—test first on a small area. Always dry grout after cleaning.
| Cleaner | Use |
|---|---|
| Baking soda paste | Gentle scrubbing |
| Vinegar spray | Mild disinfectant |
| Hydrogen peroxide | Stains |
| Commercial grout cleaner | Heavy buildup |
Prevent Future Growth
Want to stop mildew and mold from coming back in your grout lines? You can prevent regrowth by drying and treating grout, then following a simple routine focused on mold prevention and sealant application. Do these steps regularly:
- Scrub grout with a brush and diluted bleach or vinegar solution; rinse thoroughly.
- Dry tiles and grout completely after cleaning or showers to remove moisture.
- Apply a grout sealant every 6–12 months to block spores and stains.
- Improve ventilation with an exhaust fan or open window to reduce humidity.
Keep up this routine and you’ll minimize mold return.
Removing Oil-Based Stains and Makeup From Tiles
If oil-based stains or makeup have smudged your bathroom tiles, you can lift them without harsh scrubbing by using a targeted solvent and gentle agitation.
For oil stains, apply a few drops of dish soap or a citrus-based degreaser, let sit two minutes, then blot with a microfiber cloth.
For makeup removal, dab isopropyl alcohol on a cotton pad and work from edges inward to avoid spreading.
Rinse the area with warm water and wipe dry.
For stubborn residue, repeat once and finish with a mild tile cleaner to restore shine without damaging grout.
How to Clean Textured or Matte Tiles Without Dulling Them
When you clean textured or matte tiles, stick to gentle daily methods to avoid wearing down the finish. Use a soft broom or microfiber mop and a pH-neutral cleaner that lifts dirt without stripping the surface.
That way you preserve the tile’s natural texture while keeping floors clean.
Gentle Daily Cleaning
How do you keep textured or matte bathroom tiles looking fresh without flattening their finish? Use gentle daily habits: wipe spills promptly, avoid harsh scrubs, and rely on mild cleaners so texture stays intact. Good bathroom lighting helps you spot grime early. Choose ventilation options that cut humidity and slow residue build-up.
Follow this simple routine:
- Sweep or vacuum loose dirt.
- Damp-mop with pH-neutral cleaner.
- Spot-clean grout with a soft brush.
- Dry tiles with a microfiber cloth.
Do this daily or every other day; small, consistent steps protect the finish without polishing it away.
Preserve Surface Texture
Because textured and matte tiles show wear differently than glossy ones, you’ll want cleaning techniques that lift dirt without smoothing the surface. Start with a soft-bristle brush or microfiber mop to dislodge grime without abrading.
Use pH-neutral cleaners diluted per instructions to avoid stripping factory finishes—this aids surface preservation while preventing dullness. Rinse thoroughly and blot dry to remove residue that can fill crevices.
For stubborn stains, apply a paste of baking soda and water, scrub gently, then rinse.
Avoid waxes or high-gloss sealers; instead, choose products labeled for texture enhancement to keep pores open and grip intact.
How to Clean Glossy Tiles Without Leaving Streaks
While glossy tiles give your bathroom a sleek look, they also show streaks and water spots easily — so you’ll want the right technique and tools to get a truly shiny, streak-free finish. You can achieve a lasting glossy finish with careful cleaning and streak prevention habits. Follow this simple routine:
- Use a pH-neutral cleaner diluted per instructions.
- Wring microfiber mop or cloth so it’s damp, not soaking.
- Clean in straight lines, then immediately dry with a clean, dry microfiber in the opposite direction.
- Buff lightly with a dry cloth to remove remaining marks and enhance shine.
Grout Whitening Methods That Actually Work
If your grout’s lost its original color, you can restore it without harsh sanding or costly regrouting by using proven whitening methods—from targeted cleaners and baking soda pastes to steam and grout-specific dyes—chosen for the stain type and grout material.
You’ll start by testing a mild bleach or oxygen cleaner on a hidden spot, scrubbing with a nylon brush.
For set-in stains, apply a baking soda and hydrogen peroxide paste, let sit, then steam or rinse.
Use grout coloring for uniform results and finish with tile sealing to protect the restored shade and reduce future staining.
When to Reseal Grout and How to Do It
Once your grout looks refreshed, you’ll want to protect that work by resealing at the right time. You should plan sealing grout after it’s fully dry and clean—usually 48–72 hours post-whitening—and whenever water stops beading.
For timing resealing, check every 1–2 years in high-traffic or wet areas.
- Clean and dry grout thoroughly.
- Test porosity: drop water; it should bead.
- Apply grout sealer with a brush or applicator; wipe excess.
- Let cure per manufacturer instructions before use.
Do reseal proactively to prevent staining and extend grout life without unnecessary repairs.
How to Repair Small Grout Cracks and Chips
Start by cleaning the grout with a brush and mild cleaner so you can clearly inspect for cracks and chips.
After the area is dry, remove any loose bits and fill hairline cracks or chips with a matching grout or epoxy filler.
Once cured, seal the repaired spots to protect them from moisture and staining.
Clean And Inspect Grout
Because grout seals the gaps between tiles, you should inspect it regularly for small cracks and chips that can trap dirt and let moisture through. Check for grout discoloration and areas where tile polishing hasn’t restored the surface sheen.
Follow these steps:
- Sweep and vacuum to remove loose debris.
- Scrub grout with a pH-neutral cleaner and a stiff brush.
- Rinse thoroughly and let the grout dry fully before further work.
- Note damaged spots for repair and prevent future staining by addressing source moisture promptly.
You’ll catch problems early and keep tiles looking clean and protected.
Fill And Seal Cracks
If you find small grout cracks or chips, repair them promptly to stop dirt and moisture from causing bigger damage. You’ll clean the area, remove loose grout, then apply a matching grout compound for crack filling. Smooth joints with a damp finger or tool, let cure, then wipe residue. After curing, perform sealant application along repaired lines to waterproof and prevent discoloration. Repeat in high-traffic spots. Maintain ventilation while materials set. Check repairs monthly and touch up before gaps widen. Properly done, small fixes keep your tiles sealed, cleaner, and longer-lasting.
| Step | Action |
|---|---|
| 1 | Clean area |
| 2 | Fill crackatitis |
How to Prevent Mildew in Damp Bathrooms
When your bathroom stays damp, mildew can take hold quickly, so you’ll want to cut off its moisture source and keep air moving. Focus on mildew prevention with simple habits and small upgrades that won’t affect tile cleaning routines. Do these steps consistently:
When bathrooms stay damp, stop moisture and increase airflow—simple habits and small upgrades prevent mildew without major work.
- Squeegee walls and glass after showers to remove standing water.
- Hang towels and bathmats to dry fully; wash them weekly.
- Use a mold-resistant shower curtain and wash it regularly.
- Keep bathroom ventilation unobstructed; guarantee fans and vents are clean.
These actions reduce dampness and keep grout and tile healthier without major work.
Ventilation and Humidity Tips to Protect Tile Floors
You should boost air circulation by opening windows and using an exhaust fan during and after showers.
Keep humidity between 30–50% with a dehumidifier or fan to stop moisture from weakening grout and causing mold.
Regularly airing the room and drying wet spots will protect your tile floors and make cleaning easier.
Improve Air Circulation
Wondering why your grout keeps staying damp even after mopping? Improve air circulation and bathroom ventilation to speed drying and prevent mildew. You can act now:
- Open windows and doors after showers to let steam escape.
- Run an exhaust fan for at least 20 minutes post-shower; choose a fan sized for your bathroom.
- Use a portable fan angled toward the floor to move air across tiles and grout.
- Keep towels and rugs hung to dry elsewhere to avoid reintroducing moisture.
Good air flow protects tile adhesives and grout, making cleaning more effective and longer lasting.
Control Bathroom Humidity
Because high humidity feeds mildew and loosens grout, keeping bathroom moisture in check protects tile floors and cuts down on frequent deep cleans.
You should run a bathroom ventilation fan during and after showers (20–30 minutes) to expel steam. Open windows when possible and use a dehumidifier in persistently damp spaces.
Wipe tiles and grout dry after bathing to stop water pooling. Fix leaks and seal grout lines to prevent water intrusion.
Monitor humidity with a hygrometer; aim for under 50%. These steps improve bathroom ventilation and support mold prevention, extending tile life and reducing cleaning frequency.
How to Clean Corners and Behind the Toilet Efficiently
Looking for a quick way to tackle grime in tight spots? You can beat bathroom mold and finish toilet cleaning behind the bowl with a few focused steps.
Use a narrow brush or old toothbrush and a disinfectant spray, let it sit, then scrub seams and grout lines. For stubborn buildup, apply baking soda paste before scrubbing. Rinse and dry to prevent return.
- Remove loose debris with a vacuum or brush.
- Apply cleaner and wait 5–10 minutes.
- Scrub corners, baseboards, and behind the toilet.
- Rinse, dry, and ventilate to deter mold.
Cleaning Around Bathroom Fixtures Without Damage
When you clean around sinks, faucets, showerheads, and towel bars, use gentle, nonabrasive methods to protect finishes and seals. Work with a soft microfiber cloth, a soft-bristled brush, and diluted, eco-friendly solutions like vinegar-water for mineral deposits or mild castile soap for grime.
Dab, don’t scrub, near caulking and joints to avoid loosening seals. Rinse thoroughly and dry to prevent water spots and mold.
Inspect grout and consider grout repair if you see cracks or missing mortar; fix small areas promptly to stop water damage.
Always test cleaners on an inconspicuous spot first.
Pet- and Kid-Friendly Cleaning Options
After taking care around fixtures and grout, shift focus to cleaning choices that keep kids and pets safe. You want solutions labeled Pet safe and Kid friendly that still cut grime. Consider gentle, effective options and routines that minimize exposure and residue.
- Use diluted dish soap and warm water for everyday mopping—nonirritating and simple.
- Apply a vinegar-water mix sparingly on ceramic; rinse thoroughly afterward to avoid lingering smell.
- Spot-treat stubborn stains with baking soda paste, then wipe clean.
- Keep cleaners sealed and stored high; ventilate the room and restrict access until floors are fully dry.
Eco-Friendly Cleaning Swaps That Still Get Tiles Clean
Swap harsh chemicals for simple, eco-friendly options that still get your tiles spotless. Mix a vinegar-based all-purpose cleaner for routine wiping. Use a baking soda paste for gritty scrubs. Add a few drops of essential oil to freshen the room.
I’ll show you how to make and use each one safely and effectively.
Vinegar-Based All-Purpose Cleaner
Because vinegar cuts grease and dissolves mineral deposits without harsh chemicals, you can mix a simple, eco-friendly all-purpose cleaner that still leaves bathroom tiles sparkling.
You’ll dilute white vinegar with water (1:1), add a few drops of dish soap, and optionally a citrus peel for scent. Use a spray bottle, let it sit two minutes, then wipe.
- Test a small area first.
- Avoid porous stone; use vinegar alternatives there.
- Rinse thoroughly to prevent residue.
- Store labeled, away from children.
These eco friendly solutions are cheap, effective, and reduce your chemical load.
Baking Soda Scrub Power
If you want a gentle but effective abrasive that’s safe for most tiles and grout, baking soda’s your go-to: mix it with water into a paste, apply to stains or grout lines, scrub with a brush, then rinse to reveal cleaner, brighter surfaces without harsh chemicals.
| Use | Tip |
|---|---|
| Stains | Apply paste, wait 10–15 min |
| Grout lines | Scrub with small brush |
| Tile patterns | Test paste on inconspicuous area |
| Sealing prep | Clean thoroughly before grout sealing |
| Frequency | Monthly for high-traffic spots |
You’ll avoid residues, protect finishes, and refresh grout without toxic cleaners.
Essential Oil Deodorizing Boost
Want your bathroom to smell fresh without harsh chemicals? Use Essential oils for a simple Deodorizing boost that’s eco-friendly and effective. Add 10–20 drops to vinegar or distilled water in a spray bottle, or mix with baking soda for targeted odor control.
Follow these steps:
- Clean tiles with your regular eco cleaner.
- Spray diluted Essential oils for ongoing fragrance.
- Sprinkle oil-infused baking soda on grout, wait 10 minutes.
- Rinse and dry thoroughly to lock in scent.
You’ll maintain cleanliness, reduce chemicals, and enjoy a natural, lasting aroma from your tiles.
How Often to Deep Clean Versus Spot-Clean Tiles
When you mop and wipe up spills regularly, your bathroom tiles mostly just need quick spot-cleaning to stay presentable; reserve a deeper scrub for buildup, grout discoloration, or a noticeable odor.
Keep tiles tidy with regular mopping and spot-cleaning; save deep scrubs for grime, stained grout, or odors.
You should spot-clean weekly or whenever you see soap scum, splashes, or hair.
Deep clean monthly for moderate use, or every two months for light-use bathrooms.
Focus deep cleaning on grout lines, apply grout sealing afterward to protect against stains, and finish with tile polishing for shine.
If you notice persistent mildew or odor, deep clean immediately and reassess ventilation to prevent frequent repeat problems.
Time-Saving Hacks for Cleaning Before Guests Arrive
When guests are on their way, start with a quick sweep and spot-clean any sticky or stained areas so the floor looks instantly tidier.
For grout that’s dull or dingy, grab a grout brush and a paste of baking soda and water to brighten spots in minutes.
These two fast steps will make your bathroom presentable without a full deep clean.
Quick Sweep And Spot-Clean
If you’re short on time but want the floor to look guest-ready, start with a quick sweep to remove dust and loose debris, then spot-clean any visible marks with a damp microfiber cloth or a mild cleaner. You’ll focus on speed and visible impact: concentrate on high-traffic zones and corners.
Use proper mop techniques later to maintain results and practice stain prevention by treating spills immediately.
- Sweep corners and under cabinets first.
- Wipe scuffs with a damp microfiber cloth.
- Apply mild cleaner sparingly to stubborn spots.
- Finish with a quick dry to avoid streaks.
Speedy Grout Brightening
Want grout that looks fresh without hours of scrubbing? Mix equal parts baking soda and hydrogen peroxide into a paste, apply to stained grout, let it fizz for 5–10 minutes, then scrub with a stiff brush.
For quick touch-ups, use a whitening tooth gel on problem lines and wipe after a few minutes. Rinse thoroughly and dry to prevent lingering moisture.
If grout discoloration returns, reapply and consider light regrouting in high-traffic spots.
Once clean, apply a clear tile sealing product to protect grout and cut future cleaning time—guests will notice, and you’ll save effort.
How to Maintain Grout Color and Avoid Discoloration
Because grout soaks up dirt and moisture, you’ll need a simple routine to keep its color consistent and prevent staining. You can limit grout discoloration by acting regularly and using gentle products that won’t erode sealers. Set a cleaning frequency and stick to it so grime doesn’t set.
- Sweep and mop weekly to remove surface debris.
- Wipe spills immediately to stop staining.
- Rinse thoroughly after cleaning to avoid residue buildup.
- Re-seal grout annually or when water stops beading.
Follow these steps and you’ll preserve grout color without harsh scrubbing.
Tools and Tricks for Stubborn Grout Stains
Keeping grout looking fresh sometimes means more than routine cleaning—stubborn stains call for the right tools and tricks. You’ll want a stiff nylon brush, a grout scraper for raised grime, and a handheld steam cleaner for deep lift without harsh chemicals.
Try a paste of baking soda and hydrogen peroxide for targeted stain removal, letting it sit before scrubbing. For mold or persistent discoloration, use an oxygen-based bleach following label directions.
After cleaning, apply grout sealing to protect pores and reduce future staining. Test methods on a small area first to avoid damage.
How to Revive Old, Dull Tile Finishes Safely
If your tile finish looks dull, start with gentle cleaning methods like a pH-neutral cleaner and soft mop to remove film without damaging the surface.
After it’s clean, use a dedicated tile polish or a tiny amount of mineral oil to restore shine on ceramic or porcelain.
Test any product in a hidden spot first and buff with a microfiber cloth for an even, lasting sheen.
Gentle Cleaning Methods
When your tile’s shine has faded and harsh scrubbing won’t help, gentle methods can restore finish without damage. You can refresh dull tiles safely by using mild, eco-friendly options and focusing on stain prevention. Follow these careful steps:
- Mix warm water with a few drops of pH-neutral cleaner; mop gently to lift grime.
- Use a soft-bristle brush on grout lines; avoid abrasive pads that scratch.
- Spot-treat stains with a paste of baking soda and water; let sit briefly, then rinse.
- Dry thoroughly and apply a breathable sealer if recommended for your tile type.
Restore Tile Shine
Although years of soap scum and mineral buildup can dull your tiles, you can bring back their shine without harsh chemicals or sanding.
Begin by rinsing and drying thoroughly, then test a small area with a pH-neutral cleaner.
Use a microfiber mop to polish, following tile patterns to avoid streaks.
For matte or honed finishes, apply a specifically labeled restorative product sparingly and buff with a soft cloth.
Avoid wax on porous tiles; instead, consider professional refinishing for severe wear.
Finish by inspecting grout; proper grout sealing protects edges and maintains the overall refreshed look.
When to Call a Pro for Tile and Grout Restoration
Even with regular cleaning, some tile and grout problems need professional attention; call a pro if stains, cracks, or loose tiles persist after your best efforts. You’ll know it’s time when DIY fixes fail or damage risks spread.
Even with regular cleaning, call a pro when stains, cracks, or loose tiles persist after your best efforts.
Pros handle deep-set outdoor staining, structural cracks, and full grout sealing beyond spot treatments. Consider hiring if moisture keeps returning or tiles shift underfoot.
- Persistent stains after targeted cleaning
- Cracked, chipped, or loose tiles
- Recurrent mold or moisture intrusion
- Worn or failing grout that needs full restoration
Act quickly to prevent bigger repairs.
Cost-Effective Supplies That Deliver the Best Results
You don’t need fancy products to get sparkling tiles—start with affordable cleaning essentials like a good microfiber mop, pH-neutral tile cleaner, and a stiff-bristled brush for grout.
For spots and routine upkeep, try budget-friendly natural alternatives such as white vinegar, baking soda, and a few drops of dish soap.
I’ll show how to use each option safely and effectively so you can pick what works best for your bathroom.
Affordable Cleaning Essentials
A few budget-friendly supplies will get your bathroom tiles sparkling without breaking the bank: a good all-purpose cleaner, white vinegar, baking soda, a stiff-bristled brush, microfiber cloths, and a mop with a removable head.
You’ll choose items that work well and won’t harm surfaces or pets — look for eco-friendly solutions and pet-safe products labeled clearly. Prioritize durability and versatility to reduce repeats and waste.
Consider:
- Concentrated cleaner for dilution and savings
- Stiff brush for grout scrubbing
- Microfiber cloths for streak-free drying
- Removable-head mop for easy washing and storage
Budget-Friendly Natural Alternatives
Looking for cheap, natural cleaners that actually work? You can mix simple natural remedies like vinegar, baking soda, and lemon to tackle grout and soap scum without harsh fumes.
Use a spray bottle with half water, half vinegar for daily shine.
Sprinkle baking soda on stains, scrub with a damp brush, then rinse.
Lemon brightens and deodorizes; salt adds mild abrasiveness.
These household shortcuts save money and reduce waste.
Test small areas first, avoid vinegar on natural stone, and wear gloves if you have sensitive skin.
Regular, small efforts keep tiles spotless without expensive products.
Tile-Damaging Mistakes to Avoid
While it’s tempting to grab the strongest cleaner or scrub with all your might, those choices can wear down grout and glaze fast. You’ll want to avoid common mistakes that cause grout discoloration or undo sealant application. Follow these quick cautions:
Avoid harsh cleaners and hard scrubbing—test products, rinse thoroughly, and re-seal as directed to protect grout and glaze.
- Overuse of acidic cleaners — they etch glaze and fade grout.
- Hard scrubbing with metal brushes — they abrade surfaces.
- Skipping rinsing — residue leads to buildup and staining.
- Ignoring manufacturer instructions — wrong products void warranties.
Be gentle, test cleaners in a hidden spot, and reapply sealant as directed to protect tiles and grout.
Quick Troubleshooting: Why Your Tiles Look Cloudy After Cleaning
Because mineral deposits, cleaner residue, or worn sealant can all leave a hazy film, cloudy tiles after cleaning usually mean something was left behind or removed in the wrong way.
Check for soap scum or hard-water spots: wipe a small area with white vinegar diluted 1:1, rinse, dry. If haze persists, you likely used too much cleaner or didn’t rinse thoroughly; switch to a neutral pH cleaner.
Inspect grout and sealant—worn tile sealing lets moisture alter appearance and invites mildew; address seal failures and consider mildew prevention steps.
Finish by buffing dry with a microfiber cloth for clarity.
Best Storage and Organization for Tile Cleaning Supplies
If you want your tile-cleaning routine to be quick and stress-free, set up a compact, labeled storage zone for cleaners, brushes, and tools so you can grab what you need fast. Store concentrated cleaners and microfiber cloths on one shelf; keep brushes, grout tools, and a squeegee in a caddy.
Use clear bins and waterproof labels that match your bathroom decor so everything looks tidy. Consider wall-mounted hooks or a slim cart to save floor space and support water conservation by preventing spills.
- Label bottles
- Group by task
- Use ventilated bins
- Mount tools
Creating a Reusable Cleaning Schedule You’ll Stick To
When you set a simple, repeatable cleaning schedule, keeping bathroom tiles pristine becomes manageable instead of overwhelming. Plan daily quick wipes, weekly mopping, and monthly grout scrubs in a reusable checklist you can print or keep on your phone.
Block time on weekends for deeper tasks and rotate responsibilities if you share the space. Note seasonal adjustments—more frequent cleaning in humid months.
Track supplies alongside tasks, and review color options for storage bins so everything’s easy to find. Jot installation tips or warranty dates in the schedule to avoid damaging new tiles during maintenance.
Quick Reference: Do’s and Don’ts by Tile Type
Though each tile material needs different care, you can follow a short list of do’s and don’ts for each type to prevent damage and keep surfaces looking their best. Use this quick guide to protect Tile patterns and preserve grout color:
- Porcelain: Do use pH-neutral cleaner; don’t bleach sealed grout.
- Ceramic: Do mop gently; don’t use abrasive pads that scratch glaze.
- Natural stone: Do test cleaners; don’t use acidic solutions that etch.
- Vinyl or LVT: Do avoid steam cleaners; don’t drag heavy items across seams.
Follow these simple rules and you’ll keep floors durable and visually consistent.
Final Maintenance Checklist for a Spotless Bathroom Floor
As you finish cleaning, follow a concise maintenance checklist to keep your bathroom floor spotless and prevent grime from coming back.
Dry floors immediately to avoid streaks and water spots, and ventilate the room to reduce humidity.
Sweep daily, mop weekly with a pH-appropriate cleaner, and treat grout monthly with a scrub or sealed grout product.
Check for loose tiles or cracked grout and repair promptly to stop dirt buildup.
Keep mats clean and position them to protect high-traffic areas.
Inspect bathroom lighting for adequate visibility and guarantee your tile design remains clear and attractive with regular care.
Frequently Asked Questions
Can Grout Colorants Permanently Change Grout Shade or Fade Over Time?
Yes — grout colorants can permanently change grout shade, but you should know color fading can occur over time from UV exposure, harsh cleaners, or wear, so you’ll need occasional touch-ups to maintain the look.
Are There Cleaners Safe for Antique or Reclaimed Bathroom Tiles?
Start off on the right foot: you can use pH-neutral cleaners, diluted vinegar sparingly, or baking soda paste with a gentle brush; natural remedies work, but test first and avoid harsh acids or abrasive scrubbing on antique tiles.
How Do I Remove Efflorescence From Cement-Based Tile Substrates?
You’ll dry-brush loose salt, then apply a mild acid rinse (dilute white vinegar or phosphoric cleaner) for efflorescence removal, scrub gently, rinse thoroughly, and seal once fully cured to protect the cement substrate cleaning.
Will Radiant Floor Heating Affect Cleaning Products or Methods?
Like a warm oven, radiant heating can change cleaning choices; you’ll want products rated for radiant heating and check cleaning compatibility, avoid harsh solvents or excess water, and let floors cool before heavy scrubbing to prevent damage.
Can Cleaning Products Damage Under-Tile Waterproofing Membranes?
Yes — they can. You’ll risk waterproof integrity if you use incompatible chemicals; always check product compatibility with your membrane manufacturer, avoid harsh solvents or acids, and test cleaners in an inconspicuous area first.
Conclusion
You’ve got this: clean tiles cared for consistently cut chaos and keep your bathroom bright. Choose the correct cleaner for ceramic, porcelain, or vinyl, stash supplies smartly, and schedule short sweeps and spot treatments. Tackle soap scum, stubborn stains, and sneaky mildew swiftly to save scrubbing stress. With simple supplies, sensible storage, and a steady short routine, your floors stay fresh—minimal effort, maximum maintenance, marvelous results.