
How to Get a Tile Floor Really Clean at Home
You can get a tile floor truly clean by identifying your tile and grout, clearing the area, and sweeping or vacuuming to remove grit. Test cleaners in a hidden spot, then mop with a pH-appropriate solution, scrub grout with a stiff nylon brush and baking-soda paste for stains, rinse well, and dry with microfiber towels. Seal porous stone and grout as needed, keep daily wiping and mats, and follow a weekly routine to prevent buildup—keep going for practical step-by-step tips.
How to Tell Your Tile and Grout Type Quickly
Before you start scrubbing, identify the materials so you use the right cleaner. Walk the floor, note color variations and surface sheen—glossy porcelain resists staining, matte ceramic soaks more.
Before scrubbing, identify tile and grout—note sheen, color, and sound to choose the right cleaner.
Tap tiles: solid sound suggests porcelain or natural stone; hollow hints of thin-set issues or large format tiles and different installation methods.
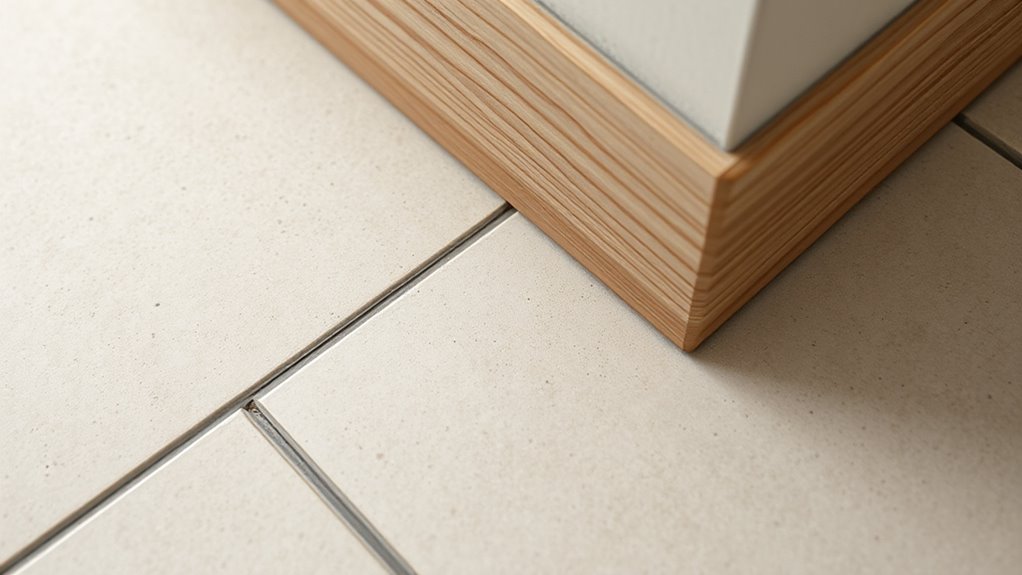
Inspect grout width and texture: sanded grout has a gritty feel and wider joints; unsanded is smooth and narrow.
Test a hidden spot with diluted vinegar (avoid on stone) to see reaction.
Label each area mentally so you pick cleaners and techniques suited to each tile and grout type.
Tools and Household Supplies You’ll Actually Need
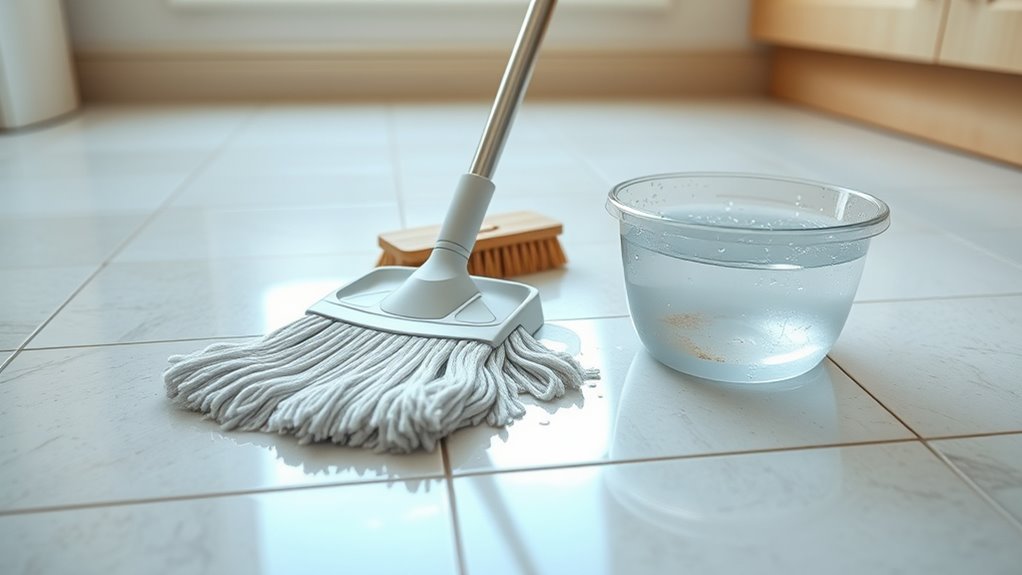
Now that you know your tile and grout, let’s look at the tools and household supplies you’ll actually need. You’ll want a stiff-bristled brush, a mop with a removable head, microfiber cloths, a bucket, and rubber gloves for basic scrubbing and rinsing.
For everyday supplies, keep mild detergent, white vinegar, baking soda, and a pH-neutral tile cleaner on hand.
Essential Cleaning Tools
When you’re aiming for a truly clean tile floor, having the right tools makes the job faster and prevents damage; you don’t need a closet full of products, just a handful of reliable supplies.
Start with a microfiber mop and washable pads to protect tile design and pick up fine dust. Use a stiff nylon brush for grout — it won’t scrape grout color or tile glaze.
A flat-head squeegee clears soapy water quickly. Grab a cordless stick vacuum for corners, a bucket with a wringer, and rubber gloves.
Keep a grout brush and a soft scrub pad for stubborn spots.
Everyday Household Supplies
If you want a spotless tile floor without hauling out specialty cleaners, stick to a short list of dependable household supplies you probably already have: white vinegar, baking soda, mild dish soap, warm water, a spray bottle, microfiber cloths, and a sturdy scrub brush.
Use vinegar diluted with water for routine mopping and baking soda paste on grout stains. Mix mild soap and warm water for sticky spots.
Keep a spray bottle labeled for quick spots and microfiber for drying. These items support eco friendly solutions and let you create personalized cleaning tips tailored to your tile type and traffic.
Safe Cleaners for Ceramic, Porcelain, and Stone Tile
Different tile materials need different care, so you’ll want to match your cleaner to ceramic, porcelain, or natural stone to avoid damage.
Choose pH-safe cleaners—neutral pH for stone and mild alkaline for ceramic and porcelain—to keep grout and finish intact.
If your stone or grout is sealed, stick to sealer-friendly techniques and avoid harsh scrubs that can wear the coating.
Tile Material Differences
Because tile materials respond differently to cleaners, you should match your product to the tile type—ceramic and porcelain tolerate mild alkali cleaners and steam, while natural stone (like marble, travertine, and slate) needs pH-neutral, non-acidic formulas to avoid etching or discoloration. You’ll consider finish, porosity, Tile patterns, and grout colors when choosing tools and frequency. Test any cleaner in a hidden spot first. Avoid harsh scrubbing on polished stone. Use soft brushes on grout and stronger agitation on durable tiles. Keep sealers current for porous stone to protect appearance and ease cleaning.
| Tile Type | Care Tip |
|---|---|
| Ceramic/Porcelain | Steam or mild cleaner |
| Natural Stone | pH-neutral, sealed |
pH-Safe Cleaner Choices
When you pick a cleaner, choose one that’s pH-safe for the specific tile—neutral for natural stone and mild-alkaline or neutral for ceramic and porcelain—so you won’t risk etching, dulling, or breaking down sealers.
Test cleaners in an inconspicuous spot, follow label dilution, and avoid acids or harsh alkalis on stone.
For glazed ceramic and porcelain, mild-alkaline formulas lift grime without harming glazes.
Use neutral cleaners for marble, travertine, and limestone.
Keep towels and mop heads clean to protect grout and decorative accents.
Match cleaning tools to your aesthetic and color coordination so maintenance complements your room.
Sealer-Friendly Techniques
If you want sealers to last and grout to stay intact, choose cleaning methods and products that respect those protective layers. Use pH-neutral cleaners, soft brushes, and avoid bleach or acidic rinses so your tile patterns and grout colors don’t fade. Test products in a hidden spot, rinse thoroughly, and dry to prevent residue.
| Surface | Safe Cleaner | Tool |
|---|---|---|
| Ceramic | pH-neutral | Microfiber |
| Porcelain | Mild detergent | Soft mop |
| Natural stone | Stone soap | Soft brush |
| Grout | Baking soda paste | Toothbrush |
What “Deep Clean” for Tile and Grout Really Means
A deep clean for tile and grout means going beyond surface dirt to remove ingrained grime, grease, and old sealant that regular mopping can’t reach. You’ll target discolored grout lines, soap scum, and sticky residues with agitation, appropriate cleaners, and time.
Deep cleaning supports tile maintenance by restoring slip resistance and aesthetic appeal, and it helps you spot areas needing grout repair before problems spread. You’ll use brushes, pH-appropriate solutions, and rinse cycles to avoid residue.
Afterward, inspect tiles and joints, let everything dry thoroughly, and decide if sealing or targeted repairs are required to protect results.
Prepare the Room for a Thorough Tile Clean

Before you start scrubbing, clear the floor space so you can reach every tile and grout line.
Move furniture, rugs, and any breakables to a safe spot so you won’t have to work around obstacles.
This makes the cleaning faster, safer, and more effective.
Clear The Floor Space
Ready to get serious about cleaning? Clear the floor space before you wet or scrub anything. Move small breakables, clutter, and toys to one side so you can see grout lines and inspect for stains.
Open windows and doors for ventilation and lay down protective pads where you’ll set tools. If you’ve planned color coordination or pattern design changes later, mark areas now so you don’t mix grout or sealers.
Sweep or vacuum to remove loose debris; that prevents grit from scratching tiles during mopping. Keep cleaning supplies nearby but off the floor until you’re ready to work.
Remove Furniture And Rugs
Once you’ve cleared small items, pull out furniture and roll up rugs so you can access every tile and grout line without obstruction. This lets you spot stains, lift embedded dirt, and prevent missed spots during scrubbing.
Move pieces methodically, using sliders or a dolly for heavy items to avoid scratching tiles. Note your furniture arrangement and photograph it if you’ll need help restoring the room.
Shake out or vacuum rugs before rolling them for transport or cleaning. Proper rug placement back on dry, cleaned tiles prevents mildew.
Keep hardware and felt pads handy to protect floors when you replace items.
Step-by-Step Deep-Clean Routine for Tile Floors
Although deep-cleaning tile takes more time than quick mopping, following a clear step-by-step routine makes it manageable and efficient.
Start by testing a small area to check how your cleaner affects tile patterns and grout color.
Mix an appropriate cleaner, then apply in sections so solution doesn’t dry.
Scrub grout lines with a stiff brush, working along joints rather than across tiles.
Rinse thoroughly with clean water, using a mop or wet-vac to remove residue.
Dry with microfiber towels to prevent streaks and spotting.
Inspect for stubborn stains and repeat spot-treatment if needed before replacing furniture.
Remove Dust, Surface Dirt, and Loose Grime
After rinsing and drying, start by removing loose debris so your deeper cleaners can work on grime, not grit. Walk the room with a soft-bristle broom or vacuum with a hard-floor setting, reaching corners and along baseboards.
Use a microfiber dust mop to capture fine particles that dull tile design and trap in grout color recesses. For textured tiles, brush along grout lines to loosen lodged dirt, then sweep or vacuum again.
Empty the vacuum or shake out the mop outside to avoid redepositing dust. This prep prevents scratching and lets subsequent cleaning solutions penetrate where they’ll actually help.
Cut Through Grease and Sticky Residue
When grease or sticky spills linger, you’ll want a strong but safe degreaser to break them down without damaging grout or tile.
Try a diluted citrus or enzyme-based cleaner for heavy grease, and keep a microfiber cloth or plastic scraper handy to lift residue as it softens.
Act quickly on sticky messes to prevent them from hardening and making the job harder.
Degreasing Solutions That Work
If grease and sticky residue are making your tile look dull, you don’t need fancy cleaners—just the right degreasing solutions and a focused approach will cut through buildup without harming grout or finish.
Start with a mild alkaline cleaner or diluted dish soap for light film; test an inconspicuous area so tile patterns and grout colors don’t shift.
For stubborn grease, use a citrus-based degreaser or a vinegar-water solution on glazed tiles, avoiding acid on natural stone.
Apply, let sit briefly, scrub with a nylon brush, then rinse thoroughly.
Finish by drying to prevent streaks and residue.
Tackling Sticky Residue Quickly
You’ve handled the grease—now tackle sticky spots that attract dirt and leave footprints. Mix warm water with a few drops of dish soap for quick lift, or try a vinegar-water spray for light residue.
For stubborn tackiness, sprinkle baking soda, mist with vinegar, let fizz, then scrub gently—DIY stain removal that’s effective. Rinse thoroughly to remove film.
If you prefer eco friendly solutions, use castile soap or a citrus-based cleaner. Always test a small area first, wear gloves, and dry the tile to prevent slips.
Repeat as needed until the surface feels clean and smooth.
Deep-Clean Grout Lines: Tools and Technique
Though grout often looks like just narrow lines between tiles, it’s actually porous and traps dirt, oils, and mildew that regular mopping won’t remove. You’ll need a stiff brush, a grout cleaner or baking soda paste, and patience. Scrub along tile patterns to avoid uneven wear. Test a hidden area if you plan grout coloring afterward. Rinse and dry thoroughly, then seal to slow re-soiling. Work in small sections, keep tools clean, and replace brushes when bristles splay.
| Tool | Purpose |
|---|---|
| Stiff brush | Agitate grime |
| Baking soda paste | Gentle cleaner |
| Grout cleaner | Deep lift |
| Toothbrush | Precision |
| Sealer | Protect grout |
Remove Mineral Deposits and Soap Scum From Tile
First, you’ll identify whether the buildup is hard mineral deposits or soap scum so you can match the treatment.
Then pick an effective cleaner—acidic solutions for minerals, gentle alkaline or enzyme cleaners for soap scum.
Finally, use soft brushes and nonabrasive pads with controlled scrubbing to remove residue without damaging the tile.
Identify Deposit Types
When you’re tackling mineral deposits and soap scum on tile, the first step is learning to tell them apart so you can choose the right cleaner and method.
Mineral deposits look chalky or crystalline, often white or cloudy, and may cause color variation on glossy tiles.
Soap scum appears filmy, greasy, and can darken textured surfaces.
Check grout discoloration: mineral buildup often leaves powdery residue in grout lines, while soap scum creates a greasy film that attracts dirt, making grout look grimy.
Test a small area with water and a microfiber cloth; observational clues guide your next move without guessing.
Choose Effective Cleaners
After you’ve identified whether you’re dealing with mineral deposits or soap scum, pick cleaners formulated for that specific buildup—acidic or descaling products for minerals and alkaline or surfactant-based cleaners for soap scum—so you don’t waste effort or damage the tile. Test cleaner on an inconspicuous spot considering tile color and grout pattern. Use diluted vinegar or commercial descaler for hard-water rings; choose a mild alkaline or surfactant cleaner for oily soap scum. Rinse thoroughly and ventilate. Replace harsh acids on porous stone. Track results and adjust concentration rather than scrubbing harder.
| Buildup | Recommended cleaner |
|---|---|
| Minerals | Descaler/acidic |
| Soap scum | Alkaline/surfactant |
Gentle Scrubbing Techniques
Because scrubbing can wear grout and dull tile, use gentle techniques that rely more on the right cleaner and motion than brute force.
You’ll spray a descaling or mild alkaline cleaner, let it sit briefly, then work in small sections with a soft-bristled brush or microfiber pad. Move in circular motions along grout lines to lift mineral deposits and soap scum without gouging.
Rinse thoroughly and dry to prevent streaks.
For older tile installation with faded grout, consider grout coloring after deep cleaning to refresh appearance.
Test cleaners in an inconspicuous spot first to protect finish and grout.
Treat Mold and Mildew on Tile and Grout Safely
If you spot mold or mildew on tile or grout, tackle it promptly to prevent stains and health risks. Wear gloves and a mask, ventilate the room, and test a small area.
Use a diluted bleach solution or a commercial mildew cleaner for porous grout, scrubbing with a stiff brush. Rinse thoroughly and dry to discourage regrowth.
Treat porous grout with diluted bleach or a mildew cleaner, scrub with a stiff brush, then rinse and dry thoroughly.
For ongoing mold prevention, control humidity, fix leaks, and dry floors after mopping.
Consider grout coloring or sealers to restore appearance and add a protective layer.
Repeat treatments only as needed, and call a pro for persistent or widespread infestations.
Fix Common Tile Stains: Oil, Rust, Ink, Wine
Want to know the quickest way to get stubborn stains out of tile? You’ll treat oil, rust, ink, and wine with targeted cleaners and gentle scrubs so your tile patterns and grout colors stay sharp. Blot fresh spills, use baking soda paste for oil, lemon or oxalic acid for rust, rubbing alcohol for ink, and hydrogen peroxide for wine. Test hidden spots first.
| Stain | Fix |
|---|---|
| Oil | Baking soda paste, scrub |
| Rust | Oxalic acid, rinse |
| Ink/Wine | Alcohol/peroxide, blot |
Finish by rinsing and drying to preserve finishes.
When and How to Strip Old Sealer or Wax
Old sealer or wax can trap dirt and dull tile even after you’ve removed surface stains, so you’ll want to strip it before resealing or deep-cleaning the grout. Start by testing a small spot to confirm the stripper won’t hurt your tile design or alter grout color. Use a commercial stripper or a diluted ammonia solution, ventilate, and wear gloves. Scrub with a nonmetal brush, rinse thoroughly, and dry.
- Feel relief seeing original shine return.
- Feel empowered restoring beauty.
- Feel cautious testing first.
- Feel proud of the finished floor.
How and When to Reseal Grout and Natural Stone
Because grout and natural stone are porous, they absorb spills and wear down over time, so you should reseal them to protect against stains and moisture. Test porosity with water: if it beads, sealing’s fine; if it soaks in, reseal now.
Choose a sealer compatible with tile and natural stone—impregnating sealers penetrate; topical ones sit on surface.
Clean and dry thoroughly, then apply per manufacturer instructions, usually two thin coats.
Pay attention to grout color—sealers can darken or change tone—so test in an inconspicuous spot.
Reseal high-traffic areas annually; less-used zones every 2–3 years.
Daily Habits That Keep Tile Looking Clean
If you make a few simple habits part of your routine, your tile will stay cleaner with less effort. You’ll notice dust and spills before they set, protecting tile patterns and preventing grout colors from dulling. Do quick daily checks: sweep, spot-wipe, and open vents to cut humidity.
- Sweep or vacuum high-traffic areas each morning.
- Wipe spills immediately with a microfiber cloth.
- Use mats at entrances to trap dirt and grit.
- Air out rooms to reduce moisture and mildew risk.
These small actions keep floors fresh, extend deep-clean intervals, and preserve appearance.
Weekly Maintenance Checklist for Tile Floors
When you set aside a regular weekly routine, your tile stays in top shape and deep cleans become easier. Start by sweeping or vacuuming edges and high-traffic areas, following tile design patterns to catch dirt in seams.
Mop with a pH-neutral cleaner, rinsing frequently so residue doesn’t dull finishes. Inspect grout color for fading or staining; spot-clean with a soft brush and appropriate cleaner.
Wipe baseboards and transition strips, and air-dry floors to prevent streaks. Move lightweight furniture to clean underneath.
Note any chips or loose tiles for repair, and record areas needing attention next week.
Troubleshooting Stubborn Marks and Recurring Dirt
Ever wondered why some marks keep coming back no matter how often you clean? You’re not imagining it: traffic, spills, and ingrained dirt react differently to cleaners depending on tile patterns and grout colors.
Diagnose by testing a small area, then act:
- Scrub targeted spots with a pH-neutral cleaner and a nylon brush.
- Use a poultice for oil-based stains and rinse thoroughly.
- Reassess grout colors—darkened grout may need stain remover or recoloring.
- Adjust cleaning frequency where wear repeats, and place mats to reduce return.
If marks persist after these steps, isolate source and treat specifically rather than over-cleaning.
Avoiding Damage: Do’s and Don’ts for Tile Care
You’ve already learned how to diagnose and treat stubborn marks; now focus on preventing harm so those fixes stick. Don’t use harsh acids or abrasive pads that dull finishes or scratch tile patterns. Do sweep and mop with pH-neutral cleaners, and blot spills immediately to avoid staining.
Don’t drag furniture—lift or use felt pads to prevent chips. Do follow a grout sealing schedule to keep joints waterproof and stain-resistant. Don’t overuse steam cleaners or high heat on older grout.
Do test any new product in an inconspicuous spot first, and inspect regularly to catch issues early.
Frequently Asked Questions
Can I Use a Steam Mop on All Tile and Grout Types?
You can use a steam mop on many glazed tiles and sealed grout, but you shouldn’t on unsealed natural stone or fragile grout; adjust mopping techniques and cleaning solutions accordingly to avoid damage and excessive moisture.
How Do I Clean Tile in High-Humidity Bathrooms Long-Term?
Start smart: scrub, squeegee, and set routines. You’ll prevent mold with daily ventilation, dehumidifiers, and quick drying; schedule sealant maintenance, use mildew-resistant caulk, and inspect grout regularly to stop long-term humidity harm.
Are Pets’ Paw Stains Treated Differently on Tile?
Yes — you’ll treat pet paw stains slightly differently: for pet stain removal, blot fresh messes, use a pet-safe enzymatic cleaner for odors, and perform paw print cleaning gently with a microfiber mop so you don’t spread residue around.
What’s the Best Way to Remove Adhesive or Carpet Glue?
You’ll soften adhesive removal with heat or a citrus-based solvent, then scrape gently; for stubborn carpet glue, use a commercial adhesive remover, wipe residue, rinse thoroughly, and ventilate the room while wearing gloves and eye protection.
How Do I Safely Clean Heated (Radiant) Tile Floors?
Imagine warmth underfoot—you’ll turn heat off, mop with pH-neutral cleaner, avoid harsh solvents to protect tile sealants, scrub grout discoloration gently with a soft brush, rinse well, dry, then slowly restore radiant heat.
Conclusion
So you’ve learned how to boss your tile into submission — congrats, tile-whisperer. Keep identifying grout and picking proper cleaners, prep like a drill sergeant, and stick to daily dusting and weekly scrubbing. When stains sulk, treat them politely but firmly. Don’t fling bleach haphazardly or crown your tiles with harsh chemicals; they don’t deserve that drama. Follow the do’s and don’ts, and your floor will stay less tragic, more triumph.
