
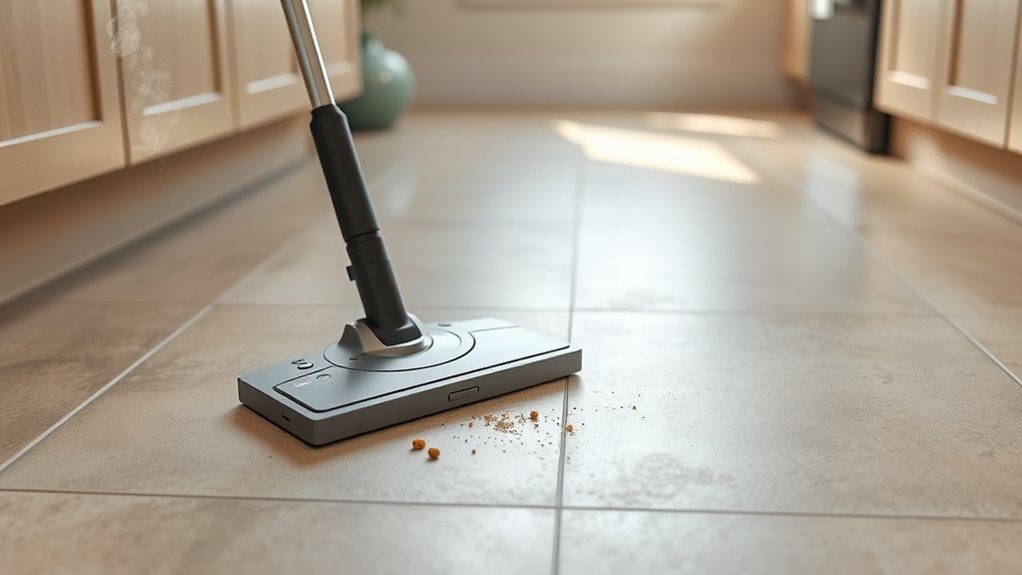
How to Steam Clean Tile Floors (Easy Step-by-Step Guide)
You can steam clean tile floors quickly: inspect and repair cracked tiles and grout, sweep and spot-treat grease, then use distilled water in a steam cleaner with a microfiber pad or nylon brush for grout. Work from the far corner toward the exit, use short steam bursts, wipe moisture with a microfiber mop, and reseal grout after drying. Avoid unsealed stone and fragile grout. Keep going to learn precise settings, timing, and troubleshooting tips.
Why This Guide Helps You Steam Clean Tile Floors (Search Intent)
Because you’re likely searching for a quick, effective way to clean tile without harsh chemicals, this guide focuses on practical steam-cleaning steps, safety tips, and troubleshooting so you get consistent results.
You’ll find clear instructions tailored to tile types, surface prep, and steam settings that protect finishes and help preserve grout. Tips on grout sealing and simple color matching for repaired tiles prevent patchy outcomes after cleaning.
You’ll also get concise safety reminders, tools-to-buy lists, and troubleshooting for common issues like streaking or weak steam. Follow these steps, and you’ll refresh tile efficiently with predictable results.
Steam Cleaning vs. Mopping: Why Steam Wins for Tile
You’ll notice steam cleans faster than mopping, cutting the time you spend on floors.
It reaches deeper into pores and grout to lift dirt while sanitizing without chemicals. That combination makes steam a stronger choice for tile and grout care.
Faster, Deeper Cleaning
Want cleaner tile in less time? You’ll notice steam penetrates grout and textured surfaces faster than mopping, loosening grime so you wipe it away quickly.
Steam’s heat lifts stubborn residues that a mop merely smears, saving you effort and repeat passes. You’ll also spend less downtime drying floors, so rooms stay usable sooner.
Think of it like swapping basic cooking tips for a professional technique — small change, big payoff — or upgrading gardening advice from watering to mulching for deeper results.
Use targeted steam settings and a microfiber pad to extract dirt efficiently and move on.
Chemical-Free Sanitizing
While mopping mainly moves dirt around, steam cleaning actually kills germs and loosens soils without chemicals, so you get a truly sanitized tile surface using only water and heat.
You’ll notice how steam lifts trapped grime from crevices between tiles, restoring surface shine and revealing tile patterns more clearly. Because you’re not rinsing detergent into seams, the visible grout color stays truer and won’t attract residue that hides bacteria.
Steam’s high temperature sanitizes in seconds, so you’ll spend less time scrubbing and more time enjoying a cleaner floor. For chemical-free sanitation, steam is faster, safer, and more effective than mopping.
Better For Grout
Because steam penetrates grout’s porous surface with heat and moisture, it loosens embedded dirt and kills microbes where mops only move residue around, so your grout actually gets cleaner. You’ll see grout brighten without harsh chemicals, making grout sealing more effective afterward. Steam also aids tile polishing by lifting grime before you buff, so finishes last longer. You control temperature and dwell time to avoid damage. Compare benefits below to decide when to steam instead of mop.
| Advantage | Result |
|---|---|
| Deep cleaning | Removes embedded dirt |
| Sanitizing | Kills microbes |
| Prep for sealing | Enhances grout sealing |
| Finish care | Improves tile polishing |
Which Tile and Grout Types Are Safe for Steam Cleaning
If your tile and grout are in good condition, steam cleaning can be a fast, chemical-free way to lift dirt and sanitize surfaces. You’ll want to confirm tile type—glazed ceramic, porcelain, and sealed natural stone usually tolerate steam. Unsealed stone and delicate mosaics may not.
Check grout: dense, cured grout holds up better than crumbly joints; grout color can hide or reveal stains, so test a small area. Consider tile patterns that concentrate seams or textured surfaces; they need more scrutiny. Test first and proceed slowly.
Inspect grout and tile closely—dense, cured joints and smooth surfaces handle steam; test a small area and proceed slowly.
- Relief — clean grout
- Confidence — restored shine
- Pride — refreshed patterns
- Calm — sanitary floors
When Not to Steam Clean Your Floors

When your tile or grout shows damage, don’t use steam cleaning—high heat and moisture can worsen cracks, lift loose grout, and strip sealers.
Avoid steaming if tiles are unsealed natural stone, old adhesive beds, or vinyl-look tiles that aren’t rated for heat.
Don’t steam floors that sit over sensitive subfloors (like particleboard) or areas with mold issues—you’ll spread spores and add moisture.
Skip steam for transition zones that meet rugs or require carpet cleaning methods instead.
For outdoor maintenance, avoid steam on exterior tile exposed to freeze cycles or porous masonry that can trap water.
Inspect and Repair Cracked Tiles and Grout Before Steaming
Before you bring steam into the equation, take a close look for cracked tiles, loose grout, and missing sealant—they’ll only get worse with heat and moisture. You want to preserve tile patterns and avoid color fading; small repairs now prevent larger, costly fixes later.
Inspect tiles, grout, and sealant first—repair cracks and reseal edges to prevent steam damage and color loss.
Assess each issue, then act:
- Pinpoint cracked tiles—replace to stop water intrusion.
- Scrape loose grout, then regrout to seal joints.
- Reseal edges and transitions to protect subflooring.
- Match grout color and tile hues to prevent noticeable patches.
After repairs cure, you’ll steam safely without spreading damage or ruining aesthetics.
Pre-Cleaning: Remove Dirt, Grease, and Sticky Residues
Before you steam, sweep and vacuum the floor to remove loose dirt and grit that can scratch grout and tile.
Tackle greasy spots with a degreaser or a baking soda paste, and spot-treat sticky residues with a scraper or warm soapy water.
Doing this pre-cleaning will let the steam cleaner work more effectively and prevent smeary streaks.
Sweep And Vacuum
Wondering why sweeping and vacuuming matter before you steam? You’ll protect your tile’s Color patterns and Tile patterns from grit scratching and guarantee steam reaches grout, not loose debris. Clear the room, then:
- Start with a broom to lift surface dirt—feel the relief as dust disappears.
- Use a vacuum on corners and grout lines—notice how the floor’s design pops.
- Empty the vacuum to avoid redistributing dust—gratifying, right?
- Sweep again for stubborn crumbs—satisfaction guaranteed.
This prepping saves time and gives you a smoother, more effective steam-cleaning result.
Degrease And Spot-Treat
Ready to tackle grease and sticky spots? Start by blotting fresh spills with a microfiber cloth, then apply a degreaser to greasy areas and let it sit per instructions.
Use a soft brush to scrub along grout lines so grout color won’t darken unevenly. For stubborn spots, use a paste of baking soda and water, work gently, then rinse.
Test any cleaner on an inconspicuous area to protect tile patterns and finish. Wipe residue thoroughly before steam cleaning so the steamer won’t spread grime.
Finish by drying the floor; steam will be far more effective on a pre-cleaned surface.
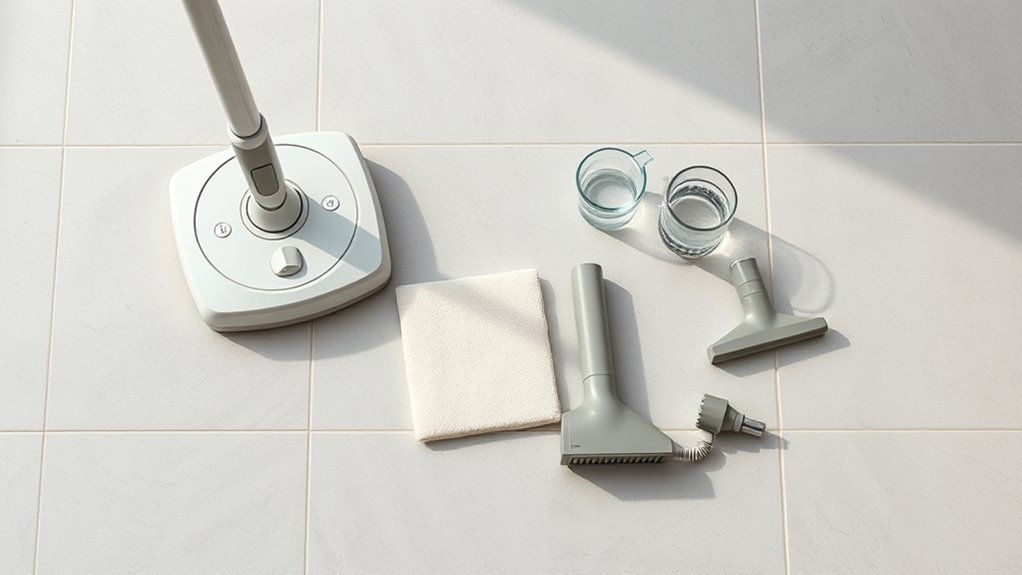
Essential Tools and Supplies (Mop, Brushes, Safety Gear)
When you’re prepping to steam clean tile, gather a reliable mop, a selection of brushes, and basic safety gear so the job goes smoothly and safely. You’ll want a microfiber mop head for lift and a stiff-bristle brush for grout.
Wear gloves, goggles, and non-slip shoes. Consider plant-based rinses after steaming for a gentle finish and note how steam aids air purification by reducing airborne irritants.
Keep a bucket, scrub brush, grout tool, and spare pads handy. Small comforts—knee pads, a timer—help you stay focused and finish with pride.
- Mop
- Brushes
- Safety gear
- Rinses
What Water and Attachments to Use for Tile Floors
Which water you use and which attachments you pick will make a big difference in cleaning power and finish. Use distilled or softened water if your area has high water hardness to prevent mineral buildup and protect seals. Check attachment compatibility with your steam cleaner—flat pads for sealed tile, nylon brushes for grout, and microfiber for shine. Match heat and nozzle size to tile type and grout depth to avoid damage.
| Surface | Recommended Water | Attachment |
|---|---|---|
| Glazed tile | Distilled | Microfiber pad |
| Porous grout | Softened | Nylon brush |
| Natural stone | Distilled | Low-heat nozzle |
Set Up Your Steam Cleaner Step by Step
First, pick the right attachments for grout, flat tile, or edges so you get effective contact and steam control.
Next, fill the water tank with distilled water to the indicated level and secure the cap.
Finally, plug in and power on the cleaner, letting it heat until the ready indicator shows it’s up to pressure.
Choose The Right Attachments
Because steam cleaners come with a variety of nozzles and brushes, you’ll want to match the attachment to the job before you plug it in. Pick a wide mop head for open areas, a small triangular brush for grout lines, and a nylon brush for textured tile patterns—rotate attachments as rooms and cleaning schedules demand.
Use a squeegee for glossy finishes to avoid streaks. Don’t force an attachment; it should glide.
- Relief — grout finally clean
- Pride — floor looks new
- Ease — less scrubbing
- Confidence — consistent results
Fill And Power On
After you’ve picked the right attachment, fill the tank with distilled water to the indicated level and secure the cap—don’t overfill.
Next, place the cleaner on a flat surface and plug it into a grounded outlet.
Use the Fill and Power controls per the manual: turn the power dial to the standby position, then engage the steam trigger once the ready light indicates proper pressure.
Observe Safety Precautions: wear gloves, keep children and pets away, and avoid pointing the nozzle at skin.
Test a small area to confirm steam output and temperature before proceeding with full-floor cleaning.
Room-by-Room Steam Cleaning Technique
When you tackle steam cleaning room by room, you’ll work more efficiently and avoid spreading dirt from one area to another. Plan a path that follows tile patterns and highlights color contrast so each sweep feels satisfying. Start at the far corner and move toward the exit, keeping slower passes over stubborn spots. Take short breaks to empty the mop pad and refresh steam.
Work room by room: follow tile lines, start at the far corner, slow over spots, refresh steam regularly.
Focus on one room until it looks uniformly clean before moving on.
- Anticipation — seeing grime lift feels rewarding.
- Relief — one clean room at a time.
- Pride — your tiles shine.
- Calm — steady routine soothes.
Clean Grout Lines Effectively With Steam
Start by pre-treating stubborn grout grime with a pH-neutral cleaner or a paste of baking soda and water so the steam can work faster.
Focus steam on one narrow section at a time, holding the nozzle close and using a brush attachment to agitate loosened dirt.
Wipe and rinse as you go to prevent residue from re-depositing.
Pre-Treat Stubborn Grime
If grout lines are caked with soap scum or mildew, you’ll get much better results by pre-treating before you steam—this loosens stubborn grime so the steam can lift it away instead of just softening the surface.
You’ll tackle grime buildup and stubborn stains faster if you follow a simple routine:
- Apply a pH-safe grout cleaner; let it dwell for 5–10 minutes.
- Scrub with a stiff brush to agitate embedded dirt.
- Rinse lightly to remove loosened debris, not all product.
- Blot excess moisture so steam can penetrate, then proceed to steam.
Targeted Steam Technique
Once you’ve pre-treated and loosened the grime, focus your steam cleaner right on the grout lines for best results. Hold the nozzle close, move slowly, and let short bursts of steam penetrate the grout without over-saturating the tile.
Scrub gently with a stiff brush where soot or mildew lingers, then wipe residue with a microfiber cloth. After drying, inspect for stains that need grout coloring to renew a uniform appearance.
If tiles look dull, apply a compatible tile polish sparingly, avoiding grout. Repeat spot treatments as needed, and protect cleaned areas by sealing grout according to manufacturer guidelines.
Handle Stubborn Stains and Sticky Residues
When steam alone won’t lift grime, tackle stubborn stains and sticky residues with targeted agitation and the right cleaning agents. You’ll focus on Stain removal and Residue elimination without overworking the tile.
Start with a soft scrub brush and pH-neutral cleaner; test hidden spot first. For really stubborn spots, apply a paste of baking soda and water, let sit, then scrub gently. Use a microfiber cloth to wipe away loosened grime and rinse.
Start with a soft brush and pH-neutral cleaner; test first. For stubborn spots, use a baking soda paste, scrub, then rinse.
- Feel relieved when the spot fades.
- Be confident as residue melts away.
- Smile at clearer tile.
- Enjoy a fresher floor.
Avoid Damaging Grout, Sealant, or Tile Finish
Keep your steam cleaner on a low setting and hold the nozzle several inches above grout and sealed areas so you don’t soften grout or strip finishes. Move steadily; don’t linger on one spot.
Test a hidden area first to confirm your tile polishing or sealant won’t dull. If grout looks crumbly, skip steam and repair before cleaning—steam can undermine grout sealing.
Use a soft microfiber cloth or pad to catch loosened dirt instead of abrasive scrubbing.
Finish by drying surfaces promptly to prevent moisture seeping into joints. Regular gentle care preserves both grout and tile shine without risking damage.
Use Steam Safely Around Cabinets and Baseboards
After protecting grout and finishes, you’ll want to pay the same attention to cabinets and baseboards—steam can warp wood, soften paint, or loosen adhesives if applied too close or held in place. Keep Cabinet safety and Baseboard protection in mind as you work. Use low steam settings near wood, maintain distance, and move continuously to avoid soaking.
If paint looks old or loose, skip steam nearby. For confidence and care, follow these steps:
- Test a hidden spot first.
- Use a narrow nozzle and low steam.
- Keep moving; don’t hover.
- Dry immediately with a soft cloth.
How Long to Steam and How Often for Maintenance
You’ll want to hold the steam mop over each tile for about 5–10 seconds to loosen grime without over-saturating grout.
For regular upkeep, steam once every 1–2 weeks in high-traffic areas and every 3–4 weeks elsewhere.
Adjust timing and frequency based on soil level and your floor’s condition.
Steam Duration Per Tile
A quick pass of about 5–10 seconds per tile is usually enough to lift dirt and sanitize without over-wetting grout; focus on moving the steamer steadily so steam loosens soil rather than sitting and soaking the tile. You’ll adjust for tile patterns and avoid exacerbating grout discoloration by pausing longer only on stubborn spots. Keep sessions short to protect sealants.
- Relief — stains vanish with steady motion.
- Confidence — consistent timing avoids damage.
- Pride — floors look renewed quickly.
- Calm — predictable rhythm makes cleaning easier.
Trust your eyes; increase time only when residue persists.
Maintenance Frequency Guide
Now that you’ve got the hang of timing each tile, let’s look at how often and how long you should steam-clean to keep floors in good shape without overdoing it. Tailor frequency to traffic, tile patterns, and grout colors. Low-traffic rooms: quick monthly passes. High-traffic or pet homes: weekly, deeper sessions. Sensitive grout: reduce heat, shorter cycles. Always test a small area.
| Area | Frequency | Steam Time per Tile |
|---|---|---|
| Low traffic | Monthly | 5–7 sec |
| Moderate | Biweekly | 7–10 sec |
| High traffic | Weekly | 10–15 sec |
| Grout-sensitive | Monthly | 3–5 sec |
Drying and Finishing: Get Streak-Free Results
While the steam does most of the cleaning, how you dry and finish the floor determines whether you’ll end up with streaks or a spotless shine. You want quick, consistent drying to preserve color patterns and protect tile durability. Follow this simple routine to feel pride in the result:
- Wipe immediately with a microfiber mop to lift moisture and prevent streaks.
- Use overlapping strokes toward a vent or door to guide drying.
- Buff high-gloss tiles with a dry cloth for extra shine.
- Inspect from different angles; touch up damp spots before they dry.
Finish calmly; the right technique makes your floor gleam.
When and How to Reseal Grout and Tile After Deep Cleaning
After a deep steam cleaning, you should reseal grout and porous tile within 24–72 hours once everything’s fully dry to lock out moisture and stains.
Reseal grout and porous tile within 24–72 hours after deep steam cleaning to lock out moisture and stains.
Inspect grout lines for chips or residue, then vacuum and wipe with a damp cloth.
Choose a penetrating grout sealing product for porous grout and a compatible sealant for your tile—some tiles need no sealant; others benefit from tile polishing products after sealing.
Apply sealant evenly with a small brush or applicator, let it penetrate, then wipe excess.
Cure time varies; avoid traffic until manufacturer-recommended drying time passes to guarantee lasting protection.
Clean and Maintain Your Steam Cleaner to Protect Tile Results
Keep your steam cleaner in top shape by following a regular descaling routine so mineral buildup won’t reduce heat and suction.
You should also clean and replace brushes and pads after each use to avoid transferring dirt back onto your tiles.
Doing these simple maintenance steps will protect your tile results and extend the life of your machine.
Regular Descaling Routine
Because hard water deposits and mineral buildup will shorten your steam cleaner’s life and reduce its effectiveness, you should descale it on a regular schedule. Use eco friendly solutions or safe chemical alternatives if needed; always check your manual first.
Empty water after each use, run plain vinegar or descaling mix through the system monthly, then flush with clean water until odorless. Wipe seals and nozzle openings; let parts air dry.
- Feel confident knowing buildup won’t ruin results.
- Save money by preventing failure.
- Protect tile performance you worked for.
- Keep cleaning simple and reliable.
Proper Brush And Pad Care
When you finish steaming, remove brushes and pads promptly and rinse them under warm water to prevent grime from hardening and abrading tile surfaces. Inspect for trapped debris that can scratch tile patterns or alter grout color. Air-dry components fully before storage to avoid mold and odors. Replace worn pads and stiff bristles to maintain even cleaning pressure. Store pads flat and brushes upright.
| Component | Action | Frequency |
|---|---|---|
| Pads | Rinse, wring, air-dry | After each use |
| Brushes | Remove debris, rinse | After each use |
| Filters | Inspect, replace | Monthly |
| Storage | Dry, ventilate | Always |
Troubleshoot Common Steam Cleaning Problems on Tile Floors
If your steam cleaner isn’t giving you the results you expect, troubleshooting likely fixes most issues quickly. Check pad condition and replace dirty pads to prevent streaks and poor color matching. Verify water quality and descale to restore steam pressure.
Confirm temperature and speed—move slower for stubborn grime. Inspect brushes and vents for clogs; clean them regularly. Seal grout after cleaning to lock in results and prevent stains.
Don’t over-saturate; tiles shouldn’t stay wet long. If performance still lags, consult the manual or manufacturer for parts and warranty help.
Choosing the Right Steam Cleaner for Tile Floors
Although you can buy many steam cleaners, choosing the right one for tile floors comes down to three essentials: steam pressure, tank capacity, and attachments.
Choosing a tile steam cleaner boils down to three essentials: steam pressure, tank capacity, and the right attachments.
You’ll pick pressure that suits tile patterns—delicate porcelain needs lower pressure, textured or heavily soiled stone can take higher.
Tank capacity determines runtime; larger tanks cover big rooms without refills, smaller ones suit quick touch-ups.
Choose attachments that match your floor layout and edges.
Consider weight and maneuverability so you’ll clean comfortably.
Also think about warranty and user reviews focused on tile performance.
Match the cleaner to your tiles and grout colors for best results.
Steam Cleaner Features That Matter for Grout Cleaning
When cleaning grout you’ll want a steam cleaner that gives you adjustable pressure so you can control how forceful the steam is.
Stable temperature matters too, since consistent heat breaks down grime more effectively without cooling off mid-clean.
Also check nozzle and brush compatibility so you can target narrow grout lines with the right attachments.
Steam Pressure And Control
How much steam you can deliver and how precisely you can control it make the biggest difference when cleaning grout. Higher pressure loosens embedded dirt while adjustable settings prevent damage to delicate tile or sealant. You’ll want clear Steam pressure indicators and intuitive Control settings so you can match force to grime.
Start low, increase gradually, and watch results. Emotional payoff comes from satisfying transformation and confidence in your tool.
- Relief — stubborn stains give way.
- Pride — grout looks renewed.
- Assurance — no accidental damage.
- Efficiency — less scrubbing, more time saved.
Steam Temperature Stability
Want consistent heat that actually loosens grime instead of wasting steam? You’ll want a cleaner with reliable steam temperature stability so heat stays constant across runs.
Stable temperature helps break down dirt and grease in grout without overheating, which can cause grout color fading or damage to sealants. Look for models with thermostatic control or feedback sensors that maintain set temps and recover quickly between passes.
When you move methodically, steady heat means fewer repeats and better results in grout lines. Consistent temperature also reduces water use and prevents cold spots that leave residue behind.
Nozzle And Brush Compatibility
Although steam and temperature matter, the tool that actually scrubs grout is the nozzle and brush head you attach, so pick ones that match your grout’s width, texture, and cleaning needs. You’ll want to confirm nozzle compatibility with your steamer model and test brush options on an inconspicuous area.
Tough, narrow grout benefits from a pointed nozzle and stiff nylon brush; softer grout needs softer bristles to avoid damage. Consider accessory length for reach and swivel for control.
Choose durable materials that tolerate heat and moisture so you don’t replace parts mid-job.
Steam Cleaning Tactics for Large Rooms and Odd Layouts
When you’re tackling a large room or an odd layout, break the space into manageable zones and clean one section at a time so you keep track of progress and avoid re-soiling already-cleaned tile.
Start along natural lines—rows, furniture edges, or tile patterns—and work toward an exit to avoid stepping on wet tile.
Use smaller tools for corners and around fixtures, and a wider head for open areas to save time.
Adjust steam intensity for grout color and soil level, testing inconspicuously.
Take short breaks to rinse pads and change water so each zone gets consistent, effective steam cleaning.
Steam Cleaning Specialty Tiles: Stone, Encaustic, Porcelain
Curious how steam cleaning changes with specialty tiles? You’ll adapt technique for stone, encaustic, and porcelain to protect color variation and tile durability. Test a hidden spot first; adjust temperature and suction.
- Stone: use low heat; avoid etching and preserve natural tones.
- Encaustic: gentle passes only; protect painted patterns from fading.
- Porcelain: higher heat’s okay; still watch grout edges.
- Sealed vs. unsealed: sealed tiles tolerate steam better; unsealed need extra caution.
You’ll move slowly, blot spills, and re-seal stone or encaustic when recommended to maintain longevity and appearance.
Combining Steam With Eco-Friendly Cleaning Solutions
If you want to boost cleaning power without harsh chemicals, pair steam with green cleaners designed for tile and grout; they cut grease and lift soils that steam loosens while keeping fumes and residues low.
You’ll choose eco-friendly solutions labeled pH-neutral or biodegradable, dilute per directions, and test a small area first.
Apply the cleaner before steaming to break down grime, then follow with steam to sanitize and flush loosened dirt.
Apply a green cleaner first to loosen grime, then steam to sanitize and rinse away the debris.
For stubborn grout, use a brush with a mild eco cleaner plus targeted steam.
These chemical alternatives help protect finishes, indoor air, and your family.
Quick Checklist for a One-Hour Steam Clean
Because you’ve already prepped the room and chosen your eco-friendly cleaner, this quick checklist will keep you on track to finish a thorough steam clean in about an hour; follow each step in order and set a timer for pacing. Begin confident, knowing your tiles’ color patterns will pop when you’re done. Then:
- Vacuum and spot-treat stains, focusing on grout lines.
- Pre-steam mop to loosen dirt, working in sections.
- Steam with slow passes, rinse microfiber pad frequently.
- Inspect, dry, and apply grout sealing where needed to protect results.
You’ll finish energized, proud of the gleaming floor.
Estimate Time and Cost for DIY Steam Cleaning
A 1,000–square-foot room will typically take you 45–90 minutes to steam clean start to finish, depending on how dirty the tiles and grout are and whether you’re doing prep like vacuuming, spot-treating, and grout sealing; plan on about an hour for an average kitchen or bathroom. For Time estimation, factor prep, steaming, drying, and minor repairs. For Cost analysis, include machine rental or purchase, pads, cleaners, and electricity.
| Item | Low cost | High cost |
|---|---|---|
| Machine | $0 (rental) | $250 (buy) |
| Pads/cleaner | $5 | $30 |
| Time (hr) | 0.75 | 1.5 |
When to Call a Professional for Tile Steam Cleaning
When grout is crumbling, stains won’t lift, or the tile surface looks pitted, call a professional—these issues often need specialized tools, stronger cleaning agents, or repair skills you probably don’t have.
You should also hire help if moisture damage, mold, or extensive discoloration appears, or if you’re unsure about sealed surfaces.
Consider pros when pricing strategies matter; contractors can give warranty-backed results and avoid costly mistakes.
Keep DIY tips for routine upkeep, not major restoration.
Decide based on risk, cost, and time—hire someone when the job exceeds your comfort or could worsen the damage.
- Fear
- Relief
- Trust
- Pride
Frequently Asked Questions
Can Steam Cleaning Remove Mold and Mildew Deep in Grout?
By and large, you won’t fully remove deep mold and mildew from grout discoloration with steam alone; you’ll loosen surface growth yet risk grout surface damage, so you’ll need scrubbing, specialty cleaners, or grout replacement for thorough remediation.
Is Steam Safe on Radiant-Heated Floors?
Yes — you can use steam on radiant-heated floors if you check manufacturer guidelines first. You’ll protect floor safety and heating compatibility by using low-pressure steam, short passes, and avoiding saturated water near seams or exposed components.
Will Steam Cleaning Void My Flooring Warranty?
Possibly — check your warranty; manufacturers often forbid steam cleaning because it can affect floor polishing finishes and void grout sealing guarantees. You’ll want written approval or use approved cleaners to keep your coverage intact.
Can Pets Be in the Room During Steam Cleaning?
No, you shouldn’t keep pets in the room during steam cleaning; you’ll protect pet safety by removing them. Use steam cleaning precautions, ventilate afterward, secure pets elsewhere, and avoid exposing them to heat, steam, or cleaning residues.
How Long Must Rooms Be Ventilated After Steaming?
You should ventilate rooms for 30–60 minutes to restore air quality; ventilation duration depends on steam intensity and room size, so keep windows and fans on, and extend airing if odors or humidity persist.
Conclusion
You’ve got the know-how to refresh tile and grout quickly and safely—why not try it today? Steam cleaning beats mopping for deep, chemical-free results on most ceramic and porcelain tiles, and a little prep keeps problems away. If grout’s badly crumbling or tiles are fragile, call a pro. Otherwise, follow the steps, use eco-friendly boosts, and enjoy cleaner floors with less effort—faster than you think and kinder to your home.