How to Install Peel and Stick Tile on a Wall (That Will Actually Stay)
You can make peel-and-stick tile stick for years if you prep, plan, and install right. Start by choosing wall-rated tiles and a smooth, clean, dry surface. Repair damage, sand glossy paint, and prime porous areas. Lay out centerlines, dry-fit tiles, and cut for edges. Peel backing gradually, press from center outward, and roll seams firmly. Seal exposed edges and let adhesive cure. Keep going to get step-by-step tips, tools, and troubleshooting you’ll need.
Quick Answer Can Peel and Stick Tile Be Installed on a Wall and Stay?
Yes — peel-and-stick tile can stay on a wall if you prepare the surface and choose the right product.
You’ll get the best results on clean, smooth, non-porous surfaces like painted drywall, existing tile, or backer board and in low- to moderate-moisture areas.
Avoid textured surfaces, high-humidity zones without proper ventilation, or crumbling substrates that won’t hold the adhesive.
One-sentence summary of viability and conditions for success
If your wall is smooth, clean, dry, and free of loose paint or wallpaper, peel-and-stick tile will adhere and last well; however, you’ll need to prep the surface, choose tiles rated for walls, and avoid high-moisture or uneven substrates for best results.
When you learn how to install peel and stick tile on wall, follow manufacturer instructions, use proper tools, and press tiles firmly to guarantee long-term hold.
What surfaces and situations work best
Most smooth, clean, and dry walls—like painted drywall, plaster, and properly primed cement board—will hold peel-and-stick tile long-term when you prep them and use products rated for walls.
You should avoid textured, damp, or oily surfaces and pick tiles suited for vertical use.
- Smooth painted drywall
- Primed cement board or plaster
- Avoid textured, wet, or greasy walls
Basic Understanding What Peel and Stick Tile Is and Why Use It
Peel-and-stick tile is a thin, self-adhesive sheet made from materials like vinyl, PVC, or metal-look laminates that you can stick directly onto clean, smooth surfaces.
It’s faster and cheaper than traditional ceramic or porcelain tile, but it isn’t as durable or heat-resistant and can show seams or lift over time.
You’ll often use it for backsplashes, accent walls, or low-moisture areas, though it’s less suited for high-traffic floors or consistently wet locations.
Definition and common materials (vinyl, PVC, metal-look)
Although it looks like traditional tile, peel and stick tile is a thin, self-adhesive flooring or wall covering that you simply peel from a backing and press into place.
You’ll find vinyl and PVC options offering flexibility, water resistance, and printed patterns. Some mimic stone or ceramic; metal-look panels give industrial shine.
Choose based on durability, thickness, and adhesive strength for your wall.
Pros and cons compared with traditional tile
Now that you know what peel and stick tile is and the materials it’s made from, you’ll want to weigh how it stacks up against traditional tile.
You’ll decide based on cost, install effort, and durability trade-offs.
- Cheaper upfront, faster DIY install.
- Less durable, easier to replace.
- Lighter, needs smoother substrate; limited heat resistance.
Typical use-cases and limitations (backsplash, accent walls, moisture areas)
You’ll find peel and stick tile works best for quick cosmetic updates like backsplashes and accent walls where appearance matters more than heavy wear.
You can refresh kitchens, laundry rooms, or rental spaces without demolition. Avoid high-moisture zones or shower stalls unless product specifies waterproof rating and proper sealing.
Expect limited longevity under heavy heat, steam, or constant abrasion; plan accordingly.
Before You Start Assessment and Planning
Before you peel any tiles, you’ll want to inspect the wall to confirm the surface is smooth, clean, and suitable for adhesive.
Gather the tools and materials on a checklist, then measure the area, plan your layout and mock up patterns to avoid surprises.
Calculate how many tiles you’ll need, adding a waste allowance for cuts and any damaged pieces.
Inspect and prepare the wall: surface types and suitability
Start by checking what kind of wall you’ve got and whether it’s suitable for peel-and-stick tile: smooth, clean, dry, and structurally sound surfaces like painted drywall, plywood, or existing ceramic tile usually work best, while textured plaster, wallpaper, glossy surfaces, and damp or crumbling walls will need repair or an alternate underlayment.
Inspect for level, contamination, and moisture.
- Levelness: high/low spots.
- Clean: grease, dust.
- Moisture: damp, leaks.
Tools and materials checklist
Checklist time: gather the right tools and materials so your peel-and-stick tile project goes smoothly.
You’ll need basics for prep, cutting, and installation. Keep everything handy and organized to avoid delays and mistakes.
- Utility knife, straightedge, tile cutter, sanding block.
- Primer/cleaner, caulk, seam sealer, painter’s tape.
- Level, measuring tape, pencil, rubber roller, rags.
Measuring, layout planning, and pattern mockup
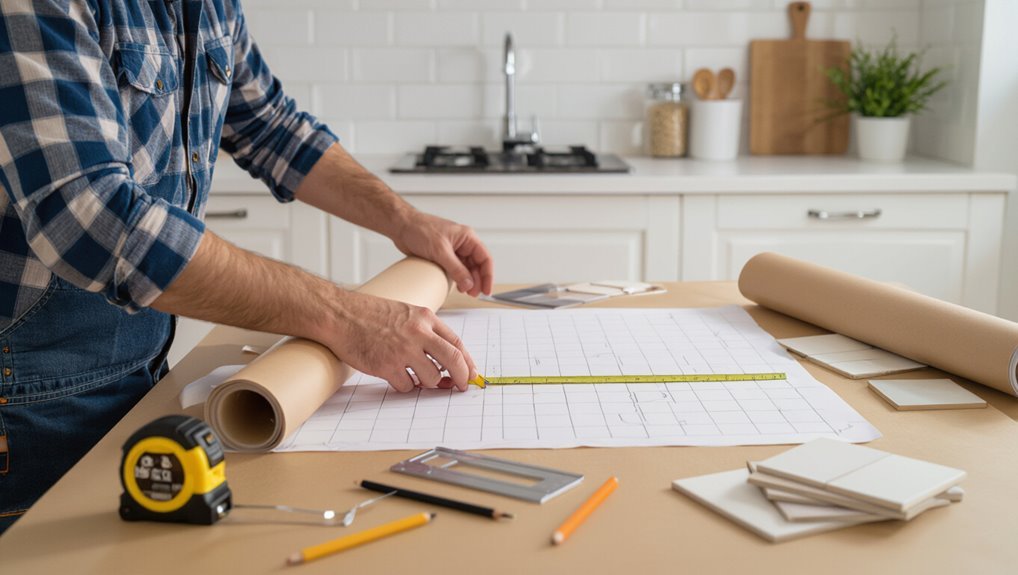
With your tools staged and the surface prepped, measure the room carefully to create an efficient tile layout plan.
Mark centerlines and sightlines on the wall, note outlets, switches, and seams.
Dry-fit tiles on a board or the wall to test pattern alignment and edge cuts.
Adjust spacing so focal areas use full tiles and minimize narrow slivers at visible edges.
How to calculate tile quantity and allow for waste (cutting, damaged tiles)
Before you buy tiles, calculate how many you’ll need and add a waste allowance so you don’t run short once cutting and accidental damage are factored in.
Measure wall area (height × width), subtract openings, then divide by tile area to get required count.
Add 10–15% for straight runs; use 15–20% for intricate patterns or lots of cuts.
Round up and buy extra.
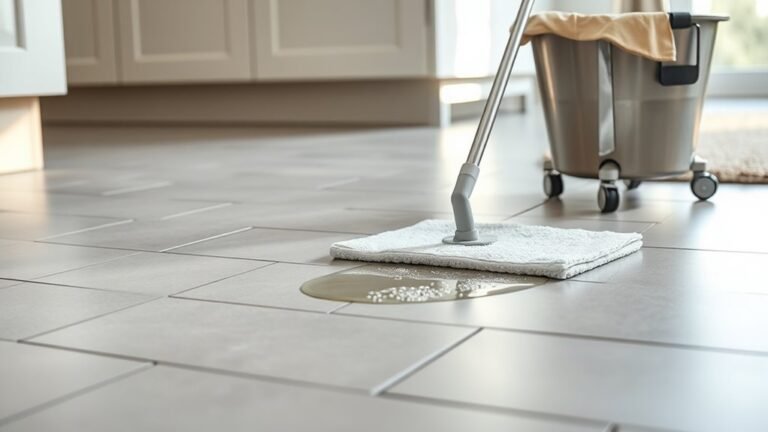
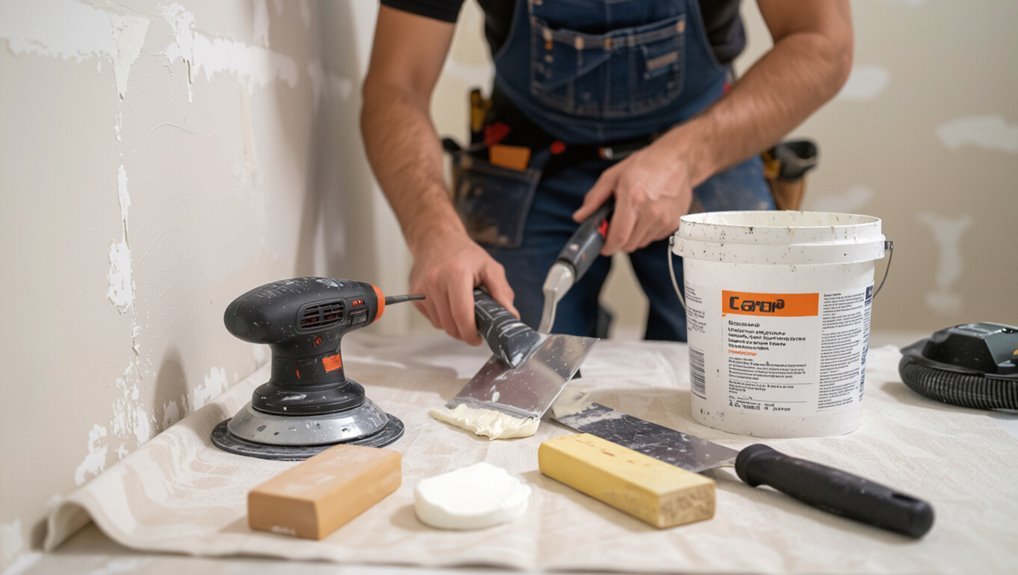
Surface Preparation Making the Wall Ready to Bond
Before you stick tiles up, you’ll need to clean the wall thoroughly—remove grease, dust, mold, and any soap residue so the adhesive can grip.
Patch holes, fix cracks or loose drywall, and sand or skim any textured areas until the surface is smooth.
If the wall is porous or uneven, apply the appropriate primer, spackle, or a thinset alternative to level and seal it for a strong bond.
Cleaning steps: grease, dust, mold, and soap residues
A clean, contaminant-free surface is essential for peel-and-stick tile to bond properly, so start by removing grease, dust, mold, and soap scum from the wall area you’ll cover.
Wipe with a degreaser, rinse, then dry.
Use diluted bleach or mold remover on mildew, scrub gently, rinse thoroughly, and let air-dry.
Finish with a lint-free cloth to remove any remaining dust.
Repairing common wall problems: holes, cracks, loose drywall
Start by inspecting the area and mark any holes, cracks, or sections of loose drywall so you know exactly what to fix. Small nail holes and hairline cracks can be filled with spackle, larger gaps need joint compound or backing, and loose or sagging drywall must be re-secured or patched before you apply adhesive tiles.
Remove loose debris, sand smooth, fasten loose panels, and verify repairs are flush and dry.
Priming and leveling: when to use primer, spackle, or thinset alternatives
One clear rule will save you time: choose primer when the surface is porous or painted with low-adhesion finishes.
Use spackle or joint compound to fill small depressions and smooth seams, and turn to thinset or patching mortars for larger gaps or uneven substrates that need a true bedding layer.
Clean first, sand glossy spots, apply primer sparingly, feather spackle, and let cure fully before tiling.
Dealing with textured surfaces and the need for smoothing
If your walls have a textured finish, you’ll need to decide whether to remove or smooth that texture before applying peel-and-stick tile, because tile requires a flat, stable surface to bond properly.
Light orange peel can be sanded or skim-coated; heavy popcorn or knockdown should be removed or fully covered with backer board or drywall patch.
Clean, prime, and confirm firmness before sticking.
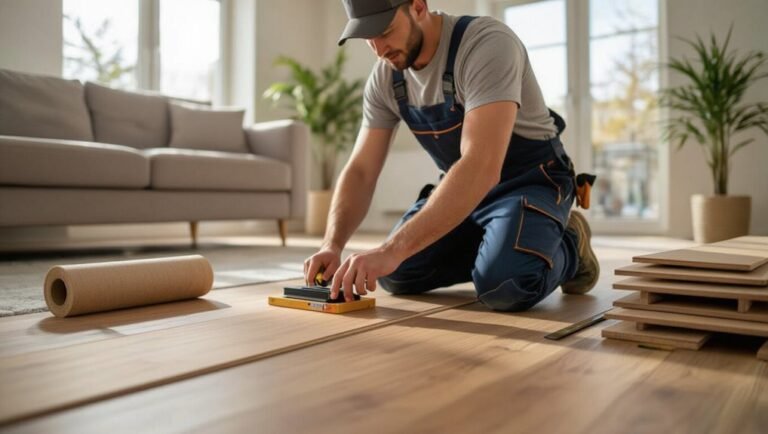
Step-by-Step Installation
Start by doing a dry layout and marking center and level lines so your tiles align from the beginning.
Cut pieces accurately with the right tools, then peel and apply each tile using firm pressure, staggered seams, and careful alignment.
Finish by fitting trim, corners, and outlets, then roll, seal edges, and caulk any wet areas.
Step 1 Dry layout and mark guidelines (center lines, level line)
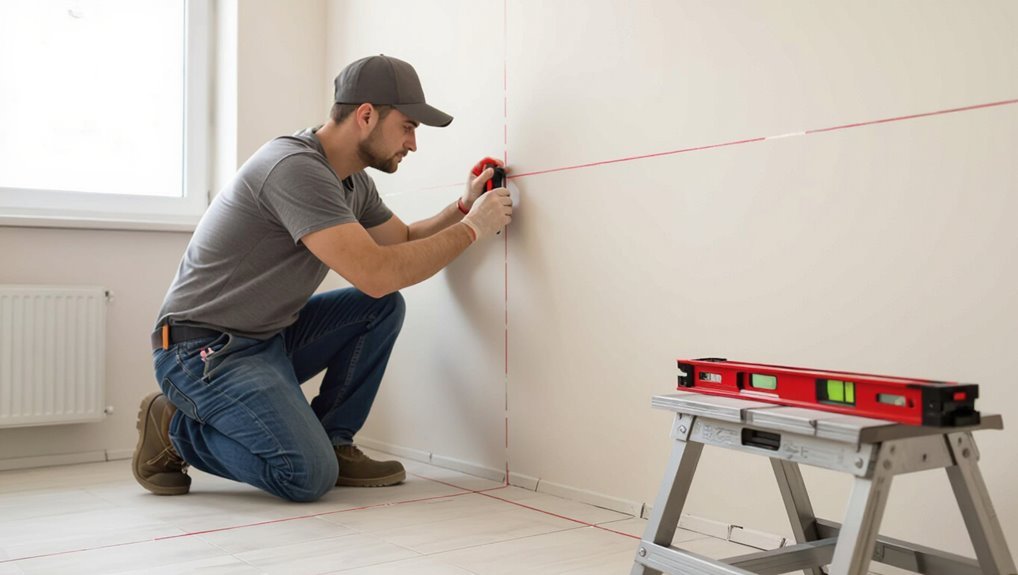
Begin by dry-laying a few tiles from the center toward the walls so you can see how the pattern fits and where cuts will fall.
Mark a vertical center line with a pencil, then snap a level line for your first row.
Use those guides to align each tile as you stick them, keeping seams straight and spacing consistent across the wall.
Step 2 Cutting tiles accurately: tools and techniques
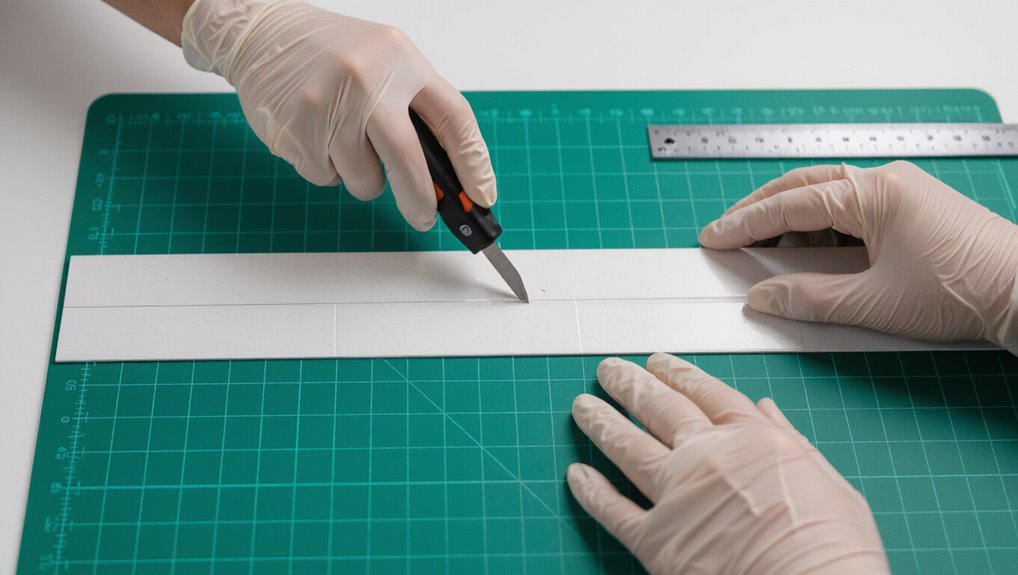
One clear-cut way to get neat edges is to use the right tool for each material: a sharp utility knife and straightedge for vinyl-backed peel-and-stick tiles, a scoring tool and snap for thin porcelain-look tiles, and a wet tile saw or diamond blade shears for tougher ceramic or stone-look options.
Measure, mark pieces, support them firmly, cut slowly, and sand or file edges for a precise fit.
Step 3 Applying tiles: peel technique, pressure patterns, and seam alignment
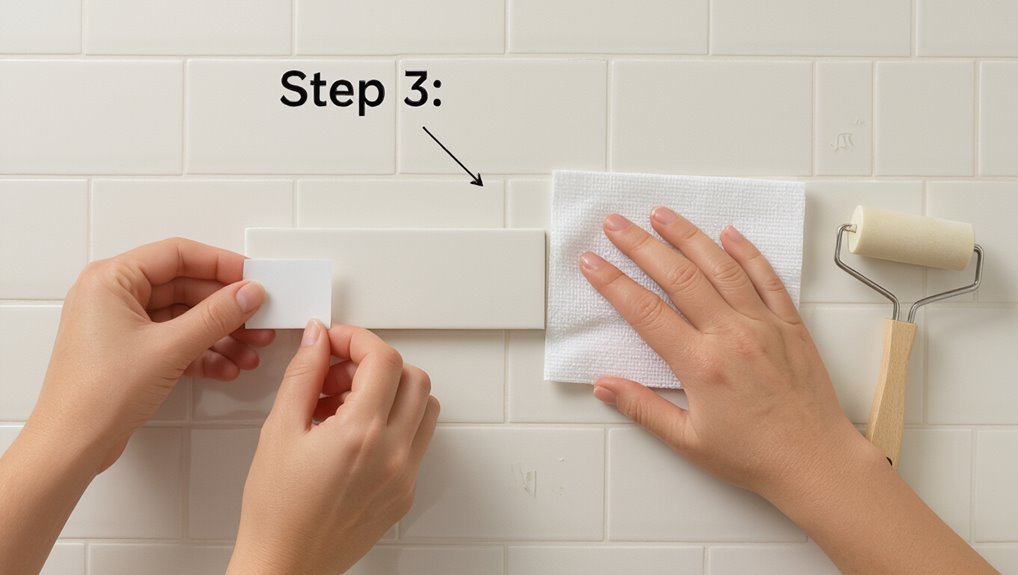
With your cuts fitted and edges smoothed, you’re ready to apply the tiles to the floor.
Peel backing gradually, aligning seams tightly and keeping grout lines consistent. Press from center outward with firm, even pressure to eliminate air pockets.
Use a roller or palm to bond edges. Check alignment frequently and adjust before adhesive sets to maintain straight, continuous rows.
Step 4 Handling edges, outlets, corners, and trim pieces
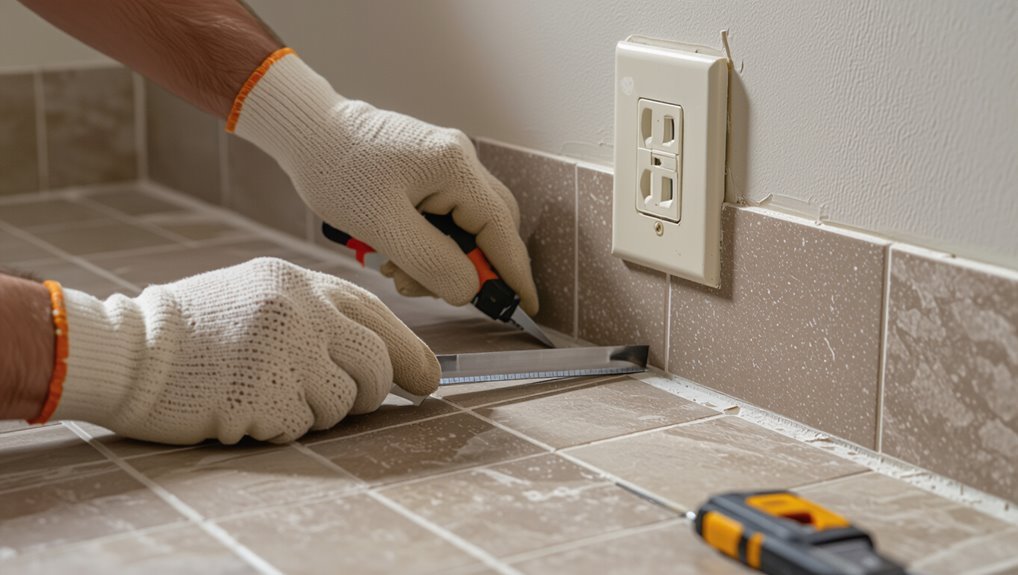
When you reach walls, doorways, outlets, or inside corners, measure carefully and cut tiles so edges sit snug against trim and baseboards; trim or undercut baseboards as needed to tuck tiles underneath for a clean finish.
For outlets and switches, turn power off, remove covers, cut holes slightly oversized, and test-fit.
For outside corners, miter or overlap tiles neatly and use trim pieces for protection and aesthetics.
Step 5 Finishing touches: rolling, edge sealing, caulking for wet areas
Press a floor roller or hand roller firmly across each tile to guarantee full contact with the adhesive, then inspect and seal any exposed edges—tuck trim or apply edge sealant where tiles meet cabinets, thresholds, or walls.
Run silicone caulk in showers or other wet zones to prevent water intrusion and keep seams flexible. Smooth caulk bead, wipe excess with a wet finger, and let joints set.
Step 6 Curing time and initial care after installation
After sealing edges and smoothing the caulk, let the tiles set undisturbed so the adhesive can cure properly; you’ll typically wait 24–48 hours before light foot traffic and up to 72 hours for heavy loads or rolling furniture.
Protect the area from moisture and direct heat, avoid cleaning with harsh chemicals for a week, and handle seams gently until the adhesive achieves full strength.
Troubleshooting and Common Problems
If you run into trouble, check common causes like poor adhesion, bubbles or wrinkles, and cuts or chips from handling.
You can often fix adhesion by cleaning and priming the substrate, smooth bubbles or realign tiles while adhesive is still tacky, and patch or replace pieces damaged during cutting.
For high‑moisture areas, seal seams, use a moisture‑rated primer or underlayment, and consider tiles rated for wet environments.
Adhesion failures: causes and fixes
While peel-and-stick tiles make DIY flooring faster, adhesion failures are one of the most frustrating problems you’ll face — and they usually point to surface, environmental, or product issues you can fix.
Check substrate cleanliness, dryness, and smoothness; remove paint, grease, or loose mortar.
Control temperature and humidity, use recommended primers or stronger adhesives, press tiles firmly, and replace defective tiles or batches.
Bubbles, wrinkles, and misalignment: how to correct during and after install
When you spot bubbles, wrinkles, or misaligned tiles during installation, act quickly to prevent permanent defects and ease corrections. Small air pockets and shifts are usually fixable on the spot, but larger problems may require partial lifts or reinstallation.
Press out small bubbles toward the edge with a squeegee. Lift and relayout misaligned tiles, and re-adhere edges using firm pressure and a low-heat hair dryer.
Damage during cutting or handling: repair options
Small fixes like pressing out bubbles or reheating edges help during install, but handling and cutting introduce different risks that need their own fixes.
If chips or nicks appear, trim jagged edges with a sharp utility knife and sand lightly.
For missing corners, glue a small matching scrap underneath, press, and seal seams with color-matched caulk.
Replace seriously damaged tiles.
Issues in high-moisture areas and how to mitigate them
If you’re installing peel-and-stick tile in bathrooms, laundry rooms, or other damp spots, moisture can loosen adhesive, warp backing, and promote mold unless you take steps to protect the substrate and seams.
Prime and seal drywall or cement board with a waterproof membrane, use mold-resistant adhesive where recommended, caulk all edges and joints, guarantee ventilation, and avoid direct water spray on the tiles.
Best Practices and Professional Tips for a Lasting Install
For a lasting peel-and-stick tile job, you’ll want to use the right primer or adhesive on challenging substrates and pay attention to temperature and humidity during installation.
Keep maintenance simple—use gentle cleaners, protect high-traffic areas, and know how to remove and replace damaged tiles.
If the subfloor is unstable, surfaces are irregular, or the layout is complex, call a pro instead of risking a costly redo.
Recommended adhesives or primers for difficult surfaces
When you’re facing slick, dusty, or porous substrates, choosing the right adhesive or primer makes the difference between a temporary fix and a lasting install.
You’ll want primers that promote bonding and adhesives rated for nonporous or irregular surfaces.
- High-bond acrylic primer for slick tile or glass.
- Penetrating masonry primer for porous concrete or plaster.
- Hybrid or MS polymer adhesive for challenging, flexible bonds.
Temperature and humidity considerations during installation
After choosing the right primer or adhesive for slick, dusty, or porous surfaces, pay close attention to temperature and humidity—both directly affect adhesive cure, tack, and long-term bond strength.
Work when room temperature stays within the product’s recommended range (usually 50–80°F) and humidity is moderate. Avoid installing during rapid swings, heavy rain, or drying heat.
Let tiles acclimate before sticking.
Long-term maintenance: cleaning, avoiding damage, and replacement tips
Although peel-and-stick tiles are low-maintenance, you’ll get the longest life by cleaning gently, preventing gouges and heat damage, and planning for modest touch-ups over time.
You should wipe spills quickly with mild soap, avoid abrasive pads, and keep heat sources and sharp objects away.
Replace individual tiles when edges lift to prevent moisture.
- Clean gently
- Prevent physical/heat damage
- Replace as needed
When to call a pro vs. DIY
Wondering whether you can handle the job yourself or should hire a pro? If your surface is flat, clean, and small, you can DIY confidently.
Call a pro for large walls, uneven substrates, moisture-prone areas, or intricate patterns needing precise cuts.
Hire one if you lack tools, time, or experience with preparation and sealing—prevention beats costly fixes.
Comparison Peel-and-Stick vs. Alternatives
When choosing peel-and-stick over ceramic or porcelain, you’ll trade the latter’s long-term durability and grout look for faster, easier installation.
Compared with solid surface or laminate panels, peel-and-stick is usually cheaper and simpler to replace but won’t match thickness or seamless edges.
We’ll compare cost, durability, and appearance so you can pick the right material for your space.
Peel-and-stick vs. ceramic/porcelain tile
If you’re weighing peel-and-stick against ceramic or porcelain tile, focus on how each option fits your room, budget, and skill level. You’ll choose peel-and-stick for quick, low-cost updates and lighter prep; pick ceramic/porcelain for durability, heat resistance, and resale value despite higher cost and labor.
| Peel-and-Stick | Ceramic/Porcelain |
|---|---|
| Quick install | Long-lasting |
| Low cost | Higher cost |
| Easier DIY | Professional work |
| Less durable | Highly durable |
| Lightweight | Heavy, permanent |
Peel-and-stick vs. solid surface and laminate panels
Beyond comparing peel-and-stick to ceramic or porcelain, you’ll also want to weigh it against solid surface and laminate panels, since those options often target the same quick-update market. You’ll choose based on installation speed, cutting ease, and repairability. Panels often cover seams; peel-and-stick lets you customize patterns.
| Feature | Peel-and-Stick | Panels |
|---|---|---|
| Install speed | Fast | Fast |
| Cutability | Easy | Moderate |
| Repairs | Spot | Section |
Cost, durability, and appearance trade-offs
Cost often drives the choice between peel-and-stick and other surfaces, but durability and appearance quickly shift the balance depending on your needs.
You’ll save money and install fast with peel-and-stick, but expect lower impact resistance and potential fading.
Consider long-term value vs. upfront cost before choosing.
- Peel-and-stick: cheap, easy, less durable
- Laminate: mid-cost, better durability
- Solid surface: costly, longest-lasting
Mistakes to Avoid
Don’t skip prepping the surface — dirt, grease, or uneven spots will make tiles fail.
Measure and lay out carefully instead of rushing or cutting corners, and use the right tools and cutting methods for clean edges.
Also don’t install peel-and-stick in outdoor or high-steam areas where adhesive and backing won’t hold up.
Skipping surface prep
Skipping surface prep is one of the quickest ways to ruin a peel-and-stick tile job because the adhesive needs a clean, dry, and smooth base to bond properly.
Don’t stick over dust, grease, old caulk, or textured paint. Clean, degrease, sand high spots, and fill holes.
Let surfaces fully dry before applying tiles so they’ll adhere and stay put long term.
Rushing layout or mis-measuring
If you rush the layout or mis-measure, you’ll quickly end up with uneven seams, awkward cuts, and wasted tiles that make the whole job look amateurish.
Take time to measure walls, mark stud lines, and plan full and edge tiles.
Dry-fit a few rows, establish a centered starting line, and recheck measurements before peeling adhesive to avoid costly mistakes.
Using wrong tools or cutting methods
Anyone can botch a peel-and-stick install by using the wrong tools or cutting methods, but you can avoid that by equipping yourself with the right gear and simple techniques.
Use a sharp utility knife, straightedge, and fine-tooth tile saw or snap cutter for precision. Score and snap thin tiles; slow, steady cuts prevent chipping. Keep blades fresh and measure twice before cutting.
Installing in unsuitable environments (outdoor or high-steam areas)
After you’ve got the right tools and cutting technique, don’t ruin the job by installing peel-and-stick tile where it won’t hold up.
You shouldn’t install these tiles outdoors or in constantly steamy rooms like unvented showers. Adhesive breaks down with UV, temperature swings, and moisture.
Choose proper waterproof, exterior-rated materials or improve ventilation and substrate prep; otherwise tiles will peel, warp, or mold.
Project Examples and Scenarios
You can tackle a quick backsplash refresh in an afternoon—I’ll note key steps and a realistic time estimate so you know what to expect.
For a living-room accent wall, I’ll cover pattern choices and simple design tips to make the layout pop without overcomplicating installation.
If you’re in a rental, I’ll explain temporary install techniques and removal considerations to protect the underlying surface.
Small backsplash refresh step highlights and time estimate
When you want a quick kitchen pick-me-up, a small backsplash refresh with peel-and-stick tile can usually be done in a single afternoon—about 2–4 hours for a 3–6 square foot area—assuming the wall is clean, flat, and free of peeling paint.
Prep includes cleaning, sanding, and priming. Measure and dry-fit tiles, cut as needed, peel and press, then seal edges and grout lines where recommended.
Accent wall in living space pattern and design tips
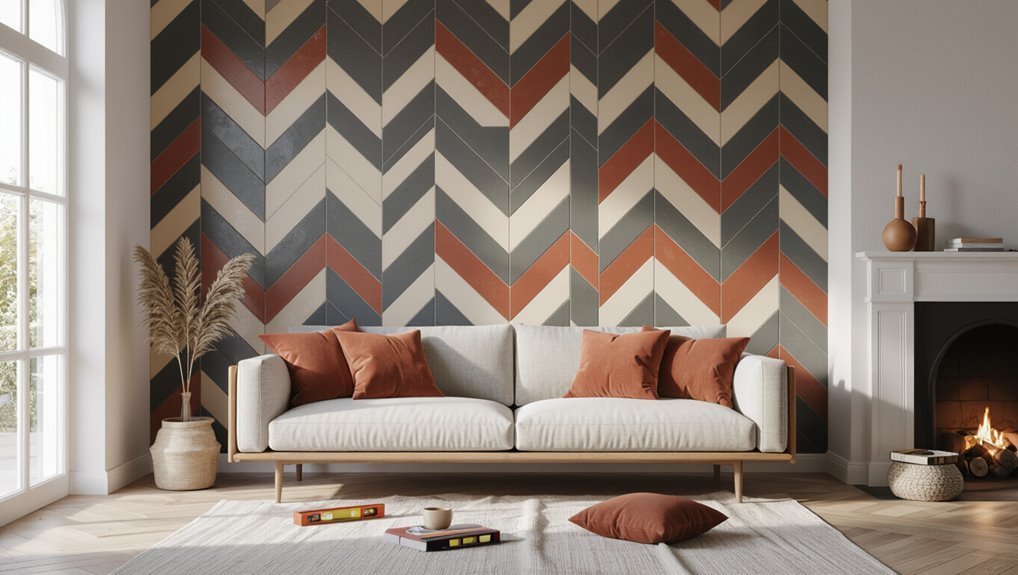
If a small backsplash gave your kitchen a fresh look, try the same peel-and-stick approach to create an eye-catching accent wall in a living space—it’s a bold upgrade that you can complete in a weekend.
Choose a focal area, pick contrasting grout and tile colors, and test patterns (herringbone, vertical stack, staggered).
Plan layout, measure precisely, and work from a centered starting line for symmetry.
Rental-friendly temporary installs and removal considerations
Because peel-and-stick tiles peel away cleanly and don’t require mortar, they’re one of the easiest temporary upgrades you can add to a rental without risking your deposit.
Prep surfaces, test a small area, and use low-tack adhesive or removable mounting strips for extra security.
Keep records of original walls, remove tiles slowly at room temperature, and clean residue with adhesive remover to avoid damage.
FAQ
You probably have questions about lifespan, placement, and care for peel-and-stick tile, like how long it lasts on a wall and whether it’s safe behind a stove or in a shower.
You’ll also want to know if removing it will damage walls, how to fix tiles that lift, and whether you can paint or grout it.
Below are clear answers to those common concerns.
How long does peel-and-stick tile last on a wall?
Wondering how long peel-and-stick tile will last on your wall? With proper prep, clean smooth substrate, and moderate humidity, expect 10–15 years of good performance for quality vinyl tiles.
Lifespan shortens with poor adhesion, high moisture, or heavy wear. You can extend life by sealing edges, avoiding direct heat, and repairing lifts promptly to prevent peeling and dirt buildup.
Can I use peel-and-stick tile behind a stove or in a shower?
Can you use peel-and-stick tile behind a stove or in a shower? You can in low-heat, splash-prone areas if the product’s rated for high temperatures and moisture.
Use heat- and water-resistant tiles, proper wall prep, waterproof seams, and high-temp caulk or trim.
Avoid direct flame, continuous steam, or wet zones unless manufacturer specs explicitly allow such exposure to prevent failure and safety hazards.
Will peel-and-stick tile damage my wall when removed?
If you’ve installed peel-and-stick tile near heat or moisture, you’ll also want to know what happens when it comes off.
You might get light adhesive residue, paint lifting, or damaged drywall paper if removal’s aggressive.
Peel slowly at a low angle, use heat and adhesive remover, then sand and spot-prime.
Proper technique minimizes harm, but delicate surfaces can need patching.
How do I fix a tile that lifts after a few weeks?
What should you do when a peel-and-stick tile starts lifting after a few weeks?
Gently peel it off, clean adhesive residue and wall with rubbing alcohol, let dry, and check for moisture or contamination.
Apply a strong construction adhesive or replacement peel-and-stick tile backing, press firmly, and weight while curing.
Seal edges with clear silicone if edges keep lifting.
Can I paint or grout peel-and-stick tile?
Curious about altering peel-and-stick tile? You can paint certain tiles if the manufacturer says it’s safe—clean, scuff with fine sandpaper, prime with an adhesion primer, then use a durable latex or enamel.
You can grout faux joints for a sealed look using sanded non-sanded grout? Use flexible caulk instead for movement.
Test a small area first and follow product instructions.