How to Install a Frameless Glass Shower Door on Tile: A Precise Guide
You can install a frameless glass shower door on tile if your walls and curb are plumb and sound; measure jamb-to-jamb and height, choose tempered 3/8″ or 1/2″ glass, heavy-duty hinges or channel, and proper anchors. Prep by cleaning, repairing tiles, and dry-fitting guides, then drill with a carbide tile bit, shim for plumb, silicone-seal all seams, and lift panels with suction cups and help. Follow manufacturer specs and safety steps, and learn the detailed sequence and tips next.
Can You Install a Frameless Glass Shower Door on Tile and How Long It Takes
You can install a frameless glass shower door on tile if the walls are plumb and you have the right tools—glass clamps, a level, a drill with tile bits, anchors, and silicone.
Expect a careful DIY install to take a full day for preparation and hanging, while a pro can usually finish in a few hours with less risk.
Hire a pro if your tile is uneven, the opening needs shimming, or you’re uncomfortable handling heavy glass and precise measurements.
Short summary of feasibility, tools, and estimated time
Although attaching a frameless glass shower door directly to tile takes careful preparation, it’s entirely feasible if the tile and substrate are sound and you use the right anchors and silicone.
For how to install frameless glass shower door on tile, you’ll need a drill with masonry bits, level, anchors, silicone, shims, and safety gear.
Expect 4–8 hours for a single-door install.
When to hire a pro versus DIY
If your tile and wall substrate are in good shape and you’re comfortable drilling into masonry, installing a single frameless shower door on tile is a doable weekend project that typically takes 4–8 hours.
Hire a pro if the tile is cracked, the substrate is suspect, the opening isn’t square, or you’re facing heavy glass panels, plumbing rerouting, or local code requirements.
You should hire help for complex layouts, structural repairs, or precise glass handling; DIY when you have solid walls, proper tools, steady hands, and clear measurements.
Basic Understanding What Is a Frameless Glass Shower Door and Why Choose It
A frameless glass shower door is a thick, tempered glass panel or panels hung with minimal hardware so you don’t have the bulky metal frame of traditional doors.
You’ll get a cleaner, more open look that shows off tile, is easier to wipe down, and can be engineered to contain water when installed properly.
However, frameless doors need precise walls and floors and may not suit poor tile conditions, budget constraints, or bathrooms that require extra sealing for leaks.
Definition and key features of frameless glass doors
Think of a frameless glass shower door as a clean, minimalist barrier that uses thick tempered glass and discrete hardware instead of bulky metal frames.
You’ll get continuous sightlines, custom sizing, and hinge- or patch-fitted pivots. Seals and drip rails manage water; glass thickness (typically 3/8″–1/2″) and edge polishing guarantee strength and safety.
Installation needs precise measurements and sturdy anchoring.
Benefits for tiled showers (aesthetics, maintenance, water containment)
Moving from the technical build of frameless doors to how they perform with tiled showers, you’ll find several clear advantages.
You’ll enjoy a seamless, modern look that highlights tile patterns and grout. Smooth glass cuts cleaning time, reduces mold-prone crevices, and resists staining.
Proper seals and thresholds keep water contained effectively, minimizing splash and protecting surrounding flooring and fixtures.
Limitations and situations where frameless may not be suitable
Although frameless glass doors look great, they’re not always the best choice—if your bathroom has uneven walls, limited space, or a tight budget, you may run into installation, sealing, or cost problems that make a framed or semi-frameless option more practical.
You should also avoid frameless if you need maximum water containment, have thin walls that can’t support heavy glass, or require frequent adjustments.
Pre-Installation Planning and Measurements
Before you cut glass or buy hardware, inspect the wall, curb, and tile for soundness and levelness so you know what fixes might be needed.
Measure carefully for the door type you’re using—single-panel, hinged, pivot, or sliding—and note clearances required for swing, overlap, and seals.
Also check wall plumb, floor level, tile integrity, and hardware compatibility against manufacturer standards to guarantee a safe, watertight fit.
Assessing wall and curb conditions on tile
When you’re evaluating tile walls and the shower curb, check for level surfaces, sound substrate, and any loose or cracked tiles that could compromise the glass or mounting hardware.
Tap tiles for hollow spots, confirm grout integrity, and verify the curb is plumb and solid.
Repair or replace damaged tiles, re-bed the curb if needed, and allow adhesives to fully cure before drilling.
Measuring for door type: single-panel, hinged, pivot, sliding
If you’re choosing between single-panel, hinged, pivot, or sliding frameless doors, measure carefully to match the door type to your opening and hardware needs.
Measure width at top, middle, bottom; record smallest. Measure height from curb to desired stop, subtract clearance.
For sliding systems, measure track length and wall or header space. Note hinge offsets and swing clearances for hinged/pivot doors.
Checking wall plumb, floor level, and tile integrity
Because a perfectly plumb wall and level floor make hardware fit and seals work, you’ll verify wall plumb, floor level, and tile integrity before you order or hang glass.
Use a level and straightedge, probe grout and tile, and note deviations. Record measurements and plan corrections.
- Check wall plumb at multiple heights.
- Verify floor level and slope.
- Inspect tile adhesion and grout.
- Document fixes needed.
Required clearances and hardware compatibility standards
Measure three key clearances before you order glass: jamb-to-jamb width, threshold-to-ceiling height, and the gap needed for hinges and seals. Verify compatibility: glass thickness vs. hinge rating, seal type, and floor load. Confirm ADA or local codes for clear opening and hardware. Use manufacturer specs and tolerance allowances to prevent binding, leaks, or warranty voids.
| Item | Spec to check |
|---|---|
| Glass thickness | Hinge rating |
| Seal gap | Manufacturer tolerance |
| Clearance | ADA/local code |
| Threshold | Floor load/level |
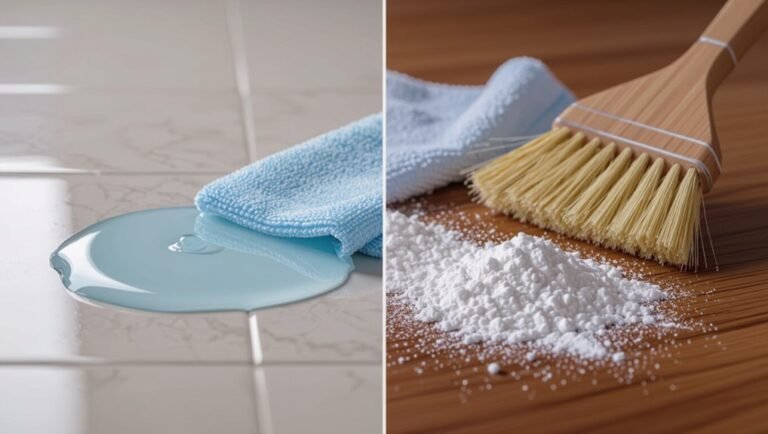
Materials, Tools, and Hardware Checklist
Now that your measurements are set, gather the right glass, hardware, tools, and safety gear before you start.
Choose tempered glass of the proper thickness and edge finish, pick hinges, threshold/transit, handles, seals, and anchors designed for frameless installations, and have a drill with ceramic bits, level, shims, silicone gun, and suction cups on hand.
Don’t forget gloves, eye protection, and pads to protect the glass and your floors.
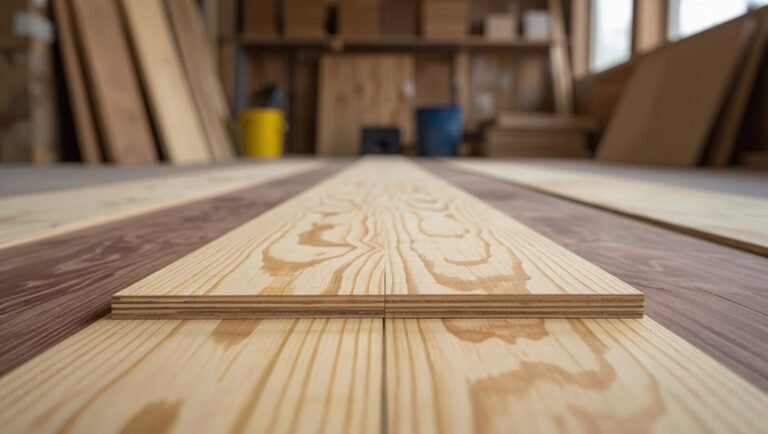
Glass panel specifications (thickness, finish, edge type)
Glass panels are the core of a frameless shower, so pick the right thickness, finish, and edge type to guarantee safety, function, and the look you want.
Choose 3/8″ or 1/2″ tempered glass for stability; clear, low-iron, or frosted finishes for aesthetics and privacy; and polished or flat edges for safety and seamless seals.
Confirm local code and installer recommendations.
Essential hardware (hinges, threshold/transit, handles, seals, anchors)
With your panel specs set, pick hardware that matches those choices for strength, fit, and style.
Choose heavy-duty stainless-steel or brass hinges rated for your glass thickness, a low-profile threshold/transit to control water, ergonomic handles with secure backplates, continuous or edge seals sized to gaps, and corrosion-resistant anchors and mounting plates.
Verify load ratings and finish compatibility before buying.
Tools required (drill with ceramic bits, level, shims, silicone gun, suction cups)
You’ll need a small set of reliable tools to install a frameless shower door safely and accurately:
- Drill with ceramic/tile bits for anchors.
- Long bubble level and square for plumb and alignment.
- Nylon shims and suction cups to position glass without chips.
- Caulk/silicone gun for watertight seals and a torque-limited driver for hinge fasteners.
Safety gear and protective materials
Because handling heavy, brittle panels and power tools increases risk, wear proper safety gear and lay out protective materials before you start.
Put on safety glasses, cut-resistant gloves, hearing protection, and non-slip shoes. Use knee pads for tile work.
Lay drop cloths, foam pads, and cardboard to protect tile and glass. Keep a first-aid kit and fire extinguisher nearby.
Step-by-Step Installation Guide
Now you’ll move through the installation steps in order, starting with preparing the tile and work area and ending with setting the glass panels.
You’ll install the threshold or bottom guide, mark and drill for hinges or the wall channel, and use proper anchors and techniques to avoid cracking the tile.
When it’s time to lift the glass, use suction cups and safe handling practices to position each panel accurately.
Step 1 Preparing the tile surface and work area
Before you begin installing the frameless glass door, clear the shower area and inspect the tile for loose, cracked, or uneven pieces that could affect the door’s fit and seal.
Remove debris, old caulk, and soap scum. Repair or replace damaged tiles, level uneven grout joints, and let adhesives cure.
Arrange tools, protective pads, and adequate lighting before proceeding.
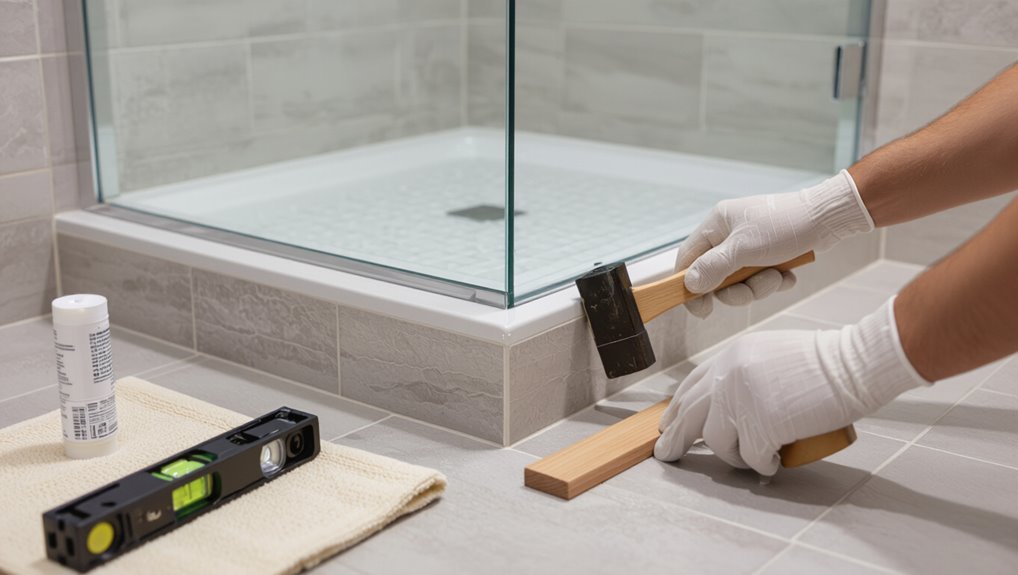
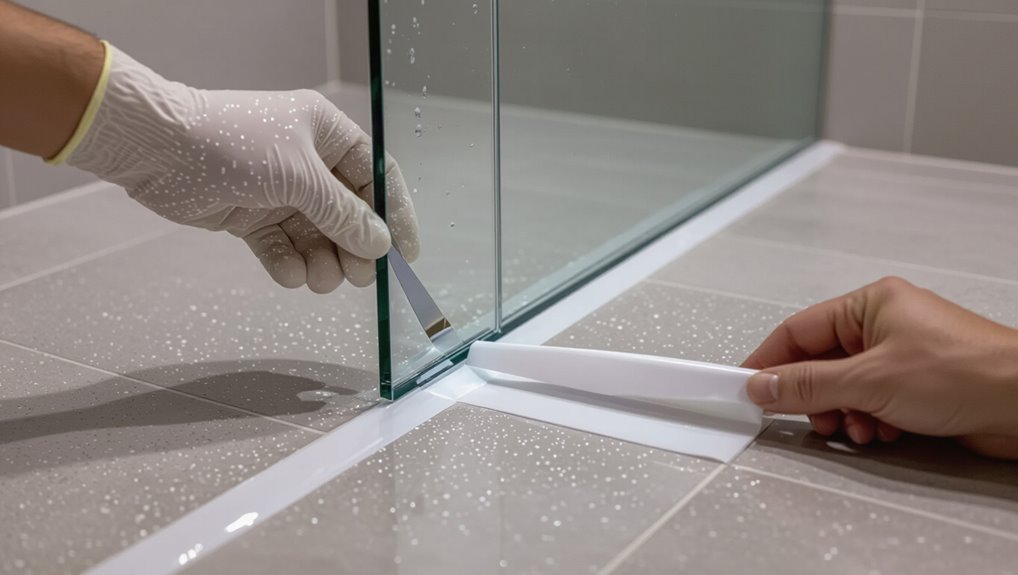
Step 2 Installing the threshold or bottom guide on tile
1. You’ll dry-fit the threshold or bottom guide, ensuring it aligns with tiles and drains.
Clean and mark positions, then apply a bead of silicone adhesive or thin-set per manufacturer instructions.
Press the guide firmly, check level and slope toward the drain, and remove excess sealant.
Allow curing time before proceeding so the guide bonds securely to the tile surface.
Step 3 Marking and drilling for hinges or wall channel on tile
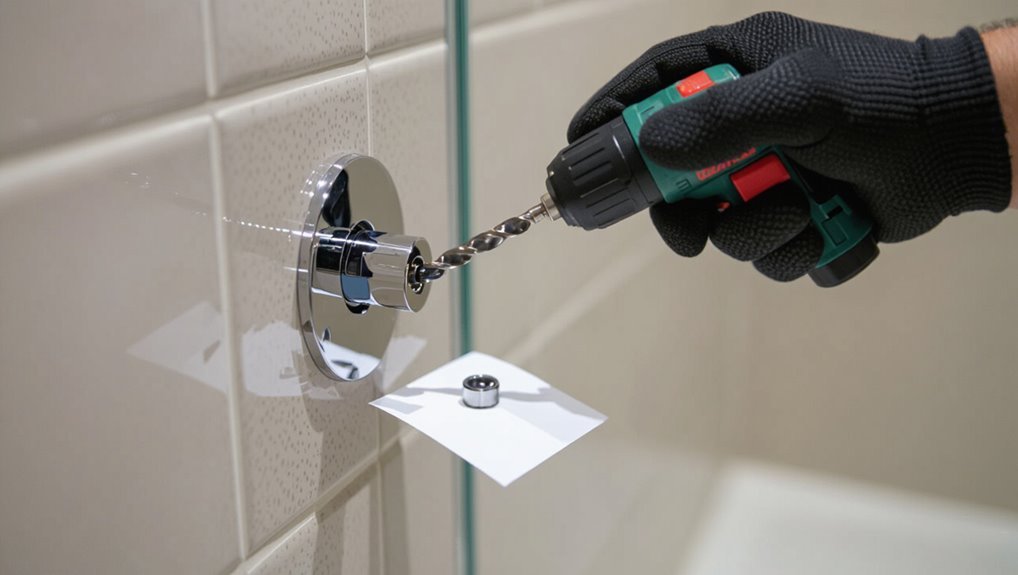
With the bottom guide set and cured, you’ll move on to marking and drilling for the hinges or wall channel on the tile.
Measure and transfer hinge or channel positions from the glass to the wall, use a rubber template to prevent slip, and center-punch each mark.
Use a carbide-tipped masonry bit with steady pressure and slow speed, keeping the drill perfectly vertical.
Step 4 Anchoring hardware into tile without cracking (techniques and anchors)
Once the holes are drilled, take care anchoring hardware into tile so you don’t crack it: choose the right anchors, ease the fasteners in slowly, and support the surrounding tile while you tighten.
Use nylon or sleeve anchors sized to the tile thickness, insert with a rubber washer to cushion, hand-start screws, torque gently with a driver, and recheck alignment before final tightening.
Step 5 Lifting and setting glass panels safely (use of suction cups)
Lift carefully: the most dangerous part of installing a frameless shower door is handling the glass—use at least two people and industrial suction cups rated for the panel weight, position them on clean, dry glass, and keep the panel vertical and steady as you move it into place.
Grip handles firmly, communicate each movement, watch edges and bottom clearances, and set the panel into prepared brackets without twisting.
Step 6 Aligning, leveling, and shimming the glass panels
Now that the panels are set in their brackets, you’ll focus on getting them perfectly plumb and stable.
Use a torpedo level vertically and horizontally, adjust shims at the base and between panel and bracket, and tap gently with a rubber mallet.
Check gaps and alignment repeatedly, tighten temporary screws just enough to hold position, and recheck plumb before moving to permanent fastening.
Step 7 Securing hinges/track and adjusting door swing/tension
Step 7 focuses on fastening the hinges or track and fine-tuning the door swing and tension so the door operates smoothly and seals correctly.
Tighten hinge bolts or track screws incrementally, checking alignment after each adjustment.
Set hinge pivots or spring tension per manufacturer specs, test swing for binding or drift, and lock fasteners.
Confirm even gap and smooth, controlled closing before moving on.
Step 8 Applying seals, sweep, and silicone waterproofing
With the hinges tightened and the door swinging smoothly, you’re ready to seal against water and drafts.
Install vinyl edge seals and a bottom sweep, trimming to fit. Press seals firmly into glass channels, ensuring continuous contact.
Apply a smooth bead of mildew-resistant silicone along the perimeter where glass meets tile, wiping excess with a damp cloth.
Let cure per manufacturer directions before use.
Step 9 Final adjustments, testing for smooth operation and leaks
Double-check all fasteners, hinge tension, and seal placement, then operate the door through its full range to confirm smooth, consistent motion.
Adjust hinge screws or shims to eliminate rubbing or uneven gaps. Inspect silicone lines and seals for voids; retouch as needed.
Cycle the door multiple times, watch for drips, and tighten slow-close or self-close settings until operation is reliable and watertight.
Step 10 Curing time and post-installation cleanup
Before you use the shower, let the silicone and any sealants cure fully so they form a watertight bond; curing times vary by product but are commonly 24–48 hours for light use and up to 7 days for full strength.
After curing, remove protective tape, clean glass with nonabrasive cleaner, wipe tracks and hardware, and dispose of debris.
Inspect seals and retighten fittings if needed.
Common Problems During Installation and How to Fix Them
You’ll run into a few common issues—cracked or chipped tile from drilling, a door that isn’t plumb and binds, leaks at the threshold or seams, and misaligned hinges or uneven gaps.
For each problem you’ll get quick diagnostic steps and immediate fixes, plus prevention tips to avoid repeat issues.
Start by identifying where the fault shows (tile damage, binding, seepage, or gap) and follow the targeted correction for that symptom.
Cracked or chipped tile when drilling immediate fixes and prevention
Cracked or chipped tile when drilling can derail a shower-door install, but you can fix small damage immediately and prevent bigger breaks by using the right tools and techniques.
Stop drilling, clear debris, and reinforce the area with epoxy or a tile repair kit.
Use a carbide bit, slow speed, masking tape over the mark, and a backing block to reduce vibration and spreading.
Door not plumb or binding adjustment steps
If your frameless glass door isn’t plumb or it binds when opening, don’t panic—small misalignments are usually fixable with a few adjustments.
Check hinge screws and tighten or loosen to shift the glass vertically and horizontally. Use shims behind hinges for fine plumbing.
Adjust bottom pivot height if present, then test swing. Repeat until the door closes squarely without rubbing.
Leaks at threshold or along seams diagnosing and sealing
One common cause of water seeping at the threshold or along seams is an incomplete seal where glass meets tile, floor, or another panel.
Start by running a visual inspection and a quick water test to pinpoint the leak path.
Clean surfaces, remove old sealant, apply continuous high-quality silicone or urethane seal, smooth bead, and let cure.
Retest and adjust sealant thickness as needed.
Misaligned hinges or uneven gaps troubleshooting and correction
After sealing seams and confirming there are no leaks, check the hinge alignment next—misaligned hinges or uneven gaps will let water spray out and cause the door to bind or rub.
Loosen hinge screws, shim or pack with nylon shims, then retighten while holding the door plumb.
Adjust strike plate and bottom sweep for uniform gaps.
Recheck operation and seal small gaps with clear silicone.
Best Practices, Tips, and Safety Precautions
You’ll need to handle heavy glass with proper lifts, gloves, and at least one helper to avoid injury and damage.
Pick anchors and adhesives rated for your tile substrate, protect finished tile and grout with soft coverings during work, and follow manufacturer cure times for seals.
Finally, maintain the door by checking seals, tightening hardware, and cleaning with non-abrasive products to extend lifespan.
Working with heavy glass safely
Handle heavy glass with care and respect—its weight and fragility demand focused attention and the right techniques to keep you and others safe.
Always work with a partner, use suction lifters and padded gloves, and lift from knees, not back.
Clear the workspace, plan movements, and set glass on soft supports.
Stop and reassess if alignment or balance feels unstable.
Choosing anchors and adhesives for tile substrates
Selecting the right anchors and adhesives for tile substrates is critical to a secure frameless glass shower door installation, so match fasteners to the tile type, substrate behind it, and the loads they’ll carry.
Use stainless steel or brass anchors rated for dynamic loads, choose epoxy or silicone adhesives certified for glass-to-tile, follow manufacturer cure times, and pre-drill with proper bits to prevent cracking.
Protecting finished tile and grout during installation
Before you set heavy hardware or mix adhesives, cover and mask finished tile and grout to prevent chips, stains, and permanent damage—this saves time and costly repairs later.
Use low-tack painter’s tape, kraft paper, and thin foam pads at bracket and hinge contact points.
Wipe spills immediately with solvent-safe cloths, keep tools cushioned, and wear soft-soled shoes to avoid scratches.
Maintenance tips to extend lifespan and preserve seals
Because proper care keeps seals flexible and hardware aligned, regular maintenance will extend your frameless shower door’s lifespan and prevent leaks.
- Clean seals weekly with mild soap and dry to avoid mildew.
- Inspect silicone and replace any cracked or detached sections promptly.
- Lubricate hinges and rollers quarterly with silicone-based lubricant.
- Tighten loose screws and check glass alignment to prevent stress on seals.
When to Call a Professional
If your walls, plumbing, or tile look compromised, you should call a pro to assess the structural and waterproofing risks.
Get help for complex door layouts or custom-sized glass to guarantee proper fit and safe hardware installation.
Also consult a professional if you need to preserve warranties or meet insurance requirements.
Structural, plumbing, or tile integrity concerns
When your shower walls, floor, or plumbing show signs of damage or instability, call a professional rather than attempting a DIY frameless installation.
You should get an expert if tiles are loose, grout is crumbling, waterproofing looks compromised, or plumbing leaks or uneven substrates exist.
A pro will assess structural load, repair or re-tile properly, and guarantee secure anchoring so glass is safe and watertight.
Complex door configurations or custom glass requirements
After you’ve ruled out structural or plumbing problems, turn your attention to the layout and glass specs: complicated door arrangements or bespoke glass needs usually call for a pro.
If you face angled walls, multiple panels, sidelights, curved glass, or tempered units requiring special fittings, hire an expert. They’ll guarantee precise measurements, correct hardware, safe handling, and compliance with local codes.
Warranty and insurance considerations
Because warranty terms and insurance coverage can hinge on who installs your frameless shower door, you should check both before you start any work.
If the manufacturer voids warranty for DIY installs or your homeowner’s policy won’t cover damage from amateur work, hire a licensed pro.
Save documentation, confirm installer credentials, and get written warranties and proof of liability insurance before they begin.
Cost Breakdown and Time Estimate
You’ll want a clear sense of typical material costs—tempered glass, hinges and clamps, and silicone sealant—before you start.
Expect professional labor to add a few hundred to over a thousand dollars depending on complexity, while a DIY install mainly costs your time.
A pro job usually finishes in a few hours to a day, whereas a careful DIY can take a full weekend.
Typical material costs (glass, hardware, silicone)
While prices vary by glass thickness, finish, and local labor rates, you can expect most materials for a frameless glass shower door to fall into clear ranges: tempered glass panels typically cost $200–$600 per panel.
Hardware (hinges, clamps, handles, and a threshold or patch fitting) runs $150–$500, and high-quality silicone and sealants add $10–$30.
Expect totals of about $360–$1,130 for basic components.
Labor cost ranges for professional installation
Those material totals give you a starting point, but labor often doubles or even triples the final bill depending on complexity. You should budget $300–$900 for basic installs, $900–$1,800 for complex frameless setups, and higher for custom work. Compare quotes and check reviews to avoid surprises.
| Job Type | Typical Range | Notes |
|---|---|---|
| Basic | $300–$900 | Standard doors |
| Complex | $900–$1,800 | Custom glass |
| Premium | $1,800+ | High-end hardware |
Timeline estimates for DIY vs pro install
How long will the project take, and how does time affect cost?
Expect a pro to finish mounting, sealing, and adjusting in 3–6 hours, minimizing risk and warranty issues but costing more.
DIY typically takes 1–2 days—planning, measuring, drilling, and curing—saving labor but risking mistakes that raise expenses.
Factor skill level, tools, and tile condition when choosing.
FAQ
You’ll want clear answers to common concerns before you start: installing on existing tile, required glass thickness, preventing water escape, drilling risks, and cleaning tips.
I’ll explain whether tile needs reinforcement, what thickness and hardware are safe, how to seal the threshold, and whether drilling affects warranties or plumbing.
I’ll also cover straightforward maintenance to keep the glass spot-free.
Can I install a frameless glass door on existing tile without reinforcement?
Can you mount a frameless glass shower door directly to existing tile without reinforcing the wall? You can in some cases, but you shouldn’t assume the tile substrate is structurally adequate.
Check backing: solid masonry or properly anchored studs are required. If tile covers weak backer board, add reinforcement or blocking behind tiles before drilling.
Prioritize safe anchor points and consult a pro if unsure.
What glass thickness is required for a safe frameless door?
Why does glass thickness matter for a frameless shower door?
You need sturdy, tempered glass to resist impact and span without metal framing. For single-panel doors, 3/8″ (10 mm) is common; 1/2″ (12 mm) gives greater rigidity for larger panels or heavier hardware.
Thicker glass reduces flex, vibration, and stress at fittings—improving longevity and safety.
How do I prevent water from escaping under a frameless door?
How do you keep water from escaping under a frameless shower door?
Use a bottom sweep or drip rail on the glass, install a threshold or curb angled toward the drain, and slope the tile slightly inward.
Apply a clear silicone seal at junctions where glass meets tile, and make sure door gaps match manufacturer specs so seals compress properly when closed.
Will drilling into tile void my bathroom warranty or damage plumbing?
If you drill into tile for a frameless shower door, check your warranty terms first—some manufacturers or builders void coverage if you alter finished surfaces or penetrate walls.
Also verify plumbing layout before drilling; water and drain lines often run behind tiled walls. Use a stud/pipe detector, consult plumbing schematics, and consider hiring a pro to avoid voiding warranty or causing costly leaks or repairs.
How do I maintain and clean a frameless shower door to avoid water spots?
After checking warranties and behind-wall plumbing, you’ll want a simple routine to keep a frameless glass shower door clear of water spots.
Squeegee glass after each shower, wipe hardware dry, and ventilate the bathroom.
Weekly, use a pH-neutral glass cleaner or a 1:1 vinegar-water spray, rinse, then dry.
Reapply a silica-repellent coating every few months for long-term protection.