How to Install Drop Ceiling Tiles: A Step-by-Step Guide That Saves Time
You can install drop ceiling tiles yourself in a weekend with basic tools and planning. Start by measuring the room, marking level reference lines, and installing perimeter trim. Hang and level main runners, snap in cross tees, then cut and fit tiles around lights and vents. Use proper hangers, test fixtures, and allow a 10–15% waste factor. Work methodically to save time; keep going and you’ll pick up practical tips and shortcuts.
Can You Install Drop Ceiling Tiles Yourself?
You can often install drop ceiling tiles yourself in a weekend if you’re handy, since basic jobs are low-cost and require only common tools and moderate skill.
Expect straightforward layouts to be easy, but complex electrical, plumbing, or uneven ceilings are best left to a pro.
Call a contractor if the job needs structural changes, permits, or work above the grid you’re not comfortable handling.
Short summary of time, difficulty, cost, and required skill level
Although the exact time and cost vary with room size and materials, most DIYers can install a standard drop ceiling in a day or two with basic tools and a helper.
You’ll learn how to install drop ceiling tiles, handle grid layout, and cut panels. Expect low-to-moderate difficulty, modest material costs, and basic carpentry skills—measuring, cutting, and fastening—no advanced licensing required.
When to call a pro vs DIY
If your space is straightforward—level, accessible ceiling cavity, and no electrical or ductwork to move—you can probably install a drop ceiling yourself with a helper and basic tools.
Call a pro if you face uneven joists, complex wiring, HVAC modifications, load-bearing concerns, or local permit requirements.
Pros guarantee code compliance, safe wiring/duct changes, precise leveling, and faster completion when challenges arise.
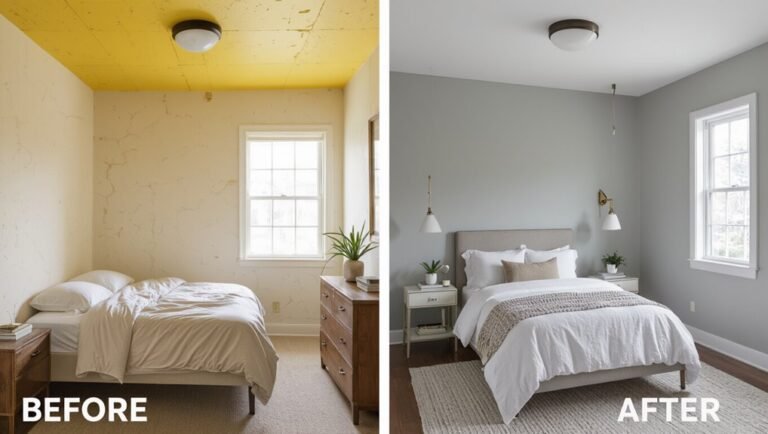
What Is a Drop Ceiling and Why Choose It?
A drop ceiling is a suspended system of metal grid, tiles, and hangers that you install below the structural ceiling.
You’ll choose it for easy access to wiring and ducts, improved acoustics and insulation, and a quick aesthetic upgrade.
It’s common in basements, offices, and commercial spaces, though it can reduce ceiling height and isn’t ideal for very humid areas.
Definition and components (grid, tiles, suspension system)
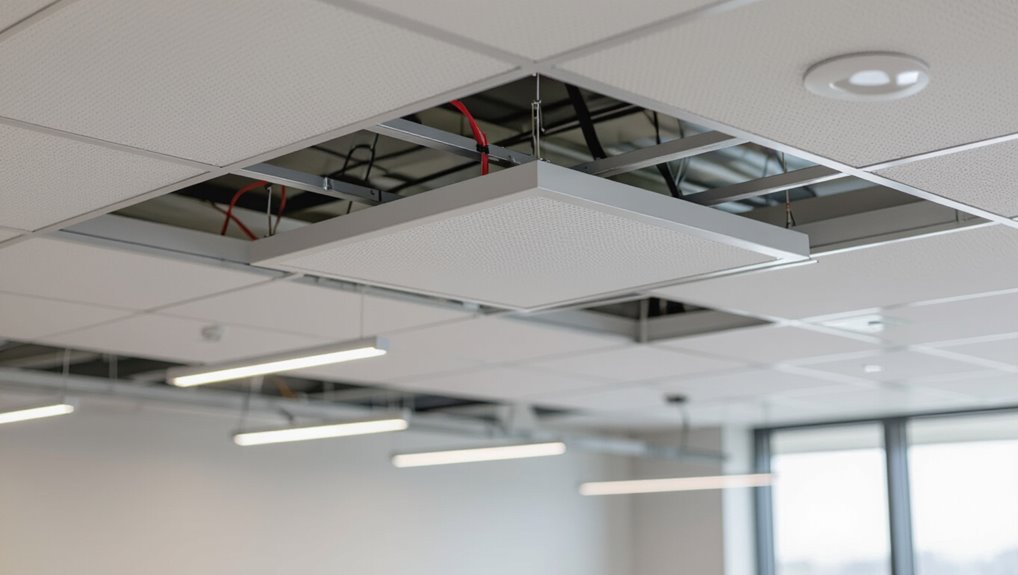
Think of a drop ceiling as a room-within-a-room: it’s a lightweight, suspended ceiling made of a metal grid that holds individual tiles, all hung from the overhead structure by a suspension system.
You’ll install main runners, cross tees, and wall angles to form the grid, drop in tiles sized to fit, and secure hanger wires and fasteners to anchor the system safely.
Benefits: accessibility, aesthetics, sound control, insulation
Now that you know the parts that make up a drop ceiling, you can see why many people choose one: it gives you easy access to plumbing, wiring, and HVAC above the tiles while improving room looks, acoustics, and insulation.
You’ll enjoy simple panel removal for maintenance, customizable design for a polished finish, reduced noise through acoustic tiles, and added thermal resistance that can cut heating and cooling costs.
Common uses and limitations
Drop ceilings work well in basements, offices, retail spaces, and utility rooms because they hide ducts, wiring, and pipes while staying easy to access for repairs.
You’ll use them where access, acoustics, or simple aesthetics matter. They’re limited by lowered headroom, moisture sensitivity, and less durability than drywall.
Plan drainage, ventilation, and replacement access before you install.
Tools, Materials, and Safety Equipment You Need
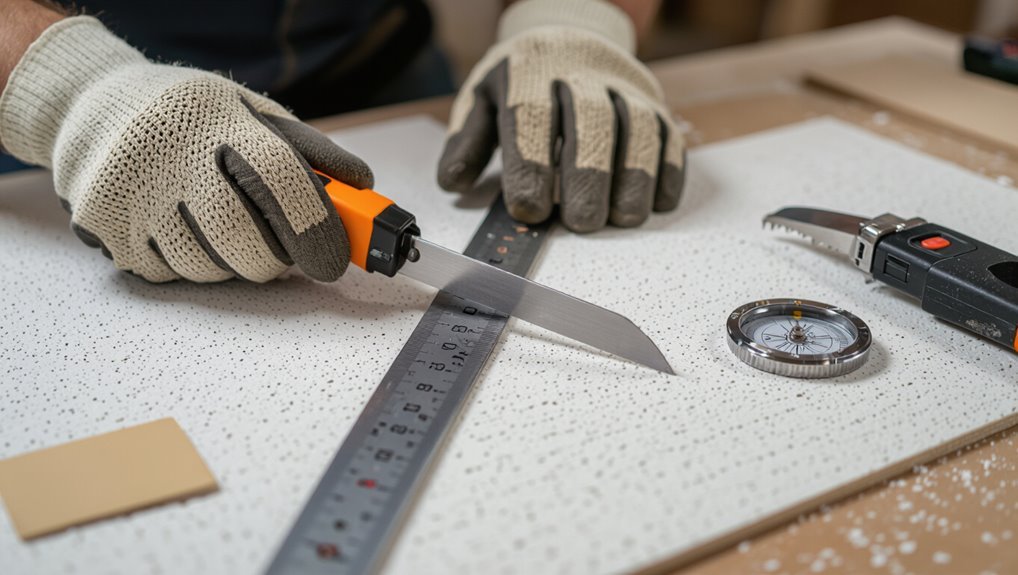
Before you start, gather the essential tools—tape measure, chalk line, level, utility knife, and a hacksaw or tin snips—so you won’t stop mid-job.
Pick your materials and tile type (mineral fiber, metal, PVC, or acoustic) based on budget and performance needs.
Wear safety gear—glasses, gloves, dust mask—and prepare the job site by clearing the area and protecting floors.
Essential tools list
A few basic tools, some common materials, and the right safety gear will make installing a drop ceiling faster and safer—here’s what you’ll want on hand before you get started.
- Tape measure, chalk line, level, utility knife, tin snips.
- Screwdriver/drill, wire cutters, pliers, ladder or scaffold.
- Safety glasses, gloves, dust mask, ear protection, work lights.
Materials and tile types (mineral fiber, metal, PVC, acoustic)
Now that you’ve got the right tools and safety gear lined up, you’ll want to pick materials and tiles that match your budget, performance needs, and room style. Choose mineral fiber for affordability and sound control, metal for modern durability, PVC for moisture resistance, or specialty acoustic tiles for quiet comfort.
| Type | Feeling |
|---|---|
| Mineral fiber | Cozy |
| Metal | Sleek |
| PVC | Secure |
| Acoustic | Calm |
Safety gear and job-site preparation
Since you’ll be working overhead and handling sharp or heavy pieces, gear up with eye protection, a hard hat or bump cap, gloves, and a dust mask or respirator.
Clear the room, cover furniture and floors with drop cloths, and set up stable ladders or scaffolding.
Keep a first-aid kit, flashlight, and proper lighting nearby.
Inspect tools before use and keep pathways tidy.
Pre-Installation Planning and Measurements
Before you start cutting or hanging anything, you’ll check ceiling height and note obstacles like ducts, pipes, and light fixtures that will affect your grid.
Measure the room and calculate the grid layout and tile count, including a 10%–15% waste factor for cuts and mistakes.
Finally, mark your reference lines and set the drop height so the grid will be level and clear of obstructions.
Assessing ceiling height and obstacles (ducts, pipes, lights)

When you’re prepping for a drop ceiling, measure the finished ceiling height and map any obstacles—ducts, pipes, beams, recessed lights—so you can plan grid placement and tile cuts accurately.
Note clearances required for HVAC, access panels, and light fixtures. Mark obstacle centers and edge distances on a ceiling sketch.
Verify local code for minimum headroom and allow space for suspension clips, hangers, and insulation.
How to measure room and calculate grid layout and tile count (including waste factor)
Although you’ve already mapped obstacles and measured finished height, now you’ll measure the room’s length and width to lay out the grid and calculate tile needs precisely.
Measure wall-to-wall, note odd angles, and divide by tile size to get full and partial tiles. Add a waste factor (10–15%) and round up for cuts and spares.
- Calculate rows/columns.
- Count full vs. cut tiles.
- Add waste.
Marking reference lines and determining drop height
Start by deciding the finished ceiling height and mark a continuous level line around the room at that elevation; this line becomes your primary reference for setting the main tees and ensuring the grid stays true.
Then locate walls, obstacles, and fixtures, transfer heights to each wall, snap perpendicular reference lines for main-tee alignment, and record drop depth for lighting, pipes, and insulation.
Step-by-Step Installation Process
Now you’ll work through the installation in clear stages, starting by preparing the room and existing ceiling.
Next you’ll mount perimeter wall angles, secure anchor points, and install main runners before adding cross tees to finish the grid.
Finally you’ll cut and fit tiles around fixtures and edges for a clean, professional look.
Step 1 Prepare the room and existing ceiling
1. Clear the room, remove fixtures and furniture, and cover floors with drop cloths.
Turn off power and label wiring, then disconnect lighting and vents you’ll recess.
Inspect the existing ceiling for joists, pipes, and water damage; repair leaks and secure loose material.
Measure ceiling height and mark high/low spots so you’ll level the new grid accurately.
Step 2 Install perimeter wall angles and anchor points
Measure and snap a level line around the room at the finished ceiling height, then fasten the perimeter wall angles to that line so the grid has a true reference.
Mark and install anchors or toggles into studs or masonry every 12–16 inches.
Make certain angles sit plumb and level, cut corners neatly, and leave clearance for lighting, vents, and access panels before proceeding.
Step 3 Lay out and install main runners (T-bars)
With the perimeter angles in place and anchors secure, you can begin laying out the main runners (T-bars) that form the grid’s backbone.
Measure and mark main-span centers, snap a chalk line, then cut runners to fit.
Hang runners from the ceiling using wire at specified intervals, level each run, and guarantee consistent spacing so tiles will sit squarely without gaps or sagging.
Step 4 Add cross tees and complete the grid
Snap in the cross tees to connect your main runners and start seeing the grid take shape.
Work row by row, aligning tees at factory notches and locking them into runner slots. Use a level to keep the grid flat and adjust hanger wires if sections sag.
Trim any tees to fit perimeter spaces, ensuring all intersections are square and secure before installing tiles.
Step 5 Cut and fit tiles around fixtures and edges
Now cut tiles to fit around lights, vents, pipes, and the room perimeter so each piece sits cleanly in the grid.
Measure carefully, mark cutlines, and score tiles with a utility knife or use a snips for metal edges.
Test-fit trimmed pieces before final placement, smoothing edges and ensuring tiles rest flat.
Label odd pieces for easy reinstall.
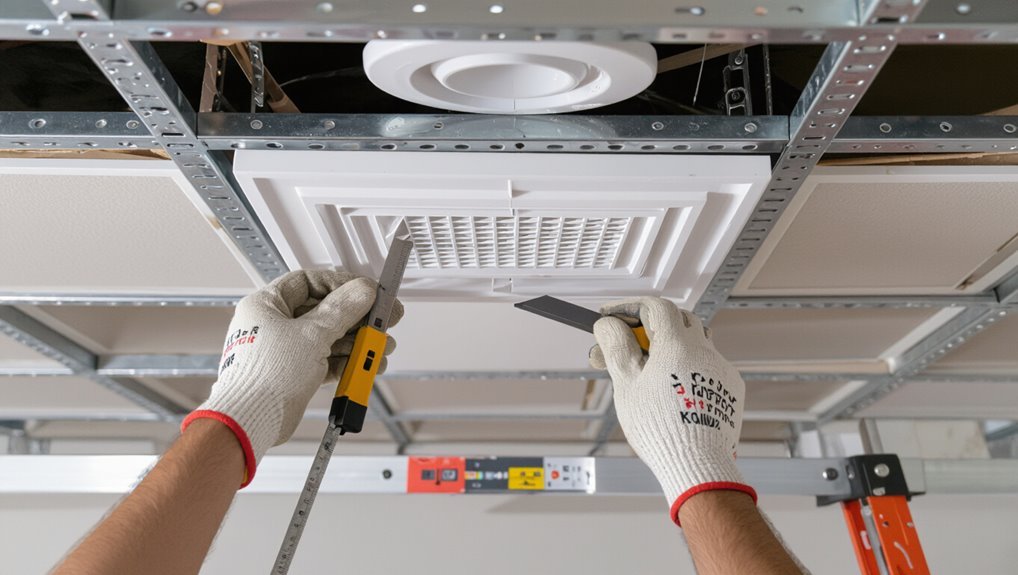
Step 6 Install light fixtures, vents, and access panels
Position fixtures and panels before final tile placement so you can route wiring and ductwork without juggling pieces mid-install.
Mount light housings to the grid per manufacturer instructions, secure vents to duct collars, and fasten access panels with their clips or screws.
Connect electrical and HVAC hookups, test each component for operation, and adjust clearances so tiles fit neatly around installed elements.
Step 7 Final alignment, leveling, and cleanup
Tighten your grid, level any sagging runners, and check tile alignment across the room so the ceiling looks uniform and functions properly.
Adjust hangers, twist fasteners, and shim where needed for a flat plane. Replace damaged tiles, reinstall trim, and verify fixtures sit flush.
Sweep debris, vacuum edges, and wipe tiles. Dispose of scrap materials and store leftover tiles for future repairs.
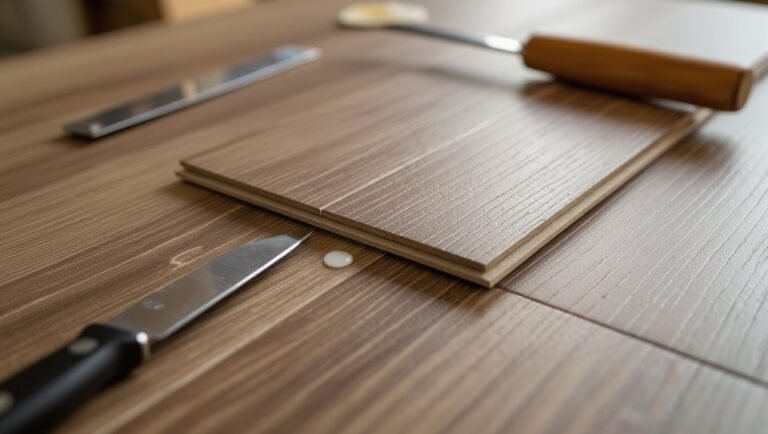
Cutting and Custom Fitting Techniques
You’ll need accurate measurements and clean cuts to fit tiles around edges, vents, and pipes.
Use the right tools—utility knife or snap cutter for straight lines, hole saws or jigsaws for curves—and score fragile or specialty tiles gently to avoid crumbling.
Take extra care with delicate materials by supporting them fully and cutting slowly to maintain a neat finish.
Measuring and cutting tiles for edges and obstacles
Measuring and cutting tiles for edges and obstacles takes careful planning and the right tools to get clean, snug fits.
You’ll measure each opening twice, mark cut lines on the tile face, and account for fixture clearances and trim. Cut just outside the line, test-fit, then fine-tune with small trims.
Label edge pieces so installation stays organized and efficient.
Best tools and methods for straight cuts and curves
For clean straight cuts and smooth curves you’ll want the right combination of blades and guides: a straightedge and utility knife or a score-and-snap cutter for linear cuts, and a jigsaw or oscillating multi-tool with a fine-tooth blade for curves and notches.
Clamp templates, cut slowly, and deburr edges with sandpaper. Test-fit pieces, trim incrementally, and keep blades sharp for consistent, professional results.
Handling fragile or specialty tiles
Precision matters most when you’re working with fragile or specialty ceiling tiles, because they won’t forgive rough handling or blunt tools.
Use a fine-tooth utility knife or score-and-snap method for clean edges, support pieces on a flat surface, and clamp delicate sections.
Measure twice, cut once, and sand or file tiny burrs.
Test-fit trims before adhesive or grid placement to avoid breakage.
Common Problems During Installation and How to Fix Them
You’ll likely run into a few common issues—sagging or uneven grids, misaligned tiles with visible gaps, or moisture and mold damaging tiles—and you’ll need quick fixes.
Check and tighten grid supports, re-measure and trim tiles for proper fit, and replace any water-stained or moldy panels while addressing the leak source.
I’ll walk you through the causes and step-by-step solutions for each problem.
Uneven grid or sagging tiles causes and fixes
When your drop ceiling looks wavy or tiles keep sagging, it’s usually because the grid wasn’t squared, the hangers are too far apart, or the tiles absorbed moisture; you can fix most issues by realigning the main runners, tightening or adding support wires, and replacing damp tiles with moisture-resistant ones.
Check hanger spacing (max 4′), level with a laser or string, and replace warped tiles promptly.
Misaligned tiles and visible gaps troubleshooting
If tiles sit crooked or gaps show along the seams, it’s usually from an off-square grid, uneven tile trimming, or clips and tees that haven’t seated fully.
You’ll want to identify whether the error comes from the framework or the tiles themselves before digging in. Check grid squareness, level tees, and secure clip engagement.
Recut tiles cleanly, adjust hangers, and realign sections until gaps close and tiles sit flush.
Dealing with moisture, mold, and damaged tiles
Because moisture and mold can ruin tiles and the underlying grid, you should spot and address any signs quickly to prevent wider damage.
Inspect stains, soft spots, and musty odors; replace affected tiles and corroded grid pieces.
Fix leaks and improve ventilation before reinstalling.
Treat minor mold with a bleach solution, wear protective gear, and discard heavily contaminated materials to avoid recurrence.
Time-Saving Tips and Best Practices
To save time and reduce waste, plan an efficient layout that minimizes cuts and groups similar tile sizes together.
Assign clear team roles—one person measures and cuts while another installs—to keep a smooth workflow.
Finally, follow simple maintenance tips like storing tiles flat and handling them with clean gloves to extend their shelf life.
Efficient layout strategies to minimize cuts and waste
When you plan your grid with care, you’ll cut fewer tiles and save time and money; measure the room, mark centerlines, and lay full tiles along sightlines.
Use standard tile sizes to align fixtures, stagger seams, and reserve edge cuts for least visible areas.
Sketch layouts, dry-fit panels, and label cut pieces to reduce rework, waste, and installation time.
Team roles and workflow for faster installation
Assign clear roles and a smooth workflow to speed installation and cut rework: designate a lead installer to set and verify the grid, a measuring/cutter specialist to handle all edge and fixture cuts, and one or two helpers to lift panels, hold tees, and tidy debris.
Coordinate tasks: lead sequences work, cutter preps pieces, helpers stage tiles and clear scrap.
Use signals and checkpoints to keep pace.
Maintenance tips to extend shelf life of tiles
Although ceiling tiles are low‑maintenance, a few simple habits will keep them looking good and cut replacement costs.
Dust regularly with a soft brush or vacuum, spot‑clean stains with mild detergent, and address leaks immediately to prevent mold.
Rotate removable tiles when possible to distribute wear, maintain humidity under 60%, and inspect grid clips quarterly to catch issues before they damage tiles.
Cost Estimate and Project Timeline
You’ll want a quick cost check before you start, since materials and labor typically range widely depending on tile type and installer rates.
Expect small rooms to take a few hours, medium rooms a day, and large spaces one to several days for an experienced crew.
I’ll break down typical price ranges and a time estimate for each room size so you can plan accordingly.
Typical material and labor cost ranges
Typical projects for installing drop ceiling tiles usually fall into predictable cost bands, so you can budget more confidently. You’ll usually pay $2–$6 per sq ft for basic tiles, $6–$12 for premium, plus $1–$3 for grid. Labor runs $1.50–$4 per sq ft. Estimate total $300–$1,200 for small rooms.
| Item | Typical cost |
|---|---|
| Basic tiles | $2–$6/sq ft |
| Premium tiles | $6–$12/sq ft |
| Grid | $1–$3/sq ft |
| Labor | $1.50–$4/sq ft |
Time breakdown for small, medium, and large rooms
When planning a drop ceiling install, factor both prep and finishing into your timeline so you get realistic start-to-finish estimates.
For small rooms (100–150 sq ft) expect 4–8 hours with one person; medium (150–400 sq ft) takes 1–2 days with two people; large spaces (400+ sq ft) require 2–4 days and extra hands.
Allow extra time for obstacles and cleanup.
Alternatives to Drop Ceilings and When to Choose Them
Before you commit to a drop ceiling, consider alternatives like drywall, open ceilings, or suspended wood systems and weigh their pros and cons.
Think about how each option affects energy efficiency, acoustics, and the room’s look. That way you can choose the solution that best balances performance, budget, and style.
Drywall ceilings, open ceilings, suspended wood systems pros and cons
If you’re weighing alternatives to a drop ceiling, drywall, open ceilings, and suspended wood systems each offer distinct looks and trade-offs you should know. You can choose drywall for a clean, permanent finish; open ceilings for industrial access; or suspended wood for warmth and style, noting cost and installation complexity.
| Option | Strength | Trade-off |
|---|---|---|
| Drywall | Seamless look | Harder access |
| Open | Easy access | Noisier |
| Wood | Warmth | Higher cost |
Energy, acoustic, and aesthetic considerations
Because the ceiling you pick affects more than looks, weigh energy, acoustic, and aesthetic factors together so you choose the right alternative to a drop ceiling.
Consider insulation and HVAC access for energy efficiency, sound absorption and transmission for acoustics, and style, finish, and lighting integration for aesthetics.
Match priorities: prioritize insulation in conditioned spaces, acoustics in noisy rooms, and finishes where appearance matters most.
Mistakes to Avoid
Don’t skip accurate measurements or layout planning, because miscuts and uneven rows will bug you later.
Make sure you pick tiles rated for moisture and heat in kitchens or basements, or they’ll warp or stain.
Anchor the suspension properly and don’t overload the grid with heavy fixtures or it could sag or fail.
Skipping accurate measurements or layout planning
When you skip accurate measurements and layout planning, you’ll likely end up with uneven grids, wasted tiles, and awkward seams that ruin the finished look.
You should measure room dimensions, locate focal points, and snap chalk lines before cutting.
Plan tile placement to minimize tiny edge pieces and align ceiling fixtures.
Accurate layouts save time, reduce waste, and give a professional result.
Using wrong tile type for environment (moisture/heat)
Once you’ve planned the layout, pick tiles that can handle the room’s conditions—using the wrong type for moisture or heat will warp tiles, stain them, or cause mold.
Don’t assume standard tiles suit bathrooms, kitchens, or basements. Choose moisture-, mold-, or heat-resistant materials, check R-values and vapor barriers, and match manufacturer specs to the environment to avoid replacements and health risks.
Poor suspension anchoring and overloading grid
If you skimp on anchors or cram too much weight onto the grid, the whole ceiling can sag, pull loose, or collapse.
You should fasten suspension wires to structural members, use specified anchors, and space supports per manufacturer guidelines.
Don’t hang heavy fixtures without reinforcing the grid.
Inspect connections periodically and redistribute loads to prevent deformation, safety hazards, and costly repairs.
Frequently Asked Questions
You probably have questions about height loss, installation over an existing ceiling, fire safety, upkeep, and fitting lights or speakers.
I’ll answer how much headroom a drop ceiling removes, whether you can install one over your current ceiling, and which tiles meet fire codes.
You’ll also get simple tips for cleaning and for installing recessed fixtures safely.
How low will a drop ceiling lower my room height?
Because the suspended grid and tiles hang below the structural ceiling, a drop ceiling will lower your room height by the thickness of the grid plus the tiles and any clearance you need for fixtures or ductwork.
Typically that’s 3 to 12 inches for standard systems, more if you need space for HVAC, plumbing, or lighting.
Measure carefully to preserve headroom and code compliance.
Can I install a drop ceiling over an existing ceiling?
Wondering whether you can fit a drop ceiling over your current ceiling? Yes—you can in many cases, especially if the existing surface is flat and securely attached.
You’ll need enough clearance for the grid and tiles, and to accommodate lighting, vents, and access to utilities.
Inspect for moisture, mold, or structural issues first; fix problems before installing the new ceiling.
Are drop ceiling tiles fire-resistant and safe?
Curious if drop ceiling tiles will slow a fire or keep you safe? You should check tile ratings: many are noncombustible or have Class A, B, or C flame-spread ratings.
Install tiles and grid that meet local codes and maintain clearances around fixtures. Use fire-rated tiles and hold-down clips where required.
Consult local fire authority or a professional for compliance and safety assurance.
How do I clean and maintain ceiling tiles?
If you want your drop ceiling tiles to look good and last, keep a regular cleaning and inspection routine—wipe or vacuum tiles gently, spot-treat stains, and replace any damaged or sagging panels promptly.
Check for moisture, mold, or leaks; address sources immediately.
Use mild cleaners, test a hidden area first, and handle tiles carefully to avoid breaking edges or compromising acoustical surfaces.
Can I install recessed lights or speakers in drop ceiling tiles?
After you’ve kept your tiles clean and addressed any water or damage issues, you may want to add recessed lights or speakers for a finished look and better functionality.
You can cut tiles for shallow fixtures, use air-tight housings, and mount speakers in drop-friendly enclosures. Always follow electrical codes, secure fixtures to the grid or joists, and consult an electrician for wiring or insulation contact issues.