How to Deep Clean Vinyl Floors With Grooves and Get Dirt Out of Every Crevice
You can deep-clean grooved vinyl by clearing the room, sweeping, and vacuuming first, then pre-treating stains with a pH-neutral cleaner. Agitate grooves gently with a soft brush or toothbrush, or use a low-speed scrubber for large areas, and extract loosened grit with a wet-vac or damp microfiber mop. Rinse thoroughly to remove residue and let dry before replacing furniture. Keep tools, ventilation, and manufacturer guidance in mind—keep going to get step-by-step tips and troubleshooting.
How to Deep Clean Vinyl Floors with Grooves and Remove Dirt from Every Crevice
If your vinyl has grooves, you’ll need targeted cleaning to lift trapped dirt and restore the finish.
You should deep clean when grime is visible, odors persist, or regular mopping no longer restores the look.
For routine maintenance, stick to sweeping and a gentle mop so you only deep clean when necessary.
One-sentence summary
When grooves trap dirt and grime, you’ll need a focused routine to reach every crevice and restore your vinyl’s look.
Follow a step-by-step plan for how to deep clean vinyl floors with grooves: sweep, pretreat with gentle cleaner, agitate grout lines with a soft brush, rinse thoroughly, and dry.
Repeat stubborn spots until grooves are debris-free and the floor’s texture and sheen are restored.
When deep cleaning is necessary vs. regular maintenance
You’ve got the basic routine down, but there are clear signs that a deeper clean is needed for grooved vinyl floors.
You should deep clean when dirt remains after sweeping or mopping, grooves smell or discolor, sticky residue builds up, or traffic areas look dull.
Regular maintenance keeps grime minimal; deep cleans every few months—or after spills and heavy use—restore texture and appearance.
Basic Understanding What Causes Dirt Build-up in Grooved Vinyl Floors
You’ll want to know that vinyl floors are made of layered materials with embossed or routed grooves and textured finishes that mimic wood or stone. Those indentations are where dirt settles.
Different groove styles—shallow embossing, deep graining, or micro-textures—trap dust, grit, pet hair, grease, and black heel marks in different ways. Understanding those patterns helps you target the right tools and cleaners to pull debris out of every crevice.
How vinyl flooring is constructed and where grooves come from
Vinyl flooring is a layered material built for durability, but its structure also explains why dirt loves to hide in grooves.
You’ve got a wear layer, printed design, core and backing; grooves are cut, embossed or molded into the wear layer during manufacturing to mimic planks or stone.
Those recesses collect grit and moisture, so you’ll need targeted cleaning to reach every crevice.
Types of grooves and textured finishes that trap dirt
Because grooves and textured finishes come in many forms, knowing which type you’re dealing with helps you target trapped dirt more effectively.
Shallow micro-grooves hide fine particles, deep plank grooves collect larger debris along edges, embossed textures trap grime in peaks and valleys, and directional ridges channel dirt along grain.
Identify pattern depth and orientation to choose brushes and techniques that reach every crevice.
Common debris types (dust, grit, pet hair, grease, black heel marks)
Those grooves and textures don’t just hide dirt—they collect specific kinds of debris that demand different removal methods.
You’ll find fine dust and pollen that settle, gritty sand that grinds into grooves, pet hair that tangles, greasy residues from cooking or hands, and black heel marks from shoes.
Each needs targeted tools and cleaners to lift without damaging the vinyl.
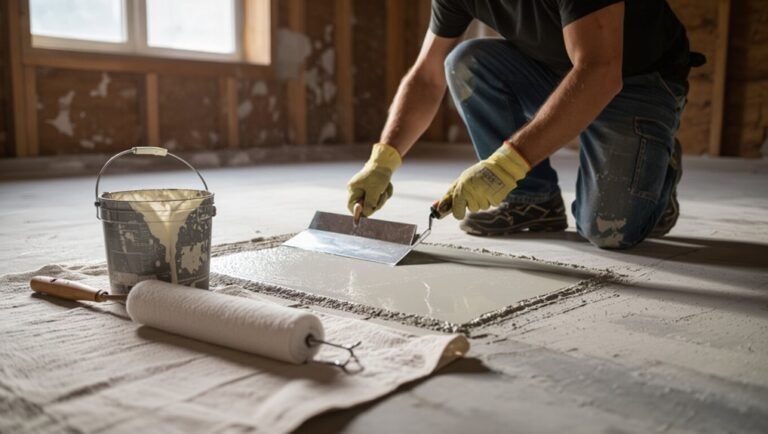
Safety and Preparation Before Deep Cleaning
Before you start, gather a checklist of tools and materials—mop, soft-bristle brush, mild cleaner, bucket, gloves, and ventilation plan.
Wear gloves, air the room, patch-test any cleaner on an inconspicuous spot, and steer clear of harsh chemicals that can damage vinyl.
Check your flooring manufacturer’s guidelines and call a professional if stains or damage look beyond routine cleaning.
Tools and materials checklist
1. Gather essentials before you start so cleaning goes fast and thorough.
You’ll need tools for grooves and gentle cleaners that won’t harm vinyl.
- Soft-bristle brush or toothbrush for grout-like grooves
- Microfiber mop and bucket for even cleaning
- pH-neutral vinyl cleaner or diluted dish soap
- Soft cloths and a squeeze bottle for targeted rinsing and spot work
Safety precautions (ventilation, gloves, patch test, avoid harsh chemicals)
While you clean, make sure the room is well ventilated and you’re wearing gloves to protect your skin—vinyl’s finish can react to strong chemicals and prolonged contact can irritate hands.
Always patch test cleaners in an inconspicuous spot, wait for full drying, and check for discoloration.
Skip abrasive pads, bleach, and solvents; use mild, pH-neutral cleaners to avoid damage and fumes.
When to consult manufacturer guidelines or a professional
If your vinyl came with care instructions, follow them first and contact the manufacturer when anything’s unclear—warranties, recommended cleaners, and temperature limits can affect what methods are safe.
If stains persist, grooves trap grime, or adhesive seams lift, consult the maker or a flooring pro before deep cleaning. They’ll confirm safe products, advise on repairs, and help avoid voiding warranties or causing irreversible damage.
Step-by-Step Deep Cleaning Process
Start by clearing the room, sweeping, and vacuuming so grit won’t scratch the surface.
Pre-treat stains and high-traffic spots, then pick a cleaning solution suited for grooved vinyl.
Agitate the grooves with a soft brush or toothbrush for small areas, or use a steam mop/rotary scrubber on low settings while following safety tips.
Step 1 Clear, sweep, and vacuum to remove surface debris
Before you deep-clean vinyl floors, clear the area of furniture and large items. Then sweep and vacuum to remove loose dirt, dust, and crumbs that can scratch the surface or clog your mop.
Move methodically from one corner toward an exit. Use a soft-bristle broom, vacuum with a hard-floor setting, and empty the vacuum so trapped grit won’t be reintroduced.
Step 2 Pre-treat high-traffic and stained areas
Step 2 focuses on tackling the spots that wear fastest: high-traffic lanes, entryways, and visible stains that a general mop won’t remove.
Spot-treat with a soft brush and a mild, non-abrasive cleaner or a paste of baking soda and water for stubborn grime. Let it sit a few minutes, scrub grooves gently, then blot and rinse.
Repeat if needed.
Step 3 Choose the right cleaning solution for grooved vinyl
When you’re working with grooved vinyl, pick a cleaner that can reach into the channels without damaging the surface.
Use mild, pH-neutral solutions and avoid harsh acids or waxy products. Test a small area first.
- pH-neutral vinyl cleaner
- Diluted dish soap solution
- Enzyme-based cleaner for organic stains
- Commercial vinyl degreaser (follow label)
Step 4 Agitate grooves: manual methods (soft brush, grout brush, toothbrush)
Now grab a soft brush, grout brush, or toothbrush and work each groove with short, firm strokes so dirt and grime loosen without scratching the vinyl.
Focus on one small area at a time, rinsing the brush often. Wipe loosened debris with a microfiber cloth or damp mop, repeating until grooves look clean.
Check edges and corners thoroughly for trapped residue.
Step 5 Agitate grooves: powered methods (steam mop, rotary scrubber) and safe usage tips
5. Use powered agitation sparingly: a low-heat steam mop or soft-bristled rotary scrubber loosens grime in grooves faster than hand tools.
Test a hidden spot first, keep steam brief to avoid vinyl warping, and use gentle RPMs with a non-abrasive pad.
Keep tools moving—don’t dwell.
Wear protective gloves and ventilate the area.
Rinse residues promptly.
Step 6 Extract loosened dirt: wet-vac or microfiber mop techniques
Start extracting loosened grime immediately to prevent it from re-depositing in grooves: use a wet-vac to suck up slurry and dirty water or a damp microfiber mop to lift soil, working in small sections so you’re always removing, not spreading, residue.
Empty the wet-vac often, rinse or change mop pads when soiled, and overlap passes to guarantee you pull out trapped debris.
Step 7 Rinse thoroughly and remove residue
After you’ve extracted the slurry, rinse the floor to remove any remaining cleaner and loosened grime so nothing dulls the vinyl or attracts dirt later.
Use clean water and a neutral pH rinse solution, working in small sections. Wring mop heads frequently or change rinse water often.
Inspect grooves with a flashlight, repeat rinsing where residue lingers until the surface feels clean and residue-free.
Step 8 Drying techniques to prevent water infiltration and streaks
Proper drying prevents water from seeping into seams and keeps your vinyl streak-free, so work methodically and don’t rush.
Use a microfiber mop or soft towel to follow plank lines, wringing frequently. Open windows or run fans for airflow, and avoid walking until fully dry.
For grooves, use a gentle suction vacuum or a soft-bristled brush plus blotting to extract trapped moisture.
Step 9 Final inspection and touch-ups
1 final sweep will catch what you missed during cleaning: inspect seams, corners, and high-traffic areas for remaining residue, streaks, or moisture, and note any spots that need a targeted touch-up.
Use a microfiber cloth and a gentle cleaner to address streaks or stubborn grime. Rinse touched areas, dry thoroughly, and reassess until the floor is evenly clean and dry.
Tools, Cleaners, and Products Compared
You’ll want to weigh manual tools (mops, soft-bristle brushes) against powered options (spin mops, floor scrubbers) based on stain severity and floor condition.
I’ll compare DIY cleaners (vinegar solutions, mild dish soap) with commercial vinyl products and explain when each is appropriate.
I’ll also point out what to avoid—bleach, abrasive powders, and oil-based waxes—to prevent damage.
Manual tools vs. powered tools
When deciding between manual tools and powered tools for deep-cleaning vinyl, weigh control and gentleness against speed and muscle—manual options like microfiber mops and scrub brushes give you precise pressure and less risk of damage, while powered tools such as rotary scrubbers and steam cleaners cut time and effort but demand careful technique and the right attachments.
| Tool Type | Best For |
|---|---|
| Microfiber mop | Light soils |
| Scrub brush | Grooves |
| Rotary scrubber | Large areas |
| Steam cleaner | Sanitizing |
| Toothbrush | Crevices |
Recommended DIY cleaners vs. commercial vinyl cleaners
After choosing the right tools, pick cleaners that match the job and your floor’s finish—DIY mixes can be cheap and gentle, while commercial vinyl cleaners promise convenience and targeted performance. You’ll want mild dish soap, vinegar solutions, or a pH-neutral commercial product for regular care; reserve stronger specialty cleaners for stubborn grime.
| Type | Cost | Best for |
|---|---|---|
| DIY | Low | Light soil |
| Commercial | Medium | Targeted stains |
| Specialty | High | Deep grime |
What to avoid (bleach, abrasive powders, oil-based waxes)
Although some strong cleaners seem like a quick fix, avoid bleach, abrasive powders, and oil-based waxes because they can dull, etch, or chemically damage vinyl surfaces.
You should skip ammonia, solvent-based degreasers, and scouring pads too. Instead, choose pH-neutral cleaners and soft microfiber tools.
Test any new product in an inconspicuous spot first to prevent discoloration or long-term harm.
Targeted Techniques for Different Groove Types and Problem Areas
When you’re tackling grooves and trouble spots, pick tools and motions that match the profile—narrow, shallow grooves need stiff-bristled brushes and back-and-forth scrubbing, while deep, wide grooves often require scraping, targeted suction, and combo brushing.
Treat textured sheet vinyl differently from LVP/LVT by adjusting pressure and cleaner concentration to protect the finish.
For grease, gum, paint, and stubborn stains, use the appropriate solvent or mechanical method and test in an inconspicuous spot first.
Narrow, shallow grooves: best brushes and motion
Usually, you’ll get the best results using a soft nylon toothbrush or detail brush for narrow, shallow grooves.
Work along the groove direction with short, firm strokes to lift trapped dirt without scratching. Use a mild cleaner and repeat passes, wiping residue with a microfiber cloth.
Finish by buffing dry to restore sheen and prevent streaks.
Deep, wide grooves: scraping, suction, and brush combos
Attack deep, wide grooves with a three-step approach: loosen stubborn grime with a plastic or rubber scraper, extract debris with a wet/dry vacuum or suction tool, then finish by scrubbing with a stiff nylon brush to lift residue without gouging the vinyl.
Work in short sections, rinse with microfiber dampened in mild cleaner, and repeat suction.
Dry grooves thoroughly to prevent trapped moisture.
Textured sheet vinyl vs. luxury vinyl plank (LVP/LVT) tailored approaches
After you’ve cleared and rinsed deep grooves, shift focus to the material: textured sheet vinyl and luxury vinyl plank (LVP/LVT) need different care because their groove patterns, surface textures, and seam constructions hold soil differently.
For sheet vinyl, use soft bristle scrubbing and low‑pressure rinses to protect embossing.
For LVP/LVT, target seams with a narrow nylon brush, avoid excess water at joins, and dry promptly.
Dealing with grease, gum, paint, and stubborn stains
Tackle grease, gum, paint, and other stubborn stains with targeted methods that respect the groove type and surface finish: shallow embossing needs gentler, low‑abrasion solvents and soft nylon scrubs, while deeper grooves and tight LVP seams may require a narrow brush, a poultice, or a dampened plastic scraper to lift residues without driving them deeper.
Test solvents on an inconspicuous area, work outward, rinse, and dry.
Common Mistakes and How to Avoid Them
Don’t soak your vinyl or you risk loosening the adhesive underneath.
Avoid abrasive pads or harsh scrubbing that can scratch the surface, and don’t mix cleaners incorrectly or use too-strong solutions that leave residue or a dull finish.
Always follow the manufacturer’s instructions to keep warranty coverage and get the best results.
Over-wetting and causing adhesive failure
If you let water pool on vinyl or use too much cleaning solution, you can loosen the glue that holds tiles or planks to the subfloor and cause lifting or warping.
Work in small sections, wring mop heads thoroughly, and use damp—not soaking—cloths.
Dry promptly with towels or a fan.
Test cleaners on a hidden patch before full use to avoid adhesive damage.
Using abrasive tools that scratch vinyl
When you reach for a stiff brush, steel wool, or a scouring pad, you’re risking fine scratches that dull vinyl’s finish and trap dirt.
Instead, use a soft-bristle brush, microfiber mop, or nylon pad designed for vinyl. Test any tool in an inconspicuous area first.
Work gently along grooves, rinse frequently, and replace abrasive tools with gentler options to preserve finish and ease cleaning.
Improper product mixes that leave residue or dull finish
Scrubbing with the right tools is only part of the job—what you mix and apply matters just as much. You shouldn’t over-concentrate cleaners or combine products; leftover soap or wax dulls vinyl and traps grit in grooves.
Dilute cleaners per label, rinse thoroughly, and test mixes in an inconspicuous spot. If residue remains, repeat with plain water and a microfiber mop until the surface looks clear.
Skipping manufacturer recommendations
Although routine cleaning tips are handy, ignoring the manufacturer’s instructions can undo your work and even void warranties.
You should read labels and follow recommended cleaners, dilution rates, and tools. Manufacturers test products for compatibility with finish and grooves; deviating risks discoloration, swelling, or seal failure.
When in doubt, contact customer support or use their approved products to protect appearance and warranty.
Prevention and Best Practices to Keep Grooves Clean Longer
Keep a simple maintenance schedule—daily spot wipes, weekly mopping, and a monthly deeper clean—to prevent grime from settling into grooves.
Use entry mats, felt pads under furniture, and timely spot-clean routines, and plan seasonal deep cleans to catch buildup before it bonds.
If your vinyl is compatible, consider recommended sealants or finishes to add extra protection.
Regular maintenance schedule (daily, weekly, monthly)
When you follow a simple daily, weekly, and monthly routine, your vinyl’s grooves stay cleaner and you avoid tougher buildup later.
You’ll keep dirt minimal and catch spills before they settle.
- Daily: sweep or vacuum high-traffic areas.
- Weekly: damp-mop with mild cleaner, focus on grooves.
- Monthly: inspect grout lines, spot-treat stubborn grime.
- Quarterly: deep clean with a soft brush and rinse.
Entryway mats, felt pads, and furniture protection
You’ve already cut down on dirt with regular sweeping and monthly spot-treats, so now focus on stopping grime at the source: place durable, low-profile mats at all entrances to trap grit and moisture before it reaches your vinyl, and fit felt pads or protective glides on furniture legs to prevent scratches that lodge dirt into grooves.
Rotate and clean mats regularly, inspect pads, and replace worn protectors promptly.
Quick spot-clean routines and seasonal deep-clean timing
Although quick spot-clean routines won’t replace a full scrub, they stop grime from settling into vinyl grooves and make deep cleans easier; tackle spills and tracked-in dirt as soon as you notice them with a microfiber cloth, gentle cleaner, and a soft-bristled brush for textured areas.
Do quick weekly touch-ups, inspect high-traffic zones monthly, and schedule a thorough seasonal deep clean every 3–6 months.
Recommended sealants or finishes (if compatible)
If your vinyl is compatible with topical sealants, applying a thin, water-based polyurethane or a commercial vinyl floor finish can help fill shallow grooves and repel dirt, making routine cleaning easier.
Test a small area first, follow manufacturer directions, and avoid oil-based products that can yellow.
Reapply as recommended, and combine with proper cleaning to extend protection and reduce debris buildup.
Cost, Time, and Frequency Estimates
Expect the time to deep clean vinyl to range from 30 minutes for a small room with shallow grooves to a few hours for large areas or stubborn grime.
You’ll compare DIY costs—mainly cleaners and tools—against professional rates that can be higher but faster and more thorough.
Depending on pets, kids, and foot traffic, you’ll want to schedule deep cleans anywhere from quarterly to once a year.
Typical time required by floor size and groove severity
For a straightforward estimate, plan about 30–60 minutes per 100 square feet for light grime, and 60–120 minutes per 100 square feet when dirt’s lodged in deep grooves.
Rougher or older vinyl and high-traffic areas can push times toward the upper end. Multiply by your floor area, add 15–30 minutes for edging and drying between passes, and schedule accordingly for breaks.
Cost comparison: DIY vs. hiring a pro
Knowing how long cleaning will take helps you weigh whether to do it yourself or hire a pro. DIY saves money—expect supplies and 1–4 hours; pros cost more but cut time and guarantee deep groove cleaning. Use this quick comparison:
| Option | Typical Cost | Typical Time |
|---|---|---|
| DIY | $10–$60 | 1–4 hrs |
| Pro | $100–$300+ | 1–2 hrs |
| Hybrid | $30–$150 | 0.5–2 hrs |
Recommended cleaning frequency based on household type
Because traffic, pets, and kids change how quickly vinyl shows wear, you’ll want a cleaning schedule matched to your household—light-use homes can get by with once-a-month deep cleans, busy families with pets or toddlers should deep clean every 1–2 weeks, and high-traffic entryways or rental units benefit from weekly spot-cleaning plus biweekly deep cleans.
Factor in the DIY cost/time ranges ($10–$60 and 1–4 hours) or pro rates ($100–$300+, 1–2 hours) when planning.
Adjust for stains, allergies, and visible grime: increase frequency if you see buildup, reduce to monthly if floors stay clean and undamaged.
Troubleshooting If Dirt Still Remains in Crevices
If dirt still clings in grooves after your first pass, try repeating the cleaning steps or using a stronger vinyl-safe cleaner and a soft-bristled brush.
If that doesn’t work, consider hiring a professional who can deep-clean or steam-treat the crevices.
For grooves that are permanently discolored or gouged, you may need refinishing or to replace affected planks.
Escalation steps: repeat methods, stronger cleaners, professional services
When stubborn grime still hides in seams after your first pass, don’t give up—step up your approach methodically: repeat scrubbing with a nylon brush, rinse, and dry; try a stronger cleaner like diluted white vinegar or a pH-balanced vinyl cleaner; test cleaners in an inconspicuous spot first; use a steam mop cautiously on low; if residue persists, hire a floor-care pro for deep extraction and safe chemical treatments.
When grooves are permanently discolored or damaged
Although you can often lift grime from grooves with persistence, some staining or gouging is permanent and needs a different response: assess whether the discoloration is surface-level (cleaner or gentle buffing will help) or structural (scratches, deep pits, or color loss that require repair or replacement).
Document the damage with photos, and avoid harsh abrasives that can make it worse while you decide on restoration, patching, or full plank replacement.
Inspect lighting, note patterns, and consult manufacturer guidance before acting.
Repair and restoration options (refinishing, replacement of planks)
Sometimes cleaning and gentle buffing won’t restore stained or gouged grooves, so you’ll need to contemplate repair and restoration options.
You can refinish wear layers with manufacturer-approved products or hire a pro for buffing and sealant application.
For deep damage, replace individual planks or tiles—match color and thickness, cut carefully, and adhesive-set replacements.
Test small areas first to guarantee seamless results.
FAQ Common Questions About Deep Cleaning Grooved Vinyl Floors
You probably have specific questions about grooved vinyl—like whether a steam mop is safe or how to lift black scuff marks from the grooves.
I’ll also cover whether frequent deep cleaning can harm your flooring, which household ingredients are safe for groove cleaning, and how to restore shine afterwards.
Read on for clear, practical answers.
Can I use a steam mop on grooved vinyl floors?
Wondering whether a steam mop’s safe for grooved vinyl floors? You can, but cautiously: check manufacturer guidelines first.
Use low steam settings, avoid prolonged passes, and keep mop moving to prevent heat and moisture buildup that can warp or delaminate seams.
Test a hidden spot, protect edges, and dry grooves promptly with a microfiber cloth or fan.
Don’t oversteam.
How do I remove black scuff marks from grooves?
1 straightforward approach works best: tackle black scuff marks in grooves by loosening debris, applying a targeted cleaner, and agitating gently with a soft brush so you lift the mark without damaging the vinyl.
Scrub along the groove, rinse with a damp microfiber cloth, then dry.
For stubborn marks, repeat with a paste of baking soda and water or a vinyl-safe melamine sponge, testing first.
Will frequent deep cleaning damage my vinyl flooring?
How often is “frequent” enough to cause wear on your grooved vinyl?
Regular deep cleaning won’t harm vinyl if you use gentle tools, mild cleaners, and avoid abrasive scrubbing.
Excessive force, harsh chemicals, or aggressive brushes can dull the wear layer and erode edges over time.
Limit intensive cleaning to needed spots, follow manufacturer guidance, and test methods on an inconspicuous area first.
What household ingredients safely clean grooves?
If you want to clean grooves without risking damage, stick to gentle, household ingredients like warm water, mild dish soap, white vinegar (diluted), and baking soda for spot treatment—these lift dirt without stripping the wear layer when used sparingly and rinsed well.
Use a soft brush or toothbrush to agitate grooves, blot with microfibers, rinse with clean water, and dry to prevent residue or moisture damage.
How do I restore shine after deep cleaning?
Want that post-clean sparkle back? Rinse thoroughly, let the floor dry completely, then apply a manufacturer-approved vinyl polish or restorer sparingly with a microfiber mop.
Work in small sections, buff gently to avoid streaks. For natural shine, try a diluted white vinegar rinse followed by buffing.
Avoid waxes not designed for vinyl—they can yellow or attract dirt.
Visual Aids and Step Demonstrations
You’ll want clear before-and-after photos to show the real results of each step.
Include tool-orientation and brush-technique diagrams so you know how to hold and move each implement.
Finish with a short workflow infographic for weekly maintenance that you can follow at a glance.
Before-and-after process photos
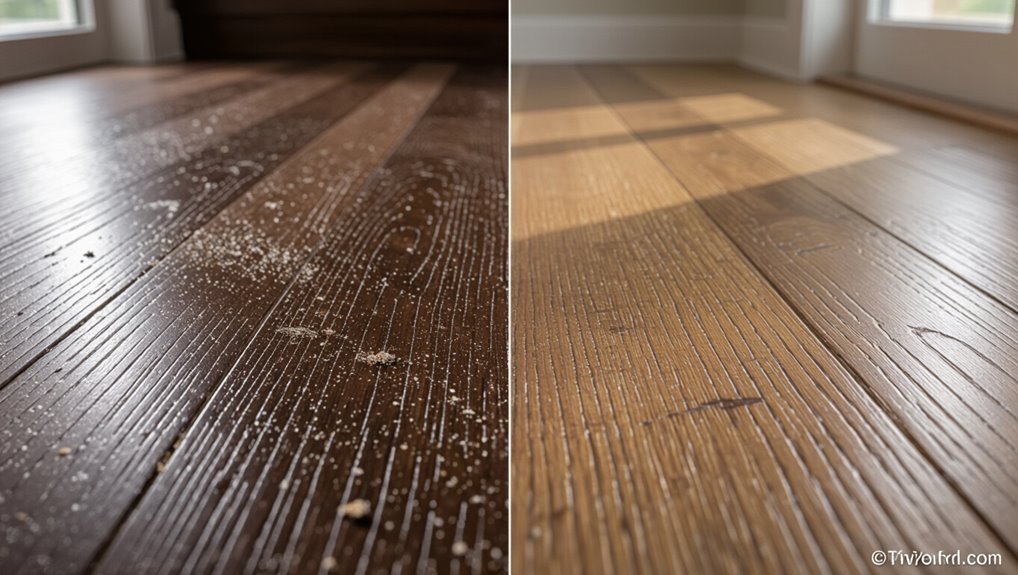
Photos showing before-and-after stages make each step of deep cleaning vinyl floors clear and repeatable. You can see exactly what to expect and where to focus effort.
Use close-up shots of grooves, mid-range photos of tool placement, and final wide views. Label images with brief captions noting products, dwell times, and results so you can replicate successful methods and track progress.
Tool orientation and brush technique diagrams
When you learn proper tool orientation and brush technique from clear diagrams, you’ll clean vinyl floors faster and avoid streaks or surface damage.
Study illustrations showing brush angle, pressure, and stroke direction relative to grooves. Follow arrows for uphill/downhill passes, rotate the handle to reach recessed edges, and use short, controlled strokes in textured areas.
Labels should note recommended bristle stiffness and safety tips.
Short workflow infographic for weekly maintenance
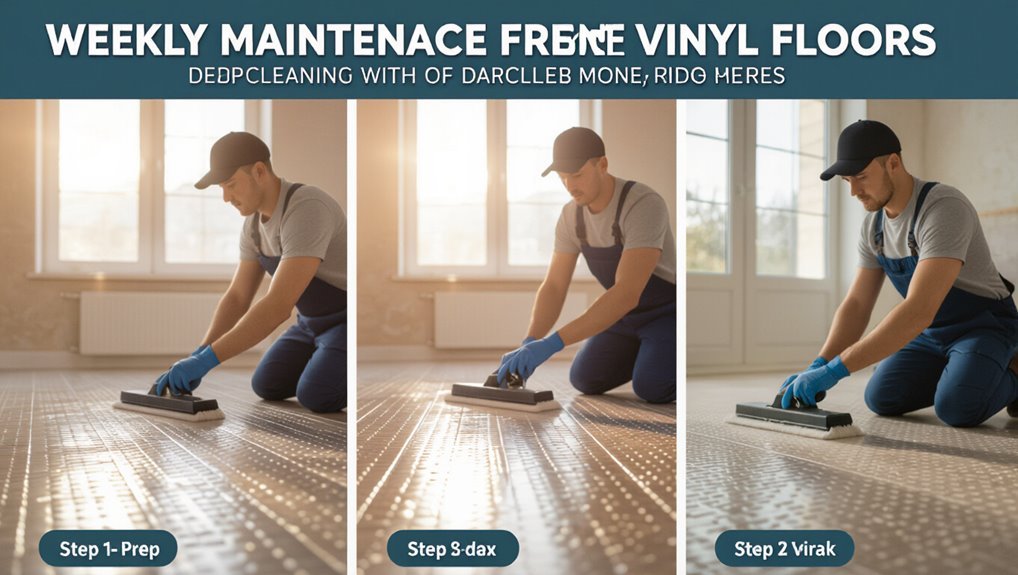
With brush angles and stroke patterns mastered from the diagrams, create a short workflow infographic that lays out your weekly vinyl-floor maintenance in five clear steps.
Use icons for sweep, pre-treat, scrub with grain, rinse, and dry/inspect.
Add time estimates, recommended tools, and one safety tip.
Keep layout linear, high-contrast, and printable so you can follow it at a glance.