How to Deep Clean Floors and Get Them Spotless From Grout to Grain
Start by clearing and sweeping the area, spot-treating stains, then choose cleaners fit for the floor—pH-neutral for wood and stone, stronger or steam-safe solutions for tile and grout, gentle products for vinyl or laminate. Use low moisture on delicate surfaces, scrub grout with a brush or rotary tool, rinse thoroughly, and dry to avoid streaks. Reinspect and touch up missed spots, seal grout or stone as needed, and keep a simple maintenance routine to stay spotless—more tips follow.
How to Deep Clean Floors and Get Them Spotless: Quick Answer
The quickest route to spotless floors is a thorough sweep or vacuum, targeted spot treatment, then a mop with a suitable cleaner.
You should deep clean when dirt, stains, or buildup don’t respond to your regular routine or before guests and seasonal changes.
For routine maintenance, stick to weekly sweeping and mopping to keep grime from becoming a bigger job.
One-sentence summary of the fastest route to spotless floors
If you want spotless floors fast, start by clearing the area, sweep or vacuum thoroughly, spot-treat stains, then mop with a suitable cleaner and finish by drying and buffing for streak-free shine.
To master how to deep clean floors, follow that one streamlined routine, adjust products for your surface, and work methodically so you’ll cut time while getting consistent, professional-looking results every time.
When to deep clean vs. regular cleaning
When you notice dullness, grout buildup, persistent stains, lingering odors, or worn finish that regular sweeping and mopping won’t fix, it’s time for a deep clean; otherwise stick to your routine quick cleans to maintain shine and prevent dirt from embedding.
- Weekly sweeping or vacuuming
- Damp mopping for spots
- Monthly grout scrubs
- Seasonal deep-cleaning session
- Immediate stain treatment
Understanding Floor Types and Why Deep Cleaning Matters
You’ll want to know how different floor materials—hardwood, tile and grout, vinyl, laminate, stone, and concrete—need different cleaners and methods.
Dirt, grime, and clogged grout not only make floors look bad but can wear finishes and shorten their lifespan.
Regular deep cleaning also protects your health by removing allergens, mold, and slip hazards.
Common floor materials and how they differ (hardwood, tile & grout, vinyl, laminate, stone, concrete)
Because floors come in many materials—each with different porosity, finish, and vulnerability,you’ll need different deep-cleaning strategies for hardwood, tile and grout, vinyl, laminate, stone, and concrete. You’ll choose cleaners, tools, and moisture levels based on material to protect finish and longevity.
| Material | Key care note |
|---|---|
| Hardwood | Low moisture, pH-neutral |
| Tile & grout | Stronger cleaners, scrubbing |
| Vinyl/laminate | Gentle cleaners, avoid soaking |
| Stone/concrete | Sealers, pH-specific care |
How dirt, grime, and grout buildup affect appearance and longevity
Although dirt and grime often seem cosmetic, they actively accelerate wear and damage by abrading finishes, trapping moisture, and dulling surfaces.
Grout buildup holds stains and harbors mold that can weaken tile bonds and discolor floors over time.
You’ll notice scratches, finish loss, and faded color sooner when buildup remains; regular deep cleaning preserves appearance, prevents costly repairs, and extends material life.
Health and safety reasons to deep clean (allergens, mold, slip hazards)
When you skip deep cleaning, allergens like dust mites and pet dander build up in carpets and crevices. Mold can take hold in grout and wood joints, and surface residue creates slick spots that raise slip-and-fall risk.
You’ll reduce respiratory triggers, prevent structural damage from mold, and cut accident chances by removing hidden grime, drying surfaces, and using appropriate cleaners for each floor type.
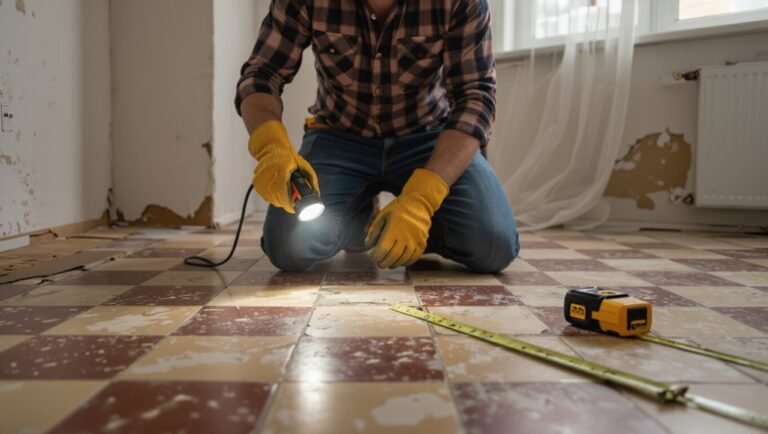
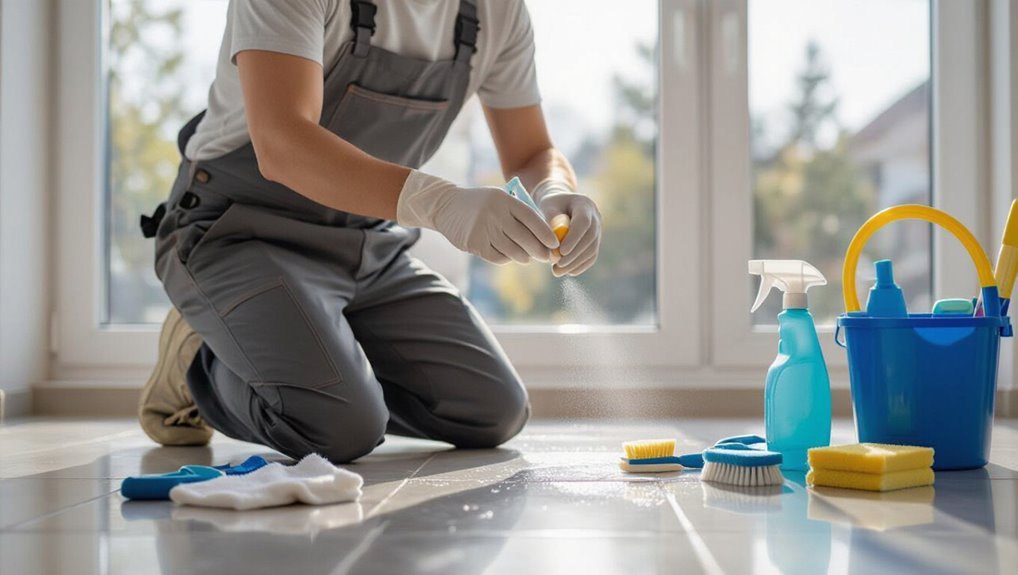
Preparation Before Deep Cleaning
Before you start, gather a clear checklist of essential and optional tools and supplies so you won’t stop mid-job.
Follow basic safety steps—wear gloves, keep kids and pets away, and open windows or use fans for ventilation.
Always test any cleaner on a small, inconspicuous spot to check for discoloration or damage before treating the whole floor.
Tools and supplies checklist (essential vs. optional)
Start with a short list of essentials you’ll always need and a secondary list of optional items that make the job faster or gentler on certain floors.
You’ll want basics for stripping dirt plus optional tools for delicate finishes. Choose products suited to your floor type and test small areas first.
- Microfiber mop
- Neutral pH cleaner
- Stiff brush
- Grout brush
- Floor polisher
Safety precautions and ventilation
Because deep cleaning often uses concentrated products and power tools, take a few safety steps so you don’t create new hazards: open windows and doors, run fans, and avoid sparks.
Wear gloves, eye protection, and a mask rated for fumes if needed.
Keep pets and kids away, read labels, store chemicals upright, and unplug tools before changing attachments or cleaning them.
How to test a cleaner on a small area
If you’re unsure how a cleaner will react with your floor’s finish, test it on an inconspicuous spot first: apply a small amount, wait the recommended dwell time, then blot and inspect for discoloration, texture change, or residue.
Note results, rinse thoroughly, and let dry. If damage or dulling appears, try a milder product or consult manufacturer guidance before proceeding.
Step-by-Step Deep Cleaning Process (Room-Agnostic)
Start by clearing furniture and dry debris so you can see problem spots and move freely.
Pre-treat stains and pick a cleaning solution that matches your floor, then choose the appropriate method—mop, scrub, steam, or machine—based on the surface and soil level.
Finish by rinsing, neutralizing if needed, and drying thoroughly to protect the floor and prevent residue.
Step 1 Clear and dust: removing furniture and dry debris
- You’ll start by moving furniture out of the way, unplugging cords, and protecting anything delicate. Clear the floor so you can access every corner.
- Slide lightweight items first
- Use furniture pads for heavy pieces
- Sweep or vacuum loose dirt
- Dust baseboards and edges
- Check for small dropped items before mopping
Step 2 Pre-treat stains and high-traffic areas
With the floor cleared and dust removed, you’re ready to target stains and worn spots before mopping.
Spot-treat grease, pet stains, and scuffs using appropriate cleaners or a baking soda paste. Let treatments sit per directions, agitate gently with a soft brush, then blot.
For high-traffic zones, repeat where needed and rinse residue so the main cleaning works evenly.
Step 3 Choose the right cleaning solution for the floor type
Although different floors look similar at a glance, they each need specific cleaners and dilution ratios to avoid damage, dulling, or residue; identify whether you’re working with hardwood, laminate, tile, vinyl, stone, or sealed concrete and pick a pH-appropriate product or homemade solution recommended for that material.
| Floor Type | pH Range | Recommended Cleaner |
|---|---|---|
| Hardwood | Neutral | Wood floor soap |
| Tile | Mild alkaline | Tile cleaner |
| Stone | Acid-free | Stone-safe cleaner |
Step 4 Cleaning technique: mop, scrub, steam, or machine (when to use each)
Now that you’ve picked a cleaner suited to your floor, decide how to apply it: mopping, scrubbing, steaming, or using a machine—each method fits different soils and surfaces.
Mop for light dirt on sealed floors. Scrub grout and stubborn spots with a brush. Steam for sanitizing and lifting grime on durable surfaces. Use machines for large areas or deep-cleaning carpets and hard floors efficiently.
Step 5 Rinsing, neutralizing, and drying properly
Because residues from cleaners can attract dirt and damage finishes, you should rinse and neutralize surfaces before they dry, then speed drying to prevent streaks and mold.
Use clean water or recommended neutralizer, wring mops often, and change rinse water.
Blot excess moisture with microfiber towels, run fans or dehumidifiers, and avoid walking until fully dry to preserve finish and prevent streaks.
Step 6 Post-clean inspection and spot touch-ups
Once you’ve rinsed and dried the floor, take a slow, systematic walk-through to inspect for missed spots, streaks, or lingering residue so you can catch issues before they set.
Carry a microfiber cloth, spray bottle with diluted cleaner, and a soft brush.
Target trouble areas, reapply cleaner sparingly, agitate gently, then blot and dry.
Reinspect until uniform shine and cleanliness are achieved.
Deep Cleaning Tile and Grout: From Grimy to Clean
You’ll start by learning how to identify grout types and the problems each one faces so you can pick the right cleaner.
Compare homemade solutions with commercial products, then follow a clear prep-scrub-steam-seal routine for best results.
I’ll also show methods for removing stubborn stains and efflorescence, plus when and how to reseal grout to keep it protected.
Identifying types of grout and common problems
Whether you’re renovating or just tackling a weekend cleaning, knowing what grout you’re dealing with makes the job quicker and prevents damage.
Check whether grout is sanded or unsanded, epoxy or cement-based, then note age, colorant presence and sealant status.
Look for hairline cracks, spalling, staining, mold or loose sections. That guides repair needs and proper cleaning approach.
Homemade vs. commercial grout cleaners
After you’ve identified the grout type, condition, and any repairs it needs, decide whether to use homemade mixes or a commercial cleaner for the actual deep clean. You’ll weigh cost, strength, safety, and staining: DIY is gentler and cheap; commercial products act faster on deep stains but need ventilation and caution.
| Homemade | Commercial |
|---|---|
| Gentle | Strong |
| Cheap | Faster |
| Customizable | Consistent |
| Safer fumes | Higher cost |
| Best for light grime | Best for heavy stains |
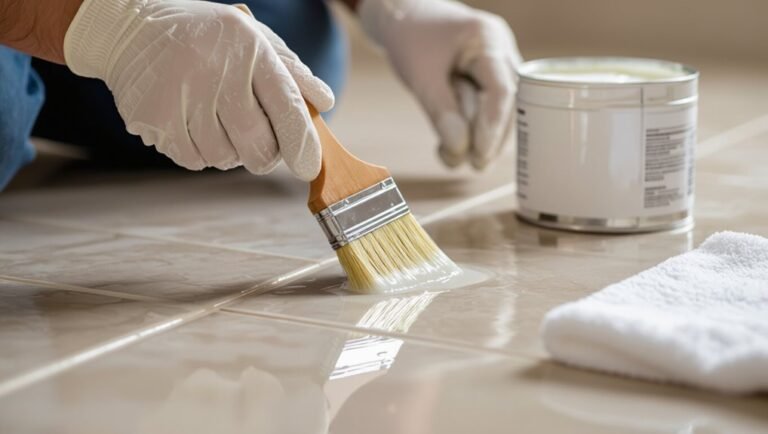
Step-by-step grout cleaning method (prep, scrub, steam, seal)
Start with a clear plan: prep the area, apply your cleaner, scrub stubborn grout lines, use steam or rinse to lift residue, and finish by sealing to protect your work.
Tape off baseboards, sweep and mop.
Apply grout cleaner, let dwell per instructions, scrub with a stiff brush, rinse or steam to remove residue, let dry fully, then apply a penetrating grout sealer.
How to remove stubborn grout stains and efflorescence
Tackle stubborn grout stains and efflorescence by first identifying the cause—organic grime, mineral deposits, or salt deposits from moisture—and choosing the right treatment for each.
Use oxygen bleach or enzyme cleaner for organic stains, dilute muriatic or white vinegar for mineral build-up, and brush gently with a nylon brush.
Rinse thoroughly, dry, and improve ventilation to prevent recurrence.
When and how to reseal grout
Knowing when to reseal grout saves you time and prevents damage: if water beads no longer on the surface, stains soak in, or the grout looks dull or crumbly, it’s time to reseal.
Clean and dry grout thoroughly, apply a penetrating sealer with a brush or applicator, wipe excess, and let cure per instructions.
Reseal every 1–3 years or sooner in high-traffic or wet areas.
Deep Cleaning Hardwood and Laminate Floors
When cleaning hardwood and laminate, you’ll want to pick pH-neutral cleaners and avoid excess water, wax buildup, or harsh chemicals that can damage finishes.
I’ll walk you through a step-by-step hardwood deep clean with minor scratch treatment, a laminate-specific method that prevents edge swelling, and how to decide when refinishing—not just deep cleaning—is needed.
Follow these tips to protect your floors’ appearance and longevity.
Safe cleaners and what to avoid (water, wax buildup, harsh chemicals)
Because hardwood and laminate are sensitive to moisture and harsh chemicals, pick cleaners formulated for those surfaces and use them sparingly.
Avoid soaking floors, steam mops, oil soaps that leave residue, and abrasive powders. Don’t wax laminate or overapply polish on finished wood.
Test any product in a hidden spot first, wipe spills immediately, and use microfiber mops with minimal cleaning solution.
Step-by-step hardwood deep clean and minor scratch treatment
1. Start by sweeping and vacuuming edges, then mop with a barely damp microfiber and pH-neutral wood cleaner.
Dry immediately. For sticky spots, rub gently with a soft cloth and diluted cleaner.
Treat minor scratches by rubbing a matching wood-tone marker or blending wax stick, then buff.
Finish with a thin coat of approved floor polish if needed, following manufacturer instructions.
Laminate-specific procedure and preventing edge swelling
For laminate floors, you’ll clean differently than hardwood to avoid water damage and edge swelling: use a barely damp microfiber mop with a manufacturer-recommended laminate cleaner, work in small sections, and wipe up any moisture immediately with a dry cloth.
Vacuum or sweep first, treat stubborn spots with a dampened cloth, avoid steam cleaners, and protect edges from standing water or wet mopping.
Refinishing vs. deep cleaning: how to decide
After you’ve cleaned and protected edges on laminate or followed hardwood-specific steps, you’ll need to decide whether the next move is another deep clean or a full refinish.
Inspect surface wear, stains, finish depth, and structural damage. Choose cleaning for surface grime and light scratches; refinish for worn finish, deep gouges, or recurring stains.
- Wear level
- Scratch depth
- Stain permanence
- Finish thickness
- Budget and time
Deep Cleaning Vinyl, Linoleum, and Concrete Floors
For vinyl and linoleum, you’ll want pH-neutral cleaners or a mild detergent and a soft mop to lift grime without damaging the surface.
Use a plastic scraper and an adhesive remover for old glue, and a melamine (magic) eraser or rubbing alcohol to tackle scuffs and wax buildup.
For concrete, pressure-wash or scrub with a degreaser and oxygen bleach for stains, then consider sealing once it’s fully clean and dry to protect against future soiling.
Best cleaners and methods for resilient flooring
Anyone can keep resilient floors like vinyl, linoleum, and concrete looking fresh by choosing the right cleaner and technique for each surface; use pH-neutral solutions and gentle agitation for finished vinyl and linoleum, and stronger alkaline cleaners or steam for bare or sealed concrete, always testing a small area first.
Rinse thoroughly, mop with microfiber, dry promptly, and repeat weekly for routine maintenance.
Removing adhesive, scuffs, and wax buildup
Tackling adhesive, scuffs, and wax buildup takes a mix of the right solvents, gentle abrasion, and patience so you don’t damage vinyl, linoleum, or concrete finishes.
Spot-test a mild citrus or mineral spirits for adhesive, scrape gently with a plastic putty knife, then mop with a neutral pH cleaner.
For wax, use a commercial wax stripper per instructions, rinsing thoroughly and ventilating.
Concrete deep cleaning and stain removal (including sealing tips)
Concrete floors demand a different approach than vinyl or linoleum: you’ll need stronger cleaners, more elbow grease, and attention to porosity to remove ingrained dirt and stains without harming the slab.
Start with sweeping, degrease with alkaline cleaner, scrub with a stiff brush or rotary scrubber, rinse thoroughly, and spot-treat stains with poultices.
Once dry, apply a penetrating sealer to protect and simplify future cleaning.
Using Machines: Steam Cleaners, Scrubbers, and Vacuums
Decide whether steam, low‑moisture, or rotary scrubbers fit the job by matching moisture level and soil type to your floor material.
Choose machines designed for your floor—vinyl and sealed concrete tolerate more moisture and agitation than laminate or unsealed wood.
Follow manufacturer operating tips, use the right pads and detergents, and avoid common mistakes like over‑wetting, wrong-speed pads, or skipping spot tests.
When to use steam vs. low-moisture vs. rotary scrubbers
Wondering which machine will give you the best results? Use steam on sealed hard floors and grout to lift grime and sanitize, but avoid unsealed wood.
Choose low‑moisture systems for delicate finishes, quick drying, and maintenance cleaning.
Pick rotary scrubbers for heavy buildup, textured surfaces, and commercial jobs where agitation matters.
Match method to floor condition, finish, and drying time.
Machine selection guide by floor type
Now that you know when to use steam, low‑moisture, or rotary methods, let’s match machines to specific floor types so you can choose the right tool for the job. You’ll pick steam for sealed stone, low‑moisture vacuums for hardwood, rotary scrubbers for tile/grout, and carpet extractors for rugs. Compare options below:
| Floor type | Recommended machine |
|---|---|
| Sealed stone | Steam cleaner |
| Hardwood | Low‑moisture vacuum |
| Tile/grout | Rotary scrubber |
| Carpet | Extractor |
Operating tips and common mistakes with machines
1 clear rule: read the machine’s manual before you plug it in and follow basic safety and setup steps—fill reservoirs with the right solutions, attach the proper pads or brushes, and test a small inconspicuous area first.
Use correct settings for surface type, change pads often, and avoid overwetting.
Empty and rinse tanks, inspect hoses, and don’t ignore unusual smells or smoke—stop and troubleshoot.
Eco-Friendly and DIY Cleaning Solutions
You can make safe homemade cleaners tailored to each floor type—diluted vinegar for sealed tile, mild soap for hardwood, and a baking soda paste for grout.
I’ll cover the pros and cons of common natural ingredients like vinegar, baking soda, and hydrogen peroxide so you know when they help or harm.
Then we’ll look at how to balance eco-friendliness with real cleaning effectiveness and when to choose a commercial product.
Safe homemade cleaners for each floor type
A set of simple, eco-friendly cleaners can keep every floor type spotless without harsh chemicals or expensive products.
You’ll match solutions to materials: mild soap for sealed wood, enzyme spray for carpets, gentle stone cleaner for tile, diluted castile for vinyl, and breathable oil for cork.
Test in a hidden spot first.
- Sealed wood: mild soap
- Carpets: enzyme spray
- Tile: stone cleaner
- Vinyl: diluted castile
- Cork: breathable oil
Pros and cons of natural ingredients (vinegar, baking soda, hydrogen peroxide)
While vinegar, baking soda, and hydrogen peroxide are affordable, accessible, and effective for many cleaning tasks, each has limits and safety considerations you should know before using them around your floors.
You can deodorize and scrub grout with baking soda, disinfect with hydrogen peroxide, and remove grime with diluted vinegar.
However, avoid vinegar on stone or waxed wood, and never mix chemicals.
How to balance eco-friendliness with effectiveness
Having covered what common natural cleaners can and can’t do, it helps to weigh their environmental benefits against real-world performance and safety for your floors.
Choose plant-based or phosphate-free products for routine cleaning, reserve tougher formulations for heavy grime, and always test a small area.
Combine diluted DIY solutions with good tools and ventilation to keep both surfaces and indoor air safe and effective.
Common Mistakes and How to Avoid Them
Don’t soak floors or you’ll risk warping, especially with wood or laminate.
Avoid abrasive cleaners on delicate surfaces and always rinse to prevent sticky residue.
Learn the right way to use machines and tools so you don’t damage finishes or furniture.
Over-wetting and warping
If you let too much water sit on wood or laminate floors, the boards can swell, warp, and even separate at the seams, so you should control moisture every step of the way.
Work with a damp—not dripping—mop, wring frequently, and dry with microfiber or a towel.
Wipe spills immediately and avoid steam cleaners on vulnerable flooring to prevent irreversible damage.
Using abrasive cleaners on delicate surfaces
When you scrub delicate surfaces with abrasive cleaners or rough pads, you can strip finishes, scratch veneers, and leave dull, permanent marks.
Use mild pH-neutral cleaners and soft microfiber or non-abrasive pads instead. Test cleaners on an inconspicuous spot first, follow manufacturer guidelines, and work gently along the grain.
Replace harsh tools with gentler options to preserve appearance and longevity.
Skipping rinsing and leaving residue
Although it’s tempting to skip rinsing to save time, leaving cleaner residue on floors traps dirt, dulls finishes, and can make surfaces sticky or slippery.
You should rinse after cleaning with clean water, wring mops frequently, and change water when it’s dirty.
Test a small area first to verify rinsing won’t harm finishes, then dry thoroughly to prevent streaks and residue buildup.
Misusing machines and tools
Because machines and tools can speed up deep cleaning or cause costly damage, you need to know how to use them correctly.
Read manuals, match attachments to surfaces, and test settings on inconspicuous spots.
Don’t overload pads, skip maintenance, or use harsh brushes on delicate floors.
Rent specialized equipment when needed, and wear protection to avoid injury and preserve finishes.
Maintenance Plan to Keep Floors Spotless Longer
Start with simple daily, weekly, and monthly routines that keep dirt from building up and make deep cleans easier.
Create a seasonal deep-clean checklist so you know exactly when to tackle tasks like grout scrubbing, waxing, or resealing.
Use preventive measures—door mats, felt furniture pads, and humidity control—to reduce wear and keep floors spotless longer.
Daily, weekly, and monthly maintenance routines
When you stick to simple daily, weekly, and monthly routines, your floors stay cleaner longer and need fewer deep cleanings. Daily sweeping or quick vacuuming removes grit, while weekly damp mopping tackles spills and buildup. Monthly inspections plus targeted treatments keep wear and stains from becoming permanent.
- Sweep/vacuum high-traffic areas daily
- Damp-mop weekly with appropriate cleaner
- Spot-treat stains immediately
- Check grout, seams monthly
- Rotate mats and furniture pads regularly
Seasonal deep-clean checklist
After you’ve kept up with daily, weekly, and monthly care, plan seasonal deep-cleans to tackle buildup that routine maintenance won’t remove.
Each season, inspect grout, grout seals, hardwood finish, and tile grout lines; shampoo or steam-clean carpets; strip and recoat waxed floors; deep-scrub grout with appropriate cleaners; and reseal porous stone.
Schedule tasks, gather supplies, and allow proper drying time for lasting results.
Preventive measures (mats, furniture pads, humidity control)
1 simple habit—using the right mats, furniture pads, and humidity control—can cut wear and cleaning time dramatically.
Place doormats outside and inside to trap dirt, use felt or rubber pads under legs to prevent scratches, and adjust humidity (35–55%) to stop warping and grout cracking.
Vacuum regularly, shake or wash mats, and replace pads when worn to extend floor life and reduce deep cleans.
Troubleshooting Specific Problems
You’ll learn how to spot and treat mold or mildew so it doesn’t spread.
You’ll also get fast methods for lifting oil, grease, and pet stains without harming the finish.
Finally, you’ll find ways to address discoloration and etching on stone to restore appearance.
Identifying and treating mold and mildew on floors
When you spot dark, fuzzy patches or a musty smell on your floors, that’s usually mold or mildew taking hold, and you should act quickly to prevent spread and damage.
Ventilate the area, wear gloves and a mask, and scrub hard surfaces with a diluted bleach or vinegar solution.
For porous flooring, dry thoroughly and consider replacing affected sections to stop recurrence.
Removing oil, grease, and pet stains
After handling mold and mildew, you’ll often face oily spots, greasy footprints, or pet accidents that need a different approach.
Blot fresh pet stains, then clean with enzyme cleaner for odors.
For grease or oil, sprinkle baking soda or cornstarch to absorb, let sit, then sweep and wipe with degreasing dish soap diluted in warm water.
Rinse and dry thoroughly.
Dealing with discoloration and etching on stone
Although natural stone resists wear, it can still show discoloration and etching from acids, hard water, or harsh cleaners.
You’ll need a targeted approach to restore its appearance. Test a neutral pH stone cleaner on an inconspicuous area, rinse thoroughly, then use a poultice for stains.
For etching, consider professional honing or a mild abrasive pad, and always reseal afterward.
Cost, Time, and When to Hire a Professional
Expect the time and cost for a DIY deep clean to vary by floor type—hardwood might take a few hours and need gentle cleaners, while tile or grout can be more time-consuming and may require stronger cleaners or tools.
If you spot persistent stains, damage, odor, or the job feels physically overwhelming, it’s a sign you should call a pro.
A professional service will give a clear quote, use specialized equipment, and restore floors more quickly and safely than most DIY attempts.
Estimated time and cost for DIY deep clean by floor type
A quick DIY deep clean can take anywhere from 30 minutes for a small tiled bathroom to several hours for an entire hardwood or carpeted floor, and costs will vary by supplies and whether you rent equipment; below we’ll break down typical time ranges, likely expenses, and clear signs you should call a pro.
| Floor Type | Time Range | Estimated Cost |
|---|---|---|
| Tile/grout | 30–90 mins | $10–$40 |
| Hardwood | 1–3 hrs | $15–$60 |
| Carpet | 1–4 hrs | $20–$80 |
Signs you should call a pro
If stains, odors, or wear go beyond what your usual deep-clean routine removes, call a pro—especially when the damage risks permanent harm or requires specialized equipment you don’t have.
Hire professionals if cleaning takes more time than you can spare, costs outweigh DIY fixes, mold or structural issues appear, or delicate materials (antique wood, natural stone) need careful treatment to avoid irreversible damage.
What to expect from professional services
When you decide a pro is the right move, know what their visit will cost, how long it will take, and what level of care to expect.
Expect estimates based on square footage, condition, and materials; budget for deep-clean, stain removal, and sealant.
Typical jobs take a few hours to a day.
Hire pros for persistent stains, delicate surfaces, or time constraints.
Frequently Asked Questions
You’ll find answers to common concerns like how often to deep clean different floor types and whether you can use a steam cleaner on sealed hardwood.
I’ll also cover safe methods for removing grease from tile grout, getting water stains out of wood, and whether natural cleaners work on tough stains.
Read on for clear, practical guidance.
How often should I deep clean different floor types?
Because different materials wear and show dirt differently, the right deep-clean schedule depends on your floor type, traffic level, and pet or kid activity.
Aim to deep clean high-traffic areas monthly, medium-traffic rooms every 2–3 months, and low-traffic spaces twice yearly.
Tile and grout may need more frequent attention; sealed stone and well-finished hardwood can go longer if you vacuum and spot-clean regularly.
Can I use a steam cleaner on sealed hardwood?
Can you use a steam cleaner on sealed hardwood? You can, but you should proceed cautiously.
High heat and moisture can damage finish or seep into seams over time. Use a low-moisture, manufacturer-approved steam setting, avoid prolonged passes, and test a hidden spot first.
Wipe floors dry immediately and follow your floor maker’s guidelines to protect warranty and finish integrity.
What is the safest way to remove grease from tile grout?
If you’ve tested your steam cleaner on sealed hardwood and decided against heavy moisture, the same caution applies when tackling greasy grout — you want effective cleaning without harming grout or surrounding tile.
Start with a dry brush, then apply a baking soda paste or pH-neutral degreaser.
Scrub with a nylon brush, rinse lightly, and dry thoroughly.
Repeat if needed.
How do I remove water stains from wood floors?
Wondering how to get those white or dark water rings out of your wood floor?
First, blot moisture and let the area dry.
For white rings, gently rub with a soft cloth and a small amount of white vinegar or baking soda paste; wipe and dry.
For dark stains that penetrate, sand lightly and refinish the spot or call a professional to avoid worsening the damage.
Are natural cleaners effective for tough stains?
How well do natural cleaners tackle tough stains on floors?
You can get good results with vinegar, baking soda, lemon, or hydrogen peroxide for many spots—especially organic stains and surface grime.
For set-in oil, dye, or deep grout discoloration, you’ll need stronger commercial or enzymatic cleaners and sometimes light scrubbing or sanding.
Always test a hidden area first.