How to Apply Vinyl Plank Flooring: A Foolproof Installation Guide
You can install vinyl plank flooring yourself in a weekend by prepping a clean, level subfloor, acclimating the planks, and choosing the right type (LVP, SPC, or WPC) for your space. Measure carefully, lay underlayment if needed, snap a starter line, click or glue planks row by row, trim around obstacles, and finish with trims and connections while keeping expansion gaps. Follow manufacturer instructions for adhesives and maintenance, and keep going to learn detailed techniques and tips.
How to Apply Vinyl Plank Flooring and Overview
Yes—you can often DIY vinyl plank flooring in a weekend for a single room, with materials and tools typically costing $200–$800 depending on quality.
This guide is for handy homeowners with basic carpentry skills and patience for measuring, cutting, and fitting planks.
You’ll get a visual overview of the steps: prep the subfloor, lay underlayment if needed, snap or glue planks in place, and finish with trim.
One-paragraph direct answer: can you DIY and typical time/cost
If you’re reasonably handy and willing to follow instructions, you can DIY vinyl plank flooring—most homeowners handle a 200–400 sq ft room in a weekend or two.
Expect 1–3 days for prep (remove old floor, level subfloor), 1–2 days for laying planks, plus extra time for trim and connections.
You’ll save labor costs; materials and tools typically run $2–6/ft², installers more.
Who this guide is for and required skill level
Although you don’t need to be a pro, this guide assumes you’re comfortable with basic hand and power tools, careful measuring, and some light demolition and cleanup.
It’s aimed at confident DIYers, homeowners tackling a single room, and handy beginners ready to learn technique. You’ll need patience, attention to detail, and willingness to follow steps precisely; no advanced carpentry required.
Visual overview of the installation process
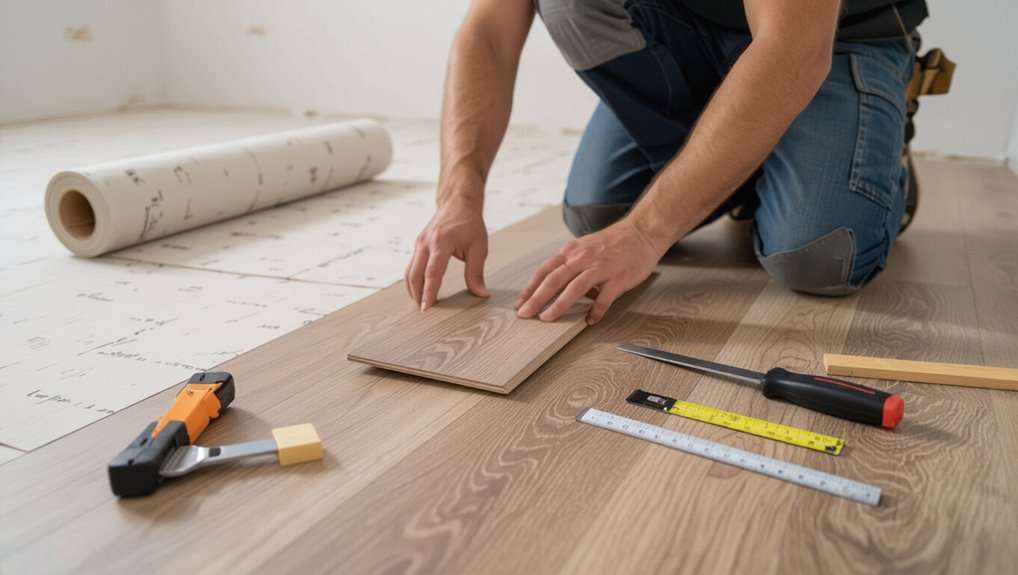
Think of the installation as a short series of clear stages: prep the subfloor, lay underlayment, plan your layout and stagger planks, cut and fit pieces, lock them together, and finish edges with trim and connections.
Visualize each stage: measure and mark, snap chalk lines, test-fit rows, use spacers, trim doorways, and inspect seams.
Work methodically, check alignment, and clean as you go.
Basic Understanding What Vinyl Plank Flooring Is and Why Choose It
Before you start installation, you should know the main vinyl plank types—LVP (flexible), SPC (rigid stone core), and WPC (wood-plastic core)—and how their feel and durability differ.
We’ll weigh benefits like water resistance, low maintenance, and cost against drawbacks such as potential off-gassing, temperature sensitivity, and edge separation risks.
Finally, you’ll learn which rooms and moisture conditions each type suits best so you can pick the right product for bathrooms, kitchens, basements, or dry living areas.
Vinyl plank types (LVP, SPC, WPC)
Vinyl plank flooring comes in three main types—LVP, SPC, and WPC—each built differently to suit various rooms and budgets. You’ll pick LVP for softness, SPC for rigidity and thin installs, or WPC for comfort and slight cushion. Consider subfloor, traffic, and moisture when choosing.
| Type | Core | Best for |
|---|---|---|
| LVP | Vinyl | Low budget |
| SPC | Stone | High traffic |
Benefits vs drawbacks
Although it looks like hardwood, vinyl plank flooring gives you a much more durable, water-resistant surface that’s easier to install and maintain.
- You get affordability and realistic visuals.
- You’ll enjoy scratch and stain resistance.
- Installation is fast, especially with click-lock systems.
- Consider tradeoffs: lower resale impact, potential off-gassing, and less reparability than solid wood.
Where vinyl plank is appropriate (rooms, moisture considerations)
1. You can install vinyl plank in living rooms, bedrooms, kitchens, and basements—anywhere you want durable, low-maintenance flooring.
It’s water-resistant and often waterproof, so it handles spills and humidity better than hardwood.
Avoid prolonged standing water; install in bathrooms only if the product is rated for wet areas.
Verify proper subfloor prep and use recommended underlayment for moisture control.
Tools, Materials, and Preparations
Before you start laying planks, gather the required and optional tools—saw, tapping block, spacers, utility knife, and a pull bar—and the materials like underlayment, trim, adhesives, and spacers.
Inspect and prepare the subfloor using a checklist for flatness, cleanliness, and moisture, and make any repairs or leveling as needed.
Finally, acclimate the flooring, test for moisture, and plan the room layout so your installation goes smoothly.
Required tools and optional tools
Getting the right tools makes installation faster and gives you cleaner results, so gather both required items and a few optional extras before you start.
You’ll need basic hand and measuring tools plus a few power tools for speed.
- Tape measure, utility knife, T-square
- Rubber mallet, tapping block, pull bar
- Jigsaw or miter saw (optional)
- Knee pads, spacers, pry bar (optional)
Materials and accessories (underlayment, trim, adhesives, spacers)
You’ll need a few key materials and accessories beyond the planks themselves to guarantee a durable, professional-looking floor:
- Underlayment — moisture barrier and sound insulation.
- Trim and junction strips — finish edges and doorways.
- Adhesive or double-sided tape — for glue-down or secure perimeters.
- Spacers and transition hardware — maintain expansion gaps and smooth joins.
Subfloor requirements and inspection checklist
1 essential step is a thorough subfloor inspection to guarantee your vinyl plank will perform and last—check for clean, dry, level, and structurally sound surfaces, remove old adhesives or debris, and confirm moisture and flatness tolerances per the manufacturer.
- Verify flatness and level within spec.
- Look for rot, loose boards, or soft spots.
- Remove residues and repair cracks.
- Confirm subfloor thickness and fastening.
Site preparation: acclimation, moisture testing, room layout planning
Before you lay a single plank, make sure the room and materials are ready: acclimate the vinyl planks in the installation space for the time the manufacturer specifies, test the subfloor and concrete for moisture with an appropriate meter, and plan the layout so plank direction, changeover locations, and focal areas are set.
- Open boxes, spread planks to acclimate.
- Use a calibrated moisture meter.
- Mark starting line and sightlines.
- Locate connections and thresholds.
Step-by-Step Installation Guide
Start by measuring your room and calculating how much material you’ll need. Then make sure the subfloor is clean, level, and protected from moisture.
Acclimate the planks and plan your layout—stagger seams, choose the installation direction, and mark focal points—before installing any underlayment or your first row.
Finally, use proper starting-row techniques and a click-lock floating method, joining and tapping rows as you go for a tight, even floor.
Step 1 Measure the room and calculate materials needed
Measure the room carefully so you know exactly how much vinyl plank flooring, underlayment, and trim you’ll need.
Measure length and width, note alcoves, and mark doorways. Calculate square footage, add 10% waste for cuts and pattern matching. Confirm plank coverage per box and underlayment roll size.
- Measure area
- Map obstacles
- Add waste
- Buy supplies
Step 2 Prepare and level the subfloor (repair, clean, moisture barrier)
Now that you’ve got your materials and layout planned, prepare the subfloor so your vinyl planks sit flat and last.
- Remove debris, nails, and old adhesive; sweep and vacuum thoroughly.
- Repair dips and cracks with appropriate patching compound; sand smooth when dry.
- Check moisture with a meter; install a vapor barrier if readings exceed manufacturer limits.
- Confirm the surface is level within tolerance before proceeding.
Step 3 Acclimate planks and plan layout (staggering, direction, focal points)

Before you lay a single plank, let the flooring acclimate in the room for at least 48 hours and map out your layout so seams, pattern, and focal lines look intentional.
Measure room width, decide plank direction toward the longest sightline, and mark a centered starter line.
Stagger end joints at least 6–12 inches, plan short-piece placement, and adjust to avoid thin strips at walls.
Step 4 Install underlayment (if required) and starting row techniques
If your vinyl plank requires underlayment, roll it out across the subfloor, trim it to fit, and tape seams so the surface is smooth and continuous; otherwise, you can move straight to the starter row.
- Lay underlayment perpendicular to planks if specified.
- Trim edges and leave expansion gap.
- Snap a chalk line for your starting edge.
- Place first row with decorative edge toward the wall and spacers in place.
Step 5 Click-lock floating installation: joining rows and tapping techniques
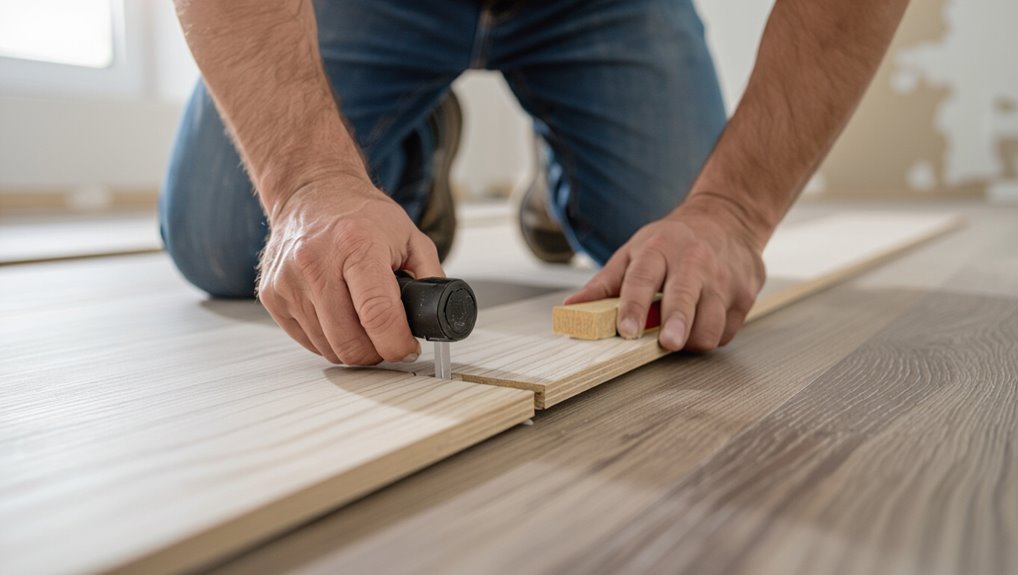
Once you’ve laid the starter row, begin joining the next planks by angling their tongue into the preceding plank’s groove and lowering them until they click.
Use a tapping block and soft mallet to seat seams tight without damaging the profile. Stagger end joints at least 6–8 inches, check alignment frequently, and maintain consistent expansion gaps.
Tap gently along seams to eliminate gaps.
Step 6 Cutting planks for edges, doorways, and fixtures (tools and templates)
After you’ve locked most rows in place, you’ll need to cut planks to fit along walls, around doorways, and snugly around pipes and other fixtures.
Use proper tools and templates to get clean, accurate cuts:
- Measure and mark precisely.
- Score and snap or use a jigsaw for curves.
- Drill clearance holes for pipes.
- Dry-fit pieces before final placement.
Step 7 Installing transition strips, trims, and baseboards
Step 7 brings the finishing touches: you’ll fit connector strips, trims, and baseboards to protect edges, hide gaps, and create a polished look.
- Measure thresholds and cut strips for doorways.
- Snap or screw down threshold profiles per manufacturer.
- Install quarter-round or reducer trims, mitering corners.
- Nail or adhesive-mount baseboards, leaving expansion gap access beneath.
Step 8 Final inspection, cleanup, and immediate care instructions
With trims, thresholds, and baseboards in place, you’ll move on to a careful final inspection and cleanup to make sure the floor looks right and will perform well.
Check seams, remove debris, and follow care tips:
- Inspect for gaps or high spots; fix immediately.
- Sweep and vacuum thoroughly.
- Clean with manufacturer-approved cleaner.
- Avoid heavy loads and water for 48–72 hours.
Adhesive and Glue-Down Installation (When and How)
You’ll choose glue-down, click-lock, or loose-lay based on room use, subfloor type, and traffic levels.
Prepare the surface thoroughly, pick the manufacturer-recommended adhesive, and follow a precise trowel pattern, then press and roll each plank to guarantee full contact.
I’ll walk you through the step-by-step glue-down process, rolling techniques, and common adhesive problems with fixes.
When to use glue-down vs click-lock vs loose lay
Because each vinyl plank installation method handles different site conditions and traffic demands, choosing glue-down, click-lock, or loose lay comes down to substrate, permanence, and performance.
Use glue-down for high-traffic commercial areas or uneven substrates needing full contact.
Choose click-lock for DIY-friendly, floating installations on stable subfloors.
Pick loose lay for quick, temporary installs or low-traffic rooms where easy replacement matters.
Surface preparation and recommended adhesives
Once you decide glue-down is the right method, prepare the subfloor carefully to guarantee a lasting bond.
Clean, dry, and level the surface; repair cracks and remove contaminants.
Choose adhesive matched to vinyl type and traffic: pressure-sensitive, permanent, or epoxy.
Follow manufacturer VOC and cure times.
- Clean
- Level/repair
- Select adhesive
- Confirm open time and coverage
Step-by-step glue-down application and rolling techniques
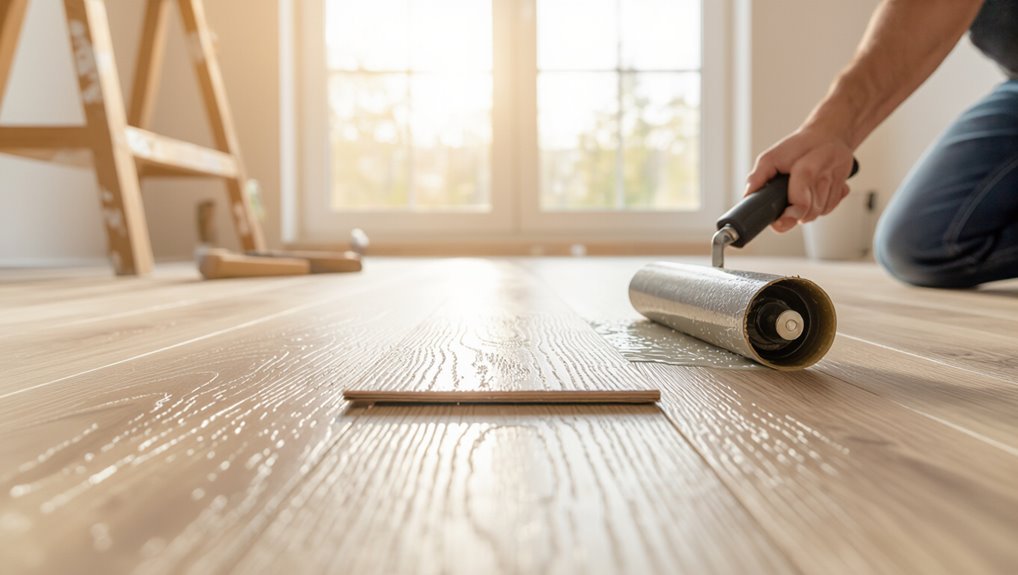
After you’ve prepped the subfloor and picked the right adhesive, lay out planks dry to confirm the pattern and openings.
Then apply adhesive in workable sections following the manufacturer’s trowel size and open time; press each plank firmly into place with a slight sliding motion to seat it and stagger end joints for stability.
Roll the floor with a 100–150 lb roller twice—first crosswise, then lengthwise—wipe excess adhesive immediately.
Common adhesive problems and fixes
Adhesive failures are the biggest cause of short-lived glue-down vinyl floors, so you’ll want to recognize common problems early and know the right fixes.
Watch for poor bonding from wrong adhesive, uneven trowel coverage, or wet substrates.
Clean, dry, and prime surfaces, use manufacturer-recommended adhesive and trowel size, apply consistent pressure with a roller, and replace failed sections promptly to prevent spread.
Special Situations and Room-Specific Guidance
When you tackle special situations, you’ll need specific techniques for each challenge—like installing over radiant heat, managing moisture in bathrooms and basements, or repairing uneven subfloors.
Learn the right leveling compounds and moisture barriers, and plan cuts and connections for cabinets, pipes, and stairs.
With the proper prep and tools you’ll avoid problems and guarantee a durable finish.
Installation over radiant heat systems
If your home uses radiant heat, you can still install vinyl plank flooring—but you’ll need to follow specific temperature limits, acclimation steps, and manufacturer guidelines to avoid warping or adhesive failure.
Keep surface temps under the recommended maximum (usually 85°F).
Acclimate planks over the active system, use compatible adhesives or floating installations, monitor heat changes gradually, and verify warranty coverage before proceeding.
Installing in bathrooms and basements (moisture control)
Because bathrooms and basements are prone to moisture, you’ll need to prioritize subfloor preparation, moisture barriers, and appropriate installation methods to prevent warping, mold, and adhesive failure.
Use waterproof vinyl rated for wet areas, install a continuous vapor barrier or waterproof underlayment, slope changes to drains, seal perimeter and seams with compatible caulk, and maintain ventilation to reduce humidity and prolong flooring life.
Uneven or damaged subfloors: leveling and repair approaches
Moisture issues aren’t the only threat to a successful vinyl plank install—uneven or damaged subfloors can cause gaps, clicking, and premature wear, so you’ll want to assess and correct them before laying planks.
- Inspect for soft spots, high spots, and cracks.
- Sand or grind high areas; patch low spots with leveling compound.
- Replace rotted plywood or damaged panels.
- Verify flatness with a straightedge and allow repairs to cure before installing.
Working around obstacles: cabinets, pipes, stairs
Working around cabinets, pipes, and stairs requires planning and the right tools, since these obstacles demand precise cuts and adjustments to keep the floor stable and looking professional.
Remove baseboards, scribe and undercut cabinets, and cut planks around pipes using a hole saw or coping.
At stairs, install a nosing and secure planks with adhesive or junction strips.
Take accurate measurements.
Common Mistakes and How to Avoid Them
Don’t rush acclimation or skip moisture testing, because trapped humidity and temperature differences will bite you later.
Make sure your subfloor is clean, level, and properly prepped, plan a staggered layout with correct cuts to avoid weak seams, and handle planks carefully to prevent damage.
If something goes wrong, learn to spot gaps, lifting, or mismatched edges early so you can diagnose the cause and repair or replace affected planks promptly.
Mistake: poor acclimation and moisture testing
If you skip proper acclimation and moisture testing, you’ll likely face warped, cupped, or bubbling vinyl planks down the road.
Before installation, leave boxes unopened in the room 48–72 hours so planks adjust to temperature and humidity.
Use a reliable moisture meter and follow manufacturer limits.
Don’t guess—address high moisture with mitigation or choose suitable flooring to prevent failure.
Mistake: improper subfloor prep and leveling
One overlooked step that’ll sabotage even the best planks is failing to properly prep and level the subfloor; unevenness, debris, or remnants of old flooring lead to gaps, clicking, and premature wear.
You should clean, repair, and sand high spots, fill low areas with an appropriate leveling compound, and verify flatness with a long straightedge before laying planks to guarantee a stable, long-lasting floor.
Mistake: wrong plank layout and poor staggering
When you skip planning the plank layout or fail to stagger seams properly, the floor will look patchy, weaken at joint lines, and draw attention to changes.
You should map rows before you start, keep end joints at least 6–12 inches apart, and vary plank lengths.
Follow manufacturer staggering guidelines, dry-fit sections, and adjust starter rows to balance cut sizes at walls.
Mistake: incorrect cutting or damage during installation
After laying out and staggering your planks properly, you’ll need to cut and fit pieces without nicking edges or splintering, since mistakes here are among the most common causes of visible damage.
Use a sharp utility knife and straightedge, score and snap when appropriate, clamp for stability, and protect plank tongues.
Measure twice, cut once, and handle pieces gently to avoid chips or fractures.
How to diagnose and repair installation errors
Spot problems early by walking the floor and checking for gaps, lifted edges, loose seams, or visible damage to planks and connections.
- Isolate loose planks, remove and clean subfloor.
- Replace damaged planks; cut precisely and glue or click back.
- Fill small gaps with matching filler or seam sealer.
- Re-level uneven areas; add underlayment or shim before reinstallation.
Tips, Best Practices, and Maintenance After Installation
Now that your planks are down, you’ll want to follow a few best practices to keep the floor looking great and lasting longer.
Clean regularly with recommended products, treat stains promptly, and use mats or felt pads to prevent wear.
For long-term upkeep, learn simple repair steps and when to replace individual boards to avoid bigger problems later.
Best practices for durability and appearance
To keep your vinyl plank floor looking its best and lasting for years, follow a few simple practices:
- Use protective pads under furniture and felt caps on chair legs to prevent scratches.
- Place entry mats to trap grit and moisture.
- Maintain stable indoor humidity and temperature to prevent plank movement.
- Avoid harsh cleaners and steam mops; stick to manufacturer-approved products.
Routine cleaning and stain removal tips
Although vinyl plank is low-maintenance, regular care keeps it looking like new and prevents stains from setting in.
You should clean often and tackle spills fast. Follow these steps:
- Sweep/vacuum daily to remove grit.
- Mop with a manufacturer-approved cleaner; avoid abrasive products.
- Blot spills immediately with a soft cloth.
- Use gentle stain removers for oil/ink, testing first in a hidden spot.
Long-term maintenance, repairs, and replacing boards
Plan for longevity by keeping a simple maintenance routine and knowing how to handle damage when it appears.
You’ll prevent major issues and extend floor life with routine care and prompt fixes.
- Sweep and mop weekly with manufacturer-approved cleaner.
- Use felt pads and rugs to reduce wear.
- Replace damaged planks by removing joints and installing matching pieces.
- Keep humidity stable to avoid warping.
Comparison: Vinyl Plank vs Other Flooring Options
When choosing flooring, you’ll want to weigh vinyl plank against hardwood for warmth and resale, laminate for cost and ease, and tile for durability and water resistance.
Vinyl plank often wins on waterproofing and installation simplicity, while hardwood offers natural beauty and laminate can be the most budget-friendly.
Think about traffic, moisture, and long-term value to pick the best fit for your space.
Vinyl plank vs hardwood
If you’re choosing between vinyl plank and hardwood, think about where you’ll install the floor and how you live day-to-day: vinyl handles moisture and heavy traffic better; hardwood offers timeless warmth and can be refinished.
| Feature | Vinyl Plank | Hardwood |
|---|---|---|
| Moisture | Excellent | Poor |
| Durability | High | Variable |
| Refinishing | No | Yes |
Vinyl plank vs laminate
Although both vinyl plank and laminate mimic wood, they use different materials and perform differently in real-world use, so you’ll want to weigh moisture resistance, durability, and installation ease before choosing.
| Feature | Quick Compare |
|---|---|
| Moisture | Vinyl resists water; laminate doesn’t. |
| Durability | Vinyl tolerates wear and dents better. |
| Installation | Both click-lock; vinyl often thinner. |
| Cost | Similar ranges; vinyl can be pricier for premium styles. |
Vinyl plank vs tile
You’ve just compared vinyl plank to laminate, and now it helps to look at how vinyl stacks up against tile. Vinyl’s softer, warmer, cheaper, and easier to install; tile wins on longevity and heat resistance. Choose vinyl for comfort and budget, tile for durability and style.
| Feature | Vinyl vs Tile |
|---|---|
| Comfort | Vinyl softer |
| Durability | Tile lasts longer |
Cost, Time Estimates, and When to Hire a Pro
Expect to pay for both materials and labor — vinyl planks range widely per square foot, and installers add a separate hourly or per-room charge.
A DIY job will save you labor costs but take longer, while pros can finish faster and handle tricky prep or shifts.
If your subfloor’s uneven, you’re short on time, or the layout is complex, you should hire a professional.
Typical material and labor cost breakdown
A straightforward breakdown helps you budget: vinyl plank materials usually run $1–$5 per square foot for basic wear-layer options and $3–$8+ for premium or rigid-core planks, while labor—if you hire a pro—adds roughly $1.50–$4 per square foot for straightforward installs and more for complex rooms, subfloor prep, or removal of old flooring.
| Item | Low | High |
|---|---|---|
| Basic plank | $1/sqft | $5/sqft |
| Premium plank | $3/sqft | $8+/sqft |
| Labor | $1.50/sqft | $4+/sqft |
Time estimates for DIY vs professional installation
Now that you’ve got a sense of material and labor costs, it’s helpful to compare how time commitments stack up for DIYers versus hiring a pro.
A typical 200–400 sq ft room takes a motivated DIYer 2–4 weekends (including prep). A professional crew can finish in 1–2 days.
Factor in learning curves, drying times, and furniture moving when scheduling either option.
Signs you should hire a professional
If your subfloor is uneven, the room is large or awkwardly shaped, or you don’t have time for a multi-day project, hire a pro—these factors can quickly turn a weekend DIY into costly mistakes or delays.
You should also call a pro if budgeting for labor fits your timeline, if intricate cuts or changes are needed, or if warranty requires certified installation to avoid voiding coverage.
FAQ
You’ll often ask whether you can install vinyl plank over existing flooring and how much expansion gap to leave and why.
You’ll also want to know if planks can be repaired or refinished, whether they’re waterproof or just water-resistant, and how long they typically last.
Below are clear answers to these common questions.
Can I install vinyl plank over existing flooring?
Wondering whether you can lay vinyl plank over your current floor? You often can if the substrate is flat, dry, clean, and securely bonded—think well-adhered tile, vinyl, or wood.
Remove loose material, fill gaps, and make certain no height issues with doors or changes in level.
Avoid installing over carpet, cushioned vinyl, or compromised subfloors; they’ll cause instability and failures.
How much expansion gap is needed and why?
Because vinyl plank floating floors expand and contract with changes in temperature and humidity, you need to leave a consistent expansion gap around the room—typically 1/4 inch to 1/2 inch at walls and fixed objects—to prevent buckling, warping, or separation at seams.
Use spacers during installation, maintain the gap at thresholds and around pipes, and cover it with baseboards or trim for a clean, secure finish.
Can vinyl plank be refinished or repaired?
Can vinyl plank be refinished, or should you repair what’s damaged? You can’t sand and refinish most vinyl planks—the wear layer’s thin and printed.
For scratches, dents, or isolated damage, you’ll repair: replace individual planks if floating, use filler or touch-up kits for minor blemishes, and epoxy or seam sealer for water-damaged edges.
Preventive care extends life; keep extra planks.
Is vinyl plank waterproof or water-resistant?
You can’t refinish most vinyl planks, so it’s worth knowing how they hold up to moisture before you install more.
Vinyl plank comes in waterproof and water-resistant types. Waterproof luxury vinyl (WPC/SPC with sealed seams) tolerates spills and wet rooms; water-resistant options handle occasional dampness but not standing water.
Always check manufacturer ratings and warranty for wet-area suitability.
How long will vinyl plank flooring last?
Most vinyl plank floors last 10 to 25 years in typical homes, depending on wear layer thickness, installation quality, and how well you maintain them.
You’ll get longer life from thicker wear layers (20 mil+), proper subfloor prep, and glue-down or well-clicked installations.
Clean spills, avoid harsh cleaners, use pads under furniture, and replace damaged planks promptly to maximize longevity and appearance.